fold seats BMW 325XI SEDAN 2006 E90 Owner's Manual
[x] Cancel search | Manufacturer: BMW, Model Year: 2006, Model line: 325XI SEDAN, Model: BMW 325XI SEDAN 2006 E90Pages: 245, PDF Size: 8.24 MB
Page 45 of 245

Controls
43Reference
At a glance
Driving tips
Communications
Navigation
Entertainment
Mobility
Front seats
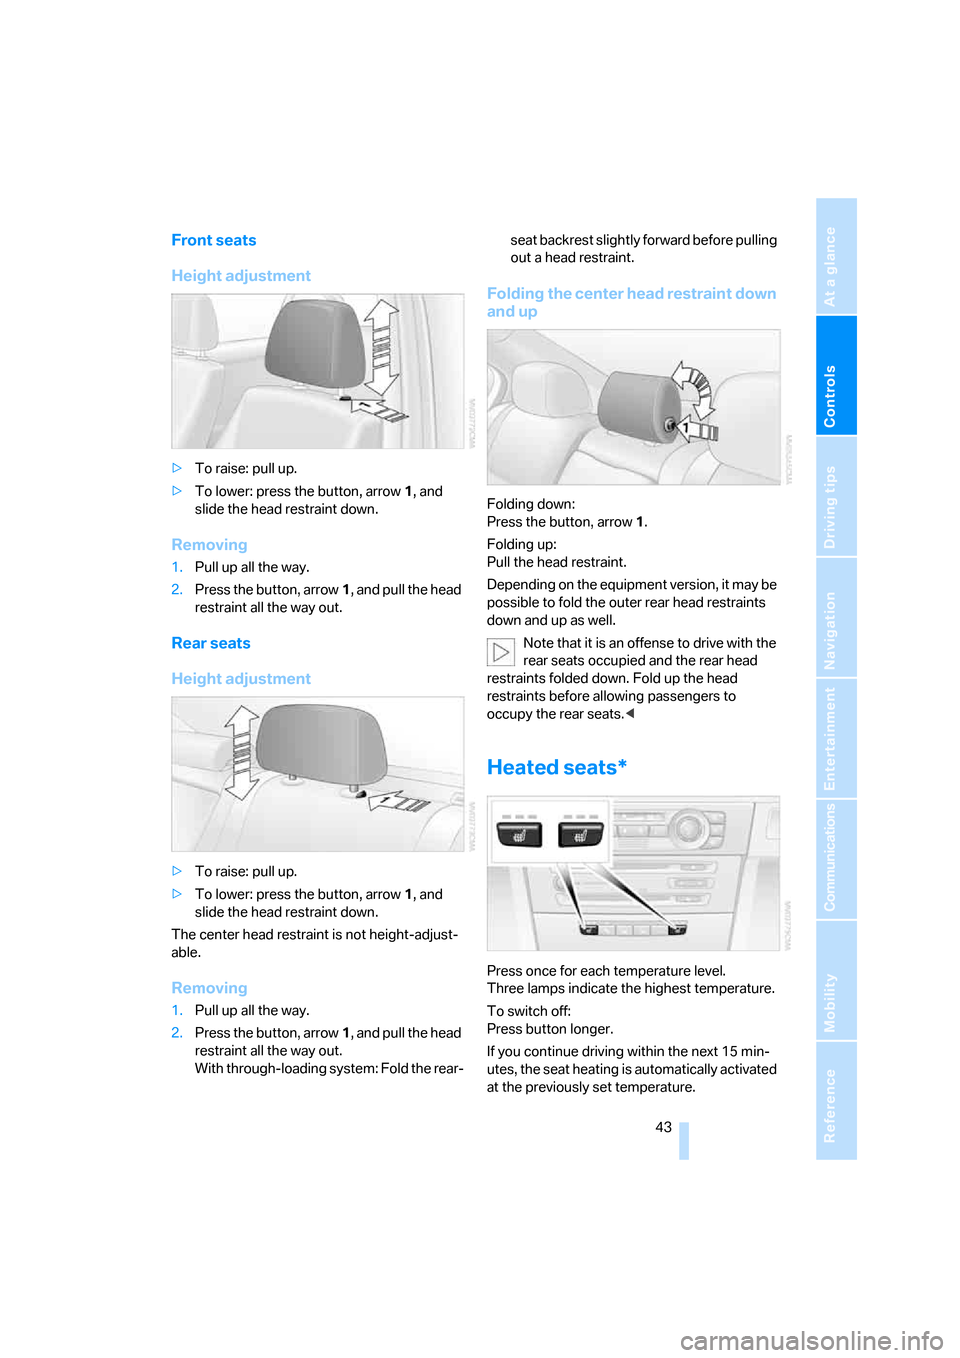
Height adjustment
>To raise: pull up.
>To lower: press the button, arrow1, and
slide the head restraint down.
Removing
1.Pull up all the way.
2.Press the button, arrow1, and pull the head
restraint all the way out.
Rear seats
Height adjustment
>To raise: pull up.
>To lower: press the button, arrow1, and
slide the head restraint down.
The center head restraint is not height-adjust-
able.
Removing
1.Pull up all the way.
2.Press the button, arrow1, and pull the head
restraint all the way out.
With through-loading system: Fold the rear-seat backrest slightly forward before pulling
out a head restraint.
Folding the center head restraint down
and up
Folding down:
Press the button, arrow1.
Folding up:
Pull the head restraint.
Depending on the equipment version, it may be
possible to fold the outer rear head restraints
down and up as well.
Note that it is an offense to drive with the
rear seats occupied and the rear head
restraints folded down. Fold up the head
restraints before allowing passengers to
occupy the rear seats.<
Heated seats*
Press once for each temperature level.
Three lamps indicate the highest temperature.
To switch off:
Press button longer.
If you continue driving within the next 15 min-
utes, the seat heating is automatically activated
at the previously set temperature.
Page 52 of 245

Transporting children safely
50
Child seat security
All rear safety belts and the front passenger's
safety belt can be prevented from being pulled
out in order to fasten child-restraint systems.
To lock the safety belt
1.Secure the child-restraint system with the
belt.
2.Pull the belt strap all the way out.
3.Allow the belt strap to retract and pull it taut
against the child-restraint system.
The safety belt is locked.
To unlock the safety belt
1.Open the belt buckle
2.Remove the child-restraint system.
3.Allow the safety belt strap to retract all the
way.
Child-restraint system with tether
strap
There are three additional anchors for child-
restraint systems with tether straps, see
arrows.
Placement of the tether strap
Fold the anchors upward before using them.
1.Push the head restraint upward.
2.Guide the tether strap through the mount-
ing for the head restraint.
3.Push the head restraint into its lowermost
position.
LATCH child-restraint fixing system
LATCH: Lower Anchor and Tethers for CHil-
dren.
When installing a LATCH child seat, com-
ply with the system manufacturer's oper-
ating and safety instructions.<
Rear seats with through-loading
system
The anchor points for the LATCH child-
restraint fixing system are located behind the
indicated protective caps. Flip up the corre-
sponding caps.
Page 108 of 245

Practical interior accessories
106
Roller sun blinds*
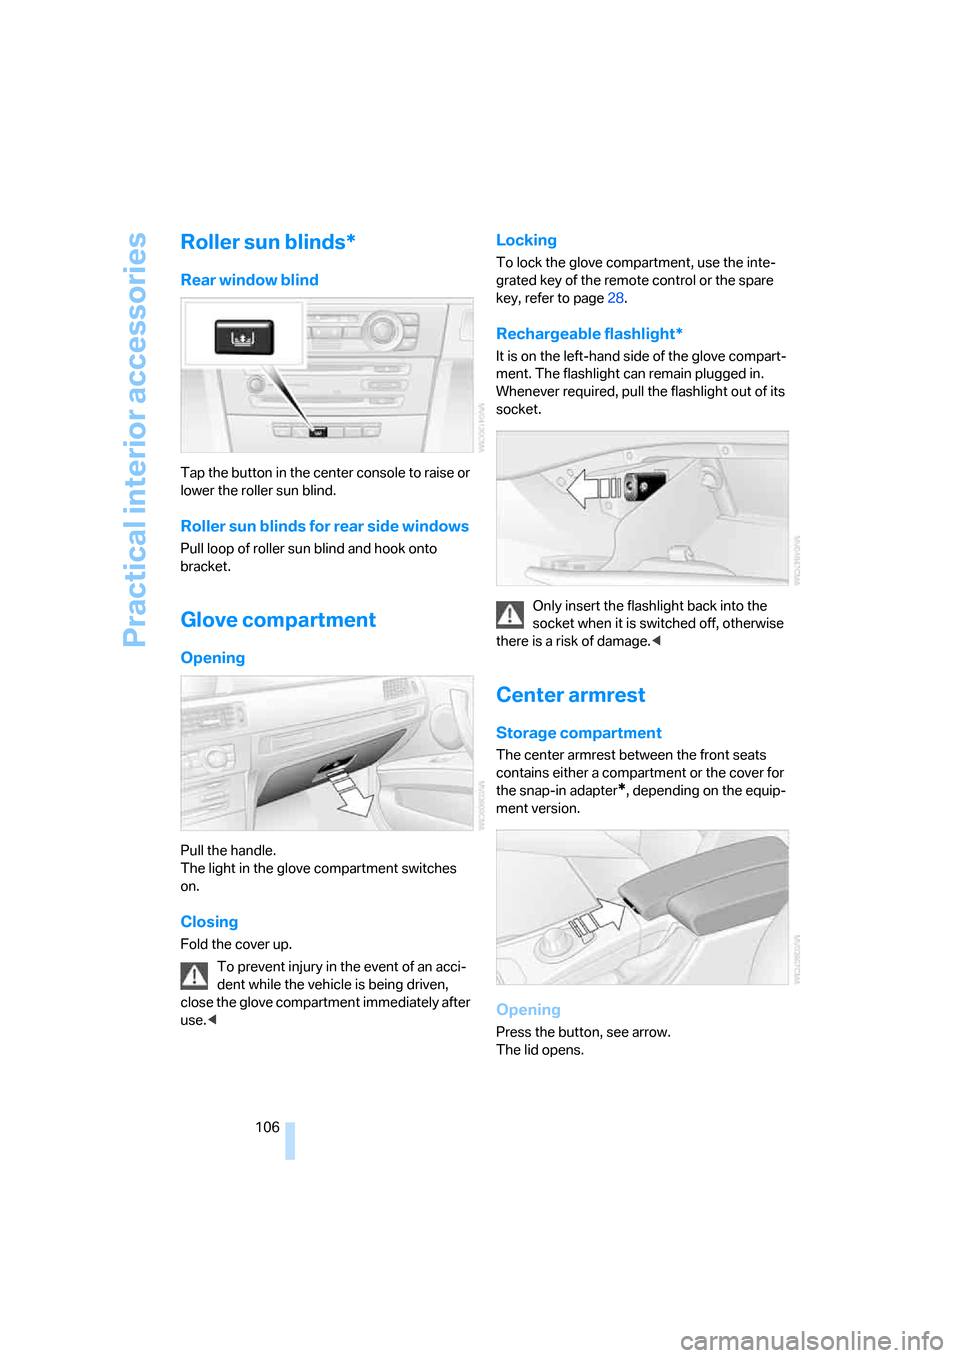
Rear window blind
Tap the button in the center console to raise or
lower the roller sun blind.
Roller sun blinds for rear side windows
Pull loop of roller sun blind and hook onto
bracket.
Glove compartment
Opening
Pull the handle.
The light in the glove compartment switches
on.
Closing
Fold the cover up.
To prevent injury in the event of an acci-
dent while the vehicle is being driven,
close the glove compartment immediately after
use.<
Locking
To lock the glove compartment, use the inte-
grated key of the remote control or the spare
key, refer to page28.
Rechargeable flashlight*
It is on the left-hand side of the glove compart-
ment. The flashlight can remain plugged in.
Whenever required, pull the flashlight out of its
socket.
Only insert the flashlight back into the
socket when it is switched off, otherwise
there is a risk of damage.<
Center armrest
Storage compartment
The center armrest between the front seats
contains either a compartment or the cover for
the snap-in adapter
*, depending on the equip-
ment version.
Opening
Press the button, see arrow.
The lid opens.
Page 113 of 245

Controls
111Reference
At a glance
Driving tips
Communications
Navigation
Entertainment
Mobility
Take the retaining strap on the right-hand side
of the drawer out of the bracket and use it to fix
the cargo luggage compartment panel in place.
Do not exceed the maximum permissible
load of 55 lbs/25 kg for the storage com-
partment under the floor panel, otherwise dam-
age could result.<
Lashing eyes
You will find lashing eyes in the luggage com-
partment for securing luggage items with nets
or tensioning straps, refer to page119.
Ski bag*
Designed for safe, clean transport of up to
4 pairs of standard skis or up to 2 snowboards.
With the ski bag you can stow skis with a length
of up to 6ft 10in/2.10m. When skis of 6ft 10in/
2.10 m length are loaded, the overall capacity of
the ski bag is reduced due to its tapered design.
Loading
1.Fold down the center armrest.
2.Press the button, reach into the recess and
fold down the cover.
3.Open the Velcro fastener, spread the ski
bag between the front seats and insert the
skis or snowboards.
The zip fastener makes objects in the ski
bag easier to reach.4.Insert the latch plate of the ski bag's retain-
ing strap in the center belt buckle.
Make sure to load only clean skis into the ski
bag. Wrap sharp edges to prevent damage.
Securing cargo
After loading, secure the ski bag and its con-
tents. Tighten the retaining strap on the ten-
sioning buckle for this purpose.
Secure the ski bag in the manner
described, otherwise it could endanger
the car's occupants, e.g. in case of heavy brak-
ing or sudden swerving.<
To store the ski bag, perform the steps
described for loading in reverse order.
Removing the ski bag
The ski bag can be completely removed, e.g. for
faster drying or to allow you to use other inserts.
Page 238 of 245

Everything from A - Z
236 Phone numbers
– deleting from phone
book173
– dialing171
– most recent numbers172
– selecting in phone book172
– Top 8172
Placing a call, refer to
telephone owner's manual
"Play" for audio mode157
"Play"
on the radio155
Pollen
– refer to Microfilter/activated-
charcoal filter for automatic
climate control101
Position
– displaying140
– storing132
Power failure209
Power windows37
– safety switch38
Power windows, refer to
Windows37
Preselecting the switch-on
times for parked car
ventilation/heating101
"Presets", calling up on
radio148
"Presets" on the radio154
Pressure, tires188
Pressure monitoring, tires88
– Flat Tire Monitor88
Protection function, refer to
Anti-trapping mechanism
– glass sunroof, electric39
– windows37
Providing medical assistance,
refer to First add pouch212
Puncture
– Flat Tire Monitor88
R
Radio
– autostore149
– controls144
– sampling stations149
– satellite radio153
– selecting the frequency
manually149
– selecting the
waveband144,148
– station search149
– station selection148
– stations with the best
reception149
– storing stations150
– switching on/off144
– tone control145
– volume145
– Weather Band151
Radio key, refer to Integrated
key/Remote control28
Radio position, refer to Radio
readiness52
Radio readiness52
– switched off52
– switched on52
Rain sensor59
"Random", random play160
"Random all" for audio
mode160
"Random directory" for audio
mode160
Reading lamps96
Rear lamps, refer to Tail
lamps207
– replacing bulbs208
Rear seats
– adjusting head restraints43
– folding head restraint down
and up43
Rear turn signals
– replacing bulbs208
Rear ventilation100
Rearview mirror, refer to
Mirrors45
Rear window defroster100
Rear window roller blind, refer
to Roller sun blinds106Rear window safety switch38
"Received calls"172
Receiving level of mobile
phone, refer to Status
information20
Reception
– radio stations151
Rechargeable flashlight106
Recirculated-air mode99
Recirculation of air, refer to
Recirculated-air mode99
Reclining seat, refer to
Backrest
41
Recording times, refer to
Stopwatch81
"Redial" for mobile phone172
Refueling186
Releasing
– hood198
Remaining distance, refer to
Cruising range70
Remote control28
– battery renewal37
– convenient access35
– garage door opener103
– luggage compartment lid31
– malfunctions31,36
– service data203
"Repeat directory" for audio
mode159
"Repeat" for audio mode159
"Repeat track" for audio
mode159
Replacement remote
control28
Replacing bulbs, refer to
Lamps and bulbs205
Replacing tires, refer to New
wheels and tires196
Reporting an accident, refer to
Initiating an emergency
call211
Reporting safety defects6
Reserve warning, refer to Fuel
gauge70
Reservoir for washer
systems60
Reset, refer to Resetting tone
settings147