reset HYUNDAI GENESIS G70 2018 Owners Manual
[x] Cancel search | Manufacturer: HYUNDAI, Model Year: 2018, Model line: GENESIS G70, Model: HYUNDAI GENESIS G70 2018Pages: 516, PDF Size: 12.84 MB
Page 86 of 516
Convenient features of your vehicle
Accessing Your Vehicle .........................................3-3
Smart Key ............................................................................3-3
Immobilizer System ...........................................................3-9
Door Locks ............................................................3-10
Operating Door Locks from Outside the Vehicle ....3-10
Operating Door Locks from Inside the Vehicle .......3-11
Automatic Door Lock and Unlock Features .............3-13
Child-protector Rear Door Locks ...............................3-14
Theft-Alarm System ............................................3-15
Driver Position Memory System ........................3-16
Storing Positions into Memory ..................................3-16
Recalling Positions from Memory...............................3-17
Resetting the Driver's Seat Memory System...........3-17
Easy Access Function ....................................................3-18
Steering Wheel .....................................................3-20
Electric Power Steering (EPS) .....................................3-20
Tilt Steering / Telescope Steering ..............................3-21
Heated Steering Wheel ..................................................3-22
Horn ....................................................................................3-23
Mirrors ...................................................................3-23
Inside Rearview Mirror ..................................................3-23
Side View Mirrors ...........................................................3-31
Reverse Parking Aid Function......................................3-33
Windows ................................................................3-34
Power Windows ...............................................................3-34
Wide Sunroof........................................................3-38
Sunshade ...........................................................................3-39
Sliding the Sunroof .........................................................3-39
Tilting the Sunroof .........................................................3-40
Closing the Sunroof........................................................3-40
Resetting the Sunroof ...................................................3-41
Sunroof Open Warning ..................................................3-41
Exterior Features .................................................3-42
Hood ...................................................................................3-42
Non-Powered Trunk .......................................................3-43
Power Trunk .....................................................................3-46
Smart Trunk ......................................................................3-52
Fuel Filler Door ................................................................3-55
Instrument Cluster ...............................................3-58
Instrument Cluster Control............................................3-59
Gauges and Meters ........................................................3-60
Transmission Shift Indicator .........................................3-63
Warning and Indicator Lights .......................................3-65
LCD Display Messages ...................................................3-77
LCD Display ...........................................................3-83
LCD Display Control ........................................................3-83
LCD Display Modes .........................................................3-84
Trip Computer .......................................................3-97
Head Up Display (HUD).....................................3-101
3
Page 100 of 516
3-15
Convenient features of your vehicle
THEFT-ALARM SYSTEM
3
This system helps to protect your
vehicle and valuables. The horn will
sound and the hazard warning lights
will blink continuously if any of the
following occurs:
- A door is opened without using the
smart key.
- The trunk is opened without using
the smart key.
- The engine hood is opened.
The alarm continues for 30 seconds
(repeats 2 times unless the system is
disarmed), then the system resets.
To turn off the alarm, unlock the
doors with the smart key.
The Theft Alarm System automati-
cally sets 30 seconds after you lock
the doors and the trunk. For the sys-
tem to activate, you must lock the
doors and the trunk from outside the
vehicle with the smart key or by
pressing the button on the outside of
the door handles with the smart key
in your possession.
The hazard warning lights will blink
and the chime will sound once to indi-
cate the system is armed.Once the security system is set,
opening any door, the trunk, or the
hood without using the smart key will
cause the alarm to activate.
The Theft Alarm System will not set if
the hood, the trunk, or any door is
not fully closed. If the system will not
set, check the hood, the trunk, or the
doors are fully closed.
Do not attempt to alter this system or
add other devices to it.Information
• Do not lock the doors until all pas-
sengers have left the vehicle. If the
remaining passenger leaves the
vehicle when the system is armed,
the alarm will be activated.
• If the vehicle is not disarmed with
the smart key, open the doors by
using the mechanical key and start
the engine.
• When the system is disarmed but a
door or trunk is not opened within
30 seconds, the system will be
rearmed.
i
Page 102 of 516
3-17
Convenient features of your vehicle
3
Recalling Positions from
Memory
1. Check that the gear is in P (Park)
while the Engine Start/Stop button
is in the ON position.
2. Press the desired memory button
(1 or 2). The system will beep
once, and then the driver's seat
position, side view mirror position,
steering wheel position, instru-
ment panel illumination intensity
and head-up display height/bright-
ness will automatically adjust to
the stored positions.
3. "Driver 1 (or 2) settings applied"
will appear on the cluster LCD dis-
play.
Information
• While recalling the "1" memory
position, pressing the SET or 1 but-
ton temporarily stops the adjust-
ment of the recalled memory posi-
tion. Pressing the 2 button recalls
the "2" memory position.
• While recalling the "2" memory
position, pressing the SET or 2 but-
ton temporarily stops the adjust-
ment of the recalled memory posi-
tion. Pressing the 1 button recalls
the "1" memory position.
• While recalling the stored positions,
pressing one of the control buttons
for the driver's seat, side view mir-
ror, steering wheel, instrument
panel illumination or head-up dis-
play will cause the movement of that
component to stop and move in the
direction that the control button is
pressed.
Resetting the Driver's Seat
Memory System
Take the following procedures to reset
the driver's seat memory system,
when it does not operate properly.
To reset the driver's seat memo-
ry system
1. Press the Engine Start/Stop but-
ton to the ON position, set the
gear in P (Park), and open the dri-
ver's door.
2. Operate the control switch to set
the driver's seat and seatback to
the foremost position.
3. Simultaneously press the SET
button and push forward the seat
movement switch over 2 seconds.
i
Page 103 of 516
3-18
Convenient features of your vehicle
While resetting the driver's seat
memory system
1. It starts with the notification
sound.
2. The driver's seat and seatback is
adjusted to the rearward position
with the notification sound.
3. The driver's seat and seatback is
re-adjusted to the default position
(central position) with the notifica-
tion sound.
However, in the following cases, the
resetting procedure and the notifica-
tion sound may stop.
- The memory button is pressed.
- The control switch is operated.
- The gear is shifted out of P (Park).
- The driving speed exceeds 2 mph
(3 km/h).
- The driver's door is closed.• Reattempt to do the resetting
procedure again, when the reset-
ting procedure incompletely
stops or the notification sound
do not stop.
• Make sure that there is no obsta-
cle around the driver's seat in
advance of resetting the driver's
seat memory system.
Easy Access Function
The system will move the driver's
seat and steering wheel automatical-
ly as follows:
• Exiting the vehicle:
The driver's seat will move rear-
ward and the steering wheel will
move upward when the driver’s
door is opened and the Engine
Start/Stop button is in the OFF
positon with the gear in P (Park).
However, the driver's seat may not
move rearward if there is not
enough space between the driver’s
seat and the rear seats.
Also, on a regular basis, the steer-
ing wheel will also move forward to
adjust its location by itself.
NOTICE
Page 121 of 516
3-36
Convenient features of your vehicle
To reset the power windows
If the power windows do not operate
normally, the automatic power win-
dow system must be reset as follows:
1. Place the Engine Start/Stop but-
ton to the ON position.
2. Close the window and continue
pulling up on the power window
switch for at least one second.
If the power windows do not operate
properly after resetting, have the
system checked by an authorized
retailer of Genesis Branded prod-
ucts.
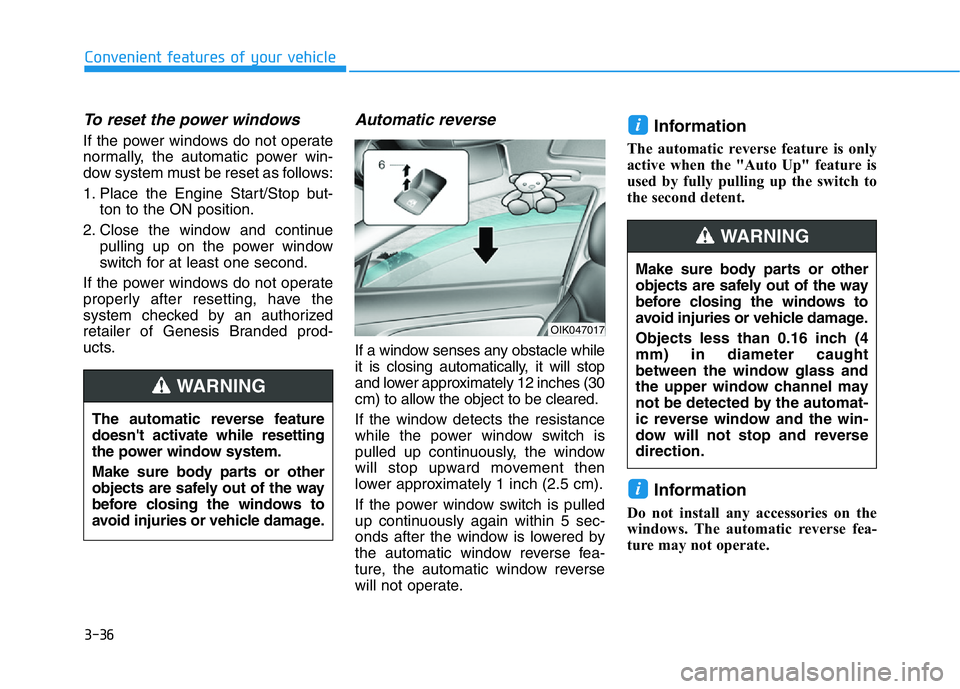
Automatic reverse
If a window senses any obstacle while
it is closing automatically, it will stop
and lower approximately 12 inches (30
cm) to allow the object to be cleared.
If the window detects the resistance
while the power window switch is
pulled up continuously, the window
will stop upward movement then
lower approximately 1 inch (2.5 cm).
If the power window switch is pulled
up continuously again within 5 sec-
onds after the window is lowered by
the automatic window reverse fea-
ture, the automatic window reverse
will not operate.
Information
The automatic reverse feature is only
active when the "Auto Up" feature is
used by fully pulling up the switch to
the second detent.
Information
Do not install any accessories on the
windows. The automatic reverse fea-
ture may not operate.
i
i
OIK047017
The automatic reverse feature
doesn't activate while resetting
the power window system.
Make sure body parts or other
objects are safely out of the way
before closing the windows to
avoid injuries or vehicle damage.
WARNING
Make sure body parts or other
objects are safely out of the way
before closing the windows to
avoid injuries or vehicle damage.
Objects less than 0.16 inch (4
mm) in diameter caught
between the window glass and
the upper window channel may
not be detected by the automat-
ic reverse window and the win-
dow will not stop and reverse
direction.
WARNING
Page 126 of 516
3-41
Convenient features of your vehicle
3
• Periodically remove any dirt that
may accumulate on the sunroof
guide rail or between the sun-
roof and roof panel which can
make a noise.
• Do not try to open the sunroof
when the temperature is below
freezing or when the sunroof is
covered with snow or ice, other-
wise the motor could be dam-
aged. In cold and wet climates, the
sunroof may not work properly.
Resetting the Sunroof
The sunroof may need to be reset if
the following conditions occur:
• The battery is discharged or dis-
connected or the sunroof fuse has
been replaced or disconnected
• The sunroof control lever is not
operating correctly
To reset the sunroof, perform the fol-
lowing steps:
1. Turn the engine on and close the
sunroof glass and sunshade com-
pletely.2. Release the control lever.
3. Push and hold the sunroof control
lever forward (to close the sun-
shade) for about 10 seconds until
the sunroof moves slightly, then
release the control lever.
4. Push and hold the sunroof control
lever forward until the sunroof
operates as follows:
Sunshade Open→ Glass Tilt Open
→ Glass Slide Open → Glass Slide
Close → Sunshade Close
Then, release the control lever.
When this is complete, the sunroof
system is reset.
For more information, contact an
authorized retailer of Genesis
Branded products.
Information
If you do not reset the sunroof, it may
not work properly.
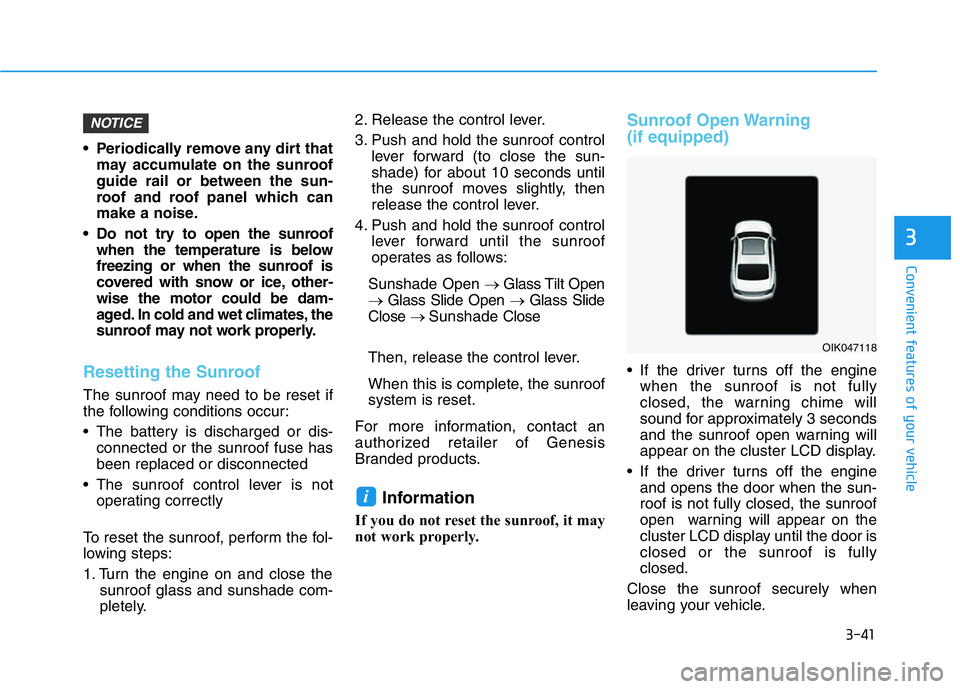
Sunroof Open Warning
(if equipped)
• If the driver turns off the engine
when the sunroof is not fully
closed, the warning chime will
sound for approximately 3 seconds
and the sunroof open warning will
appear on the cluster LCD display.
• If the driver turns off the engine
and opens the door when the sun-
roof is not fully closed, the sunroof
open warning will appear on the
cluster LCD display until the door is
closed or the sunroof is fully
closed.
Close the sunroof securely when
leaving your vehicle.
i
NOTICE
OIK047118
Page 136 of 516
3-51
Convenient features of your vehicle
3
How to reset the power trunk
If the battery has been discharged or
disconnected, or if the power trunk
fuse has been replaced or removed,
reset the power trunk by performing
the following procedure:
1. Put the shift lever in P (Park).
2. Press the power trunk inner button
and the power trunk outer handle
button simultaneously for more
than 3 seconds. The chime will
sound.
3. Close the trunk manually.
If the power trunk does not work prop-
erly after the above procedure, have
the system checked by an authorized
retailer of Genesis Branded products.
When operating the power trunk,
the gear shift lever must be in the
(P) park position in order to oper-
ate normally.
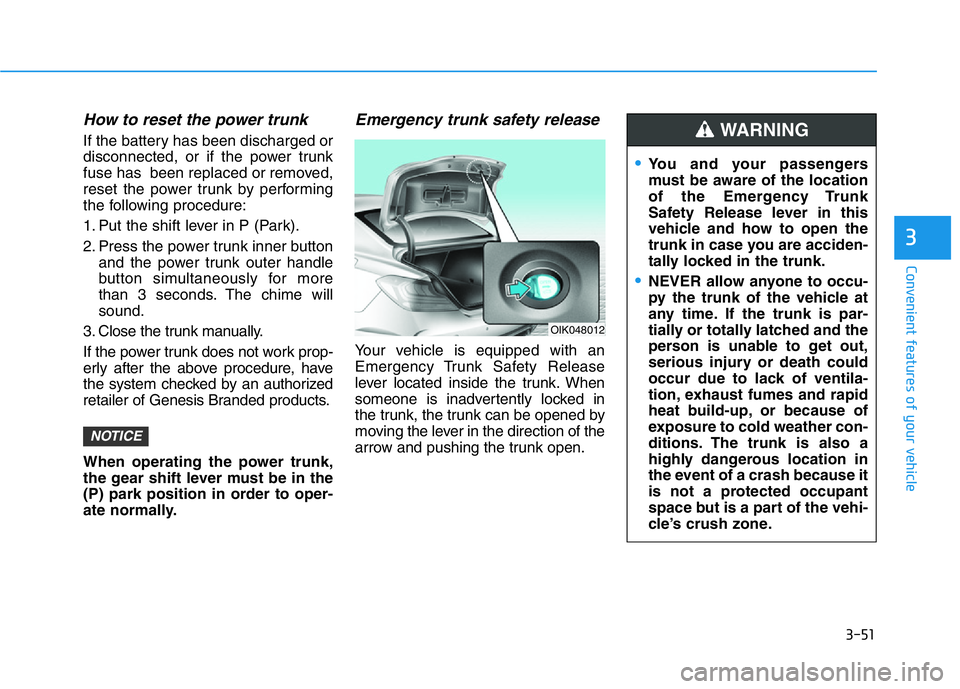
Emergency trunk safety release
Your vehicle is equipped with an
Emergency Trunk Safety Release
lever located inside the trunk. When
someone is inadvertently locked in
the trunk, the trunk can be opened by
moving the lever in the direction of the
arrow and pushing the trunk open.
NOTICE
OIK048012
•You and your passengers
must be aware of the location
of the Emergency Trunk
Safety Release lever in this
vehicle and how to open the
trunk in case you are acciden-
tally locked in the trunk.
•NEVER allow anyone to occu-
py the trunk of the vehicle at
any time. If the trunk is par-
tially or totally latched and the
person is unable to get out,
serious injury or death could
occur due to lack of ventila-
tion, exhaust fumes and rapid
heat build-up, or because of
exposure to cold weather con-
ditions. The trunk is also a
highly dangerous location in
the event of a crash because it
is not a protected occupant
space but is a part of the vehi-
cle’s crush zone.
WARNING
Page 168 of 516
3-83
Convenient features of your vehicle
3
LCD DISPLAY
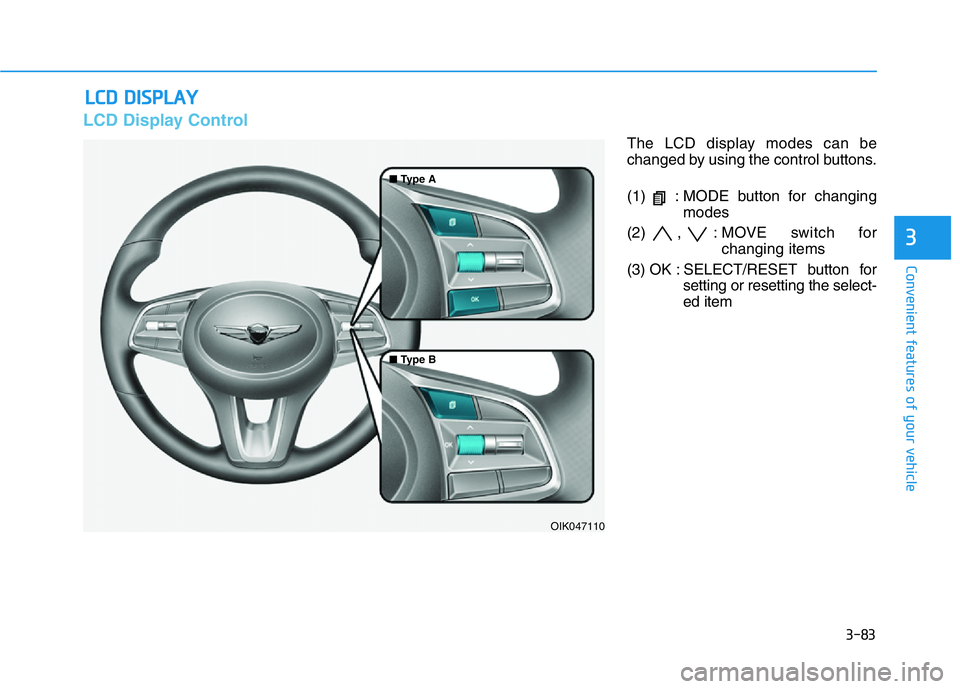
LCD Display Control
The LCD display modes can be
changed by using the control buttons.
(1) : MODE button for changing
modes
(2) , : MOVE switch for
changing items
(3) OK : SELECT/RESET button for
setting or resetting the select-
ed item
OIK047110 ■ Type A
■ Type B
Page 170 of 516
3-85
Convenient features of your vehicle
3
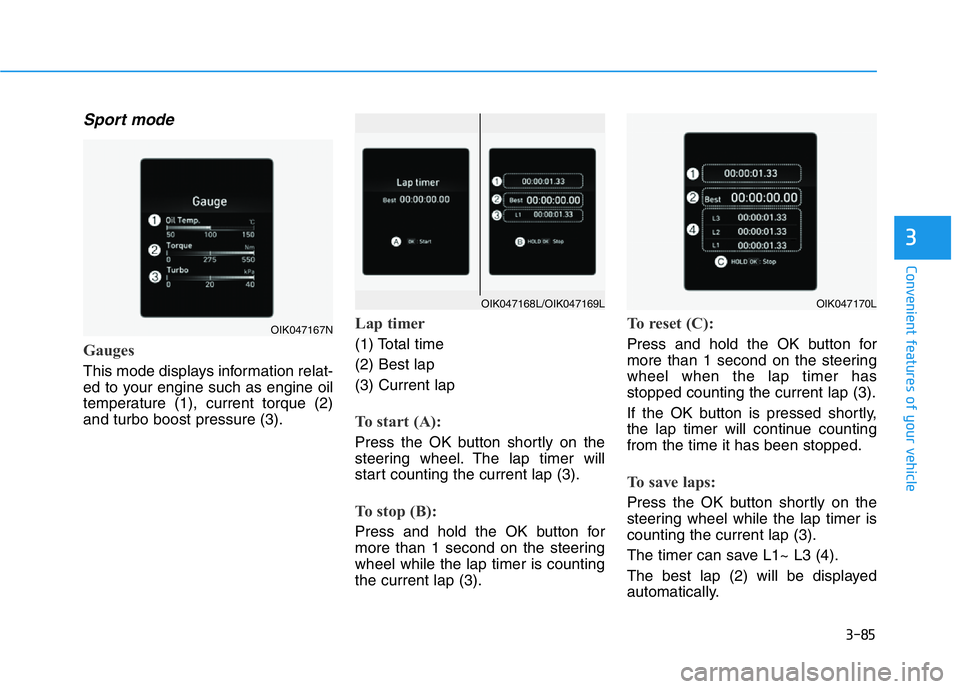
Sport mode
Gauges
This mode displays information relat-
ed to your engine such as engine oil
temperature (1), current torque (2)
and turbo boost pressure (3).
Lap timer
(1) Total time
(2) Best lap
(3) Current lap
To start (A):
Press the OK button shortly on the
steering wheel. The lap timer will
start counting the current lap (3).
To stop (B):
Press and hold the OK button for
more than 1 second on the steering
wheel while the lap timer is counting
the current lap (3).
To reset (C):
Press and hold the OK button for
more than 1 second on the steering
wheel when the lap timer has
stopped counting the current lap (3).
If the OK button is pressed shortly,
the lap timer will continue counting
from the time it has been stopped.
To save laps:
Press the OK button shortly on the
steering wheel while the lap timer is
counting the current lap (3).
The timer can save L1~ L3 (4).
The best lap (2) will be displayed
automatically.
OIK047167N
OIK047170LOIK047168L/OIK047169L
Page 171 of 516
3-86
Convenient features of your vehicle
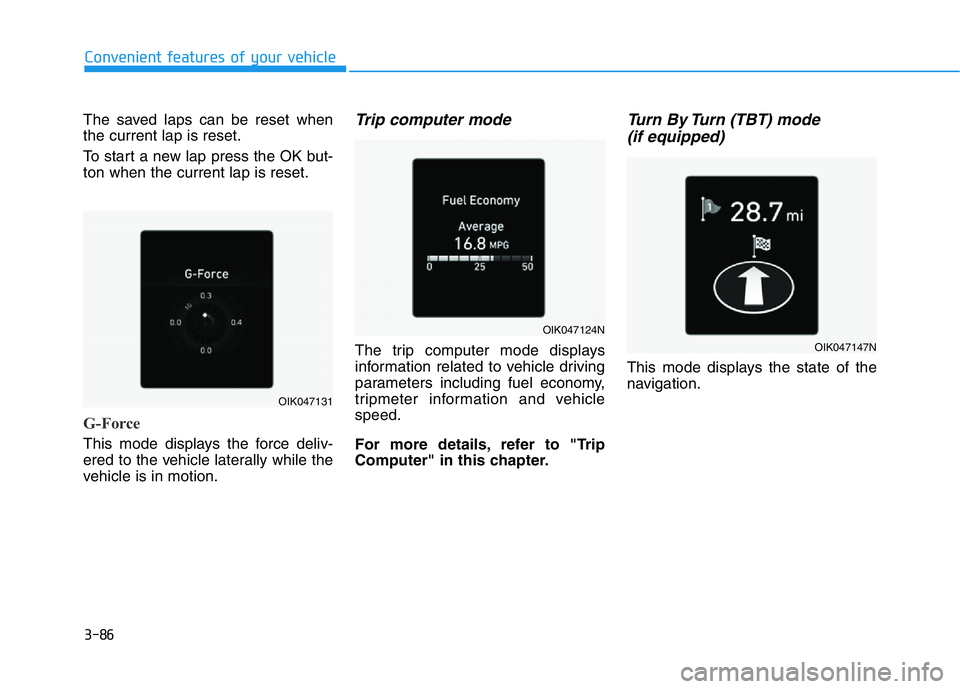
The saved laps can be reset when
the current lap is reset.
To start a new lap press the OK but-
ton when the current lap is reset.
G-Force
This mode displays the force deliv-
ered to the vehicle laterally while the
vehicle is in motion.
Trip computer mode
The trip computer mode displays
information related to vehicle driving
parameters including fuel economy,
tripmeter information and vehicle
speed.
For more details, refer to "Trip
Computer" in this chapter.
Turn By Turn (TBT) mode
(if equipped)
This mode displays the state of the
navigation.
OIK047131
OIK047147N
OIK047124N