instrument panel LINCOLN NAVIGATOR 2014 Quick Reference Guide
[x] Cancel search | Manufacturer: LINCOLN, Model Year: 2014, Model line: NAVIGATOR, Model: LINCOLN NAVIGATOR 2014Pages: 8, PDF Size: 0.76 MB
Page 2 of 8

2 3
2014 NAVIGATOR
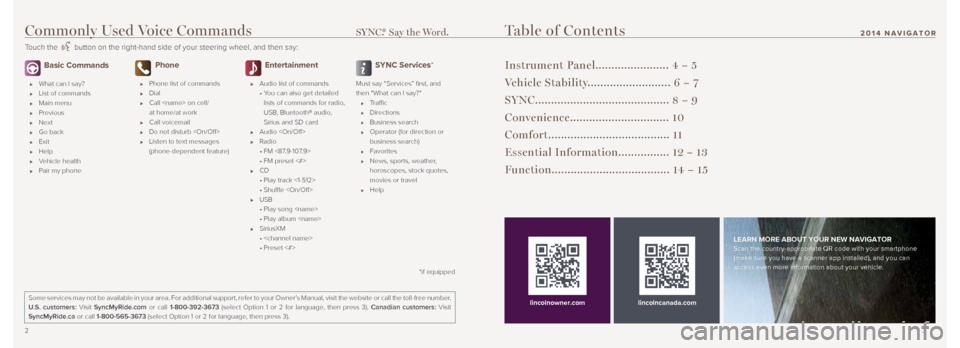
Basic Commands
What can I say?
List of commands
Main menu
Previous
Next
Go back
Exit
Help
Vehicle health
Pair my phone
Phone
Phone list of commands
Dial
Call
at home/at work
Call voicemail
Do not disturb
Listen to text messages
(phone-dependent feature)
Entertainment
Audio list of commands
• You can also get detailed
lists of commands for radio,
USB, Bluetooth® audio,
Sirius and SD card
Audio
Radio
• FM <87.9-107.9>
• FM preset <#>
CD
• Play track <1-512>
• Shuffle
USB
• Play song
• Play album
SiriusXM
•
• Preset <#>
SYNC Services*
Must say “Services” first, and
then "What can I say?"
Traffic
Directions
Business search
Operator (for direction or
business search)
Favorites
News, sports, weather,
horoscopes, stock quotes,
movies or travel
Help
Table of Contents
Instrument Panel....................... 4 – 5
Vehicle Stability.......................... 6 – 7
SYNC.......................................... 8 – 9
Convenience............................... 10
Comfort...................................... 11
Essential Information................ 12 – 13
Function..................................... 14 – 15
lincolncanada.com
LEARN MORE ABOUT YOUR NEW NAVIGATORScan the country-appropriate QR code with your smartphone
(make sure you have a scanner app installed), and you can
access even more information about your vehicle.
Some services may not be available in your area. For additional support,\
refer to your Owner’s Manual, visit the website or call the toll-free number.
U.S. customers: Visit SyncMyRide.com or call 1-800-392-3673 (select Option 1 or 2 for language, then press 3). Canadian customers: Visit
SyncMyRide.ca or call 1-800-565-3673 (select Option 1 or 2 for language, then press 3).
lincolnowner.com
*if equipped
Commonly Used Voice Commands SYNC.® Say the Word.
Touch the button on the right-hand side of your steering wheel, and then say:
Page 3 of 8

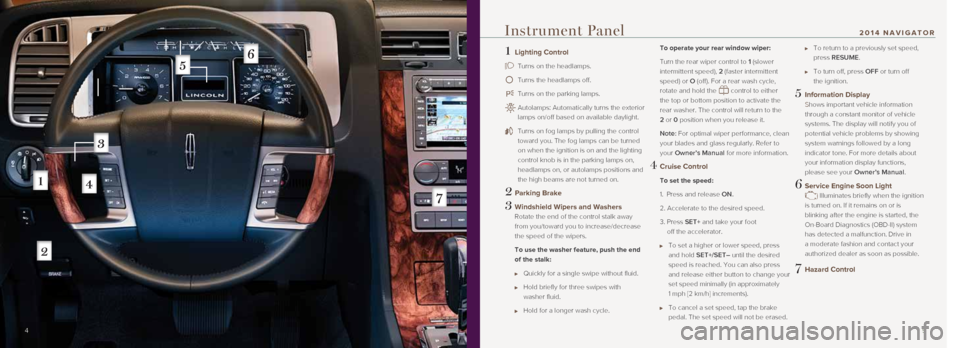
1 Lighting Control
Turns on the headlamps.
Turns the headlamps off.
Turns on the parking lamps.
Autolamps: Automatically turns the exterior
lamps on/off based on available daylight.
Turns on fog lamps by pulling the control
toward you. The fog lamps can be turned
on when the ignition is on and the lighting
control knob is in the parking lamps on,
headlamps on, or autolamps positions and
the high beams are not turned on.
2 Parking Brake
3 Windshield Wipers and Washers
Rotate the end of the control stalk away
from you/toward you to increase/decrease
the speed of the wipers.
To use the washer feature, push the end
of the stalk:
Quickly for a single swipe without fluid.
Hold briefly for three swipes with
washer fluid.
Hold for a longer wash cycle.
To operate your rear window wiper:
Turn the rear wiper control to 1 (slower
intermittent speed), 2 (faster intermittent
speed) or O (off). For a rear wash cycle,
rotate and hold the
control to either
the top or bottom position to activate the
rear washer. The control will return to the
2 or 0 position when you release it.
Note: For optimal wiper performance, clean
your blades and glass regularly. Refer to
your Owner’s Manual for more information.
4 Cruise Control
To set the speed:
1. Press and release ON.
2. Accelerate to the desired speed.
3. Press SET+ and take your foot
off the accelerator.
To set a higher or lower speed, press
and hold SET+/SET– until the desired
speed is reached. You can also press
and release either button to change your
set speed minimally (in approximately
1 mph [2 km/h] increments).
To cancel a set speed, tap the brake
pedal. The set speed will not be erased.
To return to a previously set speed,
press RESUME.
To turn off, press OFF or turn off
the ignition.
5 Information Display
Shows important vehicle information
through a constant monitor of vehicle
systems. The display will notify you of
potential vehicle problems by showing
system warnings followed by a long
indicator tone. For more details about
your information display functions,
please see your Owner’s Manual.
6 Service Engine Soon Light
Illuminates briefly when the ignition
is turned on. If it remains on or is
blinking after the engine is started, the
On-Board Diagnostics (OBD-II) system
has detected a malfunction. Drive in
a moderate fashion and contact your
authorized dealer as soon as possible.
7 Hazard Control
4 5
Instrument Panel2014 NAVIGATOR
Page 6 of 8

Second-row Heated Seats
The rear heated seat controls are
located on the rear of the center
console. Press the indicated side
of the control
for maximum
heat. Press again to deactivate.
Press the indicated side of the
control
for minimum heat.
Press again to deactivate.
Note: The heated seats reset at
every ignition run cycle. They will
turn off automatically when the
engine is turned off.
Memory Seat Feature
The memory function will save
and recall the positions of the
driver seat, power mirrors,
adjustable pedals and steering
column. Use the control located
on the side of the driver’s seat
to program and then
recall saved memory positions.
To program position 1, switch the
ignition on. Move the memory
features to your preferred
position. Press and hold the
1 button
for about two
seconds until you hear a tone.
Use this same procedure to set
the second position by using the
2 button
. You can now use
these controls to recall the set
memory positions.
Convenience
Rain-sensing Wipers
If activated, your wipers will
automatically turn on when
moisture is present on the
windshield. The wipers will not
cycle until moisture is detected
on the windshield, and the wiper
speed will vary based on the
amount of moisture detected on
the windshield and the sensitivity
setting. The wipers will continue
to wipe as long as moisture is
detected. To deactivate, turn
your wiper controls off.
Note: Make sure that this feature
is turned off before entering a
car wash.
MyKey®
MyKey allows you to program
certain driving restrictions in
order to promote good driving
habits. You can set speed
restrictions and limit volume
levels. For complete information,
refer to the MyKey chapter in
your Owner’s Manual.
Power Liftgate
Press
on the instrument
panel to open or close the power
liftgate. For added convenience,
there are three more ways
to activate your power
liftgate’s capabilities:
1. On your remote entry
transmitter, press
twice
within three seconds to open
or close your power liftgate.
2. To open using the liftgate
control button in the liftgate
handle: Unlock the doors
using either the remote entry
transmitter or the power door
unlock control, and press
the control. 3.
To close using the rear
cargo area button: Press and
release the
control
located on the left rear
quarter panel. This button is
automatically disabled when
the liftgate is latched.
Note: Keep clear of the liftgate
when operating the rear switch.
Your power liftgate is equipped
with an obstacle detection
feature which will either stop or
revert to a full open position if
it encounters a solid object. For
complete information, see the
Liftgate section within the Locks
chapter of your Owner’s Manual.
Power-Adjustable Foot Pedals
Located to the left of your
steering column, your power-
adjustable pedal control lets you
move your brake and accelerator
pedals closer. Press the
arrow
to move the pedals closer to
you or the
arrow to move
the pedals further away from you. The pedals should only be
adjusted when the vehicle is
stopped and in P (Park).
SecuriCodeTM Keyless
Entry Keypad
Lock or unlock the doors or
release the liftgate glass without
using a key. The keypad can be
operated with the factory-set,
5-digit entry code; this code is
located on the owner’s wallet
card in the glove box. You can
also create up to five of your own
5-digit personal entry codes. To
lock all of the doors and liftgate,
press and hold 7•8 and 9•0 at
the same time. For complete
information, refer to the Locks
chapter of your Owner’s Manual.
10 11
*if equipped
2014 NAVIGATORComfort
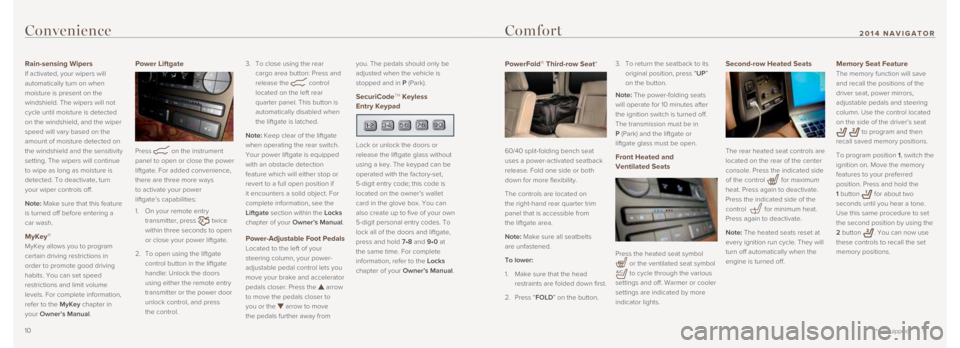
PowerFold® Third-row Seat*
60/40 split-folding bench seat
uses a power-activated seatback
release. Fold one side or both
down for more flexibility.
The controls are located on
the right-hand rear quarter trim
panel that is accessible from
the liftgate area.
Note: Make sure all seatbelts
are unfastened.
To lower:
1. Make sure that the head
restraints are folded down first.
2. Press “FOLD” on the button. 3.
To return the seatback to its
original position, press “UP”
on the button.
Note: The power-folding seats
will operate for 10 minutes after
the ignition switch is turned off.
The transmission must be in
P (Park) and the liftgate or
liftgate glass must be open.
Front Heated and
Ventilated Seats
Press the heated seat symbol
or the ventilated seat symbol
to cycle through the various
settings and off. Warmer or cooler
settings are indicated by more
indicator lights.