key battery SUZUKI CELERIO 2020 Owners Manual
[x] Cancel search | Manufacturer: SUZUKI, Model Year: 2020, Model line: CELERIO, Model: SUZUKI CELERIO 2020Pages: 201, PDF Size: 5.82 MB
Page 15 of 201
0-3
76MH1-74E
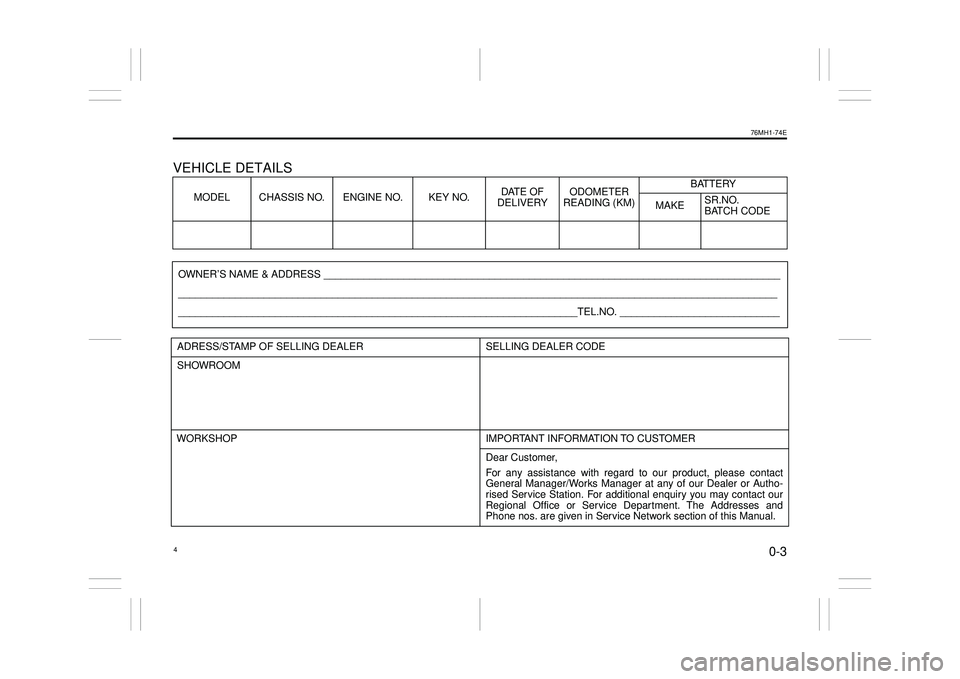
VEHICLE DETAILS
MODEL CHASSIS NO. ENGINE NO. KEY NO.DATE OFDELIVERYODOMETERREADING (KM)
BATTERY
MAKESR.NO. BATCH CODE
OWNER’S NAME & ADDRESS ________________________________________________________________________________
_________________________________________________________________________________________________________
______________________________________________________________________TEL.NO. ____________________________
ADRESS/STAMP OF SELLING DEALER SELLING DEALER CODE
SHOWROOM
WORKSHOP IMPORTANT INFORMATION TO CUSTOMER
Dear Customer,
For any assistance with regard to our product, please contact General Manager/Works Manager at any of our Dealer or Autho-rised Service Station. For additional enquiry you may contact ourRegional Office or Service Department. The Addresses andPhone nos. are given in Service Network section of this Manual.
4
Page 26 of 201
2-4
BEFORE DRIVING
76MH1-74E
76MH1-74E
Ta i l g a t e
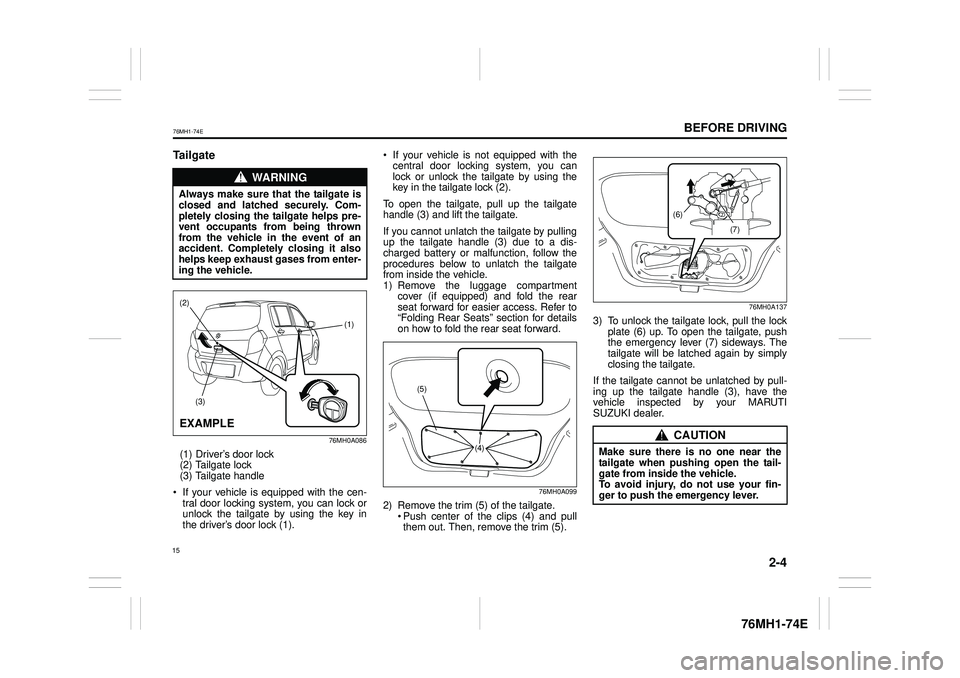
76MH0A086
(1) Driver’s door lock (2) Tailgate lock (3) Tailgate handle
If your vehicle is equipped with the cen-tral door locking system, you can lock orunlock the tailgate by using the key in the driver’s door lock (1).
If your vehicle is not equipped with thecentral door locking system, you can lock or unlock the tailgate by using thekey in the tailgate lock (2).
To open the tailgate, pull up the tailgatehandle (3) and lift the tailgate.
If you cannot unlatch the tailgate by pulling up the tailgate handle (3) due to a dis- charged battery or malfunction, follow the procedures below to unlatch the tailgatefrom inside the vehicle. 1) Remove the luggage compartmentcover (if equipped) and fold the rear seat forward for easier access. Refer to “Folding Rear Seats” section for details on how to fold the rear seat forward.
76MH0A099
2) Remove the trim (5) of the tailgate. Push center of the clips (4) and pullthem out. Then, remove the trim (5).
76MH0A137
3) To unlock the tailgate lock, pull the lockplate (6) up. To open the tailgate, pushthe emergency lever (7) sideways. Thetailgate will be latched again by simply closing the tailgate.
If the tailgate cannot be unlatched by pull-ing up the tailgate handle (3), have the vehicle inspected by your MARUTISUZUKI dealer.
WA R N I N G
Always make sure that the tailgate is closed and latched securely. Com- pletely closing the tailgate helps pre-vent occupants from being thrown from the vehicle in the event of an accident. Completely closing it alsohelps keep exhaust gases from enter- ing the vehicle.
(3)
(1)
(2)
EXAMPLE
(5)
(4)
CAUTION
Make sure there is no one near the tailgate when pushing open the tail- gate from inside the vehicle. To avoid injury, do not use your fin-ger to push the emergency lever.
(6)
(7)
15
Page 28 of 201
2-6
BEFORE DRIVING
76MH1-74E
76MH1-74E
Panic alarm function (if equipped)This function is to get the attention of oth- ers. Push both of the “LOCK” button (1) and “UNLOCK” button (2) for more than 3 sec-onds. The turn signal lights will blink for about 27.5 seconds. Also, the siren will sound for about 27.5 seconds at the sametime. To cancel the panic alarm, press any but- ton (LOCK or UNLOCK). You can also turnthe ignition switch to the “ON” position to cancel the panic alarm.
NOTE: The panic alarm function will not activate when the key is in the ignition switch.
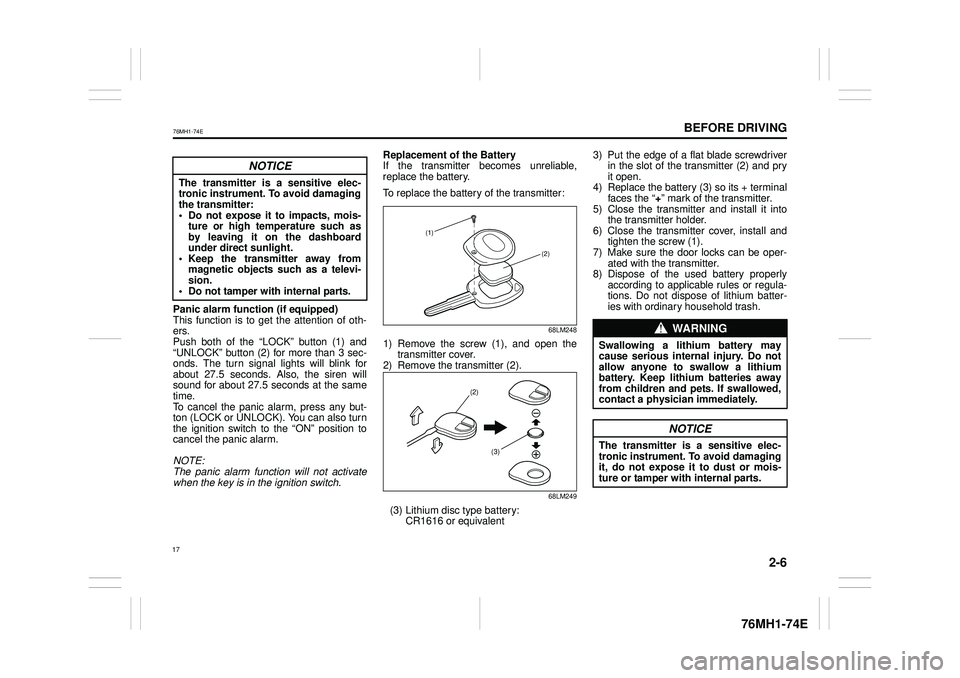
Replacement of the Battery If the transmitter becomes unreliable, replace the battery.
To replace the battery of the transmitter:
68LM248
1) Remove the screw (1), and open thetransmitter cover.2) Remove the transmitter (2).
68LM249
(3) Lithium disc type battery:CR1616 or equivalent
3) Put the edge of a flat blade screwdriverin the slot of the transmitter (2) and pry it open.4) Replace the battery (3) so its + terminalfaces the “+” mark of the transmitter.5) Close the transmitter and install it intothe transmitter holder.6) Close the transmitter cover, install andtighten the screw (1).7) Make sure the door locks can be oper-ated with the transmitter.8) Dispose of the used battery properlyaccording to applicable rules or regula- tions. Do not dispose of lithium batter- ies with ordinary household trash.
NOTICE
The transmitter is a sensitive elec-tronic instrument. To avoid damagingthe transmitter: • Do not expose it to impacts, mois-ture or high temperature such as by leaving it on the dashboard under direct sunlight.• Keep the transmitter away frommagnetic objects such as a televi-sion.• Do not tamper with internal parts.
(1)
(2)
(2)
(3)
WA R N I N G
Swallowing a lithium battery may cause serious internal injury. Do notallow anyone to swallow a lithium battery. Keep lithium batteries away from children and pets. If swallowed,contact a physician immediately.
NOTICE
The transmitter is a sensitive elec- tronic instrument. To avoid damaging it, do not expose it to dust or mois-ture or tamper with internal parts.
17
Page 30 of 201
2-8
BEFORE DRIVING
76MH1-74E
76MH1-74E
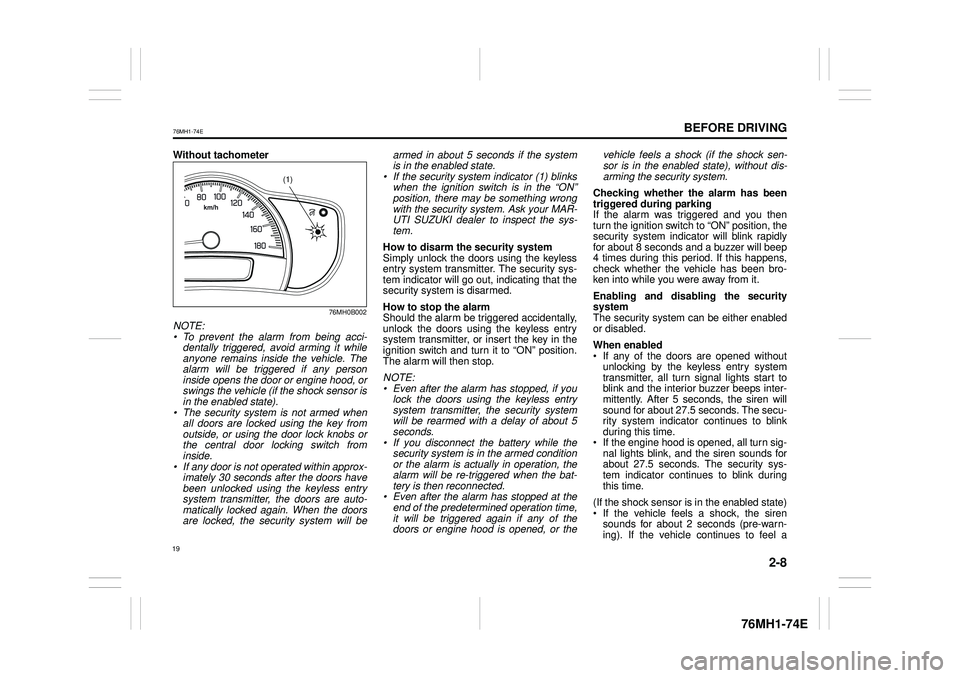
Without tachometer
76MH0B002
NOTE: • To prevent the alarm from being acci-dentally triggered, avoid arming it while anyone remains inside the vehicle. The alarm will be triggered if any person inside opens the door or engine hood, orswings the vehicle (if the shock sensor is in the enabled state).• The security system is not armed whenall doors are locked using the key fromoutside, or using the door lock knobs or the central door locking switch frominside.• If any door is not operated within approx-imately 30 seconds after the doors havebeen unlocked using the keyless entry system transmitter, the doors are auto-matically locked again. When the doors are locked, the security system will be
armed in about 5 seconds if the system is in the enabled state.• If the security system indicator (1) blinkswhen the ignition switch is in the “ON”position, there may be something wrong with the security system. Ask your MAR-UTI SUZUKI dealer to inspect the sys- tem.
How to disarm the security systemSimply unlock the doors using the keyless entry system transmitter. The security sys-tem indicator will go out, indicating that the security system is disarmed.
How to stop the alarm Should the alarm be triggered accidentally, unlock the doors using the keyless entrysystem transmitter, or insert the key in the ignition switch and turn it to “ON” position. The alarm will then stop.
NOTE: • Even after the alarm has stopped, if youlock the doors using the keyless entry system transmitter, the security system will be rearmed with a delay of about 5seconds.• If you disconnect the battery while thesecurity system is in the armed conditionor the alarm is actually in operation, the alarm will be re-triggered when the bat- tery is then reconnected.• Even after the alarm has stopped at theend of the predetermined operation time,it will be triggered again if any of thedoors or engine hood is opened, or the
vehicle feels a shock (if the shock sen- sor is in the enabled state), without dis- arming the security system.
Checking whether the alarm has beentriggered during parkingIf the alarm was triggered and you then turn the ignition switch to “ON” position, the security system indicator will blink rapidlyfor about 8 seconds and a buzzer will beep 4 times during this period. If this happens, check whether the vehicle has been bro-ken into while you were away from it.
Enabling and disabling the security system The security system can be either enabled or disabled.
When enabled If any of the doors are opened withoutunlocking by the keyless entry system transmitter, all turn signal lights start to blink and the interior buzzer beeps inter-mittently. After 5 seconds, the siren will sound for about 27.5 seconds. The secu- rity system indicator continues to blinkduring this time. If the engine hood is opened, all turn sig-nal lights blink, and the siren sounds forabout 27.5 seconds. The security sys- tem indicator continues to blink during this time.
(If the shock sensor is in the enabled state) If the vehicle feels a shock, the sirensounds for about 2 seconds (pre-warn- ing). If the vehicle continues to feel a
(1)
19
Page 72 of 201
3-2
OPERATING YOUR VEHICLE
76MH1-74E
76MH1-74E
NOTE: It is normal for water to drip from the air conditioning system after use.
4) Make sure the hood is fully closed and latched.5) Check the headlights, turn signal lights, brake lights and horn for proper opera- tion.6) Adjust the seat and head restraint (if equipped). 7) Check the brake pedal and the parkingbrake lever. 8) Adjust the mirrors. 9) Make sure that you and all passengershave properly fastened your seat belts. 10)Make sure that all warning lights come on as the key is turned to the “ON” posi-tion. 11)Check all gauges. 12)Make sure that the BRAKE SYSTEMWARNING light turns off when the parking brake is released.
Once a week, or each time you fill your fuel tank, perform the following under-hood checks:
1) Engine oil level 2) Coolant level3) Brake fluid level 4) Windshield washer fluid level 5) Battery solution level6) Hood latch operation Pull the hood release handle inside the vehicle. Make sure that you cannotopen the hood all the way without
releasing the secondary latch. Be sure to close the hood securely after check- ing for proper latch operation. See “Alllatches, hinges & locks” of “CHASSIS AND BODY” in the “Periodic Mainte- nance Schedule” in the “INSPECTIONAND MAINTENANCE” section for lubri- cation schedule.
Once a month, or each time you fill your fuel tank, check the tire pressure using a tire pressure gauge. Also check the tirepressure of the spare tire.
Engine Oil Consumption
It is normal for the engine to consume some engine oil during normal vehicle operation.
The amount of engine oil consumed depends on the viscosity of the oil, thequality of the oil and the conditions the vehicle is driven under. More oil is consumed during high-speeddriving and when there is frequent acceler- ation and deceleration. Under high loads, your engine also will consume more oil.A new engine also consumes more oil, since its pistons, piston rings and cylinder
walls have not yet become conditioned. New engines reach the normal level of oil consumption only after approximately 5000km (3000 miles) driving.
Oil consumption: Max. 1.0 L per 1000 km (1 Qt. per 600 miles)
When judging the amount of oil consump- tion, note that the oil may become diluted and make it difficult to accurately judge thetrue oil level. As an example, if a vehicle is used for repeated short trips, and consumes a nor-mal amount of oil, the dipstick may not show any drop in the oil level at all, even after 1000 km (600 miles) or more of driv-ing. This is because the oil is gradually becoming diluted with fuel or moisture, making it appear that the oil level has notchanged. You should also be aware that the diluting ingredients evaporate out when the vehicleis subsequently driven at high speeds, such as on an expressway, making it appear that oil is excessively consumedafter high-speed driving.
WA R N I N G
Make sure the hood is fully closed and latched before driv ing. If it is not, it can fly up unexpectedly duringdriving, obstructing your view and resulting in an accident.
61
Page 74 of 201
3-4
OPERATING YOUR VEHICLE
76MH1-74E
76MH1-74E
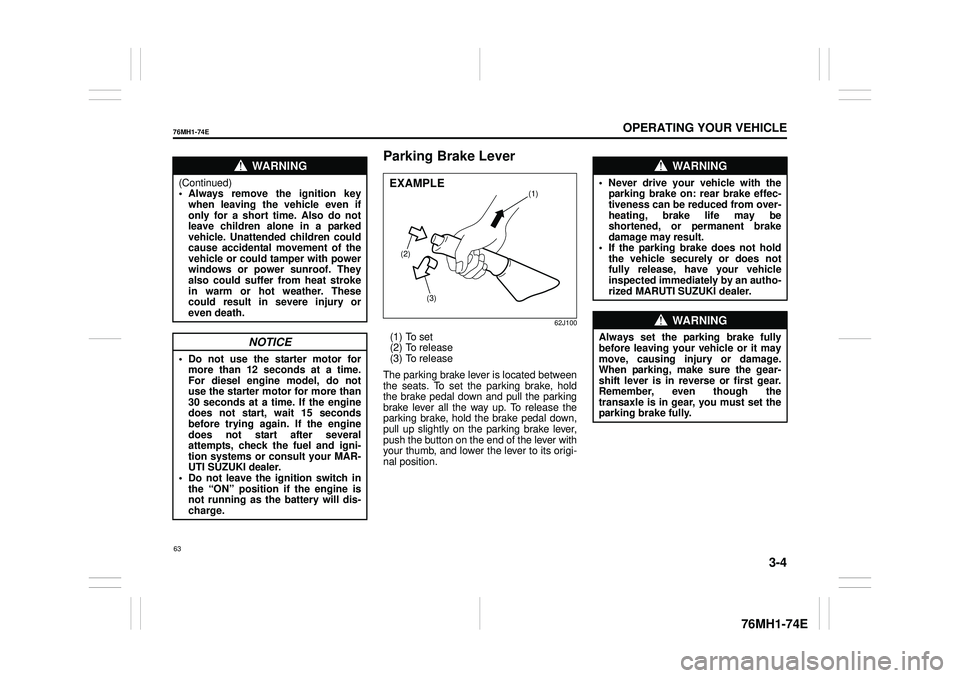
Parking Brake Lever
62J100
(1) To set (2) To release(3) To release
The parking brake lever is located between the seats. To set the parking brake, hold the brake pedal down and pull the parking brake lever all the way up. To release theparking brake, hold the brake pedal down, pull up slightly on the parking brake lever, push the button on the end of the lever withyour thumb, and lower the lever to its origi- nal position.
WA R N I N G
(Continued) • Always remove the ignition keywhen leaving the vehicle even if only for a short time. Also do not leave children alone in a parkedvehicle. Unattended children could cause accidental movement of the vehicle or could tamper with powerwindows or power sunroof. They also could suffer from heat stroke in warm or hot weather. Thesecould result in severe injury or even death.
NOTICE
• Do not use the starter motor for more than 12 seconds at a time.For diesel engine model, do not use the starter motor for more than 30 seconds at a time. If the enginedoes not start, wait 15 seconds before trying again. If the engine does not start after severalattempts, check the fuel and igni- tion systems or consult your MAR- UTI SUZUKI dealer.• Do not leave the ignition switch in the “ON” position if the engine is not running as the battery will dis-charge.
(2)
(3)
(1)EXAMPLE
WA R N I N G
• Never drive your vehicle with theparking brake on: rear brake effec-tiveness can be reduced from over- heating, brake life may be shortened, or permanent brakedamage may result. • If the parking brake does not hold the vehicle securely or does notfully release, have your vehicle inspected immediately by an autho- rized MARUTI SUZUKI dealer.
WA R N I N G
Always set the pa rking brake fully before leaving your vehicle or it may move, causing injury or damage. When parking, make sure the gear-shift lever is in reverse or first gear. Remember, even though the transaxle is in gear, you must set theparking brake fully.
63
Page 100 of 201
5-4
OTHER CONTROLS AND EQUIPMENT
76MH1-74E
76MH1-74E
Vanity mirror (if equipped)
74LHT0532
(2) Vanity mirror
There is a vanity mirror (2) on the back of the sun visor.
Interior Light
Ty p e A
61MM0A107
Ty p e B
76MH0A138
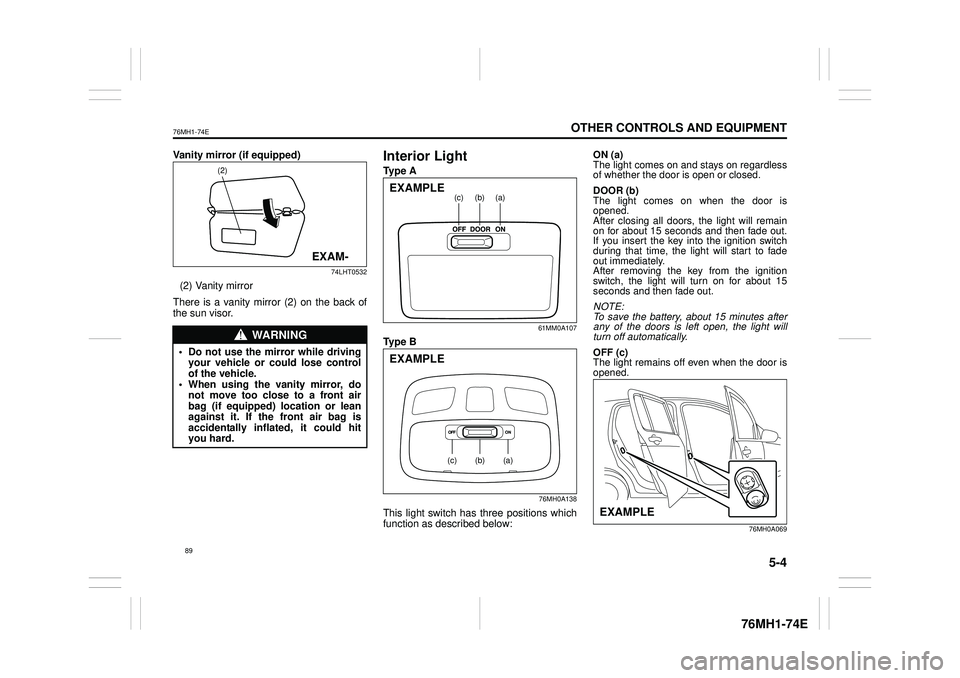
This light switch has three positions which function as described below:
ON (a) The light comes on and stays on regardless of whether the door is open or closed.
DOOR (b) The light comes on when the door isopened. After closing all doors, the light will remain on for about 15 seconds and then fade out.If you insert the key into the ignition switch during that time, the light will start to fade out immediately. After removing the key from the ignition switch, the light will turn on for about 15 seconds and then fade out.
NOTE: To save the battery, about 15 minutes after any of the doors is left open, the light will turn off automatically.
OFF (c) The light remains off even when the door is opened.
76MH0A069
WA R N I N G
• Do not use the mirror while driving your vehicle or could lose controlof the vehicle. • When using the vanity mirror, do not move too close to a front airbag (if equipped) location or lean against it. If the front air bag is accidentally inflated, it could hityou hard.
(2)
EXAM-
(a)(b)(c)EXAMPLE
(a)(b)(c)
EXAMPLE
EXAMPLE
89
Page 186 of 201
8-5
EMERGENCY SERVICE
76MH1-74E
76MH1-74E
3) Make jump lead connections as follows:
1. Connect one end of the first jump lead to the positive (+) terminal of the flat battery (1). 2. Connect the other end to the positive(+) terminal of the booster battery (2). 3. Connect one end of the second jumplead to the negative (–) terminal of the booster battery (2). 4. Make the final connection to anunpainted, heavy metal part (i.e. engine mount bracket (3)) of the engine of the vehicle with the flatbattery (1).
4) If the booster battery you are using is fitted to another vehicle, start the
engine of the vehicle with the booster battery. Run the engine at moderate speed.5) Start the engine of the vehicle with the flat battery. 6) Remove the jump leads in the exactreverse order in which you connected them.
Towing
If you need to have your vehicle towed, contact a professional service. Your dealercan provide you with detailed towing instructions.
2-Wheel Drive (2WD) Manual Tran- saxle or Auto Gear ShiftManual transaxle vehicles or Auto Gear Shift vehicles may be towed using either of the following methods.
1) From the front, with the front wheels lifted and the rear wheels on the ground. Before towing, make sure thatthe parking brake is released. 2) From the rear, with the rear wheels lifted and the front wheels on theground, provided the steering and drivetrain are in operational condition. Before towing, make sure that transaxleis in neutral, the steering wheel is
unlocked (the ignition key should be in the “ACC” position), and the steering wheel is secured with a clampingdevice designed for towing service.
WA R N I N G
Never connect the jump lead directlyto the negative (–) terminal of the dis- charged battery, or an explosion may occur.
CAUTION
Connect the jump le ad to the engine mount bracket securely. If the jump lead disconnects from the engine mount bracket because of vibrationat the start of the engine, the jump lead could be caught in the drive belts.
NOTICE
To help avoid damage to your vehicle during towing, proper equipment and towing procedures must be used.
NOTICE
After shifting the Auto Gear Shiftlever to the “N” position, always check the gear position indicator in the instrument cluster shows the “N”position to make sure that the transaxle is disengaged. If the transaxle cannot be put in neu-tral, turn the key from the “LOCK” to the “ON” position, and move the Auto Gear Shift lever from “N” to “D”,“M” or “R”, then back to “N” again. Then turn the key from the “ON” to the “LOCK” position.These procedures may help put the transaxle in neutral. If the transaxle still cannot be put in neutral, you can-not tow the vehicle without using a towing dolly. The steering column is not strongenough to with stand shocks trans- mitted from the fr ont wheels during towing. Always unlock the steeringwheel before towing.
175