light Acura RL 2000 3.5 Workshop Manual
[x] Cancel search | Manufacturer: ACURA, Model Year: 2000, Model line: RL, Model: Acura RL 2000Pages: 330, PDF Size: 4.53 MB
Page 111 of 330
Parkin
g Brake , Digita l Cloc k
Parkin g Brak e
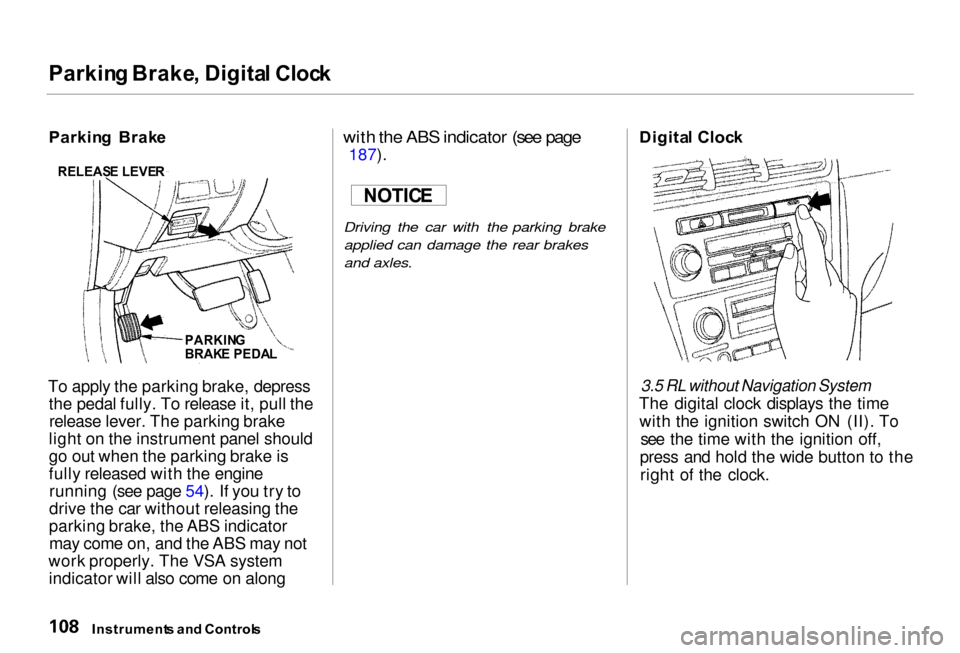
To apply the parking brake, depress the pedal fully. To release it, pull therelease lever. The parking brake
light on the instrument panel should
go out when the parking brake is
fully released with the engine running (see page 54). If you try to
drive the car without releasing the
parking brake, the ABS indicator may come on, and the ABS may not
work properly. The VSA system indicator will also come on along
with the ABS indicator (see page
187).
Driving the car with the parking brake applied can damage the rear brakes
and axles.
Digita
l Cloc k
3.5 RL without Navigation System
The digital clock displays the time with the ignition switch ON (II). To see the time with the ignition off,
press and hold the wide button to the right of the clock.
Instrument s an d Control s
RELEAS
E LEVE R
PARKIN G
BRAK E PEDA L
NOTIC
E
Page 116 of 330
Su
n Visor , Vanit y Mirro r
Su n Viso r
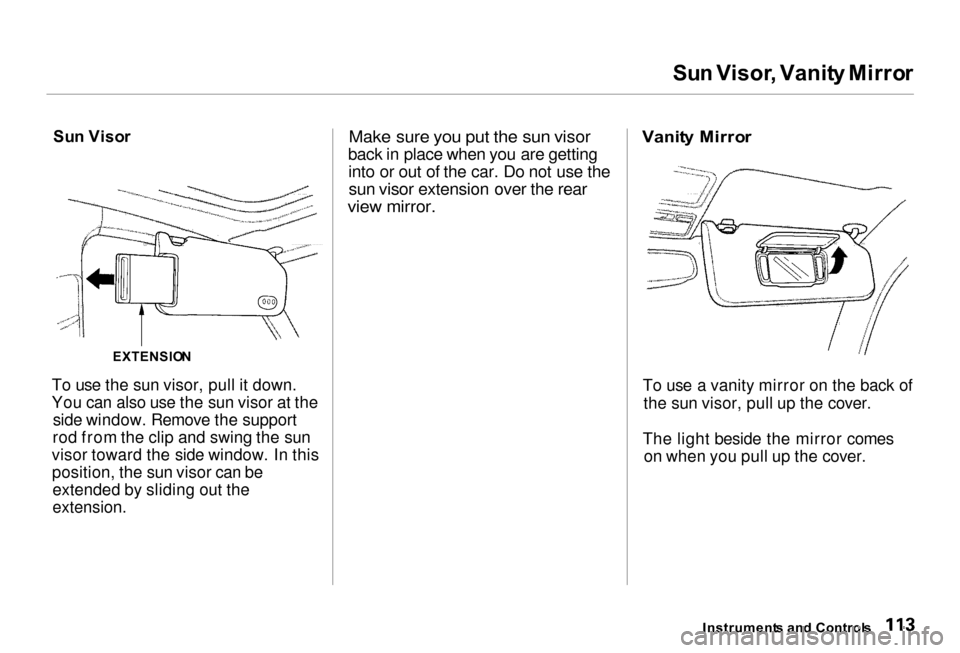
To use the sun visor, pull it down.
You can also use the sun visor at the side window. Remove the support
rod from the clip and swing the sun
visor toward the side window. In this position, the sun visor can beextended by sliding out the
extension.
Make sure you put the sun visor
back in place when you are getting into or out of the car. Do not use the
sun visor extension over the rear
view mirror. Vanit
y Mirro r
To use a vanity mirror on the back of the sun visor, pull up the cover.
The light beside the mirror comes on when you pull up the cover.
Instrument s an d Control s
EXTENSIO
N
Page 117 of 330
Accessor
y Powe r Socke t
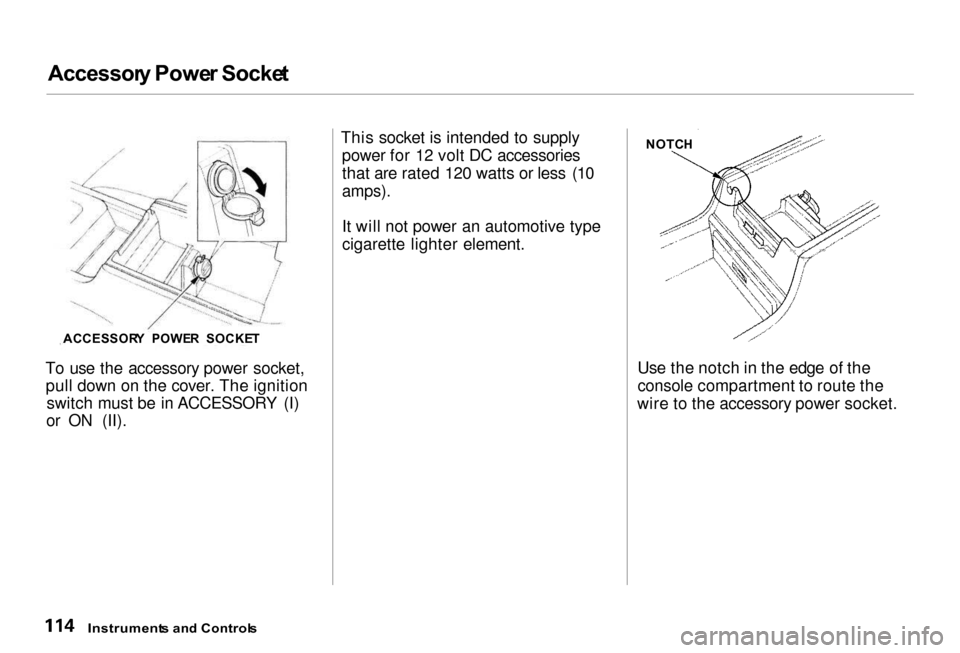
To use the accessory power socket, pull down on the cover. The ignition switch must be in ACCESSORY (I)
or ON (II). This socket is intended to supply
power for 12 volt DC accessories
that are rated 120 watts or less (10
amps).
It will not power an automotive type
cigarette lighter element.
Use the notch in the edge of the
console compartment to route the
wire to the accessory power socket.
Instrument s an d Control s
ACCESSOR
Y POWE R SOCKE T NOTC
H
Page 118 of 330
Cigarett
e Lighte r
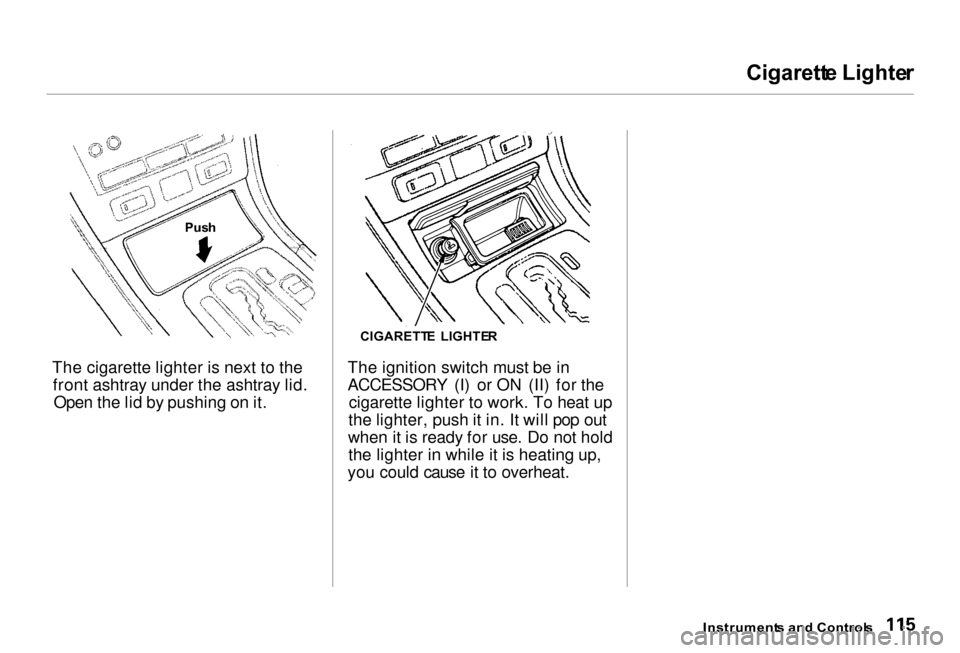
The cigarette lighter is next to the front ashtray under the ashtray lid.Open the lid by pushing on it. The ignition switch must be in
ACCESSORY (I) or ON (II) for the
cigarette lighter to work. To heat up
the lighter, push it in. It will pop out
when it is ready for use. Do not hold the lighter in while it is heating up,
you could cause it to overheat.
Instruments an d Control s
CIGARETT
E LIGHTE R
Pus
h
Page 120 of 330

Ceilin
g Light s
Both front and rear ceiling lights
contain a main light as well as two spotlights.
The front ceiling light has a three- position switch. With the switch in
the OFF position (far left), the main
lights do not come on. In the center
position, the main lights come on
when you open any door. After all doors are closed tightly, they dim
slightly then fade out in about 10
seconds. In the ON position (far
FRON
T
right), the main lights stay on continuously.
Turn on the spotlights in the front and rear ceiling lights by pushing the
grey button next to each light. Push
the button again to turn it off. You can use the front spotlights at all
times. The rear spotlights only light
when the parking lights or head- lights are on.
REA
R
On cars with automatic lighting
With the light switch in the AUTO position, you can use the rearspotlights only when the headlights
turn on automatically.
Instrument s an d Control s
O
N
OF
F
Page 121 of 330
Courtes
y Light s
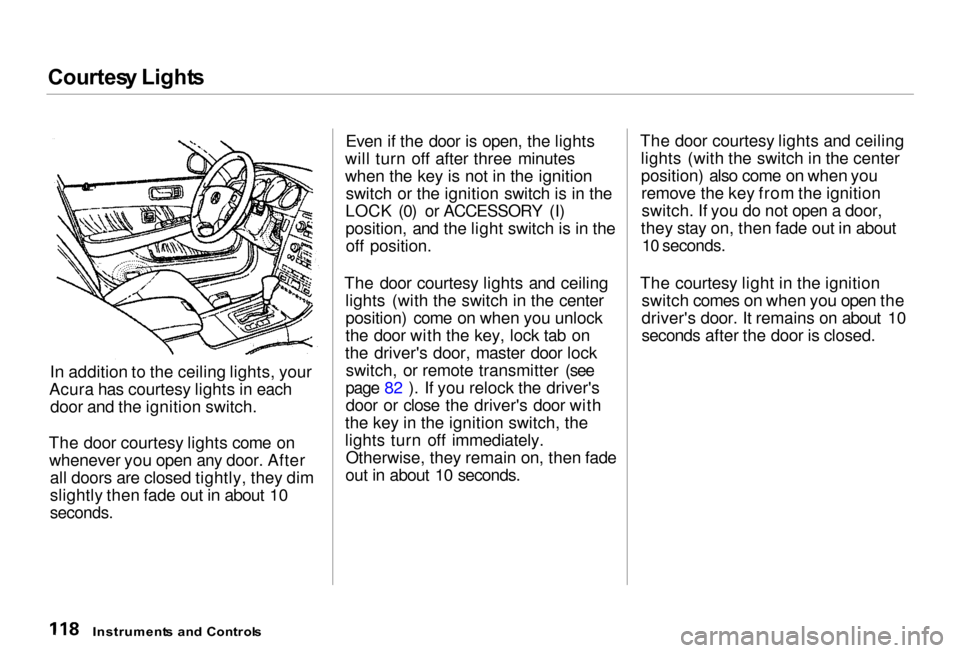
In addition to the ceiling lights, your
Acura has courtesy lights in each door and the ignition switch.
The door courtesy lights come on whenever you open any door. After all doors are closed tightly, they dim
slightly then fade out in about 10
seconds.
Even if the door is open, the lights
will turn off after three minutes
when the key is not in the ignition switch or the ignition switch is in the
LOCK (0) or ACCESSORY (I)
position, and the light switch is in the off position.
The door courtesy lights and ceiling lights (with the switch in the center
position) come on when you unlock
the door with the key, lock tab on
the driver's door, master door lock switch, or remote transmitter (see
page 82 ). If you relock the driver's door or close the driver's door with
the key in the ignition switch, the
lights turn off immediately. Otherwise, they remain on, then fade
out in about 10 seconds. The door courtesy lights and ceiling
lights (with the switch in the center
position) also come on when youremove the key from the ignitionswitch. If you do not open a door,
they stay on, then fade out in about
10 seconds.
The courtesy light in the ignition switch comes on when you open the
driver's door. It remains on about 10
seconds after the door is closed.
Instrument s an d Control s
Page 122 of 330
Comfor
t an d Convenienc e Feature s
The climate control system in your
Acura provides a comfortable driving
environment in all weather condi-
tions.
The standard audio system has
many features. This section de-
scribes those features and how to
use them.
Your Acura has an anti-theft audio
system that requires a code number
to enable it.
The security system helps to dis-
courage vandalism and theft of your
Acura. Climate Control System................ 120
3.5 RL without Navigation System
Fully-automatic Operation........ 122
Semi-automatic Operation........ 123
3.5 RL with Navigation System
Fully-automatic Operation ........ 127
Semi-automatic Operation ........ 128
Rear Ventilation ......................... 132
Sunlight Sensor/ Temperature Sensor.............
133
Audio System ................................. 134
AM/FM/Cassette Stereo
Audio System......................... 134
3.5 RL without Navigation System
Operating the Radio.................. 135
Adjusting the Sound.................. 138
Audio System Lighting............. 139 Operating the Cassette Player...................................... 139
Tape Search Functions............. 140 Operating the CD Changer...... 142
3.5 RL with Navigation System
Operating the Radio.................. 145
Adjusting the Sound.................. 148
Audio System Lighting............. 149 Radio Frequencies..................... 149
Radio Reception......................... 149Operating the Cassette
Player...................................... 151
Tape Search Functions............. 151 Caring for the Cassette Player...................................... 154
Operating the CD Changer...... 155
Loading the CD Changer ......... 157
Protecting Compact Discs........ 159 CD Changer Error Indications.............................. 160
Remote Audio Controls ............ 161
Theft Protection........................ 162
Security System............................. 163
Comfor t an d Convenienc e Feature s
Page 125 of 330
Climat
e Control System
3.5 RL without Navigation System
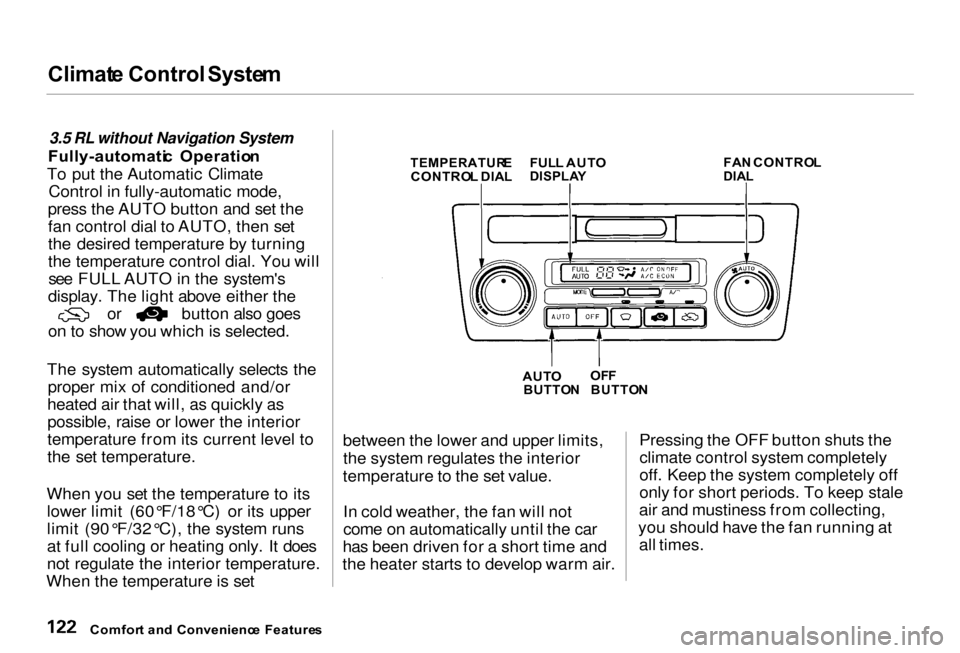
Fully-automati c Operatio n
To put the Automatic Climate Control in fully-automatic mode,
press the AUTO button and set the fan control dial to AUTO, then set
the desired temperature by turning
the temperature control dial. You willsee FULL AUTO in the system's
display. The light above either the or button also goes
on to show you which is selected.
The system automatically selects the proper mix of conditioned and/or
heated air that will, as quickly as
possible, raise or lower the interior
temperature from its current level to
the set temperature.
When you set the temperature to its lower limit (60°F/18°C) or its upper
limit (90°F/32°C), the system runs
at full cooling or heating only. It does
not regulate the interior temperature.
When the temperature is set between the lower and upper limits,
the system regulates the interior
temperature to the set value.
In cold weather, the fan will not
come on automatically until the car
has been driven for a short time and
the heater starts to develop warm air. Pressing the OFF button shuts the
climate control system completely
off. Keep the system completely off
only for short periods. To keep stale
air and mustiness from collecting,
you should have the fan running at all times.
Comfor t an d Convenienc e Feature s
TEMPERATUR
E
CONTRO L DIA LFUL
L AUT O
DISPLA Y
FA
N CONTRO L
DIA L
AUT O
BUTTO NOF
F
BUTTO N
Page 126 of 330
Climat
e Control System
Semi-automati c Operatio n
You can manually select various functions of the Climate Control system when it is in FULL AUTO.
All other features remain auto- matically controlled. Making any
manual selection causes the word
FULL to go out.
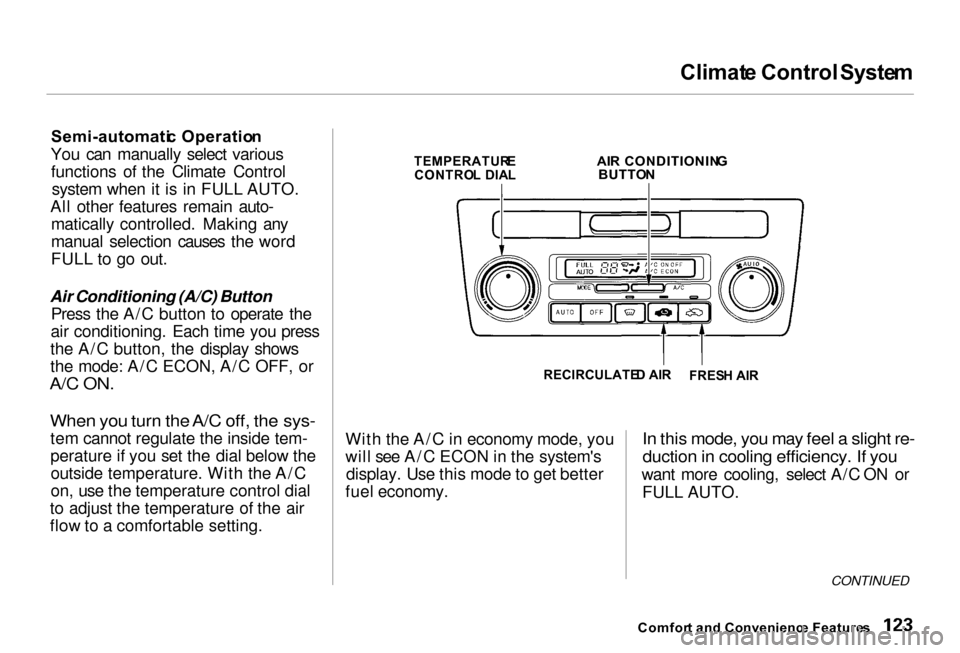
Air Conditioning (A/C) Button Press the A/C button to operate the
air conditioning. Each time you press
the A/C button, the display shows
the mode: A/C ECON, A/C OFF, or
A/C ON.
When you turn the A/C off, the sys-
tem cannot regulate the inside tem-
perature if you set the dial below theoutside temperature. With the A/C
on, use the temperature control dial
to adjust the temperature of the air
flow to a comfortable setting.
TEMPERATUR
E
CONTRO L DIA L
AI
R CONDITIONIN G
BUTTO N
RECIRCULATE D AI R
With the A/C in economy mode, you
will see A/C ECON in the system's display. Use this mode to get better
fuel economy.
In this mode, you may feel a slight re-
duction in cooling efficiency. If you
want more cooling, select A/C ON or FULL AUTO.
CONTINUED
Comfor t an d Convenienc e Feature s
FRES
H AI R
Page 127 of 330
Climat
e Control System
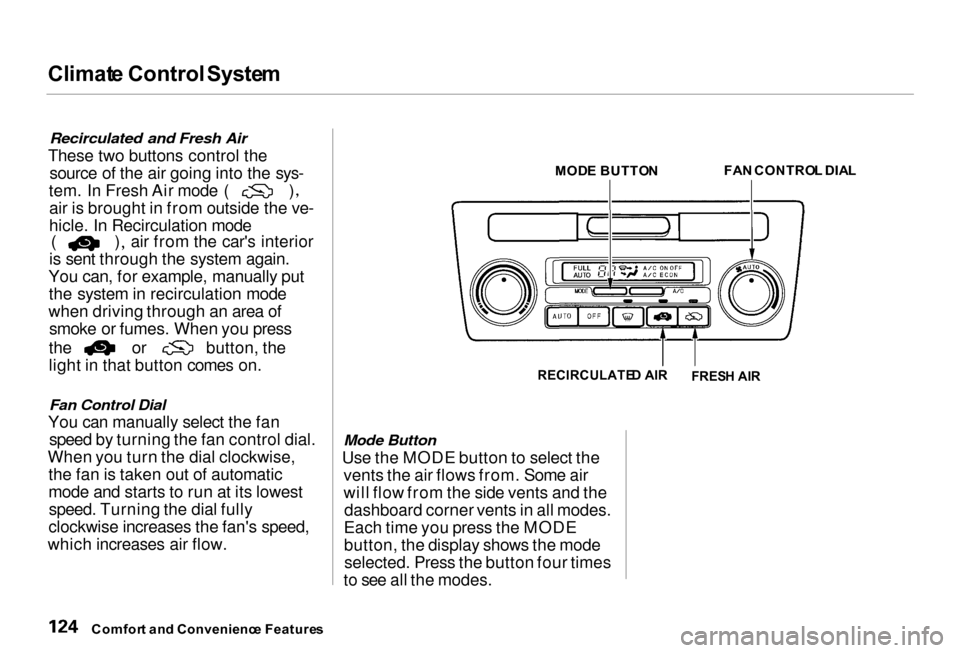
Recirculated and Fresh Air
These two buttons control the source of the air going into the sys- tem. In Fresh Air mode ( )
air is brought in from outside the ve-
hicle. In Recirculation mode ( ) air from the car's interior
is sent through the system again.
You can, for example, manually put the system in recirculation mode
when driving through an area of smoke or fumes. When you press the or button, the
light in that button comes on.
Fan Control Dial
You can manually select the fan speed by turning the fan control dial.
When you turn the dial clockwise, the fan is taken out of automatic
mode and starts to run at its lowestspeed. Turning the dial fully
clockwise increases the fan's speed,
which increases air flow. MOD
E BUTTO N
FA
N CONTRO L DIA L
RECIRCULATE D AI R
Mode Button
Use the MODE button to select the vents the air flows from. Some air
will flow from the side vents and thedashboard corner vents in all modes.
Each time you press the MODE
button, the display shows the mode selected. Press the button four times
to see all the modes.
Comfor t an d Convenienc e Feature s
FRES
H AI R