turn signal BMW 323i 2000 Owners Manual
[x] Cancel search | Manufacturer: BMW, Model Year: 2000, Model line: 323i, Model: BMW 323i 2000Pages: 189, PDF Size: 1.81 MB
Page 10 of 189
Contents
Overview
Controls and features
Cockpit16
Instrument cluster18
Indicator and warning lamps20
Multifunction steering wheel
(MFL)24
Hazard warning flashers25
Warning triangle25
First-aid kit25
Refueling26
Fuel specifications26
Tire inflation pressure27
Locks and security systems:
Keys32
Electronic vehicle
immobilizer33
Central locking system34
Opening and closing Ð from
outside34
Opening and closing Ð from
inside38
Luggage compartment lid39
Luggage compartment41
Alarm system42
Electric power windows44
Sliding/Tilt sunroof45
Adjustments:
Seats47
Seat and mirror memory50
Steering wheel51
Mirrors52
Car Memory, Key Memory53
Passenger safety systems:
Safety belts54
Child restraint systems55
Child-safety locks56
Airbags56
Child restraints59
Installing a child restraint
system60
Driving:
Steering/Ignition lock61
Starting the engine61
Switching off the engine62
Parking brake63
Manual transmission64
Automatic transmission with
Steptronic65
Turn signal indicator/Headlamp
flasher68
Wiper/Washer system/Rain
sensor68
Rear window defroster70
Cruise control71
Everything under control:
Odometer73
Tachometer73
Energy Control73
Fuel gauge74
Temperature gauge74
Service Interval Display74
Check Control75
Clock75
Onboard computer76
Technology for safety and
convenience:
Park Distance Control (PDC)78
Dynamic Stability Control
(DSC)79
Tire Pressure Control (RDC)80
Contents
Page 17 of 189
17n
IndexDataTechnologyRepairsCar careControlsOverview
Cockpit
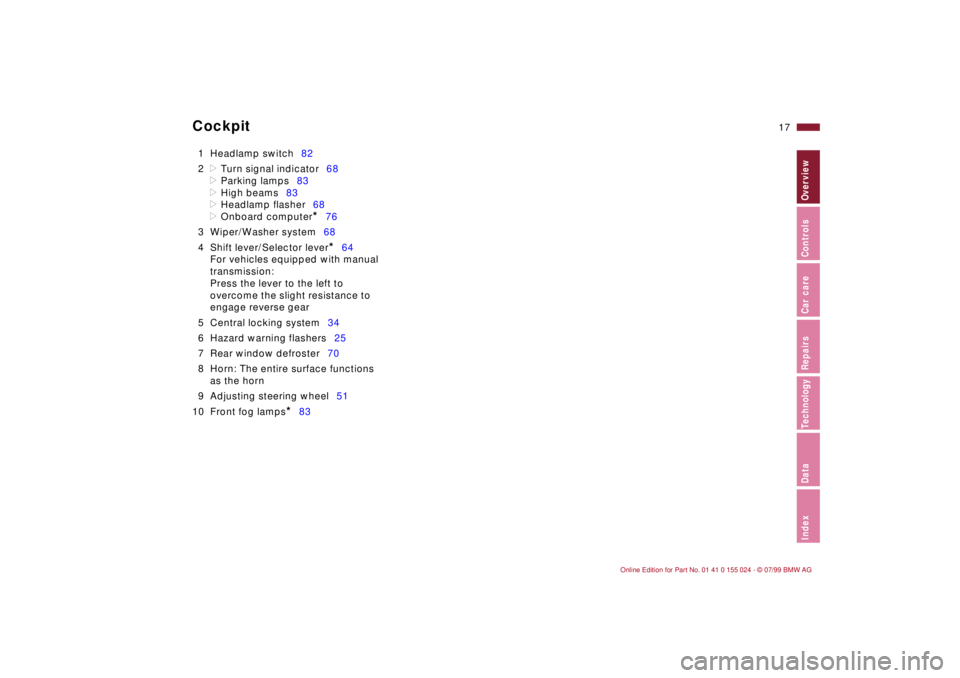
1 Headlamp switch82
2
>
Turn signal indicator68
>
Parking lamps83
>
High beams83
>
Headlamp flasher68
>
Onboard computer
*
76
3 Wiper/Washer system68
4 Shift lever/Selector lever
*
64
For vehicles equipped with manual
transmission:
Press the lever to the left to
overcome the slight resistance to
engage reverse gear
5 Central locking system34
6 Hazard warning flashers25
7 Rear window defroster70
8 Horn: The entire surface functions
as the horn
9 Adjusting steering wheel51
10 Front fog lamps
*
83
Page 19 of 189
19n
IndexDataTechnologyRepairsCar careControlsOverview
Instrument cluster
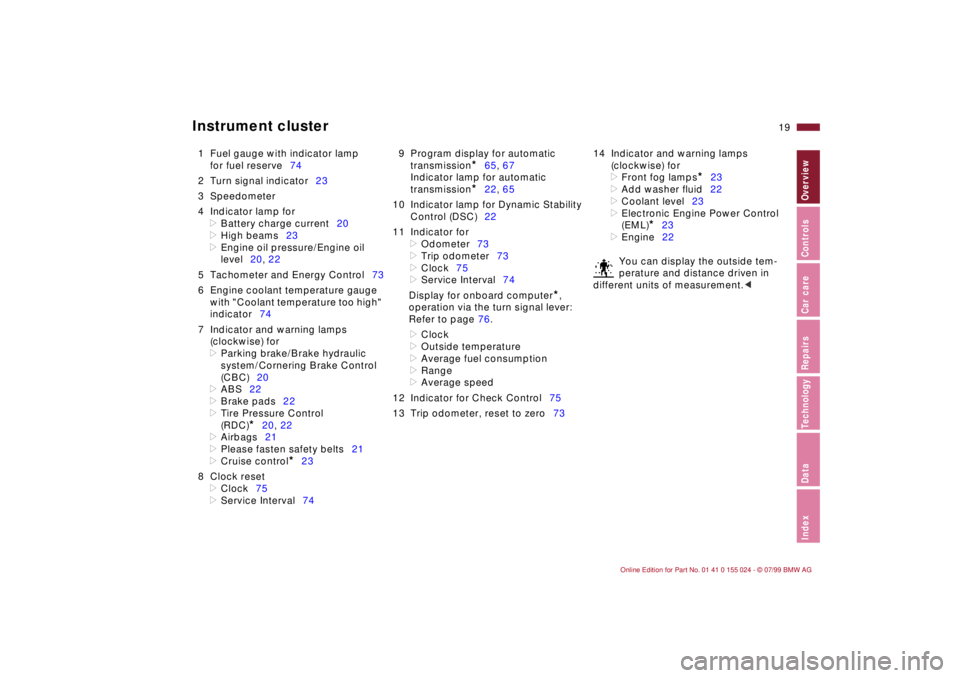
1 Fuel gauge with indicator lamp
for fuel reserve74
2 Turn signal indicator23
3 Speedometer
4 Indicator lamp for
>
Battery charge current20
>
High beams23
>
Engine oil pressure/Engine oil
level20, 22
5 Tachometer and Energy Control73
6 Engine coolant temperature gauge
with "Coolant temperature too high"
indicator74
7 Indicator and warning lamps
(clockwise) for
>
Parking brake/Brake hydraulic
system/Cornering Brake Control
(CBC)20
>
ABS22
>
Brake pads22
>
Tire Pressure Control
(RDC)
*
20, 22
>
Airbags21
>
Please fasten safety belts21
>
Cruise control
*
23
8 Clock reset
>
Clock75
>
Service Interval749 Program display for automatic
transmission
*
65, 67
Indicator lamp for automatic
transmission
*
22, 65
10 Indicator lamp for Dynamic Stability
Control (DSC)22
11 Indicator for
>
Odometer73
>
Trip odometer73
>
Clock75
>
Service Interval74
Display for onboard computer
*
,
operation via the turn signal lever:
Refer to page 76.
>
Clock
>
Outside temperature
>
Average fuel consumption
>
Range
>
Average speed
12 Indicator for Check Control75
13 Trip odometer, reset to zero7314 Indicator and warning lamps
(clockwise) for
>
Front fog lamps
*
23
>
Add washer fluid22
>
Coolant level23
>
Electronic Engine Power Control
(EML)
*
23
>
Engine22
You can display the outside tem-
perature and distance driven in
different units of measurement.
<
Page 20 of 189
20n
Indicator and warning lamps
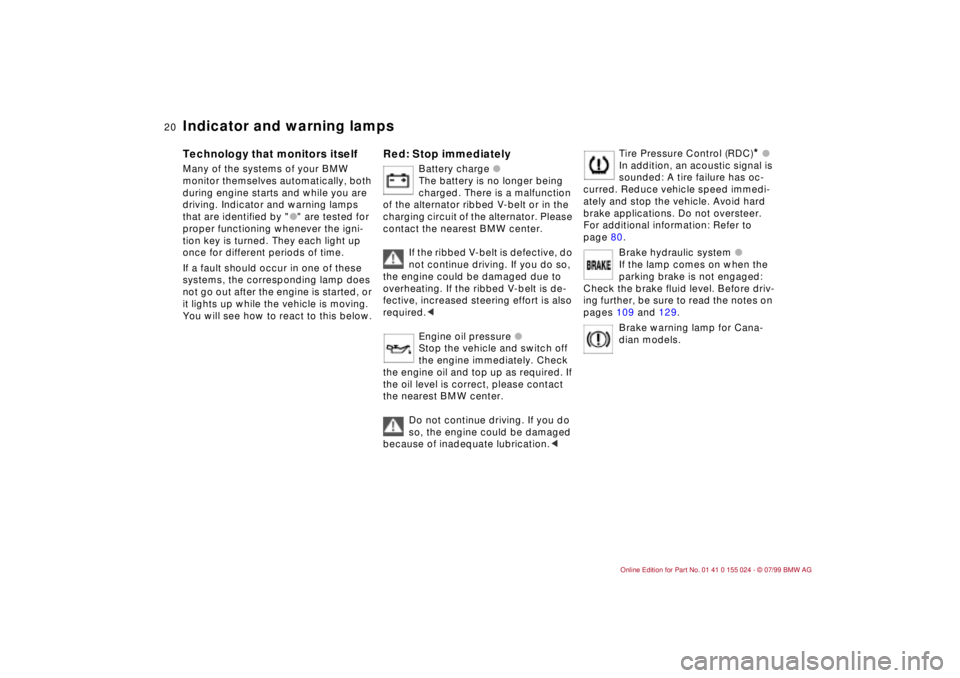
Technology that monitors itself
Many of the systems of your BMW
monitor themselves automatically, both
during engine starts and while you are
driving. Indicator and warning lamps
that are identified by "
l
" are tested for
proper functioning whenever the igni-
tion key is turned. They each light up
once for different periods of time.
If a fault should occur in one of these
systems, the corresponding lamp does
not go out after the engine is started, or
it lights up while the vehicle is moving.
You will see how to react to this below.
Red: Stop immediately
Battery charge
l
The battery is no longer being
charged. There is a malfunction
of the alternator ribbed V-belt or in the
charging circuit of the alternator. Please
contact the nearest BMW center.
If the ribbed V-belt is defective, do
not continue driving. If you do so,
the engine could be damaged due to
overheating. If the ribbed V-belt is de-
fective, increased steering effort is also
required.<
Engine oil pressure l
Stop the vehicle and switch off
the engine immediately. Check
the engine oil and top up as required. If
the oil level is correct, please contact
the nearest BMW center.
Do not continue driving. If you do
so, the engine could be damaged
because of inadequate lubrication.<
Tire Pressure Control (RDC)
* l
In addition, an acoustic signal is
sounded: A tire failure has oc-
curred. Reduce vehicle speed immedi-
ately and stop the vehicle. Avoid hard
brake applications. Do not oversteer.
For additional information: Refer to
page 80.
Brake hydraulic system l
If the lamp comes on when the
parking brake is not engaged:
Check the brake fluid level. Before driv-
ing further, be sure to read the notes on
pages 109 and 129.
Brake warning lamp for Cana-
dian models.
Page 23 of 189
23n
IndexDataTechnologyRepairsCar careControlsOverview
Indicator and warning lamps
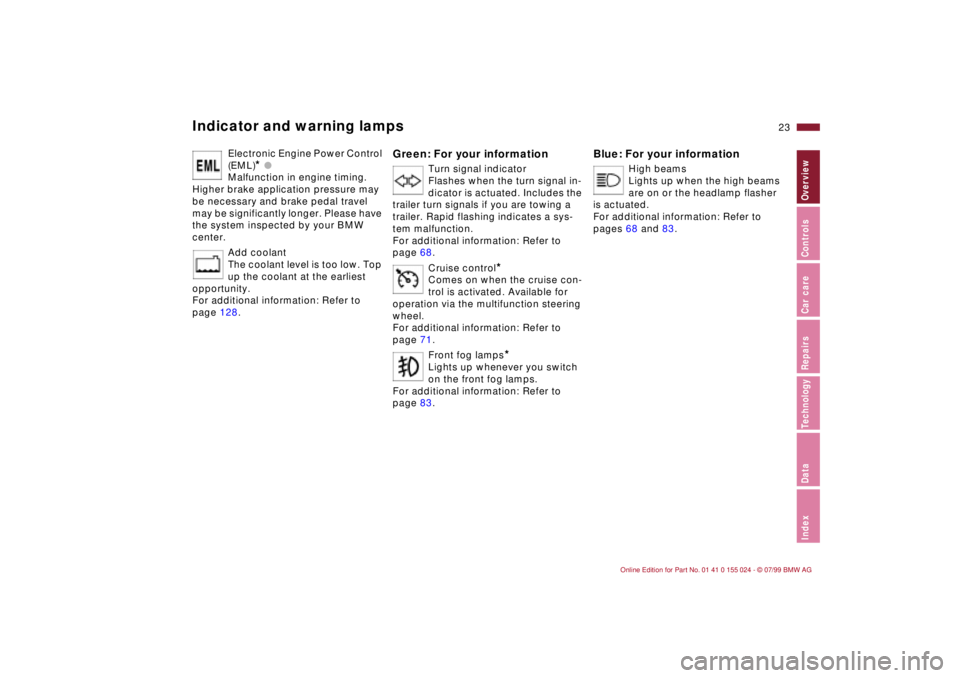
Electronic Engine Power Control
(EML)
* l
Malfunction in engine timing.
Higher brake application pressure may
be necessary and brake pedal travel
may be significantly longer. Please have
the system inspected by your BMW
center.
Add coolant
The coolant level is too low. Top
up the coolant at the earliest
opportunity.
For additional information: Refer to
page 128.
Green: For your information
Turn signal indicator
Flashes when the turn signal in-
dicator is actuated. Includes the
trailer turn signals if you are towing a
trailer. Rapid flashing indicates a sys-
tem malfunction.
For additional information: Refer to
page 68.
Cruise control
*
Comes on when the cruise con-
trol is activated. Available for
operation via the multifunction steering
wheel.
For additional information: Refer to
page 71.
Front fog lamps
*
Lights up whenever you switch
on the front fog lamps.
For additional information: Refer to
page 83.
Blue: For your information
High beams
Lights up when the high beams
are on or the headlamp flasher
is actuated.
For additional information: Refer to
pages 68 and 83.
Page 31 of 189
Overview
Controls and features
Operation, care
and maintenance
Owner service procedures
Technical data
Index Advanced technology
31n
IndexDataTechnologyRepairsCar careControlsOverview
Driving:
Steering/Ignition lock61
Starting the engine61
Switching off the engine62
Parking brake63
Manual transmission64
Automatic transmission with
Steptronic65
Turn signal indicator/Headlamp
flasher68
Wiper/Washer system/Rain
sensor68
Rear window defroster70
Cruise control71
Everything under control:
Odometer73
Tachometer73
Energy Control73
Fuel gauge74
Temperature gauge74
Service Interval Display74
Check Control75
Clock75
Onboard computer76
Technology for safety and
convenience:
Park Distance Control (PDC)78
Dynamic Stability Control
(DSC)79
Tire Pressure Control (RDC)80Lamps:
Parking lamps/Headlamps82
Dash lighting82
High beams/Parking lamps83
Fog lamps83
Interior lamps83
Reading lamps84
Controlling the climate for
pleasant driving:
Automatic climate control86
Seat heating91
Roller sun blind91
Interior conveniences:
HiFi system92
Glove compartment92
Storage compartments93
Cellular phones95
Ashtray, front95
Cigarette lighter96
Ashtray, rear96
Loading and transporting:
Through-loading system97
Ski bag98
Cargo loading99
Roof-mounted luggage rack100
Page 61 of 189
61n
IndexDataTechnologyRepairsCar careControlsOverview
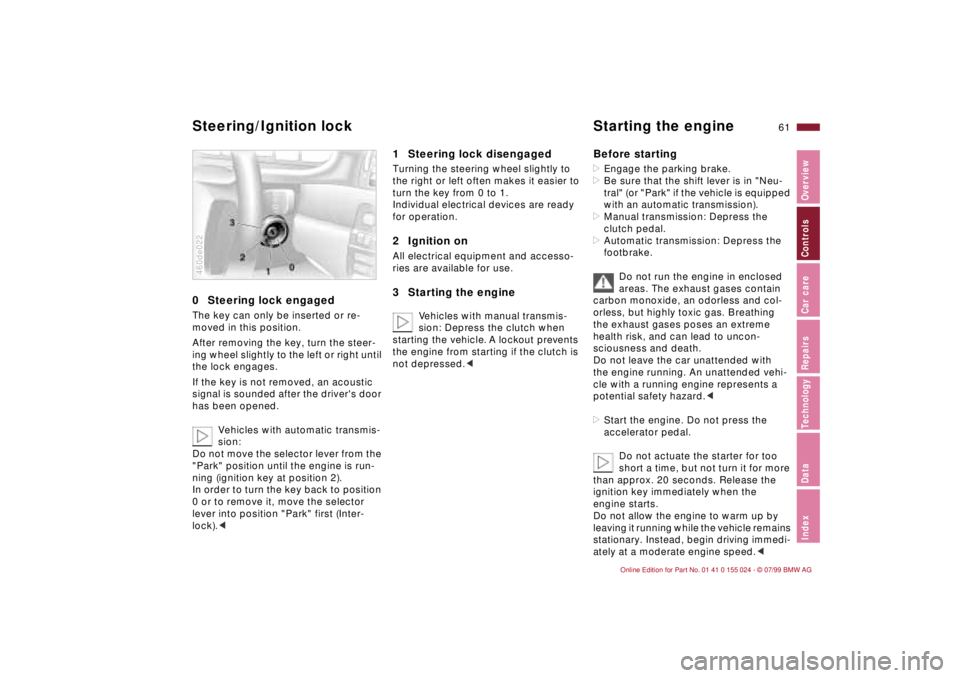
0 Steering lock engaged The key can only be inserted or re-
moved in this position.
After removing the key, turn the steer-
ing wheel slightly to the left or right until
the lock engages.
If the key is not removed, an acoustic
signal is sounded after the driver's door
has been opened.
Vehicles with automatic transmis-
sion:
Do not move the selector lever from the
"Park" position until the engine is run-
ning (ignition key at position 2).
In order to turn the key back to position
0 or to remove it, move the selector
lever into position "Park" first (Inter-
lock).<460de022
1 Steering lock disengaged Turning the steering wheel slightly to
the right or left often makes it easier to
turn the key from 0 to 1.
Individual electrical devices are ready
for operation.2 Ignition onAll electrical equipment and accesso-
ries are available for use.3 Starting the engine
Vehicles with manual transmis-
sion: Depress the clutch when
starting the vehicle. A lockout prevents
the engine from starting if the clutch is
not depressed.c
Before starting>Engage the parking brake.
>Be sure that the shift lever is in "Neu-
tral" (or "Park" if the vehicle is equipped
with an automatic transmission).
>Manual transmission: Depress the
clutch pedal.
>Automatic transmission: Depress the
footbrake.
Do not run the engine in enclosed
areas. The exhaust gases contain
carbon monoxide, an odorless and col-
orless, but highly toxic gas. Breathing
the exhaust gases poses an extreme
health risk, and can lead to uncon-
sciousness and death.
Do not leave the car unattended with
the engine running. An unattended vehi-
cle with a running engine represents a
potential safety hazard.<
>Start the engine. Do not press the
accelerator pedal.
Do not actuate the starter for too
short a time, but not turn it for more
than approx. 20 seconds. Release the
ignition key immediately when the
engine starts.
Do not allow the engine to warm up by
leaving it running while the vehicle remains
stationary. Instead, begin driving immedi-
ately at a moderate engine speed.<
Steering/Ignition lock Starting the engine
Page 68 of 189
68n
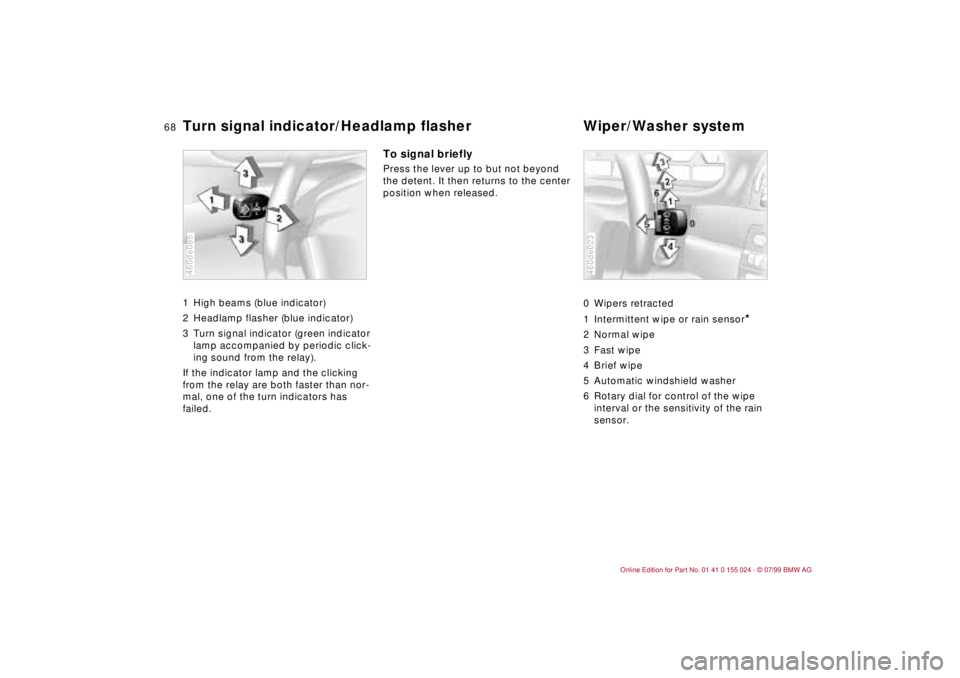
Turn signal indicator/Headlamp flasher Wiper/Washer system 1 High beams (blue indicator)
2 Headlamp flasher (blue indicator)
3 Turn signal indicator (green indicator
lamp accompanied by periodic click-
ing sound from the relay).
If the indicator lamp and the clicking
from the relay are both faster than nor-
mal, one of the turn indicators has
failed. 460de085
To signal brieflyPress the lever up to but not beyond
the detent. It then returns to the center
position when released.
0 Wipers retracted
1 Intermittent wipe or rain sensor
*
2 Normal wipe
3 Fast wipe
4 Brief wipe
5 Automatic windshield washer
6 Rotary dial for control of the wipe
interval or the sensitivity of the rain
sensor.460de023
Page 75 of 189
75n
IndexDataTechnologyRepairsCar careControlsOverview
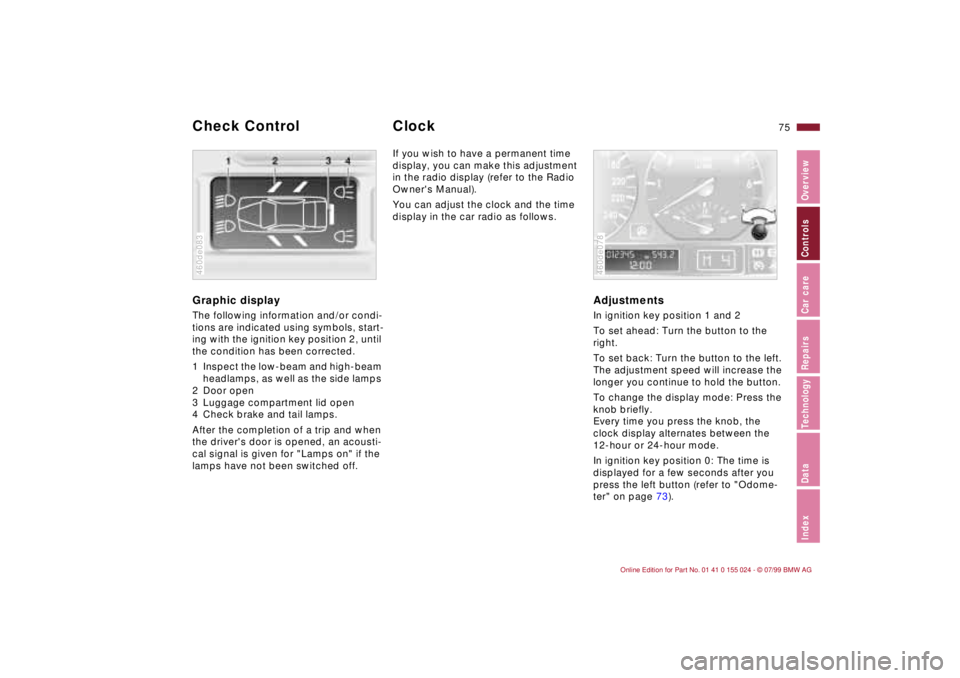
Graphic display The following information and/or condi-
tions are indicated using symbols, start-
ing with the ignition key position 2, until
the condition has been corrected.
1 Inspect the low-beam and high-beam
headlamps, as well as the side lamps
2 Door open
3 Luggage compartment lid open
4 Check brake and tail lamps.
After the completion of a trip and when
the driver's door is opened, an acousti-
cal signal is given for "Lamps on" if the
lamps have not been switched off.460de083
If you wish to have a permanent time
display, you can make this adjustment
in the radio display (refer to the Radio
Owner's Manual).
You can adjust the clock and the time
display in the car radio as follows.
AdjustmentsIn ignition key position 1 and 2
To set ahead: Turn the button to the
right.
To set back: Turn the button to the left.
The adjustment speed will increase the
longer you continue to hold the button.
To change the display mode: Press the
knob briefly.
Every time you press the knob, the
clock display alternates between the
12-hour or 24-hour mode.
In ignition key position 0: The time is
displayed for a few seconds after you
press the left button (refer to "Odome-
ter" on page 73).460de078
Check Control Clock
Page 76 of 189
76n
Onboard computer
*
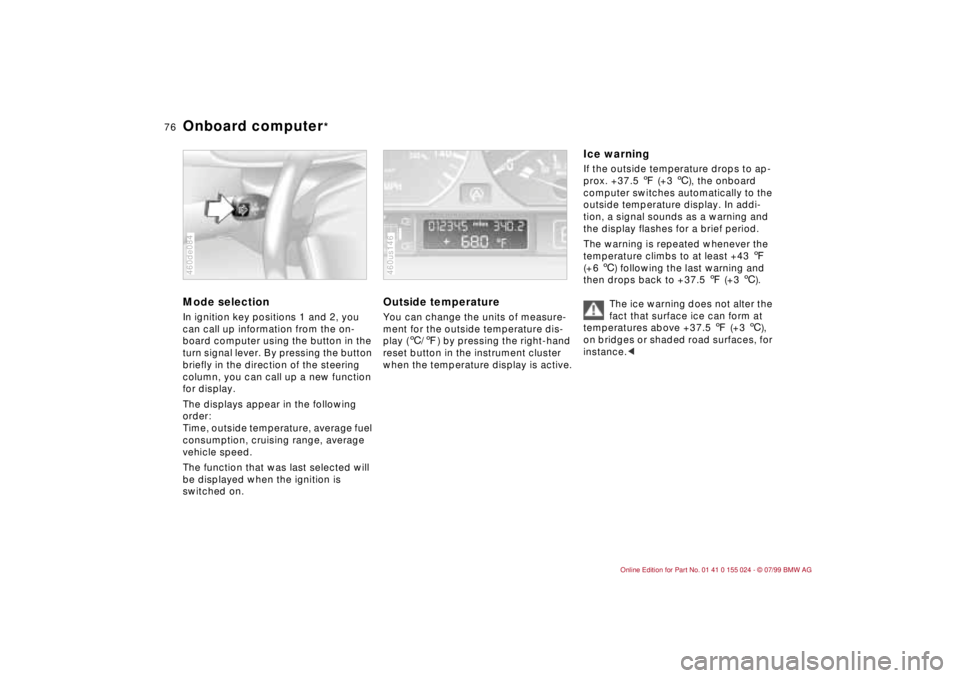
Mode selectionIn ignition key positions 1 and 2, you
can call up information from the on-
board computer using the button in the
turn signal lever. By pressing the button
briefly in the direction of the steering
column, you can call up a new function
for display.
The displays appear in the following
order:
Time, outside temperature, average fuel
consumption, cruising range, average
vehicle speed.
The function that was last selected will
be displayed when the ignition is
switched on.460de084
Outside temperature You can change the units of measure-
ment for the outside temperature dis-
play (6/7) by pressing the right-hand
reset button in the instrument cluster
when the temperature display is active.460us146
Ice warning If the outside temperature drops to ap-
prox. +37.5 7 (+3 6), the onboard
computer switches automatically to the
outside temperature display. In addi-
tion, a signal sounds as a warning and
the display flashes for a brief period.
The warning is repeated whenever the
temperature climbs to at least +43 7
(+6 6) following the last warning and
then drops back to +37.5 7 (+3 6).
The ice warning does not alter the
fact that surface ice can form at
temperatures above +37.5 7 (+3 6),
on bridges or shaded road surfaces, for
instance.<