ESP BMW 5 SERIES 2013 F10 Workshop Manual
[x] Cancel search | Manufacturer: BMW, Model Year: 2013, Model line: 5 SERIES, Model: BMW 5 SERIES 2013 F10Pages: 273, PDF Size: 6.63 MB
Page 224 of 273
Notes
Driving over rough or damaged road surfaces,
as well as debris, curbs and other obstacles
can cause serious damage to wheels, tires and
suspension parts. This is more likely to occur
with low-profile tires, which provide less cush‐
ioning between the wheel and the road. Be
careful to avoid road hazards and reduce your
speed, especially if your vehicle is equipped
with low-profile tires.
Indications of tire damage or other vehicle de‐
fects:▷Unusual vibrations during driving.▷Unusual handling such as a strong ten‐
dency to pull to the left or right.
Damage can, e. g., be caused by driving over
curbs, road damage, or similar things.
In case of tire damage
If there are indications of tire damage, re‐
duce your speed immediately and have the
wheels and tires checked right away; other‐
wise, there is the increased risk of an accident.
Drive carefully to the nearest service center. If
necessary, have the vehicle towed.
Otherwise, tire damage can be life-threatening
for vehicle occupants and other traffic partici‐
pants.◀
Repair of tire damage
For safety reasons, the manufacturer of
your vehicle recommends that you do not have
damaged tires repaired; they should be re‐
placed. Otherwise, damage can occur as a re‐
sult.◀
Changing wheels and tires
Mounting Information on mounting tires
Have mounting and balancing performed
only by a service center.
If this work is not carried out properly, there is
the danger of subsequent damage and related
safety hazards.◀
Wheel and tire combination
Information on the correct wheel-tire combina‐
tion and rim versions for your vehicle can be
obtained from your service center.
Incorrect wheel and tire combinations impair
the function of a variety of systems such as
ABS or DSC.
To maintain good handling and vehicle re‐
sponse, use only tires with a single tread con‐
figuration from a single manufacturer.
Following tire damage, have the original wheel
and tire combination remounted on the vehicle
as soon as possible.
Approved wheels and tires
The manufacturer of your vehicle recom‐
mends that you use only wheels and tires that
have been approved for your particular vehicle
model.
For example, despite having the same official
size ratings, variations can lead to body con‐
tact and with it, the risk of severe accidents.
The manufacturer of your vehicle cannot eval‐
uate non-approved wheels and tires to deter‐
mine if they are suited for use, and therefore
cannot ensure the operating safety of the vehi‐
cle if they are mounted.◀Seite 220MobilityWheels and tires220
Online Edition for Part no. 01 40 2 911 177 - VI/13
Page 225 of 273
Recommended tire brands
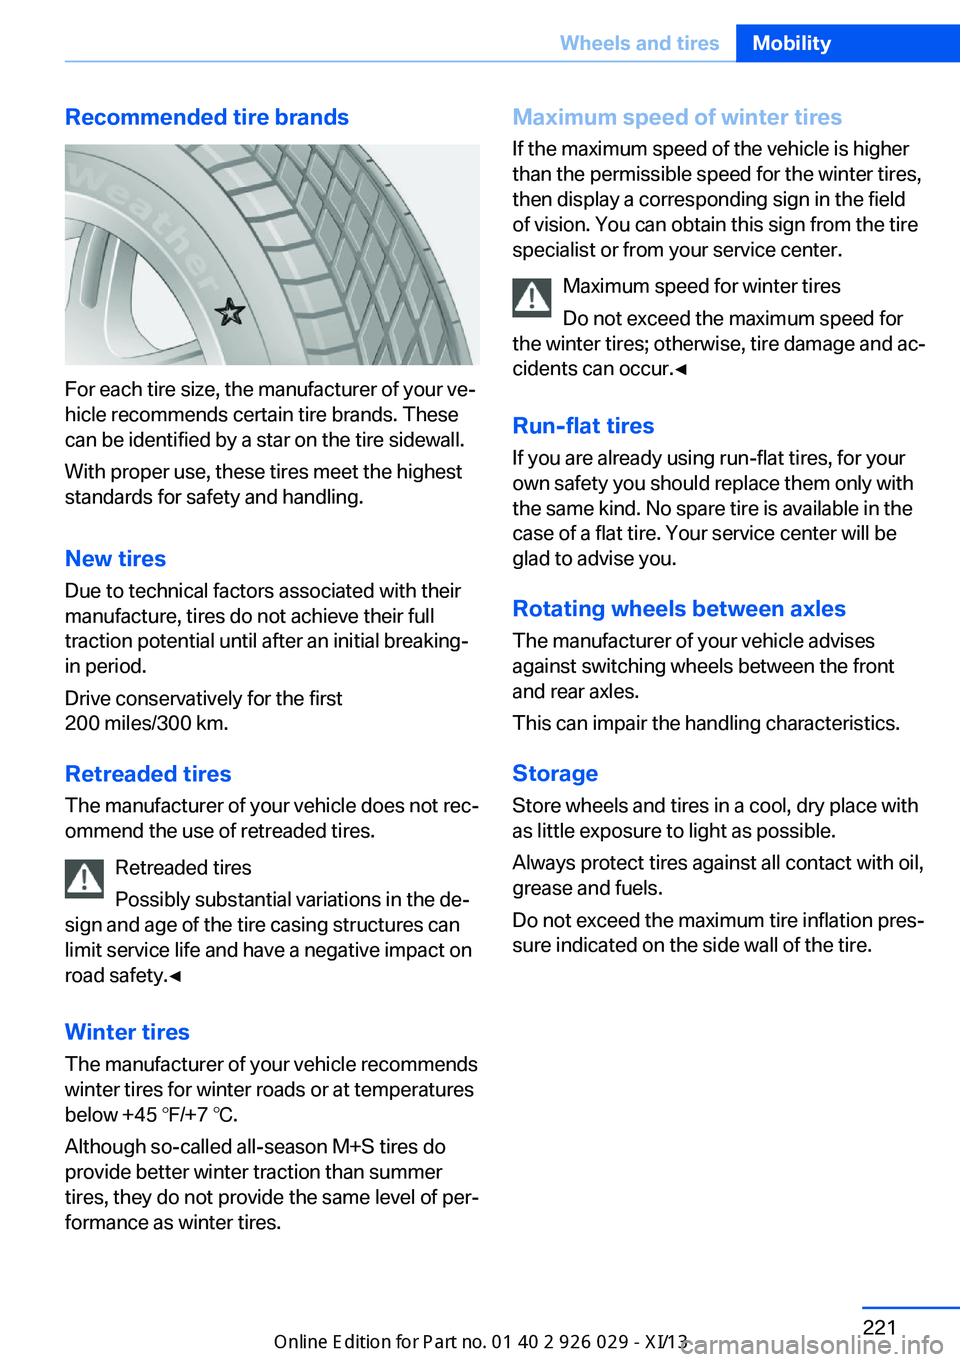
For each tire size, the manufacturer of your ve‐
hicle recommends certain tire brands. These
can be identified by a star on the tire sidewall.
With proper use, these tires meet the highest
standards for safety and handling.
New tires Due to technical factors associated with their
manufacture, tires do not achieve their full
traction potential until after an initial breaking-
in period.
Drive conservatively for the first
200 miles/300 km.
Retreaded tires
The manufacturer of your vehicle does not rec‐
ommend the use of retreaded tires.
Retreaded tires
Possibly substantial variations in the de‐
sign and age of the tire casing structures can
limit service life and have a negative impact on
road safety.◀
Winter tires
The manufacturer of your vehicle recommends
winter tires for winter roads or at temperatures
below +45 ℉/+7 ℃.
Although so-called all-season M+S tires do
provide better winter traction than summer
tires, they do not provide the same level of per‐
formance as winter tires.
Maximum speed of winter tires
If the maximum speed of the vehicle is higher
than the permissible speed for the winter tires,
then display a corresponding sign in the field
of vision. You can obtain this sign from the tire
specialist or from your service center.
Maximum speed for winter tires
Do not exceed the maximum speed for
the winter tires; otherwise, tire damage and ac‐
cidents can occur.◀
Run-flat tires If you are already using run-flat tires, for your
own safety you should replace them only with
the same kind. No spare tire is available in the
case of a flat tire. Your service center will be
glad to advise you.
Rotating wheels between axles The manufacturer of your vehicle advises
against switching wheels between the front
and rear axles.
This can impair the handling characteristics.
StorageStore wheels and tires in a cool, dry place with
as little exposure to light as possible.
Always protect tires against all contact with oil,
grease and fuels.
Do not exceed the maximum tire inflation pres‐
sure indicated on the side wall of the tire.Seite 221Wheels and tiresMobility221
Online Edition for Part no. 01 40 2 911 177 - VI/13
Page 237 of 273
Replacing componentsVehicle equipmentAll standard, country-specific and optional
equipment that is offered in the model series is
described in this chapter. Therefore, equip‐
ment is also described that is not available in a
vehicle, e. g., because of the selected optional
equipment or country variant. This also applies
for safety-related functions and systems.
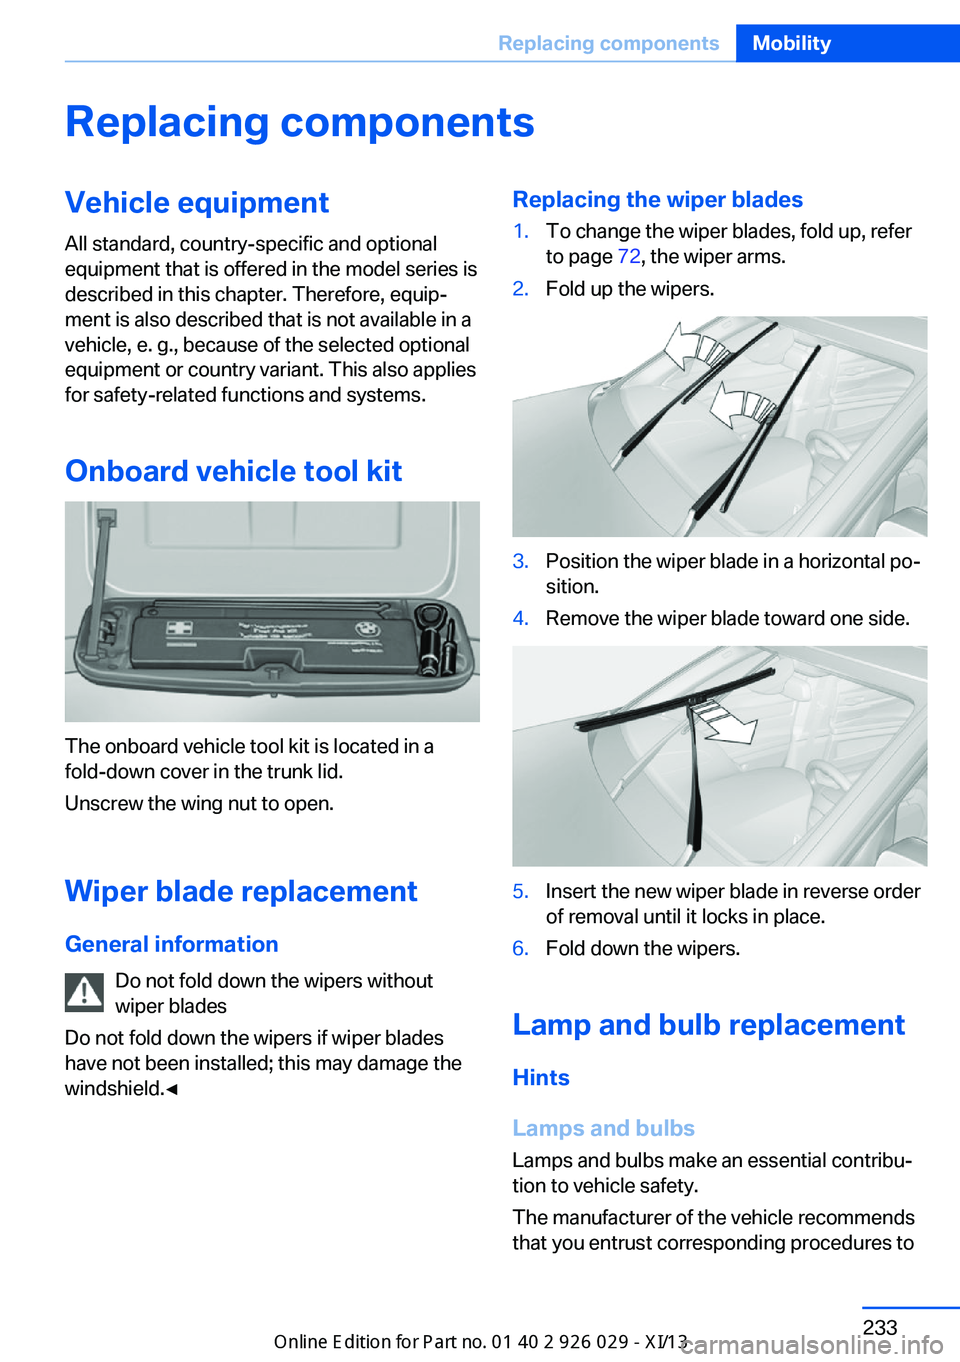
Onboard vehicle tool kit
The onboard vehicle tool kit is located in a
fold-down cover in the trunk lid.
Unscrew the wing nut to open.
Wiper blade replacement
General information Do not fold down the wipers without
wiper blades
Do not fold down the wipers if wiper blades
have not been installed; this may damage the
windshield.◀
Replacing the wiper blades1.To change the wiper blades, fold up, refer
to page 72, the wiper arms.2.Fold up the wipers.3.Position the wiper blade in a horizontal po‐
sition.4.Remove the wiper blade toward one side.5.Insert the new wiper blade in reverse order
of removal until it locks in place.6.Fold down the wipers.
Lamp and bulb replacement
Hints
Lamps and bulbs
Lamps and bulbs make an essential contribu‐
tion to vehicle safety.
The manufacturer of the vehicle recommends
that you entrust corresponding procedures to
Seite 233Replacing componentsMobility233
Online Edition for Part no. 01 40 2 911 177 - VI/13
Page 238 of 273
the service center if you are unfamiliar with
them or they are not described here.
You can obtain a selection of replacement
bulbs at the service center.
Danger of burns
Only change bulbs when they are cool;
otherwise, there is the danger of getting
burned.◀
Working on the lighting system
When working on the lighting system,
you should always switch off the lights af‐
fected to prevent short circuits.
To avoid possible injury or equipment damage
when replacing bulbs, observe any instructions
provided by the bulb manufacturer.◀
Do not perform work/bulb replacement
on xenon headlamps
Have any work on the xenon lighting system,
including bulb replacement, performed only by
a service center. Due to the high voltage
present in the system, there is the danger of
fatal injuries if work is carried out improperly.◀
Do not touch the bulbs
Do not touch the glass of new bulbs with
your bare hands, as even minute amounts of
contamination will burn into the bulb's surface
and reduce its service life.
Use a clean tissue, cloth or something similar,
or hold the bulb by its base.◀
Light-emitting diodes (LEDs)
Light-emitting diodes installed behind a cover
serve as the light source for controls, display
elements and other equipment.
These light-emitting diodes, which are related
to conventional lasers, are officially designated as Class 1 light-emitting diodes.Do not remove the covers
Do not remove the covers, and never
stare into the unfiltered light for several hours;
otherwise, irritation of the retina could result.◀
Headlamp glass
Condensation can form on the inside of the ex‐
ternal lamps in cool or humid weather. When
driving with the light switched on, the conden‐
sation evaporates after a short time. The head‐
lamp glasses do not need to be changed.
If the headlamps do not dim despite driving
with the light switched on, increasing humidity
forms, e. g. water droplets in the light, have the
service center check this.
Headlamp setting
The headlamp adjustments can be affected by
changing lamps and bulbs. Therefore after a
change, have the headlamp setting checked
and corrected by Service.
Front lamps, bulb replacement
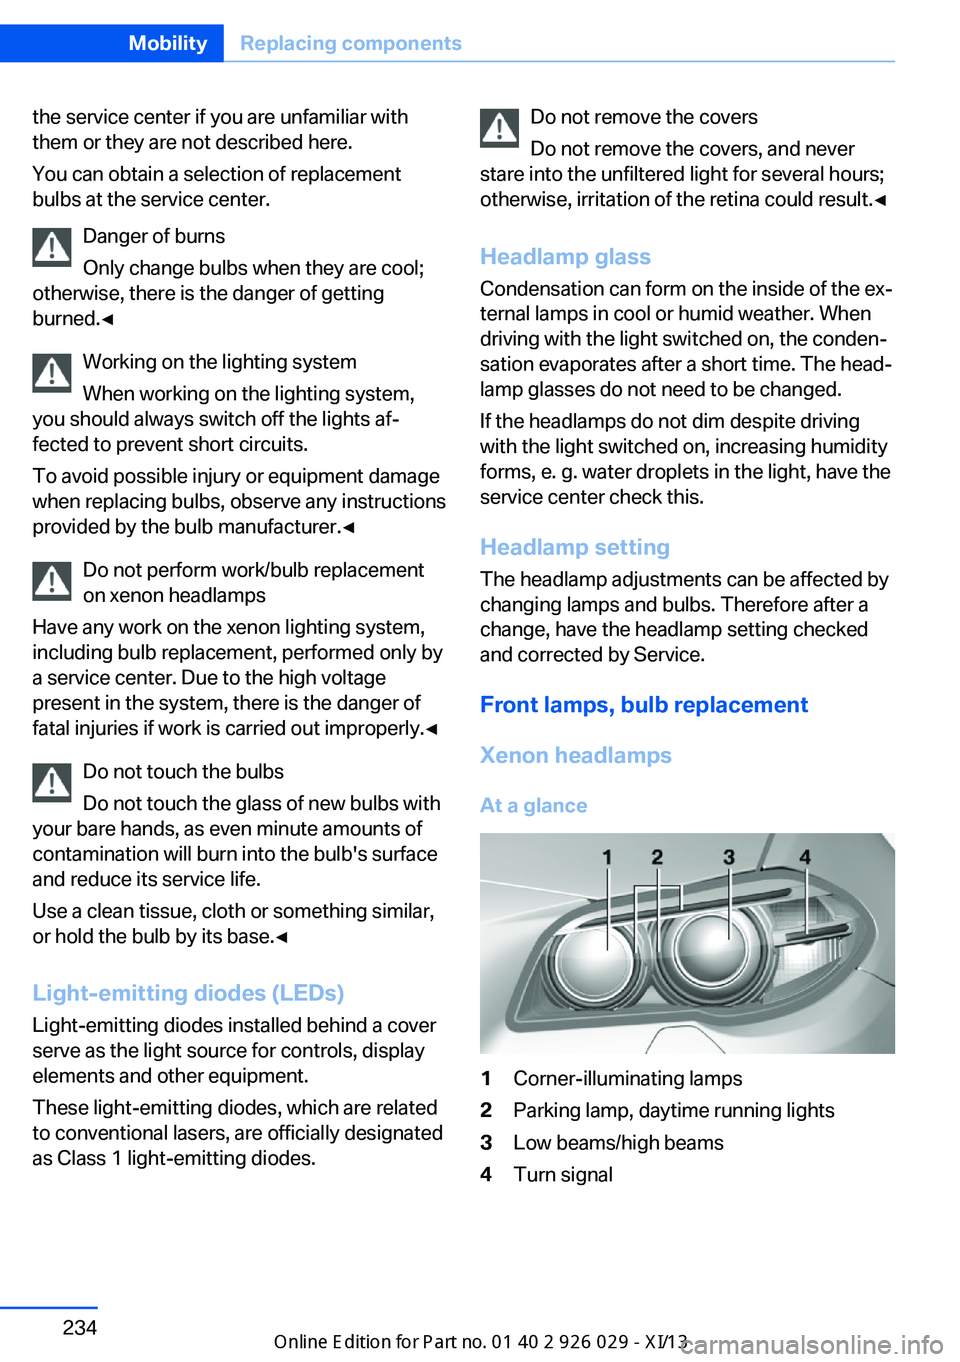
Xenon headlamps
At a glance1Corner-illuminating lamps2Parking lamp, daytime running lights3Low beams/high beams4Turn signalSeite 234MobilityReplacing components234
Online Edition for Part no. 01 40 2 911 177 - VI/13
Page 244 of 273
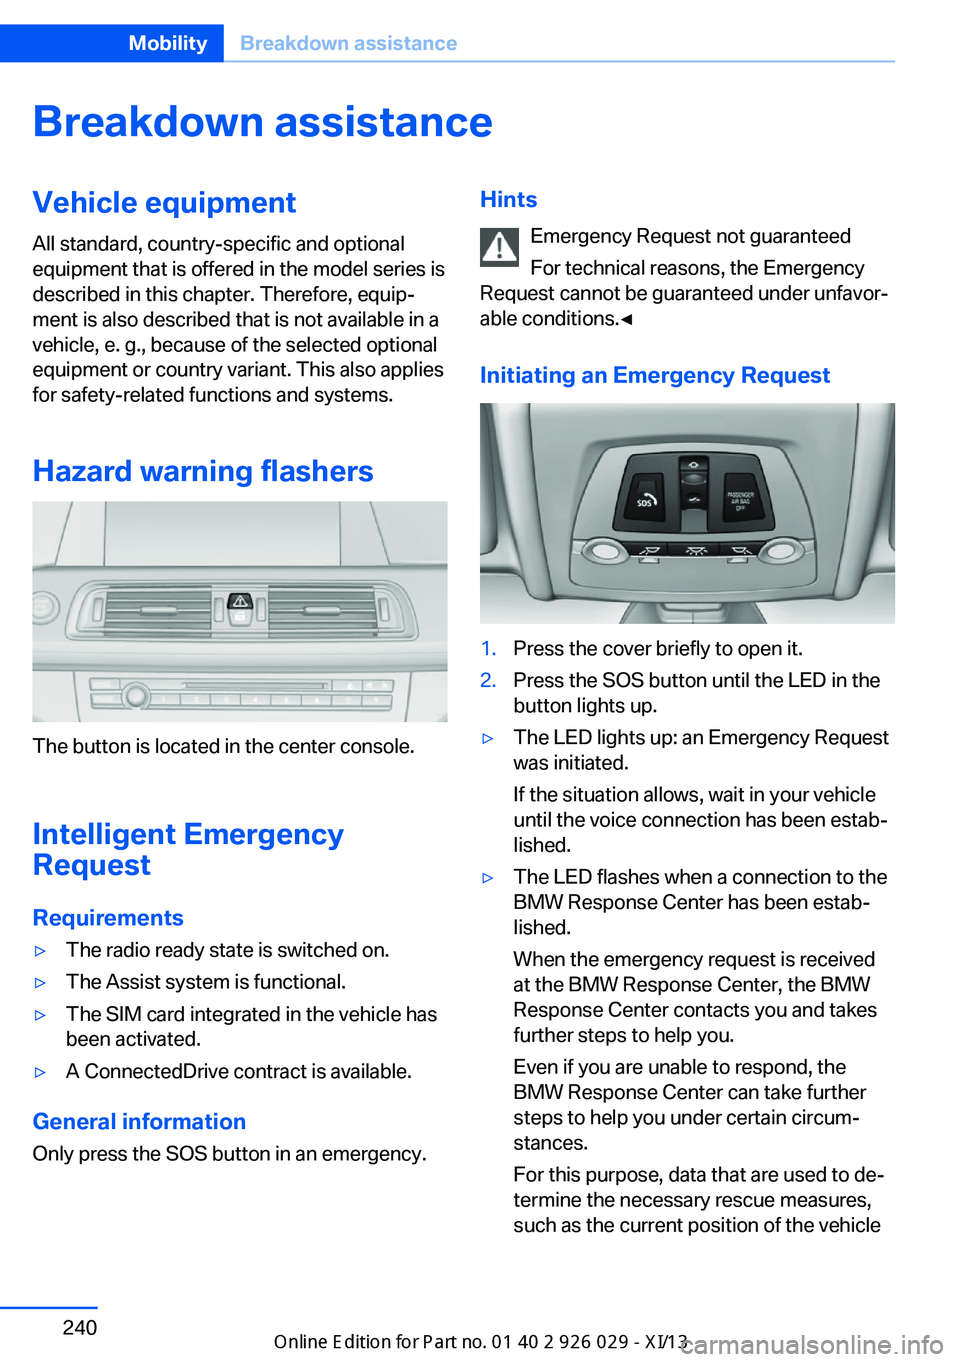
Breakdown assistanceVehicle equipment
All standard, country-specific and optional
equipment that is offered in the model series is
described in this chapter. Therefore, equip‐
ment is also described that is not available in a
vehicle, e. g., because of the selected optional
equipment or country variant. This also applies
for safety-related functions and systems.
Hazard warning flashers
The button is located in the center console.
Intelligent Emergency
Request
Requirements
▷The radio ready state is switched on.▷The Assist system is functional.▷The SIM card integrated in the vehicle has
been activated.▷A ConnectedDrive contract is available.
General information
Only press the SOS button in an emergency.
Hints
Emergency Request not guaranteed
For technical reasons, the Emergency
Request cannot be guaranteed under unfavor‐
able conditions.◀
Initiating an Emergency Request1.Press the cover briefly to open it.2.Press the SOS button until the LED in the
button lights up.▷The LED lights up: an Emergency Request
was initiated.
If the situation allows, wait in your vehicle
until the voice connection has been estab‐
lished.▷The LED flashes when a connection to the
BMW Response Center has been estab‐
lished.
When the emergency request is received
at the BMW Response Center, the BMW
Response Center contacts you and takes
further steps to help you.
Even if you are unable to respond, the
BMW Response Center can take further
steps to help you under certain circum‐
stances.
For this purpose, data that are used to de‐
termine the necessary rescue measures,
such as the current position of the vehicleSeite 240MobilityBreakdown assistance240
Online Edition for Part no. 01 40 2 911 177 - VI/13
Page 245 of 273
if it can be established, are transmitted to
the BMW Response Center.▷If the LED is flashing, but the BMW Re‐
sponse Center can no longer be heard via
the speaker, you can nevertheless still be
heard for the BMW Response Center.
Initiating an Emergency Request
automatically
Under certain conditions, an Emergency Re‐
quest is automatically initiated immediately af‐
ter a severe accident. Automatic Collision Noti‐
fication is not affected by pressing the SOS
button.
Warning triangle
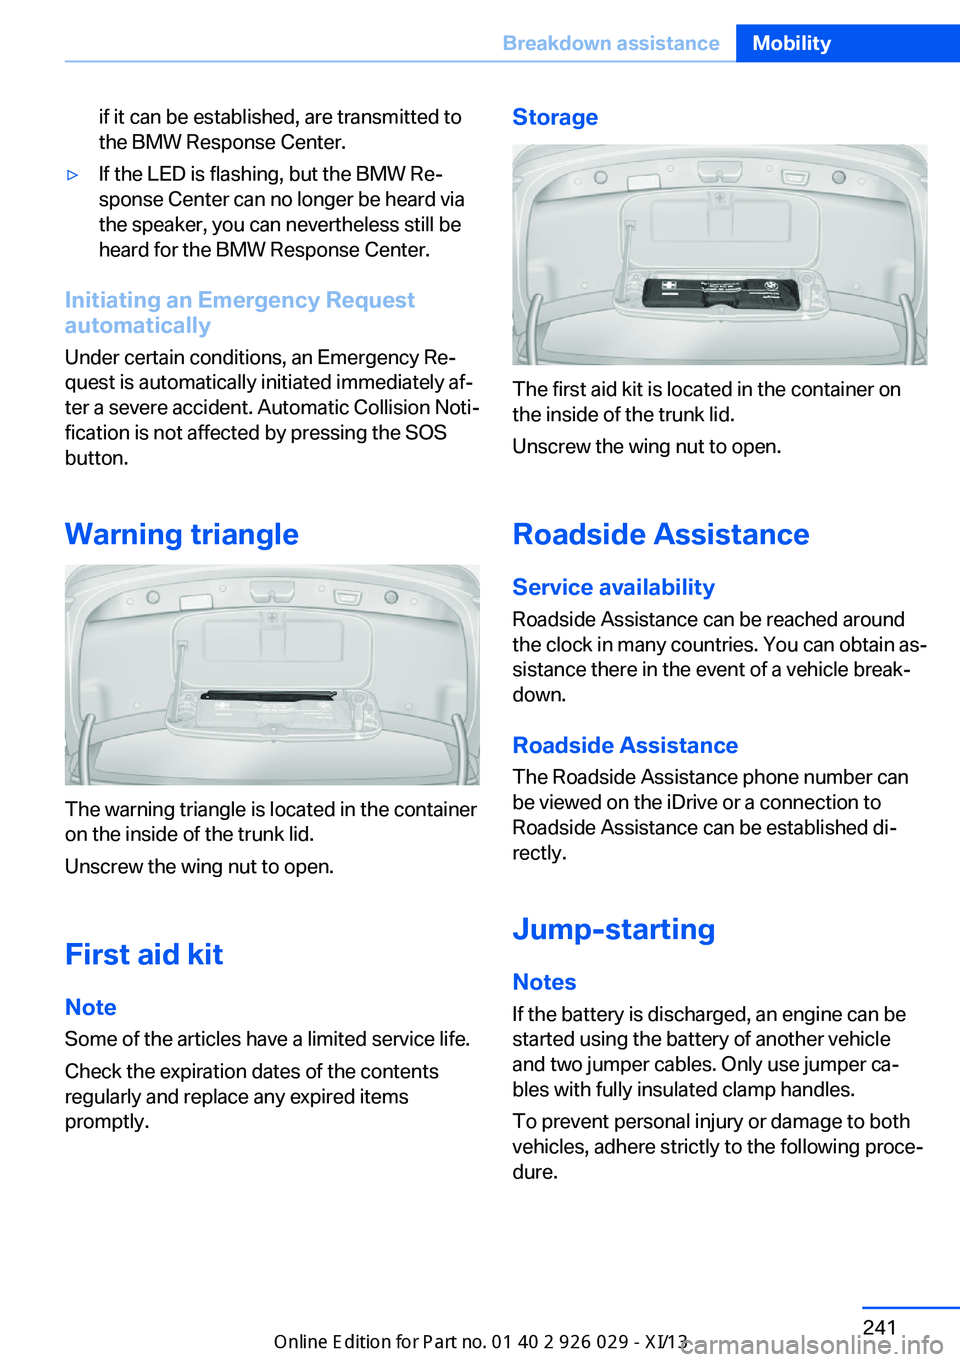
The warning triangle is located in the container
on the inside of the trunk lid.
Unscrew the wing nut to open.
First aid kit
Note Some of the articles have a limited service life.
Check the expiration dates of the contents
regularly and replace any expired items
promptly.
Storage
The first aid kit is located in the container on
the inside of the trunk lid.
Unscrew the wing nut to open.
Roadside Assistance
Service availability
Roadside Assistance can be reached around
the clock in many countries. You can obtain as‐
sistance there in the event of a vehicle break‐
down.
Roadside Assistance The Roadside Assistance phone number can
be viewed on the iDrive or a connection to
Roadside Assistance can be established di‐
rectly.
Jump-starting
Notes If the battery is discharged, an engine can be
started using the battery of another vehicle
and two jumper cables. Only use jumper ca‐
bles with fully insulated clamp handles.
To prevent personal injury or damage to both
vehicles, adhere strictly to the following proce‐
dure.
Seite 241Breakdown assistanceMobility241
Online Edition for Part no. 01 40 2 911 177 - VI/13
Page 246 of 273
Do not touch live parts
To avoid the risk of potentially fatal in‐
jury, always avoid all contact with electrical
components while the engine is running.◀
Preparation1.Check whether the battery of the other ve‐
hicle has a voltage of 12 volts. This infor‐
mation can be found on the battery.2.Switch off the engine of the assisting vehi‐
cle.3.Switch off any electronic systems/power
consumers in both vehicles.
Bodywork contact between vehicles
Make sure that there is no contact be‐
tween the bodywork of the two vehicles; other‐
wise, there is the danger of short circuits.◀
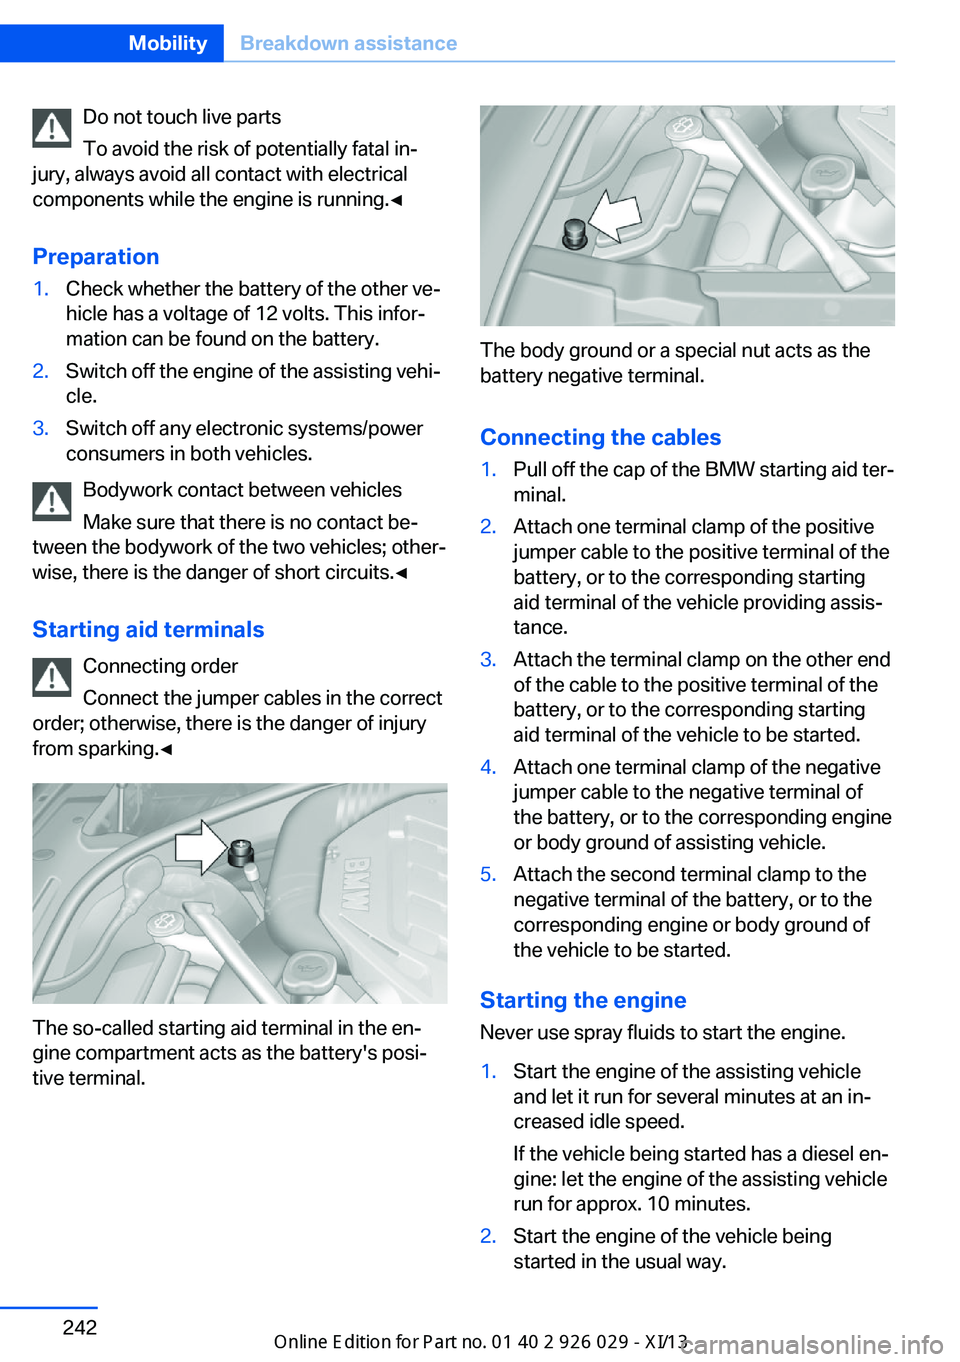
Starting aid terminals Connecting order
Connect the jumper cables in the correct
order; otherwise, there is the danger of injury
from sparking.◀
The so-called starting aid terminal in the en‐
gine compartment acts as the battery's posi‐
tive terminal.
The body ground or a special nut acts as the
battery negative terminal.
Connecting the cables
1.Pull off the cap of the BMW starting aid ter‐
minal.2.Attach one terminal clamp of the positive
jumper cable to the positive terminal of the
battery, or to the corresponding starting
aid terminal of the vehicle providing assis‐
tance.3.Attach the terminal clamp on the other end
of the cable to the positive terminal of the
battery, or to the corresponding starting
aid terminal of the vehicle to be started.4.Attach one terminal clamp of the negative
jumper cable to the negative terminal of
the battery, or to the corresponding engine
or body ground of assisting vehicle.5.Attach the second terminal clamp to the
negative terminal of the battery, or to the
corresponding engine or body ground of
the vehicle to be started.
Starting the engine
Never use spray fluids to start the engine.
1.Start the engine of the assisting vehicle
and let it run for several minutes at an in‐
creased idle speed.
If the vehicle being started has a diesel en‐
gine: let the engine of the assisting vehicle
run for approx. 10 minutes.2.Start the engine of the vehicle being
started in the usual way.Seite 242MobilityBreakdown assistance242
Online Edition for Part no. 01 40 2 911 177 - VI/13
Page 247 of 273
If the first starting attempt is not success‐
ful, wait a few minutes before making an‐
other attempt in order to allow the dis‐
charged battery to recharge.3.Let both engines run for several minutes.4.Disconnect the jumper cables in the re‐
verse order.
Check the battery and recharge if necessary.
Tow-starting and towing Automatic transmission: transporting
your vehicle
Note
Your vehicle is not permitted to be towed.
Therefore, contact a service center in the
event of a breakdown.
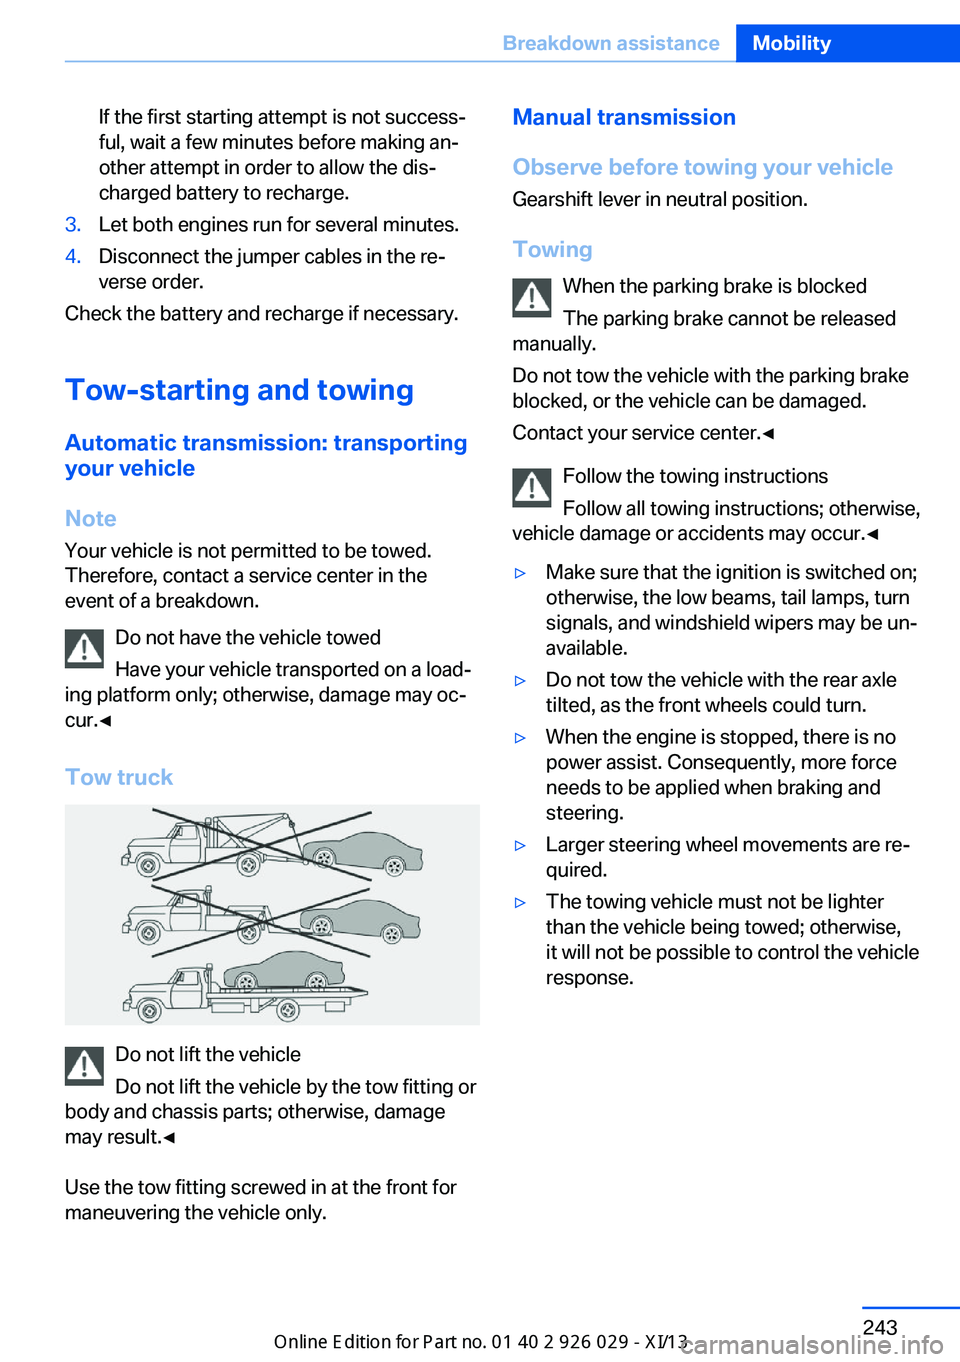
Do not have the vehicle towed
Have your vehicle transported on a load‐
ing platform only; otherwise, damage may oc‐
cur.◀
Tow truck
Do not lift the vehicle
Do not lift the vehicle by the tow fitting or
body and chassis parts; otherwise, damage
may result.◀
Use the tow fitting screwed in at the front for
maneuvering the vehicle only.
Manual transmission
Observe before towing your vehicle Gearshift lever in neutral position.
Towing When the parking brake is blocked
The parking brake cannot be released
manually.
Do not tow the vehicle with the parking brake
blocked, or the vehicle can be damaged.
Contact your service center.◀
Follow the towing instructions
Follow all towing instructions; otherwise,
vehicle damage or accidents may occur.◀▷Make sure that the ignition is switched on;
otherwise, the low beams, tail lamps, turn
signals, and windshield wipers may be un‐
available.▷Do not tow the vehicle with the rear axle
tilted, as the front wheels could turn.▷When the engine is stopped, there is no
power assist. Consequently, more force
needs to be applied when braking and
steering.▷Larger steering wheel movements are re‐
quired.▷The towing vehicle must not be lighter
than the vehicle being towed; otherwise,
it will not be possible to control the vehicle
response.Seite 243Breakdown assistanceMobility243
Online Edition for Part no. 01 40 2 911 177 - VI/13
Page 264 of 273
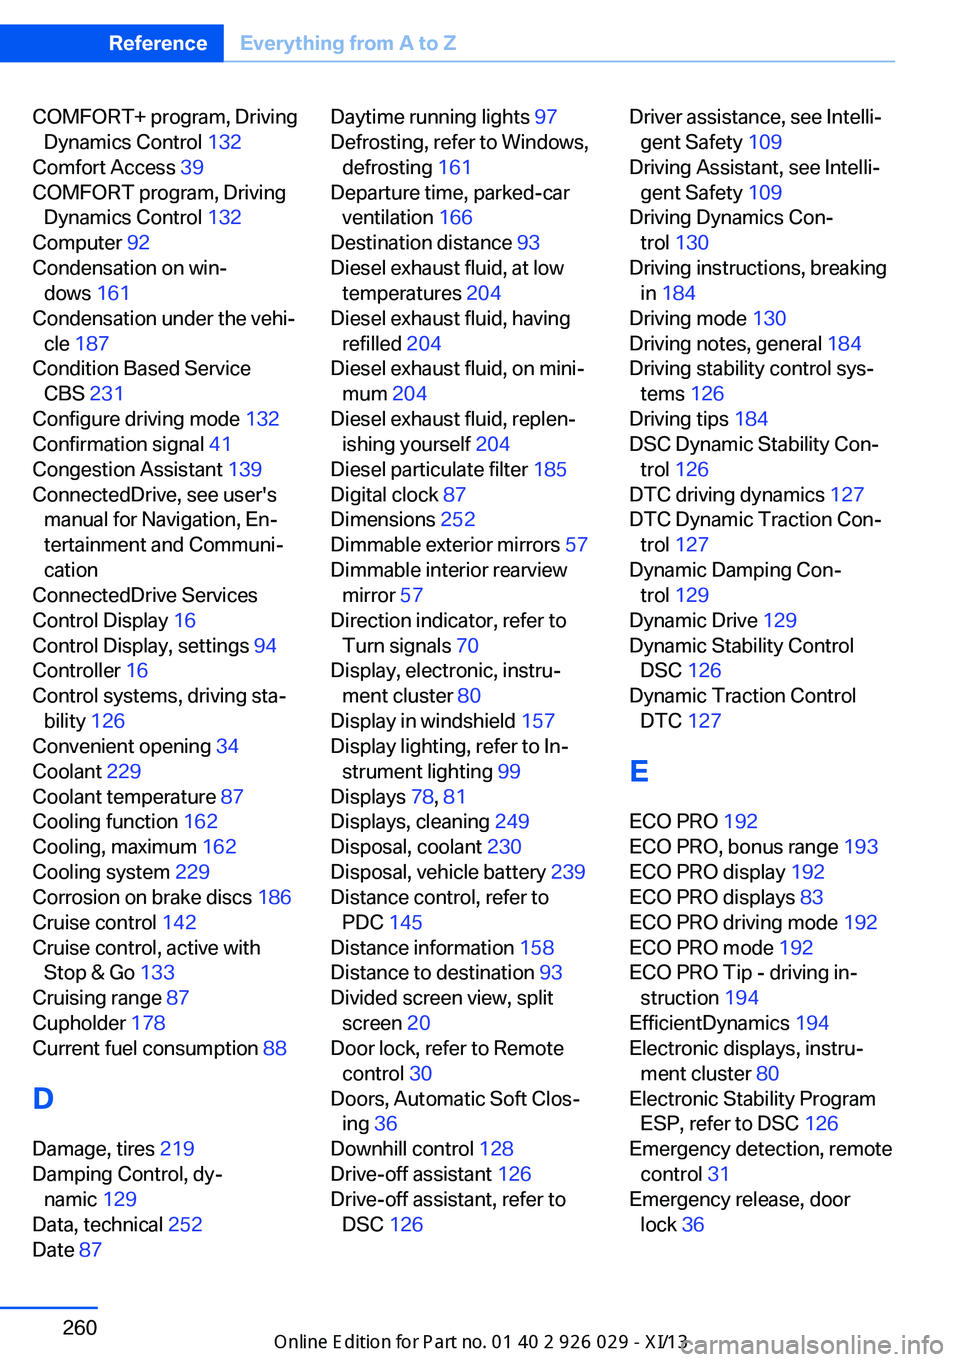
COMFORT+ program, DrivingDynamics Control 132
Comfort Access 39
COMFORT program, Driving Dynamics Control 132
Computer 92
Condensation on win‐ dows 161
Condensation under the vehi‐ cle 187
Condition Based Service CBS 231
Configure driving mode 132
Confirmation signal 41
Congestion Assistant 139
ConnectedDrive, see user's manual for Navigation, En‐
tertainment and Communi‐
cation
ConnectedDrive Services
Control Display 16
Control Display, settings 94
Controller 16
Control systems, driving sta‐ bility 126
Convenient opening 34
Coolant 229
Coolant temperature 87
Cooling function 162
Cooling, maximum 162
Cooling system 229
Corrosion on brake discs 186
Cruise control 142
Cruise control, active with Stop & Go 133
Cruising range 87
Cupholder 178
Current fuel consumption 88
D
Damage, tires 219
Damping Control, dy‐ namic 129
Data, technical 252
Date 87 Daytime running lights 97
Defrosting, refer to Windows, defrosting 161
Departure time, parked-car ventilation 166
Destination distance 93
Diesel exhaust fluid, at low temperatures 204
Diesel exhaust fluid, having refilled 204
Diesel exhaust fluid, on mini‐ mum 204
Diesel exhaust fluid, replen‐ ishing yourself 204
Diesel particulate filter 185
Digital clock 87
Dimensions 252
Dimmable exterior mirrors 57
Dimmable interior rearview mirror 57
Direction indicator, refer to Turn signals 70
Display, electronic, instru‐ ment cluster 80
Display in windshield 157
Display lighting, refer to In‐ strument lighting 99
Displays 78, 81
Displays, cleaning 249
Disposal, coolant 230
Disposal, vehicle battery 239
Distance control, refer to PDC 145
Distance information 158
Distance to destination 93
Divided screen view, split screen 20
Door lock, refer to Remote control 30
Doors, Automatic Soft Clos‐ ing 36
Downhill control 128
Drive-off assistant 126
Drive-off assistant, refer to DSC 126 Driver assistance, see Intelli‐
gent Safety 109
Driving Assistant, see Intelli‐ gent Safety 109
Driving Dynamics Con‐ trol 130
Driving instructions, breaking in 184
Driving mode 130
Driving notes, general 184
Driving stability control sys‐ tems 126
Driving tips 184
DSC Dynamic Stability Con‐ trol 126
DTC driving dynamics 127
DTC Dynamic Traction Con‐ trol 127
Dynamic Damping Con‐ trol 129
Dynamic Drive 129
Dynamic Stability Control DSC 126
Dynamic Traction Control DTC 127
E
ECO PRO 192
ECO PRO, bonus range 193
ECO PRO display 192
ECO PRO displays 83
ECO PRO driving mode 192
ECO PRO mode 192
ECO PRO Tip - driving in‐ struction 194
EfficientDynamics 194
Electronic displays, instru‐ ment cluster 80
Electronic Stability Program ESP, refer to DSC 126
Emergency detection, remote control 31
Emergency release, door lock 36 Seite 260ReferenceEverything from A to Z260
Online Edition for Part no. 01 40 2 911 177 - VI/13
Page 265 of 273
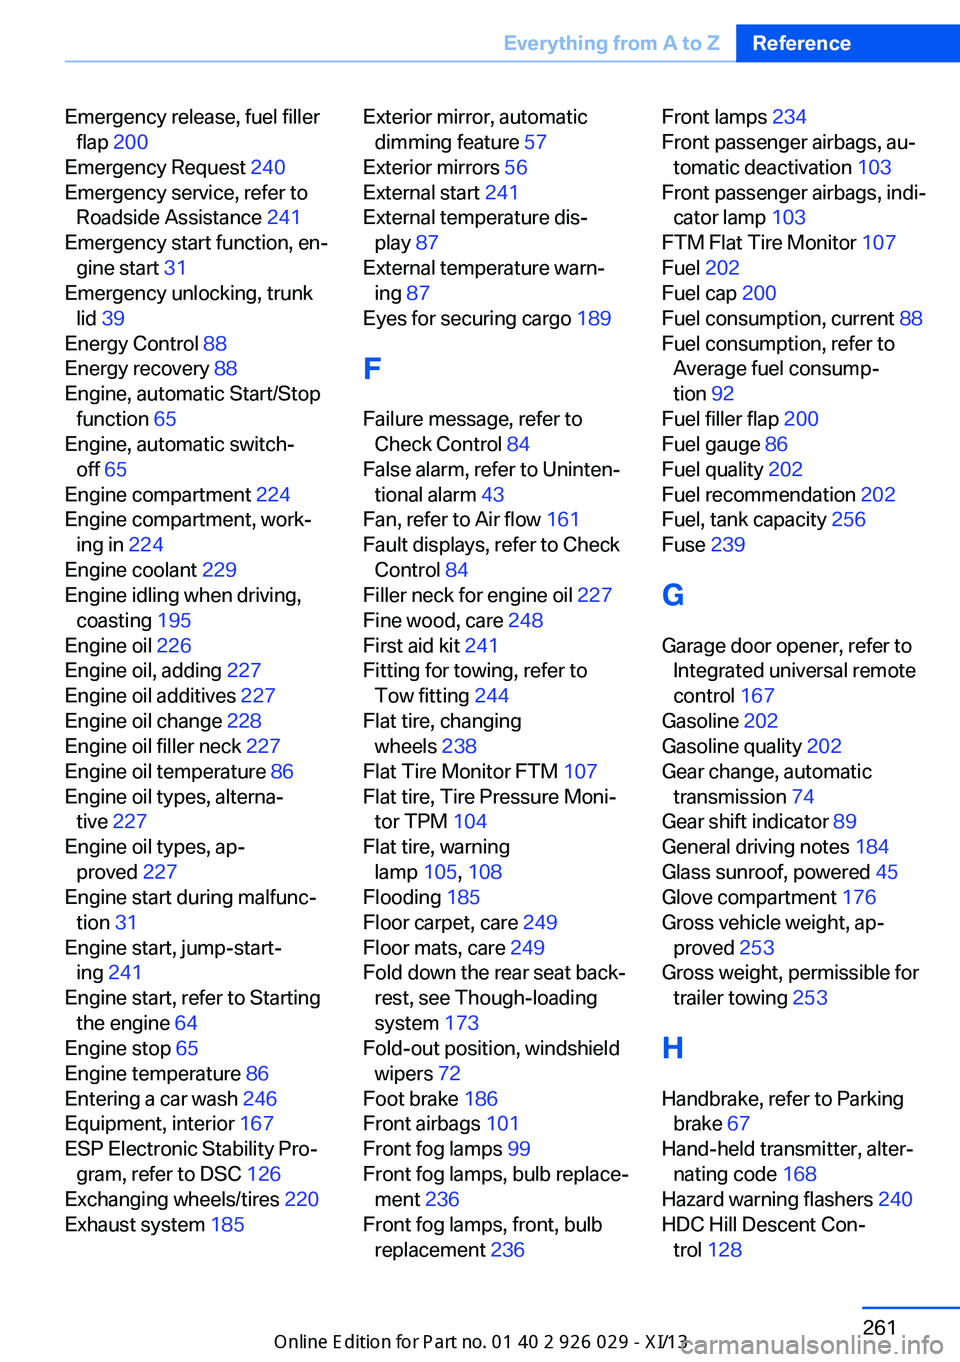
Emergency release, fuel fillerflap 200
Emergency Request 240
Emergency service, refer to Roadside Assistance 241
Emergency start function, en‐ gine start 31
Emergency unlocking, trunk lid 39
Energy Control 88
Energy recovery 88
Engine, automatic Start/Stop function 65
Engine, automatic switch- off 65
Engine compartment 224
Engine compartment, work‐ ing in 224
Engine coolant 229
Engine idling when driving, coasting 195
Engine oil 226
Engine oil, adding 227
Engine oil additives 227
Engine oil change 228
Engine oil filler neck 227
Engine oil temperature 86
Engine oil types, alterna‐ tive 227
Engine oil types, ap‐ proved 227
Engine start during malfunc‐ tion 31
Engine start, jump-start‐ ing 241
Engine start, refer to Starting the engine 64
Engine stop 65
Engine temperature 86
Entering a car wash 246
Equipment, interior 167
ESP Electronic Stability Pro‐ gram, refer to DSC 126
Exchanging wheels/tires 220
Exhaust system 185 Exterior mirror, automatic
dimming feature 57
Exterior mirrors 56
External start 241
External temperature dis‐ play 87
External temperature warn‐ ing 87
Eyes for securing cargo 189
F
Failure message, refer to Check Control 84
False alarm, refer to Uninten‐ tional alarm 43
Fan, refer to Air flow 161
Fault displays, refer to Check Control 84
Filler neck for engine oil 227
Fine wood, care 248
First aid kit 241
Fitting for towing, refer to Tow fitting 244
Flat tire, changing wheels 238
Flat Tire Monitor FTM 107
Flat tire, Tire Pressure Moni‐ tor TPM 104
Flat tire, warning lamp 105, 108
Flooding 185
Floor carpet, care 249
Floor mats, care 249
Fold down the rear seat back‐ rest, see Though-loading
system 173
Fold-out position, windshield wipers 72
Foot brake 186
Front airbags 101
Front fog lamps 99
Front fog lamps, bulb replace‐ ment 236
Front fog lamps, front, bulb replacement 236 Front lamps 234
Front passenger airbags, au‐ tomatic deactivation 103
Front passenger airbags, indi‐ cator lamp 103
FTM Flat Tire Monitor 107
Fuel 202
Fuel cap 200
Fuel consumption, current 88
Fuel consumption, refer to Average fuel consump‐
tion 92
Fuel filler flap 200
Fuel gauge 86
Fuel quality 202
Fuel recommendation 202
Fuel, tank capacity 256
Fuse 239
G
Garage door opener, refer to Integrated universal remote
control 167
Gasoline 202
Gasoline quality 202
Gear change, automatic transmission 74
Gear shift indicator 89
General driving notes 184
Glass sunroof, powered 45
Glove compartment 176
Gross vehicle weight, ap‐ proved 253
Gross weight, permissible for trailer towing 253
H
Handbrake, refer to Parking brake 67
Hand-held transmitter, alter‐ nating code 168
Hazard warning flashers 240
HDC Hill Descent Con‐ trol 128 Seite 261Everything from A to ZReference261
Online Edition for Part no. 01 40 2 911 177 - VI/13