Front BMW 525i 2001 E39 Workshop Manual
[x] Cancel search | Manufacturer: BMW, Model Year: 2001, Model line: 525i, Model: BMW 525i 2001 E39Pages: 1002
Page 939 of 1002
Downloaded from www.Manualslib.com manuals search engine
........... General ........................... .72 0.2 Rear Seat Belt Assembly 720-8
......... Troubleshooting ..................... .72 0.2 Rear seat belt assembly (sedan) 720-8
................ Rear seat belts (sedan) 720-9
... .......... Front Seat Assembly '720-4 Rear seat belt assembly (Sport Wagon) 720-9
Front seat belt tensioner,
......... Rear seat belts (Sport Wagon) 720-10
removing and installing ................ .72 0.4
Front seat belt assembly
.............. .72 0.6
Front seat belt reel. removing and
installing (sedan and Sport Wagon models)
.72 0.6
Page 942 of 1002
Downloaded from www.Manualslib.com manuals search engine
- -
Seat Belts
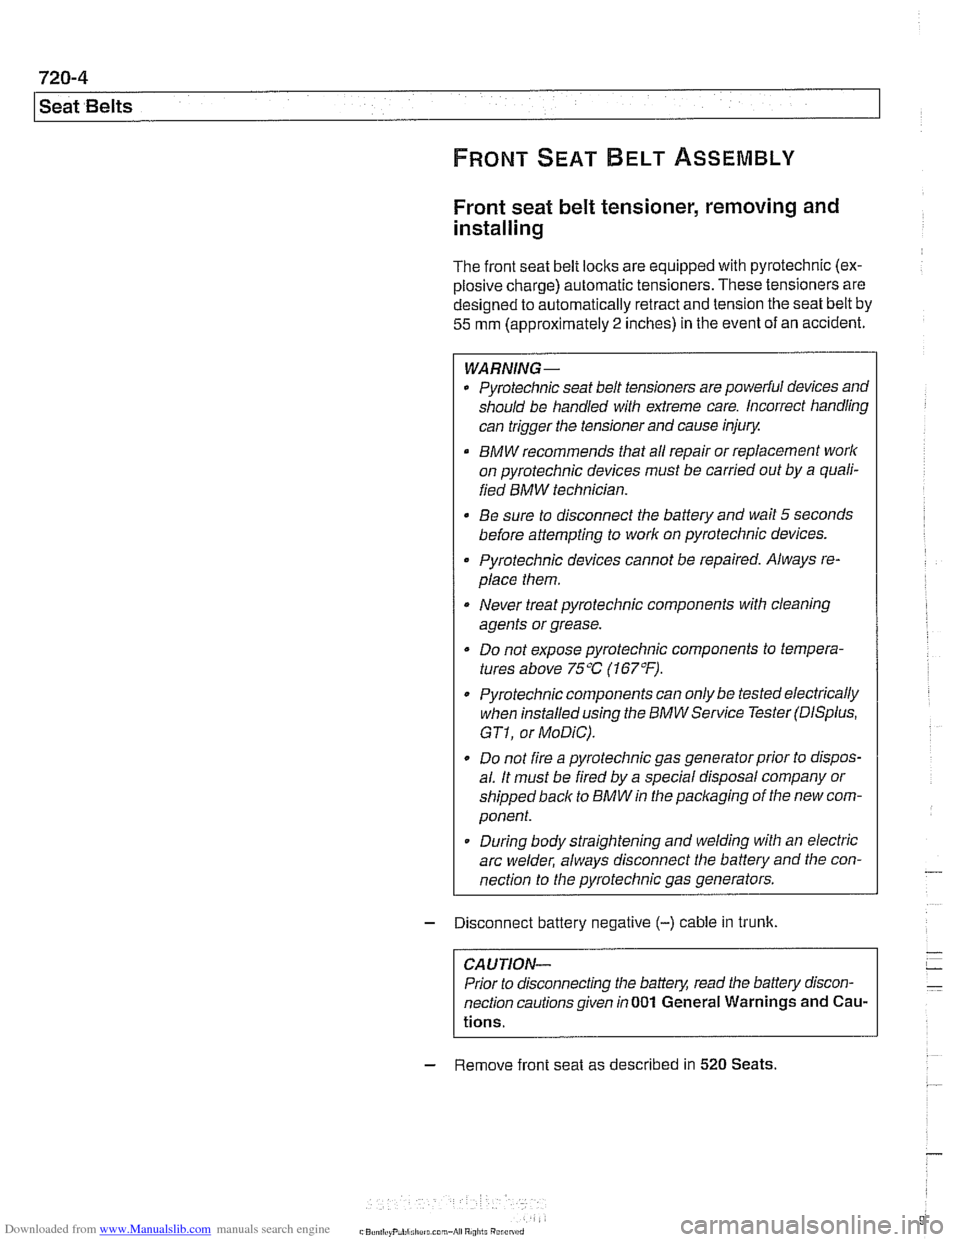
Front seat belt tensioner, removing and
installing
- Disconnect battery negative (-) cable in trunk.
The
front seat belt loclts are equipped with pyrotechnic (ex-
plosive charge) automatic tensioners. These tensioners are
designed to automatically retract and tension the seat belt by
55 mm (approximately 2 inches) in the event of an accident.
CAUTION-
Prior to disconnecting the battery, read the battery discon-
nection cautions given in
001 General Warnings and Cau-
tions.
WARNING-
Pyrotechnic seat belt tensioners are powerful devices and
should be handled with extreme care. Incorrect handling
can trigger the tensioner and cause injury
BMW recommends that all repair or replacement work
on pyrotechnic devices must be carried out by a quali-
fied BMW technician.
Be sure to disconnect the battery and wait
5 seconds
before attempting to work on pyrotechnic devices.
Pyrotechnic devices cannot be repaired. Always re-
place them.
Never treat pyrotechnic components with cleaning
agents or grease.
- Do not expose pyrotechnic components to tempera-
tures above
75% (167°F).
Pyrotechnic components can only be tested electrically
when installedusing the
BMWService Tester (DISplus,
GTI, or MoDiC).
Do not fire a pyrotechnic gas generatorprior to dispos-
al. It must be fired by a special disposal company or
shipped
back to BMW in the packaging of the new com-
ponent.
During body straightening and welding with an electric
arc welder, always disconnect the battery and the con-
nection to the pyrotechnic gas generators.
- Remove front seat as described in 520 Seats.
-
Page 943 of 1002
Downloaded from www.Manualslib.com manuals search engine
Seat ~eltsl
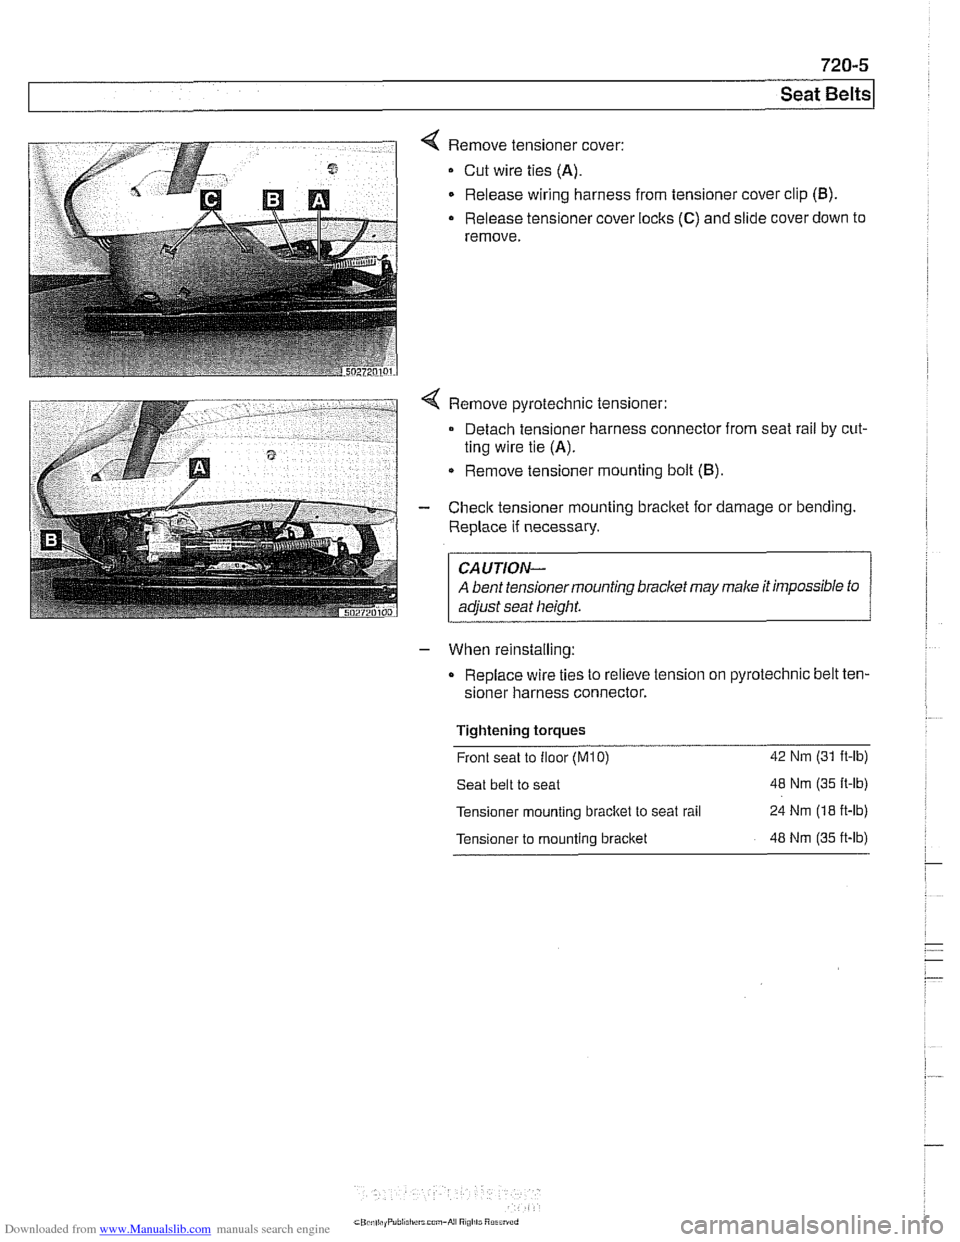
< Remove tensioner cover:
Cut wire ties (A).
Release wiring harness from tensioner cover clip (B).
- Release tensioner cover locks (C) and slide cover down to
remove.
- When reinstalling:
Replace wire ties to relieve tension on pyrotechnic belt
ten-
sioner harness connector.
Tightening torques . -
Front seat to floor (M10) 42 Nm (31 it-lb)
Seat belt to seat 48 Nm (35 It-lb)
Tensioner mounting bracitet
to seat rail 24 Nm (18 it-lb)
Tensioner to mounting bracket 48 Nm (35 it-lb)
Page 944 of 1002
Downloaded from www.Manualslib.com manuals search engine
I Seat Belts
a
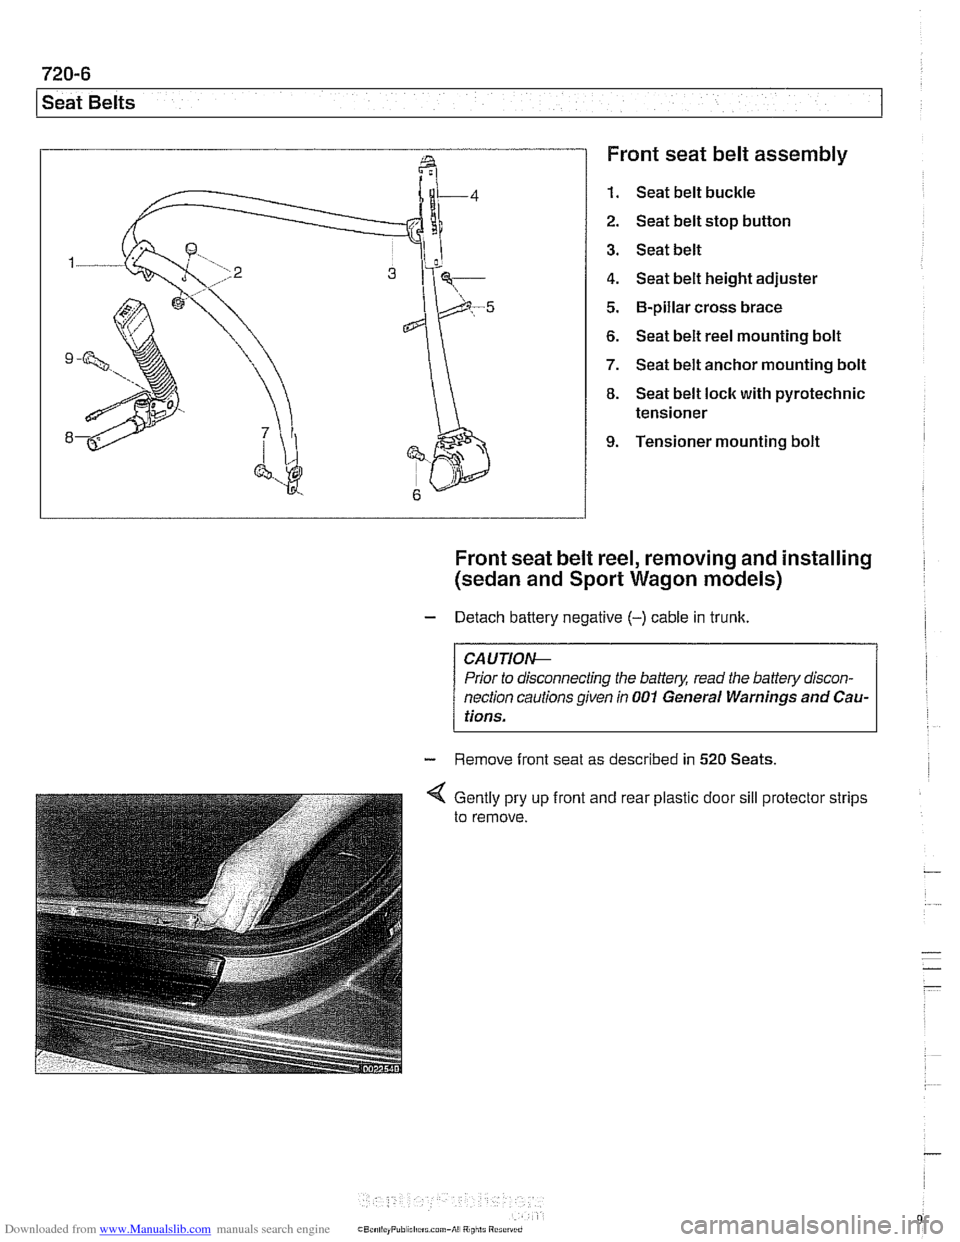
Front seat belt assembly
1. Seat belt buckle
2. Seat belt stop button
3. Seat belt
4. Seat belt height adjuster
5.
6-pillar cross brace
6. Seat belt reel mounting bolt
7. Seat belt anchor mounting bolt
8. Seat belt lock with pyrotechnic
tensioner
9. Tensioner mounting bolt
Front seat belt reel, removing and installing
(sedan and Sport Wagon models)
- Detach battery negative (-) cable in trunk.
~~-~
Prior to disconnecting the battery, read the battery discon-
nection cautions given in
001 General Warnings and Cau-
l tions. I
- Remove front seat as described in 520 Seats
4 Gently pry up front and rear plastic door sill protector strips
to remove.
Page 946 of 1002
Downloaded from www.Manualslib.com manuals search engine
720-8
I Seat Belts
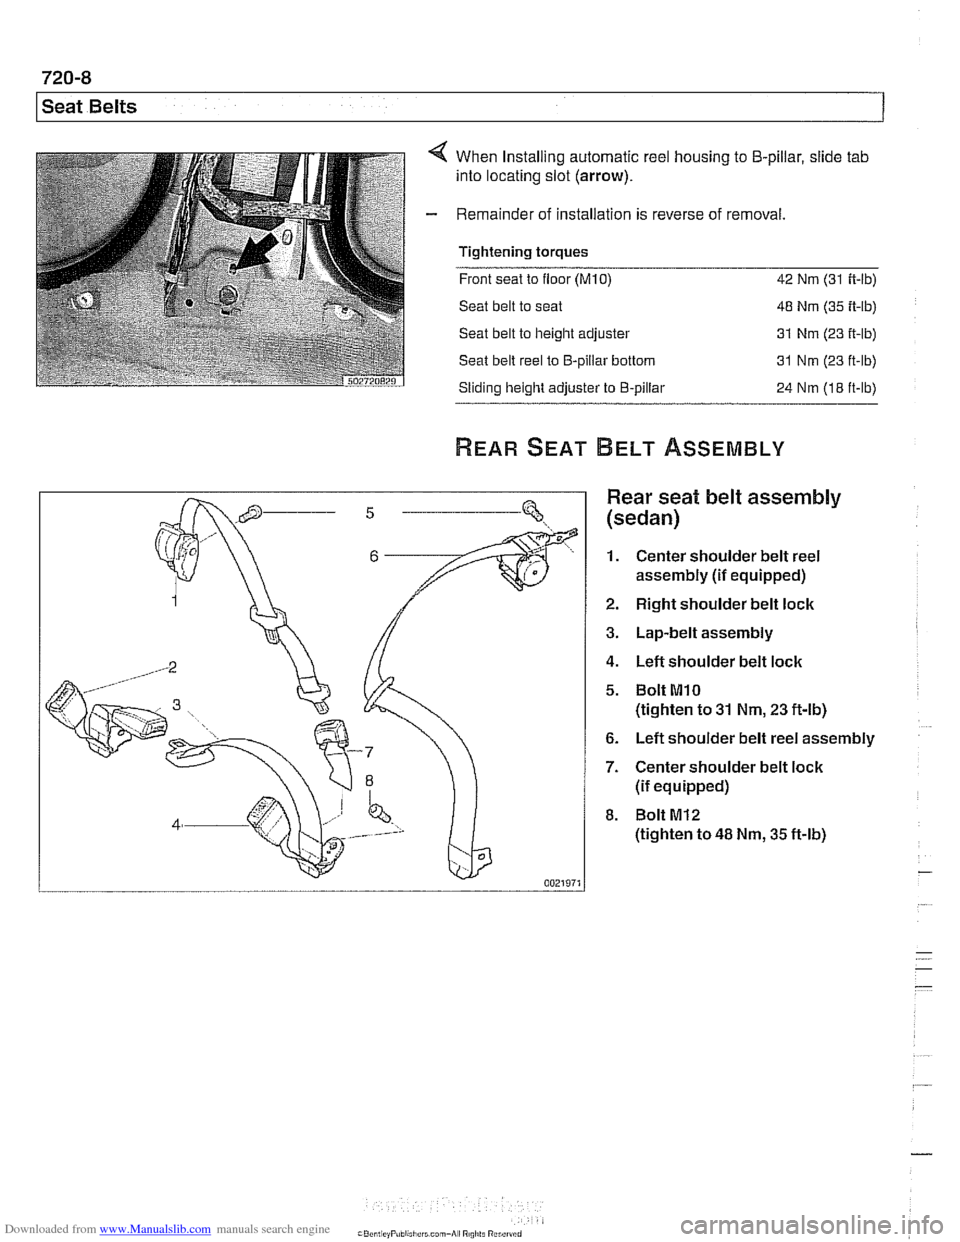
When Installing automatic reel housing to 5-pillar, slide tab
into locating slot (arrow).
Remainder of installation is reverse of removal
Tightening torques
- -.
Front seat to floor (M10) 42 Nm (31 ft-lb)
Seat belt to seat 48 Nm (35 ft-lb)
Seat belt to height adjuster 31 Nm
(23 it-lb)
Seat belt reel to €3-pillar bottom 31 Nm (23 ft-lb)
Sliding height adjuster to €3-pillar
24 Nm (18 ft-lb)
Rear seat belt assembly
(sedan)
1. Center shoulder belt reel
assembly
(if equipped)
2. Right shoulder belt lock
3. Lap-belt assembly
4. Left shoulder belt lock
5. Bolt MlO
(tighten to 31 Nm, 23 ft-lb)
6. Left shoulder belt reel assembly
7. Center shoulder belt lock
(if equipped)
8. Bolt M12
(tighten to 48 Nm, 35 ft-lb)
Page 950 of 1002
Downloaded from www.Manualslib.com manuals search engine
721 -2
l~irba~ System (SRS)
This repair group covers airbag components and replace-
ment.
Airbag system repairand fault diagnosis is not covered.
Diagnostics, component testing, and
airbag system repair
should be carried out by trained BMW service technicians.
Individual
airbag system components can only be tested elec-
tronically when installed in the car. BMW service testers
DIS
or MoDiC or equivalent must be used for diagnostic work.
WARNING-
Special test equipment is required to retrieve airbag fault
codes, diagnose system faults, and
reseffturn off the air-
bag indicator light. The indicator light will remain on until
any problem has been corrected and the fault memory has
been cleared.
Airbags are part of the BMW Multiple Restraint System
(MRS). Three versions of MRS are available in E39 models.
Multiple Restraint Systems
MRS and MRS II include the following restraint components:
311 996-811 997
911
997-311 999
311 999-2002
Driver and passenger front
airbags (MRSIMRS II)
MRS
MRS
II
MRS Ill
Passenger front two-stage airbag (cars manufactured
from
911998).
The seat occupancy sensor (SBE) is used for detection of
a passenger in the right front seat. MRS uses the SBE in-
put to determine seat belt tensioner
and/or front airbag de-
ployment thresholds.
Side impact
airbag for driver and front passenger
(MRSIMRS II)
Leftlright side impact crash sensors (MRSIMRS 11)
Side impact airbag for rear passenger (MRS II) (optional)
Head Protection System (HPS) for driver and front passen-
ger (MRS
II)
Battery Safety Terminal - BST (MRS II)
Hall Sensor seat belt switches (MRS II)
Front pyrotechnic seat belt tensioners
Fuel pump cut off message
Page 951 of 1002
Downloaded from www.Manualslib.com manuals search engine
721 -3
Airbag System (SRS)
MRS Ill adds the following features:
MRS
Ill employs "smart" technology. Smart technology re-
fers to the control module's programming for the deploy-
ment of the airbags, in stages depending on the severity of
the impact.
Two-stage a~rbag for ooln drver and passenger Alloivs for
a softer
c~snioning elfecl when the airbags are lr ggered at
lighter impact,
MRS
Ill satellite sensors use 2 wire connectors
Rear side
airbags arrive de-activated from the factory and
can only be activated upon written request from the cus-
tomer.
Rear seat head protection is available when ordered with
optional rear seat side airbags.
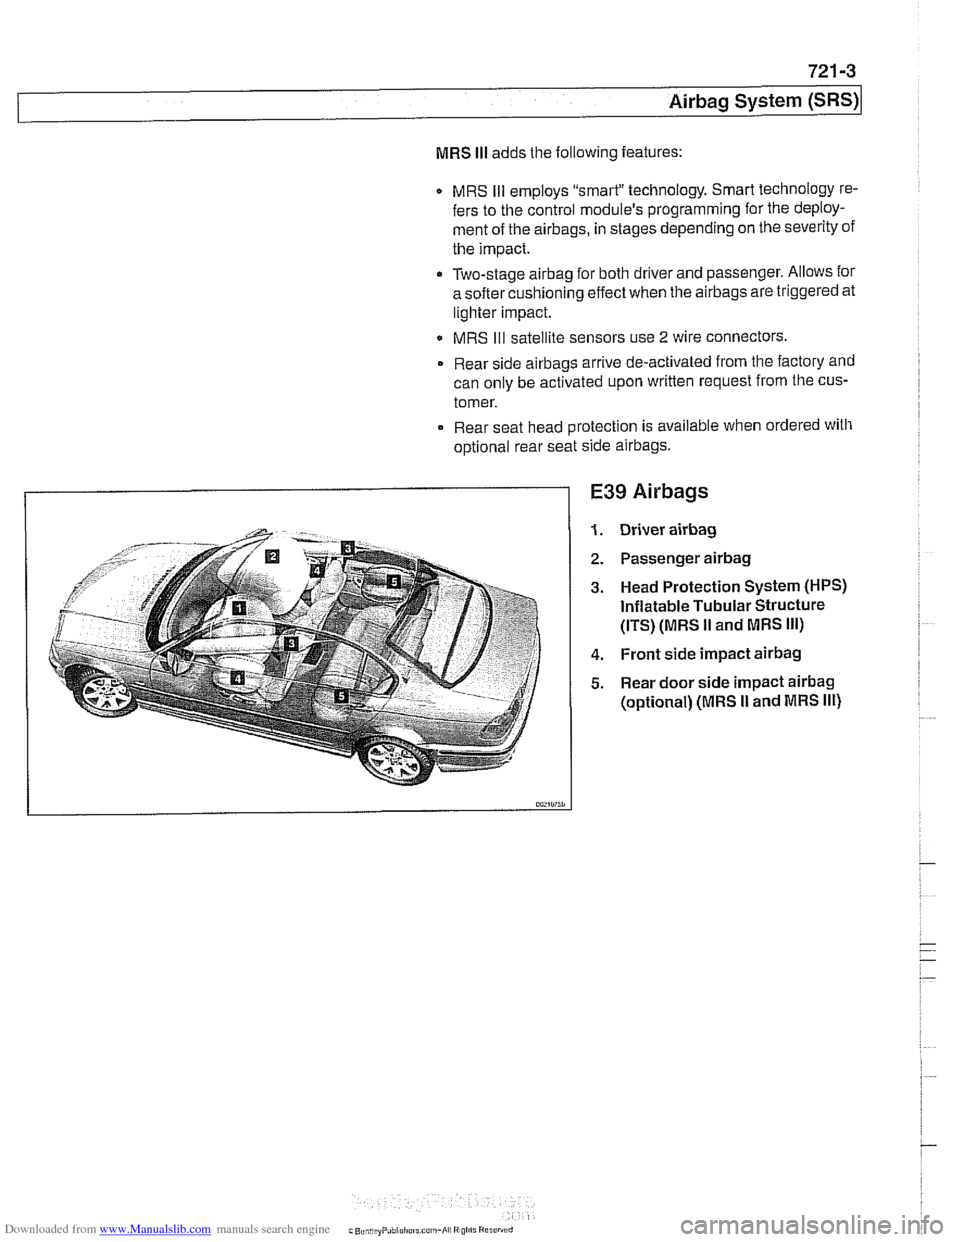
E39 Airbags
Driver airbag
Passenger airbag
Head Protection System (HPS)
Inflatable Tubular Structure
(ITS) (MRS
II and MRS Ill)
Front side impact airbag
Rear door side impact airbag
(optional) (MRS I1 and MRS Ill)
Page 952 of 1002
Downloaded from www.Manualslib.com manuals search engine
I Airbag System (SRS)
Two-stage airbag (MRS Ill)
Beginning with 2000 model year (911 999 production) the front
airbags were changed to a two-stage style airbag. This en-
sures that the force of
airbag inflation is not greater than nec-
essary to provide
protection. The airbags are designed to
Drovide "soit" de~lovment if the acceleration sensor detects a
iow-speed impact, and "hard deployment in higher speed im-
pacts.
NOTE-
A two-stage passenger airbag was used on cars built be-
tween
9/1998 and 3/1999. This pre-smart technology airbag
used two ignition stages. Stage one is designed to ignite first
during an impact. Stage two ignites after a timed period, as
programmed in the MRS
I1 control module.
Airbag indicator light
The MRS control module detects and stores system status
The
airbag indicator light in the instrument cluster displays
the status of the
airbag system when the ignition key is in "ac-
cessory" or
ON positions.
System normal: lndicator light comes on briefly, then goes
out.
- System malfunction: lndicator light fails to come on.
System malfunction: lndicator light comes on briefly, goes
out and lights up again.
The
airbag indicator light also comes on if the seat belt pyro-
technic tensioners have been triggered.
Page 954 of 1002
Downloaded from www.Manualslib.com manuals search engine
721-6
I Airbag System (SRS)
MRS
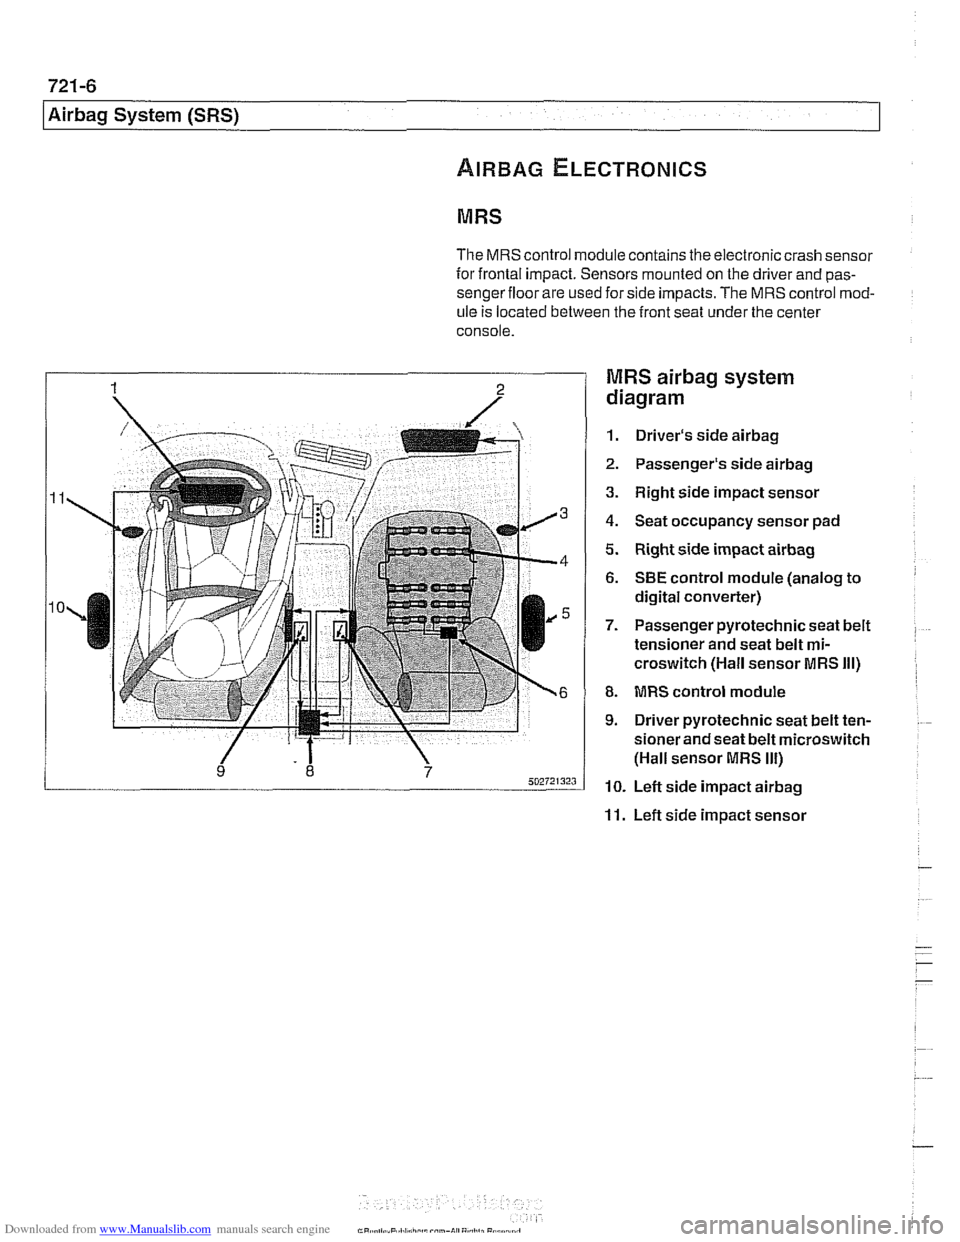
The MRS control module contains the electronic crash sensor
for frontal impact. Sensors mounted on the driver and
pas-
sengerfloor are used for side impacts. The MRS control mod-
ule
is located between the front seat under the center
console.
MRS airbag system
diagram
1. Driver's side airbag
2. Passenger's side airbag
3. Right side impact sensor
4. Seat occupancy sensor pad
5. Right side impact airbag
6. SBE control module (analog to
digital converter)
7. Passenger pyrotechnic seat belt
tensioner and seat belt
mi-
croswitch (Hall sensor MRS Ill)
8. MRS control module
9. Driver pyrotechnic seat belt ten-
sioner and seat belt microswitch
(Hall sensor MRS
Ill)
10. Left side impact airbag
11. Left side impact sensor
Page 955 of 1002
Downloaded from www.Manualslib.com manuals search engine
Airbag System (SRS)~
MRS control module, replacing
- Disconnect negative (-) cable from battery and cover nega-
tive terminal with insulating material.
CAUTIOI\C
Prior to disconnecting the battery, read the battery discon-
nection cautionsgiven in001 General Warnings and
Cau-
tions.
- Remove center console between front seats. See 513 lnteri-
or Trim.
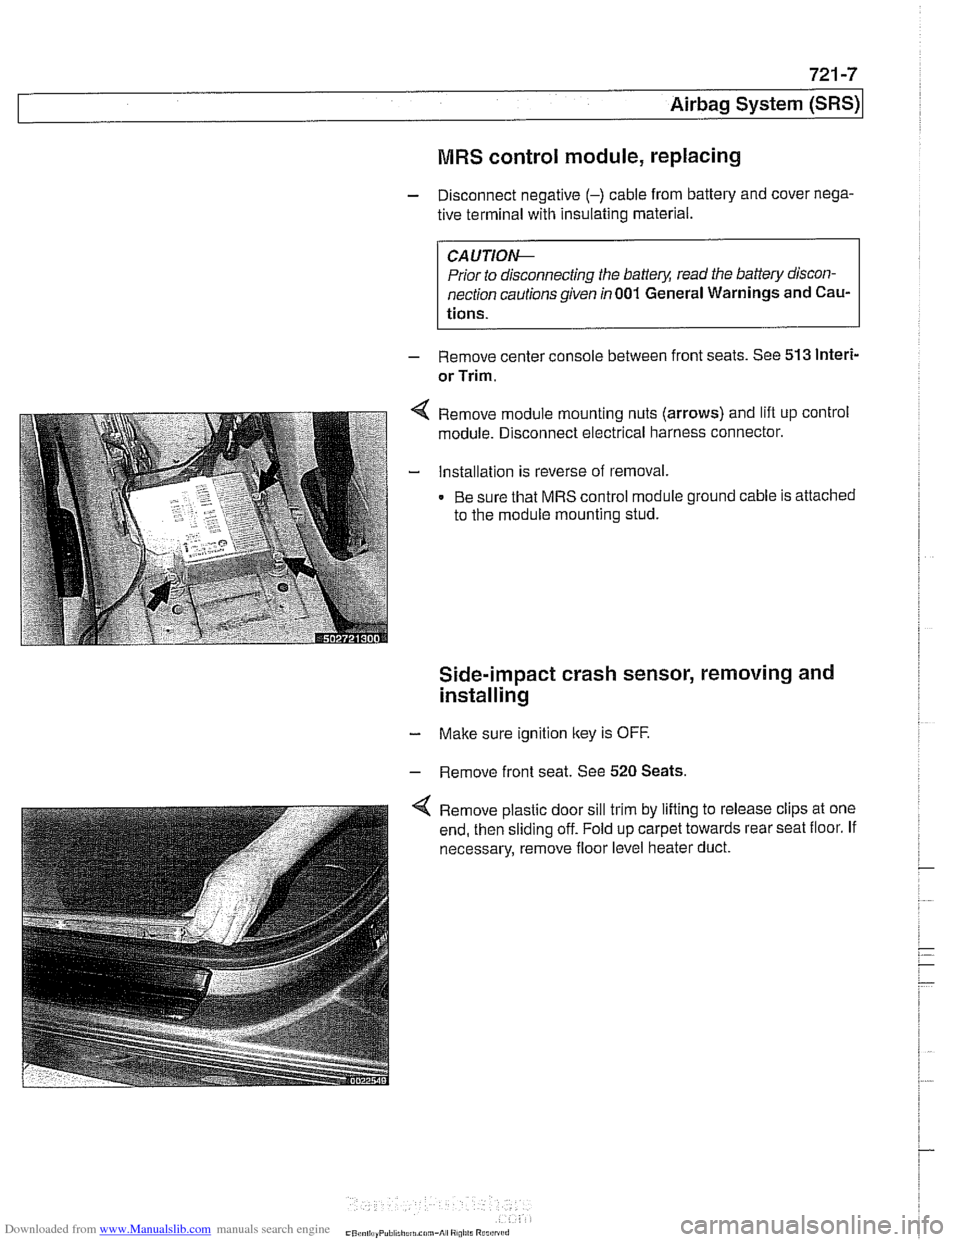
Remove module mounting nuts (arrows) and lift up control
module. Disconnect electrical harness connector.
Installation is reverse of removal.
Be sure that MRS control module ground cable is attached
to the module mounting stud.
Side-impact crash sensor, removing and
installing
- Make sure ignition key is OFF.
- Remove front seat. See 520 Seats.
Remove plastic door sill trim by lifting to release clips at one
end, then sliding off. Fold up carpet towards rear seat floor. If
necessary, remove floor level heater duct.