mirror BMW 540I SEDAN 2000 Owners Manual
[x] Cancel search | Manufacturer: BMW, Model Year: 2000, Model line: 540I SEDAN, Model: BMW 540I SEDAN 2000Pages: 217, PDF Size: 1.69 MB
Page 10 of 217

Contents
Overview
Controls and features
Cockpit16
Instrument cluster18
Indicator and warning lamps22
Multifunction steering wheel
(MFL)25
Hazard warning flashers27
Warning triangle 27
First-aid kit 27
Refueling28
Fuel specifications29
Tire inflation pressure29
Locks and security systems:
Keys34
Electronic vehicle
immobilizer35
Central locking system36
Opening and closing Ð from the
outside36
With the key 36
Opening and closing Ð from the
inside40
Luggage compartment lid/
Tailgate41
Luggage compartment44
Alarm system45
Electric power windows47
Sliding/Tilt sunroof 48
Adjustments:
Seats 50
Steering wheel 54
Mirrors54
Seat, mirror and steering wheel
memory56
Car Memory, Key Memory58
Passenger safety systems:
Safety belts59
Airbags60
Child restraints 64
Child seat security66
Child-safety locks66
Driving:
Steering/Ignition lock67
Starting the engine68
Switching off the engine69
Parking brake69
Manual transmission70
Automatic transmission 71
Automatic transmission with
Steptronic 74
Indicator/Headlamp flasher77
Wiper/Washer system77
Rear window defroster79
Cruise control80
Everything under control:
Odometer, outside temperature
display82
Tachometer83
Energy control83
Fuel gauge83
Temperature gauge84
Service Interval Display84
Check Control85
Onboard computer88
Technology for safety and
convenience:
Park Distance Control (PDC) 90
Automatic Stability Control plus
Traction (ASC+T)/Dynamic
Stability Control (DSC) 91
Tire Pressure Control (RDC) 92
Page 12 of 217

Contents
Operation, care and maintenance
Owner service procedures
Advanced technology
Under the hood:
Hood143
Engine compartment 144
Washer fluids148
Washer nozzles148
Engine oil149
Coolant151
Brake fluid152
Vehicle Identification
Number153
Care and maintenance:
The BMW Maintenance
System154
Caring for your car155
Airbags160
Vehicle storage160
Laws and regulations:
Technical modifications161
OBD connector162
Replacement procedures:
Onboard tool kit166
Wiper blades166
Lamps and bulbs167
Changing tires173
Battery176
Fuses178
In case of electrical
malfunction:
Fuel filler door180
Sliding/Tilt sunroof180
Tailgate181
Assistance, giving and
receiving:
Jump-starting182
Towing the vehicle183Airbags188
Adaptive Transmission Control
(ATC) 188
Automatic Stability Control plus
Traction (ASC+T)/Dynamic
Stability Control (DSC) 189
Radio reception190
BMW active seat 190
Safety belt tensioner191
DSP sound system 192
Interior rearview mirror with
automatic dimmer 192
Rain sensor 193
Tire Pressure Control (RDC) 194
Integrated rear suspension194
Level control system 195
Xenon lamps 195
Page 32 of 217
32n
Locks and security systems:
Keys34
Electronic vehicle
immobilizer35
Central locking system36
Opening and closing
Ð from the outside36
With the key36
Opening and closing
Ð from the inside40
Luggage compartment lid/
Tailgate41
Luggage compartment44
Alarm system45
Electric power windows47
Sliding/Tilt sunroof48
Adjustments:
Seats50
Steering wheel54
Mirrors54
Seat, mirror and steering wheel
memory56
Car Memory, Key Memory58
Passenger safety systems:
Safety belts59
Airbags60
Child restraints64
Child seat security66
Child-safety locks66Driving:
Steering/Ignition lock67
Starting the engine68
Switching off the engine69
Parking brake69
Manual transmission70
Automatic transmission71
Automatic transmission with
Steptronic74
Indicator/Headlamp flasher77
Wiper/Washer system77
Rear window defroster79
Cruise control80
Everything under control:
Odometer, outside temperature
display82
Tachometer83
Energy control83
Fuel gauge83
Temperature gauge84
Service Interval Display84
Check Control85
Onboard computer88
Technology for safety and
convenience:
Park Distance Control (PDC)90
Automatic Stability Control plus
Traction (ASC+T)/Dynamic
Stability Control (DSC)91
Tire Pressure Control (RDC)92
Page 45 of 217
45n
RepairsIndexOverview Controls Car care Technology Data
Alarm systemThe conceptThe vehicle alarm system responds:
>When a door, the hood or the lug-
gage compartment lid/tailgate is
opened
>To movement inside the vehicle
(interior motion sensor)
>To variations in the vehicle tilt sensor
such as occur during attempts to
steal the wheels or tow the vehicle
>To interruption of battery voltage.
The system responds to unauthorized
vehicle entry and attempted theft by
simultaneously activating the following:
>Sounding an acoustical alarm for
30 seconds
>The hazard warning flashers are
activated for approx. five minutes
>The high beams flash on and off in
the same rhythm.
To activate and deactivate the
alarm systemWhen the vehicle is locked or unlocked
with the key or the remote control, the
alarm system is also simultaneously
armed or disarmed.
The interior motion sensor is activated
approx. 30 seconds after you have fin-
ished locking the car.
The system indicates that it has been
correctly armed by switching on the
hazard flashers for a single cycle and by
emitting an acoustical signal.
You can have different acknowl-
edgment messages set to confirm
arming and disarming (not released at
this time).<
When the system is active, you can still
gain access to the luggage compart-
ment by pressing button 3 on the
remote control transmitter (refer to
page 39). When you close the luggage
compartment lid/tailgate, it locks again.
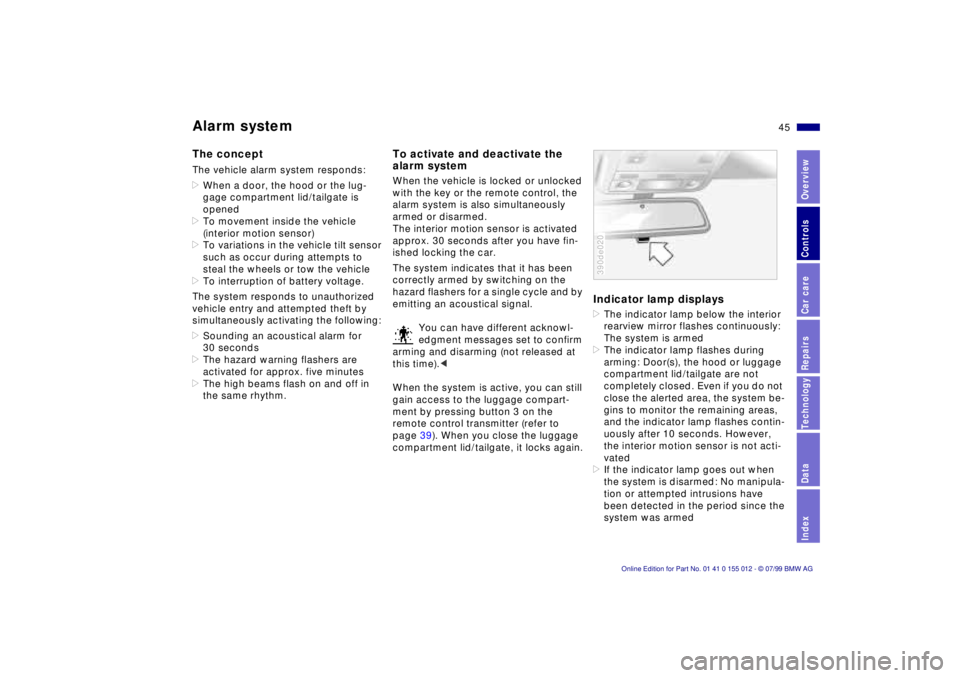
Indicator lamp displays>The indicator lamp below the interior
rearview mirror flashes continuously:
The system is armed
>The indicator lamp flashes during
arming: Door(s), the hood or luggage
compartment lid/tailgate are not
completely closed. Even if you do not
close the alerted area, the system be-
gins to monitor the remaining areas,
and the indicator lamp flashes contin-
uously after 10 seconds. However,
the interior motion sensor is not acti-
vated
>If the indicator lamp goes out when
the system is disarmed: No manipula-
tion or attempted intrusions have
been detected in the period since the
system was armed390de020
Page 54 of 217
54n
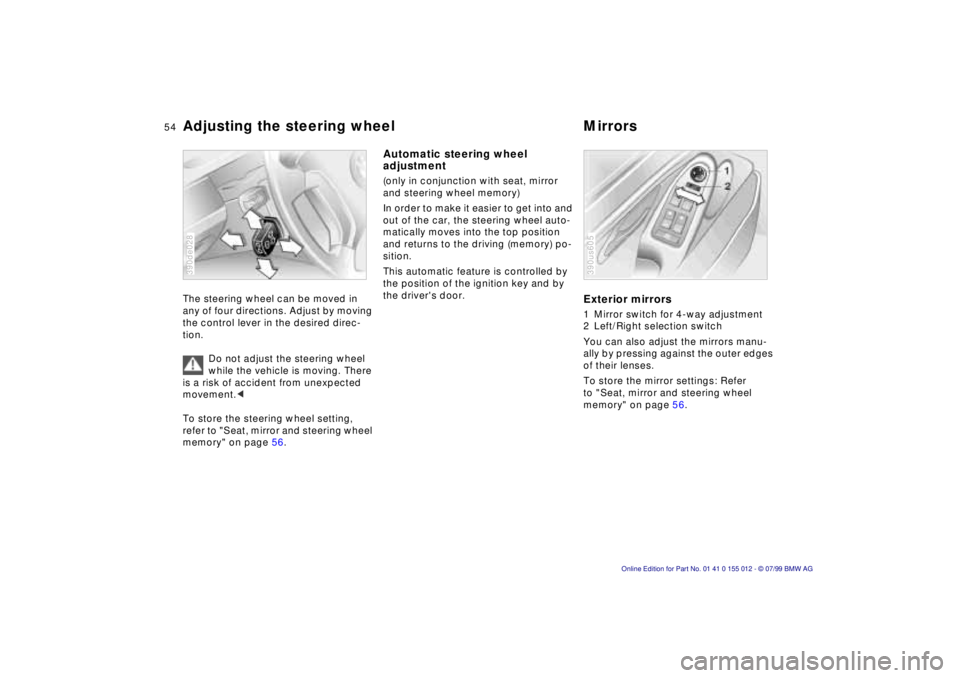
Adjusting the steering wheel MirrorsThe steering wheel can be moved in
any of four directions. Adjust by moving
the control lever in the desired direc-
tion.
Do not adjust the steering wheel
while the vehicle is moving. There
is a risk of accident from unexpected
movement.<
To store the steering wheel setting,
refer to "Seat, mirror and steering wheel
memory" on page 56.390de028
Automatic steering wheel
adjustment (only in conjunction with seat, mirror
and steering wheel memory)
In order to make it easier to get into and
out of the car, the steering wheel auto-
matically moves into the top position
and returns to the driving (memory) po-
sition.
This automatic feature is controlled by
the position of the ignition key and by
the driver's door.
Exterior mirrors1 Mirror switch for 4-way adjustment
2 Left/Right selection switch
You can also adjust the mirrors manu-
ally by pressing against the outer edges
of their lenses.
To store the mirror settings: Refer
to "Seat, mirror and steering wheel
memory" on page 56.390us605
Page 55 of 217
55n
RepairsIndexOverview Controls Car care Technology Data
Mirrors
The mirror on the passenger's
side features a lens with a more
convex surface than the mirror installed
on the driver's side. When estimating
the distance between yourself and
other traffic, bear in mind that the ob-
jects reflected in the mirror are closer
than they appear. This means that esti-
mations of the distance to following
traffic should not be regarded as pre-
cise.<
Electric heatersBoth mirrors are heated automatically
with the ignition key in position 2.
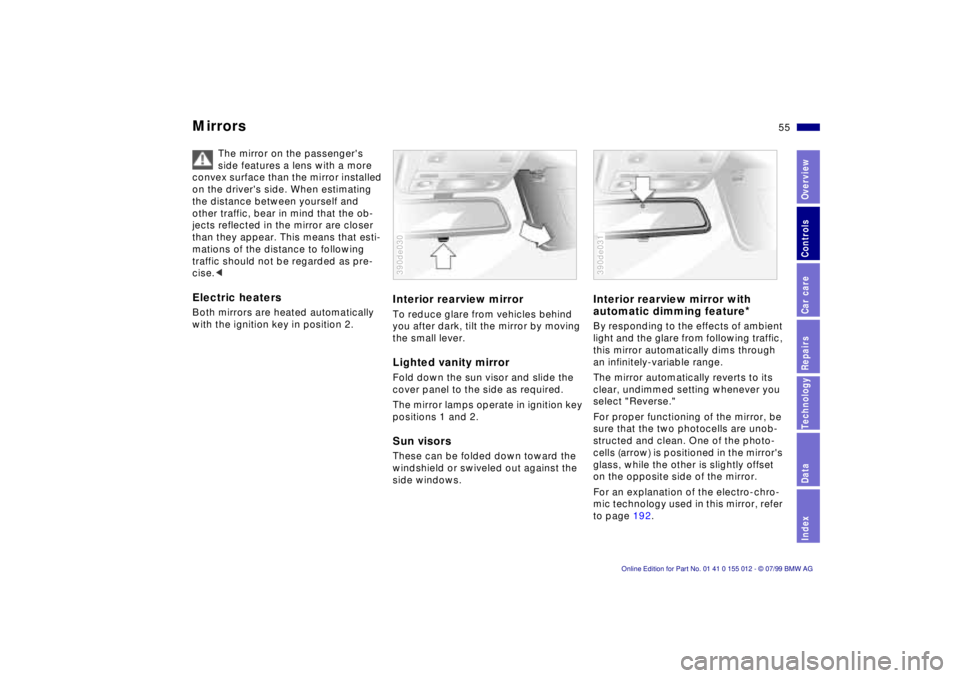
Interior rearview mirrorTo reduce glare from vehicles behind
you after dark, tilt the mirror by moving
the small lever.Lighted vanity mirrorFold down the sun visor and slide the
cover panel to the side as required.
The mirror lamps operate in ignition key
positions 1 and 2.Sun visorsThese can be folded down toward the
windshield or swiveled out against the
side windows.390de030
Interior rearview mirror with
automatic dimming feature
*
By responding to the effects of ambient
light and the glare from following traffic,
this mirror automatically dims through
an infinitely-variable range.
The mirror automatically reverts to its
clear, undimmed setting whenever you
select "Reverse."
For proper functioning of the mirror, be
sure that the two photocells are unob-
structed and clean. One of the photo-
cells (arrow) is positioned in the mirror's
glass, while the other is slightly offset
on the opposite side of the mirror.
For an explanation of the electro-chro-
mic technology used in this mirror, refer
to page 192.390de031
Page 56 of 217
56n
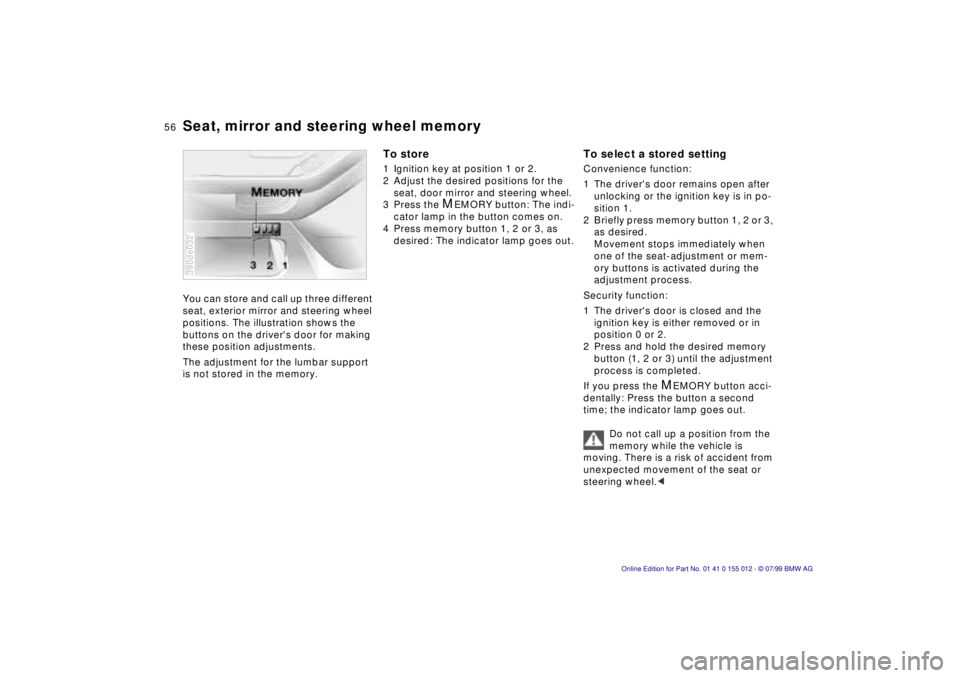
Seat, mirror and steering wheel memoryYou can store and call up three different
seat, exterior mirror and steering wheel
positions. The illustration shows the
buttons on the driver's door for making
these position adjustments.
The adjustment for the lumbar support
is not stored in the memory.390de032
To store1 Ignition key at position 1 or 2.
2 Adjust the desired positions for the
seat, door mirror and steering wheel.
3 Press the
M
EMORY button: The indi-
cator lamp in the button comes on.
4 Press memory button 1, 2 or 3, as
desired: The indicator lamp goes out.
To select a stored settingConvenience function:
1 The driver's door remains open after
unlocking or the ignition key is in po-
sition 1.
2 Briefly press memory button 1, 2 or 3,
as desired.
Movement stops immediately when
one of the seat-adjustment or mem-
ory buttons is activated during the
adjustment process.
Security function:
1 The driver's door is closed and the
ignition key is either removed or in
position 0 or 2.
2 Press and hold the desired memory
button (1, 2 or 3) until the adjustment
process is completed.
If you press the
M
EMORY button acci-
dentally: Press the button a second
time; the indicator lamp goes out.
Do not call up a position from the
memory while the vehicle is
moving. There is a risk of accident from
unexpected movement of the seat or
steering wheel.<
Page 57 of 217
57n
RepairsIndexOverview Controls Car care Technology Data
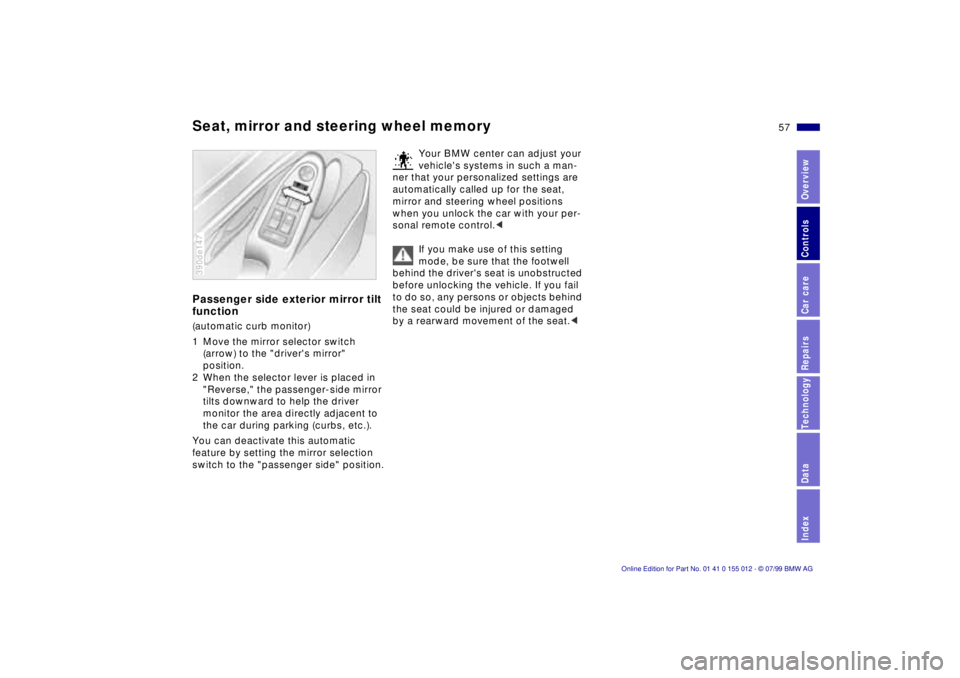
Seat, mirror and steering wheel memoryPassenger side exterior mirror tilt
function(automatic curb monitor)
1 Move the mirror selector switch
(arrow) to the "driver's mirror"
position.
2 When the selector lever is placed in
"Reverse," the passenger-side mirror
tilts downward to help the driver
monitor the area directly adjacent to
the car during parking (curbs, etc.).
You can deactivate this automatic
feature by setting the mirror selection
switch to the "passenger side" position.390de147
Your BMW center can adjust your
vehicle's systems in such a man-
ner that your personalized settings are
automatically called up for the seat,
mirror and steering wheel positions
when you unlock the car with your per-
sonal remote control.<
If you make use of this setting
mode, be sure that the footwell
behind the driver's seat is unobstructed
before unlocking the vehicle. If you fail
to do so, any persons or objects behind
the seat could be injured or damaged
by a rearward movement of the seat.<
Page 77 of 217
77n
RepairsIndexOverview Controls Car care Technology Data
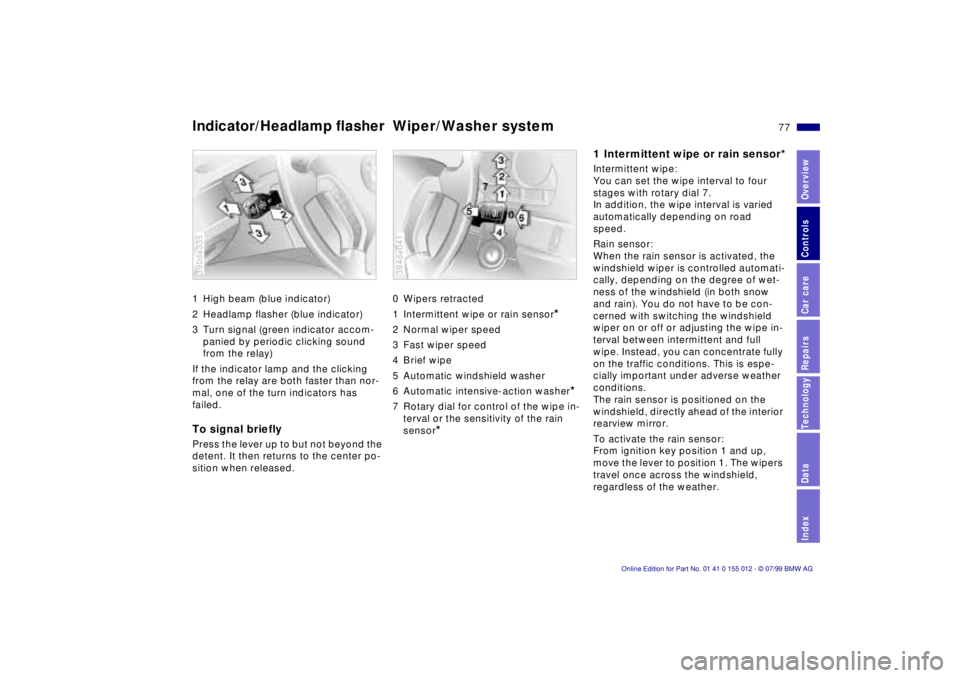
Indicator/Headlamp ßasherWiper/Washer system1 High beam (blue indicator)
2 Headlamp flasher (blue indicator)
3 Turn signal (green indicator accom-
panied by periodic clicking sound
from the relay)
If the indicator lamp and the clicking
from the relay are both faster than nor-
mal, one of the turn indicators has
failed.To signal brieflyPress the lever up to but not beyond the
detent. It then returns to the center po-
sition when released.390de335
0 Wipers retracted
1 Intermittent wipe or rain sensor
*
2 Normal wiper speed
3 Fast wiper speed
4 Brief wipe
5 Automatic windshield washer
6 Automatic intensive-action washer
*
7 Rotary dial for control of the wipe in-
terval or the sensitivity of the rain
sensor
*
394de041
1 Intermittent wipe or rain sensor*Intermittent wipe:
You can set the wipe interval to four
stages with rotary dial 7.
In addition, the wipe interval is varied
automatically depending on road
speed.
Rain sensor:
When the rain sensor is activated, the
windshield wiper is controlled automati-
cally, depending on the degree of wet-
ness of the windshield (in both snow
and rain). You do not have to be con-
cerned with switching the windshield
wiper on or off or adjusting the wipe in-
terval between intermittent and full
wipe. Instead, you can concentrate fully
on the traffic conditions. This is espe-
cially important under adverse weather
conditions.
The rain sensor is positioned on the
windshield, directly ahead of the interior
rearview mirror.
To activate the rain sensor:
From ignition key position 1 and up,
move the lever to position 1. The wipers
travel once across the windshield,
regardless of the weather.
Page 158 of 217

158n
Caring for your carWindow careYou can use window and glass cleaner
to clean inside window surfaces and
mirrors without smearing and streaking.
Never use polishing pastes or abrasive
(quartz) cleansers on mirror lenses.
When caring for break-resistant
security glass
*, observe the fol-
lowing instructions:
The inner surface of the side windows
is coated with a plastic film. For this
reason, do not affix any decals or adhe-
sive stickers on the inside of these win-
dows unless they are to be placed there
permanently.
Wash the glass with clean water. If nec-
essary, you may add a commercially-
available mild household cleaner. Do
not use abrasive cleaners.
If the windows are fogged or iced over,
treat them with an anti-misting cloth or
a deicer spray Ð do not use an ice
scraper.<
Clean the wiper blades with soapy wa-
ter. The wiper blades should be re-
placed twice a year, before and after
the cold season.
Use only wiper blades which have
been approved by BMW.<
Caring for other vehicle
components and materialsLight-alloy wheels should be treated
with alloy wheel cleaner, especially dur-
ing the winter months. However, do not
use aggressive products containing ac-
ids, strong alkalis or abrasives. Do not
use steam cleaners operating at tem-
peratures above 1407 (606). Follow
the manufacturer's instructions.
If your vehicle has chrome parts
* such
as window moldings, door handles or
other items, clean these parts carefully
with ample clean water, especially if
they have an accumulation of road salt.
Use a chrome polish for an additional
treatment.
Plastic components, vinyl upholstery,
headliners, lamp lenses, the clear cover
of the instrument panel and compo-
nents with a sprayed dull black surface
can be cleaned with water (add plastic
cleaner as required). Do not allow mois-
ture to soak through the seats or head-
liner. Never use solvents such as lac-
quer thinner, heavy-duty grease
remover, fuels, etc.Rubber components should be cleaned
with water only; a rubber treatment or
silicone spray may also be applied.
The safety belts should be cleaned with
a mild soap and water solution without
being removed from the car. Never at-
tempt chemical or dry cleaning, as
damage to the belt fabric could result.
After cleaning, never allow the inertia
reel to retract the belts until they are
completely dry. Dirty safety belts pre-
vent the inertia reel mechanism from
retracting the strap properly, and thus
constitute a safety hazard.
Heavily soiled floor carpets and mats
*
can be cleaned with an interior cleaner.
The floor mats can be removed from the
vehicle for cleaning.
Please use only a damp cloth to clean
wooden fascia panels and components.
Follow up by drying with a soft cloth.
Use cleaning and car-care
products that you can obtain
at your BMW center.<