BMW 750I 2008 E65 Owner's Manual
Manufacturer: BMW, Model Year: 2008, Model line: 750I, Model: BMW 750I 2008 E65Pages: 254, PDF Size: 7.98 MB
Page 161 of 254
Navigation
Entertainment
Driving tips
159Reference
At a glance
Controls
Communications
Mobility
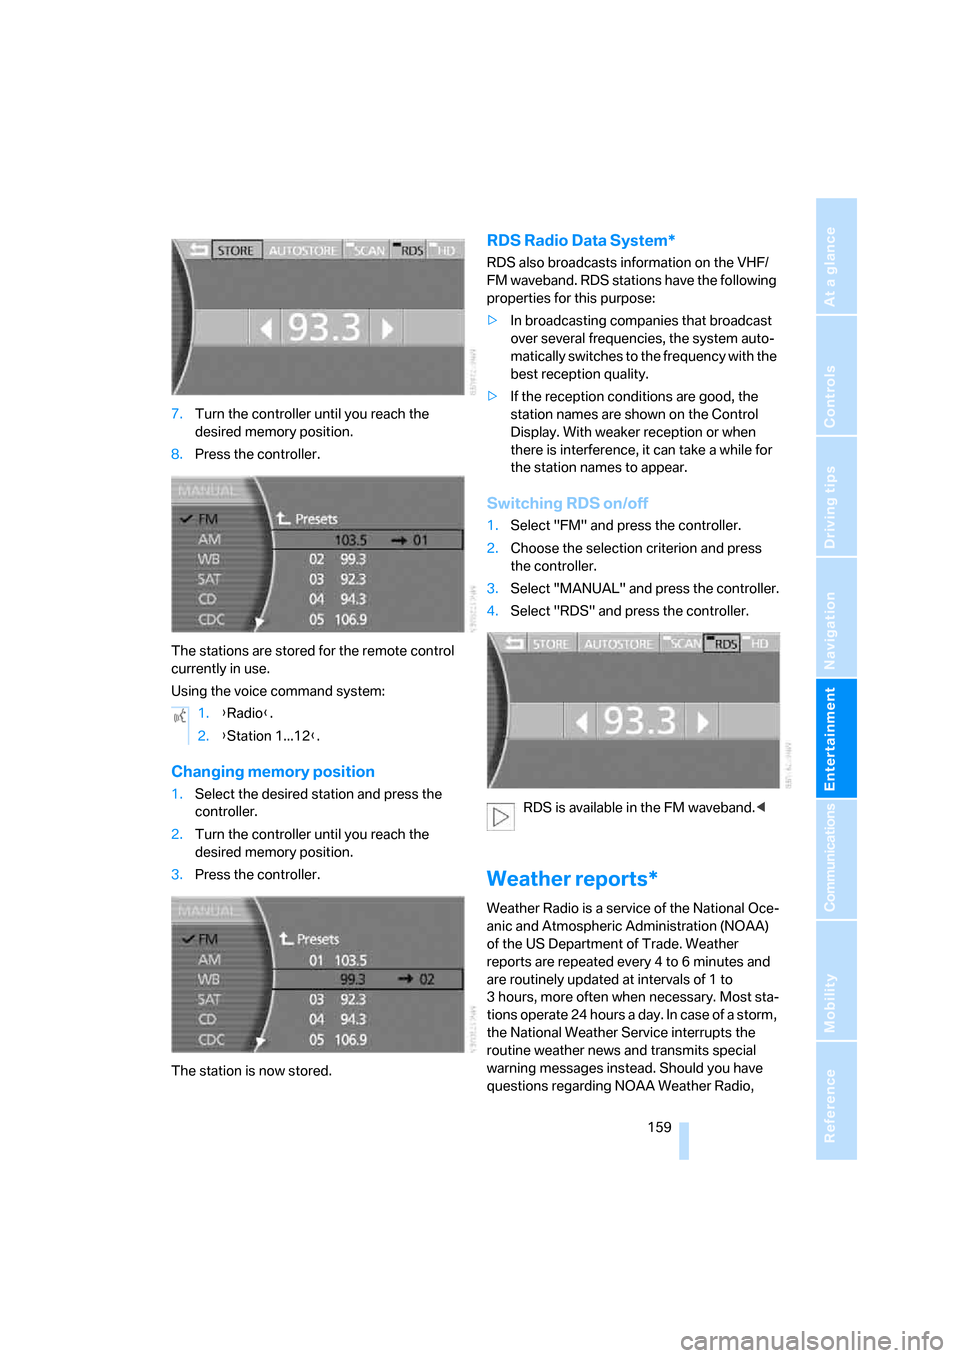
7.Turn the controller until you reach the
desired memory position.
8.Press the controller.
The stations are stored for the remote control
currently in use.
Using the voice command system:
Changing memory position
1.Select the desired station and press the
controller.
2.Turn the controller until you reach the
desired memory position.
3.Press the controller.
The station is now stored.
RDS Radio Data System*
RDS also broadcasts information on the VHF/
FM waveband. RDS stations have the following
properties for this purpose:
>In broadcasting companies that broadcast
over several frequencies, the system auto-
matically switches to the frequency with the
best reception quality.
>If the reception conditions are good, the
station names are shown on the Control
Display. With weaker reception or when
there is interference, it can take a while for
the station names to appear.
Switching RDS on/off
1.Select "FM" and press the controller.
2.Choose the selection criterion and press
the controller.
3.Select "MANUAL" and press the controller.
4.Select "RDS" and press the controller.
RDS is available in the FM waveband.<
Weather reports*
Weather Radio is a service of the National Oce-
anic and Atmospheric Administration (NOAA)
of the US Department of Trade. Weather
reports are repeated every 4 to 6 minutes and
are routinely updated at intervals of 1 to
3 hours, more often when necessary. Most sta-
tions operate 24 hours a day. In case of a storm,
the National Weather Service interrupts the
routine weather news and transmits special
warning messages instead. Should you have
questions regarding NOAA Weather Radio, 1.{Radio}.
2.{Station 1...12}.
Page 162 of 254
Radio
160 please contact the nearest office of the National
Weather Service or write to the National
Weather Service at: W/OM1, National Oceanic
and Atmospheric Administration, 1325 East-
West Highway, Silver Spring, MD 20910.
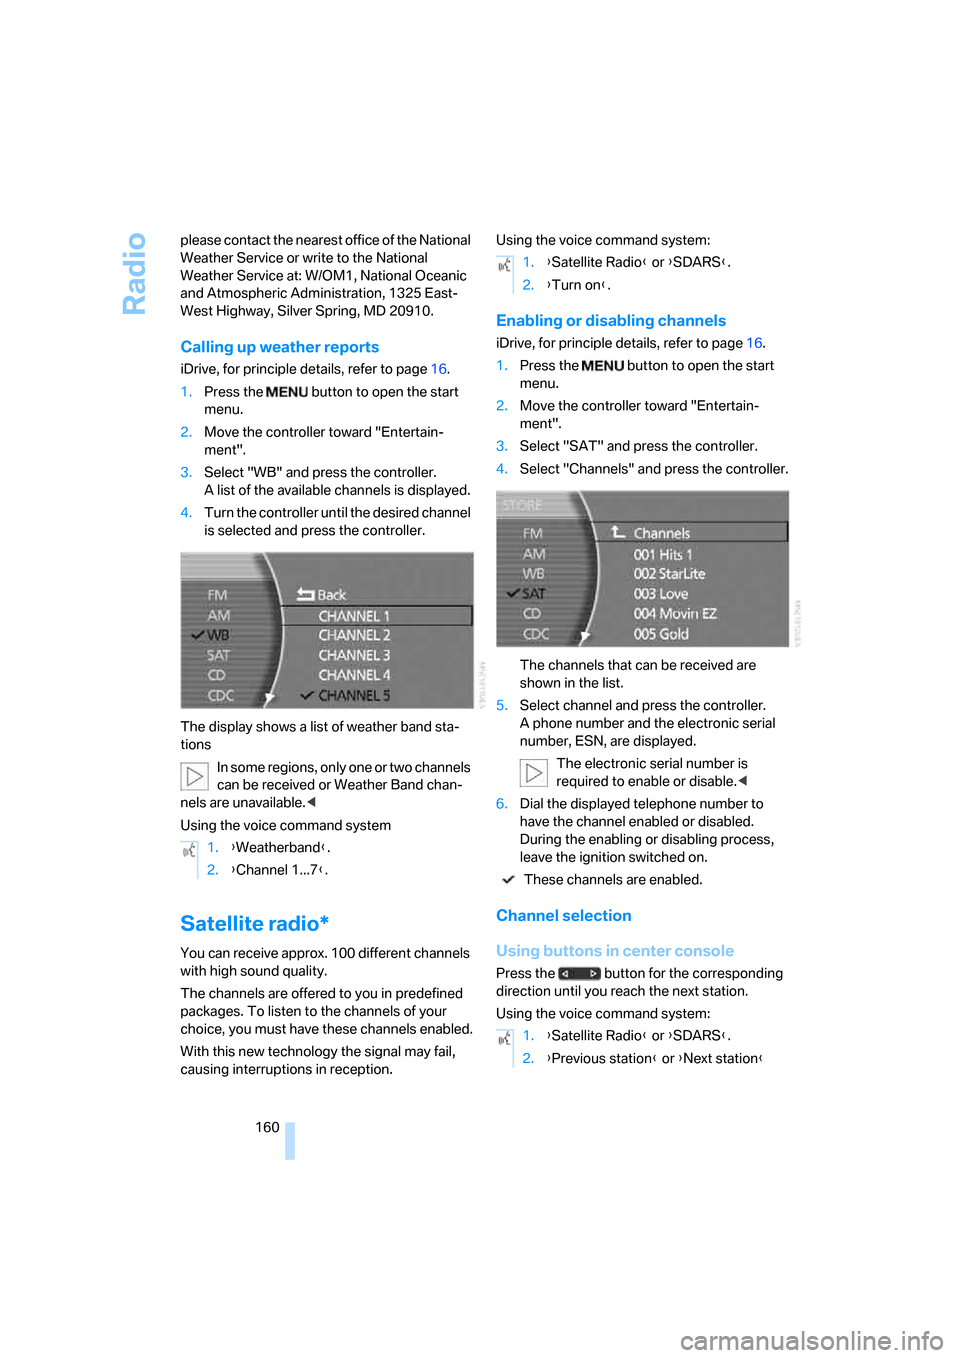
Calling up weather reports
iDrive, for principle details, refer to page16.
1.Press the button to open the start
menu.
2.Move the controller toward "Entertain-
ment".
3.Select "WB" and press the controller.
A list of the available channels is displayed.
4.Turn the controller until the desired channel
is selected and press the controller.
The display shows a list of weather band sta-
tions
In some regions, only one or two channels
can be received or Weather Band chan-
nels are unavailable.<
Using the voice command system
Satellite radio*
You can receive approx. 100 different channels
with high sound quality.
The channels are offered to you in predefined
packages. To listen to the channels of your
choice, you must have these channels enabled.
With this new technology the signal may fail,
causing interruptions in reception.Using the voice command system:
Enabling or disabling channels
iDrive, for principle details, refer to page16.
1.Press the button to open the start
menu.
2.Move the controller toward "Entertain-
ment".
3.Select "SAT" and press the controller.
4.Select "Channels" and press the controller.
The channels that can be received are
shown in the list.
5.Select channel and press the controller.
A phone number and the electronic serial
number, ESN, are displayed.
The electronic serial number is
required to enable or disable.<
6.Dial the displayed telephone number to
have the channel enabled or disabled.
During the enabling or disabling process,
leave the ignition switched on.
These channels are enabled.
Channel selection
Using buttons in center console
Press the button for the corresponding
direction until you reach the next station.
Using the voice command system: 1.{Weatherband}.
2.{Channel 1...7}.
1.{Satellite Radio} or {SDARS}.
2.{Turn on}.
1.{Satellite Radio} or {SDARS}.
2.{Previous station} or {Next station}
Page 163 of 254
Navigation
Entertainment
Driving tips
161Reference
At a glance
Controls
Communications
Mobility
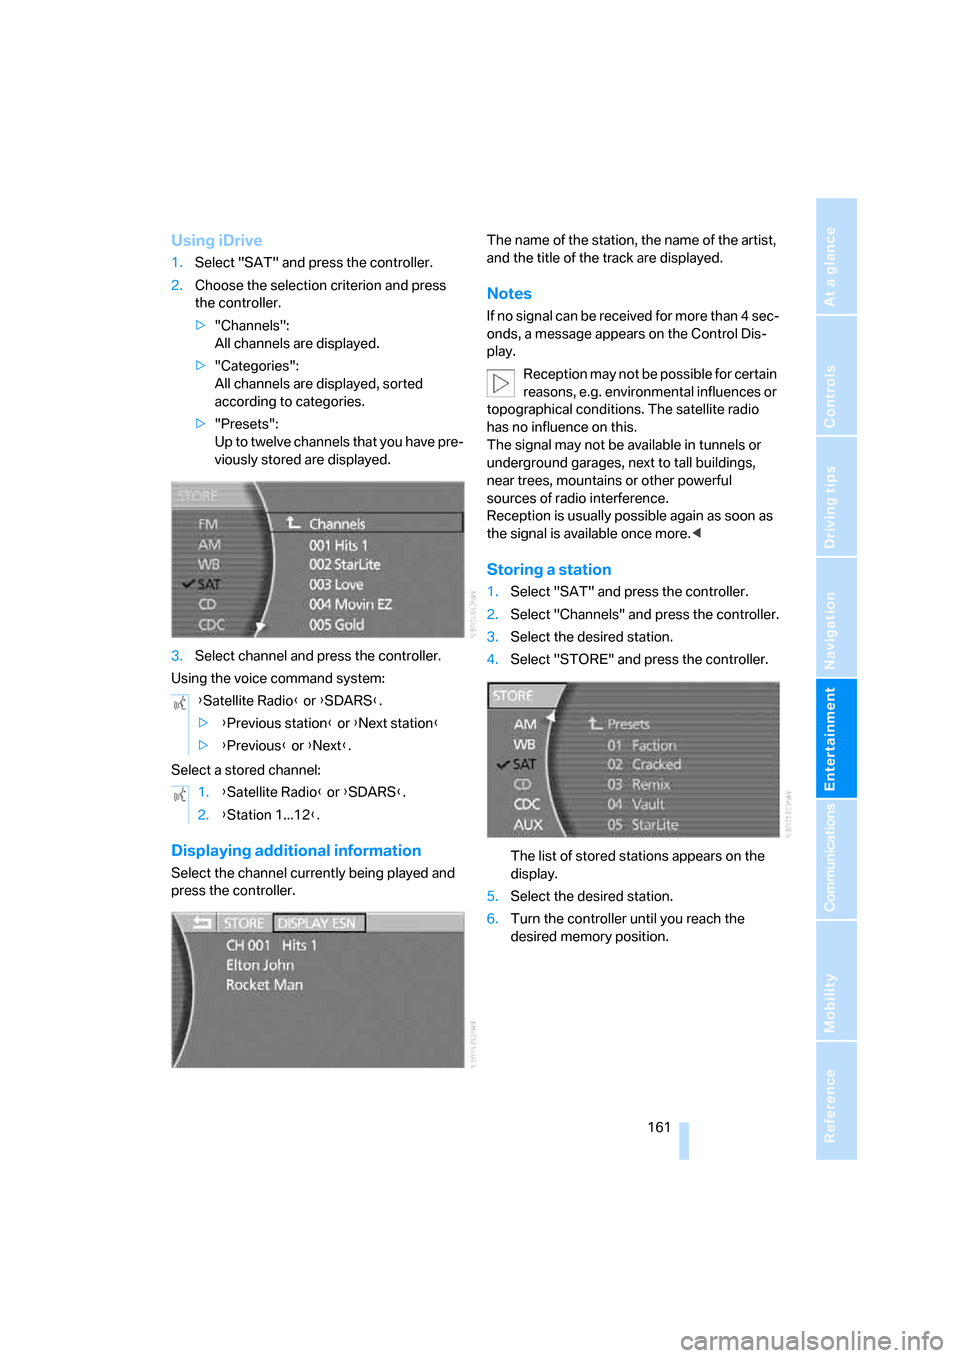
Using iDrive
1.Select "SAT" and press the controller.
2.Choose the selection criterion and press
the controller.
>"Channels":
All channels are displayed.
>"Categories":
All channels are displayed, sorted
according to categories.
>"Presets":
Up to twelve channels that you have pre-
viously stored are displayed.
3.Select channel and press the controller.
Using the voice command system:
Select a stored channel:
Displaying additional information
Select the channel currently being played and
press the controller.The name of the station, the name of the artist,
and the title of the track are displayed.
Notes
If no signal can be received for more than 4 sec-
onds, a message appears on the Control Dis-
play.
Reception may not be possible for certain
reasons, e.g. environmental influences or
topographical conditions. The satellite radio
has no influence on this.
The signal may not be available in tunnels or
underground garages, next to tall buildings,
near trees, mountains or other powerful
sources of radio interference.
Reception is usually possible again as soon as
the signal is available once more.<
Storing a station
1.Select "SAT" and press the controller.
2.Select "Channels" and press the controller.
3.Select the desired station.
4.Select "STORE" and press the controller.
The list of stored stations appears on the
display.
5.Select the desired station.
6.Turn the controller until you reach the
desired memory position. {Satellite Radio} or {SDARS}.
>{Previous station} or {Next station}
>{Previous} or {Next}.
1.{Satellite Radio} or {SDARS}.
2.{Station 1...12}.
Page 164 of 254
Radio
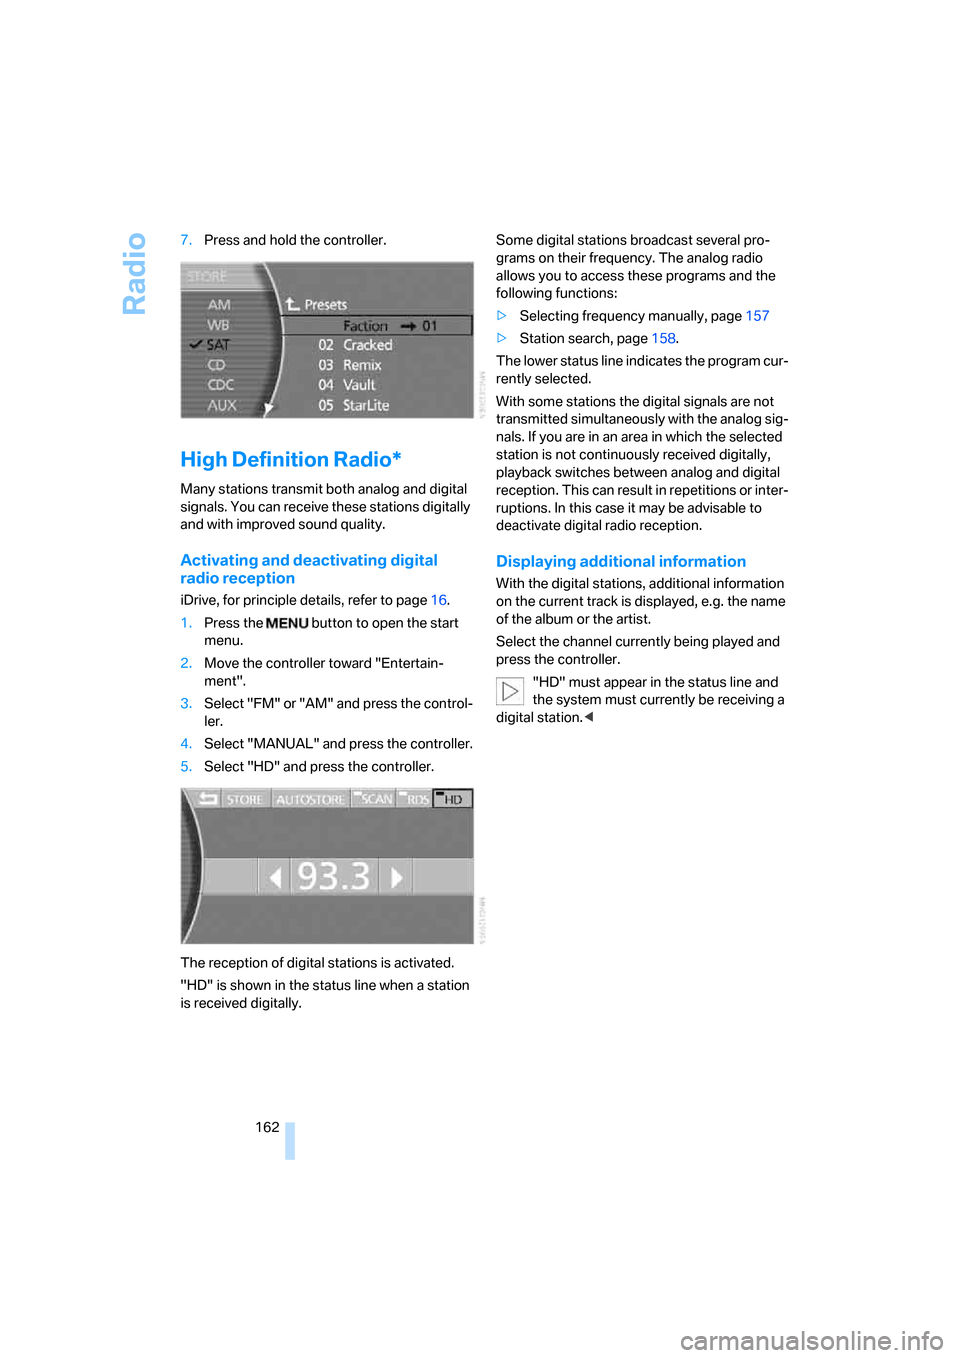
162 7.Press and hold the controller.
High Definition Radio*
Many stations transmit both analog and digital
signals. You can receive these stations digitally
and with improved sound quality.
Activating and deactivating digital
radio reception
iDrive, for principle details, refer to page16.
1.Press the button to open the start
menu.
2.Move the controller toward "Entertain-
ment".
3.Select "FM" or "AM" and press the control-
ler.
4.Select "MANUAL" and press the controller.
5.Select "HD" and press the controller.
The reception of digital stations is activated.
"HD" is shown in the status line when a station
is received digitally.Some digital stations broadcast several pro-
grams on their frequency. The analog radio
allows you to access these programs and the
following functions:
>Selecting frequency manually, page157
>Station search, page158.
The lower status line indicates the program cur-
rently selected.
With some stations the digital signals are not
transmitted simultaneously with the analog sig-
nals. If you are in an area in which the selected
station is not continuously received digitally,
playback switches between analog and digital
reception. This can result in repetitions or inter-
ruptions. In this case it may be advisable to
deactivate digital radio reception.
Displaying additional information
With the digital stations, additional information
on the current track is displayed, e.g. the name
of the album or the artist.
Select the channel currently being played and
press the controller.
"HD" must appear in the status line and
the system must currently be receiving a
digital station.<
Page 165 of 254
Navigation
Entertainment
Driving tips
163Reference
At a glance
Controls
Communications
Mobility
CD player
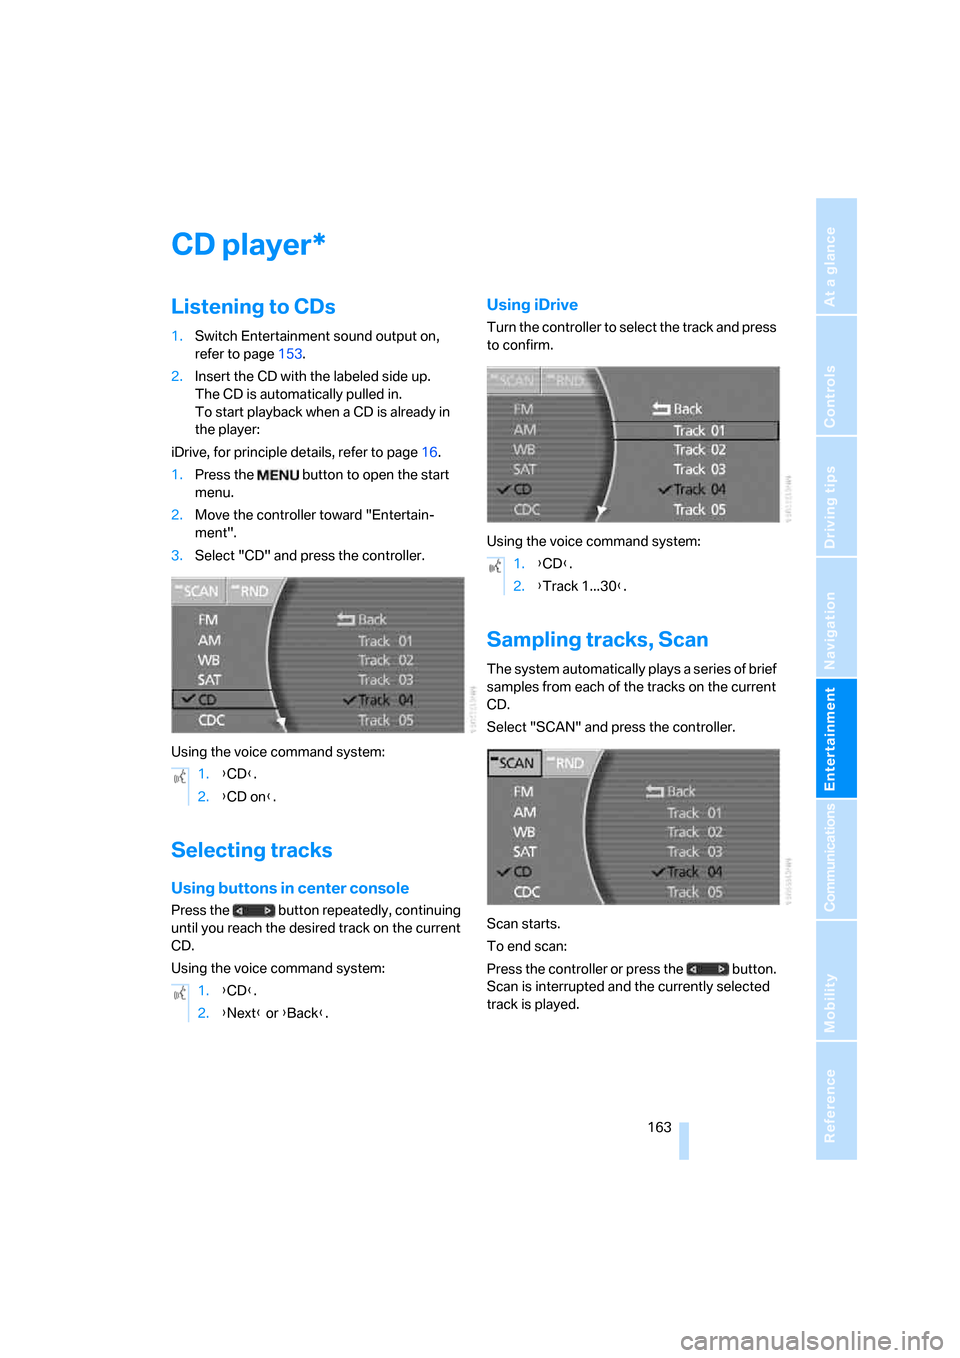
Listening to CDs
1.Switch Entertainment sound output on,
refer to page153.
2.Insert the CD with the labeled side up.
The CD is automatically pulled in.
To start playback when a CD is already in
the player:
iDrive, for principle details, refer to page16.
1.Press the button to open the start
menu.
2.Move the controller toward "Entertain-
ment".
3.Select "CD" and press the controller.
Using the voice command system:
Selecting tracks
Using buttons in center console
Press the button repeatedly, continuing
until you reach the desired track on the current
CD.
Using the voice command system:
Using iDrive
Turn the controller to select the track and press
to confirm.
Using the voice command system:
Sampling tracks, Scan
The system automatically plays a series of brief
samples from each of the tracks on the current
CD.
Select "SCAN" and press the controller.
Scan starts.
To end scan:
Press the controller or press the button.
Scan is interrupted and the currently selected
track is played.
*
1.{CD}.
2.{CD on}.
1.{CD}.
2.{Next} or {Back}.
1.{CD}.
2.{Track 1...30}.
Page 166 of 254
CD player
164
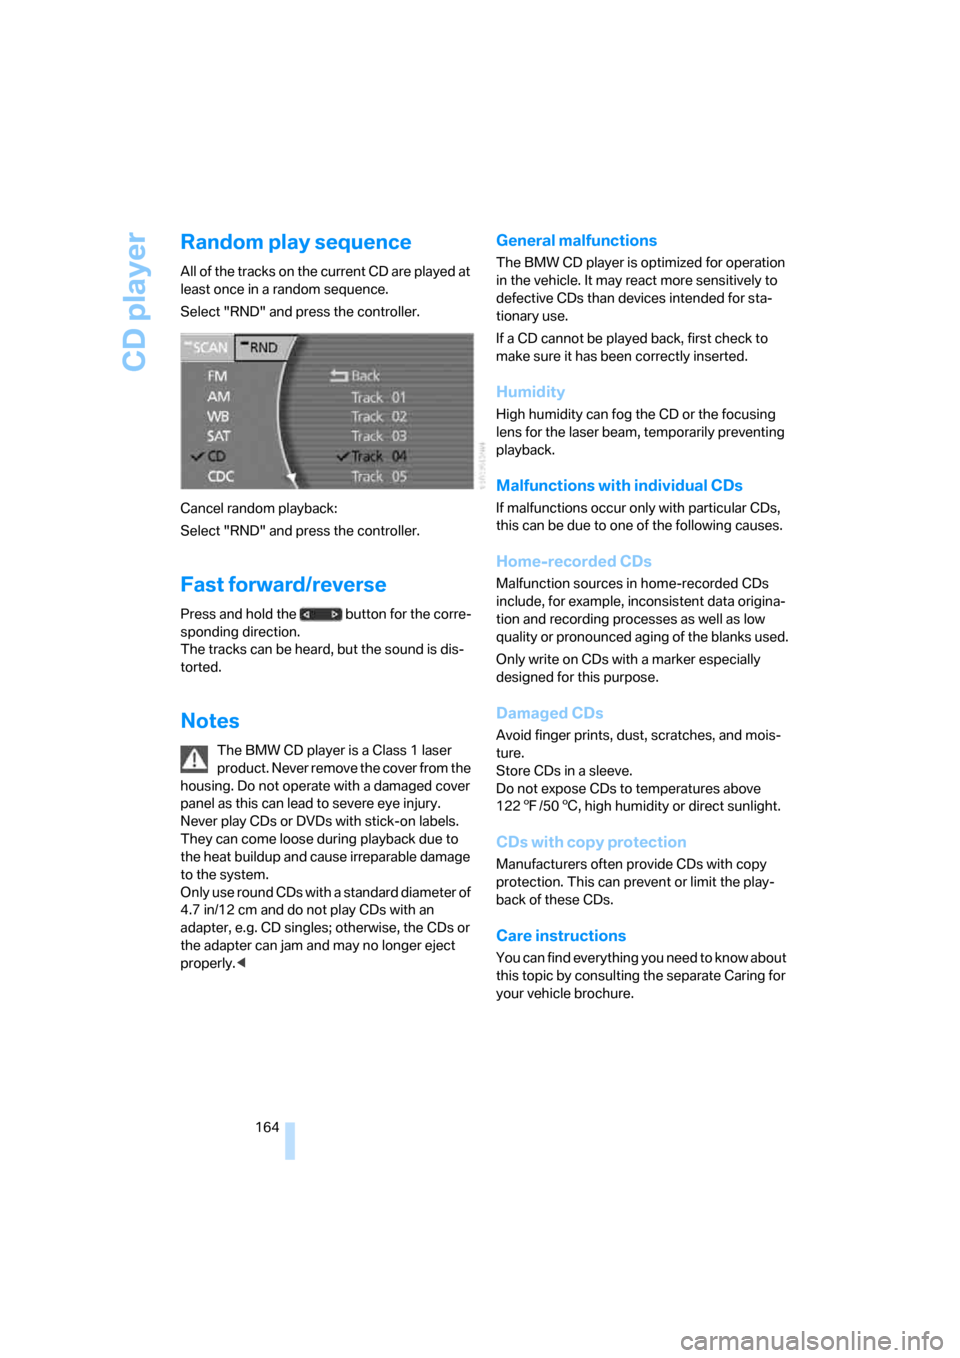
Random play sequence
All of the tracks on the current CD are played at
least once in a random sequence.
Select "RND" and press the controller.
Cancel random playback:
Select "RND" and press the controller.
Fast forward/reverse
Press and hold the button for the corre-
sponding direction.
The tracks can be heard, but the sound is dis-
torted.
Notes
The BMW CD player is a Class 1 laser
product. Never remove the cover from the
housing. Do not operate with a damaged cover
panel as this can lead to severe eye injury.
Never play CDs or DVDs with stick-on labels.
They can come loose during playback due to
the heat buildup and cause irreparable damage
to the system.
Only use round CDs with a standard diameter of
4.7 in/12 cm and do not play CDs with an
adapter, e.g. CD singles; otherwise, the CDs or
the adapter can jam and may no longer eject
properly.<
General malfunctions
The BMW CD player is optimized for operation
in the vehicle. It may react more sensitively to
defective CDs than devices intended for sta-
tionary use.
If a CD cannot be played back, first check to
make sure it has been correctly inserted.
Humidity
High humidity can fog the CD or the focusing
lens for the laser beam, temporarily preventing
playback.
Malfunctions with individual CDs
If malfunctions occur only with particular CDs,
this can be due to one of the following causes.
Home-recorded CDs
Malfunction sources in home-recorded CDs
include, for example, inconsistent data origina-
tion and recording processes as well as low
quality or pronounced aging of the blanks used.
Only write on CDs with a marker especially
designed for this purpose.
Damaged CDs
Avoid finger prints, dust, scratches, and mois-
ture.
Store CDs in a sleeve.
Do not expose CDs to temperatures above
1227/506, high humidity or direct sunlight.
CDs with copy protection
Manufacturers often provide CDs with copy
protection. This can prevent or limit the play-
back of these CDs.
Care instructions
You can find everything you need to know about
this topic by consulting the separate Caring for
your vehicle brochure.
Page 167 of 254
Navigation
Entertainment
Driving tips
165Reference
At a glance
Controls
Communications
Mobility
CD changer
Installation location
The BMW CD changer for six CDs is installed
above the glove compartment.
Compressed audio files
The CD changer can play CDs with compressed
audio files, such as MP3s.
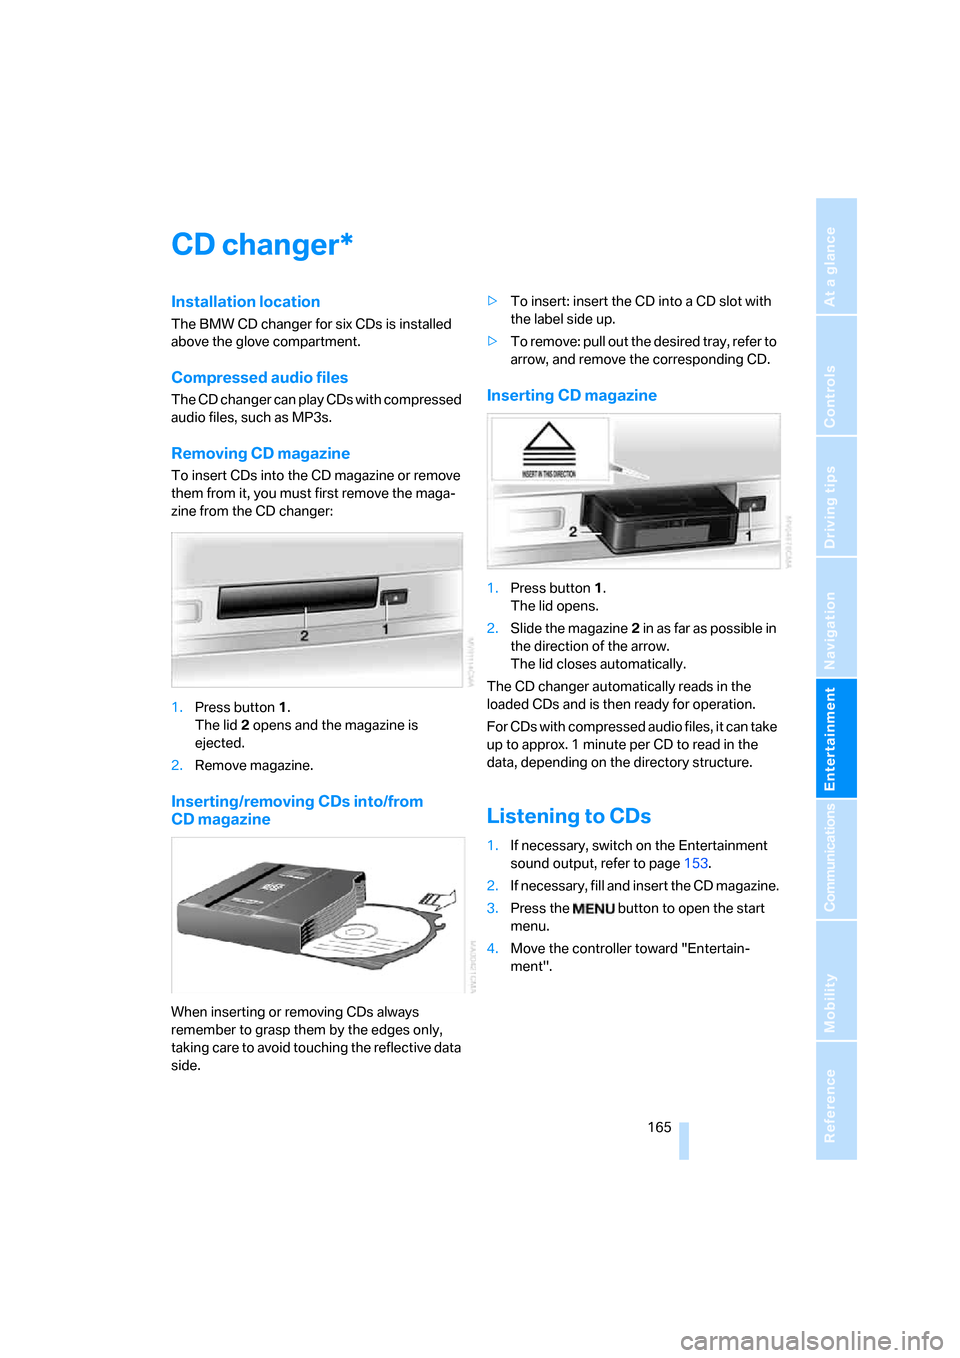
Removing CD magazine
To insert CDs into the CD magazine or remove
them from it, you must first remove the maga-
zine from the CD changer:
1.Press button1.
The lid2 opens and the magazine is
ejected.
2.Remove magazine.
Inserting/removing CDs into/from
CD magazine
When inserting or removing CDs always
remember to grasp them by the edges only,
taking care to avoid touching the reflective data
side.>To insert: insert the CD into a CD slot with
the label side up.
>To remove: pull out the desired tray, refer to
arrow, and remove the corresponding CD.
Inserting CD magazine
1.Press button1.
The lid opens.
2.Slide the magazine2 in as far as possible in
the direction of the arrow.
The lid closes automatically.
The CD changer automatically reads in the
loaded CDs and is then ready for operation.
For CDs with compressed audio files, it can take
up to approx. 1 minute per CD to read in the
data, depending on the directory structure.
Listening to CDs
1.If necessary, switch on the Entertainment
sound output, refer to page153.
2.I f n ec e s s a r y, f il l a n d i n s e r t t h e C D m a g a z in e .
3.Press the button to open the start
menu.
4.Move the controller toward "Entertain-
ment".
*
Page 168 of 254
CD changer
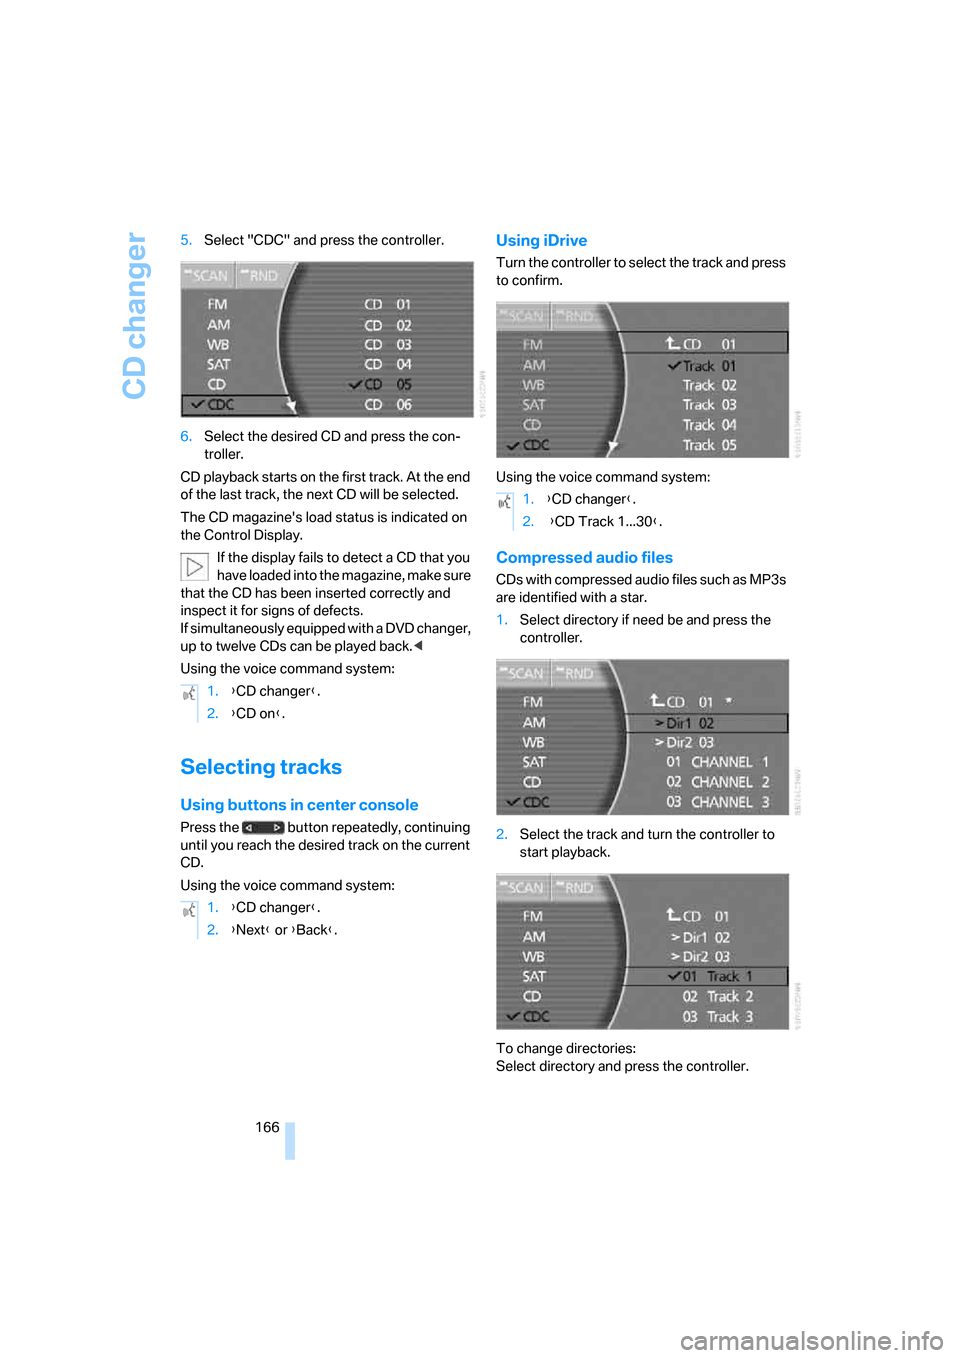
166 5.Select "CDC" and press the controller.
6.Select the desired CD and press the con-
troller.
CD playback starts on the first track. At the end
of the last track, the next CD will be selected.
The CD magazine's load status is indicated on
the Control Display.
If the display fails to detect a CD that you
have loaded into the magazine, make sure
that the CD has been inserted correctly and
inspect it for signs of defects.
If simultaneously equipped with a DVD changer,
up to twelve CDs can be played back.<
Using the voice command system:
Selecting tracks
Using buttons in center console
Press the button repeatedly, continuing
until you reach the desired track on the current
CD.
Using the voice command system:
Using iDrive
Turn the controller to select the track and press
to confirm.
Using the voice command system:
Compressed audio files
CDs with compressed audio files such as MP3s
are identified with a star.
1.Select directory if need be and press the
controller.
2.Select the track and turn the controller to
start playback.
To change directories:
Select directory and press the controller. 1.{CD changer}.
2.{CD on}.
1.{CD changer}.
2.{Next} or {Back}.
1.{CD changer}.
2. {CD Track 1...30}.
Page 169 of 254
Navigation
Entertainment
Driving tips
167Reference
At a glance
Controls
Communications
Mobility
Using the voice command system:
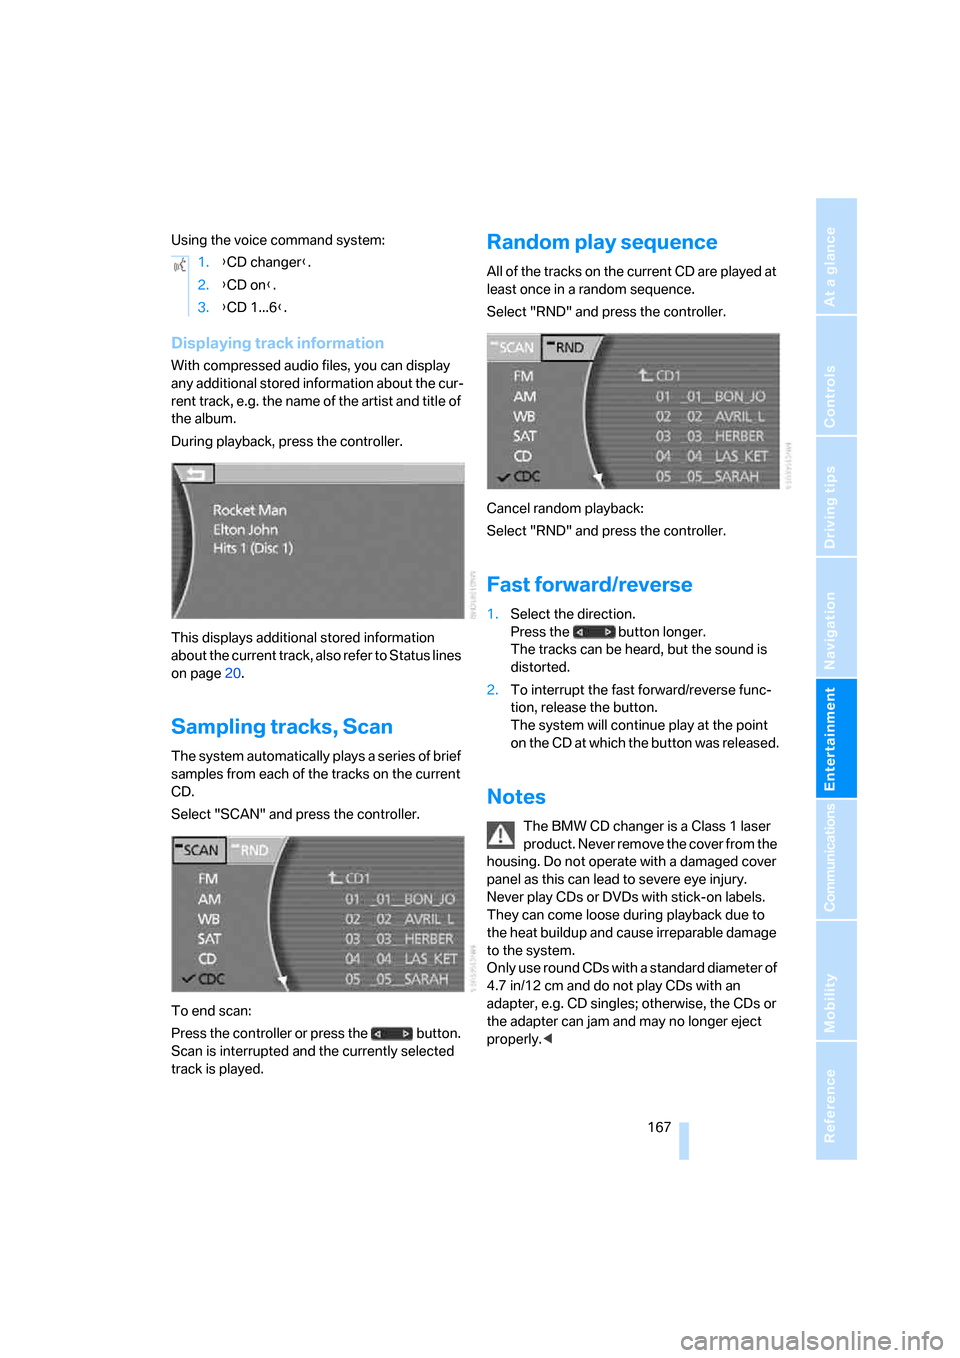
Displaying track information
With compressed audio files, you can display
any additional stored information about the cur-
rent track, e.g. the name of the artist and title of
the album.
During playback, press the controller.
This displays additional stored information
about the current track, also refer to Status lines
on page20.
Sampling tracks, Scan
The system automatically plays a series of brief
samples from each of the tracks on the current
CD.
Select "SCAN" and press the controller.
To end scan:
Press the controller or press the button.
Scan is interrupted and the currently selected
track is played.
Random play sequence
All of the tracks on the current CD are played at
least once in a random sequence.
Select "RND" and press the controller.
Cancel random playback:
Select "RND" and press the controller.
Fast forward/reverse
1.Select the direction.
Press the button longer.
The tracks can be heard, but the sound is
distorted.
2.To interrupt the fast forward/reverse func-
tion, release the button.
The system will continue play at the point
on the CD at which the button was released.
Notes
The BMW CD changer is a Class 1 laser
product. Never remove the cover from the
housing. Do not operate with a damaged cover
panel as this can lead to severe eye injury.
Never play CDs or DVDs with stick-on labels.
They can come loose during playback due to
the heat buildup and cause irreparable damage
to the system.
Only use round CDs with a standard diameter of
4.7 in/12 cm and do not play CDs with an
adapter, e.g. CD singles; otherwise, the CDs or
the adapter can jam and may no longer eject
properly.< 1.{CD changer}.
2.{CD on}.
3.{CD 1...6}.
Page 170 of 254
CD changer
168
General malfunctions
The BMW CD changer is optimized for opera-
tion in the vehicle. It may react more sensitively
to defective CDs than devices intended for sta-
tionary use.
If a CD cannot be played back, first check to
make sure it has been correctly inserted.
Humidity
High humidity can fog the CD or the focusing
lens for the laser beam, temporarily preventing
playback.
Malfunctions with individual CDs
If malfunctions occur only with particular CDs,
this can be due to one of the following causes.
Home-recorded CDs
Malfunction sources in home-recorded CDs
include, for example, inconsistent data origina-
tion and recording processes as well as low
quality or pronounced aging of the blanks used.
Only write on CDs with a marker especially
designed for this purpose.
Damaged CDs
Avoid finger prints, dust, scratches, and mois-
ture.
Store CDs in a sleeve.
Do not expose CDs to temperatures above
1227/506, high humidity or direct sunlight.
CDs with copy protection
Manufacturers often provide CDs with copy
protection. This can prevent or limit the play-
back of these CDs.
Care instructions
You can find everything you need to know about
this topic by consulting the separate Caring for
your vehicle brochure.