heating BMW ACTIVEHYBRID 5 2012 Owners Manual
[x] Cancel search | Manufacturer: BMW, Model Year: 2012, Model line: ACTIVEHYBRID 5, Model: BMW ACTIVEHYBRID 5 2012Pages: 319, PDF Size: 12.54 MB
Page 13 of 319
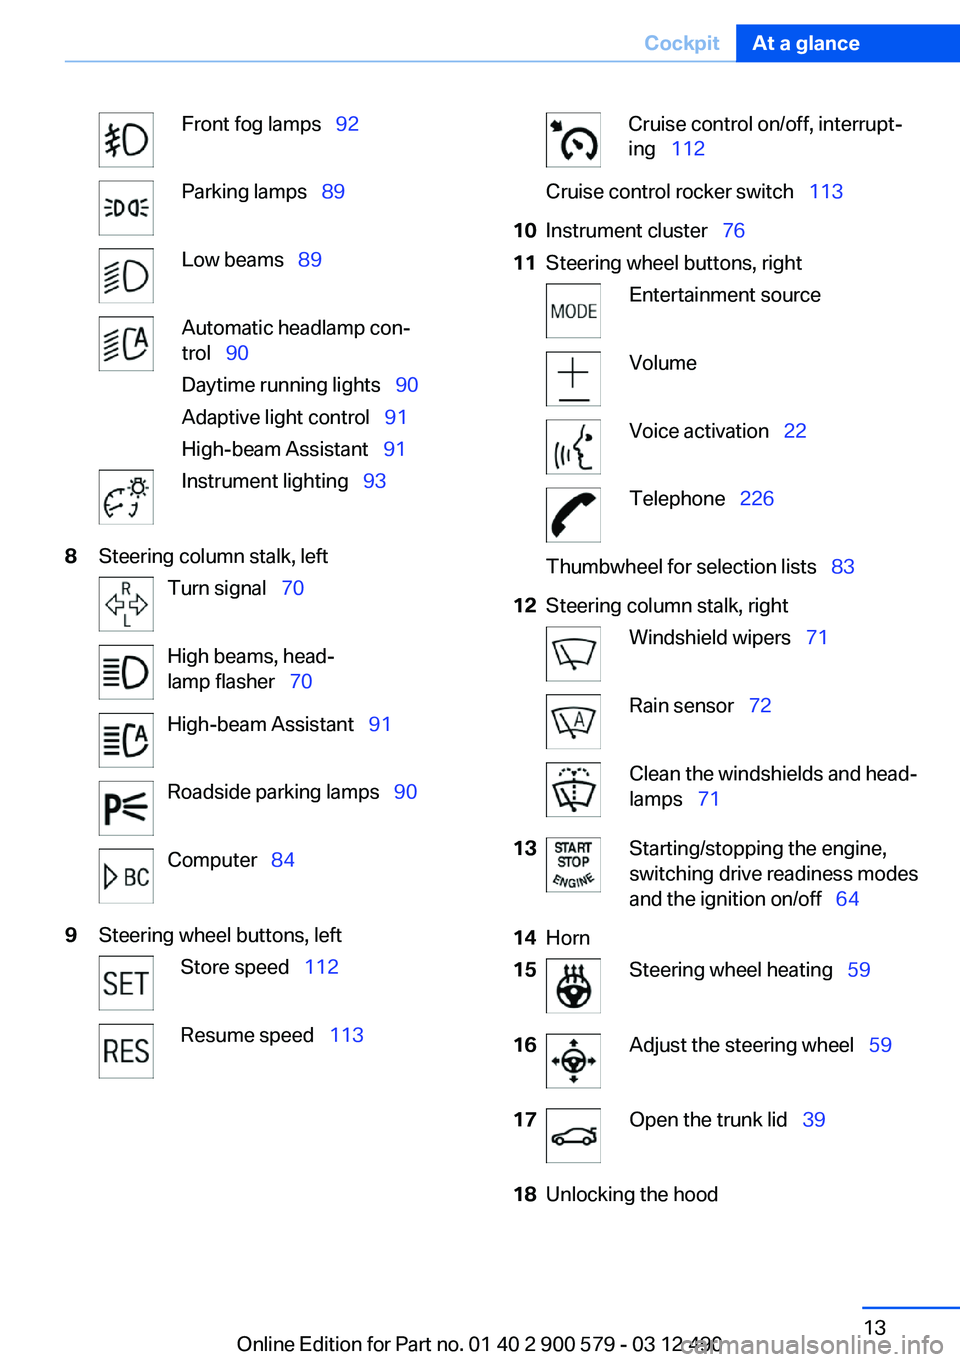
Front fog lamps‚Äā‚ÄÖ92Parking lamps‚Äā‚ÄÖ89Low beams‚Äā‚ÄÖ89Automatic headlamp con‚Äź
trol‚Äā‚ÄÖ 90
Daytime running lights‚Äā‚ÄÖ 90
Adaptive light control‚Äā‚ÄÖ 91
High-beam Assistant‚Äā‚ÄÖ 91Instrument lighting‚Äā‚ÄÖ938Steering column stalk, leftTurn signal‚Äā‚ÄÖ70High beams, head‚Äź
lamp flasher‚Äā‚ÄÖ 70High-beam Assistant‚Äā‚ÄÖ 91Roadside parking lamps‚Äā‚ÄÖ 90Computer‚Äā‚ÄÖ849Steering wheel buttons, leftStore speed‚Äā‚ÄÖ 112Resume speed‚Äā‚ÄÖ 113Cruise control on/off, interrupt‚Äź
ing‚Äā‚ÄÖ 112Cruise control rocker switch‚Äā‚ÄÖ 11310Instrument cluster‚Äā‚ÄÖ7611Steering wheel buttons, rightEntertainment sourceVolumeVoice activation‚Äā‚ÄÖ22Telephone‚Äā‚ÄÖ226Thumbwheel for selection lists‚Äā‚ÄÖ 8312Steering column stalk, rightWindshield wipers‚Äā‚ÄÖ71Rain sensor‚Äā‚ÄÖ72Clean the windshields and head‚Äź
lamps‚Äā‚ÄÖ 7113Starting/stopping the engine,
switching drive readiness modes
and the ignition on/off‚Äā‚ÄÖ 6414Horn15Steering wheel heating‚Äā‚ÄÖ 5916Adjust the steering wheel‚Äā‚ÄÖ 5917Open the trunk lid‚Äā‚ÄÖ3918Unlocking the hoodSeite 13CockpitAt a glance13
Online Edition for Part no. 01 40 2 900 579 - 03 12 490
Page 52 of 319
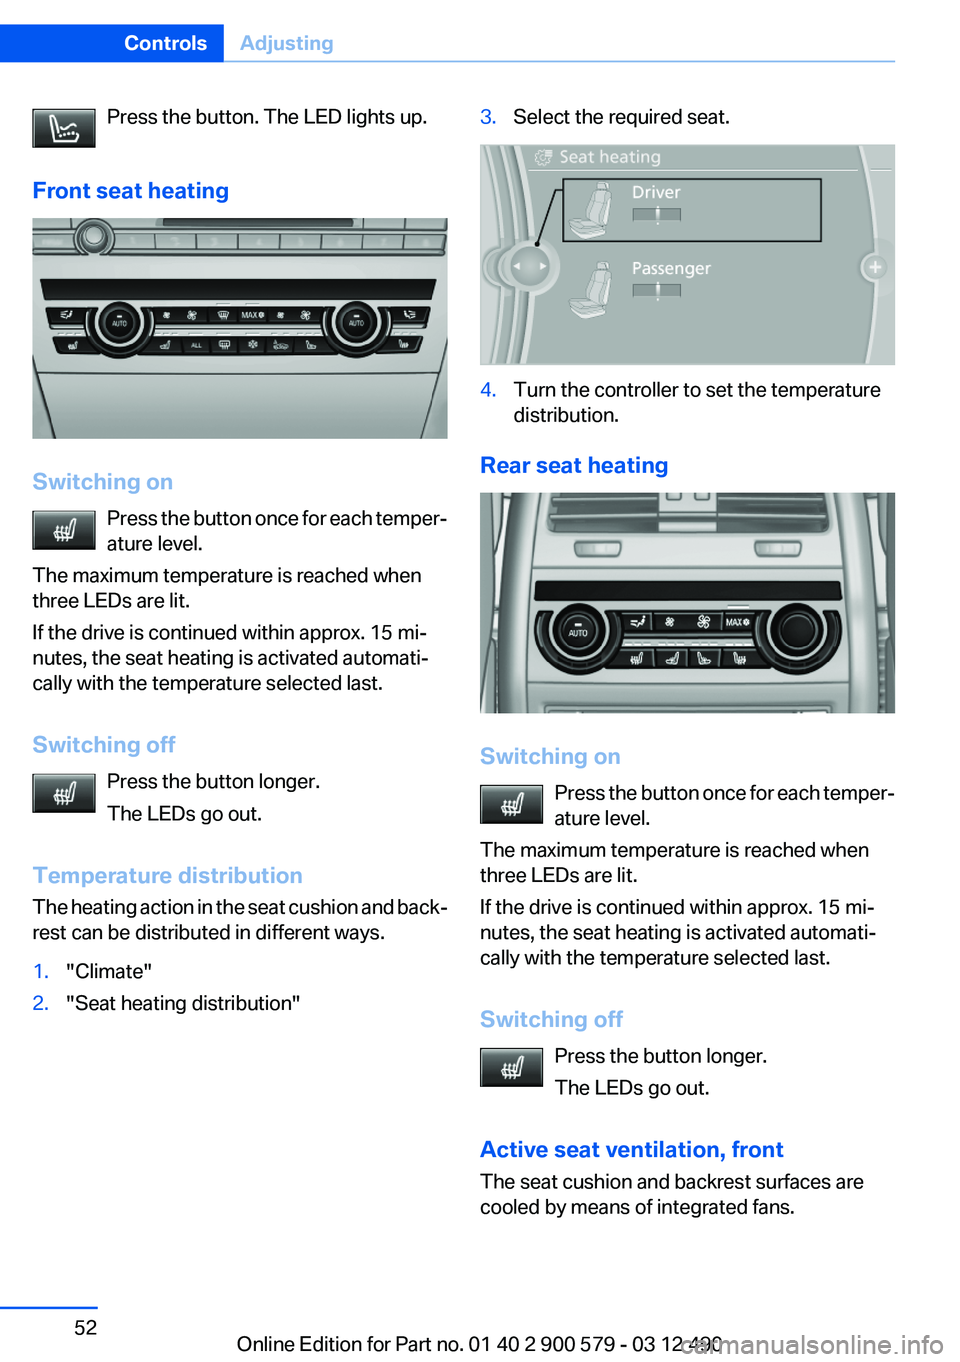
Press the button. The LED lights up.
Front seat heating
Switching on Press the button once for each temper‚Äź
ature level.
The maximum temperature is reached when
three LEDs are lit.
If the drive is continued within approx. 15 mi‚Äź
nutes, the seat heating is activated automati‚Äź
cally with the temperature selected last.
Switching off Press the button longer.
The LEDs go out.
Temperature distribution
The heating action in the seat cushion and back‚Äź
rest can be distributed in different ways.
1."Climate"2."Seat heating distribution"3.Select the required seat.4.Turn the controller to set the temperature
distribution.
Rear seat heating
Switching on
Press the button once for each temper‚Äź
ature level.
The maximum temperature is reached when
three LEDs are lit.
If the drive is continued within approx. 15 mi‚Äź
nutes, the seat heating is activated automati‚Äź
cally with the temperature selected last.
Switching off Press the button longer.
The LEDs go out.
Active seat ventilation, front
The seat cushion and backrest surfaces are
cooled by means of integrated fans.
Seite 52ControlsAdjusting52
Online Edition for Part no. 01 40 2 900 579 - 03 12 490
Page 58 of 319
Storing positions
Seat, mirror, and steering wheel memory, refer
to page 56.
Adjusting manually
If an electrical malfunction occurs, for example,
press the edges of the mirror glass.
Automatic Curb Monitor
When the reverse gear is engaged, the mirror
glass tilts downward slightly on the front pas‚Äź
senger side. This improves your view of the curb
and other low-lying obstacles when parking, for
example.
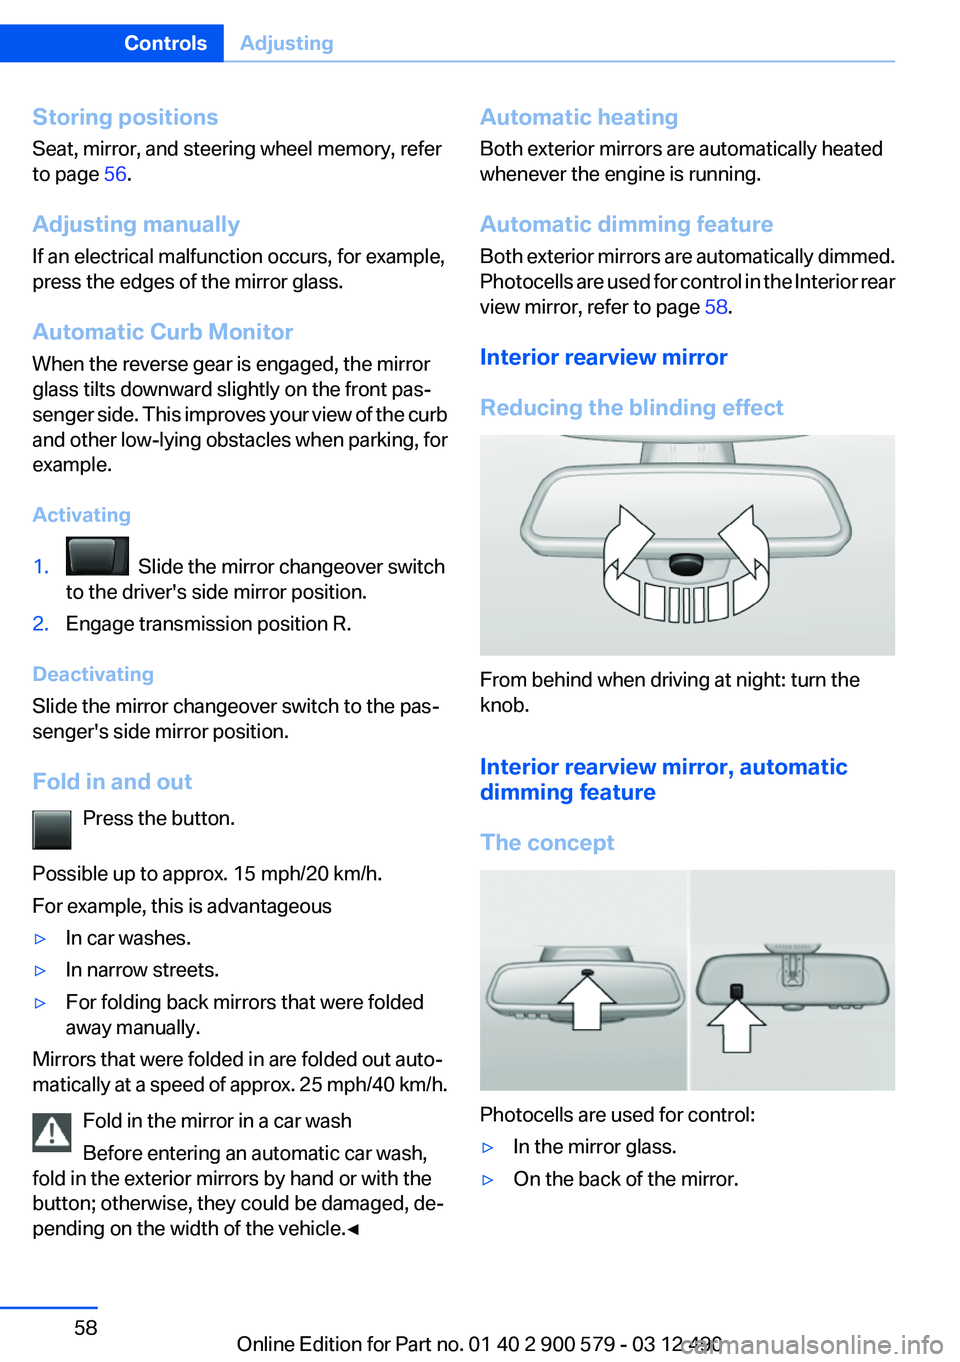
Activating1. Slide the mirror changeover switch
to the driver's side mirror position.2.Engage transmission position R.
Deactivating
Slide the mirror changeover switch to the pas‚Äź
senger's side mirror position.
Fold in and out Press the button.
Possible up to approx. 15 mph/20 km/h.
For example, this is advantageous
‚Ė∑In car washes.‚Ė∑In narrow streets.‚Ė∑For folding back mirrors that were folded
away manually.
Mirrors that were folded in are folded out auto‚Äź
matically at a speed of approx. 25 mph/40 km/h.
Fold in the mirror in a car wash
Before entering an automatic car wash,
fold in the exterior mirrors by hand or with the
button; otherwise, they could be damaged, de‚Äź
pending on the width of the vehicle.‚óÄ
Automatic heating
Both exterior mirrors are automatically heated
whenever the engine is running.
Automatic dimming feature
Both exterior mirrors are automatically dimmed.
Photocells are used for control in the Interior rear
view mirror, refer to page 58.
Interior rearview mirror
Reducing the blinding effect
From behind when driving at night: turn the
knob.
Interior rearview mirror, automatic
dimming feature
The concept
Photocells are used for control:
‚Ė∑In the mirror glass.‚Ė∑On the back of the mirror.Seite 58ControlsAdjusting58
Online Edition for Part no. 01 40 2 900 579 - 03 12 490
Page 59 of 319
Functional requirement
For proper operation:‚Ė∑Keep the photocells clean.‚Ė∑Do not cover the area between the inside
rearview mirror and the windshield.
Steering wheel
General information Do not adjust while driving
Do not adjust the steering wheel while
driving; otherwise, an unexpected movement
could result in an accident.‚óÄ
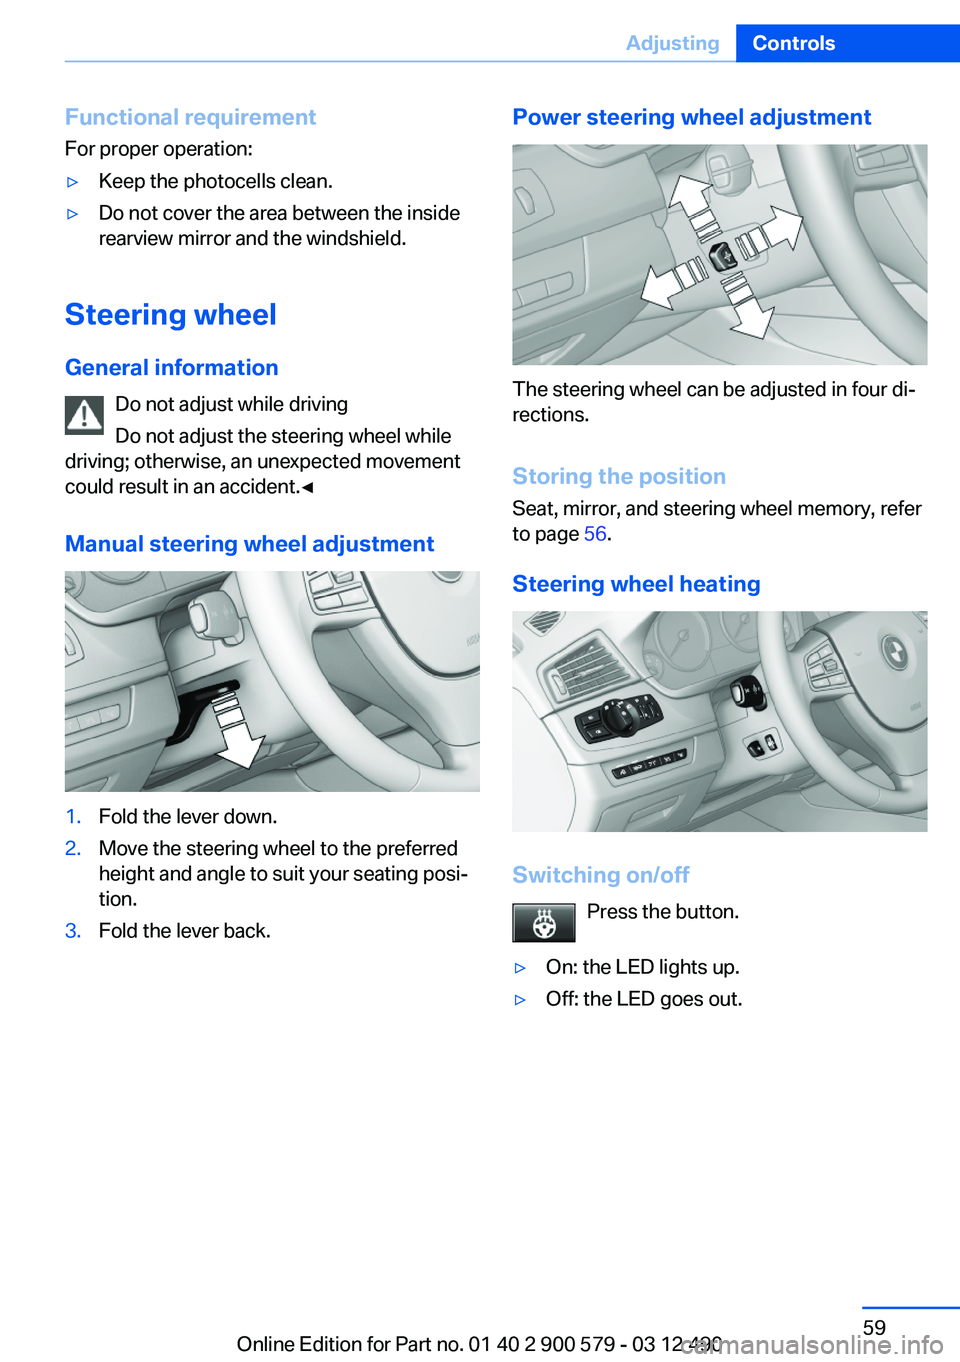
Manual steering wheel adjustment
1.Fold the lever down.2.Move the steering wheel to the preferred
height and angle to suit your seating posi‚Äź
tion.3.Fold the lever back.Power steering wheel adjustment
The steering wheel can be adjusted in four di‚Äź
rections.
Storing the position
Seat, mirror, and steering wheel memory, refer
to page 56.
Steering wheel heating
Switching on/off Press the button.
‚Ė∑On: the LED lights up.‚Ė∑Off: the LED goes out.Seite 59AdjustingControls59
Online Edition for Part no. 01 40 2 900 579 - 03 12 490
Page 66 of 319
Starting the combustion engineEnclosed areas
Do not let the engine run in enclosed
areas; otherwise, breathing of exhaust fumes
may lead to loss of consciousness and death.
The exhaust gases contain carbon monoxide, an
odorless and colorless but highly toxic gas.‚óÄ
Unattended vehicle
Do not leave the vehicle unattended with
the engine running; doing so poses a risk of dan‚Äź
ger.
Before leaving the vehicle with the engine run‚Äź
ning, set the parking brake and place the trans‚Äź
mission in position P or neutral to prevent the
vehicle from moving.‚óÄ
Repeated starting in quick succession
Avoid repeated unsuccessful attempts to
start the vehicle or starting the vehicle several
times in quick succession. Otherwise, the fuel is
not burned or is inadequately burned, posing a
risk of overheating and damage to the catalytic
converter.‚óÄ
The combustion engine is started with Activate
drive, refer to page 65, readiness under the fol‚Äź
lowing conditions:‚Ė∑The drive system is not at operating tem‚Äź
perature.‚Ė∑The temperature of the hybrid system is too
high.‚Ė∑The high-voltage battery has an insufficient
charge.
Driving away
1.Activate drive readiness.2.Select transmission position D, M/S or R.3.Release the parking brake.4.Drive away.Deactivating drive readiness
After parking the vehicle, you may hear noises
due to operation of the hybrid system, such as
for cooling of the high-voltage battery.
After stopping the vehicle:1.Select transmission position P.2.Press the Start/Stop button.3.Set the parking brake.
Before driving into a car wash
In order for the vehicle to be able to roll into a car
wash, heed the information regarding Washing
in automatic car washes, refer to page 289.
Auto Start/Stop function
The concept
The Auto Start/Stop function helps save fuel.
The system switches off the combustion engine
when conditions for electric driving, refer to
page 67, have been met. The ignition remains
switched on. The tachometer registers 0 rpm. If
necessary, the combustion engine starts auto‚Äź
matically.
Note
The combustion engine is not switched off au‚Äź
tomatically in the following situations:
‚Ė∑The combustion engine is not yet at oper‚Äź
ating temperature.‚Ė∑The high-voltage battery charge is very low
or there is a high load on the vehicle electri‚Äź
cal system, for instance due to a high load
from automatic climate control.‚Ė∑The interior is in the heating or cooling
phase.‚Ė∑The engine compartment lid is unlocked.‚Ė∑The vehicle is being optimized for the cur‚Äź
rent driving style, for instance during the
breaking-in period or after a service appoint‚Äź
ment.Seite 66ControlsDriving66
Online Edition for Part no. 01 40 2 900 579 - 03 12 490
Page 130 of 319
Climate controlVehicle equipment
All standard, country-specific and optional
equipment that is offered in the model series is
described in this chapter. Therefore, equipmentis also described that is not available in a vehicle,
e. g., because of the selected optional equip‚Äź
ment or country variant. This also applies for
safety-related functions and systems.
Automatic climate control
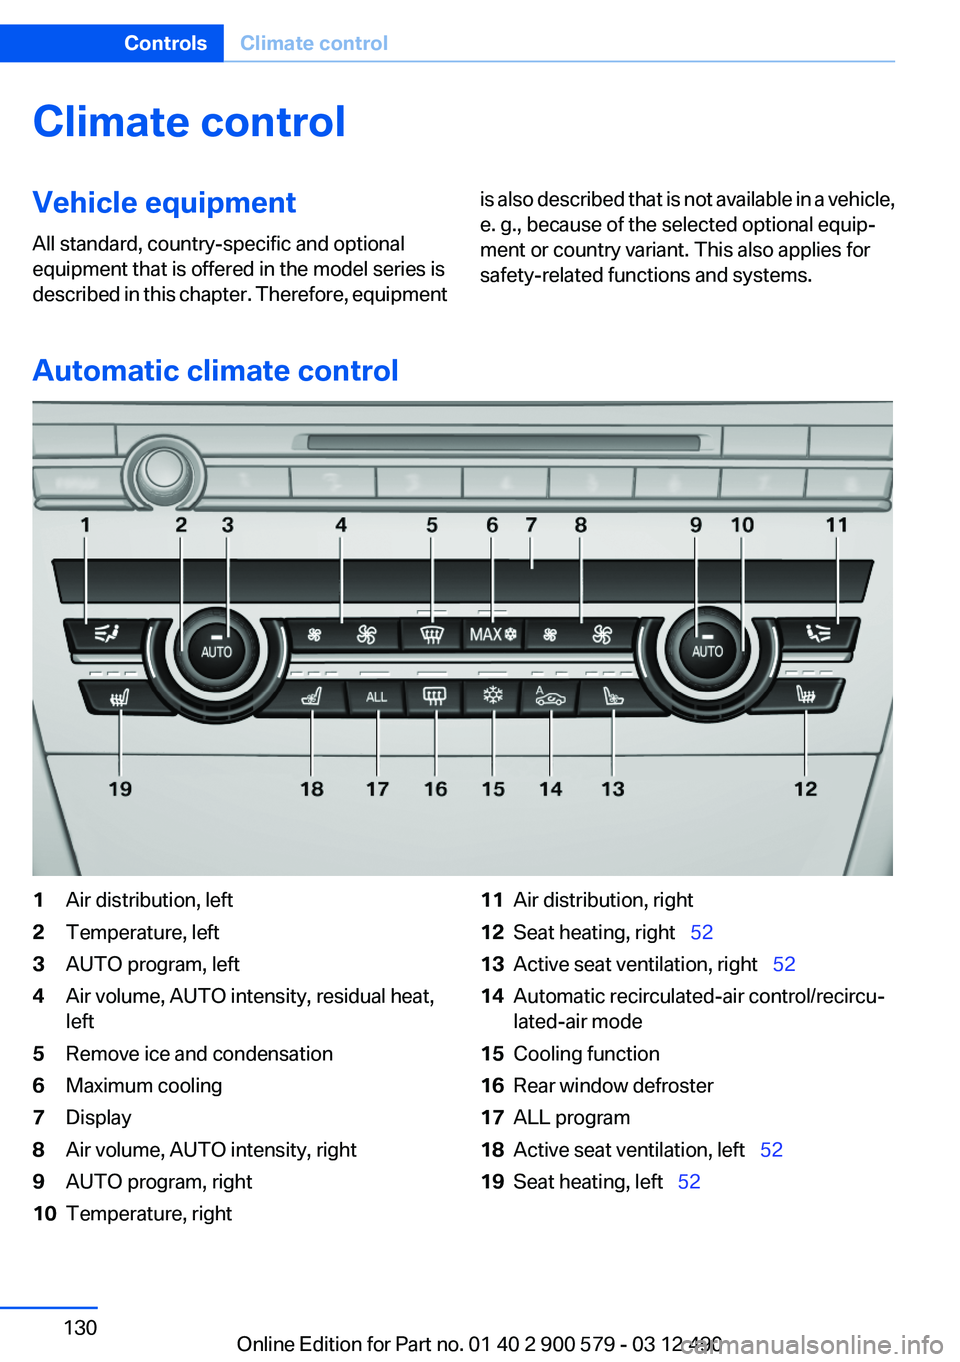
1Air distribution, left2Temperature, left3AUTO program, left4Air volume, AUTO intensity, residual heat,
left5Remove ice and condensation6Maximum cooling7Display8Air volume, AUTO intensity, right9AUTO program, right10Temperature, right11Air distribution, right12Seat heating, right‚Äā‚ÄÖ 5213Active seat ventilation, right‚Äā‚ÄÖ 5214Automatic recirculated-air control/recircu‚Äź
lated-air mode15Cooling function16Rear window defroster17ALL program18Active seat ventilation, left‚Äā‚ÄÖ 5219Seat heating, left‚Äā‚ÄÖ52Seite 130ControlsClimate control130
Online Edition for Part no. 01 40 2 900 579 - 03 12 490
Page 131 of 319
Climate control functions in detail
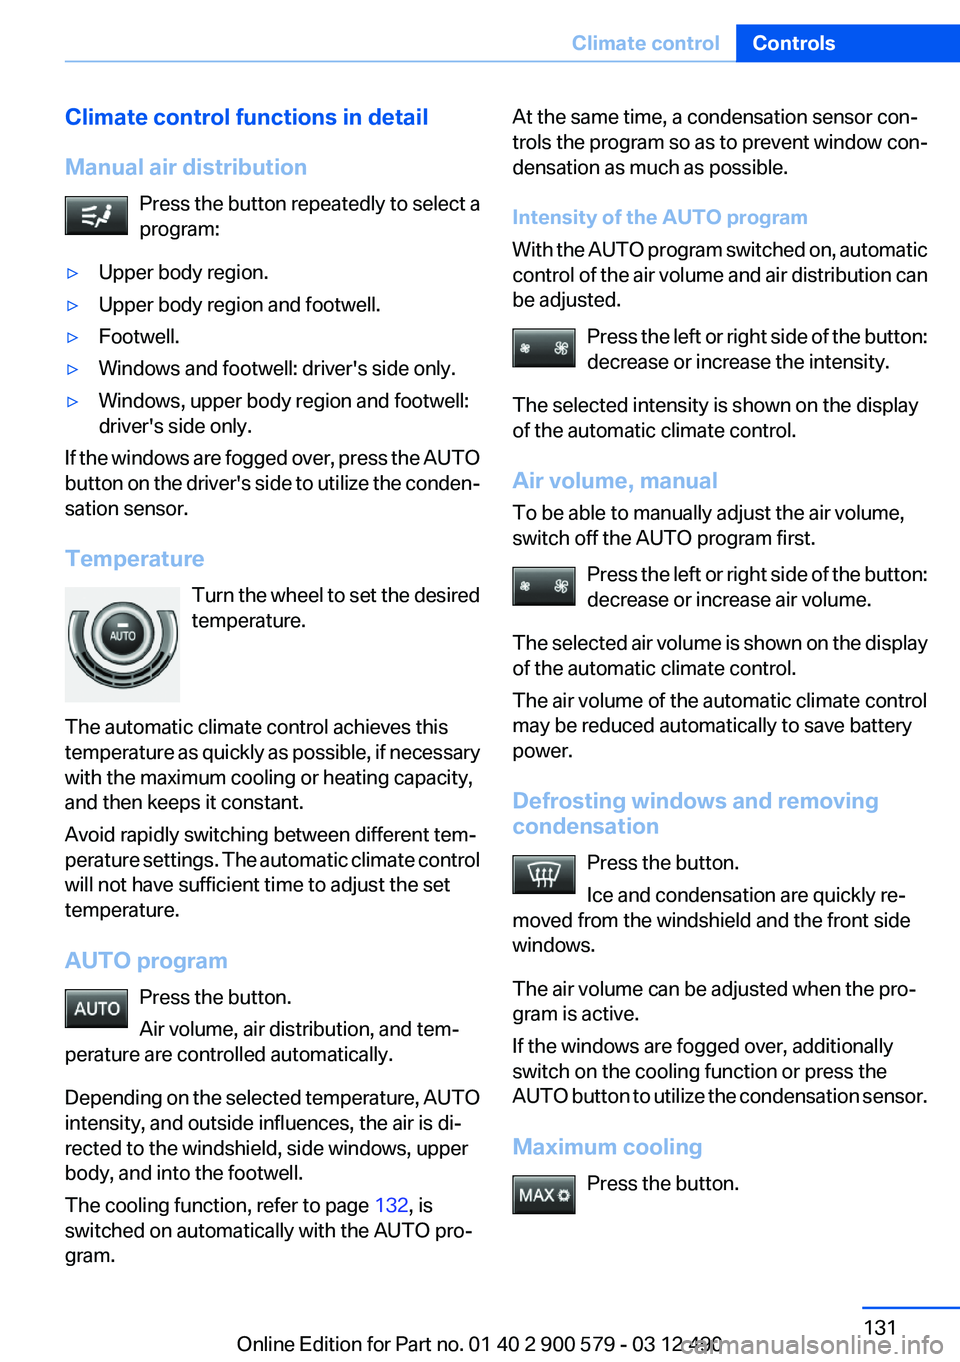
Manual air distribution Press the button repeatedly to select a
program:‚Ė∑Upper body region.‚Ė∑Upper body region and footwell.‚Ė∑Footwell.‚Ė∑Windows and footwell: driver's side only.‚Ė∑Windows, upper body region and footwell:
driver's side only.
If the windows are fogged over, press the AUTO
button on the driver's side to utilize the conden‚Äź
sation sensor.
Temperature Turn the wheel to set the desired
temperature.
The automatic climate control achieves this
temperature as quickly as possible, if necessary
with the maximum cooling or heating capacity,
and then keeps it constant.
Avoid rapidly switching between different tem‚Äź
perature settings. The automatic climate control
will not have sufficient time to adjust the set
temperature.
AUTO program Press the button.
Air volume, air distribution, and tem‚Äź
perature are controlled automatically.
Depending on the selected temperature, AUTO
intensity, and outside influences, the air is di‚Äź
rected to the windshield, side windows, upper
body, and into the footwell.
The cooling function, refer to page 132, is
switched on automatically with the AUTO pro‚Äź
gram.
At the same time, a condensation sensor con‚Äź
trols the program so as to prevent window con‚Äź
densation as much as possible.
Intensity of the AUTO program
With the AUTO program switched on, automatic
control of the air volume and air distribution can
be adjusted.
Press the left or right side of the button:
decrease or increase the intensity.
The selected intensity is shown on the display
of the automatic climate control.
Air volume, manual
To be able to manually adjust the air volume,
switch off the AUTO program first.
Press the left or right side of the button:
decrease or increase air volume.
The selected air volume is shown on the display
of the automatic climate control.
The air volume of the automatic climate control
may be reduced automatically to save battery
power.
Defrosting windows and removing
condensation
Press the button.
Ice and condensation are quickly re‚Äź
moved from the windshield and the front side
windows.
The air volume can be adjusted when the pro‚Äź
gram is active.
If the windows are fogged over, additionally
switch on the cooling function or press the
AUTO button to utilize the condensation sensor.
Maximum cooling Press the button.Seite 131Climate controlControls131
Online Edition for Part no. 01 40 2 900 579 - 03 12 490
Page 134 of 319
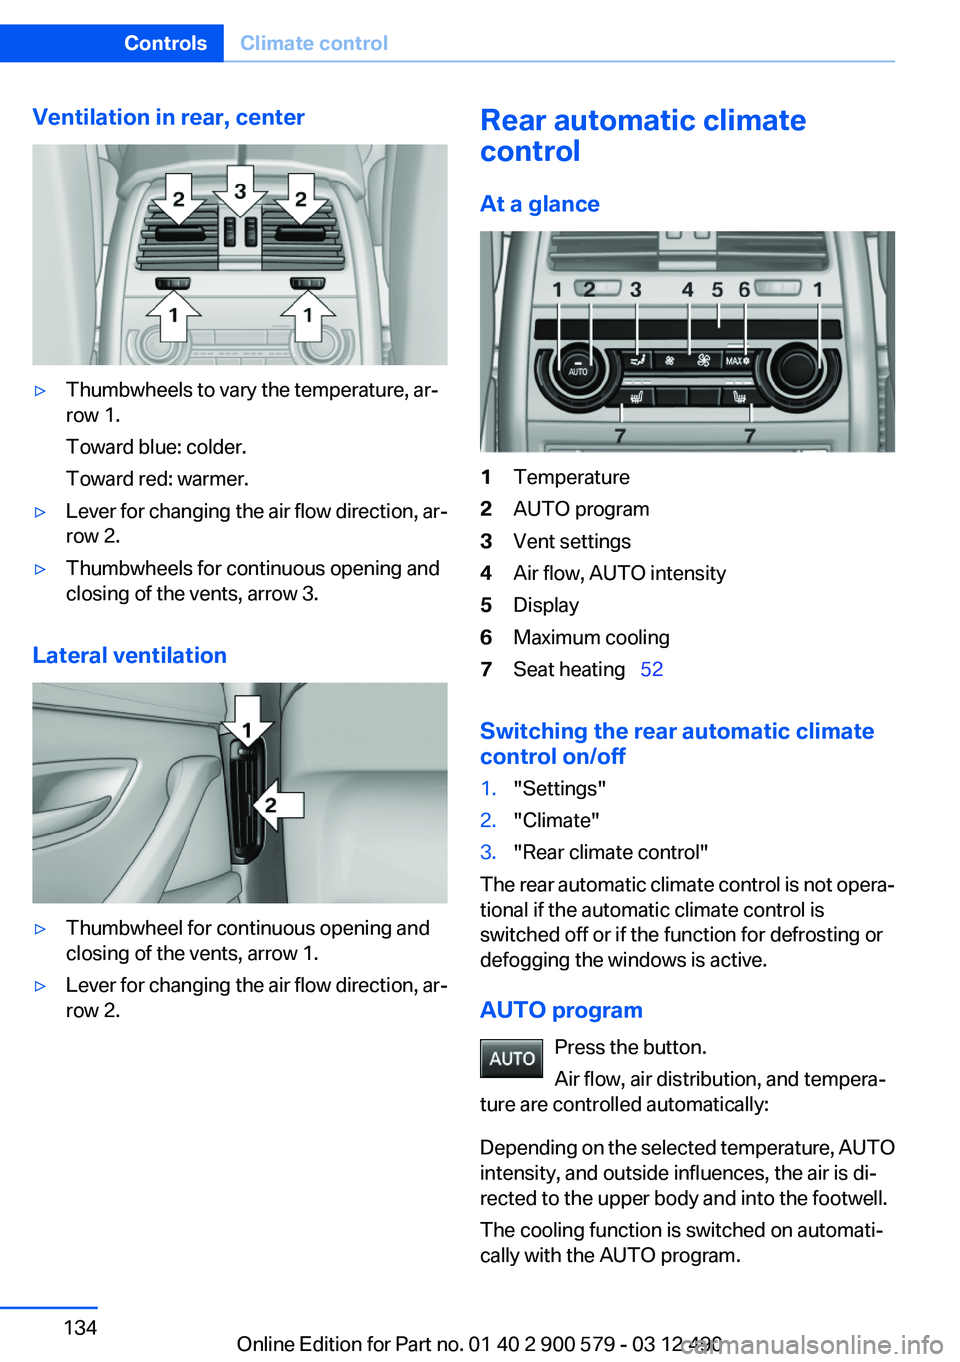
Ventilation in rear, center‚Ė∑Thumbwheels to vary the temperature, ar‚Äź
row 1.
Toward blue: colder.
Toward red: warmer.‚Ė∑Lever for changing the air flow direction, ar‚Äź
row 2.‚Ė∑Thumbwheels for continuous opening and
closing of the vents, arrow 3.
Lateral ventilation
‚Ė∑Thumbwheel for continuous opening and
closing of the vents, arrow 1.‚Ė∑Lever for changing the air flow direction, ar‚Äź
row 2.Rear automatic climate
control
At a glance1Temperature2AUTO program3Vent settings4Air flow, AUTO intensity5Display6Maximum cooling7Seat heating‚Äā‚ÄÖ 52
Switching the rear automatic climate
control on/off
1."Settings"2."Climate"3."Rear climate control"
The rear automatic climate control is not opera‚Äź
tional if the automatic climate control is
switched off or if the function for defrosting or
defogging the windows is active.
AUTO program Press the button.
Air flow, air distribution, and tempera‚Äź
ture are controlled automatically:
Depending on the selected temperature, AUTO
intensity, and outside influences, the air is di‚Äź
rected to the upper body and into the footwell.
The cooling function is switched on automati‚Äź
cally with the AUTO program.
Seite 134ControlsClimate control134
Online Edition for Part no. 01 40 2 900 579 - 03 12 490
Page 135 of 319
Intensity of the AUTO program
With the AUTO program switched on, automatic
control of the air flow and air distribution can be
adjusted.
Press the left or right side of the button:
decrease or increase the intensity.
The selected intensity is shown on the display
of the automatic climate control.
Temperature Turn the wheel to set the desired
temperature.
The automatic climate control achieves this
temperature as quickly as possible, if necessary
by using the maximum cooling or heating ca‚Äź
pacity, and then keeps it constant.
Avoid rapidly switching between different tem‚Äź
perature settings. The automatic climate control
will not have sufficient time to adjust the set
temperature.
Manual air distribution
The air distribution can be adjusted to individual
needs.
Press the button repeatedly to select a
program:‚Ė∑Upper body region.‚Ė∑Upper body region and footwell.‚Ė∑Footwell.
Air flow, manual
To be able to manually adjust the air flow, switch
off the AUTO program first.
Press the left or right side of the button:
decrease or increase air flow.
The selected air flow is shown on the display of
the automatic climate control.
Switching the system on/off
Switching off At the lowest fan speed, press the left
side of the button on the driver's side.
Switching on
Press any button.
Maximum cooling Press the button.
The system is set to the lowest tem‚Äź
perature, maximum air flow and recirculated-air
mode.
Air flows out of the vents for the upper body re‚Äź
gion. Open them for this purpose.
Air is cooled as quickly as possible:‚Ė∑At an external temperature of approx.
32 ‚ĄČ/0 ‚ĄÉ.‚Ė∑When the engine is running.
Residual cooling
When the automatic climate control has re‚Äź
duced the interior temperature, this tempera‚Äź
ture can also be maintained after the combus‚Äź
tion engine has been switched off. This function
can be activated up to 15 minutes after the en‚Äź
gine is switched off and for a maximum period of
6 minutes.
Functional requirement
‚Ė∑The high-voltage battery is sufficiently
charged.‚Ė∑Min. external temperature 59 ‚ĄČ/15 ‚ĄÉ.
Switching on
1.Switch off the ignition.2. Press the right side of the button on
the driver's side.
Seite 135Climate controlControls135
Online Edition for Part no. 01 40 2 900 579 - 03 12 490
Page 136 of 319
The symbol appears on the automatic climate
control display.
The interior temperature, air flow and air distri‚Äź
bution can be adjusted with the radio ready state
switched on.
Switching off At the lowest fan speed, press the left
side of the button on the driver's side.
The symbol on the automatic climate control
display disappears.
Parked-car ventilation
The concept
The parked-car ventilation ventilates the vehicle
interior and lowers its temperature, if necessary.
The system can be switched on and off directly
or by using two preset switch-on times. It re‚Äź
mains switched on for 30 minutes.
Operation can be performed via iDrive.
Open the vents to allow air to flow out.
Functional requirement
‚Ė∑When using a preset switch-on time: an ex‚Äź
ternal temperature above ap‚Äź
prox. 59 ‚ĄČ/15 ‚ĄÉ.‚Ė∑When operated directly and if there is no
parked-car heating: any external tempera‚Äź
ture.
Switching on/off directly
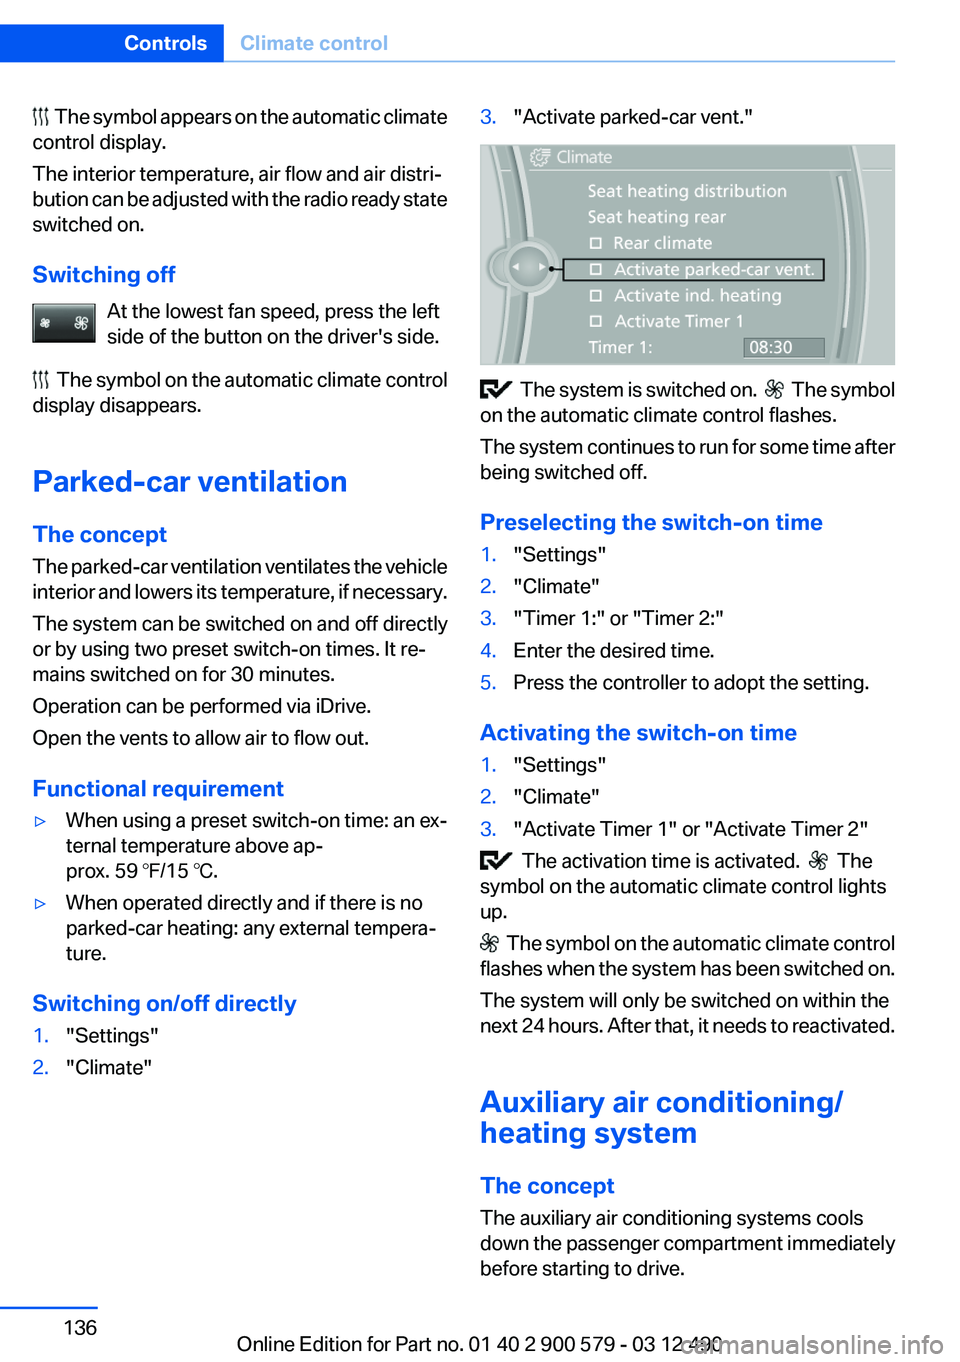
1."Settings"2."Climate"3."Activate parked-car vent."
The system is switched on. The symbol
on the automatic climate control flashes.
The system continues to run for some time after
being switched off.
Preselecting the switch-on time
1."Settings"2."Climate"3."Timer 1:" or "Timer 2:"4.Enter the desired time.5.Press the controller to adopt the setting.
Activating the switch-on time
1."Settings"2."Climate"3."Activate Timer 1" or "Activate Timer 2"
The activation time is activated. The
symbol on the automatic climate control lights
up.
The symbol on the automatic climate control
flashes when the system has been switched on.
The system will only be switched on within the
next 24 hours. After that, it needs to reactivated.
Auxiliary air conditioning/
heating system
The concept
The auxiliary air conditioning systems cools
down the passenger compartment immediately
before starting to drive.
Seite 136ControlsClimate control136
Online Edition for Part no. 01 40 2 900 579 - 03 12 490