transmission BMW CONVERTIBLE 1998 Owners Manual
[x] Cancel search | Manufacturer: BMW, Model Year: 1998, Model line: CONVERTIBLE, Model: BMW CONVERTIBLE 1998Pages: 179, PDF Size: 3.51 MB
Page 11 of 179
Contents
At a glance
Controls and features
Cockpit16
Instrument cluster18
Indicator and warning
lamps20
Hazard warning system22
Hazard warning triangle22
First-aid kit22
Refueling23
Fuel specification23
CARB OBD II interface24
Tire inflation pressures25
Locks and security systems:
Keys30
Electronic immobilizing device35
Doors31
Trunk lid33
Luggage compartment34
Power windows35
Sliding/tilt sunroof36
Convertible top operation37
Adjustments:
Seats43
Steering wheel45
Mirrors46
Passenger safety systems:
Safety belts47
Child restraint system48
Installing child seats49
Airbags50
Child-safety locks52
Rollover protection system Ð
convertible52
Driving:
Steering/ignition lock54
Starting the engine54
Switching off the engine55
Parking brake56
Manual transmission57
Automatic transmission58
Turn signals/high beam60
Wiper/washer system61
Cruise control62
Everything under control:
Odometer63
Tachometer63
Energy control63
Fuel gauge64
Coolant temperature gauge64
Service Interval Display64
Multi-Information Display (MID)66
Outside temperature display
and digital clock68
Check Control71
Check Control with outside
temperature display and
digital clock74
Onboard computer77
Technology for driving comfort
and safety:
Automatic stability control
plus traction (ASC+T)84
Page 20 of 179
Controls and features MaintenanceAt a glanceControls Car care Repairs Technical Data Index
19
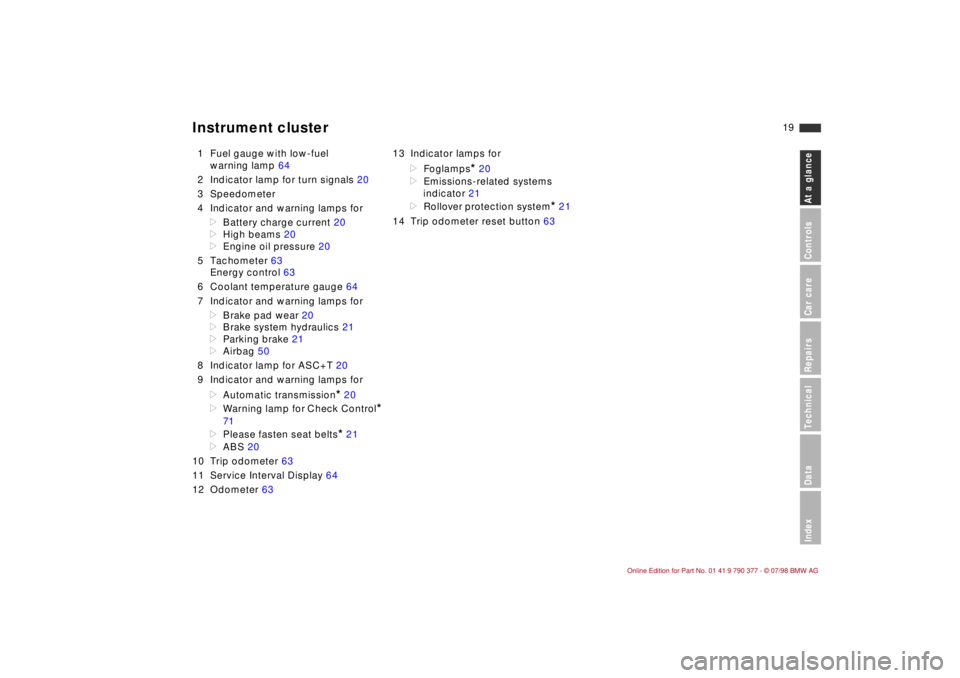
1 Fuel gauge with low-fuel
warning lamp 64
2 Indicator lamp for turn signals 20
3 Speedometer
4 Indicator and warning lamps for
d
Battery charge current 20
d
High beams 20
d
Engine oil pressure 20
5 Tachometer 63
Energy control 63
6 Coolant temperature gauge 64
7 Indicator and warning lamps for
d
Brake pad wear 20
d
Brake system hydraulics 21
d
Parking brake 21
d
Airbag 50
8 Indicator lamp for ASC+T 20
9 Indicator and warning lamps for
d
Automatic transmission
*
20
d
Warning lamp for Check Control
*
71
d
Please fasten seat belts
*
21
d
ABS 20
10 Trip odometer 63
11 Service Interval Display 64
12 Odometer 6313 Indicator lamps for
d
Foglamps
*
20
d
Emissions-related systems
indicator 21
d
Rollover protection system
*
21
14 Trip odometer reset button 63
Instrument cluster
Page 21 of 179
20
Turn signal left/right, green
k
Flashes when the turn signals
are in operation.
Battery charge current, red
v
Goes out after the engine has
started.
If the lamp comes on during
normal vehicle operation:
The battery is no longer being charged.
Indicates a defect in the generator drive
belt or the charging circuit.
a
If the V-belt is defective, do not run
the coolant pump; overheating and
potential engine damage would result.
Contact your BMW Retailer.
c
High beam, blue
l
Lights up when the high beams
are switched on or the head-
lamp flashers are activated.
Engine oil pressure, redw
Goes out after the engine has
started. May come on briefly at
idle when the engine is hot,
but must go out again at higher engine
speed.
If the lamp comes on during normal vehi-
cle operation: stop vehicle and switch off
engine immediately. Check engine oil
level; if necessary, add oil. If oil level is
correct: contact your BMW Retailer.
Foglamps
*, green
t
Lights up whenever you switch
on the foglamps.
Airbags, redp
This lamp turns on for an oper-
ational check when you turn the
ignition key to position 1. If, at
the operation check, it does not go on,
or goes on while driving, have it checked
at your BMW Retailer.
Additional notes: Page 50
Automatic transmission
*, yellow
O
Goes out after the engine has
started.
Additional notes: Page 58
ASC+T (Automatic Stability
Control plus Traction), yellows
Goes out shortly after the igni-
tion is switched on:
System OK.
Additional notes: Page 84
ABS (Antilock Brake System),
yellowo
Goes out after the engine has
started. If the lamp comes on
during normal vehicle opera-
tion: ABS has been deactivated in
response to a system malfunction. Con-
ventional braking force remains unim-
paired.
Additional notes: Page 103
Brake pad wear, yellow#
Lights up when starter is actu-
ated and goes out when the
engine is started.
If the lamp comes on during normal
vehicle operation: replace brake pads
immediately.
a
Use only original BMW-approved
brake pads otherwise the vehicle
authorization is no longer valid.c
Indicator and warning lamps
Page 29 of 179
28
Locks and security systems:
Keys30
Electronic vehicle immobilizer 30
Doors31
Luggage compartment lid33
Luggage compartment34
Power windows35
Sliding/tilt sunroof36
Convertible top operation37
Adjustments:
Seats43
Steering wheel45
Mirrors46
Passenger safety systems:
Safety belts47
Child restraint system48
Installing child seats49
Airbags50
Child-safety locks52
Rollover protection system Ð
convertible52Driving:
Steering/ignition lock54
Starting the engine54
Switching off the engine55
Parking brake56
Manual transmission57
Automatic transmission58
Turn signals/high beam60
Wiper/washer system61
Cruise control62
Everything under control:
Odometer63
Tachometer63
Energy control63
Fuel gauge64
Coolant temperature gauge64
Service Interval Display64
Multi-Information Display (MID)66
Outside temperature display
and digital clock68
Check Control71
Check Control with outside
temperature display and
digital clock74
Onboard computer77
Page 56 of 179
55
At a glanceControls Car careRepairsTechnicalDataIndex
When starting a cold engine at extreme-
ly low temperatures (+55F/-156 or be-
low) or at high altitudes (above 3,300 ft./
1,000 meters), proceed as follows:
dAt the first attempt, keep the starter
engaged for a bit longer (approx.
10 seconds).
dPress the accelerator pedal halfway
down while engaging the starter.
If you operate the vehicle for longer
periods of time at high altitudes and
very low temperatures, put into the
engine an oil with a viscosity of 5WÐ30
(refer to page 126). Please contact your
authorized BMW Retailer for additional
information.a
Never allow the engine to run with
the vehicle standing in an enclosed ar-
ea. The exhaust gases contain carbon
monoxide, an odorless and colorless,
but highly toxic gas. Breathing the ex-
haust gases poses an extreme health
risk, and can lead to unconsciousness
and death.
Never leave the vehicle unattended with
the engine running, as such a vehicle
represents a serious potential safety
hazard.cTurn the ignition key to position 1 or 0.
a
Always remove the ignition key
and engage the steering lock before
leaving the vehicle.
Vehicles with manual transmission:
Always engage the parking brake when
parking on slopes and inclined surfaces,
since selecting 1st gear or reverse may
not provide adequate resistance to roll-
ing.
Vehicles with automatic transmission:
Place the selector lever in Park.c
Starting the engine Switching off the engine
Page 57 of 179
56
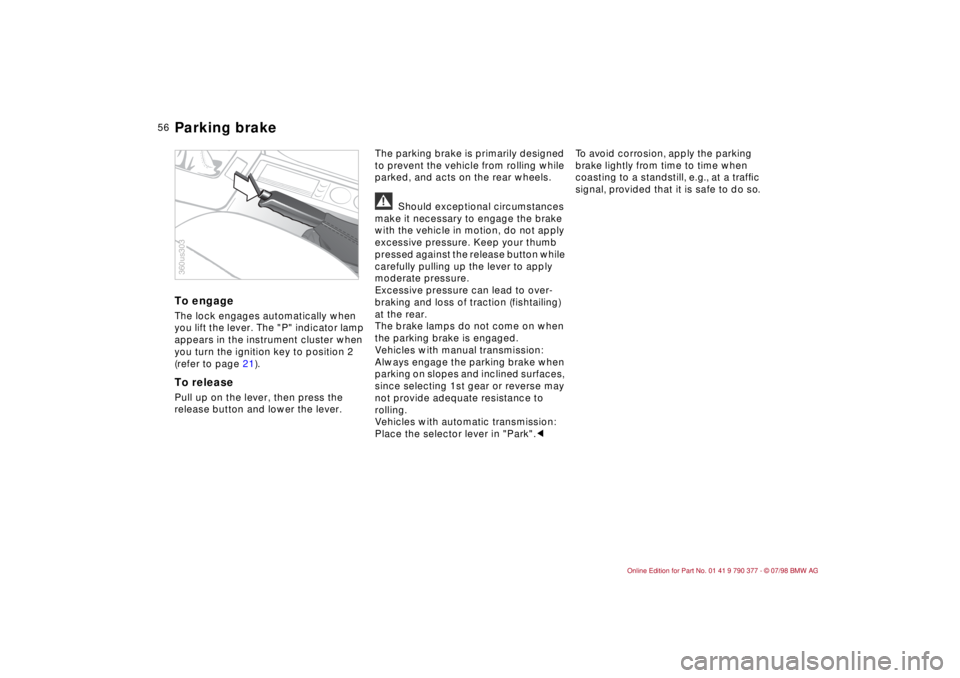
To engageThe lock engages automatically when
you lift the lever. The "P" indicator lamp
appears in the instrument cluster when
you turn the ignition key to position 2
(refer to page 21).To releasePull up on the lever, then press the
release button and lower the lever.The parking brake is primarily designed
to prevent the vehicle from rolling while
parked, and acts on the rear wheels.
a
Should exceptional circumstances
make it necessary to engage the brake
with the vehicle in motion, do not apply
excessive pressure. Keep your thumb
pressed against the release button while
carefully pulling up the lever to apply
moderate pressure.
Excessive pressure can lead to over-
braking and loss of traction (fishtailing)
at the rear.
The brake lamps do not come on when
the parking brake is engaged.
Vehicles with manual transmission:
Always engage the parking brake when
parking on slopes and inclined surfaces,
since selecting 1st gear or reverse may
not provide adequate resistance to
rolling.
Vehicles with automatic transmission:
Place the selector lever in "Park".cTo avoid corrosion, apply the parking
brake lightly from time to time when
coasting to a standstill, e.g., at a trafÞc
signal, provided that it is safe to do so.
360us303Parking brake
Page 58 of 179
57
At a glanceControls Car careRepairsTechnicalDataIndex
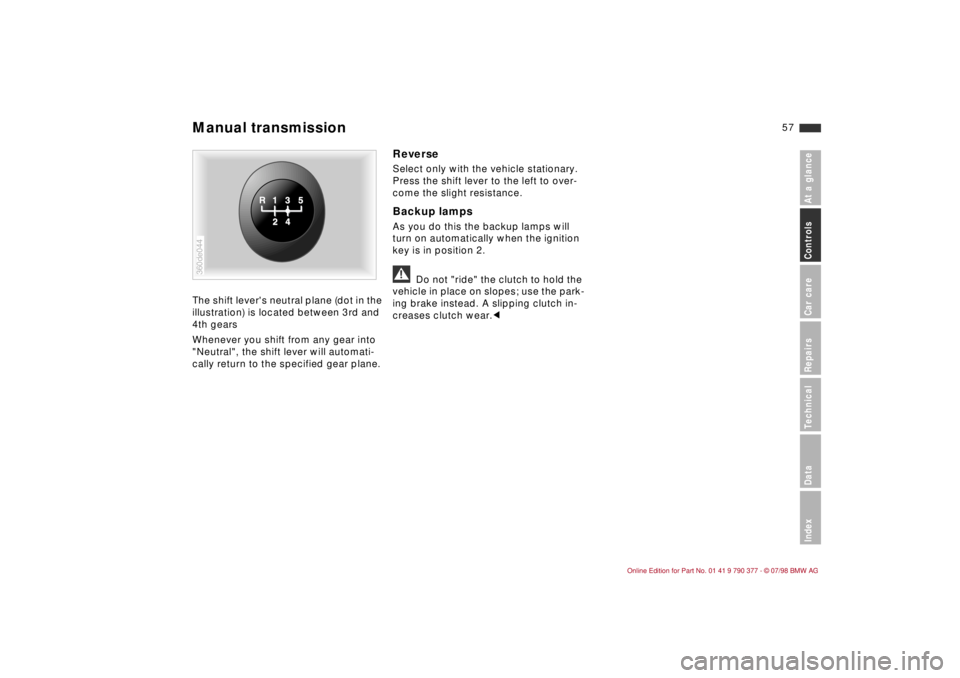
The shift lever's neutral plane (dot in the
illustration) is located between 3rd and
4th gears
Whenever you shift from any gear into
"Neutral", the shift lever will automati-
cally return to the specified gear plane.
ReverseSelect only with the vehicle stationary.
Press the shift lever to the left to over-
come the slight resistance.Backup lampsAs you do this the backup lamps will
turn on automatically when the ignition
key is in position 2.a
Do not "ride" the clutch to hold the
vehicle in place on slopes; use the park-
ing brake instead. A slipping clutch in-
creases clutch wear.c
360de044Manual transmission
Page 59 of 179
58
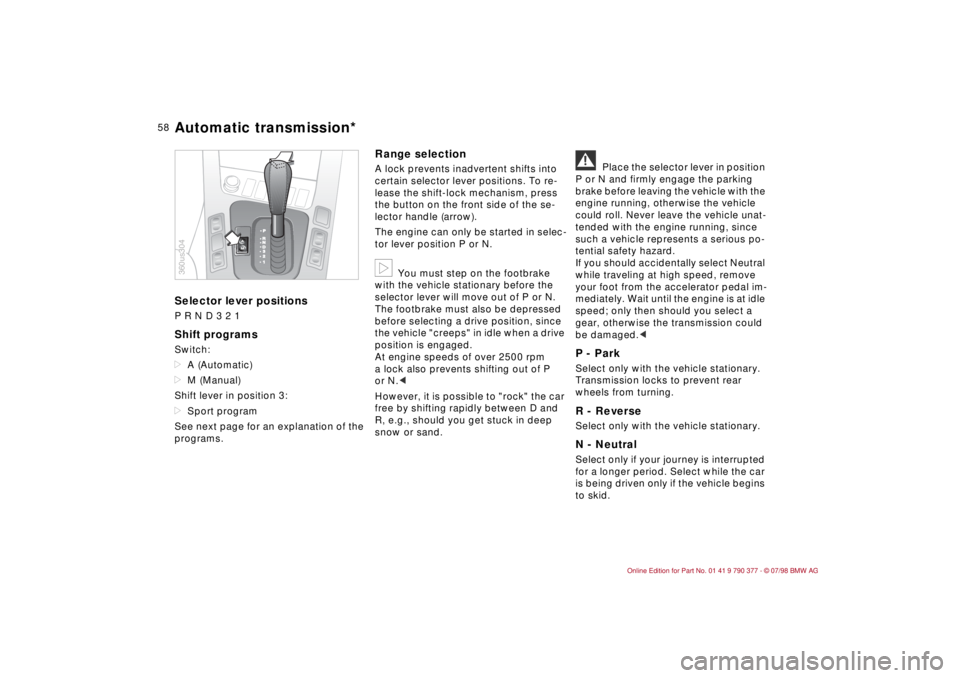
Selector lever positionsP R N D 3 2 1Shift programsSwitch:
dA (Automatic)
dM (Manual)
Shift lever in position 3:
dSport program
See next page for an explanation of the
programs.
Range selectionA lock prevents inadvertent shifts into
certain selector lever positions. To re-
lease the shift-lock mechanism, press
the button on the front side of the se-
lector handle (arrow).
The engine can only be started in selec-
tor lever position P or N.b
You must step on the footbrake
with the vehicle stationary before the
selector lever will move out of P or N.
The footbrake must also be depressed
before selecting a drive position, since
the vehicle "creeps" in idle when a drive
position is engaged.
At engine speeds of over 2500 rpm
a lock also prevents shifting out of P
or N.c
However, it is possible to "rock" the car
free by shifting rapidly between D and
R, e.g., should you get stuck in deep
snow or sand.
a
Place the selector lever in position
P or N and firmly engage the parking
brake before leaving the vehicle with the
engine running, otherwise the vehicle
could roll. Never leave the vehicle unat-
tended with the engine running, since
such a vehicle represents a serious po-
tential safety hazard.
If you should accidentally select Neutral
while traveling at high speed, remove
your foot from the accelerator pedal im-
mediately. Wait until the engine is at idle
speed; only then should you select a
gear, otherwise the transmission could
be damaged.c
P - ParkSelect only with the vehicle stationary.
Transmission locks to prevent rear
wheels from turning.R - ReverseSelect only with the vehicle stationary.N - NeutralSelect only if your journey is interrupted
for a longer period. Select while the car
is being driven only if the vehicle begins
to skid.
360us304Automatic transmission*
Page 60 of 179
59
At a glanceControls Car careRepairsTechnicalDataIndex
D - Drive (automatic shift program)This position is designed for driving
under all normal operating conditions.
All forward gears are selected by the
transmission as necessary. 3 - Sport Program, direct controlThis position is designed for perfor-
mance-oriented driving, and features
delayed upshifts for optimal utilization
of the vehicle's power reserves.
When D is engaged, the transmission
may respond to certain conditions by
repeatedly shifting between 3rd and 4th
gears. You can select this position to
suppress upshifts into 4th gear and pre-
vent the transmission from "hunting" in
this way.
2 and 1 - Mountain ascents and
engine brakingSelect these positions to prevent un-
desired shifts on mountain roads or
extended uphill and downhill stretches.
These ranges let you use the engine's
braking effect to maximum advantage.
The transmission upshifts only as far as
the selected gear (1st or 2nd).
Do not move the selector lever to either
of these positions when traveling at
speeds of 108 mph (170 km/h) or
above. The transmission downshifts
only at correspondingly low speeds."Kickdown" (automatic downshift)To obtain maximum acceleration, the
accelerator pedal can be depressed
beyond the normal to the full-throttle
position, at which a pressure point must
be overcome.
Shift programsA - Automatic program
For economical driving. This is the initial
position each time the engine is started.
M - Manual program
This program is for driving conditions
under which the selected gear is to be
retained. The transmission then remains
in this gear both when starting off and
during acceleration. With this program
you drive only in 3rd gear in position D.
It is advantageous, e.g., on slopes or
when towing a trailer, to drive in selec-
tor lever position 1 or 2, or in winter on
slippery roads in selector lever position
3, which enables gentle starts and pre-
vents undesirable shifting.
Automatic transmission*
Page 61 of 179
60
Indicator lamp for shift
electronicsdIf the lamp fails to go out or
dif it lights up during driving, there is a
malfunction in the shifting electronics
or in the transmission.
Bring the vehicle to a stop, select trans-
mission position "P", set the parking
brake and turn the engine off (ignition
key to position 0).
Wait a few seconds, then start the
engine.
If the indicator lamp goes out after a
few seconds, normal transmission per-
formance has been restored. Drive off
normally.
If the indicator lamp does not go out, all
selector lever positions can still be
selected, however in the forward posi-
tions the vehicle has limited perfor-
mances as it drives only in the 3rd or
4th gear.
If this happens, avoid extreme engine
loads and consult the nearest autho-
rized BMW Retailer.
a
Never carry out any work in the
engine compartment without first
ensuring that the transmission is in Park
or Neutral. Never leave children in the
vehicle unattended.c
For information on tow-starting, towing
and jump starting refer to pages 153
and 154.
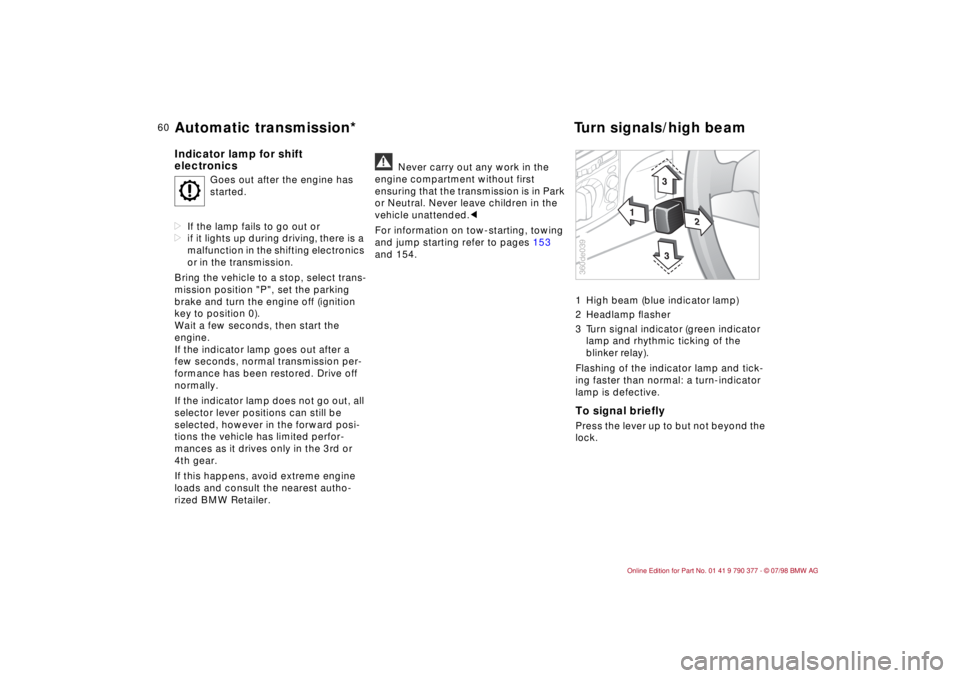
1 High beam (blue indicator lamp)
2 Headlamp ßasher
3 Turn signal indicator (green indicator
lamp and rhythmic ticking of the
blinker relay).
Flashing of the indicator lamp and tick-
ing faster than normal: a turn-indicator
lamp is defective.
To signal brieflyPress the lever up to but not beyond the
lock.
O
Goes out after the engine has
started.
1
2
3
3
360de039
Automatic transmission*Turn signals/high beam