BMW M6 COUPE 2010 E63 Manual PDF
Manufacturer: BMW, Model Year: 2010, Model line: M6 COUPE, Model: BMW M6 COUPE 2010 E63Pages: 250, PDF Size: 8.4 MB
Page 71 of 250
Controls
69Reference
At a glance
Driving tips
Communications
Navigation
Entertainment
Mobility
iDrive, for operating principle refer to page16.
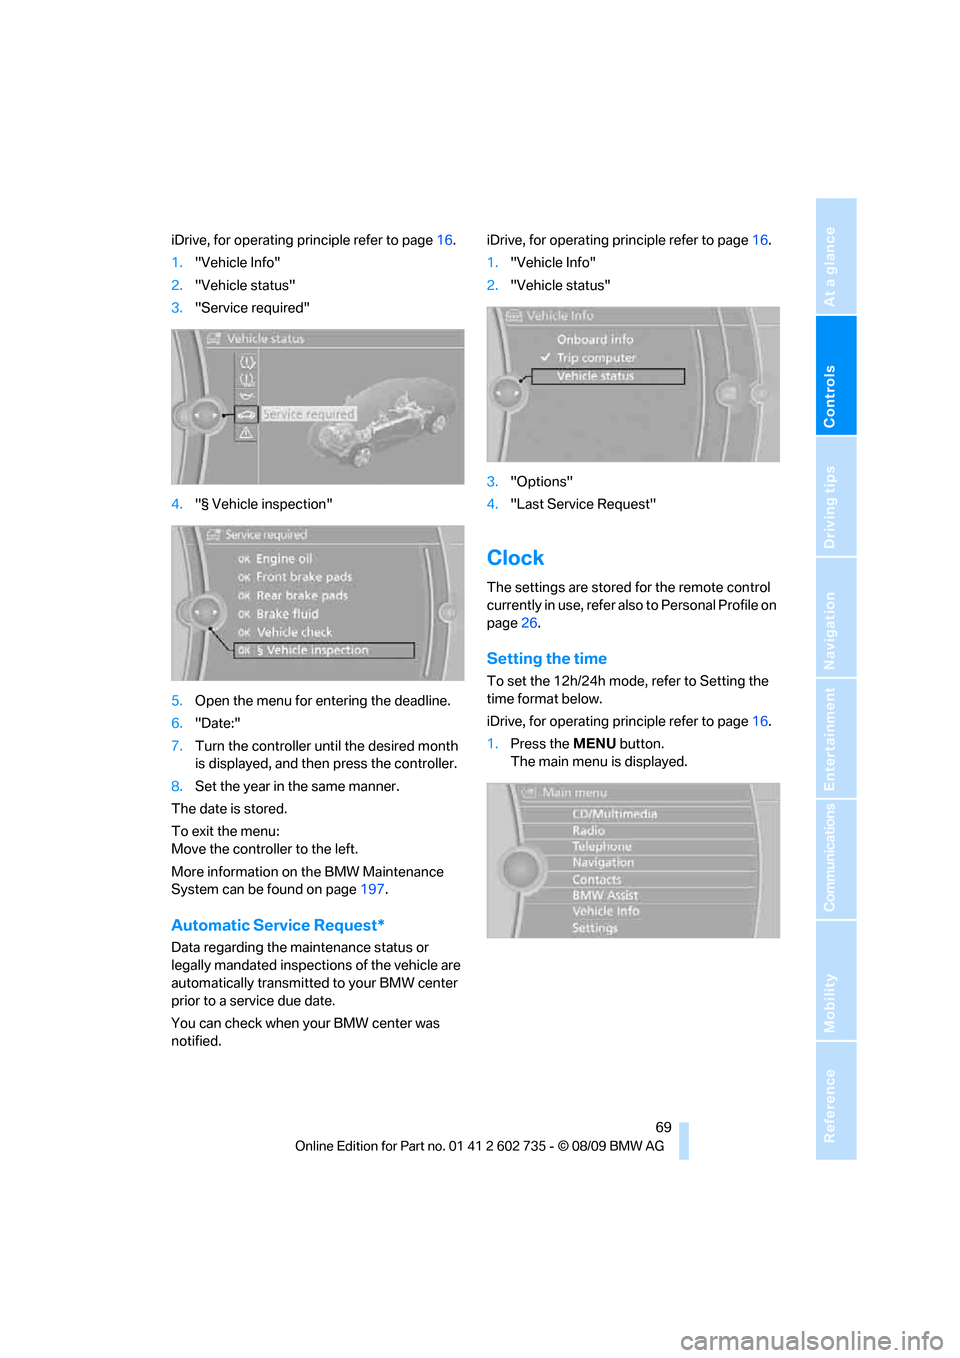
1."Vehicle Info"
2."Vehicle status"
3."Service required"
4."§ Vehicle inspection"
5.Open the menu for entering the deadline.
6."Date:"
7.Turn the controller until the desired month
is displayed, and then press the controller.
8.Set the year in the same manner.
The date is stored.
To exit the menu:
Move the controller to the left.
More information on the BMW Maintenance
System can be found on page197.
Automatic Service Request*
Data regarding the maintenance status or
legally mandated inspections of the vehicle are
automatically transmitted to your BMW center
prior to a service due date.
You can check when your BMW center was
notified.iDrive, for operating principle refer to page16.
1."Vehicle Info"
2."Vehicle status"
3."Options"
4."Last Service Request"
Clock
The settings are stored for the remote control
currently in use, refer also to Personal Profile on
page26.
Setting the time
To set the 12h/24h mode, refer to Setting the
time format below.
iDrive, for operating principle refer to page16.
1.Press the MENU button.
The main menu is displayed.
Page 72 of 250
Controls Overview
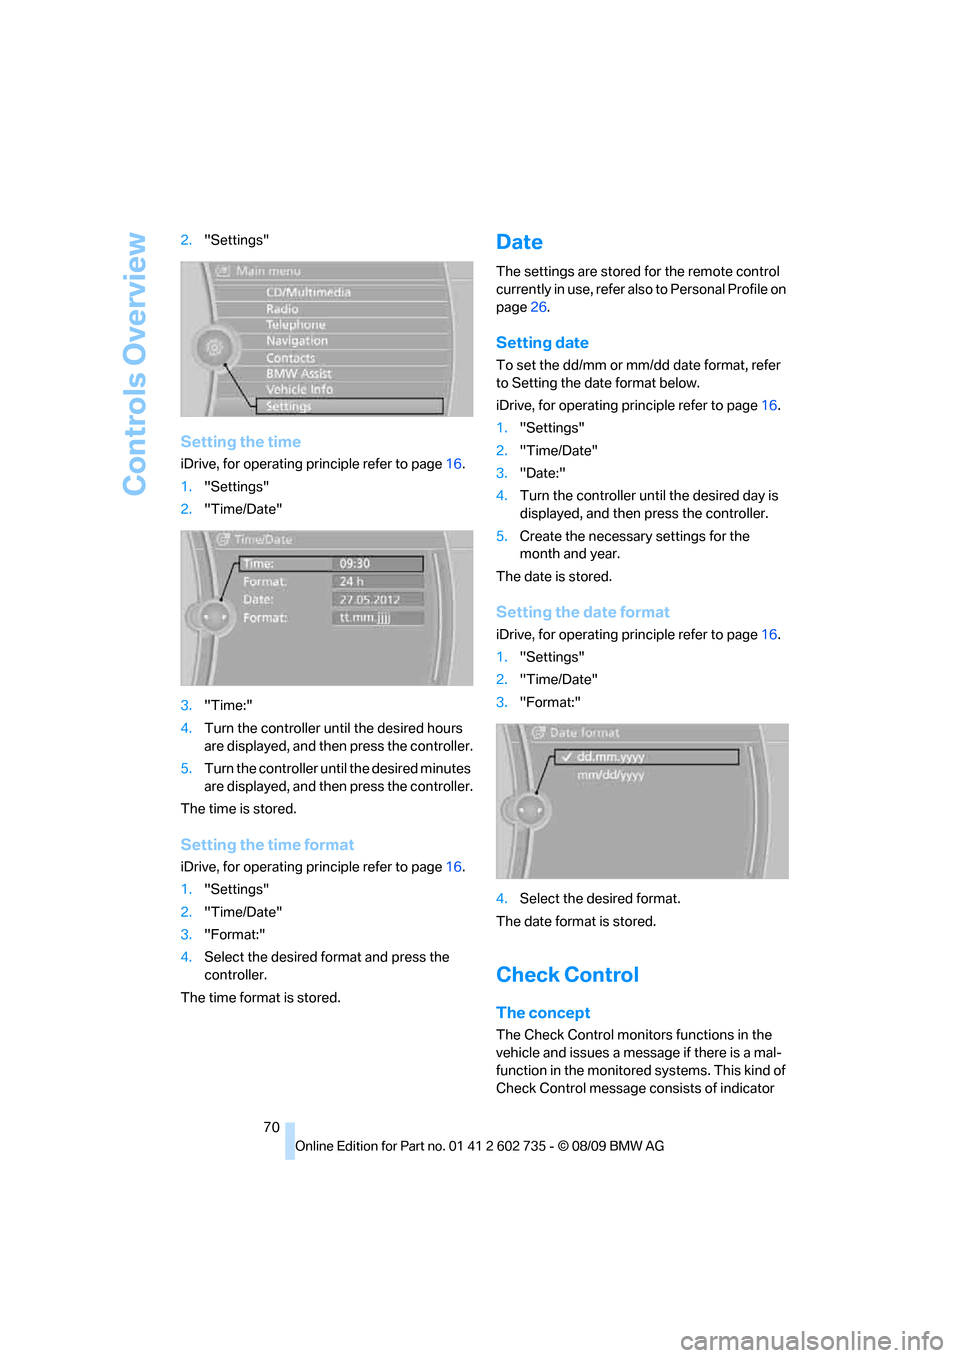
70 2."Settings"
Setting the time
iDrive, for operating principle refer to page16.
1."Settings"
2."Time/Date"
3."Time:"
4.Turn the controller until the desired hours
are displayed, and then press the controller.
5.Turn the controller until the desired minutes
are displayed, and then press the controller.
The time is stored.
Setting the time format
iDrive, for operating principle refer to page16.
1."Settings"
2."Time/Date"
3."Format:"
4.Select the desired format and press the
controller.
The time format is stored.
Date
The settings are stored for the remote control
currently in use, refer also to Personal Profile on
page26.
Setting date
To set the dd/mm or mm/dd date format, refer
to Setting the date format below.
iDrive, for operating principle refer to page16.
1."Settings"
2."Time/Date"
3."Date:"
4.Turn the controller until the desired day is
displayed, and then press the controller.
5.Create the necessary settings for the
month and year.
The date is stored.
Setting the date format
iDrive, for operating principle refer to page16.
1."Settings"
2."Time/Date"
3."Format:"
4.Select the desired format.
The date format is stored.
Check Control
The concept
The Check Control monitors functions in the
vehicle and issues a message if there is a mal-
function in the monitored systems. This kind of
Check Control message consists of indicator
Page 73 of 250
Controls
71Reference
At a glance
Driving tips
Communications
Navigation
Entertainment
Mobility
and warning lamps in the instrument cluster,
and if necessary an acoustic signal and text
messages at the bottom of the Control Display.
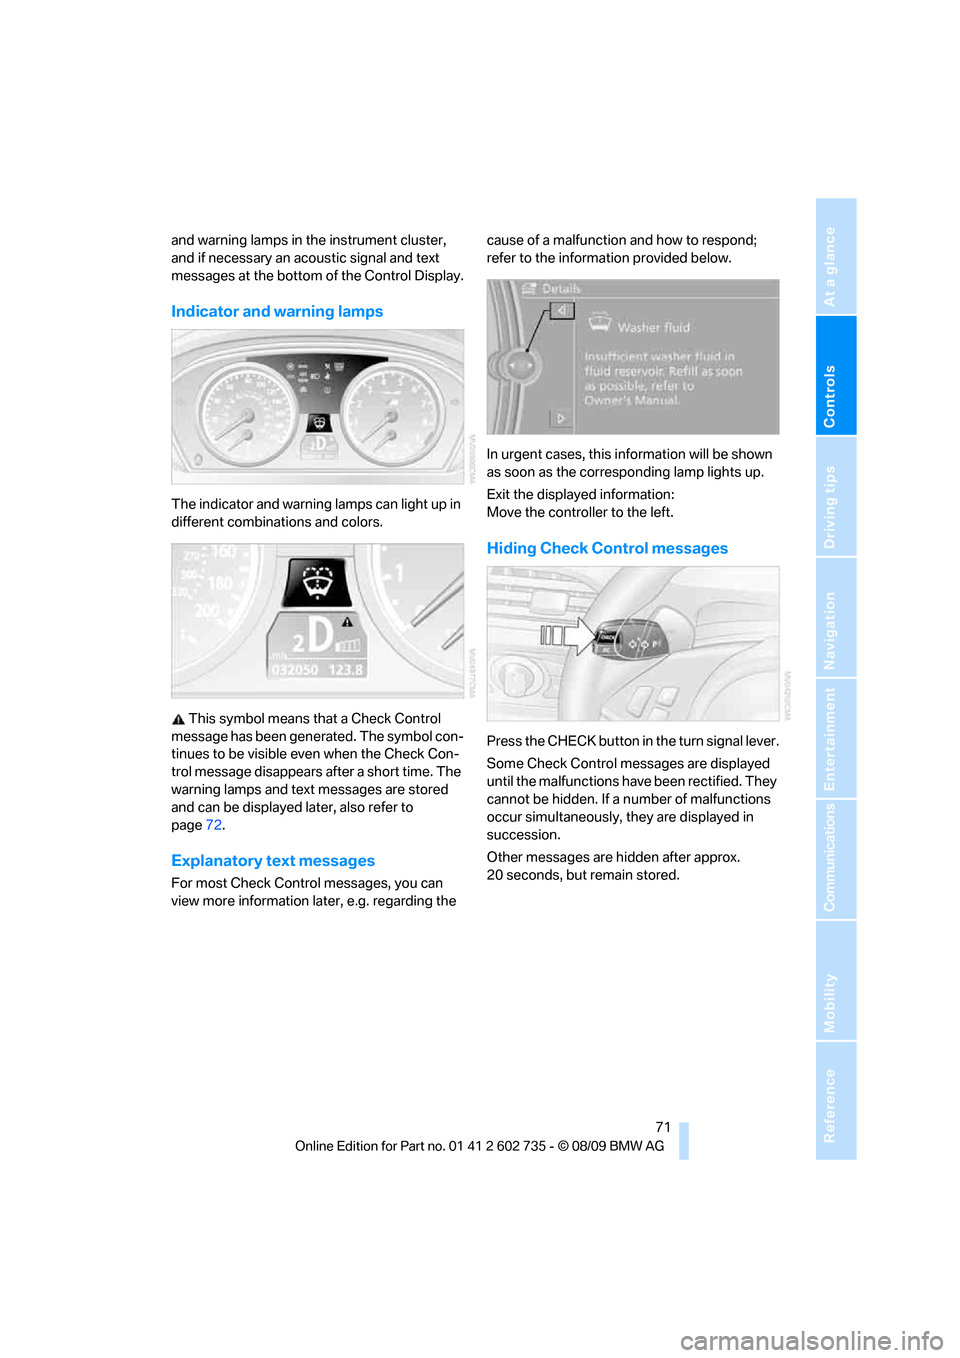
Indicator and warning lamps
The indicator and warning lamps can light up in
different combinations and colors.
This symbol means that a Check Control
message has been generated. The symbol con-
tinues to be visible even when the Check Con-
trol message disappears after a short time. The
warning lamps and text messages are stored
and can be displayed later, also refer to
page72.
Explanatory text messages
For most Check Control messages, you can
view more information later, e.g. regarding the cause of a malfunction and how to respond;
refer to the information provided below.
In urgent cases, this information will be shown
as soon as the corresponding lamp lights up.
Exit the displayed information:
Move the controller to the left.
Hiding Check Control messages
Press the CHECK button in the turn signal lever.
Some Check Control messages are displayed
until the malfunctions have been rectified. They
cannot be hidden. If a number of malfunctions
occur simultaneously, they are displayed in
succession.
Other messages are hidden after approx.
20 seconds, but remain stored.
Page 74 of 250
Controls Overview
72
Displaying stored Check Control
messages
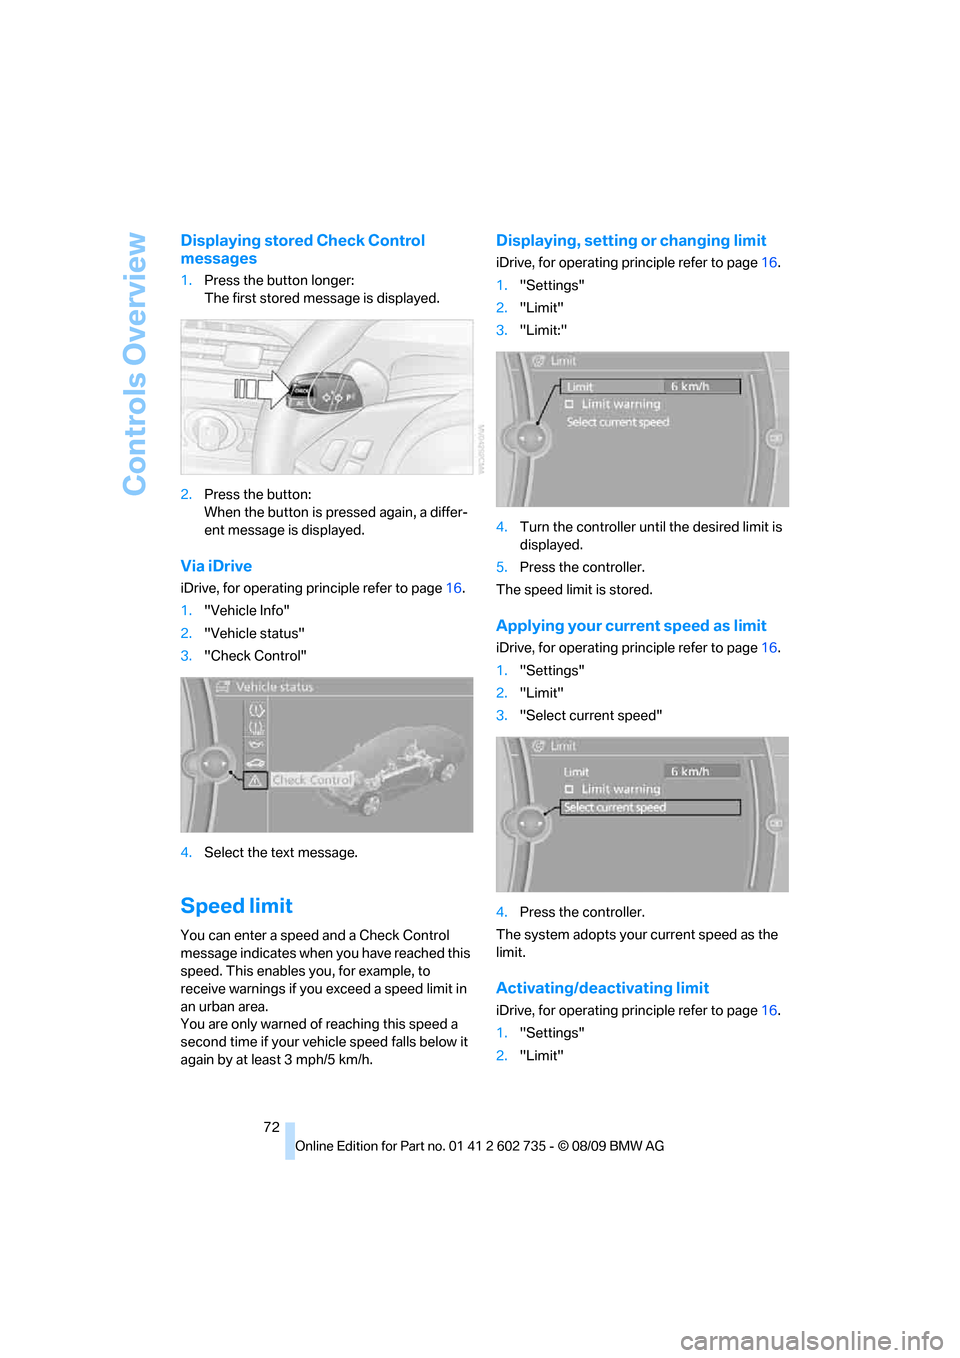
1.Press the button longer:
The first stored message is displayed.
2.Press the button:
When the button is pressed again, a differ-
ent message is displayed.
Via iDrive
iDrive, for operating principle refer to page16.
1."Vehicle Info"
2."Vehicle status"
3."Check Control"
4.Select the text message.
Speed limit
You can enter a speed and a Check Control
message indicates when you have reached this
speed. This enables you, for example, to
receive warnings if you exceed a speed limit in
an urban area.
You are only warned of reaching this speed a
second time if your vehicle speed falls below it
again by at least 3 mph/5 km/h.
Displaying, setting or changing limit
iDrive, for operating principle refer to page16.
1."Settings"
2."Limit"
3."Limit:"
4.Turn the controller until the desired limit is
displayed.
5.Press the controller.
The speed limit is stored.
Applying your current speed as limit
iDrive, for operating principle refer to page16.
1."Settings"
2."Limit"
3."Select current speed"
4.Press the controller.
The system adopts your current speed as the
limit.
Activating/deactivating limit
iDrive, for operating principle refer to page16.
1."Settings"
2."Limit"
Page 75 of 250
Controls
73Reference
At a glance
Driving tips
Communications
Navigation
Entertainment
Mobility
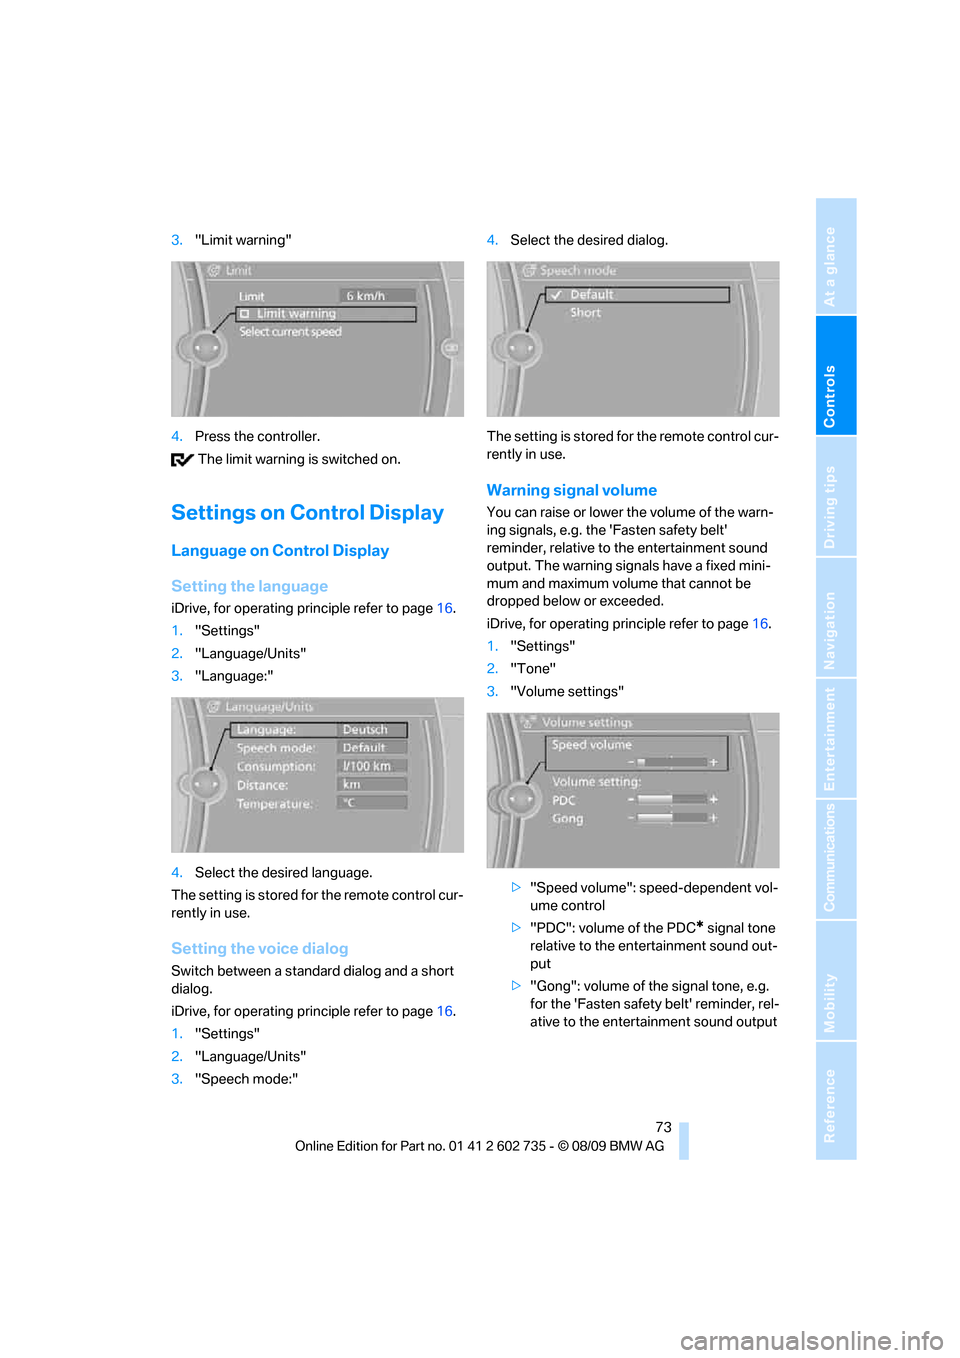
3."Limit warning"
4.Press the controller.
The limit warning is switched on.
Settings on Control Display
Language on Control Display
Setting the language
iDrive, for operating principle refer to page16.
1."Settings"
2."Language/Units"
3."Language:"
4.Select the desired language.
The setting is stored for the remote control cur-
rently in use.
Setting the voice dialog
Switch between a standard dialog and a short
dialog.
iDrive, for operating principle refer to page16.
1."Settings"
2."Language/Units"
3."Speech mode:"4.Select the desired dialog.
The setting is stored for the remote control cur-
rently in use.
Warning signal volume
You can raise or lower the volume of the warn-
ing signals, e.g. the 'Fasten safety belt'
reminder, relative to the entertainment sound
output. The warning signals have a fixed mini-
mum and maximum volume that cannot be
dropped below or exceeded.
iDrive, for operating principle refer to page16.
1."Settings"
2."Tone"
3."Volume settings"
>"Speed volume": speed-dependent vol-
ume control
>"PDC": volume of the PDC
* signal tone
relative to the entertainment sound out-
put
>"Gong": volume of the signal tone, e.g.
for the 'Fasten safety belt' reminder, rel-
ative to the entertainment sound output
Page 76 of 250
Controls Overview
74
Brightness of Control Display
The brightness is automatically adapted to the
ambient lighting conditions. However, you can
change the basic setting.
iDrive, for operating principle refer to page16.
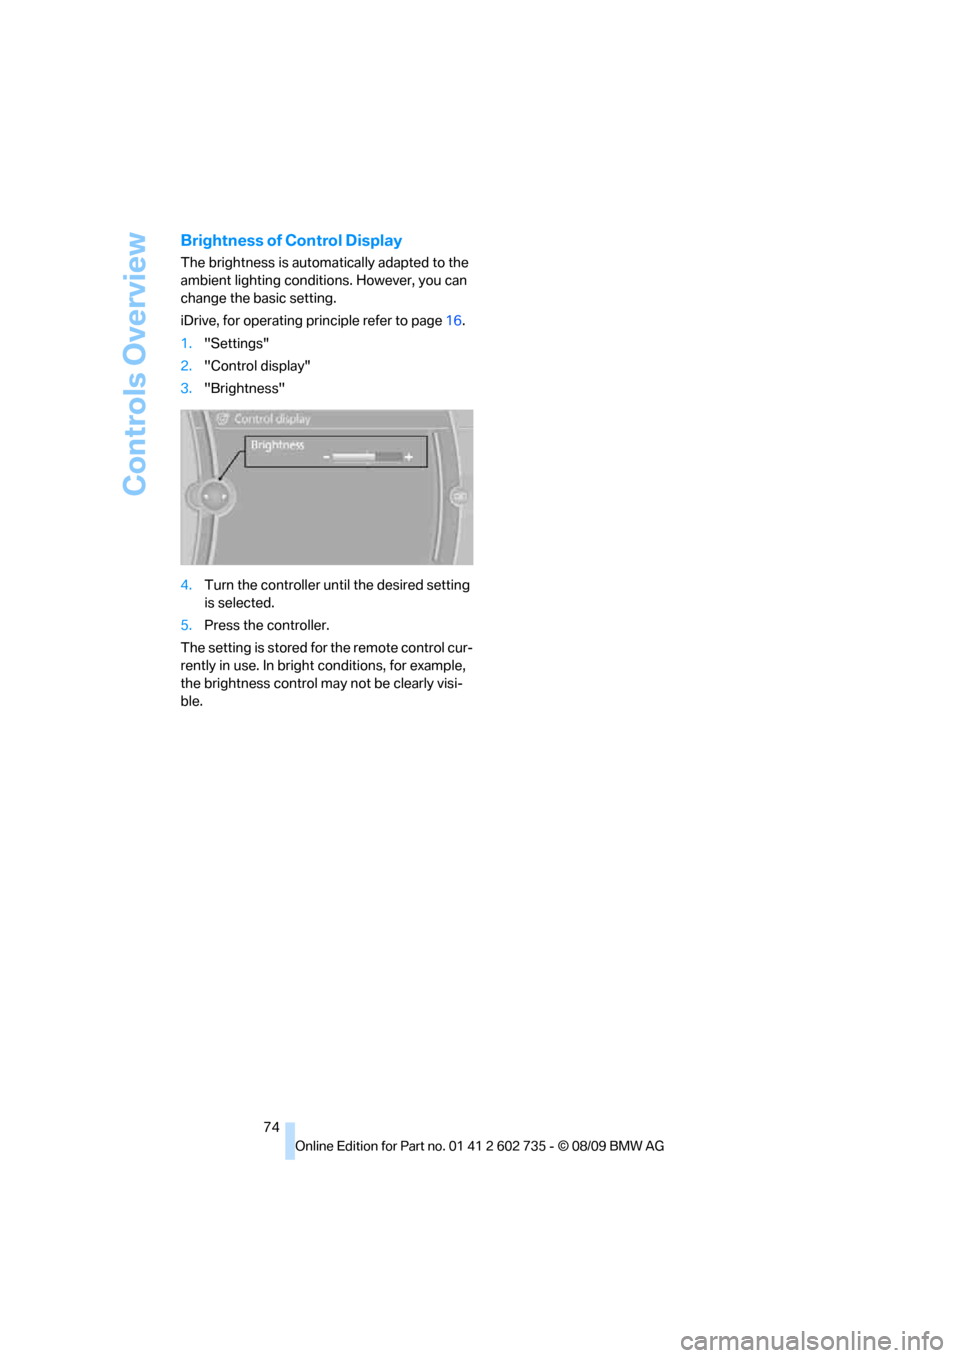
1."Settings"
2."Control display"
3."Brightness"
4.Turn the controller until the desired setting
is selected.
5.Press the controller.
The setting is stored for the remote control cur-
rently in use. In bright conditions, for example,
the brightness control may not be clearly visi-
ble.
Page 77 of 250
Controls
75Reference
At a glance
Driving tips
Communications
Navigation
Entertainment
Mobility
Technology for comfort, convenience and
safety
PDC Park Distance Control*
The concept
The PDC assists you when you are parking.
Acoustic signals and an optical display
* alert
you to the approach of an object from behind
your vehicle. To measure the distance, there
are four ultrasonic sensors in each bumper.
The range of these sensors is approx. 7 ft/2 m.
However, an acoustic warning first sounds for
the sensors at the front and at the two rear cor-
ners at approx. 24 in/60 cm, and for the center
rear sensors at approx. 5 ft/1.50 m.
PDC is a parking aid that can indicate
objects when they are approached
slowly, as is usually the case when parking.
Avoid approaching an object at high speed, oth-
erwise the physical circumstances would mean
that the system warning was too late.<
Switching on automatically
The system starts to operate approx. one sec-
ond after you shift into reverse or move the
selector lever into position R with the engine
running or the ignition switched on.
Wait this short time before driving off.
Switching on manually
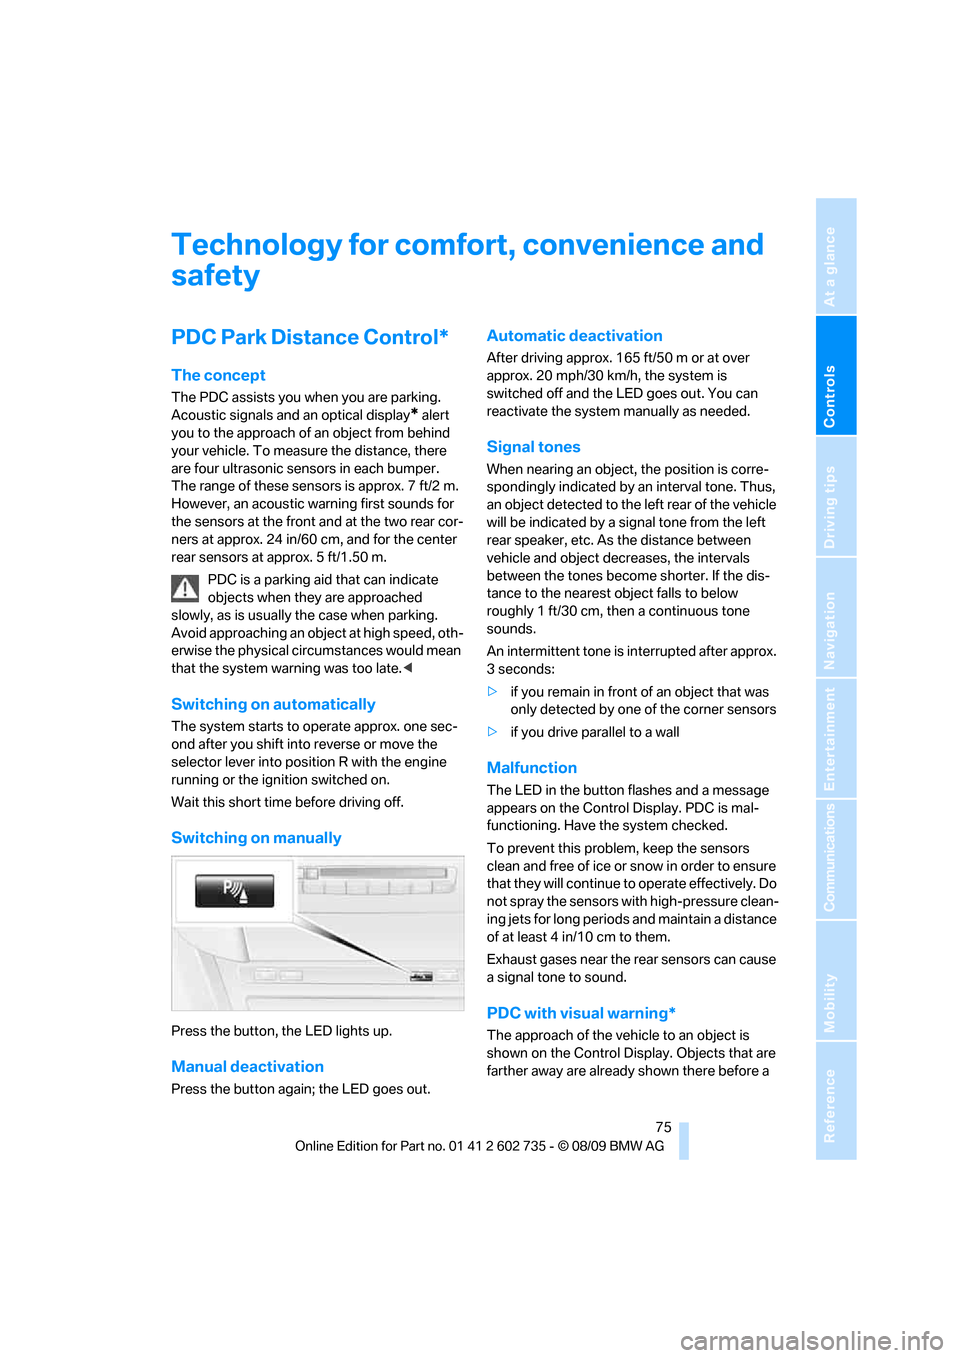
Press the button, the LED lights up.
Manual deactivation
Press the button again; the LED goes out.
Automatic deactivation
After driving approx. 165 ft/50 m or at over
approx. 20 mph/30 km/h, the system is
switched off and the LED goes out. You can
reactivate the system manually as needed.
Signal tones
When nearing an object, the position is corre-
spondingly indicated by an interval tone. Thus,
an object detected to the left rear of the vehicle
will be indicated by a signal tone from the left
rear speaker, etc. As the distance between
vehicle and object decreases, the intervals
between the tones become shorter. If the dis-
tance to the nearest object falls to below
roughly 1 ft/30 cm, then a continuous tone
sounds.
An intermittent tone is interrupted after approx.
3seconds:
>if you remain in front of an object that was
only detected by one of the corner sensors
>if you drive parallel to a wall
Malfunction
The LED in the button flashes and a message
appears on the Control Display. PDC is mal-
functioning. Have the system checked.
To prevent this problem, keep the sensors
clean and free of ice or snow in order to ensure
that they will continue to operate effectively. Do
not spray the sensors with high-pressure clean-
ing jets for long periods and maintain a distance
of at least 4 in/10 cm to them.
Exhaust gases near the rear sensors can cause
a signal tone to sound.
PDC with visual warning*
The approach of the vehicle to an object is
shown on the Control Display. Objects that are
farther away are already shown there before a
Page 78 of 250
Technology for comfort, convenience and safety
76 signal tone sounds. The display appears on the
Control Display as soon as PDC is activated.
System limits
Even with PDC, final responsibility for
estimating the distance between the
vehicle and any obstacles always remains with
the driver. Even when sensors are provided,
there is a blind spot in which objects can no
longer be detected. The system is also subject
to the physical limits that apply to all forms of
ultrasonic measurement, such as those
encountered with tow bars and trailer cou-
plings, or thin and wedge-shaped objects etc.
Low objects already displayed, e. g. curbs, can
also disappear from the detection area of the
sensors again before or after a continuous tone
already sounds. Higher, protruding objects, e.g.
ledges, cannot be detected. For this reason,
drive with care; otherwise, there is a danger of
personal injury or property damage.
Loud sources of sound, inside and outside the
vehicle, could drown out the PDC signal tone.<
Driving stability control
systems
Your BMW is equipped with an extended array
of systems designed to enhance and maintain
vehicle stability under extreme conditions.
Antilock Brake System ABS
ABS prevents locking of the wheels during
braking. Safe steering response is maintained
even during full braking. Active safety is thus
increased.
The ABS is operational every time you start the
engine. For information on safe braking, refer to
page109.
CBC Cornering Brake Control
When braking during curves or when braking
during a lane change, driving stability and steer-
ing response are improved further.
Electronic brake-force distribution
The system controls the brake pressure in the
rear wheels to ensure stable braking behavior.
Brake assistant
When you apply the brakes rapidly, this system
produces maximum braking force boosting and
thus helps to achieve the shortest possible
braking distance during full braking maneuvers.
This system exploits all of the benefits provided
by ABS.
Do not reduce the pressure on the brake pedal
for the duration of the full braking.
DSC Dynamic Stability Control
DSC optimizes vehicle stability and traction. It
also detects unstable driving states such as
understeering and oversteering, and helps
keep the vehicle on course within the physical
limits by reducing the engine output and by
braking at the wheels.
The DSC is operational every time you start the
engine.
The laws of physics cannot be repealed,
even with DSC. An appropriate driving
style always remains the responsibility of the
driver. Therefore, do not reduce the additional
safety margin further by taking risks.<
Indicator lamp
The indicator lamp goes out shortly
after the engine is started.
The indicator lamp flashes: DSC con-
trols the drive forces and brake forces.
The indicator lamp stays lit: DSC is deactivated.
M Dynamic Mode MDM
The M Dynamic Mode is a mode of the DSC
Dynamic Stability Control. It enables driving
with greater longitudinal and lateral accelera-
tion on dry road surfaces, however with limited
vehicle stability. The system does not provide
stabilizing intervention by reducing the engine
output and braking at the wheels until the abso-
lute driving limit is reached. Steering correc-
tions by the driver may also be required in this
driving state.
Page 79 of 250
Controls
77Reference
At a glance
Driving tips
Communications
Navigation
Entertainment
Mobility
The M Dynamic Mode is deactivated each time
the engine is started.
With the M Dynamic Mode activated, sta-
bilizing interventions are only carried out
to a reduced degree.<
To maintain vehicle stability, drive with
DSC activated and the M Dynamic Mode
deactivated whenever possible.<
Indicator lamp
The indicator lamp goes out shortly
after the engine is started. The indica-
tor lamp stays lit: M Dynamic Mode is
activated.
The indicator lamp lights up continuously and
the DSC indicator lamp flashes: the M Dynamic
Mode is active and controls the drive and brak-
ing forces.
Activating MDM
You activate the M Dynamic Mode with the
button on the steering wheel, refer to MDrive on
page50.
With the ignition switched on you can set
MDrive on the Control Display.
iDrive, for operating principle refer to page16.
1."Settings"
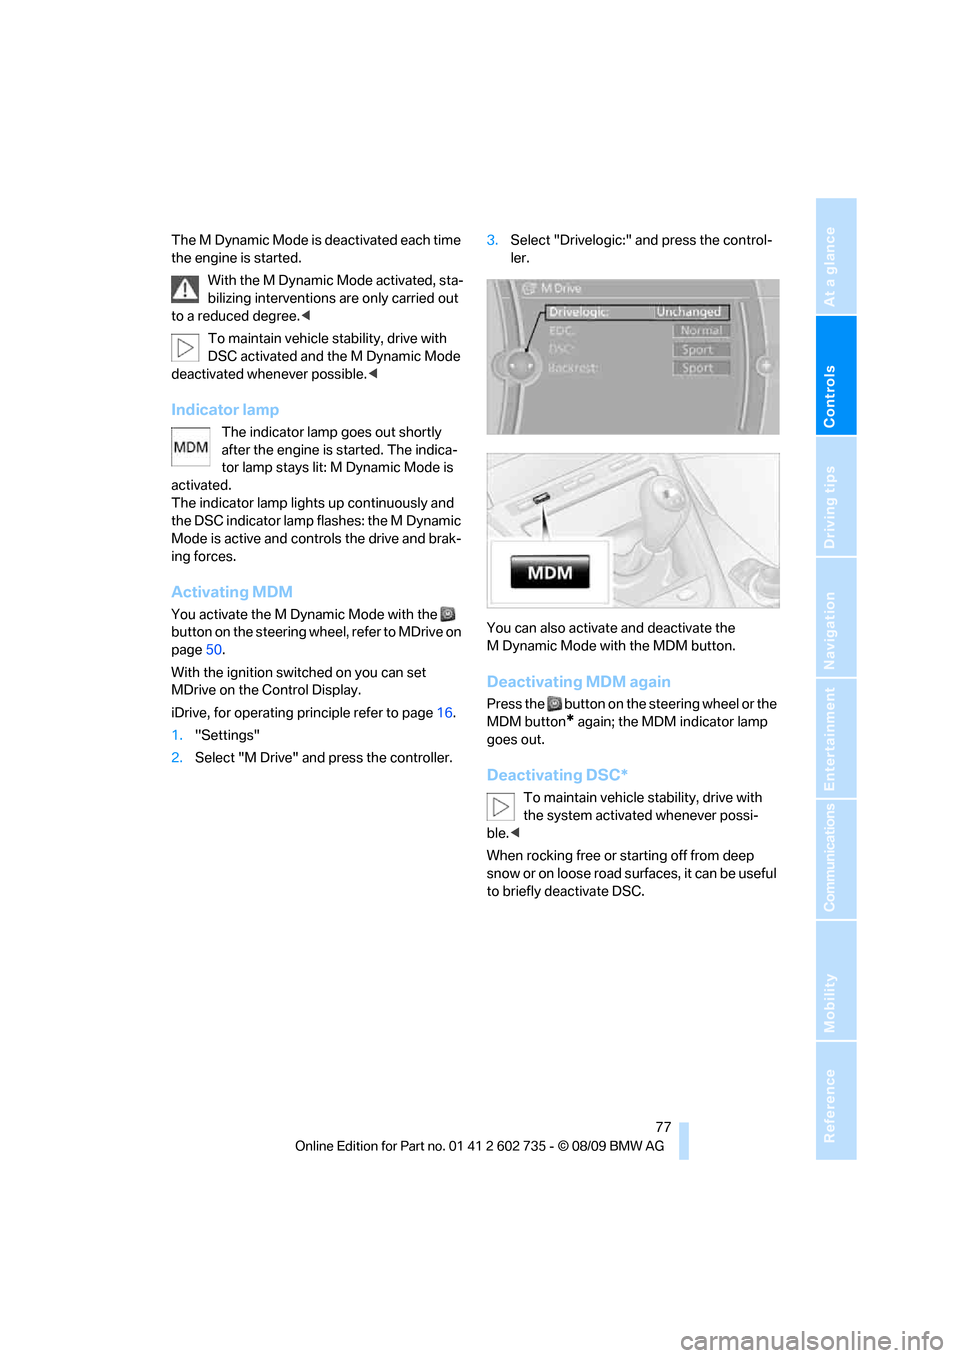
2.Select "M Drive" and press the controller.3.Select "Drivelogic:" and press the control-
ler.
You can also activate and deactivate the
M Dynamic Mode with the MDM button.
Deactivating MDM again
Press the button on the steering wheel or the
MDM button
* again; the MDM indicator lamp
goes out.
Deactivating DSC*
To maintain vehicle stability, drive with
the system activated whenever possi-
ble.<
When rocking free or starting off from deep
snow or on loose road surfaces, it can be useful
to briefly deactivate DSC.
Page 80 of 250
Technology for comfort, convenience and safety
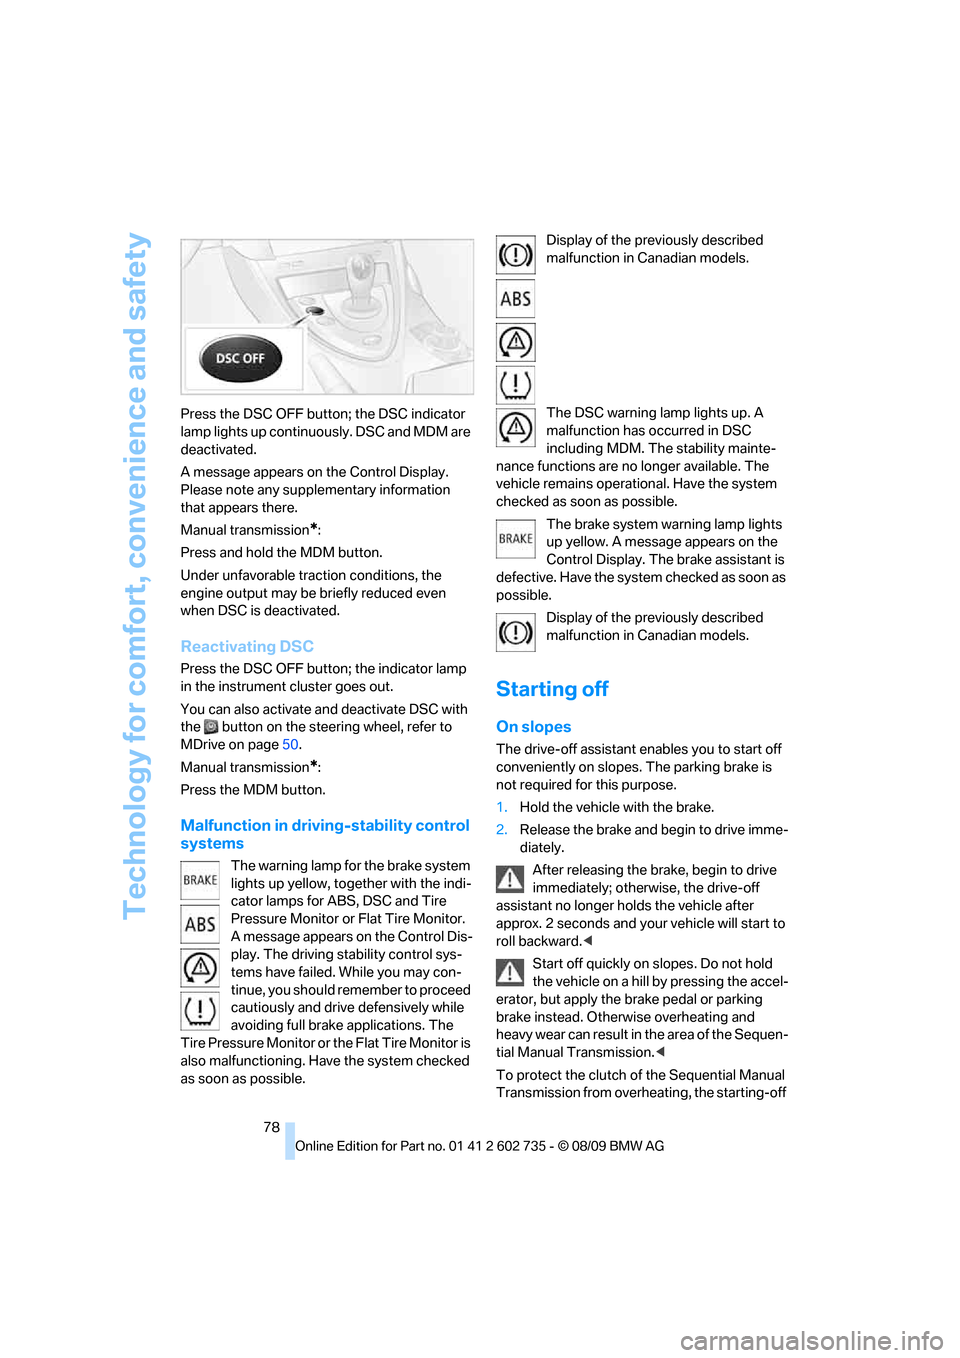
78 Press the DSC OFF button; the DSC indicator
lamp lights up continuously. DSC and MDM are
deactivated.
A message appears on the Control Display.
Please note any supplementary information
that appears there.
Manual transmission
*:
Press and hold the MDM button.
Under unfavorable traction conditions, the
engine output may be briefly reduced even
when DSC is deactivated.
Reactivating DSC
Press the DSC OFF button; the indicator lamp
in the instrument cluster goes out.
You can also activate and deactivate DSC with
the button on the steering wheel, refer to
MDrive on page50.
Manual transmission
*:
Press the MDM button.
Malfunction in driving-stability control
systems
The warning lamp for the brake system
lights up yellow, together with the indi-
cator lamps for ABS, DSC and Tire
Pressure Monitor or Flat Tire Monitor.
A message appears on the Control Dis-
play. The driving stability control sys-
tems have failed. While you may con-
tinue, you should remember to proceed
cautiously and drive defensively while
avoiding full brake applications. The
Tire Pressure Monitor or the Flat Tire Monitor is
also malfunctioning. Have the system checked
as soon as possible.Display of the previously described
malfunction in Canadian models.
The DSC warning lamp lights up. A
malfunction has occurred in DSC
including MDM. The stability mainte-
nance functions are no longer available. The
vehicle remains operational. Have the system
checked as soon as possible.
The brake system warning lamp lights
up yellow. A message appears on the
Control Display. The brake assistant is
defective. Have the system checked as soon as
possible.
Display of the previously described
malfunction in Canadian models.
Starting off
On slopes
The drive-off assistant enables you to start off
conveniently on slopes. The parking brake is
not required for this purpose.
1.Hold the vehicle with the brake.
2.Release the brake and begin to drive imme-
diately.
After releasing the brake, begin to drive
immediately; otherwise, the drive-off
assistant no longer holds the vehicle after
approx. 2 seconds and your vehicle will start to
roll backward.<
Start off quickly on slopes. Do not hold
the vehicle on a hill by pressing the accel-
erator, but apply the brake pedal or parking
brake instead. Otherwise overheating and
heavy wear can result in the area of the Sequen-
tial Manual Transmission.<
To protect the clutch of the Sequential Manual
Transmission from overheating, the starting-off