warning BMW X5 2016 F15 Owner's Manual
[x] Cancel search | Manufacturer: BMW, Model Year: 2016, Model line: X5, Model: BMW X5 2016 F15Pages: 275, PDF Size: 6.46 MB
Page 187 of 275
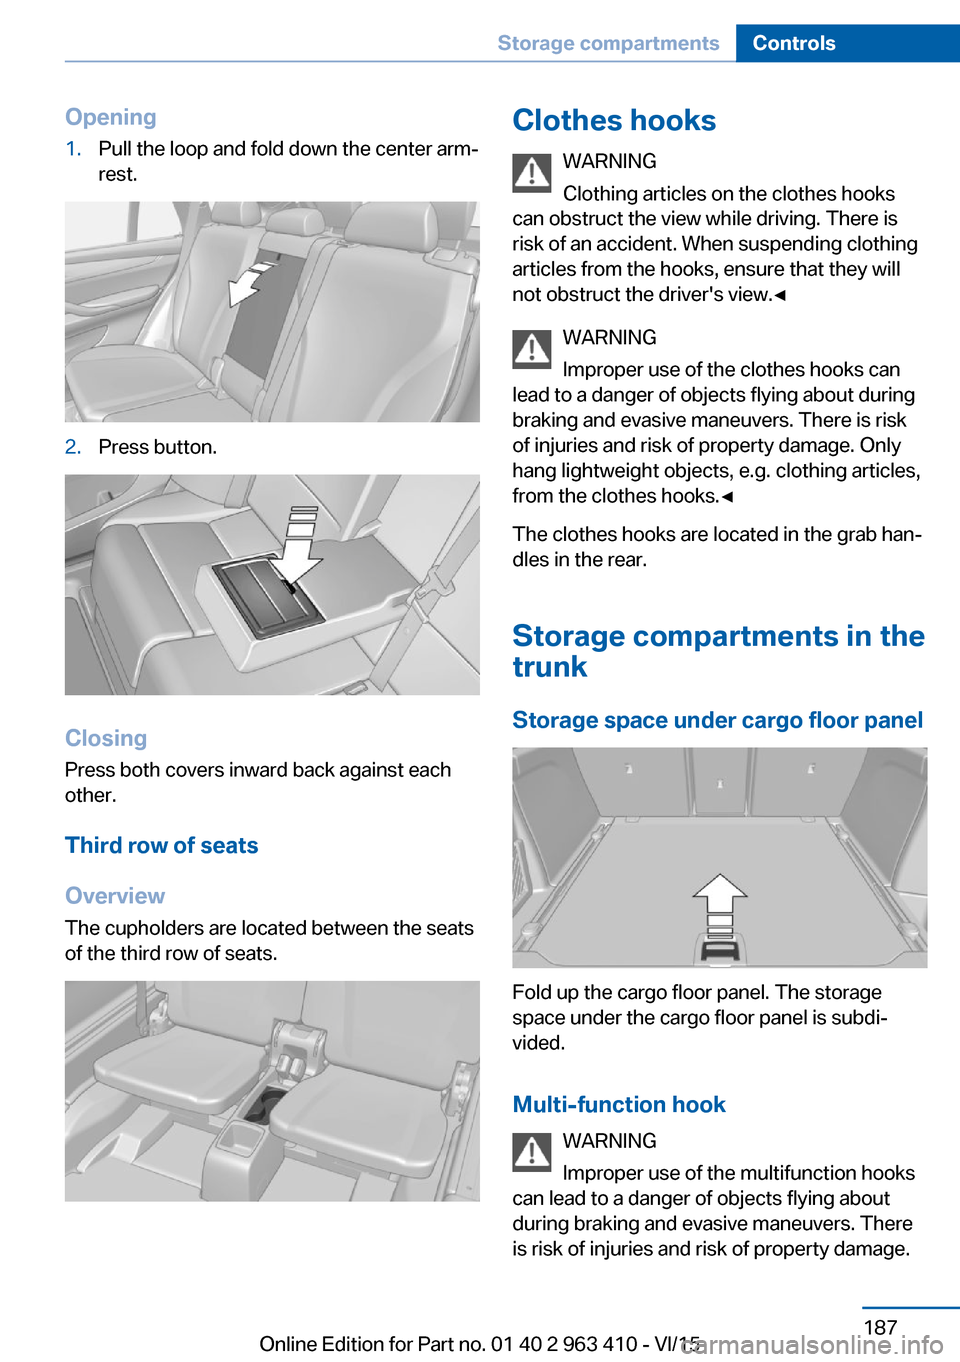
Opening1.Pull the loop and fold down the center arm‐
rest.2.Press button.
Closing
Press both covers inward back against each
other.
Third row of seats
Overview
The cupholders are located between the seats
of the third row of seats.
Clothes hooks
WARNING
Clothing articles on the clothes hooks
can obstruct the view while driving. There is
risk of an accident. When suspending clothing
articles from the hooks, ensure that they will
not obstruct the driver's view.◀
WARNING
Improper use of the clothes hooks can
lead to a danger of objects flying about during
braking and evasive maneuvers. There is risk
of injuries and risk of property damage. Only
hang lightweight objects, e.g. clothing articles,
from the clothes hooks.◀
The clothes hooks are located in the grab han‐
dles in the rear.
Storage compartments in thetrunk
Storage space under cargo floor panel
Fold up the cargo floor panel. The storage
space under the cargo floor panel is subdi‐
vided.
Multi-function hook WARNING
Improper use of the multifunction hooks
can lead to a danger of objects flying about
during braking and evasive maneuvers. There
is risk of injuries and risk of property damage.
Seite 187Storage compartmentsControls187
Online Edition for Part no. 01 40 2 963 410 - VI/15
Page 192 of 275
Things to remember when drivingVehicle features and options
This chapter describes all standard, country-
specific and optional features offered with the
series. It also describes features that are not
necessarily available in your car, e. g., due to
the selected options or country versions. This
also applies to safety-related functions and
systems. The respectively applicable country
provisions must be observed when using the
respective features and systems.
Breaking-in period General information
Moving parts need time to adjust to one an‐
other (break-in time).
The following instructions will help accomplish
a long vehicle life and good efficiency.
During break-in, do not use the Launch Con‐
trol, refer to page 83.
Engine, transmission, and axle drive
Up to 1,200 miles/2,000 km
Do not exceed the maximum engine and road
speed:▷For gasoline engine 4,500 rpm and
100 mph/160 km/h.▷For diesel engine 3,500 rpm and
93 mph/150 km/h.
Avoid full load or kickdown under all circum‐
stances.
From 1,200 miles/2,000 km The engine and vehicle speed can gradually be
increased.
Tires
Tire traction is not optimal due to manufactur‐
ing circumstances when tires are brand-new;
they achieve their full traction potential after a
break-in time.
Drive conservatively for the first
200 miles/300 km.
Brake system
Brakes require an initial break-in period of ap‐
prox. 300 miles/500 km to achieve optimal per‐
formance between brake discs and brake
pads. Drive moderately during this break-in pe‐
riod.
Following part replacement The same break-in procedures should be ob‐
served if any of the components above-men‐
tioned have to be renewed in the course of the
vehicle's operating life.
General driving notes
Closing the tailgate WARNING
An open tailgate protrudes from the vehi‐
cle and can endanger occupants and other
traffic participants or damage the vehicle in the
event of an accident, braking or evasive ma‐
neuvers. In addition, exhaust fumes may enter
the vehicle interior. There is risk of injuries or
risk of property damage. Do not drive with the
tailgate open.◀
If driving with the tailgate open cannot be
avoided:▷Close all windows and the glass sunroof.▷Greatly increase the air flow from the vents.▷Drive moderately.Seite 192Driving tipsThings to remember when driving192
Online Edition for Part no. 01 40 2 963 410 - VI/15
Page 193 of 275
Hot exhaust systemWARNING
During driving operation, high tempera‐
tures can occur underneath the body, e.g.
caused by the exhaust gas system. If combus‐
tible materials, such as leaves or grass, come
in contact with hot parts of the exhaust gas
system, these materials can ignite. There is
risk of injuries or risk of property damage.
Do not remove the heat shields installed and
never apply undercoating to them. Make sure
that no combustible materials can come in
contact with hot vehicle parts in driving opera‐
tion, idle or during parking. Do not touch the
hot exhaust system.◀
Diesel particulate filter The diesel particulate filter collects soot parti‐
cles and burns them periodically at high tem‐
peratures.
During several minutes of cleaning the follow‐
ing may occur:▷Temporarily, the engine may run less
smoothly.▷Noises and a slight amount of smoke com‐
ing from the exhaust until shortly after the
engine is shut down.▷A somewhat higher engine speed is neces‐
sary to reach usual performance.
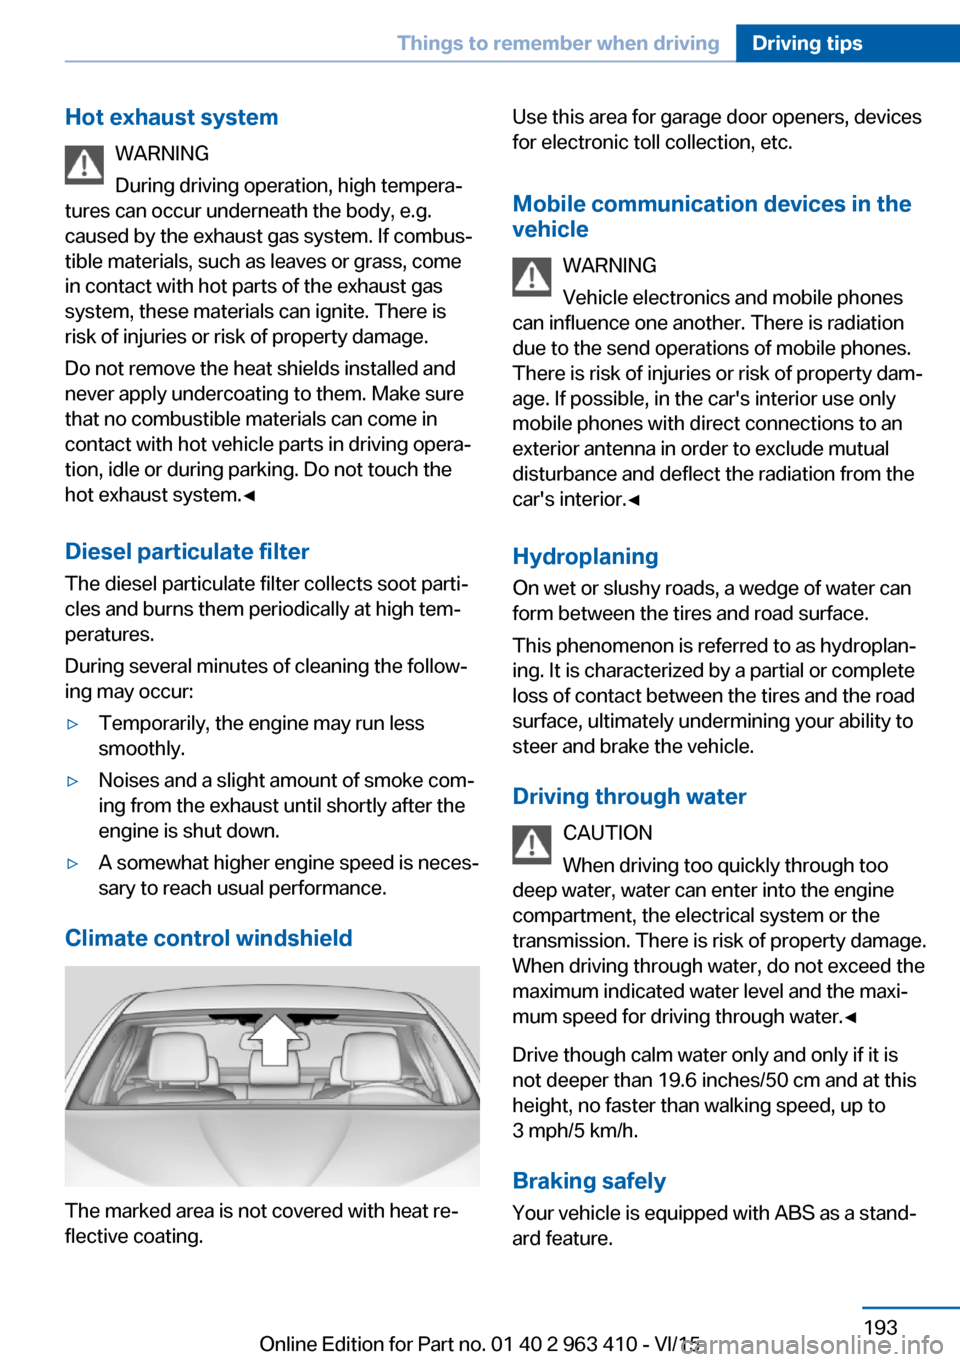
Climate control windshield
The marked area is not covered with heat re‐
flective coating.
Use this area for garage door openers, devices
for electronic toll collection, etc.
Mobile communication devices in the vehicle
WARNING
Vehicle electronics and mobile phones
can influence one another. There is radiation
due to the send operations of mobile phones.
There is risk of injuries or risk of property dam‐
age. If possible, in the car's interior use only
mobile phones with direct connections to an
exterior antenna in order to exclude mutual
disturbance and deflect the radiation from the
car's interior.◀
Hydroplaning
On wet or slushy roads, a wedge of water can
form between the tires and road surface.
This phenomenon is referred to as hydroplan‐
ing. It is characterized by a partial or complete
loss of contact between the tires and the road
surface, ultimately undermining your ability to
steer and brake the vehicle.
Driving through water CAUTION
When driving too quickly through too
deep water, water can enter into the engine
compartment, the electrical system or the
transmission. There is risk of property damage.
When driving through water, do not exceed the
maximum indicated water level and the maxi‐
mum speed for driving through water.◀
Drive though calm water only and only if it is
not deeper than 19.6 inches/50 cm and at this
height, no faster than walking speed, up to
3 mph/5 km/h.
Braking safely Your vehicle is equipped with ABS as a stand‐
ard feature.Seite 193Things to remember when drivingDriving tips193
Online Edition for Part no. 01 40 2 963 410 - VI/15
Page 194 of 275
Applying the brakes fully is the most effective
way of braking in situations needed.
Steering is still responsive. You can still avoid
any obstacles with a minimum of steering ef‐
fort.
Pulsation of the brake pedal and sounds from
the hydraulic circuits indicate that ABS is in its
active mode.
In certain braking situations, the perforated
brake discs can cause functional problems.
However, this has no effect on the perform‐
ance and operational reliability of the brake.
Objects in the movement area around
pedals and floor area
WARNING
Objects in the driver's floor area can limit
the pedal distance or block a depressed pedal.
There is risk of an accident. Stow objects in
the vehicle such that they are secured and
cannot enter into the driver's floor area. Use
floor mats that are suitable for the vehicle and
can be safely attached to the floor. Do not use
loose floor mats and do not layer several floor
mats. Make sure that there is sufficient clear‐
ance for the pedals. Ensure that the floor mats
are securely fastened again after they were re‐
moved, e.g. for cleaning.◀
Driving in wet conditionsWhen roads are wet, salted, or in heavy rain,
press brake pedal ever so gently every few
miles.
Ensure that this action does not endanger
other traffic.
The heat generated in this process helps dry
the brake discs and pads.
In this way braking efficiency will be available
when you need it.Hills
WARNING
Light but consistent brake pressure can
lead to high temperatures, brakes wearing out
and possibly even brake failure. There is risk of
an accident. Avoid placing excessive stress on
the brake system.◀
WARNING
In idle or with the engine switched off,
safety-relevant functions are restricted or not
available anymore, e.g. braking effect of the
engine or braking force and steering support.
There is risk of an accident. Do not drive in idle
or with the engine switched off.◀
Drive long or steep downhill gradients in the
gear that requires least braking efforts. Other‐
wise the brakes may overheat and reduce
brake efficiency.
You can increase the engine's braking effect
by shifting down, going all the way to first gear,
if needed.
Brake disc corrosion
Corrosion on the brake discs and contamina‐
tion on the brake pads are furthered by the fol‐
lowing circumstances:▷Low mileage.▷Extended periods when the vehicle is not
used at all.▷Infrequent use of the brakes.
Corrosion will built up when the maximum
pressure applied to the brake pads during
braking is not reached - thus discs don't get
cleaned.
Corrosion buildup on the brake discs will cause
a pulsating effect on the brakes in their re‐
sponse - generally that cannot be corrected.
Seite 194Driving tipsThings to remember when driving194
Online Edition for Part no. 01 40 2 963 410 - VI/15
Page 196 of 275
LoadingVehicle features and options
This chapter describes all standard, country-
specific and optional features offered with the
series. It also describes features that are not
necessarily available in your car, e. g., due to
the selected options or country versions. This
also applies to safety-related functions and
systems. The respectively applicable country
provisions must be observed when using the
respective features and systems.
Information WARNING
High gross weight can overheat the tires,
damage them internally, and cause a sudden
drop in tire inflation pressure. There is risk of
an accident. Pay attention to the permitted
load capacity of the tires and never exceed the
permitted gross weight.◀
CAUTION
Fluids in the cargo area can cause dam‐
age. There is risk of property damage. Make
sure that no fluids leak in the cargo area.◀
WARNING
Loose objects in the car's interior can be
thrown into the car's interior while driving, e.g.
in the event of an accident or during braking
and evasive maneuvers. There is risk of inju‐
ries. Secure loose objects in the car's inte‐
rior.◀
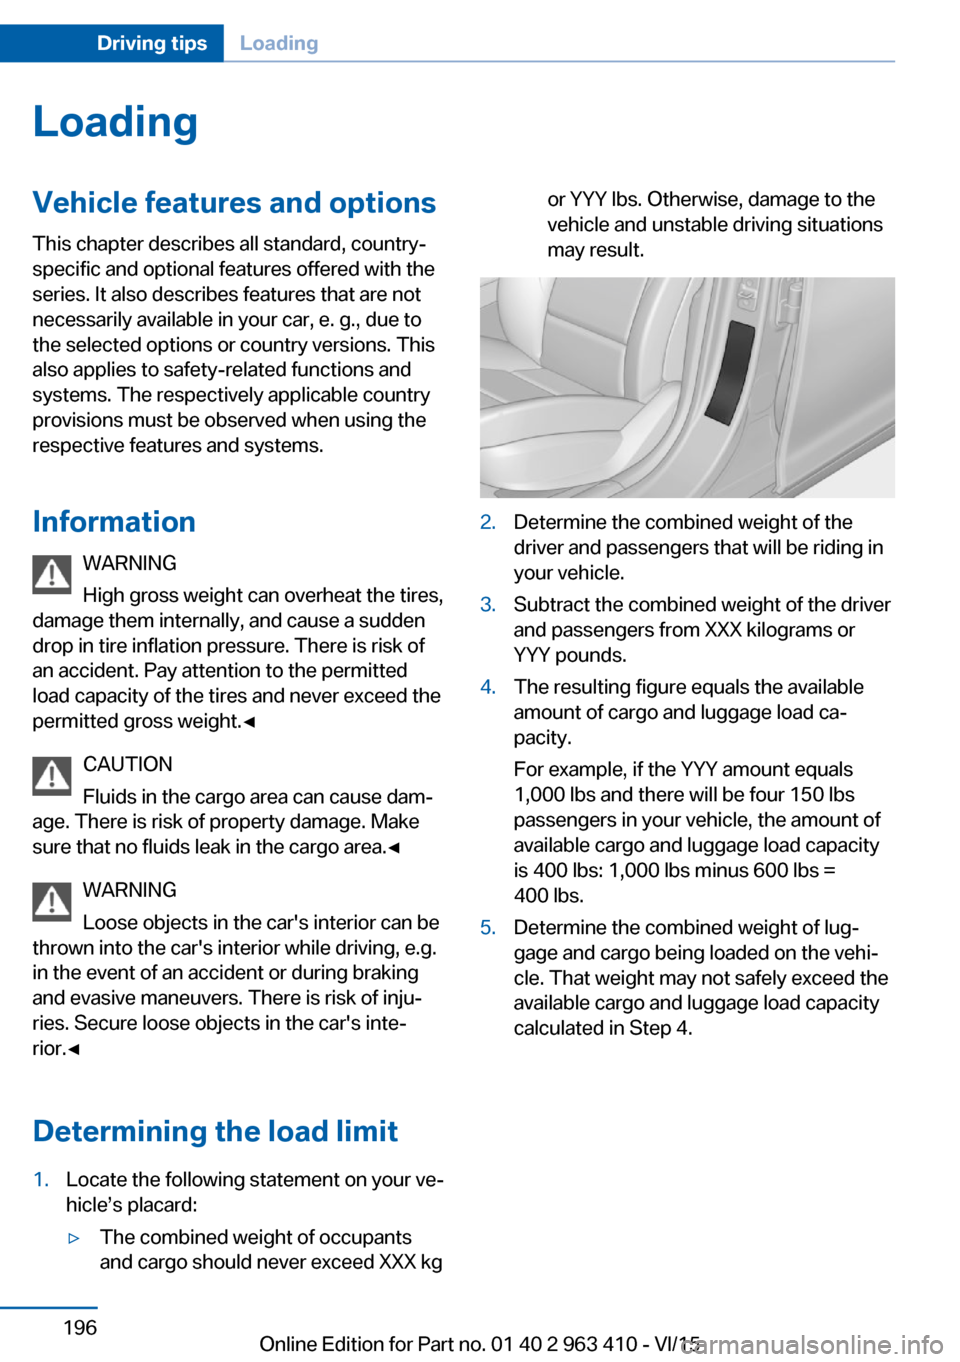
Determining the load limit1.Locate the following statement on your ve‐
hicle’s placard:▷The combined weight of occupants
and cargo should never exceed XXX kgor YYY lbs. Otherwise, damage to the
vehicle and unstable driving situations
may result.2.Determine the combined weight of the
driver and passengers that will be riding in
your vehicle.3.Subtract the combined weight of the driver
and passengers from XXX kilograms or
YYY pounds.4.The resulting figure equals the available
amount of cargo and luggage load ca‐
pacity.
For example, if the YYY amount equals
1,000 lbs and there will be four 150 lbs
passengers in your vehicle, the amount of
available cargo and luggage load capacity
is 400 lbs: 1,000 lbs minus 600 lbs =
400 lbs.5.Determine the combined weight of lug‐
gage and cargo being loaded on the vehi‐
cle. That weight may not safely exceed the
available cargo and luggage load capacity
calculated in Step 4.Seite 196Driving tipsLoading196
Online Edition for Part no. 01 40 2 963 410 - VI/15
Page 198 of 275
The lashing eyes at the openings in the rails
can be removed.
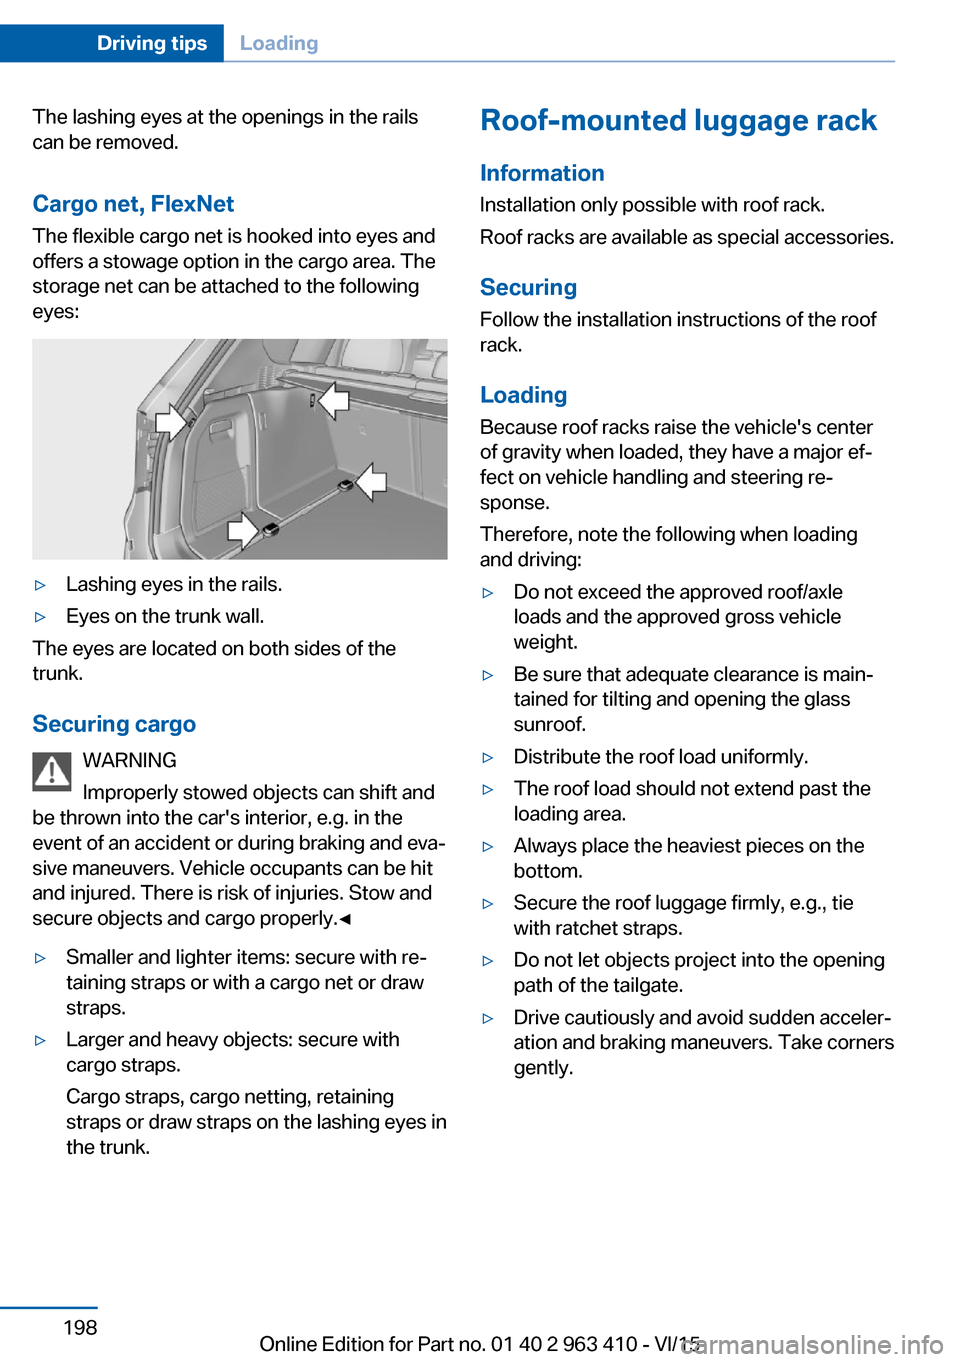
Cargo net, FlexNet The flexible cargo net is hooked into eyes and
offers a stowage option in the cargo area. The
storage net can be attached to the following
eyes:▷Lashing eyes in the rails.▷Eyes on the trunk wall.
The eyes are located on both sides of the
trunk.
Securing cargo WARNING
Improperly stowed objects can shift and
be thrown into the car's interior, e.g. in the
event of an accident or during braking and eva‐
sive maneuvers. Vehicle occupants can be hit
and injured. There is risk of injuries. Stow and
secure objects and cargo properly.◀
▷Smaller and lighter items: secure with re‐
taining straps or with a cargo net or draw
straps.▷Larger and heavy objects: secure with
cargo straps.
Cargo straps, cargo netting, retaining
straps or draw straps on the lashing eyes in
the trunk.Roof-mounted luggage rack
Information
Installation only possible with roof rack.
Roof racks are available as special accessories.
Securing
Follow the installation instructions of the roof
rack.
Loading Because roof racks raise the vehicle's center
of gravity when loaded, they have a major ef‐
fect on vehicle handling and steering re‐
sponse.
Therefore, note the following when loading
and driving:▷Do not exceed the approved roof/axle
loads and the approved gross vehicle
weight.▷Be sure that adequate clearance is main‐
tained for tilting and opening the glass
sunroof.▷Distribute the roof load uniformly.▷The roof load should not extend past the
loading area.▷Always place the heaviest pieces on the
bottom.▷Secure the roof luggage firmly, e.g., tie
with ratchet straps.▷Do not let objects project into the opening
path of the tailgate.▷Drive cautiously and avoid sudden acceler‐
ation and braking maneuvers. Take corners
gently.Seite 198Driving tipsLoading198
Online Edition for Part no. 01 40 2 963 410 - VI/15
Page 201 of 275
▷ECO PRO tips driving instruction, refer to
page 202▷ECO PRO climate control, refer to
page 201.▷ECO PRO coasting driving status, refer to
page 203.
Activate ECO PRO
Press button repeatedly until ECO
PRO is displayed in the instrument
cluster.
Configuring ECO PRO
Via the Driving Dynamics Control
1.Activate ECO PRO.2."Configure ECO PRO"3.Configure the program.
Via the iDrive
1."Settings"2."ECO PRO mode"
or
1."Settings"2."Driving mode"3."Configure ECO PRO"
Configure the program.
ECO PRO Tip
▷"Tip at:":
Adjust the ECO PRO speed.▷"ECO PRO speed warning":
The output is reduced once the set ECO
PRO speed is reached.
Coasting
Fuel-efficiency can be optimized by disengag‐
ing the engine and Coasting, refer to
page 203, with the engine idling.
This function is only available in ECO PRO
mode.
ECO PRO climate control
"ECO PRO climate control"
Climate control is set to be fuel-efficient.
By making a slight change to the set tempera‐
ture, or slowly adjusting the rate of heating or
cooling of the car's interior, fuel consumption
can be economized.
The mirror heating is made available when out‐
side temperatures are very cold.
ECO PRO potential Shows potential savings with the current set‐
tings in percentages.
Display in the instrument cluster
Display in the instrument display
When ECO PRO mode is activated, the display
switches to a special configuration.
Some of the displays may differ from the dis‐
play in the instrument cluster.
Blue bar segments symbolize the gained bo‐
nus range in stages.
In addition, the bonus range is highlighted in
blue in the total range display.
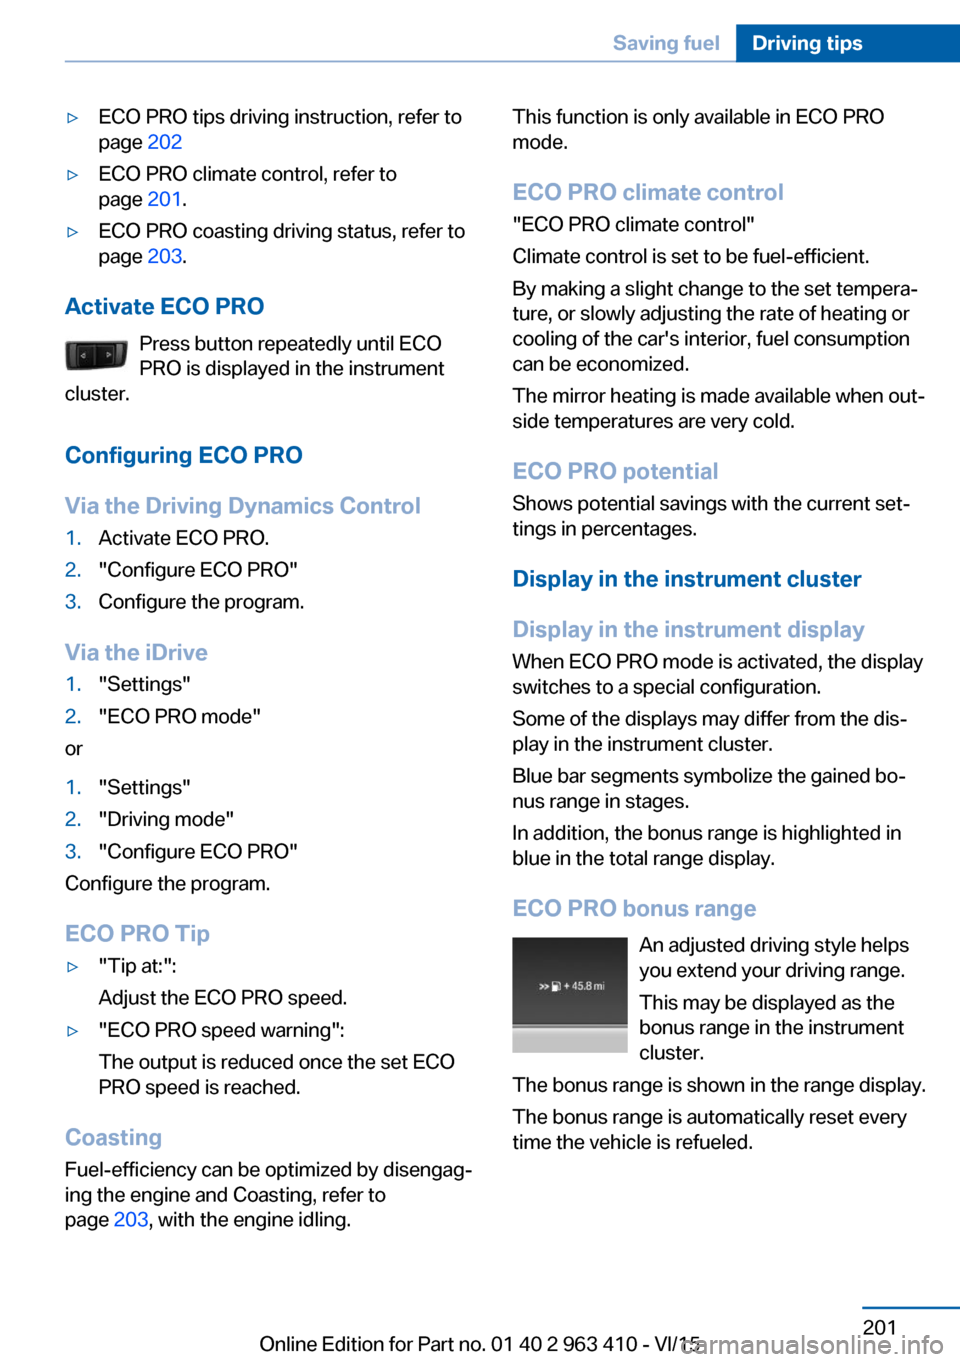
ECO PRO bonus range An adjusted driving style helps
you extend your driving range.
This may be displayed as the
bonus range in the instrument
cluster.
The bonus range is shown in the range display.
The bonus range is automatically reset every
time the vehicle is refueled.Seite 201Saving fuelDriving tips201
Online Edition for Part no. 01 40 2 963 410 - VI/15
Page 209 of 275
2.Close the fuel filler flap.
WARNING
The retaining strap of the fuel cap be
jammed and crushed during closing. In this
case, the lid cannot be correctly closed and
fuel vapors or fuel can escape. There is risk of
injuries or risk of property damage. Pay atten‐
tion that the retaining strap is not jammed or
crushed when closing the lid.◀
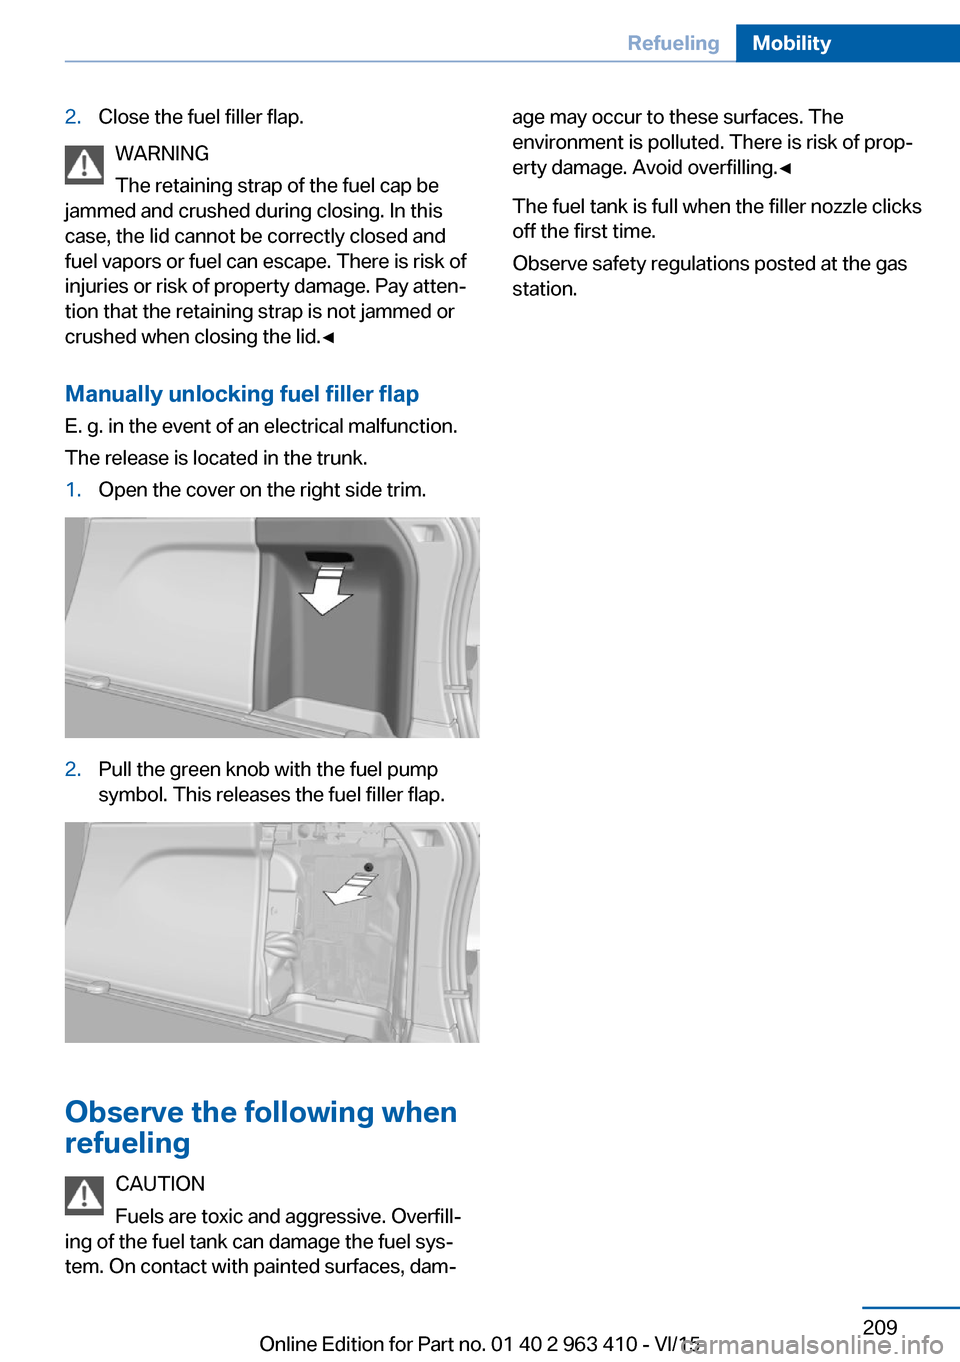
Manually unlocking fuel filler flapE. g. in the event of an electrical malfunction.
The release is located in the trunk.
1.Open the cover on the right side trim.2.Pull the green knob with the fuel pump
symbol. This releases the fuel filler flap.
Observe the following when
refueling
CAUTION
Fuels are toxic and aggressive. Overfill‐
ing of the fuel tank can damage the fuel sys‐
tem. On contact with painted surfaces, dam‐
age may occur to these surfaces. The
environment is polluted. There is risk of prop‐
erty damage. Avoid overfilling.◀
The fuel tank is full when the filler nozzle clicks
off the first time.
Observe safety regulations posted at the gas
station.Seite 209RefuelingMobility209
Online Edition for Part no. 01 40 2 963 410 - VI/15
Page 212 of 275
To be able to start the engine as usual, there
must be an adequate Diesel exhaust fluid.
Warming up the system In order to warm the engine up to its operating
temperature after a cold start, the Steptronic
transmission may subsequently shift up to the
next higher gear.
Displays in the instrument cluster
Reserve indication
This display in the instrument cluster provides
information about the distance that can still be
driven with the current reserve level.
Do not continue driving to the limit of the re‐
maining travel distance. It is not possible to re‐
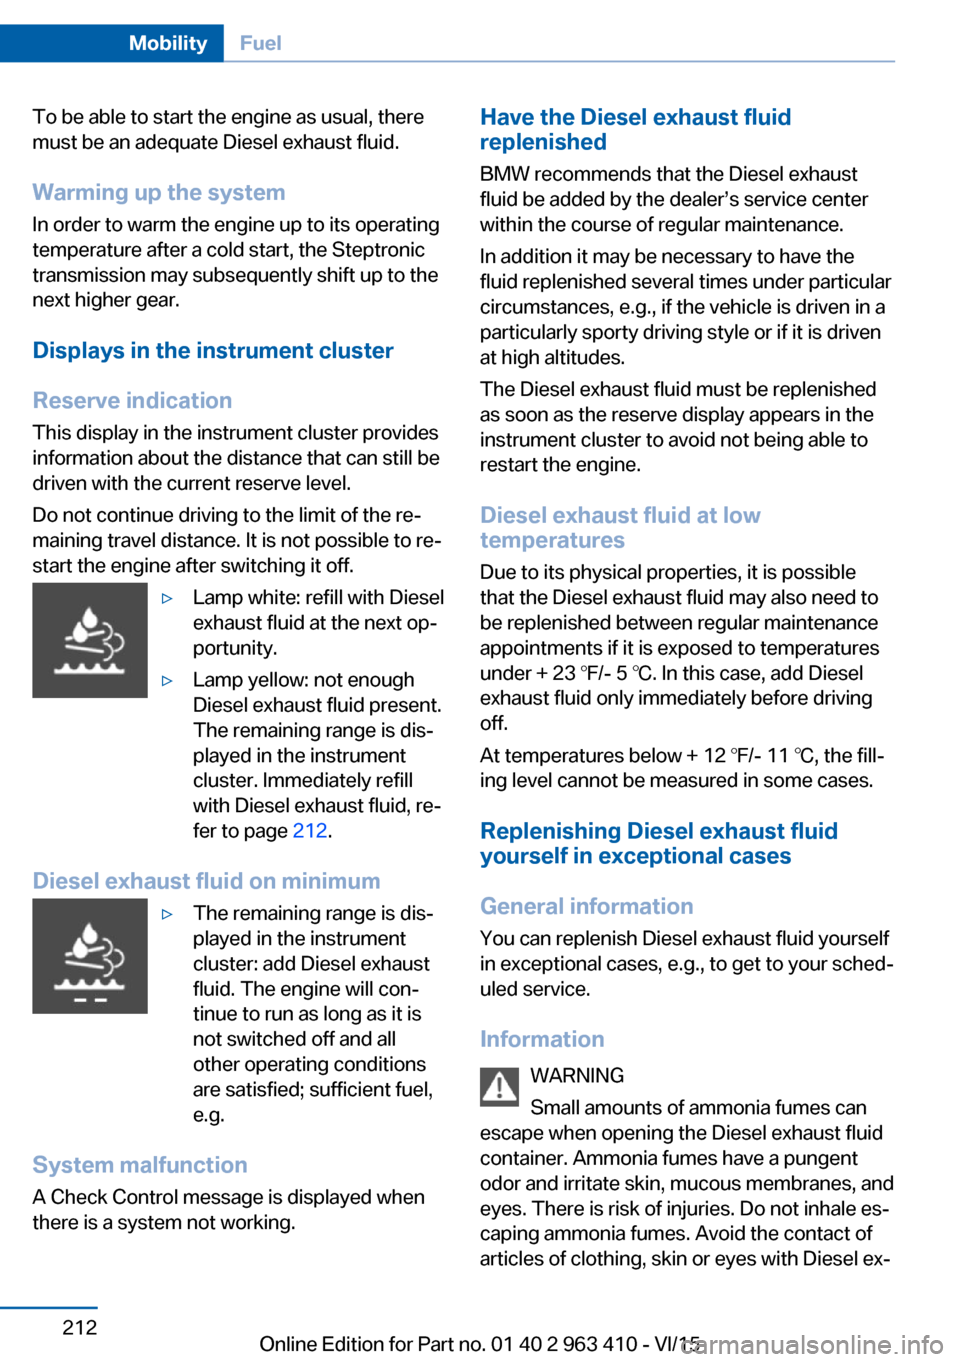
start the engine after switching it off.▷Lamp white: refill with Diesel
exhaust fluid at the next op‐
portunity.▷Lamp yellow: not enough
Diesel exhaust fluid present.
The remaining range is dis‐
played in the instrument
cluster. Immediately refill
with Diesel exhaust fluid, re‐
fer to page 212.
Diesel exhaust fluid on minimum
▷The remaining range is dis‐
played in the instrument
cluster: add Diesel exhaust
fluid. The engine will con‐
tinue to run as long as it is
not switched off and all
other operating conditions
are satisfied; sufficient fuel,
e.g.
System malfunction
A Check Control message is displayed when
there is a system not working.
Have the Diesel exhaust fluid
replenished
BMW recommends that the Diesel exhaust
fluid be added by the dealer’s service center
within the course of regular maintenance.
In addition it may be necessary to have the
fluid replenished several times under particular
circumstances, e.g., if the vehicle is driven in a
particularly sporty driving style or if it is driven
at high altitudes.
The Diesel exhaust fluid must be replenished
as soon as the reserve display appears in the
instrument cluster to avoid not being able to
restart the engine.
Diesel exhaust fluid at low
temperatures
Due to its physical properties, it is possible
that the Diesel exhaust fluid may also need to
be replenished between regular maintenance
appointments if it is exposed to temperatures
under + 23 ℉/- 5 ℃. In this case, add Diesel
exhaust fluid only immediately before driving
off.
At temperatures below + 12 ℉/- 11 ℃, the fill‐
ing level cannot be measured in some cases.
Replenishing Diesel exhaust fluid
yourself in exceptional cases
General information
You can replenish Diesel exhaust fluid yourself
in exceptional cases, e.g., to get to your sched‐
uled service.
Information WARNING
Small amounts of ammonia fumes can
escape when opening the Diesel exhaust fluid
container. Ammonia fumes have a pungent
odor and irritate skin, mucous membranes, and
eyes. There is risk of injuries. Do not inhale es‐
caping ammonia fumes. Avoid the contact of
articles of clothing, skin or eyes with Diesel ex‐Seite 212MobilityFuel212
Online Edition for Part no. 01 40 2 963 410 - VI/15
Page 213 of 275
haust fluid. Do not swallow any Diesel exhaust
fluid. Keep children away from Diesel exhaust
fluids.◀
WARNING
Operating materials, e.g. oils, greases,
coolants, fuels, can contain harmful ingredi‐
ents. There is risk of injuries or danger to life.
Observe the instructions on the containers.
Avoid the contact of articles of clothing, skin or
eyes with operating materials. Do not refill op‐
erating materials into different bottles. Store
operating materials out of reach of children.◀
CAUTION
The Diesel exhaust fluid ingredients are
very aggressive. There is risk of property dam‐
age. Avoid contact of Diesel exhaust fluid with
surfaces of the vehicle.◀
Suitable Diesel exhaust fluid▷Recommended: BMW Diesel Exhaust
Fluid. With this bottle and its special
adapter, Diesel exhaust fluid can be replen‐
ished simply and safely.▷Alternatively recommended: NOx Diesel
exhaust fluid AUS 32.
Diesel exhaust fluid can be purchased at a
dealer’s service center or another qualified
service center or repair shop.
Refill quantity
When the Reserve display starts, add at least
3 bottles of Diesel exhaust fluid.
This corresponds to approx. 1.5 US gal/6 liters.
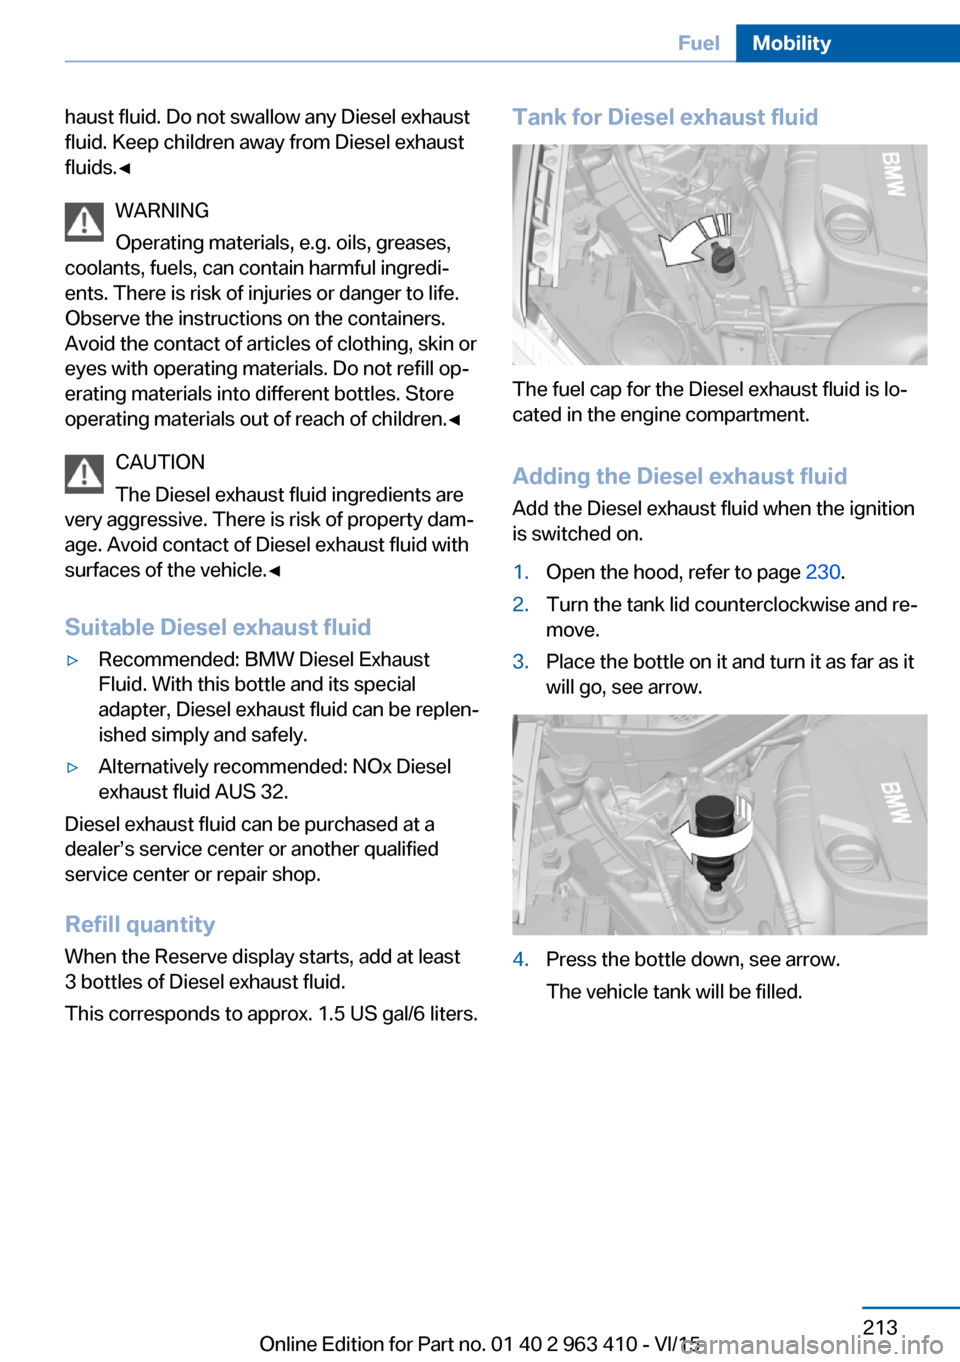
Tank for Diesel exhaust fluid
The fuel cap for the Diesel exhaust fluid is lo‐
cated in the engine compartment.
Adding the Diesel exhaust fluid
Add the Diesel exhaust fluid when the ignition
is switched on.
1.Open the hood, refer to page 230.2.Turn the tank lid counterclockwise and re‐
move.3.Place the bottle on it and turn it as far as it
will go, see arrow.4.Press the bottle down, see arrow.
The vehicle tank will be filled.Seite 213FuelMobility213
Online Edition for Part no. 01 40 2 963 410 - VI/15