ESP BMW X5 4.8I 2008 E70 Manual PDF
[x] Cancel search | Manufacturer: BMW, Model Year: 2008, Model line: X5 4.8I, Model: BMW X5 4.8I 2008 E70Pages: 292, PDF Size: 9.32 MB
Page 242 of 292
Wheels and tires
240
Wheels with electronics for
TPM Tire Pressure Monitor
When mounting new tires or changing from
summer to winter tires or vice versa, only use
wheels with TPM electronics, otherwise the
Tire Pressure Monitor cannot detect a flat tire,
refer to page94. Your BMW Sports Activity
Vehicle Center will be happy to advise you on
this subject.
Recommended tire brands
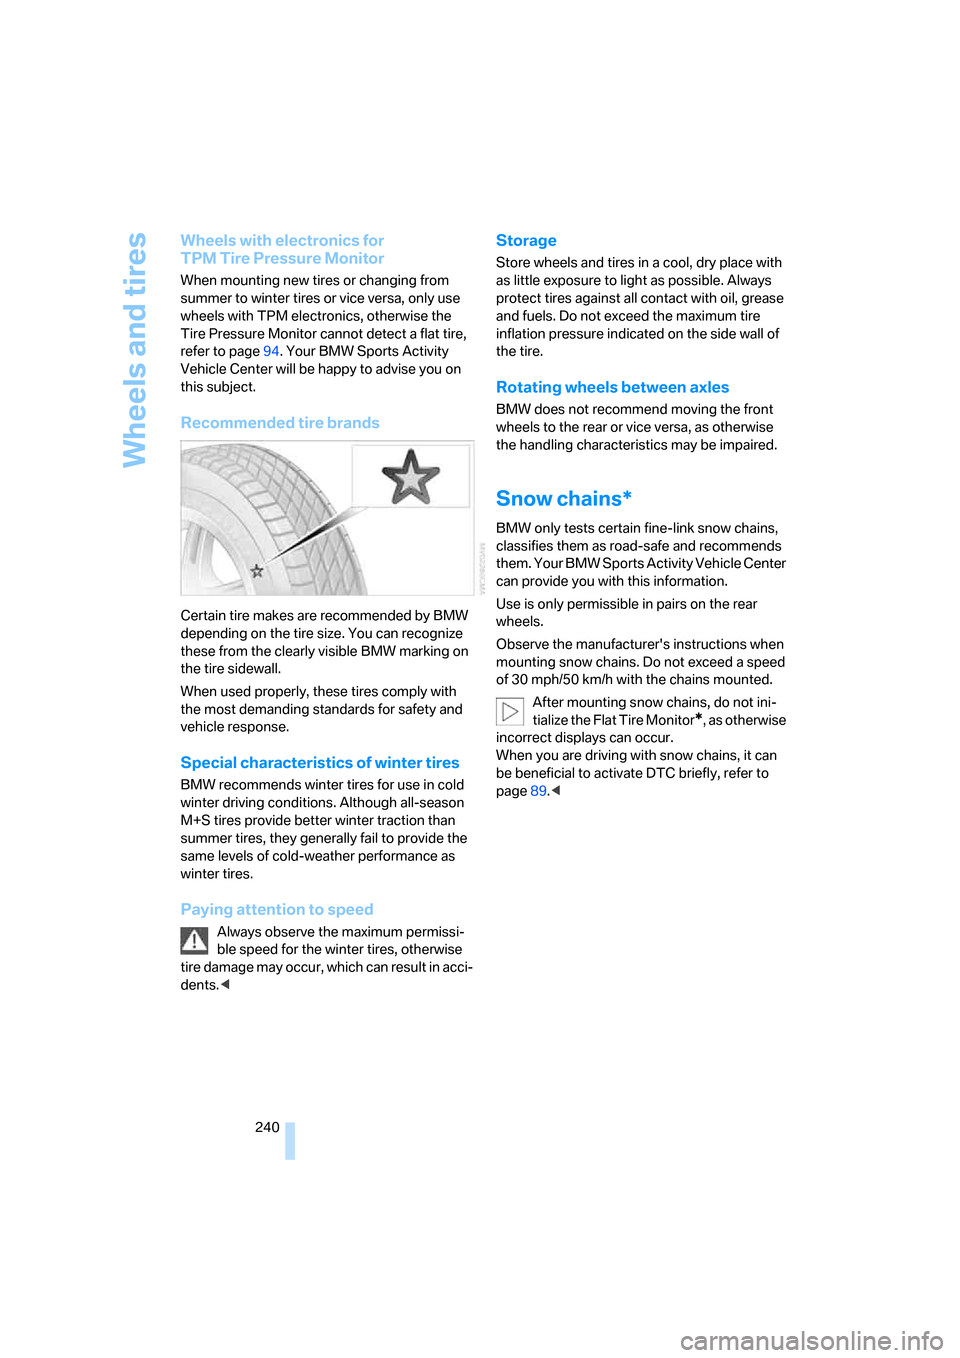
Certain tire makes are recommended by BMW
depending on the tire size. You can recognize
these from the clearly visible BMW marking on
the tire sidewall.
When used properly, these tires comply with
the most demanding standards for safety and
vehicle response.
Special characteristics of winter tires
BMW recommends winter tires for use in cold
winter driving conditions. Although all-season
M+S tires provide better winter traction than
summer tires, they generally fail to provide the
same levels of cold-weather performance as
winter tires.
Paying attention to speed
Always observe the maximum permissi-
ble speed for the winter tires, otherwise
tire damage may occur, which can result in acci-
dents.<
Storage
Store wheels and tires in a cool, dry place with
as little exposure to light as possible. Always
protect tires against all contact with oil, grease
and fuels. Do not exceed the maximum tire
inflation pressure indicated on the side wall of
the tire.
Rotating wheels between axles
BMW does not recommend moving the front
wheels to the rear or vice versa, as otherwise
the handling characteristics may be impaired.
Snow chains*
BMW only tests certain fine-link snow chains,
classifies them as road-safe and recommends
them. Your BMW Sports Activity Vehicle Center
can provide you with this information.
Use is only permissible in pairs on the rear
wheels.
Observe the manufacturer's instructions when
mounting snow chains. Do not exceed a speed
of 30 mph/50 km/h with the chains mounted.
After mounting snow chains, do not ini-
tialize the Flat Tire Monitor
*, as otherwise
incorrect displays can occur.
When you are driving with snow chains, it can
be beneficial to activate DTC briefly, refer to
page89.<
Page 243 of 292
Mobility
241Reference
At a glance
Controls
Driving tips
Communications
Navigation
Entertainment
Under the hood
Never attempt to perform any service or
repair operations on your vehicle without
the required professional technical training. If
you do not know what repair procedures to fol-
low, have work on your vehicle done only by
your BMW Sports Activity Vehicle Center or a
workshop that works according to BMW repair
procedures with correspondingly trained per-
sonnel. If this work is not carried out properly,
there is a danger of subsequent damage and
related safety hazards.<
Hood
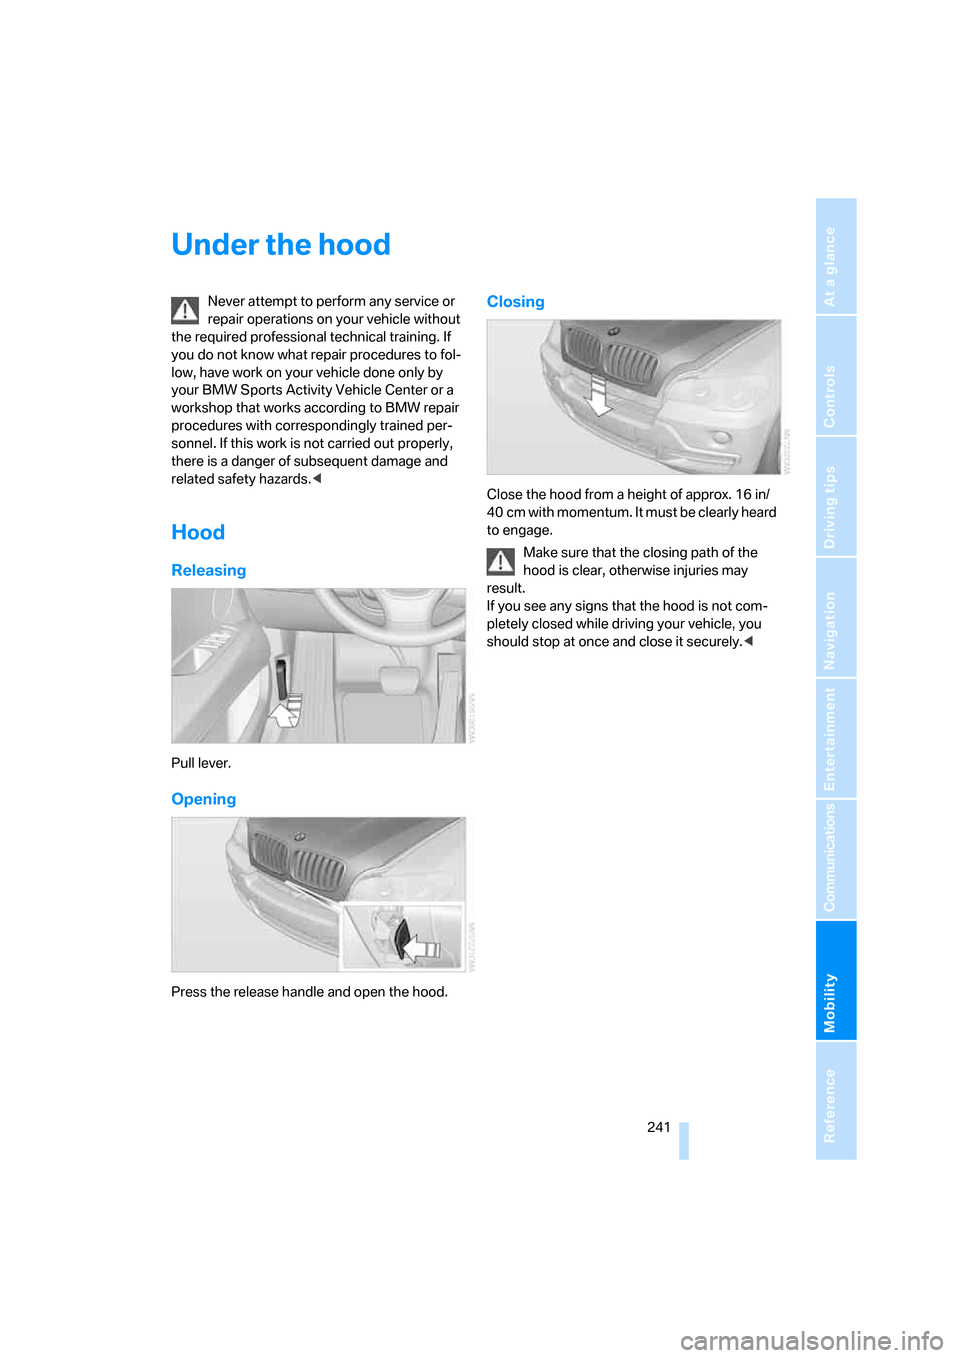
Releasing
Pull lever.
Opening
Press the release handle and open the hood.
Closing
Close the hood from a height of approx. 16 in/
40 cm with momentum. It must be clearly heard
to engage.
Make sure that the closing path of the
hood is clear, otherwise injuries may
result.
If you see any signs that the hood is not com-
pletely closed while driving your vehicle, you
should stop at once and close it securely.<
Page 248 of 292
Maintenance
246
Socket for OBD Onboard
Diagnostics interface
Components which are decisive for the
exhaust-gas composition can be checked via
the OBD socket with a device.
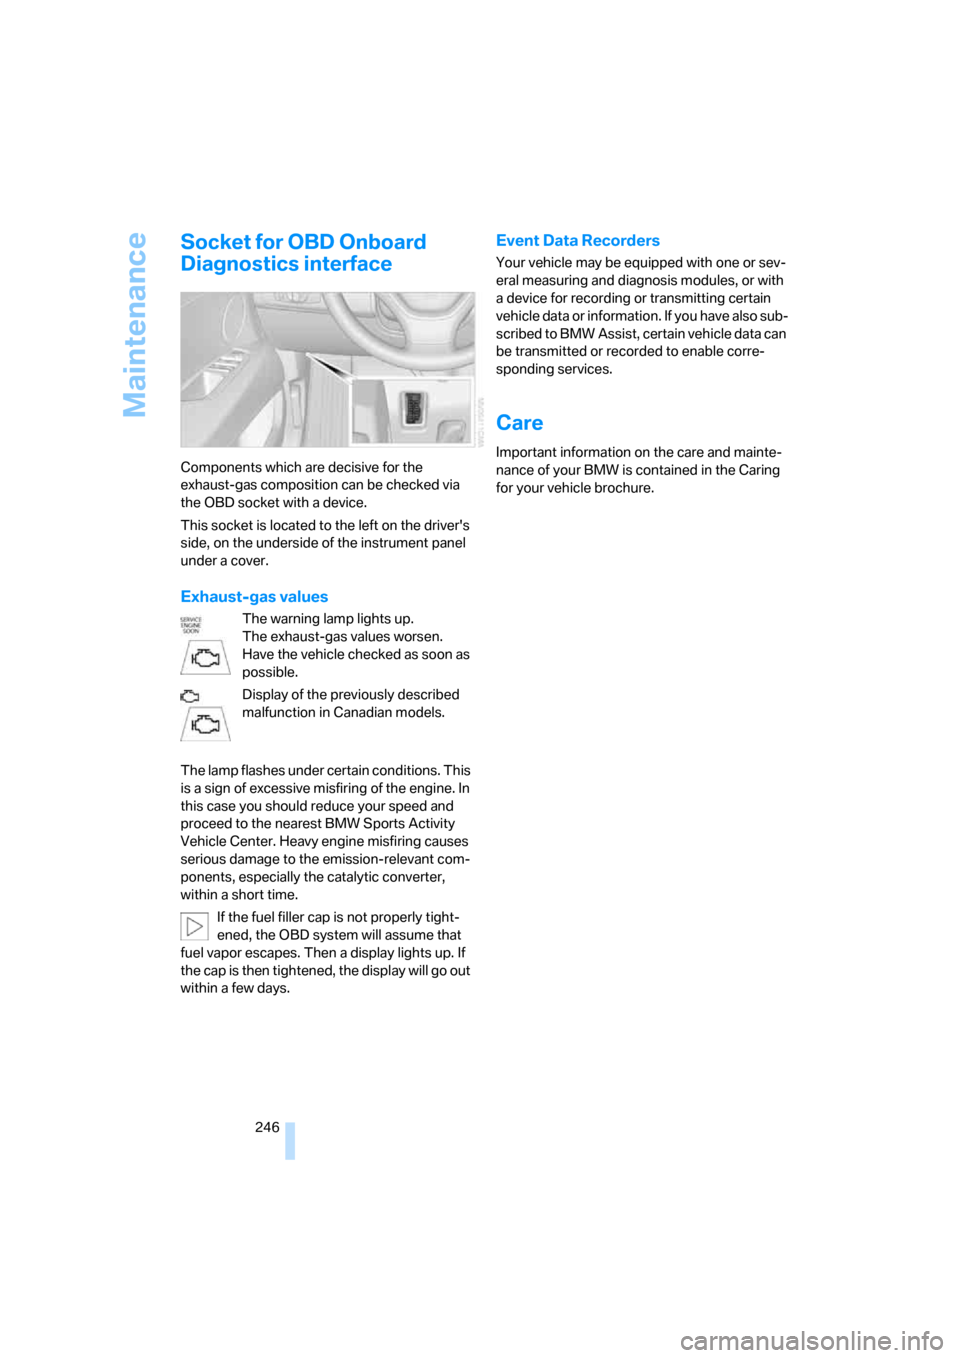
This socket is located to the left on the driver's
side, on the underside of the instrument panel
under a cover.
Exhaust-gas values
The warning lamp lights up.
The exhaust-gas values worsen.
Have the vehicle checked as soon as
possible.
Display of the previously described
malfunction in Canadian models.
The lamp flashes under certain conditions. This
is a sign of excessive misfiring of the engine. In
this case you should reduce your speed and
proceed to the nearest BMW Sports Activity
Vehicle Center. Heavy engine misfiring causes
serious damage to the emission-relevant com-
ponents, especially the catalytic converter,
within a short time.
If the fuel filler cap is not properly tight-
ened, the OBD system will assume that
fuel vapor escapes. Then a display lights up. If
the cap is then tightened, the display will go out
within a few days.
Event Data Recorders
Your vehicle may be equipped with one or sev-
eral measuring and diagnosis modules, or with
a device for recording or transmitting certain
vehicle data or information. If you have also sub-
scribed to BMW Assist, certain vehicle data can
be transmitted or recorded to enable corre-
sponding services.
Care
Important information on the care and mainte-
nance of your BMW is contained in the Caring
for your vehicle brochure.
Page 250 of 292
Replacing components
248 For care and maintenance of the headlamps,
please follow the instructions in the separate
Caring for your vehicle brochure.
For bulbs for which replacement is not
described and for checking and adjusting
headlamp aim, please contact your BMW
Sports Activity Vehicle Center.<
Light-emitting diodes LEDs
Light-emitting diodes installed behind translu-
cent lenses serve as the light source for many of
the controls and displays in your vehicle. These
light-emitting diodes, which operate using a
concept similar to that applied in conventional
lasers, are officially designated as Class 1 light-
emitting diodes.
Do not remove the covers, and never
stare into the unfiltered light for several
hours, as irritation of the retina could result.<
Xenon bulbs
The service life of these bulbs is very long and
the probability of a failure is very low, provided
that they are not switched on and off an unusual
number of times. If one of these bulbs should
nevertheless fail, it is possible to continue driv-
ing with great caution using the fog lamps, pro-
vided traffic laws in your area do not prohibit
this.
Have work on the xenon light unit includ-
ing changing the bulb carried out only by
your BMW Sports Activity Vehicle Center or a
workshop that works according to BMW repair
procedures with correspondingly trained per-
sonnel. Due to the high voltage present in the
system, there is a danger of fatal injuries when
work is carried out improperly.<
Halogen bulbs:
Parking and daytime running lamps
H8 bulb, 35 watts
The bulb is pressurized. Therefore, wear
safety glasses and protective gloves.
Otherwise there is a danger of injuries if the
bulb is accidentally damaged during replace-
ment.<
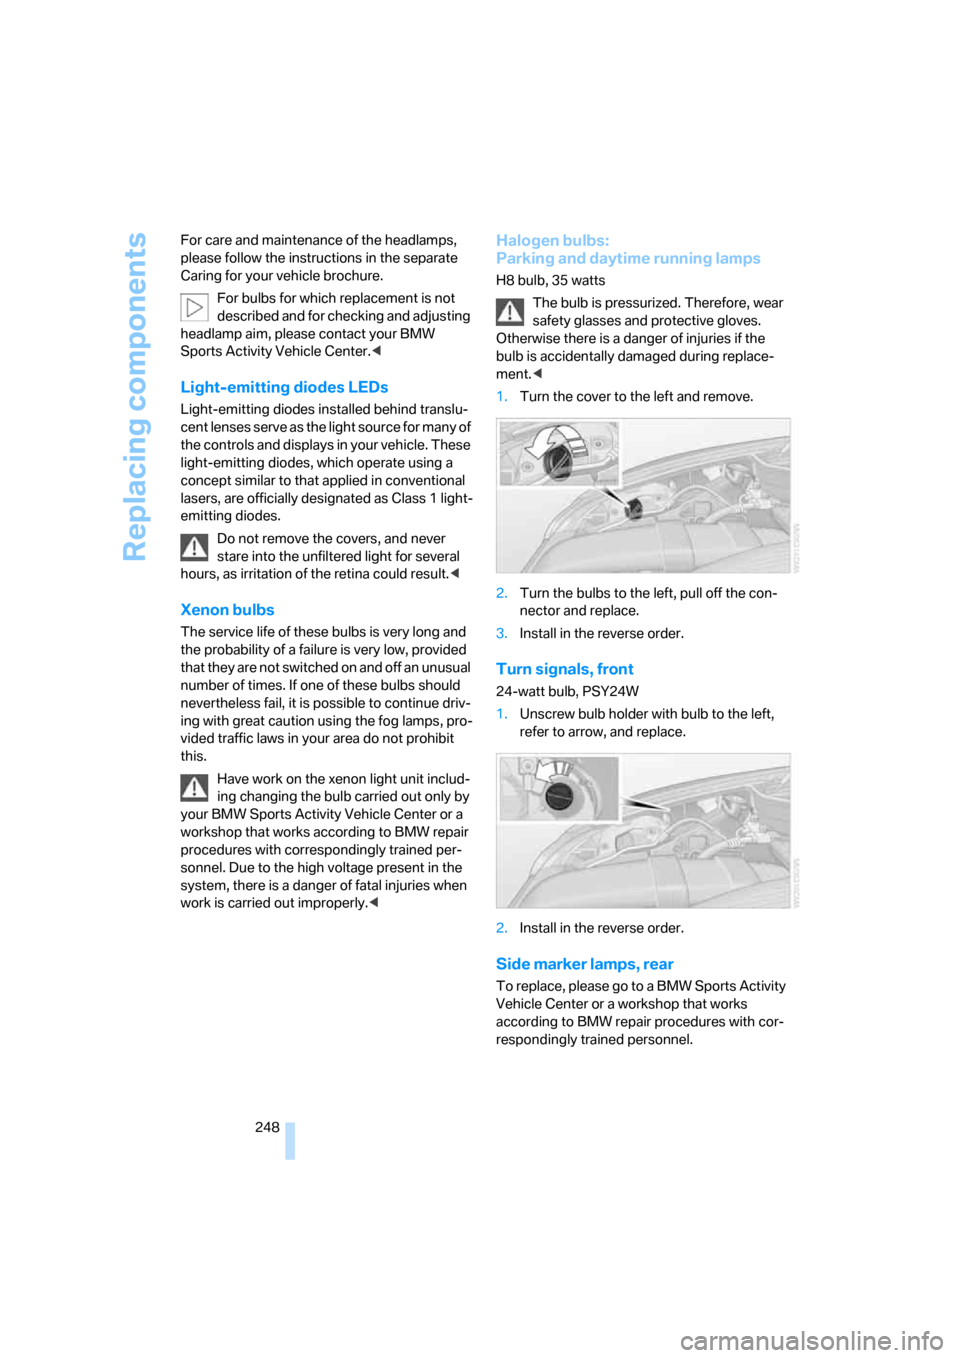
1.Turn the cover to the left and remove.
2.Turn the bulbs to the left, pull off the con-
nector and replace.
3.Install in the reverse order.
Turn signals, front
24-watt bulb, PSY24W
1.Unscrew bulb holder with bulb to the left,
refer to arrow, and replace.
2.Install in the reverse order.
Side marker lamps, rear
To replace, please go to a BMW Sports Activity
Vehicle Center or a workshop that works
according to BMW repair procedures with cor-
respondingly trained personnel.
Page 251 of 292
Mobility
249Reference
At a glance
Controls
Driving tips
Communications
Navigation
Entertainment
Tail lamps
>Turn signals, brake lamps:
21-watt bulb, P21W
>Backup lamps and brake force display:
16-watt bulb, W16W
>Rear lamp: LED technology.
In case of a defect, please go to a BMW
Sports Activity Vehicle Center or a work-
shop that works according to BMW repair
procedures with correspondingly trained
personnel.
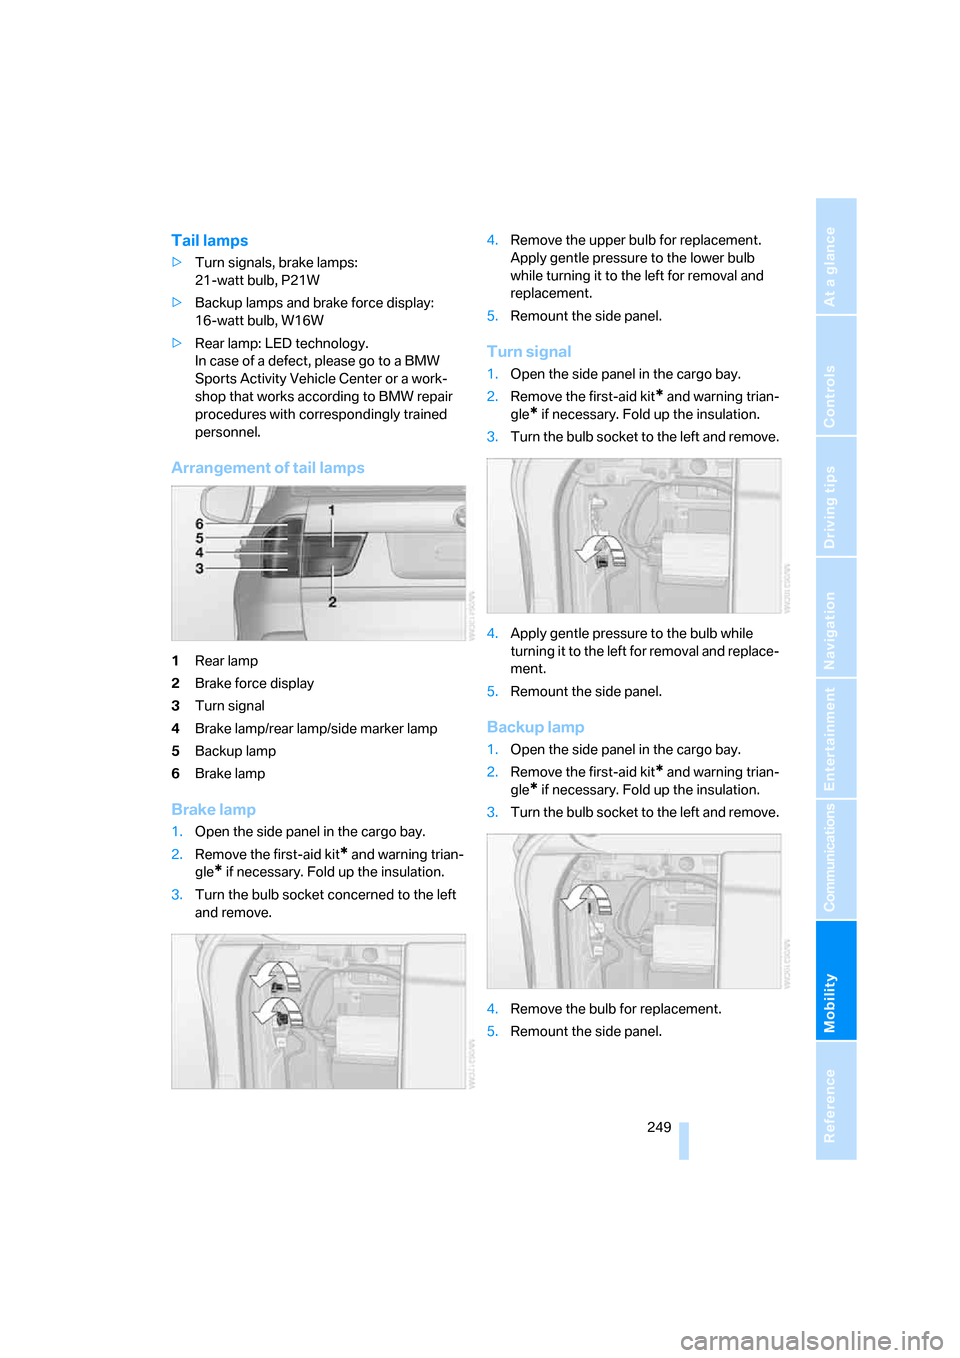
Arrangement of tail lamps
1Rear lamp
2Brake force display
3Turn signal
4Brake lamp/rear lamp/side marker lamp
5Backup lamp
6Brake lamp
Brake lamp
1.Open the side panel in the cargo bay.
2.Remove the first-aid kit
* and warning trian-
gle
* if necessary. Fold up the insulation.
3.Turn the bulb socket concerned to the left
and remove.4.Remove the upper bulb for replacement.
Apply gentle pressure to the lower bulb
while turning it to the left for removal and
replacement.
5.Remount the side panel.
Turn signal
1.Open the side panel in the cargo bay.
2.Remove the first-aid kit
* and warning trian-
gle
* if necessary. Fold up the insulation.
3.Turn the bulb socket to the left and remove.
4.Apply gentle pressure to the bulb while
turning it to the left for removal and replace-
ment.
5.Remount the side panel.
Backup lamp
1.Open the side panel in the cargo bay.
2.Remove the first-aid kit
* and warning trian-
gle
* if necessary. Fold up the insulation.
3.Turn the bulb socket to the left and remove.
4.Remove the bulb for replacement.
5.Remount the side panel.
Page 252 of 292
Replacing components
250
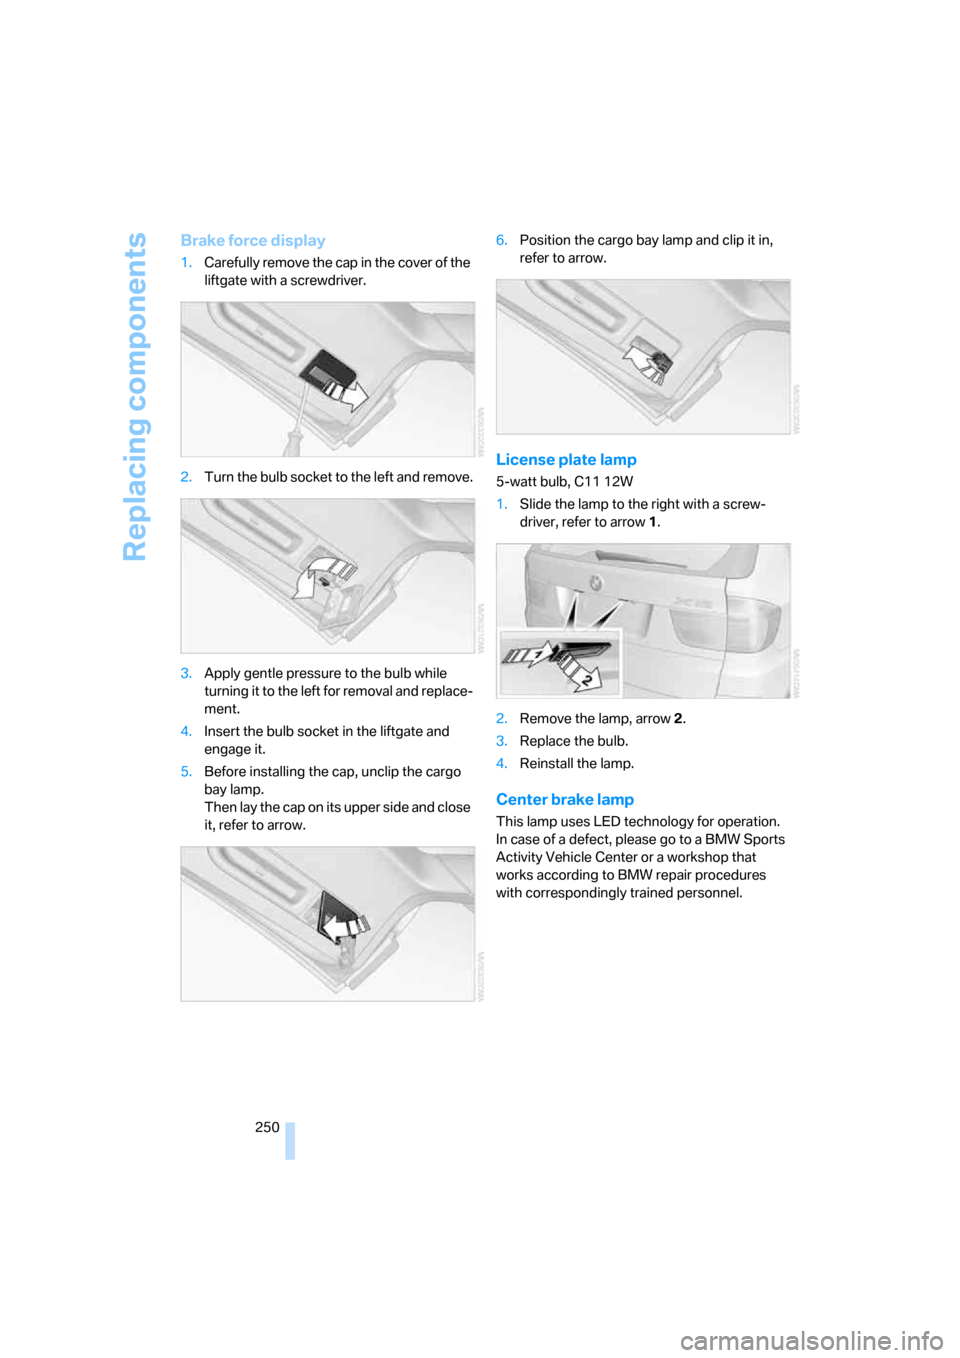
Brake force display
1.Carefully remove the cap in the cover of the
liftgate with a screwdriver.
2.Turn the bulb socket to the left and remove.
3.Apply gentle pressure to the bulb while
turning it to the left for removal and replace-
ment.
4.Insert the bulb socket in the liftgate and
engage it.
5.Before installing the cap, unclip the cargo
bay lamp.
Then lay the cap on its upper side and close
it, refer to arrow.6.Position the cargo bay lamp and clip it in,
refer to arrow.
License plate lamp
5-watt bulb, C11 12W
1.Slide the lamp to the right with a screw-
driver, refer to arrow1.
2.Remove the lamp, arrow2.
3.Replace the bulb.
4.Reinstall the lamp.
Center brake lamp
This lamp uses LED technology for operation.
In case of a defect, please go to a BMW Sports
Activity Vehicle Center or a workshop that
works according to BMW repair procedures
with correspondingly trained personnel.
Page 257 of 292
Mobility
255Reference
At a glance
Controls
Driving tips
Communications
Navigation
Entertainment
Giving and receiving assistance
Emergency request
Conditions for an emergency request:
>Full preparation package mobile phone.
With this equipment, an emergency request
is still possible when no mobile phone is
paired in the vehicle.
>BMW Assist is activated.
Activating BMW Assist, refer to page228.
>Radio readiness is switched on.
>The BMW Assist system is logged in on a
wireless communications network.
>The emergency request system is opera-
ble.
When the contract of participation with BMW
Assist expires, the BMW Assist system can be
deactivated by a BMW Sports Activity Vehicle
Center without having to visit a workshop. Once
the BMW Assist system has been deactivated,
emergency requests are not possible. The
BMW Assist system be reactivated by a BMW
Sports Activity Vehicle Center after signing a
new contract.
Initiating an emergency request
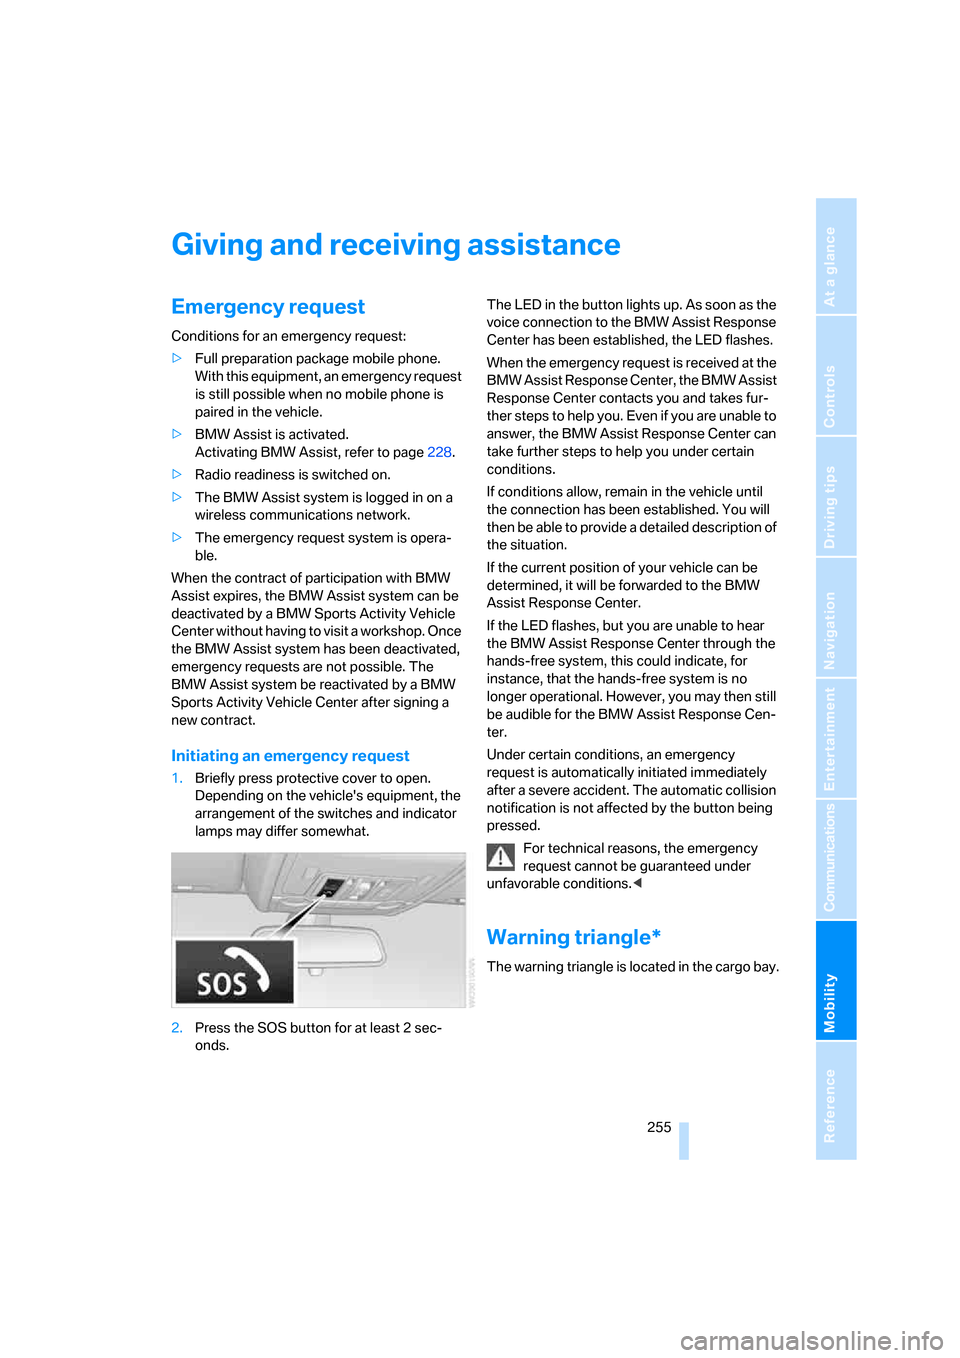
1.Briefly press protective cover to open.
Depending on the vehicle's equipment, the
arrangement of the switches and indicator
lamps may differ somewhat.
2.Press the SOS button for at least 2 sec-
onds.The LED in the button lights up. As soon as the
voice connection to the BMW Assist Response
Center has been established, the LED flashes.
When the emergency request is received at the
BMW Assist Response Center, the BMW Assist
Response Center contacts you and takes fur-
ther steps to help you. Even if you are unable to
answer, the BMW Assist Response Center can
take further steps to help you under certain
conditions.
If conditions allow, remain in the vehicle until
the connection has been established. You will
then be able to provide a detailed description of
the situation.
If the current position of your vehicle can be
determined, it will be forwarded to the BMW
Assist Response Center.
If the LED flashes, but you are unable to hear
the BMW Assist Response Center through the
hands-free system, this could indicate, for
instance, that the hands-free system is no
longer operational. However, you may then still
be audible for the BMW Assist Response Cen-
ter.
Under certain conditions, an emergency
request is automatically initiated immediately
after a severe accident. The automatic collision
notification is not affected by the button being
pressed.
For technical reasons, the emergency
request cannot be guaranteed under
unfavorable conditions.<
Warning triangle*
The warning triangle is located in the cargo bay.
Page 260 of 292
Giving and receiving assistance
258
Being towed
Make sure that the ignition is switched on,
refer to page59, otherwise the low
beams, tail lamps, turn signals and windshield
wipers would not be available. When the engine
is stopped, there is no power assist. This then
requires increased effort for braking and steer-
ing. Active steering is deactivated and larger
steering wheel movements are required.<
Switch on the hazard warning flashers depend-
ing on the local regulations. If the electrical sys-
tem fails, mark the vehicle to be towed, e.g. with
a sign or warning triangle in the rear window.
Engage transmission position N and release the
parking brake before towing.
If transmission position N cannot be engaged,
manually release the transmission lock, refer to
page65.
Do not exceed a towing speed of 45 mph/
70 km/h and a towing distance of
90 miles/150 km, otherwise the automatic
transmission may be damaged.<
Towing methods
Do not lift vehicle by tow fitting or body
and chassis parts, otherwise damage may
result.<
In some countries, towing with tow bars or
ropes in public traffic is not permitted. Familiar-
ize yourself with the regulations on towing in the
respective country.
With tow bar
The towing vehicle may not be lighter
than the vehicle to be towed, otherwise it
will not be possible to reliably control vehicle
response.<
The tow fittings used should be on the same
side on both vehicles. Should it prove impossi-
ble to avoid mounting the tow bar at an offset
angle, please observe the following:
>Clearance and maneuvering capability will
be sharply limited during cornering.
>When mounted at an angle, the tow bar will
exert lateral forces, tending to push the
vehicle sideways.Only attach the tow bar to the tow fittings,
as attachment to other vehicle parts can
lead to damage.<
With tow rope
When starting off in the towing vehicle, make
sure that the tow rope is taut.
To avoid jerking and the associated
stresses on vehicle components when
towing, always use nylon ropes or nylon straps.
Only attach tow ropes to the tow fittings, as
attachment to other vehicle parts can lead to
damage.<
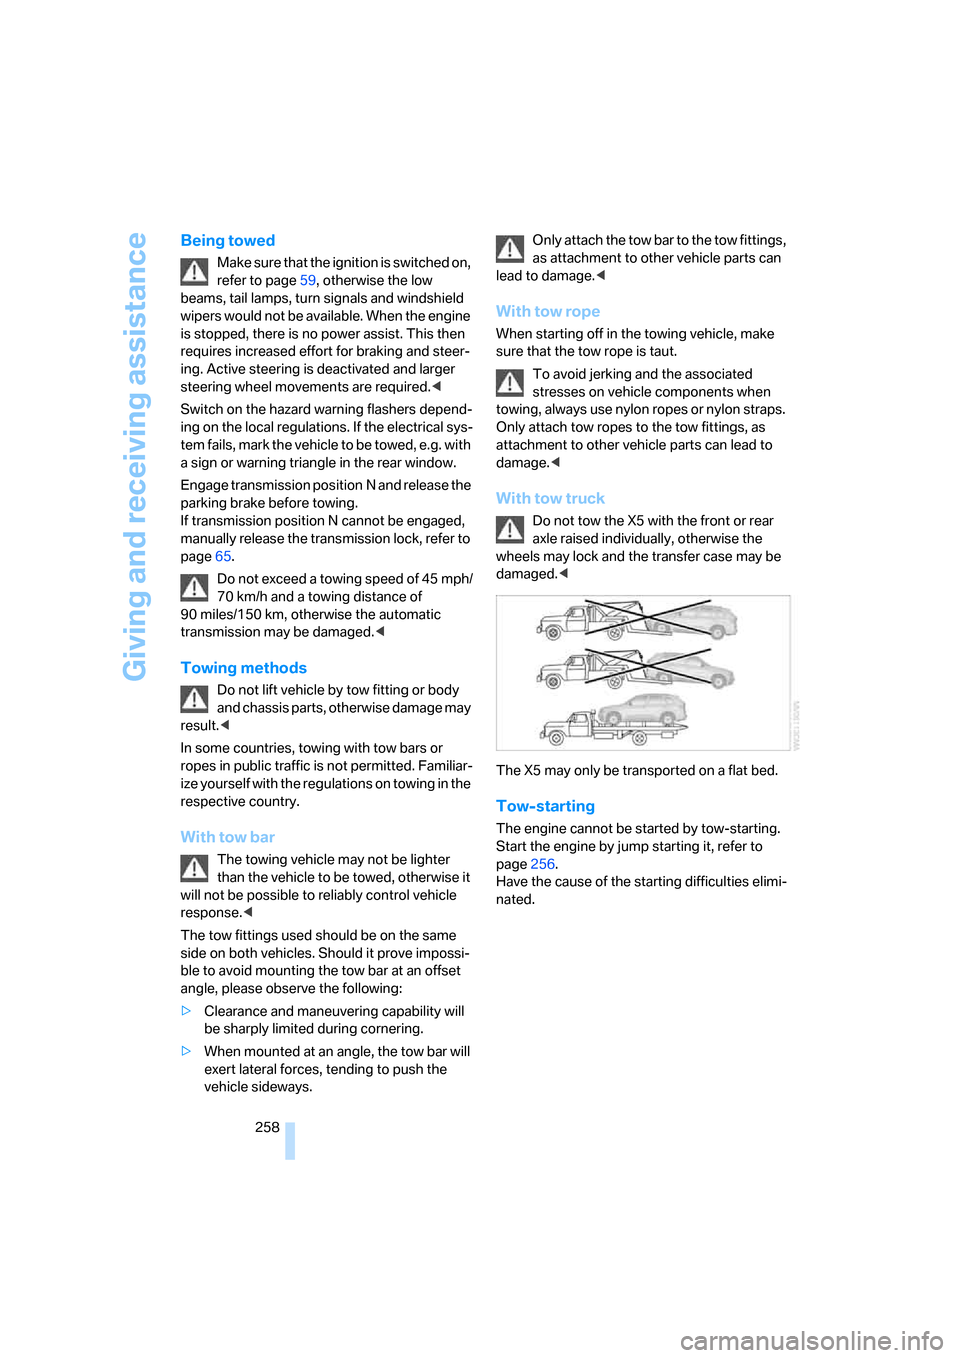
With tow truck
Do not tow the X5 with the front or rear
axle raised individually, otherwise the
wheels may lock and the transfer case may be
damaged.<
The X5 may only be transported on a flat bed.
Tow-starting
The engine cannot be started by tow-starting.
Start the engine by jump starting it, refer to
page256.
Have the cause of the starting difficulties elimi-
nated.
Page 278 of 292
Everything from A to Z
276 Engine oil
– adding243
– additives, refer to Approved
engine oils243
– approved engine oil243
– checking oil level242
– electronic oil level check242
"Engine oil level"243
Engine output, refer to Engine
data262
Engine overheating, refer to
Coolant temperature72
Engine speed262
Engine starting, refer to
Starting engine60
"Enter address"139
Entering country of
destination139
Entering destination139
Entering house number or
intersection140
Entering intersection140
Entering street140
"Entertainment"162
Entertainment sound output
on/off163
"Equalizer", refer to Tone
control165
Equalizer, refer to Tone
control165
"ESN"172
ESP Electronic Stability
Program, refer to DSC
Dynamic Stability
Control89
Event Data Recorders246
Exhaust system, refer to Hot
exhaust system129
Exterior mirrors51
– adjusting51
– automatic dimming
feature52
– automatic heating52
– folding in and out51
– tilting down passenger-side
exterior mirror52External audio device119
– refer to AUX-In
connection188
Eye for tow-starting and
towing, refer to Tow
fitting257
F
Fader, refer to Tone
control164
Failure messages, refer to
Check Control78
False alarm, refer to Avoiding
unintentional alarms36
Fastening safety belts, refer to
Safety belts48
– warning lamp49
Fastening system,
adaptive124
Fastest route for
navigation148
Fast forward
– CD changer178
– CD player178
– DVD changer183
"Fast route" for
navigation148
Fault displays, refer to Check
Control78
Filler neck for washer fluid68
First-aid kit256
Flashing during locking/
unlocking, refer to Setting
confirmation signals31
Flashlight119
Flat tire
– changing wheels251
– compact wheel251
– Flat Tire Monitor92
– run-flat tires93,95,239
– TPM Tire Pressure
Monitor94
Flat Tire Monitor FTM92
Fluid reservoir, refer to Filler
neck for washer fluid68
"FM", reception
range163,166FM, waveband166
Fog lamps105
– indicator lamp13,105
Folding display screen open/
closed, DVD system in
rear192
Folding rear seat backrest123
Footbrake, refer to Braking
safely129
Footwell lamps105
For your own safety5
4-wheel drive system, refer to
xDrive90
Fresh-air nozzles, refer to Air
vents106
Front airbags97
Front passenger airbags97
– deactivating98
– refer to Exception of front
passenger seat55
Front seat adjustment43
FTM Flat Tire Monitor92
– false alarms92
– indicating a flat tire93
– initializing the system92
– malfunction96
– snow chains240
– system limits92
– warning lamp93
Fuel233
– capacity264
– display72
– high-quality brands233
– quality233
– saving128
– specifications233
Fuel clock, refer to Fuel
gauge72
Fuel consumption display,
computer, average fuel
consumption73
Fuel display, refer to Fuel
gauge72
Fuel filler door232
– closing232
– opening232
– releasing manually232
Fuses253