battery BUICK PARK AVENUE 2004 Owner's Manual
[x] Cancel search | Manufacturer: BUICK, Model Year: 2004, Model line: PARK AVENUE, Model: BUICK PARK AVENUE 2004Pages: 410, PDF Size: 4.45 MB
Page 64 of 410
Servicing Your Air Bag-Equipped
Vehicle
Air bags affect how your vehicle should be serviced.
There are parts of the air bag systems in several places
around your vehicle. Your dealer and the service
manual have information about servicing your vehicle
and the air bag systems. To purchase a service manual,
seeService Publications Ordering Information on
page 7-11.
{CAUTION:
For up to 10 seconds after the ignition key is
turned off and the battery is disconnected,
an air bag can still in�ate during improper
service. You can be injured if you are close
to an air bag when it in�ates. Avoid yellow
connectors. They are probably part of the air
bag systems. Be sure to follow proper service
procedures, and make sure the person
performing work for you is quali�ed to do so.
The air bag systems do not need regular maintenance.
Restraint System Check
Checking Your Restraint Systems
Now and then, make sure the safety belt reminder light
and all your belts, buckles, latch plates, retractors
and anchorages are working properly. Look for any other
loose or damaged safety belt system parts. If you see
anything that might keep a safety belt system from doing
its job, have it repaired.
Torn or frayed safety belts may not protect you in a
crash. They can rip apart under impact forces. If a belt
is torn or frayed, get a new one right away.
Also look for any opened or broken air bag covers, and
have them repaired or replaced. (The air bag system
does not need regular maintenance.)
1-58
Page 71 of 410
Remote Keyless Entry System
If equipped, the remote keyless entry system operates
on a radio frequency subject to Federal Communications
Commission (FCC) Rules and with Industry Canada.
This device complies with Part 15 of the FCC Rules.
Operation is subject to the following two conditions:
1. This device may not cause interference, and
2. This device must accept any interference received,
including interference that may cause undesired
operation of the device.
This device complies with RSS-210 of Industry Canada.
Operation is subject to the following two conditions:
1. This device may not cause interference, and
2. This device must accept any interference received,
including interference that may cause undesired
operation of the device.
Changes or modi�cations to this system by other than
an authorized service facility could void authorization to
use this equipment.At times you may notice a decrease in range. This is
normal for any remote keyless entry system. If the
transmitter does not work or if you have to stand closer
to your vehicle for the transmitter to work, try this:
Check the distance. You may be too far from your
vehicle. You may need to stand closer during
rainy or snowy weather.
Check the location. Other vehicles or objects may
be blocking the signal. Take a few steps to the
left or right, hold the transmitter higher, and
try again.
Check to determine if battery replacement or
resynchronization is necessary. See “Battery
Replacement” and “Resynchronization” under
“Remote Keyless Entry System Operation” following
this section.
If you are still having trouble, see your dealer or a
quali�ed technician for service.
2-5
Page 75 of 410
Battery Replacement
Under normal use, the battery in your remote keyless
entry transmitter should last about four years.
You can tell the battery is weak if the transmitter won’t
work at the normal range in any location. If you have
to get close to your vehicle before the transmitter works,
it’s probably time to change the battery.
Notice:When replacing the battery, use care not to
touch any of the circuitry. Static from your body
transferred to these surfaces may damage the
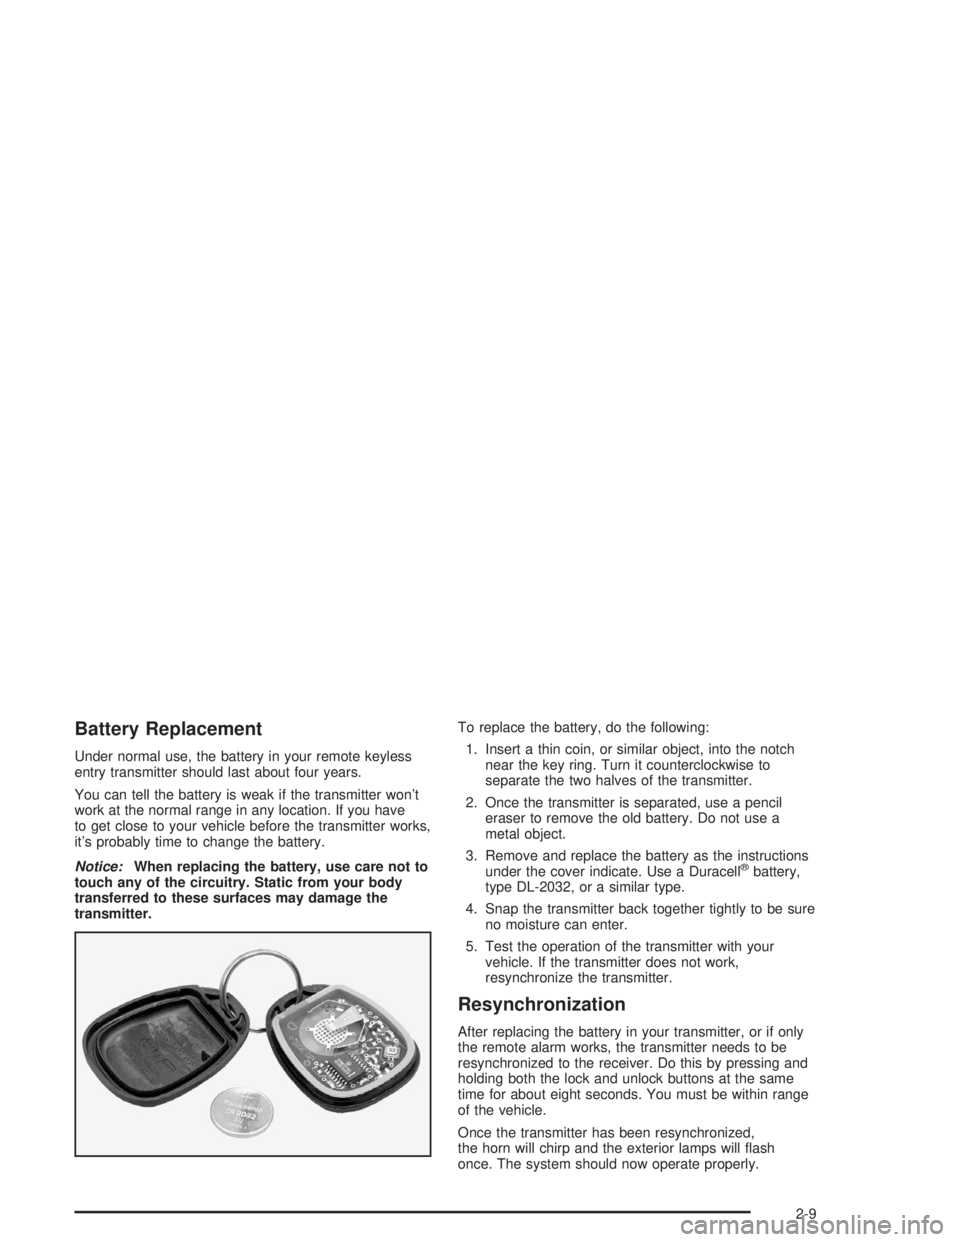
transmitter.To replace the battery, do the following:
1. Insert a thin coin, or similar object, into the notch
near the key ring. Turn it counterclockwise to
separate the two halves of the transmitter.
2. Once the transmitter is separated, use a pencil
eraser to remove the old battery. Do not use a
metal object.
3. Remove and replace the battery as the instructions
under the cover indicate. Use a Duracell
®battery,
type DL-2032, or a similar type.
4. Snap the transmitter back together tightly to be sure
no moisture can enter.
5. Test the operation of the transmitter with your
vehicle. If the transmitter does not work,
resynchronize the transmitter.
Resynchronization
After replacing the battery in your transmitter, or if only
the remote alarm works, the transmitter needs to be
resynchronized to the receiver. Do this by pressing and
holding both the lock and unlock buttons at the same
time for about eight seconds. You must be within range
of the vehicle.
Once the transmitter has been resynchronized,
the horn will chirp and the exterior lamps will �ash
once. The system should now operate properly.
2-9
Page 86 of 410

This light reminds you to activate the theft-deterrent
system. Here’s how to do it:
1. Open the door.
2. Lock the door with the power door lock switch or
the remote keyless entry transmitter (if equipped).
The SECURITY light should come on and stay on.
3. Close all doors. The SECURITY light should go off
after approximately 30 seconds. The alarm is not
armed until the SECURITY light goes off.
If a door is opened without the key or the remote keyless
entry transmitter, the alarm will go off. Your vehicle’s
lamps will �ash and the horn will sound for 30 seconds.
The lamps and horn will then turn off to save battery
power.
Remember, the theft-deterrent system won’t activate
if you lock the doors with a key or use the manual door
lock. It activates only if you use a power door lock
switch with the door open, or with the remote keyless
entry transmitter. You should also remember that
you can start your vehicle with the correct ignition key
if the alarm has been set off.Here’s how to avoid setting off the alarm by accident:
If you don’t want to activate the theft-deterrent
system, the vehicle should be locked with the
door keyafterthe doors are closed.
Always unlock a door with a key, or use the remote
keyless entry transmitter. Unlocking a door any
other way will set off the alarm.
If you set off the alarm by accident, unlock any door
with your key. You can also turn off the alarm by
pressing the unlock button on the remote keyless entry
transmitter. The alarm won’t stop if you try to unlock
a door any other way.
2-20
Page 91 of 410
Key Reminder Warning
If you leave your key in the ignition, with the engine off,
you will hear a warning chime when you open the
driver’s door.
Retained Accessory Power (RAP)
After you turn the ignition off and remove the key,
you will still have power to such accessories as the
radio, sunroof (option) and power windows for up
to 10 minutes. Power is stopped if you open a door.
Starting Your Engine
Move your shift lever to PARK (P) or NEUTRAL (N).
Your engine will not start in any other position — that is
a safety feature. To restart when you are already
moving, use NEUTRAL (N) only.
Notice:Shifting into PARK (P) with the vehicle
moving could damage the transaxle. Shift into
PARK (P) only when your vehicle is stopped.
1. With your foot off the accelerator pedal, turn your
ignition key to START. When the engine starts,
let go of the key. The idle speed will go down as
your engine gets warm.Notice:Holding your key in START for longer than
15 seconds at a time will cause your battery to
be drained much sooner. And the excessive heat
can damage your starter motor. Wait about
15 seconds between each try to help avoid
draining your battery or damaging your starter.
2. If it does not start within 10 seconds, hold your key
in START for about 10 seconds at a time until your
engine starts. Wait about 15 seconds between
each try.
3. If your engine still will not start, or starts but then
stops, it could be �ooded with too much gasoline.
Try pushing your accelerator pedal all the way to the
�oor and holding it there as you hold the key in
START for about three seconds. If the vehicle starts
brie�y but then stops again, do the same thing.
This time keep the pedal down for �ve or six
seconds to clear the extra gasoline from the engine.
After waiting about 15 seconds, repeat the normal
starting procedure.
Notice:Your engine is designed to work with the
electronics in your vehicle. If you add electrical
parts or accessories, you could change the way the
engine operates. Before adding electrical equipment,
check with your dealer. If you do not, your engine
might not perform properly.
2-25
Page 110 of 410

Keep the original transmitter for use in other vehicles as
well as for future HomeLink®programming. It is also
recommended that upon the sale of the vehicle, the
programmed HomeLink
®buttons should be erased for
security purposes. Refer to “Erasing HomeLink®Buttons”
or, for assistance, contact HomeLink®on the internet at:
www.homelink.com or by calling 1-800-355-3515.
Be sure that people and objects are clear of the
garage door or gate operator you are programming.
When programming a garage door, it is advised to
park outside of the garage.
It is recommended that a new battery be installed in
your hand-held transmitter for quicker and more
accurate transmission of the radio frequency.
Your vehicle’s engine should be turned off while
programming the transmitter. Follow these steps to
program up to three channels:
1. Press and hold down the two outside buttons,
releasing only when the indicator light begins to
�ash, after 20 seconds. Do not hold down the
buttons for longer than 30 seconds and do not
repeat this step to program a second and/or third
transmitter to the remaining two HomeLink
®buttons.
2. Position the end of your hand-held transmitter about
1 to 3 inches (3 to 8 cm) away from the HomeLink
®
buttons while keeping the indicator light in view.3. Simultaneously press and hold both the desired
button on HomeLink
®and the hand-held transmitter
button. Do not release the buttons until Step 4
has been completed.
Some entry gates and garage door openers may
require you to substitute Step 3 with the procedure
noted in “Gate Operator and Canadian
Programming” later in this section.
4. The indicator light will �ash slowly at �rst and then
rapidly after HomeLink
®successfully receives the
frequency signal from the hand-held transmitter.
Release both buttons.
5. Press and hold the newly-trained HomeLink
®button
and observe the indicator light.
If the indicator light stays on constantly, programming
is complete and your device should activate when the
HomeLink
®button is pressed and released.
To program the remaining two HomeLink®buttons,
begin with Step 2 under “Programming HomeLink®.”
Do not repeat Step 1 as this will erase all of the
programmed channels.
If the indicator light blinks rapidly for two seconds
and then turns to a constant light, continue with
Steps 6 through 8 following to complete the
programming of a rolling-code equipped device
(most commonly, a garage door opener).
2-44
Page 119 of 410
Instrument Panel Overview...............................3-2
Hazard Warning Flashers................................3-4
Other Warning Devices...................................3-4
Horn.............................................................3-5
Tilt Wheel.....................................................3-5
Turn Signal/Multifunction Lever.........................3-5
Exterior Lamps.............................................3-12
Interior Lamps..............................................3-15
Head-Up Display (HUD).................................3-18
Ultrasonic Rear Parking Assist (URPA)............3-20
Accessory Power Outlets...............................3-22
Ashtrays and Cigarette Lighter........................3-23
Climate Controls............................................3-24
Dual Automatic Climate Control System...........3-24
Outlet Adjustment.........................................3-29
Passenger Compartment Air Filter...................3-30
Steering Wheel Climate Controls.....................3-30
Climate Controls Personalization.....................3-31
Warning Lights, Gages and Indicators.............3-32
Instrument Panel Cluster................................3-33
Speedometer and Odometer...........................3-35
Tachometer.................................................3-35
Safety Belt Reminder Light.............................3-36
Air Bag Readiness Light................................3-36
Battery Warning Light....................................3-37
Brake System Warning Light..........................3-38Anti-Lock Brake System Warning Light.............3-39
Traction Control System (TCS) Warning Light......3-39
Engine Coolant Temperature Gage..................3-40
Malfunction Indicator Lamp.............................3-41
Oil Pressure Light.........................................3-44
Security Light...............................................3-45
Cruise Control Light......................................3-45
Service Vehicle Soon Light............................3-45
Fuel Gage...................................................3-46
Driver Information Center (DIC).......................3-47
DIC Controls and Displays.............................3-47
DIC Warnings and Messages.........................3-50
DIC Vehicle Personalization............................3-51
Audio System(s).............................................3-57
Setting the Time...........................................3-58
Radio with Cassette......................................3-58
Radio with Cassette and CD..........................3-63
Trunk-Mounted CD Changer...........................3-71
Personal Choice Radio Controls......................3-75
Theft-Deterrent Feature..................................3-75
Audio Steering Wheel Controls.......................3-78
Understanding Radio Reception......................3-78
Care of Your Cassette Tape Player.................3-79
Care of Your CDs.........................................3-80
Care of Your CD Player................................3-80
Heated Backlite Antenna................................3-80
Section 3 Instrument Panel
3-1
Page 136 of 410
Glove Box Lamp
When you open the glove box, a lamp will come on
inside the glove box. This will automatically turn off when
the glove box is closed.
Battery Rundown Protection
This feature shuts off all lamps that are left on for more
than 10 minutes when the ignition is off. This will keep
your battery from running down.
Head-Up Display (HUD)
{CAUTION:
If the HUD image is too bright, or too high in
your �eld of view, it may take you more time to
see things you need to see when it is dark
outside. Be sure to keep the HUD image dim
and placed low in your �eld of view.
If your vehicle is equipped with the Head-Up Display
(HUD), you can see some of the driver information that
appears on your instrument panel cluster.The information may be displayed in English or metric
units and appears as a re�ection in the windshield.
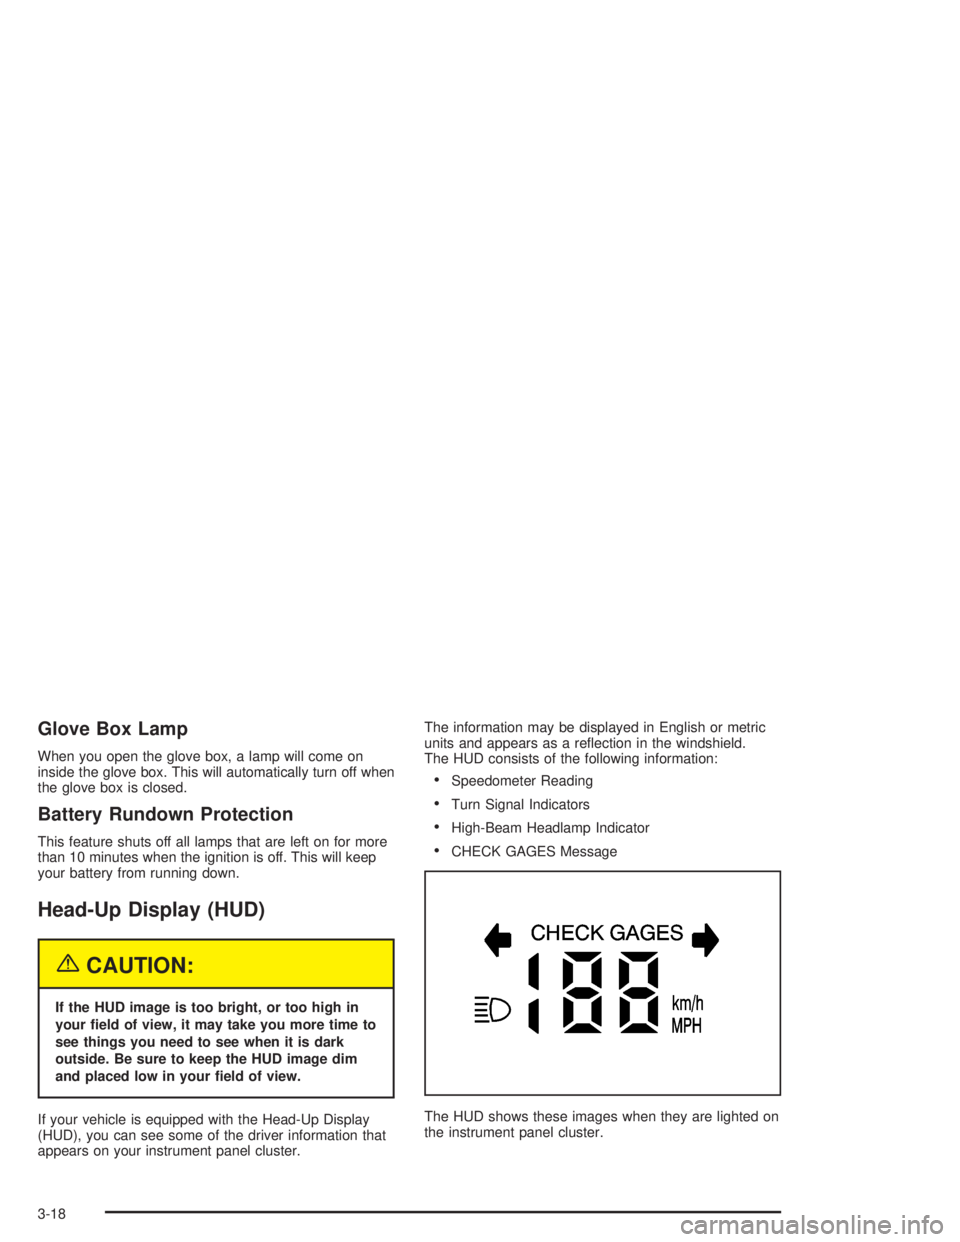
The HUD consists of the following information:
Speedometer Reading
Turn Signal Indicators
High-Beam Headlamp Indicator
CHECK GAGES Message
The HUD shows these images when they are lighted on
the instrument panel cluster.
3-18
Page 140 of 410

If the URPA system is not functioning properly, the
display will �ash red, indicating that there is a problem.
The light will also �ash red while driving if a trailer is
attached to your vehicle, or a bicycle or object is on the
back of, or hanging out of your trunk. The light will
continue to �ash until the trailer or the object is removed
and your vehicle is driven forward at at least 15 mph
(25 km/h).
It may also �ash red if the ultrasonic sensors are not
kept clean. So be sure to keep your rear bumper free of
mud, dirt, snow, ice and slush or materials such as
paint or the system may not work properly. If after
cleaning the rear bumper and driving forward at at least
15 mph (25 km/h), the display continues to �ash red,
see your dealer. For cleaning instructions, seeCleaning
the Outside of Your Vehicle on page 5-93.
It may also �ash red if your vehicle is moving in
REVERSE (R) at a speed greater than 3 mph (5 km/h).
Other conditions that may affect system performance
include things like the vibrations from a jackhammer or
the compression of airbrakes on a very large truck.
As always, drivers should use care when backing up a
vehicle. Always look behind you, being sure to check
for other vehicles, obstructions and blind spots.Accessory Power Outlets
The accessory power outlets can be used to plug in
electrical equipment such as a cellular telephone or
CB radio.
Your vehicle has two power outlets located in the rear
storage area of the front center console. SeeCenter
Console Storage Area on page 2-48for more information
on location.
Your vehicle may have a small cap that must be pulled
down to access the accessory power outlet. If it does,
when not using the outlet be sure to cover it with
the protective cap.
The accessory power outlets will only operate while the
ignition key is in RUN and for 10 minutes after turning
the ignition off. If you would like to operate an accessory
for an extended period of time, contact your dealer for
more information.
Notice:Leaving electrical equipment on for
extended periods will drain the battery. Always turn
off electrical equipment when not in use and do
not plug in equipment that exceeds the maximum
amperage rating.
3-22
Page 155 of 410
{CAUTION:
If the air bag readiness light stays on after you
start your vehicle, it means the air bag system
may not be working properly. The air bags in
your vehicle may not in�ate in a crash, or they
could even in�ate without a crash. To help
avoid injury to yourself or others, have your
vehicle serviced right away if the air bag
readiness light stays on after you start your
vehicle.
The air bag readiness light should �ash for a few
seconds when you turn the ignition key to RUN. If the
light doesn’t come on then, have it �xed so it will
be ready to warn you if there is a problem.
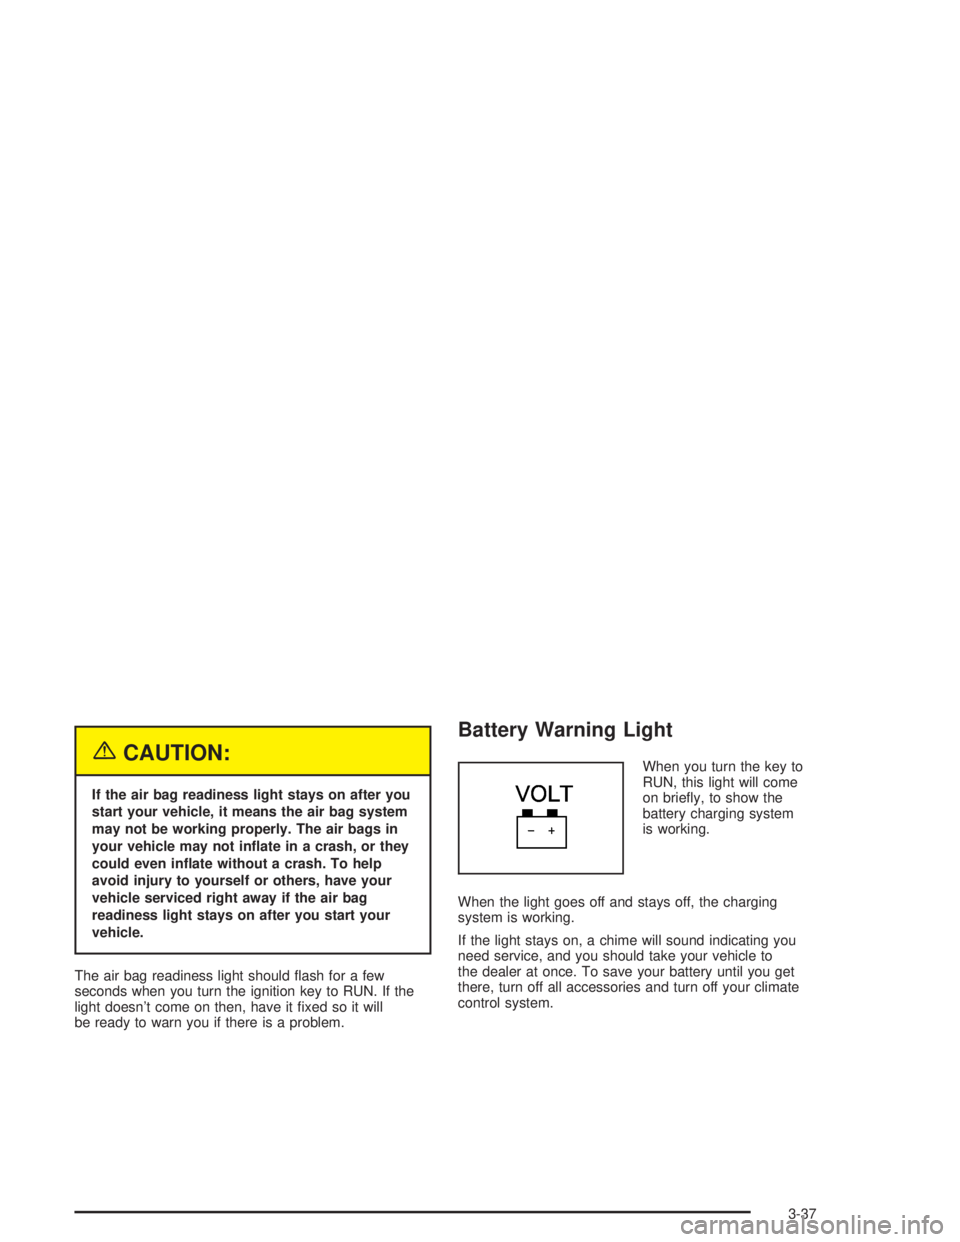
Battery Warning Light
When you turn the key to
RUN, this light will come
on brie�y, to show the
battery charging system
is working.
When the light goes off and stays off, the charging
system is working.
If the light stays on, a chime will sound indicating you
need service, and you should take your vehicle to
the dealer at once. To save your battery until you get
there, turn off all accessories and turn off your climate
control system.
3-37