center console BUICK REGAL 2017 Owner's Manual
[x] Cancel search | Manufacturer: BUICK, Model Year: 2017, Model line: REGAL, Model: BUICK REGAL 2017Pages: 344, PDF Size: 4.91 MB
Page 21 of 344
Buick Regal Owner Manual (GMNA-Localizing-U.S./Canada/Mexico-
9804381) - 2017 - crc - 8/30/16
20 In Brief
SeeAssistance Systems for Parking
or Backing 0196.
Power Outlets
The accessory power outlet can be
used to plug in electrical equipment,
such as a cell phone or MP3 player.
There are two 12-volt accessory
power outlets located:
.
On the center stack next to the
ashtray.
. Inside the center console.
The outlet is powered when the
ignition is in ON/RUN or ACC/
ACCESSORY, or until the driver
door is opened within 10 minutes of
turning off the vehicle. See Retained
Accessory Power (RAP) 0173.
Open the protective cover to use the
accessory power outlet.
See Power Outlets 098.
Universal Remote System
If equipped, this system provides a
way to replace up to three remote
control transmitters used to activate
devices such as garage door
openers, security systems, and
home automation devices.
Read the instructions completely
before attempting to program the
Universal Remote system. Because
of the steps involved, it may be
helpful to have another person
available to assist with programming
the Universal Remote system.
See Universal Remote System
0 140.
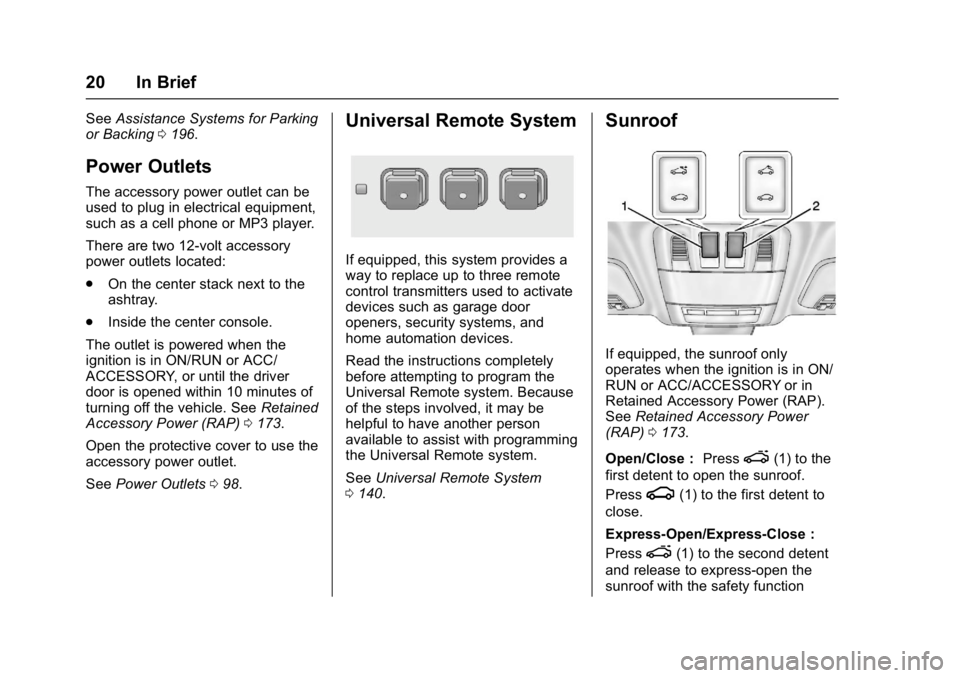
Sunroof
If equipped, the sunroof only
operates when the ignition is in ON/
RUN or ACC/ACCESSORY or in
Retained Accessory Power (RAP).
See Retained Accessory Power
(RAP) 0173.
Open/Close : Press
e(1) to the
first detent to open the sunroof.
Press
g(1) to the first detent to
close.
Express-Open/Express-Close :
Press
e(1) to the second detent
and release to express-open the
sunroof with the safety function
Page 31 of 344
Buick Regal Owner Manual (GMNA-Localizing-U.S./Canada/Mexico-
9804381) - 2017 - crc - 8/30/16
30 Keys, Doors, and Windows
and all previously known keys
will no longer work with the
vehicle.
Remaining keys can be learned by
following the procedure in
“Programming with a Recognized
Transmitter (Key Vehicles Only).”
Programming with a Recognized
Transmitter (Keyless Access
Vehicles Only)
A new transmitter can be
programmed to the vehicle when
there is one recognized transmitter.
To program, the vehicle must be off
and all of the transmitters, both
currently recognized and new, must
be with you.
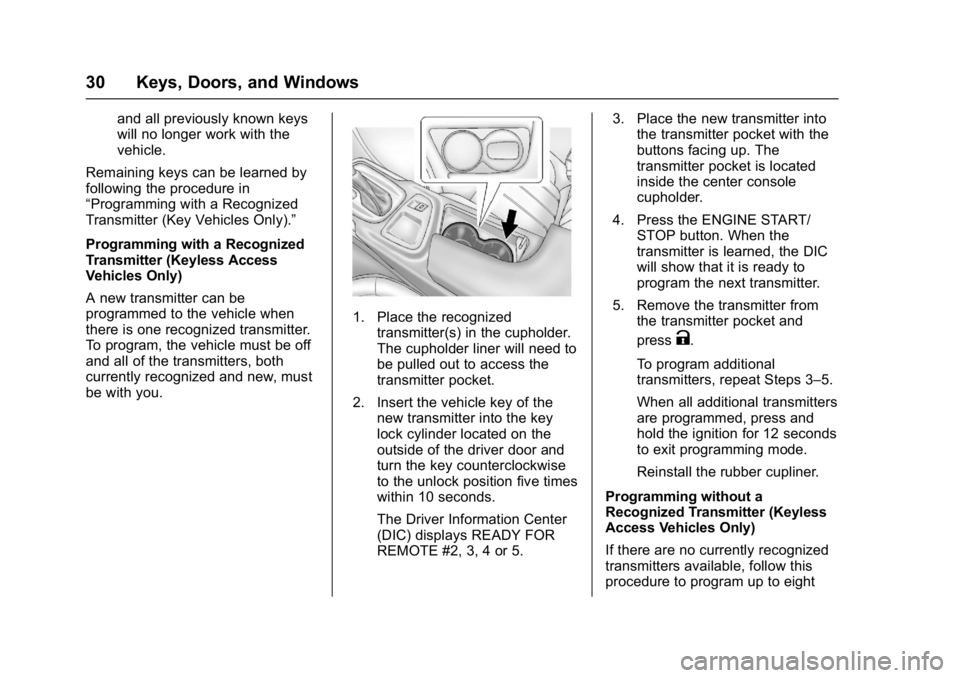
1. Place the recognized transmitter(s) in the cupholder.
The cupholder liner will need to
be pulled out to access the
transmitter pocket.
2. Insert the vehicle key of the new transmitter into the key
lock cylinder located on the
outside of the driver door and
turn the key counterclockwise
to the unlock position five times
within 10 seconds.
The Driver Information Center
(DIC) displays READY FOR
REMOTE #2, 3, 4 or 5. 3. Place the new transmitter into
the transmitter pocket with the
buttons facing up. The
transmitter pocket is located
inside the center console
cupholder.
4. Press the ENGINE START/ STOP button. When the
transmitter is learned, the DIC
will show that it is ready to
program the next transmitter.
5. Remove the transmitter from the transmitter pocket and
press
K.
To program additional
transmitters, repeat Steps 3–5.
When all additional transmitters
are programmed, press and
hold the ignition for 12 seconds
to exit programming mode.
Reinstall the rubber cupliner.
Programming without a
Recognized Transmitter (Keyless
Access Vehicles Only)
If there are no currently recognized
transmitters available, follow this
procedure to program up to eight
Page 32 of 344
Buick Regal Owner Manual (GMNA-Localizing-U.S./Canada/Mexico-
9804381) - 2017 - crc - 8/30/16
Keys, Doors, and Windows 31
transmitters. This feature is not
available in Canada. This procedure
will take approximately 30 minutes
to complete. The vehicle must be off
and all of the transmitters you wish
to program must be with you.1. Insert the vehicle key of the transmitter into the key lock
cylinder located on the outside
of the driver door and turn the
key to the unlock position,
counterclockwise, five times
within 10 seconds.
The Driver Information Center
(DIC) displays REMOTE
LEARN PENDING,
PLEASE WAIT.
2. Wait for 10 minutes until the DIC displays PRESS ENGINE
START BUTTON TO LEARN
and then press the ENGINE
START/STOP button.
The DIC display will again
show REMOTE LEARN
PENDING, PLEASE WAIT.
3. Repeat Step 2 two additional times. After the third time all
previously known transmitters will no longer work with the
vehicle. Remaining transmitters
can be relearned during the
next steps.
The DIC display should now
show READY FOR REMOTE
# 1.
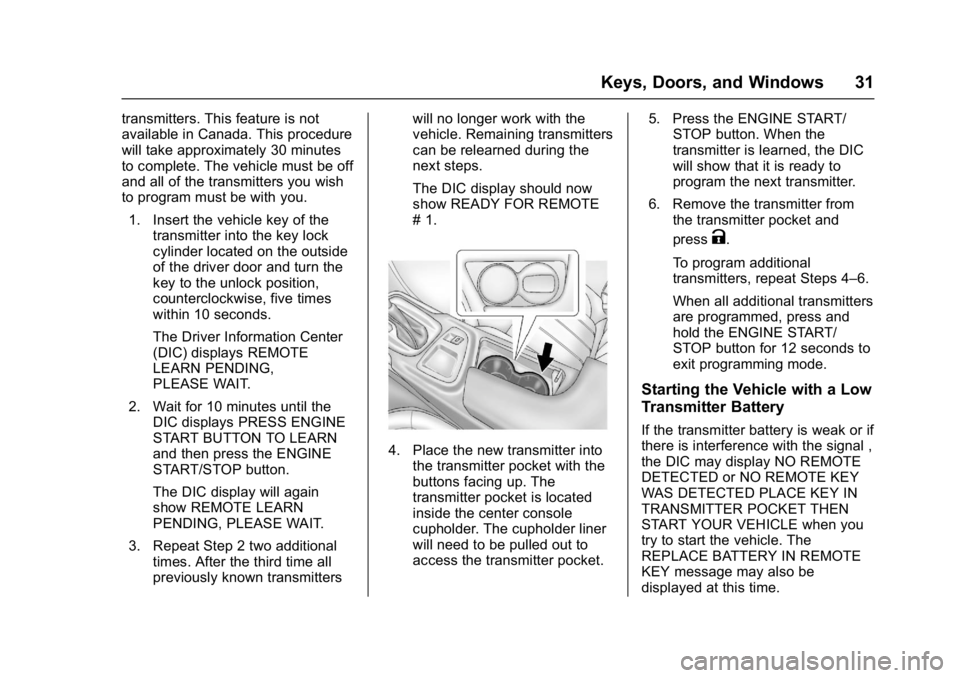
4. Place the new transmitter into
the transmitter pocket with the
buttons facing up. The
transmitter pocket is located
inside the center console
cupholder. The cupholder liner
will need to be pulled out to
access the transmitter pocket. 5. Press the ENGINE START/
STOP button. When the
transmitter is learned, the DIC
will show that it is ready to
program the next transmitter.
6. Remove the transmitter from the transmitter pocket and
press
K.
To program additional
transmitters, repeat Steps 4–6.
When all additional transmitters
are programmed, press and
hold the ENGINE START/
STOP button for 12 seconds to
exit programming mode.
Starting the Vehicle with a Low
Transmitter Battery
If the transmitter battery is weak or if
there is interference with the signal ,
the DIC may display NO REMOTE
DETECTED or NO REMOTE KEY
WAS DETECTED PLACE KEY IN
TRANSMITTER POCKET THEN
START YOUR VEHICLE when you
try to start the vehicle. The
REPLACE BATTERY IN REMOTE
KEY message may also be
displayed at this time.
Page 33 of 344
Buick Regal Owner Manual (GMNA-Localizing-U.S./Canada/Mexico-
9804381) - 2017 - crc - 8/30/16
32 Keys, Doors, and Windows
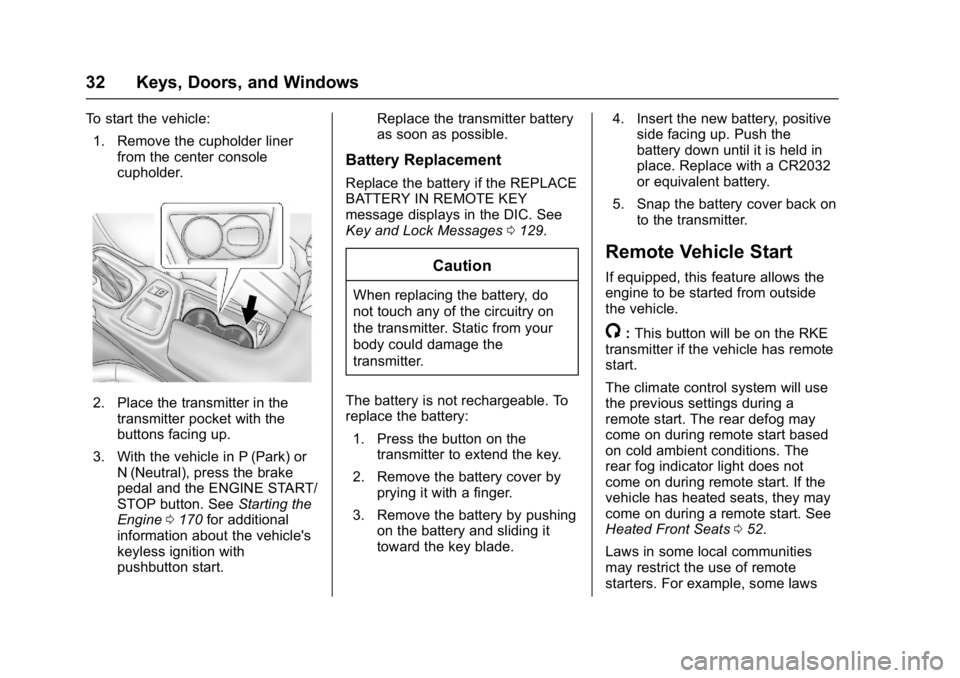
To start the vehicle:1. Remove the cupholder liner from the center console
cupholder.
2. Place the transmitter in thetransmitter pocket with the
buttons facing up.
3. With the vehicle in P (Park) or N (Neutral), press the brake
pedal and the ENGINE START/
STOP button. See Starting the
Engine 0170 for additional
information about the vehicle's
keyless ignition with
pushbutton start. Replace the transmitter battery
as soon as possible.
Battery Replacement
Replace the battery if the REPLACE
BATTERY IN REMOTE KEY
message displays in the DIC. See
Key and Lock Messages
0129.
Caution
When replacing the battery, do
not touch any of the circuitry on
the transmitter. Static from your
body could damage the
transmitter.
The battery is not rechargeable. To
replace the battery: 1. Press the button on the transmitter to extend the key.
2. Remove the battery cover by prying it with a finger.
3. Remove the battery by pushing on the battery and sliding it
toward the key blade. 4. Insert the new battery, positive
side facing up. Push the
battery down until it is held in
place. Replace with a CR2032
or equivalent battery.
5. Snap the battery cover back on to the transmitter.
Remote Vehicle Start
If equipped, this feature allows the
engine to be started from outside
the vehicle.
/:This button will be on the RKE
transmitter if the vehicle has remote
start.
The climate control system will use
the previous settings during a
remote start. The rear defog may
come on during remote start based
on cold ambient conditions. The
rear fog indicator light does not
come on during remote start. If the
vehicle has heated seats, they may
come on during a remote start. See
Heated Front Seats 052.
Laws in some local communities
may restrict the use of remote
starters. For example, some laws
Page 93 of 344
Buick Regal Owner Manual (GMNA-Localizing-U.S./Canada/Mexico-
9804381) - 2017 - crc - 8/30/16
92 Storage
Storage
Storage Compartments
Storage Compartments . . . . . . . . 92
Instrument Panel Storage . . . . . . 92
Glove Box . . . . . . . . . . . . . . . . . . . . . 92
Cupholders . . . . . . . . . . . . . . . . . . . . 92
Rear Storage . . . . . . . . . . . . . . . . . . 93
Center Console Storage . . . . . . . 93
Additional Storage Features
Convenience Net . . . . . . . . . . . . . . 94
Storage
Compartments
{Warning
Do not store heavy or sharp
objects in storage compartments.
In a crash, these objects may
cause the cover to open and
could result in injury.
Instrument Panel Storage
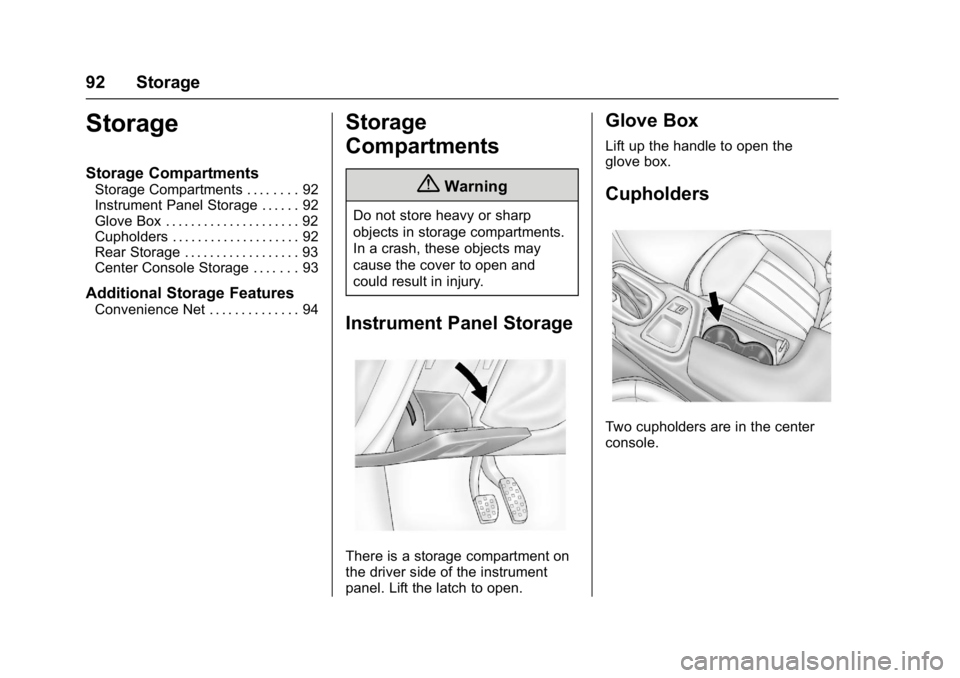
There is a storage compartment on
the driver side of the instrument
panel. Lift the latch to open.
Glove Box
Lift up the handle to open the
glove box.
Cupholders
Two cupholders are in the center
console.
Page 94 of 344
Buick Regal Owner Manual (GMNA-Localizing-U.S./Canada/Mexico-
9804381) - 2017 - crc - 8/30/16
Storage 93
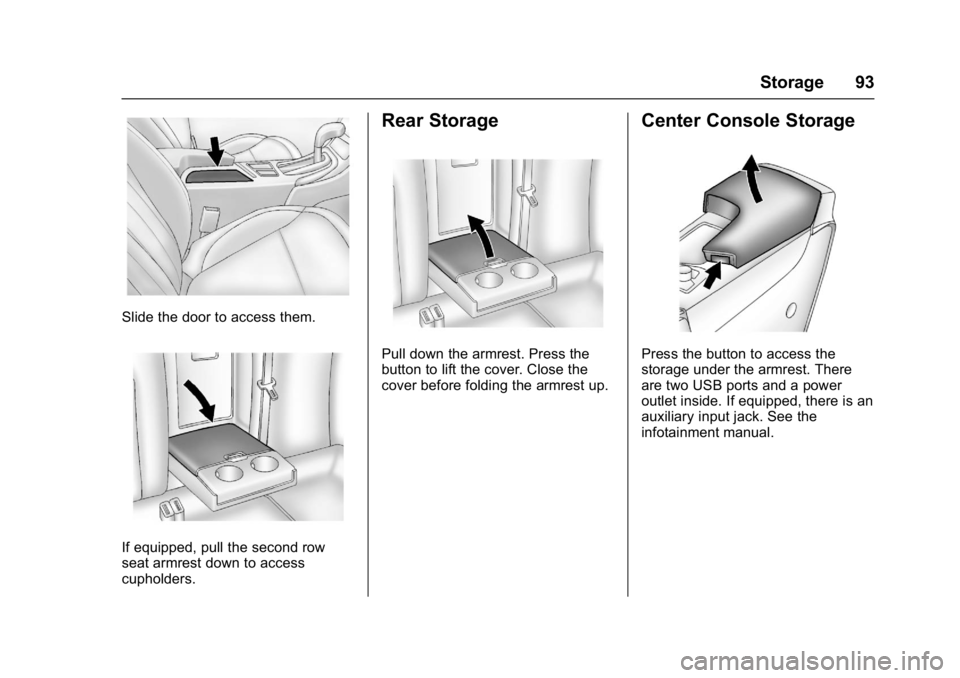
Slide the door to access them.
If equipped, pull the second row
seat armrest down to access
cupholders.
Rear Storage
Pull down the armrest. Press the
button to lift the cover. Close the
cover before folding the armrest up.
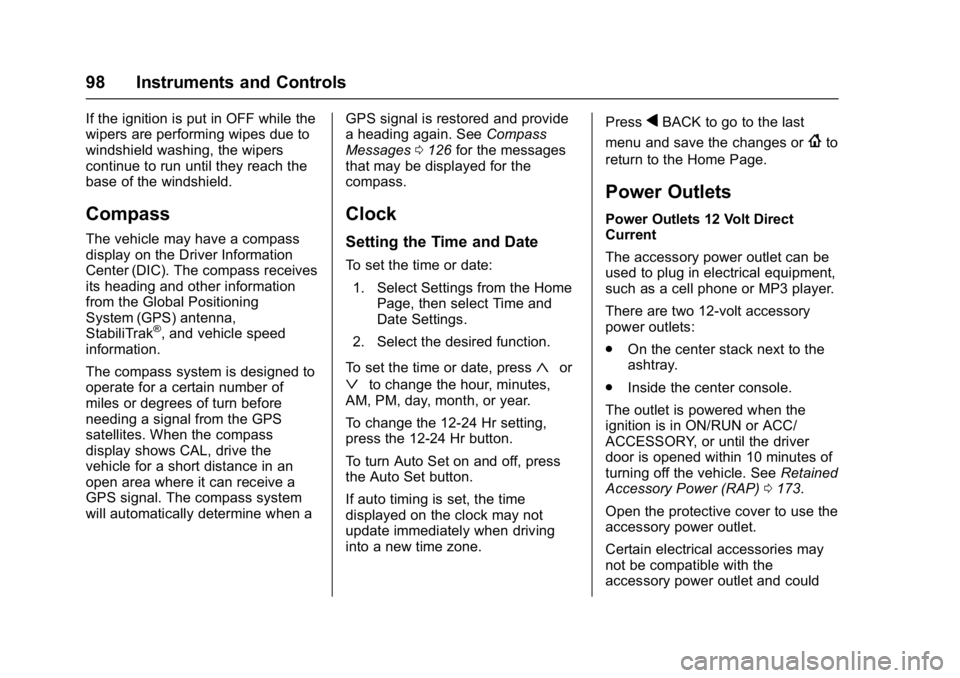
Center Console Storage
Press the button to access the
storage under the armrest. There
are two USB ports and a power
outlet inside. If equipped, there is an
auxiliary input jack. See the
infotainment manual.
Page 99 of 344
Buick Regal Owner Manual (GMNA-Localizing-U.S./Canada/Mexico-
9804381) - 2017 - crc - 8/30/16
98 Instruments and Controls
If the ignition is put in OFF while the
wipers are performing wipes due to
windshield washing, the wipers
continue to run until they reach the
base of the windshield.
Compass
The vehicle may have a compass
display on the Driver Information
Center (DIC). The compass receives
its heading and other information
from the Global Positioning
System (GPS) antenna,
StabiliTrak
®, and vehicle speed
information.
The compass system is designed to
operate for a certain number of
miles or degrees of turn before
needing a signal from the GPS
satellites. When the compass
display shows CAL, drive the
vehicle for a short distance in an
open area where it can receive a
GPS signal. The compass system
will automatically determine when a GPS signal is restored and provide
a heading again. See
Compass
Messages 0126 for the messages
that may be displayed for the
compass.
Clock
Setting the Time and Date
To set the time or date:
1. Select Settings from the Home Page, then select Time and
Date Settings.
2. Select the desired function.
To set the time or date, press
«or
ªto change the hour, minutes,
AM, PM, day, month, or year.
To change the 12-24 Hr setting,
press the 12-24 Hr button.
To turn Auto Set on and off, press
the Auto Set button.
If auto timing is set, the time
displayed on the clock may not
update immediately when driving
into a new time zone. Press
qBACK to go to the last
menu and save the changes or
{to
return to the Home Page.
Power Outlets
Power Outlets 12 Volt Direct
Current
The accessory power outlet can be
used to plug in electrical equipment,
such as a cell phone or MP3 player.
There are two 12-volt accessory
power outlets:
. On the center stack next to the
ashtray.
. Inside the center console.
The outlet is powered when the
ignition is in ON/RUN or ACC/
ACCESSORY, or until the driver
door is opened within 10 minutes of
turning off the vehicle. See Retained
Accessory Power (RAP) 0173.
Open the protective cover to use the
accessory power outlet.
Certain electrical accessories may
not be compatible with the
accessory power outlet and could
Page 100 of 344
Buick Regal Owner Manual (GMNA-Localizing-U.S./Canada/Mexico-
9804381) - 2017 - crc - 8/30/16
Instruments and Controls 99
overload vehicle or adapter fuses.
If there is a problem, see your
dealer.
When adding electrical equipment,
be sure to follow the installation
instructions included with the
equipment. SeeAdd-On Electrical
Equipment 0209.
Caution
Hanging heavy equipment from
the power outlet can cause
damage not covered by the
vehicle warranty. The power
outlets are designed for
accessory power plugs only, such
as mobile phone charge cords.
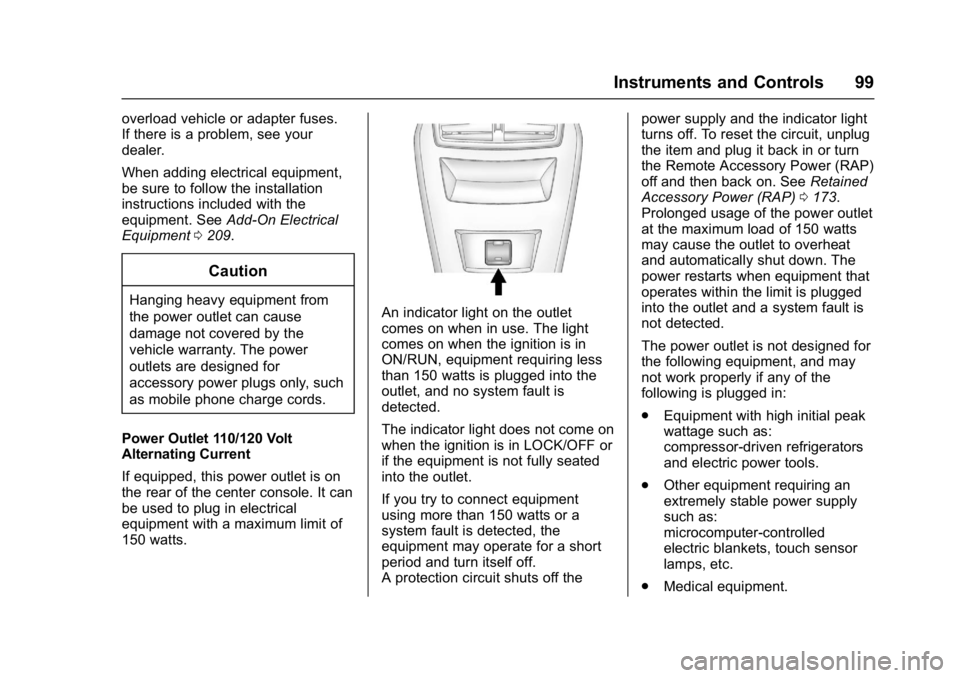
Power Outlet 110/120 Volt
Alternating Current
If equipped, this power outlet is on
the rear of the center console. It can
be used to plug in electrical
equipment with a maximum limit of
150 watts.An indicator light on the outlet
comes on when in use. The light
comes on when the ignition is in
ON/RUN, equipment requiring less
than 150 watts is plugged into the
outlet, and no system fault is
detected.
The indicator light does not come on
when the ignition is in LOCK/OFF or
if the equipment is not fully seated
into the outlet.
If you try to connect equipment
using more than 150 watts or a
system fault is detected, the
equipment may operate for a short
period and turn itself off.
A protection circuit shuts off the power supply and the indicator light
turns off. To reset the circuit, unplug
the item and plug it back in or turn
the Remote Accessory Power (RAP)
off and then back on. See
Retained
Accessory Power (RAP) 0173.
Prolonged usage of the power outlet
at the maximum load of 150 watts
may cause the outlet to overheat
and automatically shut down. The
power restarts when equipment that
operates within the limit is plugged
into the outlet and a system fault is
not detected.
The power outlet is not designed for
the following equipment, and may
not work properly if any of the
following is plugged in:
. Equipment with high initial peak
wattage such as:
compressor-driven refrigerators
and electric power tools.
. Other equipment requiring an
extremely stable power supply
such as:
microcomputer-controlled
electric blankets, touch sensor
lamps, etc.
. Medical equipment.
Page 182 of 344
Buick Regal Owner Manual (GMNA-Localizing-U.S./Canada/Mexico-
9804381) - 2017 - crc - 8/30/16
Driving and Operating 181
Parking Brake
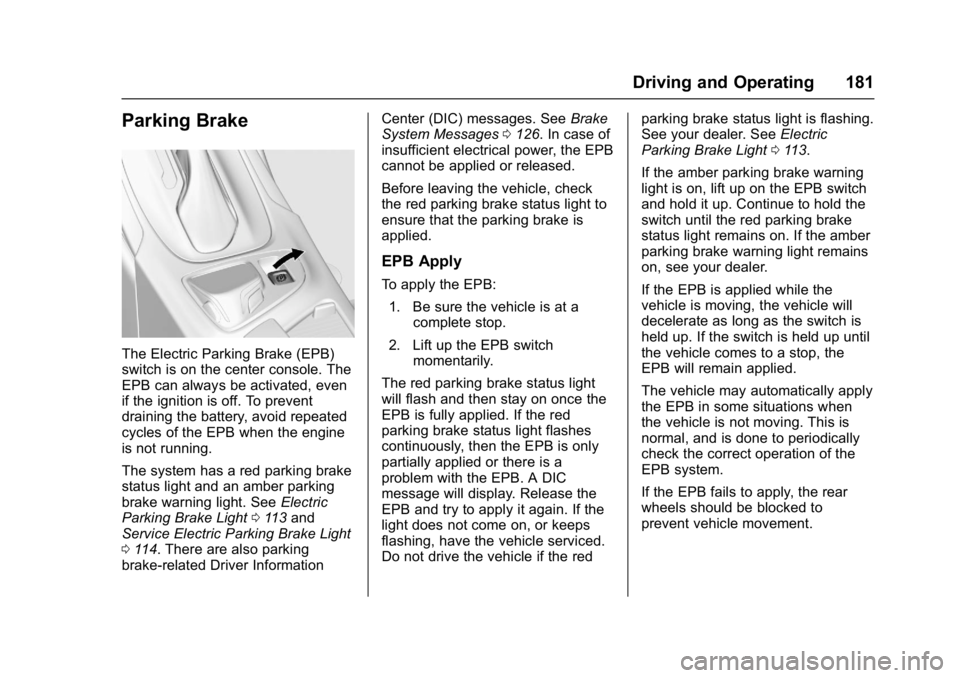
The Electric Parking Brake (EPB)
switch is on the center console. The
EPB can always be activated, even
if the ignition is off. To prevent
draining the battery, avoid repeated
cycles of the EPB when the engine
is not running.
The system has a red parking brake
status light and an amber parking
brake warning light. SeeElectric
Parking Brake Light 0113 and
Service Electric Parking Brake Light
0 114. There are also parking
brake-related Driver Information Center (DIC) messages. See
Brake
System Messages 0126. In case of
insufficient electrical power, the EPB
cannot be applied or released.
Before leaving the vehicle, check
the red parking brake status light to
ensure that the parking brake is
applied.
EPB Apply
To apply the EPB:
1. Be sure the vehicle is at a complete stop.
2. Lift up the EPB switch momentarily.
The red parking brake status light
will flash and then stay on once the
EPB is fully applied. If the red
parking brake status light flashes
continuously, then the EPB is only
partially applied or there is a
problem with the EPB. A DIC
message will display. Release the
EPB and try to apply it again. If the
light does not come on, or keeps
flashing, have the vehicle serviced.
Do not drive the vehicle if the red parking brake status light is flashing.
See your dealer. See
Electric
Parking Brake Light 0113.
If the amber parking brake warning
light is on, lift up on the EPB switch
and hold it up. Continue to hold the
switch until the red parking brake
status light remains on. If the amber
parking brake warning light remains
on, see your dealer.
If the EPB is applied while the
vehicle is moving, the vehicle will
decelerate as long as the switch is
held up. If the switch is held up until
the vehicle comes to a stop, the
EPB will remain applied.
The vehicle may automatically apply
the EPB in some situations when
the vehicle is not moving. This is
normal, and is done to periodically
check the correct operation of the
EPB system.
If the EPB fails to apply, the rear
wheels should be blocked to
prevent vehicle movement.
Page 335 of 344

Buick Regal Owner Manual (GMNA-Localizing-U.S./Canada/Mexico-
9804381) - 2017 - crc - 8/30/16
334 Index
Assistance Systems forDriving . . . . . . . . . . . . . . . . . . . . . . . . 198
Assistance Systems for Parking and Backing . . . . . . . . . . 196
Automatic Door Locks . . . . . . . . . . . . . . . . . . . . . 35
Forward Braking . . . . . . . . . . . . . . 200
Headlamp System . . . . . . . . . . . . 144
Transmission . . . . . . . . . . . . . . . . . 176
Transmission Fluid . . . . . . . . . . . 221
Automatic Transmission
Manual Mode . . . . . . . . . . . . . . . . . 178
Shift Lock Control FunctionCheck . . . . . . . . . . . . . . . . . . . . . . . 232
B
BatteryPower Protection . . . . . . . . . . . . . 148
Voltage and ChargingMessages . . . . . . . . . . . . . . . . . . . 125
Battery - North America . . . . 231, 278
Blade Replacement, Wiper . . . . . 233
Brake
System Warning Light . . . . . . . . .113
Brakes . . . . . . . . . . . . . . . . . . . . . . . . . . 229 Antilock . . . . . . . . . . . . . . . . . . . . . . . 180
Assist . . . . . . . . . . . . . . . . . . . . . . . . . 182
Fluid . . . . . . . . . . . . . . . . . . . . . . . . . . 230
Parking . . . . . . . . . . . . . . . . . . . . . . . 181 Brakes (cont'd)
System Messages . . . . . . . . . . . . 126
Braking . . . . . . . . . . . . . . . . . . . . . . . . . 157 Automatic Forward . . . . . . . . . . . 200
Break-In, New Vehicle . . . . . . . . . . 166
Bulb Replacement . . . . . . . . . . . . . . 237 Fog Lamps . . . . . . . . . . . . . . . . . . . 235
Halogen Bulbs . . . . . . . . . . . . . . . . 234
Headlamp Aiming . . . . . . . . . . . . . 234
Headlamps . . . . . . . . . . . . . . . . . . . 234
Headlamps, Front TurnSignal, and Parking
Lamps . . . . . . . . . . . . . . . . . . . . . . 235
High Intensity Discharge
(HID) Lighting . . . . . . . . . . . . . . . 235
License Plate Lamps . . . . . . . . . 236
Taillamps, Turn Signal, Stoplamps, and Back-up
Lamps . . . . . . . . . . . . . . . . . . . . . . 236
Buying New Tires . . . . . . . . . . . . . . . 259
C
Calibration . . . . . . . . . . . . . . . . . . . . . . . 98
California Fuel Requirements . . . . . . . . . . . 206 California (cont'd)
Perchlorate Materials
Requirements . . . . . . . . . . . . . . . 212
California
Proposition
65 Warning . . . . . . . . . .212, 231, 278
Canadian Vehicle Owners . . . . . . . . 2
Capacities and Specifications . . . . . . . . . . . . . . . . . 307
Carbon Monoxide Engine Exhaust . . . . . . . . . . . . . . . 175
Trunk . . . . . . . . . . . . . . . . . . . . . . . . . . . 36
Winter Driving . . . . . . . . . . . . . . . . 161
Caution, Danger, and Warning . . . . 2
Center Console Storage . . . . . . . . . 93
Chains, Tire . . . . . . . . . . . . . . . . . . . . 263
Charging System Light . . . . . . . . . 111
Check
Ignition Transmission Lock . . . 233
Malfunction IndicatorEngine Light . . . . . . . . . . . . . . . . . 111
Child Restraints Infants and Young Children . . . . . 74
Lower Anchors and Tethers
for Children . . . . . . . . . . . . . . . . . . . 79
Older Children . . . . . . . . . . . . . . . . . . 72
Securing . . . . . . . . . . . . . . . . . . . . 86, 89
Systems . . . . . . . . . . . . . . . . . . . . . . . . 76