electrical CADILLAC CTS 2005 1.G User Guide
[x] Cancel search | Manufacturer: CADILLAC, Model Year: 2005, Model line: CTS, Model: CADILLAC CTS 2005 1.GPages: 432, PDF Size: 2.52 MB
Page 197 of 432

Right Rear Door Ajar
When this message appears on the display, the right
rear door it means that the passenger’s side rear
door was not closed completely. You should check to
make sure that the door is closed completely.
Service AC (Air Conditioning) System
This message appears when the electronic sensors that
control the air conditioning and heating systems are
no longer working. Have the climate control system
serviced by your GM dealer if you notice a drop
in heating and air conditioning efficiency.
Service Air Bag
There is a problem with the airbag system when this
message appears. Have your vehicle serviced by your
GM dealer immediately. SeeAirbag Readiness Light
on page 3-38for more information.
Service Charging System
This message will display when a problem with the
charging system has been detected. Have your vehicle
serviced by your GM dealer.
Service Electrical System
This message will display if an electrical problem has
occurred within the Powertrain Control Module (PCM) or
the ignition switch. Have your vehicle serviced by
your GM dealer.
Service Fuel System
The Powertrain Control Module (PCM) has detected a
problem within the fuel system when this message
appears. Have your vehicle serviced by your GM dealer.
Service Idle Control
A problem with the idle control has occurred when this
message displays. Have your vehicle serviced by
your GM dealer.
Service Stability System Message
Your vehicle may be equipped with a vehicle stability
enhancement system called StabiliTrak®.
SeeStabiliTrak
®System on page 4-11. The Service
Stability System message will be displayed if there has
been a problem detected with StabiliTrak
®.
If the Service Stability System message comes on while
you are driving, pull off the road as soon as possible
and stop carefully. Try resetting the system by turning
the ignition off then back on. If the Service Stability
System message still stays on or comes back on again
while you are driving, your vehicle needs service.
Have the StabiliTrak
®System inspected by your
GM dealer as soon as possible.
3-71
Page 278 of 432

Driving with a Trailer
Towing a trailer requires a certain amount of experience.
Before setting out for the open road, you’ll want to get
to know your rig. Acquaint yourself with the feel of
handling and braking with the added weight of the trailer.
And always keep in mind that the vehicle you are
driving is now a good deal longer and not nearly as
responsive as your vehicle is by itself.
Before you start, check all trailer hitch parts and
attachments, safety chains, electrical connector, lamps,
tires and mirror adjustment. If the trailer has electric
brakes, start your vehicle and trailer moving and then
apply the trailer brake controller by hand to be sure
the brakes are working. This lets you check your
electrical connection at the same time.
During your trip, check occasionally to be sure that the
load is secure, and that the lamps and any trailer
brakes are still working.
Following Distance
Stay at least twice as far behind the vehicle ahead as
you would when driving your vehicle without a trailer.
This can help you avoid situations that require
heavy braking and sudden turns.
Passing
You’ll need more passing distance up ahead when
you’re towing a trailer. And, because you’re a good deal
longer, you’ll need to go much farther beyond the
passed vehicle before you can return to your lane.
Backing Up
Hold the bottom of the steering wheel with one hand.
Then, to move the trailer to the left, just move that hand
to the left. To move the trailer to the right, move your
hand to the right. Always back up slowly and, if possible,
have someone guide you.
Making Turns
Notice:Making very sharp turns while trailering
could cause the trailer to come in contact with the
vehicle. Your vehicle could be damaged. Avoid
making very sharp turns while trailering.
4-44
Page 282 of 432

Tire Pressure Monitor System (CTS-V)..............5-65
Tire Inspection and Rotation...........................5-67
When It Is Time for New Tires.......................5-69
Buying New Tires.........................................5-69
Uniform Tire Quality Grading..........................5-70
Wheel Alignment and Tire Balance..................5-72
Wheel Replacement......................................5-72
Tire Chains..................................................5-74
If a Tire Goes Flat........................................5-74
Changing a Flat Tire (CTS)............................5-76
Removing the Spare Tire and Tools (CTS).......5-77
Removing the Flat Tire and Installing the
Spare Tire (CTS).......................................5-79
Storing a Flat or Spare Tire and Tools (CTS).......5-84
Compact Spare Tire (CTS).............................5-85
Appearance Care............................................5-86
Fabric/Carpet...............................................5-86
Vinyl...........................................................5-88
Leather.......................................................5-88
Instrument Panel..........................................5-88
Interior Plastic Components............................5-88
Wood Panels...............................................5-89
Speaker Covers............................................5-89
Glass Surfaces.............................................5-89
Care of Safety Belts......................................5-89Weatherstrips...............................................5-89
Washing Your Vehicle...................................5-90
Cleaning Exterior Lamps/Lenses.....................5-90
Finish Care..................................................5-90
Windshield and Wiper Blades.........................5-91
Aluminum or Chrome-Plated Wheels................5-91
Tires...........................................................5-92
Sheet Metal Damage.....................................5-92
Finish Damage.............................................5-92
Underbody Maintenance................................5-93
Chemical Paint Spotting.................................5-93
Vehicle Care/Appearance Materials..................5-93
Vehicle Identi�cation......................................5-94
Vehicle Identi�cation Number (VIN).................5-94
Service Parts Identi�cation Label.....................5-95
Electrical System............................................5-95
Add-On Electrical Equipment..........................5-95
Windshield Wiper Fuses................................5-95
Power Windows and Other Power Options.......5-96
Fuses and Circuit Breakers............................5-96
Underhood Fuse Block..................................5-96
Rear Underseat Fuse Block..........................5-101
Capacities and Speci�cations........................5-107
Section 5 Service and Appearance Care
5-2
Page 322 of 432

Jump Starting
If your battery has run down, you may want to use
another vehicle and some jumper cables to start your
vehicle. Be sure to use the following steps to do it safely.
{CAUTION:
Batteries can hurt you. They can be dangerous
because:
They contain acid that can burn you.
They contain gas that can explode or
ignite.
They contain enough electricity to
burn you.
If you do not follow these steps exactly, some
or all of these things can hurt you.Notice:Ignoring these steps could result in costly
damage to your vehicle that would not be covered
by your warranty.
Trying to start your vehicle by pushing or pulling it
will not work, and it could damage your vehicle.
1. Check the other vehicle. It must have a 12-volt
battery with a negative ground system.
Notice:If the other vehicle’s system is not a 12-volt
system with a negative ground, both vehicles can
be damaged. Only use vehicles with 12-volt systems
with negative grounds to jump start your vehicle.
2. Get the vehicles close enough so the jumper cables
can reach, but be sure the vehicles are not touching
each other. If they are, it could cause a ground
connection you do not want. You would not be able
to start your vehicle and the bad grounding could
damage the electrical systems.
To avoid the possibility of the vehicles rolling, set
the parking brake �rmly on both vehicles involved
in the jump start procedure. Put an automatic
transmission in PARK (P) or a manual transmission
in NEUTRAL before setting the parking brake.
5-42
Page 326 of 432

6. Connect the red positive (+) cable to the positive (+)
terminal of the dead battery. Use a remote
positive (+) terminal if the vehicle has one.
7. Do not let the other end touch metal. Connect it to
the positive (+) terminal of the good battery. Use a
remote positive (+) terminal if the vehicle has one.
8. Now connect the black negative (−) cable to the
negative terminal of the good battery. Use a
remote negative (−) terminal if the vehicle has one.Do not let the other end touch anything until the
next step. The other end of the negative (−) cable
does notgo to the dead battery. It goes to a
heavy, unpainted metal engine part or to a remote
negative (−) terminal on the vehicle with the
dead battery.
9. Connect the other end of the negative (−) cable at
least 18 inches (45 cm) away from the dead battery,
but not near engine parts that move. The electrical
connection is just as good there, and the chance
of sparks getting back to the battery is much less.
Use a remote negative (−) terminal if the vehicle has
one. Your vehicle’s remote negative (−) ground
location is for this purpose.
10. Now start the vehicle with the good battery and run
the engine for a while.
11. Try to start the vehicle that had the dead battery.
If it will not start after a few tries, it probably needs
service.
5-46
Page 327 of 432

Notice:If the jumper cables are connected or
removed in the wrong order, electrical shorting may
occur and damage the vehicle. The repairs would
not be covered by your warranty. Always connect
and remove the jumper cables in the correct
order, making sure that the cables do not touch
each other or other metal.
A. Heavy, Unpainted Metal Engine Part or Remote
Negative (−) Terminal
B. Good Battery or Remote Positive (+) Terminal
C. Dead Battery or Remote Positive (+) TerminalTo disconnect the jumper cables from both vehicles,
do the following:
1. Disconnect the black negative (−) cable from the
vehicle that had the dead battery.
2. Disconnect the black negative (−) cable from the
vehicle with the good battery.
3. Disconnect the red positive (+) cable from the
vehicle with the good battery.
4. Disconnect the red positive (+) cable from the
other vehicle.
Jumper Cable Removal
5-47
Page 330 of 432

Front Turn Signal and Fog Lamps
A. Turn Signal Lamp
B. Fog Lamp
To replace a fog or turn signal lamp bulb, do the
following:
1. Remove the protection shield located on the
underside of the front of the vehicle by pulling
out the push-pins located on the underside of
the protection shield.
2. Reach up behind the front bumper area from
under the vehicle to access the lamp housing.
3. Remove the bulb socket from the housing
by turning the bulb socket one-quarter turn
counterclockwise.4. Remove the electrical connector from the bulb by
lifting the two plastic clips.
5. Pull the old bulb from the bulb socket keeping the
bulb straight as you pull it out.
6. Install a new bulb.
7. Reverse the steps to reinstall the lamp assembly.
Taillamps, Turn Signal, Stoplamps
and Sidemarker Lamps
A. Taillamps and
Stoplamps
B. Turn Signal Lamp
C. Sidemarker Lamp
5-50
Page 375 of 432

Engine Identi�cation
The eighth character in your VIN is the engine
code. This code will help you identify your engine,
speci�cations and replacement parts.
Service Parts Identi�cation Label
You will �nd this label in the trunk. It is very helpful if
you ever need to order parts. On this label, you will
�nd the following:
VIN
Model designation
Paint information
Production options and special equipment
Be sure that this label is not removed from the vehicle.
Electrical System
Add-On Electrical Equipment
Notice:Don’t add anything electrical to your
vehicle unless you check with your dealer �rst.
Some electrical equipment can damage your vehicle
and the damage wouldn’t be covered by your
warranty. Some add-on electrical equipment can
keep other components from working as they
should.
Your vehicle has an airbag system. Before attempting to
add anything electrical to your vehicle, seeServicing
Your Airbag-Equipped Vehicle on page 1-64.
Windshield Wiper Fuses
The windshield wiper motor is protected by an internal
circuit breaker. If the wiper motor overheats due to
heavy snow, the wipers will stop until the motor cools
and will then restart.
5-95
Page 376 of 432

Power Windows and Other Power
Options
Circuit breakers protect the power windows and power
seats. When the current load is too heavy, the circuit
breaker opens and closes, protecting the circuit until the
problem is �xed or goes away.
Fuses and Circuit Breakers
The wiring circuits in your vehicle are protected from
short circuits by a combination of fuses and circuit
breakers. This greatly reduces the chance of �res
caused by electrical problems.
Look at the silver-colored band inside the fuse. If the
band is broken or melted, replace the fuse. Be sure you
replace a bad fuse with a new one of the identical
size and rating. If a fuse blows, see your dealer
for service immediately.
If you ever have a problem on the road and don’t have
a spare fuse, you can “borrow” one that has the
same amperage. Pick some feature of your vehicle that
you can get along without — like the radio or cigarette
lighter — and use its fuse, if it is the correct amperage.
Replace it as soon as you can.
The fuses are located in three fuse blocks, one located
in the engine compartment on the passenger’s side
and the other two under the rear seat.
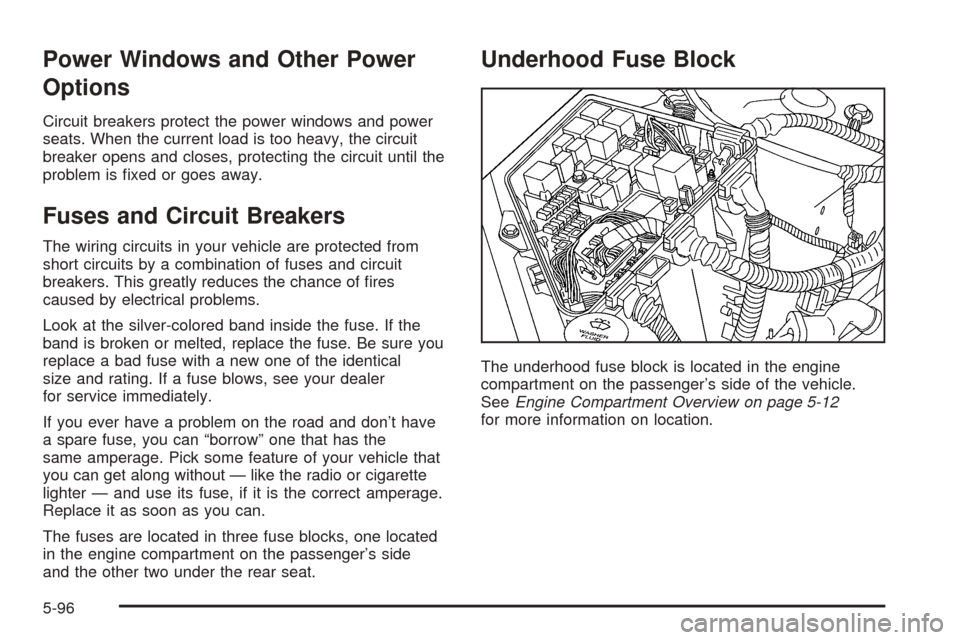
Underhood Fuse Block
The underhood fuse block is located in the engine
compartment on the passenger’s side of the vehicle.
SeeEngine Compartment Overview on page 5-12
for more information on location.
5-96
Page 417 of 432

Reporting Safety Defects to
General Motors
In addition to notifying NHTSA (or Transport Canada) in
a situation like this, we certainly hope you will notify
us. Please call us at 1-800-458-8006, or write:
Cadillac Customer Assistance Center
Cadillac Motor Car Division
P.O. Box 33169
Detroit, MI 48232-5169
In Canada, please call us at 1-888-446-2000. Or, write:
Canadian Cadillac Customer Communication Centre,
163-005
General Motors of Canada Limited
1908 Colonel Sam Drive
Oshawa, Ontario L1H 8P7
Service Publications Ordering
Information
Service Manuals
Service Manuals have the diagnosis and repair
information on engines, transmission, axle suspension,
brakes, electrical, steering, body, etc.
Transmission, Transaxle, Transfer
Case Unit Repair Manual
This manual provides information on unit repair service
procedures, adjustments, and speci�cations for GM
transmissions, transaxles, and transfer cases.
Service Bulletins
Service Bulletins give technical service information
needed to knowledgeably service General Motors cars
and trucks. Each bulletin contains instructions to
assist in the diagnosis and service of your vehicle.
In Canada, information pertaining to Product Service
Bulletins can be obtained by contacting your General
Motors dealer or by calling 1-800-GM-DRIVE
(1-800-463-7483).
7-11