engine CADILLAC CTS 2014 Owner's Manual
[x] Cancel search | Manufacturer: CADILLAC, Model Year: 2014, Model line: CTS, Model: CADILLAC CTS 2014Pages: 400, PDF Size: 4.53 MB
Page 302 of 400

Black plate (40,1)Cadillac CTS Owner Manual (GMNA-Localizing-U.S./Canada/Mexico-
6081492) - 2014 - CRC 2nd Edition - 11/18/13
10-40 Vehicle Care
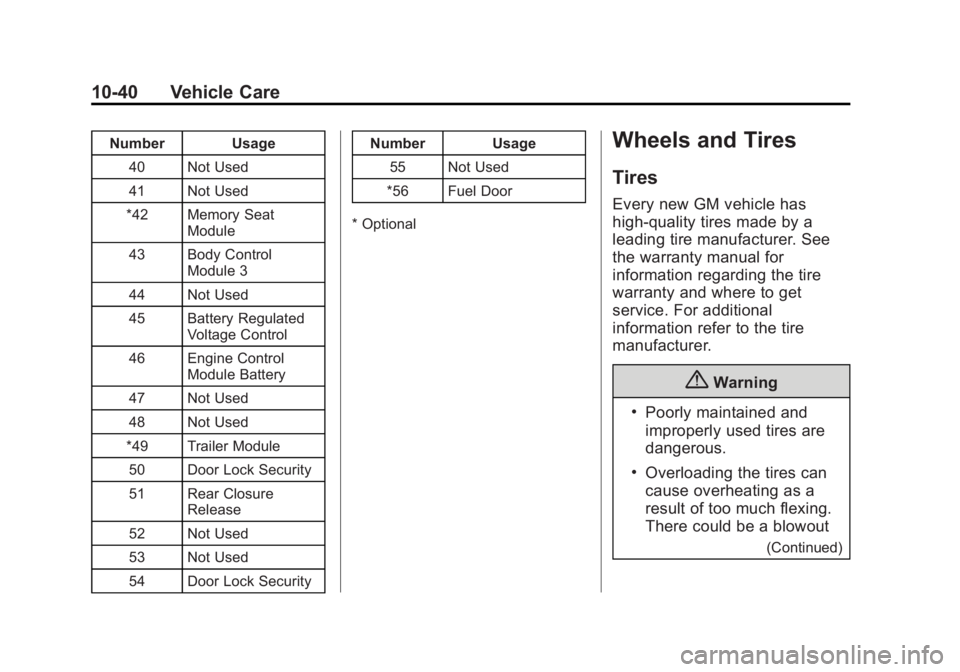
Number Usage40 Not Used
41 Not Used
*42 Memory Seat Module
43 Body Control Module 3
44 Not Used
45 Battery Regulated Voltage Control
46 Engine Control Module Battery
47 Not Used
48 Not Used
*49 Trailer Module 50 Door Lock Security
51 Rear Closure Release
52 Not Used
53 Not Used
54 Door Lock Security Number Usage
55 Not Used
*56 Fuel Door
* OptionalWheels and Tires
Tires
Every new GM vehicle has
high-quality tires made by a
leading tire manufacturer. See
the warranty manual for
information regarding the tire
warranty and where to get
service. For additional
information refer to the tire
manufacturer.
{Warning
.Poorly maintained and
improperly used tires are
dangerous.
.Overloading the tires can
cause overheating as a
result of too much flexing.
There could be a blowout
(Continued)
Page 307 of 400

Black plate (45,1)Cadillac CTS Owner Manual (GMNA-Localizing-U.S./Canada/Mexico-
6081492) - 2014 - CRC 2nd Edition - 11/18/13
Vehicle Care 10-45
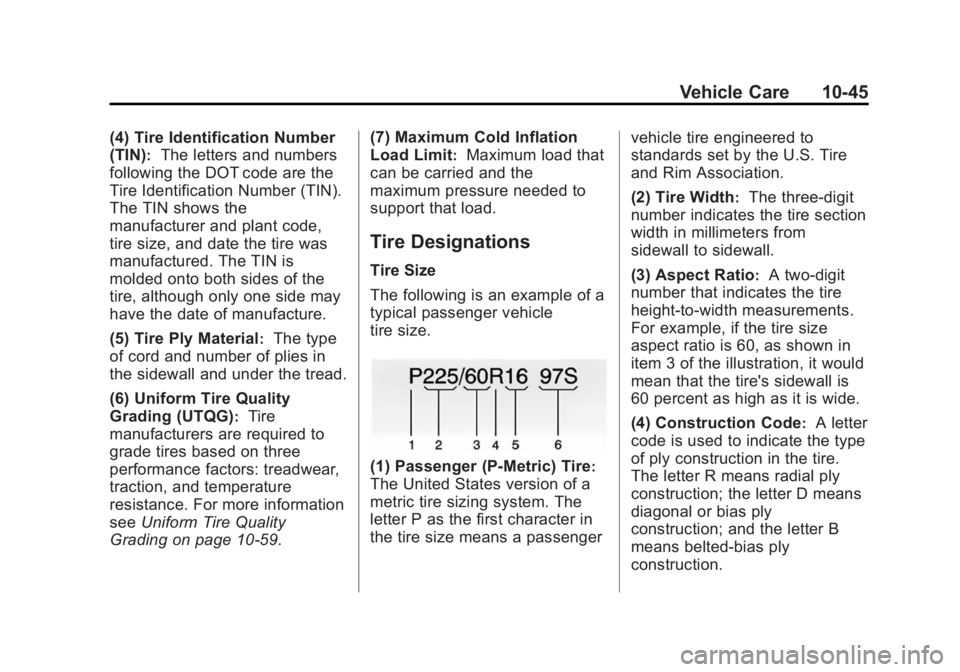
(4) Tire Identification Number
(TIN)
:The letters and numbers
following the DOT code are the
Tire Identification Number (TIN).
The TIN shows the
manufacturer and plant code,
tire size, and date the tire was
manufactured. The TIN is
molded onto both sides of the
tire, although only one side may
have the date of manufacture.
(5) Tire Ply Material
:The type
of cord and number of plies in
the sidewall and under the tread.
(6) Uniform Tire Quality
Grading (UTQG)
:Tire
manufacturers are required to
grade tires based on three
performance factors: treadwear,
traction, and temperature
resistance. For more information
see Uniform Tire Quality
Grading on page 10-59. (7) Maximum Cold Inflation
Load Limit
:Maximum load that
can be carried and the
maximum pressure needed to
support that load.
Tire Designations
Tire Size
The following is an example of a
typical passenger vehicle
tire size.
(1) Passenger (P-Metric) Tire:
The United States version of a
metric tire sizing system. The
letter P as the first character in
the tire size means a passenger vehicle tire engineered to
standards set by the U.S. Tire
and Rim Association.
(2) Tire Width
:The three-digit
number indicates the tire section
width in millimeters from
sidewall to sidewall.
(3) Aspect Ratio
:A two-digit
number that indicates the tire
height-to-width measurements.
For example, if the tire size
aspect ratio is 60, as shown in
item 3 of the illustration, it would
mean that the tire's sidewall is
60 percent as high as it is wide.
(4) Construction Code
:A letter
code is used to indicate the type
of ply construction in the tire.
The letter R means radial ply
construction; the letter D means
diagonal or bias ply
construction; and the letter B
means belted-bias ply
construction.
Page 316 of 400

Black plate (54,1)Cadillac CTS Owner Manual (GMNA-Localizing-U.S./Canada/Mexico-
6081492) - 2014 - CRC 2nd Edition - 11/18/13
10-54 Vehicle Care
using a TPMS relearn tool, in the
following order: driver side front tire,
passenger side front tire, passenger
side rear tire, and driver side rear
tire. See your dealer for service or
to purchase a relearn tool.
There are two minutes to match the
first tire/wheel position, and
five minutes overall to match all four
tire/wheel positions. If it takes
longer, the matching process stops
and must be restarted.
The TPMS sensor matching
process is:
1. Set the parking brake.
2. Place the vehicle power mode inON/RUN/START. See Ignition
Positions on page 9-16.
3. Make sure the Tire Pressure info display option is turned on. The
info displays on the DIC can be
turned on and off through the
Settings menu. See Driver
Information Center (DIC) on
page 5-30. 4. Use the five-way DIC control on
the right side of the steering
wheel to scroll to the Tire
Pressure screen under the DIC
info page. See Driver
Information Center (DIC) on
page 5-30.
5. Press and hold the SEL button in the center of the five-way DIC
control.
The horn sounds twice to signal
the receiver is in relearn mode
and the TIRE LEARNING
ACTIVE message displays on
the DIC screen.
6. Start with the driver side front tire.
7. Place the relearn tool against the tire sidewall, near the valve
stem. Then press the button to
activate the TPMS sensor.
A horn chirp confirms that the
sensor identification code has
been matched to this tire and
wheel position. 8. Proceed to the passenger side
front tire, and repeat the
procedure in Step 7.
9. Proceed to the passenger side rear tire, and repeat the
procedure in Step 7.
10. Proceed to the driver side rear tire, and repeat the procedure
in Step 7. The horn sounds two
times to indicate the sensor
identification code has been
matched to the driver side rear
tire, and the TPMS sensor
matching process is no longer
active. The TIRE LEARNING
ACTIVE message on the DIC
display screen goes off.
11. Press ENGINE START/STOP to turn the ignition off.
12. Set all four tires to the recommended air pressure
level as indicated on the Tire
and Loading Information label.
Page 327 of 400

Black plate (65,1)Cadillac CTS Owner Manual (GMNA-Localizing-U.S./Canada/Mexico-
6081492) - 2014 - CRC 2nd Edition - 11/18/13
Vehicle Care 10-65
{Caution
If the other vehicle does not have
a 12-volt system with a negative
ground, both vehicles can be
damaged. Only use a vehicle that
has a 12-volt system with a
negative ground for jump starting.
2. Position the two vehicles so that they are not touching.
3. Set the parking brake firmly and put the shift lever in P (Park)
with an automatic transmission,
or Neutral with a manual
transmission.
{Caution
If any accessories are left on or
plugged in during the jump
starting procedure, they could be
damaged. The repairs would not
be covered by the vehicle
(Continued)
Caution (Continued)
warranty. Whenever possible, turn
off or unplug all accessories on
either vehicle when jump starting.
4. Set the ignition to OFF. Turn off all lights and accessories in both
vehicles, except the hazard
warning flashers if needed.
{Warning
An electric fan can start up even
when the engine is not running
and can injure you. Keep hands,
clothing and tools away from any
underhood electric fan.
{Warning
Using a match near a battery can
cause battery gas to explode.
People have been hurt doing this,
(Continued)
Warning (Continued)
and some have been blinded.
Use a flashlight if you need more
light.
Be sure the battery has enough
water. You do not need to add
water to the battery installed in
your new vehicle. But if a battery
has filler caps, be sure the right
amount of fluid is there. If it is low,
add water to take care of that
first. If you do not, explosive gas
could be present.
Battery fluid contains acid that
can burn you. Do not get it on
you. If you accidentally get it in
your eyes or on your skin, flush
the place with water and get
medical help immediately.
Page 328 of 400

Black plate (66,1)Cadillac CTS Owner Manual (GMNA-Localizing-U.S./Canada/Mexico-
6081492) - 2014 - CRC 2nd Edition - 11/18/13
10-66 Vehicle Care
{Warning
Fans or other moving engine
parts can injure you badly. Keep
your hands away from moving
parts once the engine is running.
5. Connect one end of the red positive (+) cable to the remote
positive (+) terminal on the
discharged battery.
6. Connect the other end of the red positive (+) cable to the
positive (+) terminal of the good
battery.
7. Connect one end of the black negative (–) cable to the
negative (–) terminal of the good
battery.
8. Connect the other end of the black negative (–) cable to the
remote negative (–) grounding
terminal for the discharged
battery. 9. Start the engine in the vehicle
with the good battery and run
the engine at idle speed for at
least four minutes.
10. Try to start the vehicle that had the dead battery. If it will not
start after a few tries, it
probably needs service.
{Caution
If the jumper cables are
connected or removed in the
wrong order, electrical shorting
may occur and damage the
vehicle. The repairs would not be
covered by the vehicle warranty.
Always connect and remove the
jumper cables in the correct order,
making sure that the cables do
not touch each other or other
metal.
Jumper Cable Removal
Reverse the sequence exactly when
removing the jumper cables.
Towing the Vehicle
{Caution
Incorrectly towing a disabled
vehicle may cause damage. The
damage would not be covered by
the vehicle warranty. Do not lash
or hook to the chassis
components —including the front
and rear subframes, suspension
control arms, and links —during
towing and recovery of a disabled
vehicle, or when securing the
vehicle. Use the proper nylon
strap harnesses around the tires
to secure the vehicle.
Have the vehicle towed on a flatbed
car carrier. A wheel lift tow truck
could damage the vehicle.
Consult your dealer or a
professional towing service if the
disabled vehicle must be towed.
Page 343 of 400

Black plate (3,1)Cadillac CTS Owner Manual (GMNA-Localizing-U.S./Canada/Mexico-
6081492) - 2014 - CRC 2nd Edition - 11/20/13
Service and Maintenance 11-3
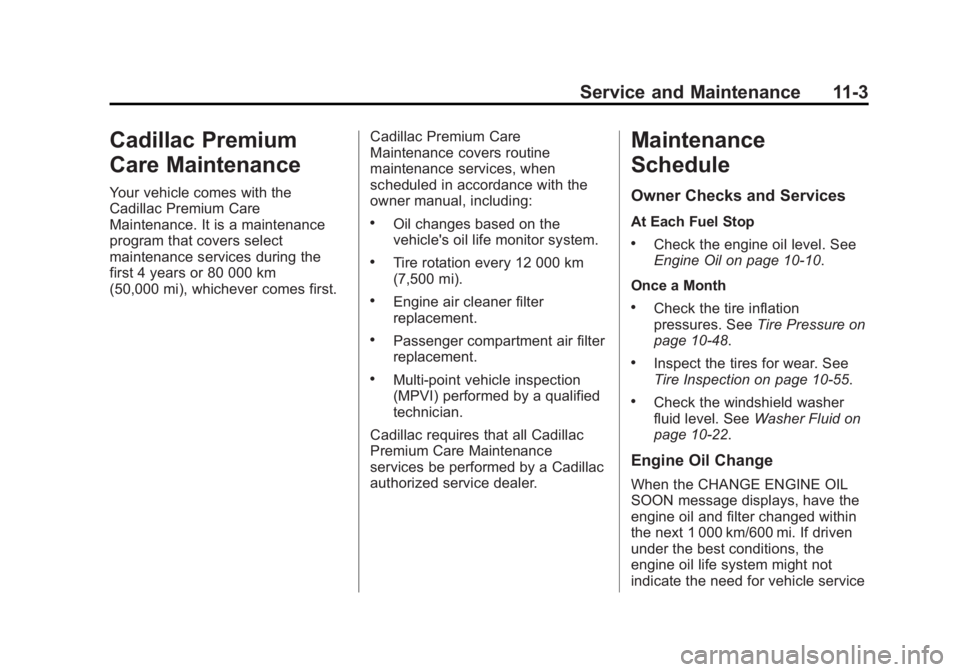
Cadillac Premium
Care Maintenance
Your vehicle comes with the
Cadillac Premium Care
Maintenance. It is a maintenance
program that covers select
maintenance services during the
first 4 years or 80 000 km
(50,000 mi), whichever comes first.Cadillac Premium Care
Maintenance covers routine
maintenance services, when
scheduled in accordance with the
owner manual, including:
.Oil changes based on the
vehicle's oil life monitor system.
.Tire rotation every 12 000 km
(7,500 mi).
.Engine air cleaner filter
replacement.
.Passenger compartment air filter
replacement.
.Multi‐point vehicle inspection
(MPVI) performed by a qualified
technician.
Cadillac requires that all Cadillac
Premium Care Maintenance
services be performed by a Cadillac
authorized service dealer.
Maintenance
Schedule
Owner Checks and Services
At Each Fuel Stop
.Check the engine oil level. See
Engine Oil on page 10-10.
Once a Month
.Check the tire inflation
pressures. See Tire Pressure on
page 10-48.
.Inspect the tires for wear. See
Tire Inspection on page 10-55.
.Check the windshield washer
fluid level. See Washer Fluid on
page 10-22.
Engine Oil Change
When the CHANGE ENGINE OIL
SOON message displays, have the
engine oil and filter changed within
the next 1 000 km/600 mi. If driven
under the best conditions, the
engine oil life system might not
indicate the need for vehicle service
Page 344 of 400

Black plate (4,1)Cadillac CTS Owner Manual (GMNA-Localizing-U.S./Canada/Mexico-
6081492) - 2014 - CRC 2nd Edition - 11/20/13
11-4 Service and Maintenance
for more than a year. The engine oil
and filter must be changed at least
once a year and the oil life system
must be reset. Your trained dealer
technician can perform this work.
If the engine oil life system is reset
accidentally, service the vehicle
within 5 000 km/3,000 mi since the
last service. Reset the oil life
system when the oil is changed.
SeeEngine Oil Life System on
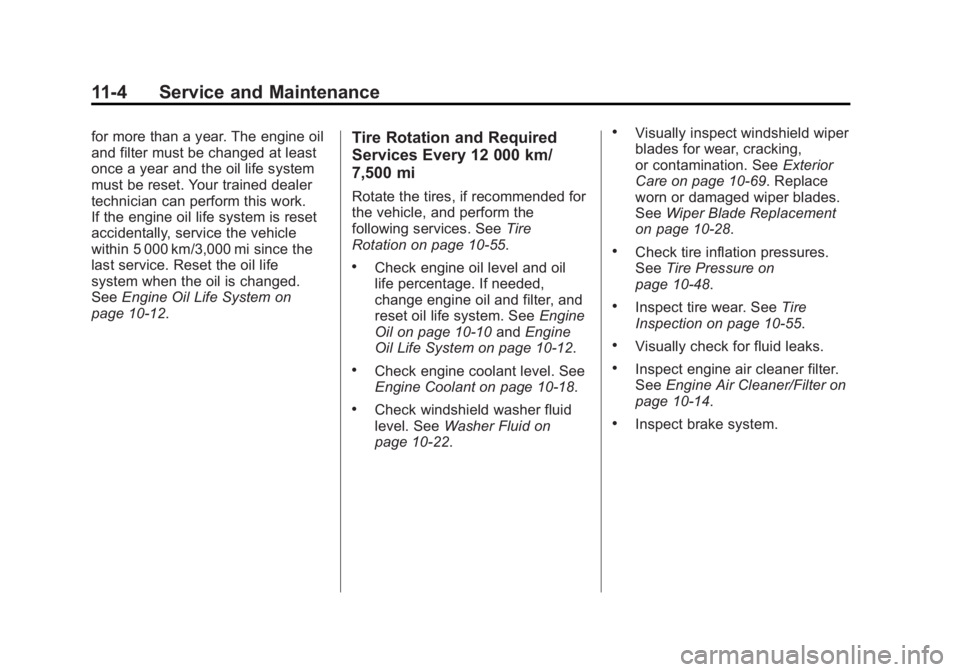
page 10-12.Tire Rotation and Required
Services Every 12 000 km/
7,500 mi
Rotate the tires, if recommended for
the vehicle, and perform the
following services. See Tire
Rotation on page 10-55.
.Check engine oil level and oil
life percentage. If needed,
change engine oil and filter, and
reset oil life system. See Engine
Oil on page 10-10 andEngine
Oil Life System on page 10-12.
.Check engine coolant level. See
Engine Coolant on page 10-18.
.Check windshield washer fluid
level. See Washer Fluid on
page 10-22.
.Visually inspect windshield wiper
blades for wear, cracking,
or contamination. See Exterior
Care on page 10-69. Replace
worn or damaged wiper blades.
See Wiper Blade Replacement
on page 10-28.
.Check tire inflation pressures.
See Tire Pressure on
page 10-48.
.Inspect tire wear. See Tire
Inspection on page 10-55.
.Visually check for fluid leaks.
.Inspect engine air cleaner filter.
See Engine Air Cleaner/Filter on
page 10-14.
.Inspect brake system.
Page 346 of 400

Black plate (6,1)Cadillac CTS Owner Manual (GMNA-Localizing-U.S./Canada/Mexico-
6081492) - 2014 - CRC 2nd Edition - 11/18/13
11-6 Service and Maintenance
Maintenance Schedule
Additional Required
Services - Normal12 000 km/7,500 mi
24 000 km/15,000 mi
36 000 km/22,500 mi
48 000 km/30,000 mi
60 000 km/37,500 mi
72 000 km/45,000 mi
84 000 km/52,500 mi
96 000 km/60,000 mi
108 000 km/67,500 mi
120 000 km/75,000 mi
132 000 km/82,500 mi
144 000 km/90,000 mi
156 000 km/97,500 mi
168 000 km/105,000 mi 180 000 km/112,500 mi
192 000 km/120,000 mi
204 000 km/127,500 mi
216 000 km/135,000 mi
228 000 km/142,500 mi
240 000 km/150,000 mi
Rotate tires, if recommended for the vehicle, and
perform Required Services. Check engine oil level
and oil life percentage. Change engine oil and
filter, if needed. (1)@ @ @ @ @ @ @ @ @ @ @ @ @ @ @ @ @ @ @ @
Replace passenger compartment air filter. (2)@ @@@@@
Inspect evaporative control system. (3)@ @@
Replace engine air cleaner filter. (4)@@@
Replace spark plugs. Inspect spark plug wires.
(2.0L LTG and 3.6L LF3 Turbo Engines)@ @
Replace spark plugs. Inspect spark plug wires.
(3.6L LFX Engine Only)@
Change automatic transmission fluid. Change
filter if serviceable.@
Change transfer case fluid, if equipped with
AWD. (5)@
Change rear axle fluid, if equipped with electronic
limited slip differential. (3.6L V6 Turbo LF3
Engine only)@
Drain and fill engine cooling system. (6)@
Visually inspect accessory drive belts. (7)@
Replace brake fluid. (8)@
Page 348 of 400

Black plate (8,1)Cadillac CTS Owner Manual (GMNA-Localizing-U.S./Canada/Mexico-
6081492) - 2014 - CRC 2nd Edition - 11/18/13
11-8 Service and Maintenance
Maintenance Schedule
Additional Required
Services - Severe12 000 km/7,500 mi
24 000 km/15,000 mi
36 000 km/22,500 mi
48 000 km/30,000 mi
60 000 km/37,500 mi
72 000 km/45,000 mi
84 000 km/52,500 mi
96 000 km/60,000 mi
108 000 km/67,500 mi
120 000 km/75,000 mi
132 000 km/82,500 mi
144 000 km/90,000 mi
156 000 km/97,500 mi
168 000 km/105,000 mi 180 000 km/112,500 mi
192 000 km/120,000 mi
204 000 km/127,500 mi
216 000 km/135,000 mi
228 000 km/142,500 mi
240 000 km/150,000 mi
Rotate tires, if recommended for the vehicle, and
perform Required Services. Check engine oil level
and oil life percentage. Change engine oil and
filter, if needed. (1)@ @ @ @ @ @ @ @ @ @ @ @ @ @ @ @ @ @ @ @
Replace passenger compartment air filter. (2)@ @@@@@
Inspect evaporative control system. (3)@ @@
Replace engine air cleaner filter. (4)@@@
2.0L LTG and 3.6L LF3 Engines: Replace spark
plugs. Inspect spark plug wires.@ @
3.6L LFX Engine Only: Replace spark plugs.
Inspect spark plug wires.@
Change automatic transmission fluid. Change
filter if serviceable.@@@
Change transfer case fluid, if equipped with
AWD. (5)@@@
Change rear axle fluid, if equipped with electronic
limited slip differential. (3.6L V6 Turbo LF3
Engine only)@ @
Drain and fill engine cooling system. (6)@
Visually inspect accessory drive belts. (7)@
Replace brake fluid. (8)@
Page 350 of 400

Black plate (10,1)Cadillac CTS Owner Manual (GMNA-Localizing-U.S./Canada/Mexico-
6081492) - 2014 - CRC 2nd Edition - 11/18/13
11-10 Service and Maintenance
Additional
Maintenance and Care
Your vehicle is an important
investment and caring for it properly
may help to avoid future costly
repairs. To maintain vehicle
performance, additional
maintenance services may be
required.
It is recommended that your dealer
perform these services—their
trained dealer technicians know
your vehicle best. Your dealer can
also perform a thorough
assessment with a multi-point
inspection to recommend when your
vehicle may need attention.
The following list is intended to
explain the services and conditions
to look for that may indicate
services are required.
Battery
The battery supplies power to start
the engine and operate any
additional electrical accessories.
.To avoid break-down or failure to
start the vehicle, maintain a
battery with full cranking power.
.Trained dealer technicians have
the diagnostic equipment to test
the battery and ensure that the
connections and cables are
corrosion-free.
Belts
.Belts may need replacing if they
squeak or show signs of
cracking or splitting.
.Trained dealer technicians have
access to tools and equipment
to inspect the belts and
recommend adjustment or
replacement when necessary.
Brakes
Brakes stop the vehicle and are
crucial to safe driving.
.Signs of brake wear may include
chirping, grinding, or squealing
noises, or difficulty stopping.
.Trained dealer technicians have
access to tools and equipment
to inspect the brakes and
recommend quality parts
engineered for the vehicle.
Fluids
Proper fluid levels and approved
fluids protect the vehicle’s systems
and components. See
Recommended Fluids and
Lubricants on page 11-13 for GM
approved fluids.
.Engine oil and windshield
washer fluid levels should be
checked at every fuel fill.
.Instrument cluster lights may
come on to indicate that fluids
may be low and need to be
filled.
Hoses
Hoses transport fluids and should
be regularly inspected to ensure
that there are no cracks or leaks.
With a multi-point inspection, your
dealer can inspect the hoses and
advise if replacement is needed.