turn signal CADILLAC ESCALADE 2010 3.G User Guide
[x] Cancel search | Manufacturer: CADILLAC, Model Year: 2010, Model line: ESCALADE, Model: CADILLAC ESCALADE 2010 3.GPages: 616, PDF Size: 39.41 MB
Page 196 of 616
Heated Steering Wheel
For vehicles with a heated steering wheel, the buttonfor this feature is located on the steering wheel.
(:Press to turn the heated steering wheel on or off.A light on the button displays when the feature isturned on.
The steering wheel takes about three minutes to startheating.
Turn Signal/Multifunction Lever
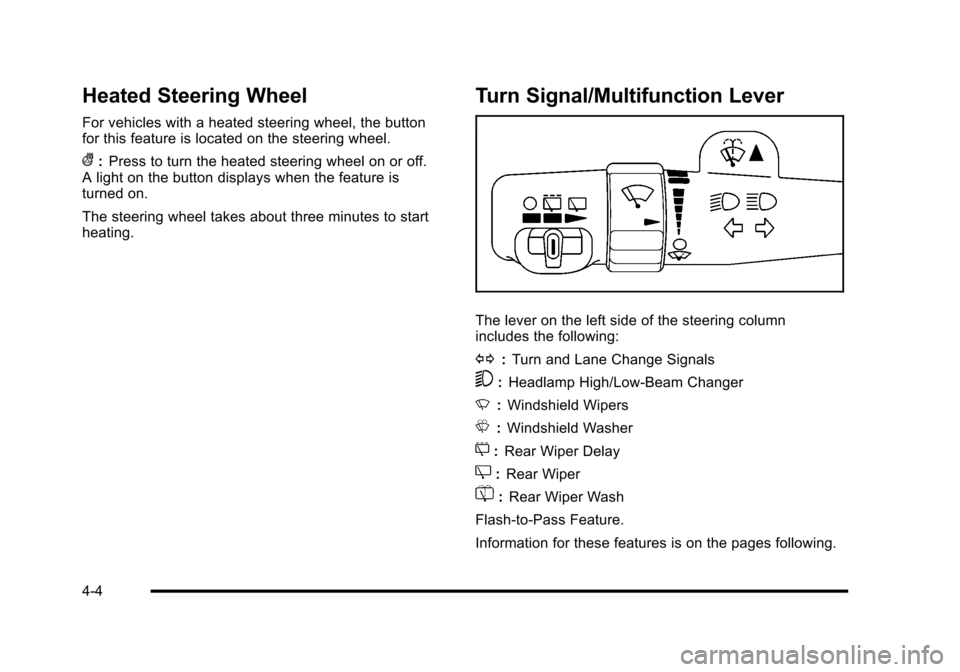
The lever on the left side of the steering columnincludes the following:
G:Turn and Lane Change Signals
5:Headlamp High/Low-Beam Changer
N:Windshield Wipers
L:Windshield Washer
5:Rear Wiper Delay
Z:Rear Wiper
=:Rear Wiper Wash
Flash-to-Pass Feature.
Information for these features is on the pages following.
4-4
Page 197 of 616
Turn and Lane-Change Signals
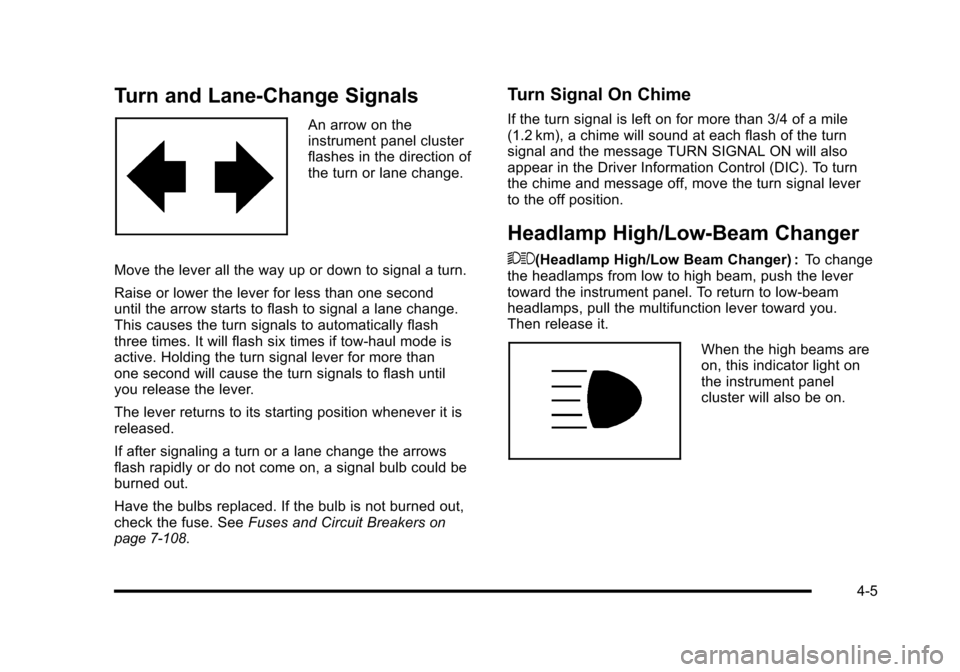
An arrow on theinstrument panel clusterflashes in the direction ofthe turn or lane change.
Move the lever all the way up or down to signal a turn.
Raise or lower the lever for less than one seconduntil the arrow starts to flash to signal a lane change.This causes the turn signals to automatically flashthree times. It will flash six times if tow-haul mode isactive. Holding the turn signal lever for more thanone second will cause the turn signals to flash untilyou release the lever.
The lever returns to its starting position whenever it isreleased.
If after signaling a turn or a lane change the arrowsflash rapidly or do not come on, a signal bulb could beburned out.
Have the bulbs replaced. If the bulb is not burned out,check the fuse. SeeFuses and Circuit Breakersonpage 7!108.
Turn Signal On Chime
If the turn signal is left on for more than 3/4 of a mile(1.2 km), a chime will sound at each flash of the turnsignal and the message TURN SIGNAL ON will alsoappear in the Driver Information Control (DIC). To turnthe chime and message off, move the turn signal leverto the off position.
Headlamp High/Low-Beam Changer
53(Headlamp High/Low Beam Changer) :To changethe headlamps from low to high beam, push the levertoward the instrument panel. To return to low-beamheadlamps, pull the multifunction lever toward you.Then release it.
When the high beams areon, this indicator light onthe instrument panelcluster will also be on.
4-5
Page 198 of 616
Flash-to-Pass
This feature lets you use the high-beam headlamps tosignal a driver in front of you that you want to pass.It works even if the headlamps are in the automaticposition.
To use it, pull the turn signal lever toward you, thenrelease it.
If the headlamps are in the automatic position or on lowbeam, the high-beam headlamps will turn on. They willstay on as long as you hold the lever toward you. Thehigh-beam indicator on the instrument panel cluster willcome on. Release the lever to return to normaloperation.
For vehicles with High Intensity Discharge (HID)headlamps, the low!beam headlamps must be on forthe flash!to!pass feature to work.
Windshield Wipers
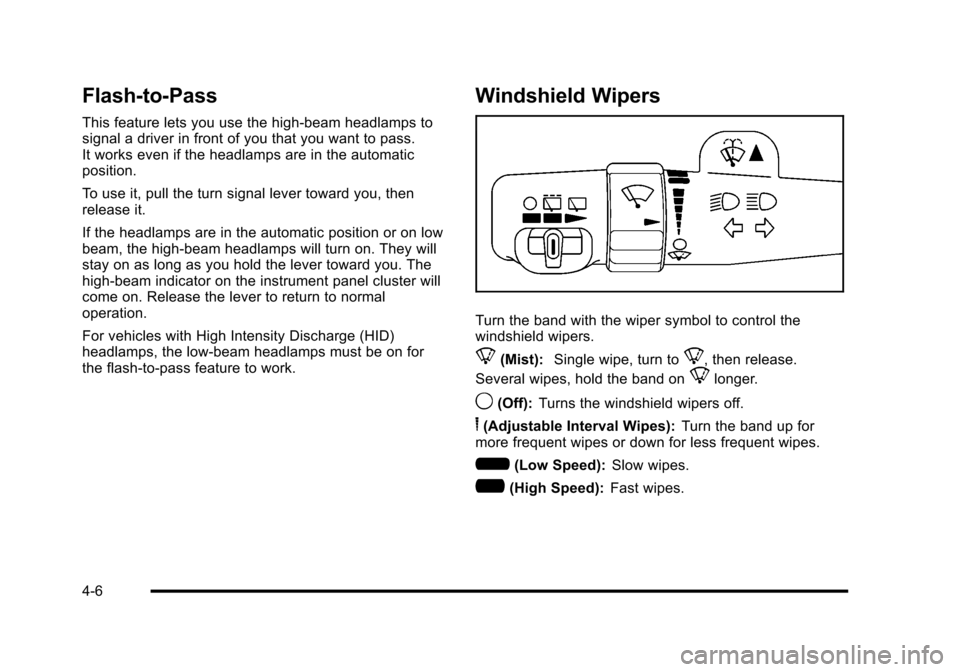
Turn the band with the wiper symbol to control thewindshield wipers.
8(Mist):Single wipe, turn to8, then release.
Several wipes, hold the band on8longer.
9(Off):Turns the windshield wipers off.
6(Adjustable Interval Wipes):Turn the band up formore frequent wipes or down for less frequent wipes.
6(Low Speed):Slow wipes.
?(High Speed):Fast wipes.
4-6
Page 199 of 616
Clear ice and snow from the wiper blades before usingthem. If frozen to the windshield, carefully loosen orthaw them. Damaged wiper blades should be replaced.SeeWindshield Wiper Blade Replacementonpage 7!57.
Heavy snow or ice can overload the wiper motor.A circuit breaker will stop the motor until it cools down.
Windshield Washer
{WARNING:
In freezing weather, do not use your washer until
the windshield is warmed. Otherwise the washer
fluid can form ice on the windshield, blocking your
vision.
L(Washer Fluid):Push the paddle marked with thewindshield washer symbol at the top of the multifunctionlever, to spray washer fluid on the windshield. Thewipers clear the window and then either stop or returnto the preset speed.
Rear Window Wiper/Washer
{WARNING:
In freezing weather, do not use your washer until
the windshield is warmed. Otherwise the washer
fluid can form ice on the windshield, blocking your
vision.
The rear wiper control is located on the turn signal/multifunction lever.
To turn the rear wiper on, slide the lever to a wiperposition.
9(Off) :Turns the wiper off.
5(Rear Wiper Delay):Turns on the rear wiper delay.
Z(Rear Wiper):Turns on the rear wiper.
=(Rear Wiper Wash):To turn on the rear wiper wash,push the button on the end of the turn signal/multifunction lever to spray washer fluid on the rearwindow. The wipers will clear the rear window andeither stop or return to your preset speed. For morewasher cycles, press and hold the button.
4-7
Page 204 of 616
Turn the headlamp control to off and then back to theheadlamp on position to make the headlamps stay onfor an additional 10 minutes.
IntelliBeam®Intelligent High-Beam
Headlamp Control System
For vehicles with this feature, be sure to read thisentire section before using it.
IntelliBeam®is an enhancement to the vehicle'sheadlamp system. Using a digital light sensor on therearview mirror, this system will turn the vehicle'shigh-beam headlamps on and off according tosurrounding traffic conditions.
The IntelliBeam®system turns the high-beamheadlamps on when it is dark enough, there is no othertraffic present, and the IntelliBeam®system is enabled.
Turning On and Enabling IntelliBeam®
Press and release the IntelliBeam®button on the insiderear view mirror. The IntelliBeam®indicator on themirror will turn on to let you know the system has beenturned on. Once the system has been turned on, it willremain on each time the vehicle is started. Additionally,the IntelliBeam®system must be enabled.
To enable the IntelliBeam®system, turn the exteriorlamp control to AUTO, with the turn signal/multifunctionlever in its neutral position. The High-Beam On Lightwill appear on the instrument panel cluster when thehigh-beams are on. SeeHighbeam On Lightonpage 4!40.
Driving with IntelliBeam®
IntelliBeam®will only activate your high-beams whendriving over 20 mph (32 km/h).
The high-beam headlamps will remain on, under theautomatic control of IntelliBeam®, until any of thefollowing situations occur:
.The system detects an approaching vehicle'sheadlamps.
.The system detects a preceding vehicle'staillamps.
.The outside light is bright enough that high-beamheadlamps are not required.
.The vehicle's speed drops below 15 mph(24 km/h).
4-12
Page 219 of 616

Automatic Operation, If Equipped.
AUTO :Press the air delivery mode button until thissetting is selected to control the inside temperature, airdelivery, and fan speed. AUTO appears in the displaywhen automatic operation is active.
+/!(Increase/Decrease Temperature) :Pressthe + or!buttons to increase or decrease the cabintemperature. The rear control temperature display willshow the temperature setting increasing or decreasing.
The display only indicates climate control functionswhen the system is in rear independent mode.
Manual Operation
DC(Fan Control):Press these buttons on the rearseat audio control panel to increase or decrease theairflow. Pressing the fan up button when the system isoff will turn the system on. The air delivery mode willremain under automatic control.
+/!(Temperature Control) :Press these buttons toadjust the temperature of the air flowing into thepassenger area. Press the + button for warmer air andpress the!button for cooler air.
N(Air Delivery Mode Control):Press the modebutton to change the direction of the airflow in thevehicle. Repeatedly press the button until the desiredmode appears on the display. Multiple presses will cyclethrough the delivery selections.
Warning Lights, Gages, and
Indicators
Warning lights and gages can signal that something iswrong before it becomes serious enough to cause anexpensive repair or replacement. Paying attention to thewarning lights and gages could prevent injury.
Warning lights come on when there might be or there isa problem with one of the vehicle's functions. Somewarning lights come on briefly when the engine isstarted to indicate they are working.
Gages can indicate when there might be or there is aproblem with one of the vehicle's functions. Often gagesand warning lights work together to indicate a problemwith the vehicle.
When one of the warning lights comes on and stays onwhile driving, or when one of the gages shows therecould be a problem, check the section that explainswhat to do. Follow this manual's advice. Waiting to dorepairs can be costly and even dangerous.
4-27
Page 249 of 616
TRANSMISSION HOT IDLE ENGINE
Notice:If you drive your vehicle while thetransmission fluid is overheating and thetransmission temperature warning is displayed onthe instrument panel cluster and/or DIC, you candamage the transmission. This could lead to costlyrepairs that would not be covered by your warranty.Do not drive your vehicle with overheatedtransmission fluid or while the transmissiontemperature warning is displayed.
This message displays along with four chimes if thetransmission fluid in the vehicle gets hot. Driving withthe transmission fluid temperature high can causedamage to the vehicle. Stop the vehicle and let it idle toallow the transmission to cool. This message clears andthe chime stops when the fluid temperature reaches asafe level.
TURN SIGNAL ON
This message displays and a chime sounds if a turnsignal is left on for 3/4 of a mile (1.2 km). Move the turnsignal/multifunction lever to the off position.
WASHER FLUID LOW ADD FLUID
This message displays when the windshield washerfluid is low. Fill the windshield washer fluid reservoir assoon as possible. SeeEngine Compartment Overviewon page 7!16for the location of the windshield washerfluid reservoir. Also, seeWindshield Washer Fluidonpage 7!39for more information.
DIC Vehicle Customization
Your vehicle may have customization capabilities thatallow you to program certain features to one preferredsetting. Customization features can only beprogrammed to one setting on the vehicle and cannotbe programmed to a preferred setting for two differentdrivers.
All of the customization options may not be available onyour vehicle. Only the options available will bedisplayed on the DIC.
The default settings for the customization features wereset when your vehicle left the factory, but may havebeen changed from their default state since then.
The customization preferences are automaticallyrecalled.
To change customization preferences, use the followingprocedure.
4-57
Page 253 of 616
DELAY DOOR LOCK
This feature allows you to select whether or not thelocking of the vehicle's doors and liftgate will bedelayed. When locking the doors and liftgate with thepower door lock switch and a door or the liftgate isopen, this feature will delay locking the doors andliftgate until five seconds after the last door is closed.You will hear three chimes to signal that the delayedlocking feature is in use. The key must be out of theignition for this feature to work. You can temporarilyoverride delayed locking by pressing the power doorlock switch twice. SeeDelayed Lockingon page 3!11for more information.
Press the customization button until DELAY DOORLOCK appears on the DIC display. Press the set/resetbutton once to access the settings for this feature. Thenpress the customization button to scroll through thefollowing settings:
OFF :There will be no delayed locking of the vehicle'sdoors.
ON (default) :The doors will not lock until five secondsafter the last door or the liftgate is closed.
NO CHANGE :No change will be made to this feature.The current setting will remain.
To select a setting, press the set/reset button while thedesired setting is displayed on the DIC.
EXIT LIGHTING
This feature allows you to select the amount of time youwant the exterior lamps to remain on when it is darkenough outside. This happens after the key is turnedfrom ON/RUN to LOCK/OFF.
Press the customization button until EXIT LIGHTINGappears on the DIC display. Press the set/reset buttononce to access the settings for this feature. Then pressthe customization button to scroll through the followingsettings:
OFF :The exterior lamps will not turn on.
30 SECONDS (default) :The exterior lamps will stay onfor 30 seconds.
1 MINUTE :The exterior lamps will stay on forone minute.
2 MINUTES :The exterior lamps will stay on fortwo minutes.
NO CHANGE :No change will be made to this feature.The current setting will remain.
To select a setting, press the set/reset button while thedesired setting is displayed on the DIC.
4-61
Page 271 of 616
The infrared transmitters are located at the rear of theRSE overhead console. The headphones shut offautomatically to save the battery power if the RSEsystem and the RSA are shut off or if the headphonesare out of range of the transmitters for more than3 minutes. If you move too far forward or step out of thevehicle, the headphones lose the audio signal.
The headphones may automatically turn off afterfour hours of continuous use.
To adjust the volume on the headphones, use thevolume control located on the right side.
For optimal audio performance, the headphones mustbe worn correctly. Headphones should be worn withheadband over the top of the head for best audioreception. The symbol L (Left) appears on the upper leftside, above the ear pad and should be positioned onthe left ear. The symbol R (Right) appears on the upperright side, above the ear pad and should be positionedon the right ear.
Notice:Do not store the headphones in heat ordirect sunlight. This could damage the headphonesand repairs will not be covered by the warranty.Storage in extreme cold can weaken the batteries.Keep the headphones stored in a cool, dry place.
If the foam ear pads attached to the headphonesbecome worn or damaged, the pads can be replacedseparately from the headphone set. See your dealer/retailer for more information.
Battery Replacement
To change the batteries on the headphones:
1. Turn the screw to loosen the battery door locatedon the left side of the headphones. Slide thebattery door open.
2. Replace the two batteries in the compartment.Make sure that they are installed correctly, usingthe diagram on the inside of the batterycompartment.
3. Replace the battery door and tighten the doorscrew.
If the headphones are to be stored for a long period oftime, remove the batteries and keep them in a cool, dryplace.
4-79
Page 272 of 616

Audio/Video (A/V) Jacks
The A/V jacks are located on the rear of the floorconsole. The A/V jacks allow audio or video signals tobe connected from an auxiliary device such as acamcorder or a video game unit to the RSE system.Adapter connectors or cables (not included) maybe required to connect the auxiliary device to theA/V jacks. Refer to the manufacturer’s instructionsfor proper usage.
The A/V jacks are color coded to match typical homeentertainment system equipment. The yellow jack (A) isfor the video input. The white jack (B) is for the leftaudio input. The red jack (C) is for the right audio input.
Power for auxiliary devices is not supplied by the radiosystem.
To use the auxiliary inputs of the RSE system, connectan external auxiliary device to the color-coded A/V jacksand turn both the auxiliary device and the video screenpower on. If the video screen is in the DVD playermode, pressing the AUX (auxiliary) button on theremote control switches the video screen from the DVDplayer mode to the auxiliary device. The radio plays theaudio of the connected auxiliary device by sourcing toauxiliary. SeeNavigation Audio Systemon page 5!60for more information.
For optimal sound quality, increase the portable audiodevice's volume to the loudest level. Higher levels ofvolume decreases audio distortion.
It is always best to power a portable audio devicethrough its own battery while playing.
4-80