headrest CADILLAC ESCALADE 2010 3.G Owners Manual
[x] Cancel search | Manufacturer: CADILLAC, Model Year: 2010, Model line: ESCALADE, Model: CADILLAC ESCALADE 2010 3.GPages: 616, PDF Size: 39.41 MB
Page 35 of 616
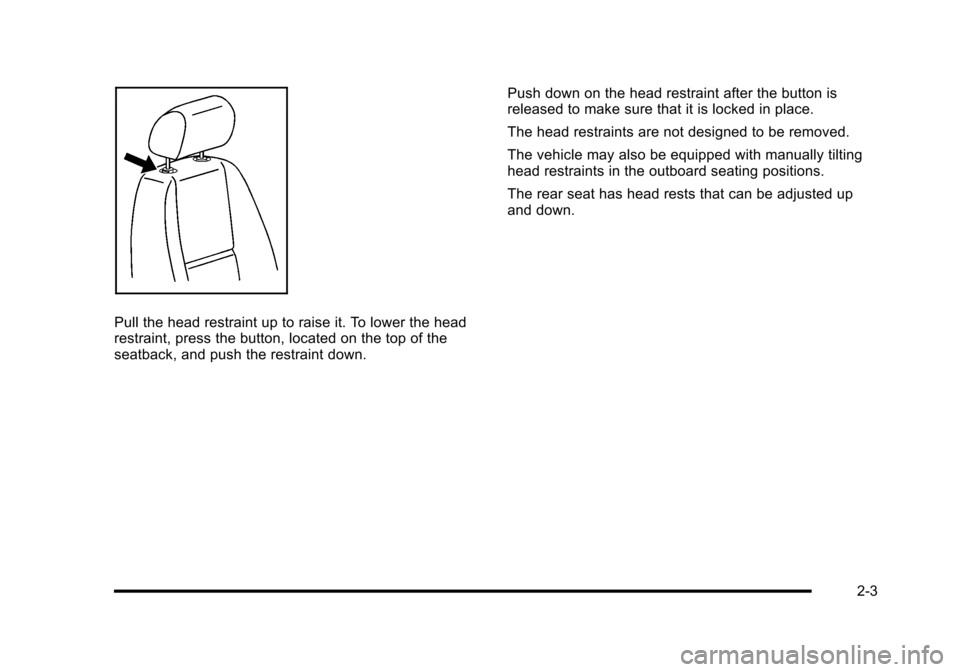
Pull the head restraint up to raise it. To lower the headrestraint, press the button, located on the top of theseatback, and push the restraint down.
Push down on the head restraint after the button isreleased to make sure that it is locked in place.
The head restraints are not designed to be removed.
The vehicle may also be equipped with manually tiltinghead restraints in the outboard seating positions.
The rear seat has head rests that can be adjusted upand down.
2-3
Page 97 of 616
Notice:Do not let the LATCH attachments rubagainst the vehicle’s safety belts. This may damagethese parts. If necessary, move buckled safety beltsto avoid rubbing the LATCH attachments.
Do not fold the empty rear seat with a safety beltbuckled. This could damage the safety belt or theseat. Unbuckle and return the safety belt to itsstowed position, before folding the seat.
1. Attach and tighten the lower attachments to thelower anchors. If the child restraint does not havelower attachments or the desired seating positiondoes not have lower anchors, secure the childrestraint with the top tether and the safety belts.Refer to your child restraint manufacturerinstructions and the instructions in this manual.
1. 1. Find the lower anchors for the desiredseating position.
1. 2. Put the child restraint on the seat.
1. 3. Attach and tighten the lower attachments onthe child restraint to the lower anchors.
2. If the child restraint manufacturer recommends thatthe top tether be attached, attach and tighten thetop tether to the top tether anchor, if the vehiclehas one. Refer to the child restraint instructionsand the following steps:
2. 1. Find the top tether anchor.
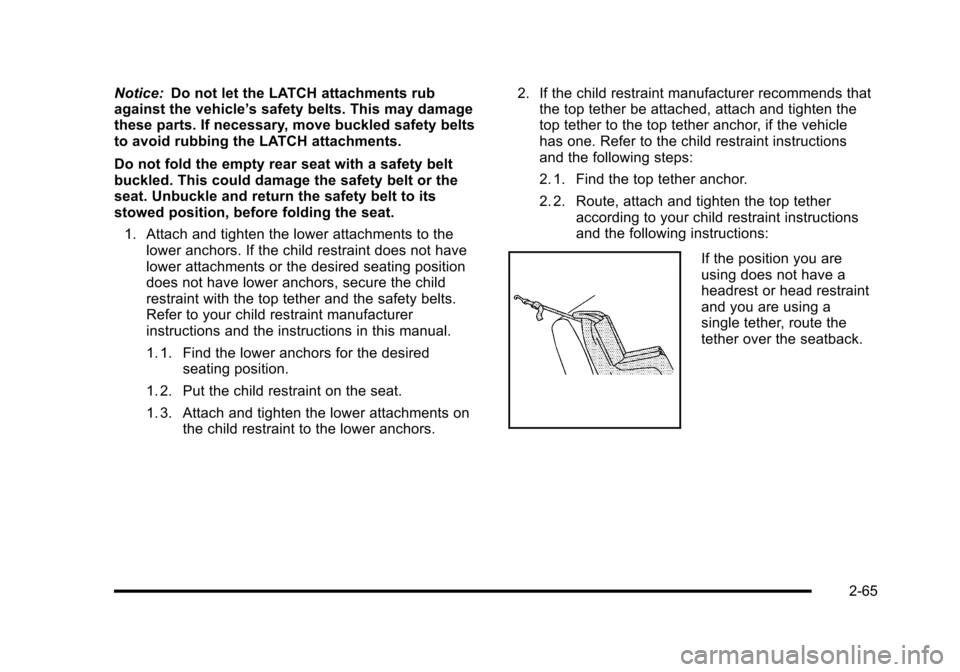
2. 2. Route, attach and tighten the top tetheraccording to your child restraint instructionsand the following instructions:
If the position you areusing does not have aheadrest or head restraintand you are using asingle tether, route thetether over the seatback.
2-65
Page 98 of 616
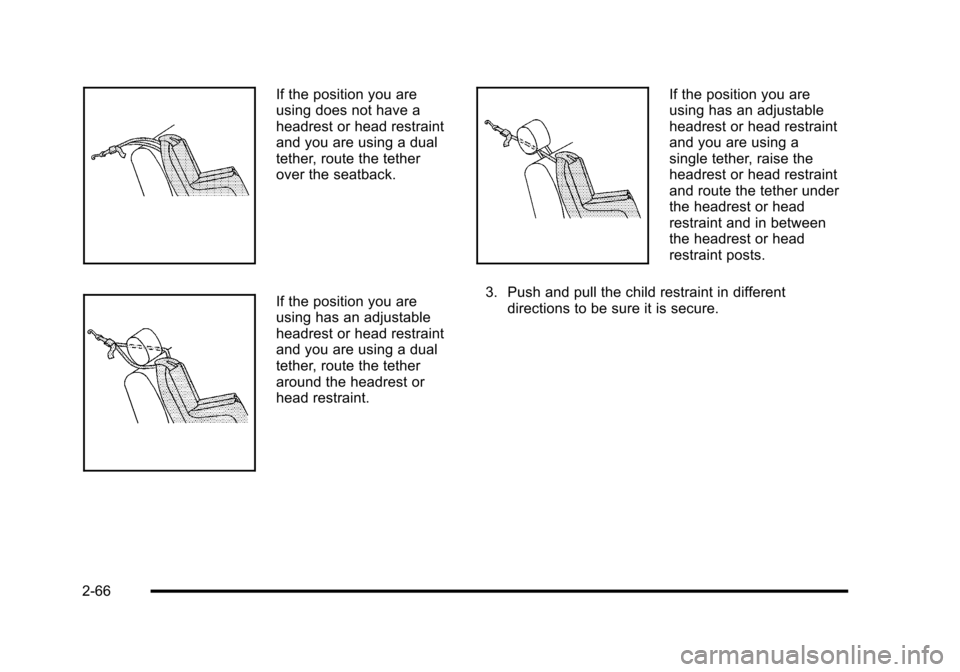
If the position you areusing does not have aheadrest or head restraintand you are using a dualtether, route the tetherover the seatback.
If the position you areusing has an adjustableheadrest or head restraintand you are using a dualtether, route the tetheraround the headrest orhead restraint.
If the position you areusing has an adjustableheadrest or head restraintand you are using asingle tether, raise theheadrest or head restraintand route the tether underthe headrest or headrestraint and in betweenthe headrest or headrestraint posts.
3. Push and pull the child restraint in differentdirections to be sure it is secure.
2-66
Page 194 of 616
Section 4 Instrument Panel
StabiliTrak®Indicator Light . . . . . . . . . . . . . . . . . . . . . 4-34Engine Coolant Temperature Gage . . . . . . . . . . . . 4-35Tire Pressure Light . . . . . . . . . . . . . . . . . . . . . . . . . . . . 4-35Malfunction Indicator Lamp . . . . . . . . . . . . . . . . . . . . 4-36Oil Pressure Light . . . . . . . . . . . . . . . . . . . . . . . . . . . . . 4-38Security Light . . . . . . . . . . . . . . . . . . . . . . . . . . . . . . . . . . 4-39Fog Lamp Light . . . . . . . . . . . . . . . . . . . . . . . . . . . . . . . . 4-39Lights On Reminder . . . . . . . . . . . . . . . . . . . . . . . . . . . 4-39Cruise Control Light . . . . . . . . . . . . . . . . . . . . . . . . . . . 4-39Highbeam On Light . . . . . . . . . . . . . . . . . . . . . . . . . . . . 4-40Tow/Haul Mode Light . . . . . . . . . . . . . . . . . . . . . . . . . . 4-40Fuel Gage . . . . . . . . . . . . . . . . . . . . . . . . . . . . . . . . . . . . . 4-40
Driver Information Center (DIC). . . . . . . . . . . . . . . . . . 4-41DIC Operation and Displays . . . . . . . . . . . . . . . . . . . 4-41DIC Compass . . . . . . . . . . . . . . . . . . . . . . . . . . . . . . . . . . 4-47DIC Warnings and Messages . . . . . . . . . . . . . . . . . . 4-48DIC Vehicle Customization . . . . . . . . . . . . . . . . . . . . 4-57
Audio System(s). . . . . . . . . . . . . . . . . . . . . . . . . . . . . . . . . . 4-67Bluetooth®. . . . . . . . . . . . . . . . . . . . . . . . . . . . . . . . . . . . . 4-67Rear Seat Entertainment (RSE) System(Overhead) . . . . . . . . . . . . . . . . . . . . . . . . . . . . . . . . . . 4-77Rear Seat Entertainment (RSE) System(Headrest DVD) . . . . . . . . . . . . . . . . . . . . . . . . . . . . . 4-86Rear Seat Audio (RSA) . . . . . . . . . . . . . . . . . . . . . . . 4-103Theft-Deterrent Feature . . . . . . . . . . . . . . . . . . . . . . 4-105Audio Steering Wheel Controls . . . . . . . . . . . . . . . 4-105Radio Reception . . . . . . . . . . . . . . . . . . . . . . . . . . . . . . 4-107Rear Side Window Antenna . . . . . . . . . . . . . . . . . . 4-108XM™Satellite Radio Antenna System . . . . . . . . 4-108
4-2
Page 278 of 616
DVD Display Error Messages
The DVD display error message depends on whichradio the vehicle has. The video screen might displayone of the following:
Disc Load/Eject Error :Displays when there are discload or eject problems.
Disc Format Error :Displays if the disc is inserted withthe disc label wrong side up, or if the disc is damaged.
Disc Region Error :Displays, if the disc is not from acorrect region.
No Disc Inserted :Displays, if no disc is present whenZor DVD AUX is pressed on the radio.
DVD Distortion
Video distortion may occur when operating cellularphones, scanners, CB radios, Global Position Systems(GPS)*, two-way radios, mobile fax, or walkie talkies.
It might be necessary to turn off the DVD player whenoperating one of these devices in or near the vehicle.
*Excludes the OnStar®System.
Cleaning the RSE Overhead Console
When cleaning the RSE overhead console surface, useonly a clean cloth dampened with clean water.
Cleaning the Video Screen
When cleaning the video screen, use only a clean clothdampened with clean water. Use care when directlytouching or cleaning the screen, as damage can result.
Rear Seat Entertainment (RSE)
System (Headrest DVD)
Vehicles with an RSE system include two head restraintvideo display screens with integrated DVD players,auxiliary inputs, two wireless headphones, and a remotecontrol. This system works independently from thevehicle's Overhead DVD RSE system. See the vehicle'sowners manual for information about the OverheadDVD RSE system.
The vehicle has a feature called Retained AccessoryPower (RAP). With RAP, the RSE system can be playedeven after the ignition is turned off. See“RetainedAccessory Power (RAP)”in the owners manual for moreinformation.
4-86
Page 281 of 616

STOPc:Press once to stop playing a DVD.
There is a pre-stop feature for DVD and video CD only.This feature resumes playback of the disc where it wasstopped. Press the stop button once during disc
playback andcdisplays on the DVD startup screen.
This icon disappears after a few seconds. Press thestop button a second time, or eject the disc, to cancelthe pre-stop feature and to clear the disc positionmemory.
SOURCE :Press to select between Monitor 3,Monitor 4, or the AV INPUT.
Each video display screen can be adjustedindependently, as well as display information from bothDVD players and both A/V inputs.
Infrared Remote Sensor :Located in the top center ofthe video display screen. Do not block the signal fromthe remote to the sensor.
Infrared Transmitters :Located in the top center of thevideo display screen. Do not block the signal from theheadphones to the transmitter.
Video Display Screen :Located on the back of eachheadrest.
AV OUTPUT (Audio/Video Output Jack) :Located onthe lower left side of the screen and is identified on thevideo screen panel as the AV OUTPUT.
Headphone Jack :Wired headphones can be pluggedinto the headphone jack with one-eighth inch stereoplugs.
AV INPUT: (Audio/Video Input Jack) :The audio/videoinput jack is located below the video display screen andallows viewing of auxiliary sources such as portableDVD players, game stations, or video cameras, on eachscreen.
.Video Input—The yellow connector is used forvideo input.
.L Audio—The white connector is used for the leftside audio.
.R Audio—The red connector is used for the rightside audio.
Level Lock and Release Latch :The viewing angle ofthe video screen can be adjusted by releasing the latchand gently moving the screen. Then lock it into a secureposition.
4-89
Page 282 of 616
Vehicle Speakers
Audio from the DVD player or an auxiliary device canbe heard through the vehicle speakers or the wireless/wired headphones, while the radio is tuned to one of thesix frequencies selected on the Sound Around portionof the system’s remote control. See“Remote Control”later in this supplement.
Only one audio source can be heard through thevehicle’s speakers at a time. The audio source beingused is specified by the A/V (audio/video) sourceselected on the driver side head restraint video displayscreen.
To turn the RSE system audio output to the vehicle’sspeakers, press Sound Around ON, on the system’sremote control. The audio from the RSE system can beheard through the wireless/wired headphones and thevehicle’s speakers at the same time. The volume on theradio can vary when switching between the radio, CD,DVD, MP3, or an auxiliary device.
Wireless Headphones
The two wireless headphones included with theHeadrest DVD RSE system will only work with theHeadrest DVD RSE system and are marked for channel3 and 4. The wireless headphones must be used withina line of sight of the transmitter that is located above thevideo display screen.
3!4 Channel Selector :This is located on the rightearpiece. Either Channel 3 or 4 can be selected withthe channel selector. The driver side monitor isdesignated as Channel 3, and the passenger side asChannel 4. Set the channel selector switch according tothe video display screen being viewed. The message,“To listen to this monitor tune your headphones toChannel 3 (or 4)”displays for five seconds thendisappears when the video display screen is turned on.
OFF/ON (Power) :Turn the power switch located onthe earpiece to turn the wireless headphones on or off.Each headphone has a light to indicate ON. If the lightdoes not come on, the batteries may need to bereplaced. See“Battery Replacement”under Rear SeatEntertainment System in the vehicle’s owner manual.
The headphones shut off automatically if the RSEsystem is turned off or if the headphones are out ofrange of the transmitter for more than three minutes.
VOL0(Volume):Use to adjust the volume on the
headphones.
Notice:Do not store the headphones in heat ordirect sunlight. This could damage the headphonesand repairs will not be covered by the warranty.Storage in extreme cold can weaken the batteries.Keep the headphones stored in a cool, dry place.
4-90
Page 283 of 616
Remote Control
To use the remote control, aim at the remote sensorlocated on top center of the video display screen andpress the desired button.
Objects blocking the line-of-sight can affect the functionof the remote control. Direct or very bright light canaffect the ability of the transmitter to receive signalsfrom the remote control. If the remote control does notseem to be working, the batteries might need to bereplaced. See“Battery Replacement”following thissection.
The remote control provided with the Headrest DVDRSE system, is not a universal remote control and willnot control other equipment.
Notice:Storing the remote control in a hot area orin direct sunlight can damage it, and the repairs willnot be covered by the warranty. Storage in extremecold can weaken the batteries. Keep the remotecontrol stored in a cool, dry place.
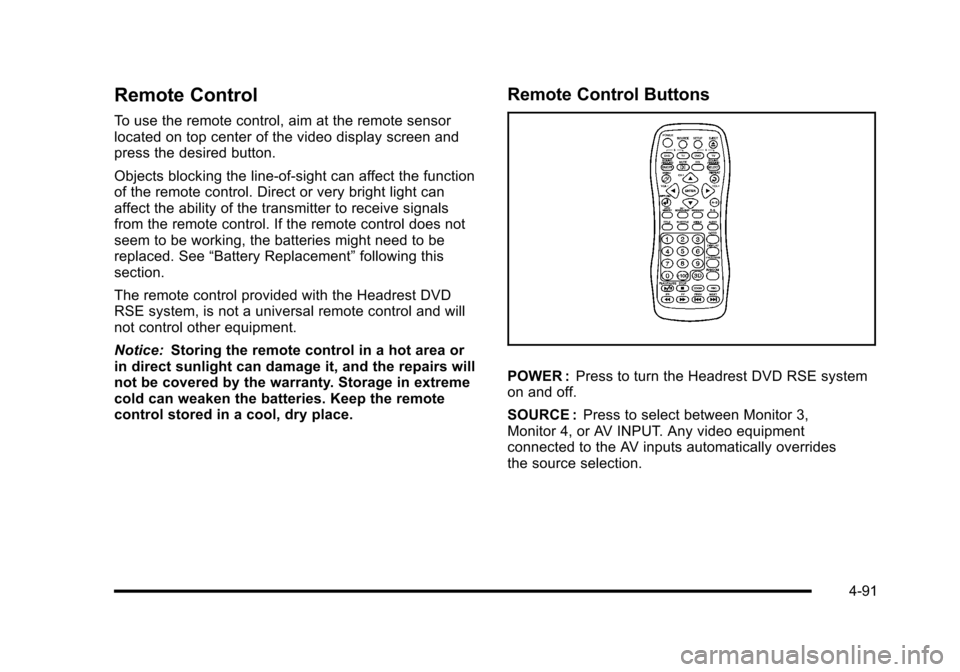
Remote Control Buttons
POWER :Press to turn the Headrest DVD RSE systemon and off.
SOURCE :Press to select between Monitor 3,Monitor 4, or AV INPUT. Any video equipmentconnected to the AV inputs automatically overridesthe source selection.
4-91
Page 385 of 616
Do not add any label to a CD or DVD, it could getcaught in the player. If a CD or DVD is recorded on apersonal computer and a description label is needed,try labeling the top of the recorded CD or DVD with asoft marker.
Auxiliary Devices
The vehicle may have a rear entertainmentsystem (RSE) with a second and third row screen.The RSE has audio adapters to allow you to connectauxiliary devices. The audio can be heard through thespeakers or through the wireless or wired headphones.See“Audio/Video Jacks”under,Rear SeatEntertainment (RSE) System (Overhead)on page 4!77orRear Seat Entertainment (RSE) System (HeadrestDVD)on page 4!86for more information.
Drivers are encouraged to set up any auxiliary devicewhile the vehicle is in P (Park). SeeDefensive Drivingo n p a g e 6!2for more information on driver distraction.
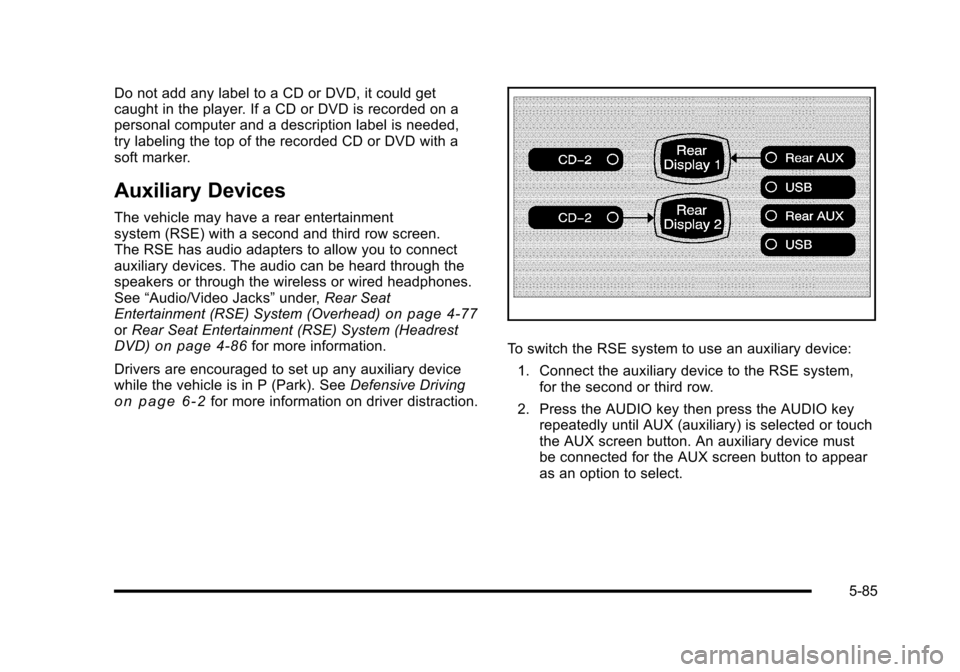
To switch the RSE system to use an auxiliary device:
1. Connect the auxiliary device to the RSE system,for the second or third row.
2. Press the AUDIO key then press the AUDIO keyrepeatedly until AUX (auxiliary) is selected or touchthe AUX screen button. An auxiliary device mustbe connected for the AUX screen button to appearas an option to select.
5-85
Page 386 of 616

3. For the second row display select the Rear AUXscreen button next to Rear Display 1 and for thethird row display select the Rear AUX screenbutton next to Rear Display 2. Each screen worksindependently of the other. The second row screencan watch a DVD while the third row screen canuse the auxiliary device.
The rear seat passengers can also use the remotecontrol to change the functions of the RSE. SeeRearSeat Entertainment (RSE) System (Overhead)onpage 4!77orRear Seat Entertainment (RSE) System(Headrest DVD)on page 4!86for more information.
Voice Recognition
The navigation system's voice recognition allowsfor hands-free operation of the navigation system,audio system, and OnStar®features. The DVD mapdisc must be installed in the navigation system for voicerecognition to work. See“Installing the DVD Map Disc”underMapson page 5!14for more information.
Voice recognition can be used when the ignition is onor when Retained Accessory Power (RAP) is active.See“Retained Accessory Power (RAP)”in the Index ofyour vehicle's owner manual for more information.
To use voice recognition, do the following:
1. Push and hold theSRCE button on thesteering wheel untilyou hear a beep. Theaudio system mutes.
2. Clearly state one of the commands listed on thefollowing pages.
Helpful Hints for Stating Commands
.When a multiple command is available, choose thecommand that works best.
.Words that are in brackets are optional. Forexample, for the command Radio [band] [select]FM, stating Radio FM or Radio select FM are bothvalid commands.
5-86