fuel cap release CADILLAC SRX 2012 2.G Owners Manual
[x] Cancel search | Manufacturer: CADILLAC, Model Year: 2012, Model line: SRX, Model: CADILLAC SRX 2012 2.GPages: 502, PDF Size: 6.23 MB
Page 29 of 502

Black plate (23,1)Cadillac SRX Owner Manual (Include Mex) - 2012
In Brief 1-23
Engine Oil Life System
The engine oil life system calculates
engine oil life based on vehicle use
and displays the CHANGE ENGINE
OIL SOON message when it is time
to change the engine oil and filter.
The oil life system should be reset
to 100% only following an oil
change.
Resetting the Oil Life System
1. Using the DIC MENU button andthumbwheel on the turn signal
lever, display REMAINING OIL
LIFE on the DIC. See Driver
Information Center (DIC) on
page 5‑28 andEngine Oil
Messages on page 5‑35.
2. Press the SET/CLR button to reset the oil life at 100%.
Be careful not to reset the oil life
display accidentally at any time
other than after the oil is
changed. It cannot be reset
accurately until the next oil
change. The oil life system can also be reset
as follows:
1. Turn the ignition on with the
engine off.
2. Fully press and release the accelerator pedal three times
within five seconds.
If the CHANGE ENGINE OIL
SOON message is not on, the
system is reset.
See Engine Oil Life System on
page 10‑10.
Fuel E85 (85% Ethanol)
Vehicles that have a FlexFuel badge
and a yellow fuel cap can use either
unleaded gasoline or ethanol fuel
containing up to 85% ethanol (E85).
See Fuel E85 (85% Ethanol) on
page 9‑49. For all other vehicles,
use only the unleaded gasoline
described under Recommended
Fuel on page 9‑47.
Driving for Better Fuel
Economy
Driving habits can affect fuel
mileage. Here are some driving tips
to get the best fuel economy
possible.
.Avoid fast starts and accelerate
smoothly.
.Brake gradually and avoid
abrupt stops.
.Avoid idling the engine for long
periods of time.
.When road and weather
conditions are appropriate, use
cruise control.
.Always follow posted speed
limits or drive more slowly when
conditions require.
.Keep vehicle tires properly
inflated.
Page 323 of 502

Black plate (51,1)Cadillac SRX Owner Manual (Include Mex) - 2012
Driving and Operating 9-51
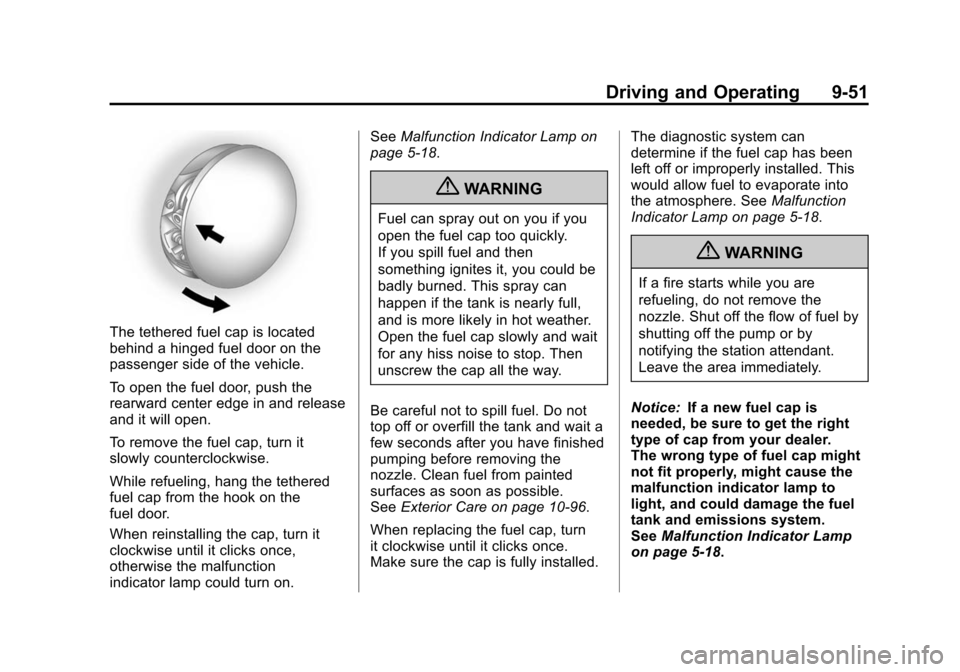
The tethered fuel cap is located
behind a hinged fuel door on the
passenger side of the vehicle.
To open the fuel door, push the
rearward center edge in and release
and it will open.
To remove the fuel cap, turn it
slowly counterclockwise.
While refueling, hang the tethered
fuel cap from the hook on the
fuel door.
When reinstalling the cap, turn it
clockwise until it clicks once,
otherwise the malfunction
indicator lamp could turn on.See
Malfunction Indicator Lamp on
page 5‑18.
{WARNING
Fuel can spray out on you if you
open the fuel cap too quickly.
If you spill fuel and then
something ignites it, you could be
badly burned. This spray can
happen if the tank is nearly full,
and is more likely in hot weather.
Open the fuel cap slowly and wait
for any hiss noise to stop. Then
unscrew the cap all the way.
Be careful not to spill fuel. Do not
top off or overfill the tank and wait a
few seconds after you have finished
pumping before removing the
nozzle. Clean fuel from painted
surfaces as soon as possible.
See Exterior Care on page 10‑96.
When replacing the fuel cap, turn
it clockwise until it clicks once.
Make sure the cap is fully installed. The diagnostic system can
determine if the fuel cap has been
left off or improperly installed. This
would allow fuel to evaporate into
the atmosphere. See
Malfunction
Indicator Lamp on page 5‑18.
{WARNING
If a fire starts while you are
refueling, do not remove the
nozzle. Shut off the flow of fuel by
shutting off the pump or by
notifying the station attendant.
Leave the area immediately.
Notice: If a new fuel cap is
needed, be sure to get the right
type of cap from your dealer.
The wrong type of fuel cap might
not fit properly, might cause the
malfunction indicator lamp to
light, and could damage the fuel
tank and emissions system.
See Malfunction Indicator Lamp
on page 5‑18.
Page 340 of 502

Black plate (8,1)Cadillac SRX Owner Manual (Include Mex) - 2012
10-8 Vehicle Care
Engine Cover
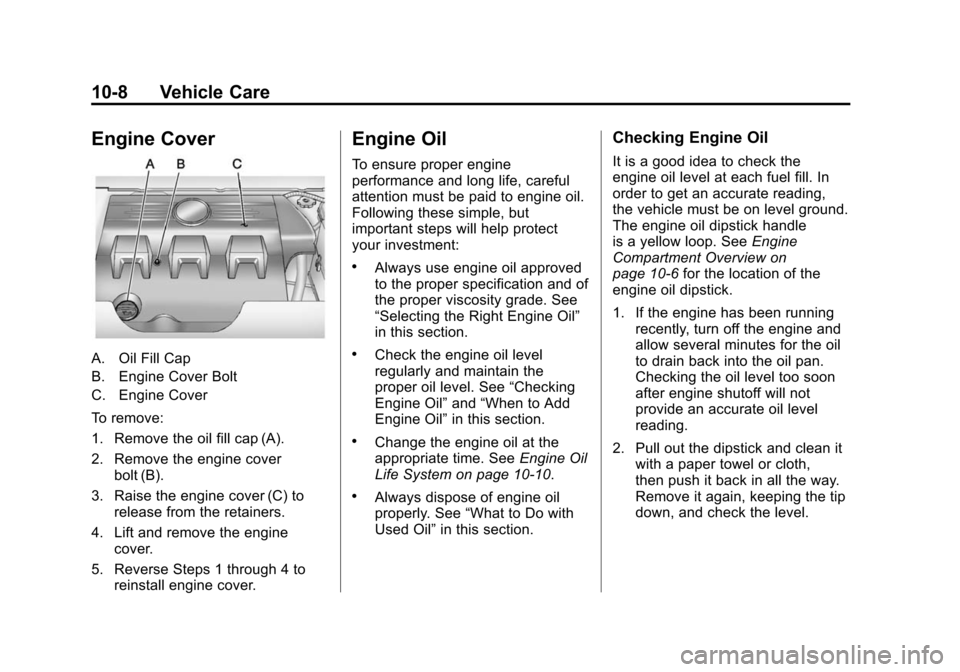
A. Oil Fill Cap
B. Engine Cover Bolt
C. Engine Cover
To remove:
1. Remove the oil fill cap (A).
2. Remove the engine coverbolt (B).
3. Raise the engine cover (C) to release from the retainers.
4. Lift and remove the engine cover.
5. Reverse Steps 1 through 4 to reinstall engine cover.
Engine Oil
To ensure proper engine
performance and long life, careful
attention must be paid to engine oil.
Following these simple, but
important steps will help protect
your investment:
.Always use engine oil approved
to the proper specification and of
the proper viscosity grade. See
“Selecting the Right Engine Oil”
in this section.
.Check the engine oil level
regularly and maintain the
proper oil level. See “Checking
Engine Oil” and“When to Add
Engine Oil” in this section.
.Change the engine oil at the
appropriate time. See Engine Oil
Life System on page 10‑10.
.Always dispose of engine oil
properly. See “What to Do with
Used Oil” in this section.
Checking Engine Oil
It is a good idea to check the
engine oil level at each fuel fill. In
order to get an accurate reading,
the vehicle must be on level ground.
The engine oil dipstick handle
is a yellow loop. See Engine
Compartment Overview on
page 10‑6 for the location of the
engine oil dipstick.
1. If the engine has been running recently, turn off the engine and
allow several minutes for the oil
to drain back into the oil pan.
Checking the oil level too soon
after engine shutoff will not
provide an accurate oil level
reading.
2. Pull out the dipstick and clean it with a paper towel or cloth,
then push it back in all the way.
Remove it again, keeping the tip
down, and check the level.