flat tire CADILLAC XT5 2020 Owner's Manual
[x] Cancel search | Manufacturer: CADILLAC, Model Year: 2020, Model line: XT5, Model: CADILLAC XT5 2020Pages: 384, PDF Size: 6.52 MB
Page 73 of 384
72 SEATS AND RESTRAINTS
sensing and diagnostic module, and
airbag wiring along with the proper
replacement procedures.
In addition, the vehicle has a
passenger sensing system for the front
outboard passenger position, which
includes sensors that are part of the
passenger seat. The passenger sensing
system may not operate properly if
the original seat trim is replaced with
non-GM covers, upholstery, or trim; or
with GM covers, upholstery, or trim
designed for a different vehicle. Any
object, such as an aftermarket seat
heater or a comfort-enhancing pad or
device, installed under or on top of
the seat fabric, could also interfere
with the operation of the passenger
sensing system. This could either
prevent proper deployment of the
passenger airbag(s) or prevent the
passenger sensing system from
properly turning off the passenger
airbag(s). SeePassenger Sensing
System 067.
If the vehicle has rollover roof-rail
airbags, see Different Size Tires and
Wheels 0299 for additional important
information. If the vehicle must be modified
because you have a disability and have
questions about whether the
modifications will affect the vehicle's
airbag system, or if you have
questions about whether the airbag
system will be affected if the vehicle is
modified for any other reason, call
Customer Assistance. See
Customer
Assistance Offices 0351.
Airbag System Check
The airbag system does not need
regularly scheduled maintenance or
replacement. Make sure the airbag
readiness light is working. See Airbag
Readiness Light 0114.
Caution
If an airbag covering is damaged,
opened, or broken, the airbag may
not work properly. Do not open or
break the airbag coverings. If there
are any opened or broken airbag
coverings, have the airbag covering
and/or airbag module replaced. For
(Continued)
Caution (Continued)
the location of the airbags, see
Where Are the Airbags?063. See
your dealer for service.
Replacing Airbag System
Parts after a Crash
{Warning
A crash can damage the airbag
systems in the vehicle. A damaged
airbag system may not properly
protect you and your passenger(s)
in a crash, resulting in serious
injury or even death. To help make
sure the airbag systems are working
properly after a crash, have them
inspected and any necessary
replacements made as soon as
possible.
If an airbag inflates, you will need to
replace airbag system parts. See your
dealer for service.
Page 98 of 384

STORAGE 97
Cargo Management System Unlock
Cargo Management System
Installation 1. Turn both knobs to the unlock position.
2. Slide the divider along the rail to the desired position until it
clicks into place.
3. Make sure the divider is locked into place in the rail grooves.
4. Turn both knobs to the lock position. Cargo Management System
Removal
1. Turn both knobs to the unlock position.
2. Press the buttons and pull up to remove the divider.
3. Remove the knobs prior to storing the divider. Failure to do
so will cause interference.
Vehicle with Spare Tire
Vehicle with Tire Inflator Kit
4. Store the divider appropriately.
Convenience Net
This vehicle may have a convenience
net in the rear of the vehicle. Attach it
to the cargo tie-downs for storing
small loads.
Do not use the net to store heavy
loads.
Page 123 of 384
122 INSTRUMENTS AND CONTROLS
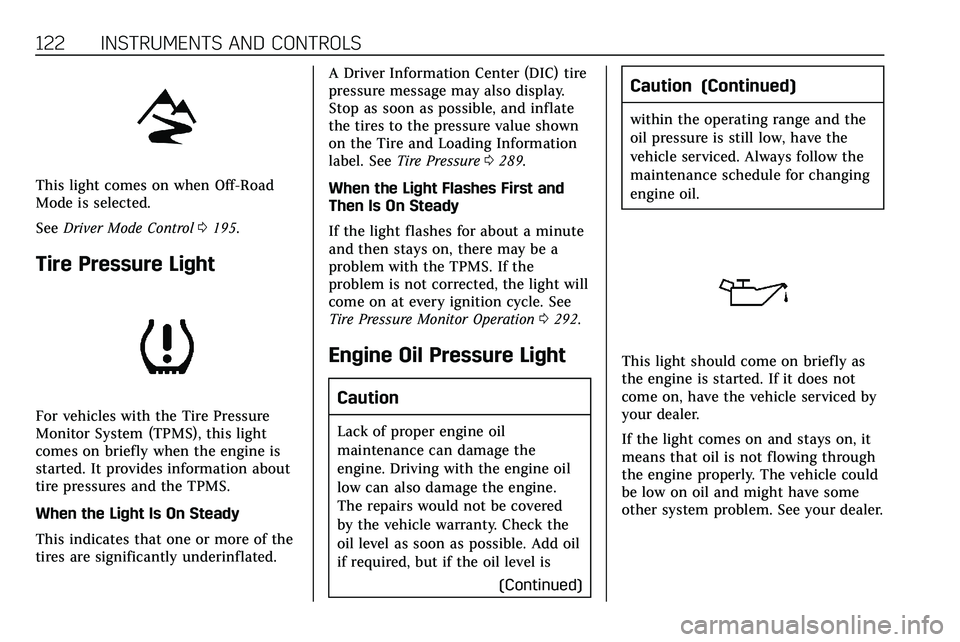
This light comes on when Off-Road
Mode is selected.
SeeDriver Mode Control 0195.
Tire Pressure Light
For vehicles with the Tire Pressure
Monitor System (TPMS), this light
comes on briefly when the engine is
started. It provides information about
tire pressures and the TPMS.
When the Light Is On Steady
This indicates that one or more of the
tires are significantly underinflated. A Driver Information Center (DIC) tire
pressure message may also display.
Stop as soon as possible, and inflate
the tires to the pressure value shown
on the Tire and Loading Information
label. See
Tire Pressure 0289.
When the Light Flashes First and
Then Is On Steady
If the light flashes for about a minute
and then stays on, there may be a
problem with the TPMS. If the
problem is not corrected, the light will
come on at every ignition cycle. See
Tire Pressure Monitor Operation 0292.
Engine Oil Pressure Light
Caution
Lack of proper engine oil
maintenance can damage the
engine. Driving with the engine oil
low can also damage the engine.
The repairs would not be covered
by the vehicle warranty. Check the
oil level as soon as possible. Add oil
if required, but if the oil level is
(Continued)
Caution (Continued)
within the operating range and the
oil pressure is still low, have the
vehicle serviced. Always follow the
maintenance schedule for changing
engine oil.
This light should come on briefly as
the engine is started. If it does not
come on, have the vehicle serviced by
your dealer.
If the light comes on and stays on, it
means that oil is not flowing through
the engine properly. The vehicle could
be low on oil and might have some
other system problem. See your dealer.
Page 160 of 384
DRIVING AND OPERATING 159
Filling the Tank . . . . . . . . . . . . . . . . . . 231
Filling a Portable FuelContainer . . . . . . . . . . . . . . . . . . . . . . . . 233
Trailer Towing
General Towing Information . . . . 234
Driving Characteristics andTowing Tips . . . . . . . . . . . . . . . . . . . . . 234
Trailer Towing . . . . . . . . . . . . . . . . . . . . 237
Towing Equipment . . . . . . . . . . . . . . . 241
Trailer Sway Control (TSC) . . . . . . 244
Conversions and Add-Ons
Add-On Electrical Equipment . . . 246
Driving Information
Driving for Better Fuel
Economy
Driving habits can affect fuel mileage.
Here are some driving tips to get the
best fuel economy possible.
. Set the climate controls to the
desired temperature after the
engine is started, or turn them off
when not required.
. On AWD vehicles, use Tour Mode
when conditions permit.
. Avoid fast starts and accelerate
smoothly.
. Brake gradually and avoid abrupt
stops.
. Avoid idling the engine for long
periods of time.
. When road and weather
conditions are appropriate, use
cruise control.
. Always follow posted speed limits
or drive more slowly when
conditions require. .
Keep vehicle tires properly
inflated.
. Combine several trips into a
single trip.
. Replace the vehicle's tires with the
same TPC Spec number molded
into the tire's sidewall near
the size.
. Follow recommended scheduled
maintenance.
Distracted Driving
Distraction comes in many forms and
can take your focus from the task of
driving. Exercise good judgment and
do not let other activities divert your
attention away from the road. Many
local governments have enacted laws
regarding driver distraction. Become
familiar with the local laws in
your area.
To avoid distracted driving, keep your
eyes on the road, keep your hands on
the steering wheel, and focus your
attention on driving.
Page 164 of 384
DRIVING AND OPERATING 163
Defensive drivers avoid most skids by
taking reasonable care suited to
existing conditions, and by not
overdriving those conditions. But
skids are always possible.
If the vehicle starts to slide, follow
these suggestions:
.Ease your foot off the accelerator
pedal and steer the way you want
the vehicle to go. The vehicle may
straighten out. Be ready for a
second skid if it occurs.
. Slow down and adjust your driving
according to weather conditions.
Stopping distance can be longer
and vehicle control can be affected
when traction is reduced by water,
snow, ice, gravel, or other material
on the road. Learn to recognize
warning clues —such as enough
water, ice, or packed snow on the
road to make a mirrored surface
— and slow down when you have
any doubt.
. Try to avoid sudden steering,
acceleration, or braking, including
reducing vehicle speed by shifting to a lower gear. Any sudden
changes could cause the tires to
slide.
Remember: Antilock brakes help avoid
only the braking skid.
Off-Road Driving
All-Wheel Drive vehicles can be used
for off-road driving. Vehicles without
All-Wheel Drive and vehicles not
equipped with All Terrain (AT) or
On-Off Road (OOR) tires must not be
driven off-road except on a level, solid
surface. To contact the tire
manufacturer for more information
about the original equipment tires, see
the Limited Warranty and Owner
Assistance Information manual.
Controlling the vehicle is the key to
successful off-road driving. One of the
best ways to control the vehicle is to
control the speed.
{Warning
When driving off-road, bouncing
and quick changes in direction can
easily throw you out of position.
This could cause you to lose control
and crash. You and your passengers
should always wear seat belts.
Before Driving Off-Road
. Have all necessary maintenance
and service work completed.
. Fuel the vehicle, fill fluid levels,
and check inflation pressure in all
tires, including the spare,
if equipped.
. Read all the information about
All-Wheel Drive vehicles in this
manual.
. Make sure all underbody shields,
if equipped, are properly attached.
. Know the local laws that apply to
off-road driving.
Page 169 of 384
168 DRIVING AND OPERATING
and you are going fast enough. When
the vehicle is hydroplaning, it has
little or no contact with the road.
There is no hard and fast rule about
hydroplaning. The best advice is to
slow down when the road is wet.
Other Rainy Weather Tips
Besides slowing down, other wet
weather driving tips include:
.Allow extra following distance.
. Pass with caution.
. Keep windshield wiping equipment
in good shape.
. Keep the windshield washer fluid
reservoir filled.
. Have good tires with proper tread
depth. See Tires0282.
. Turn off cruise control.
Hill and Mountain Roads
Driving on steep hills or through
mountains is different than driving on
flat or rolling terrain. Tips include:
.
Keep the vehicle serviced and in
good shape. .
Check all fluid levels, brakes, tires,
cooling system, and transmission.
. Shift to a lower gear when going
down steep or long hills.
{Warning
Using the brakes to slow the vehicle
on a long downhill slope can cause
brake overheating, can reduce brake
performance, and could result in a
loss of braking. Shift the
transmission to a lower gear to let
the engine assist the brakes on a
steep downhill slope.
{Warning
Coasting downhill in N (Neutral) or
with the ignition off is dangerous.
This can cause overheating of the
brakes and loss of steering assist.
Always have the engine running
and the vehicle in gear. .
Drive at speeds that keep the
vehicle in its own lane. Do not
swing wide or cross the
center line.
. Be alert on top of hills; something
could be in your lane (e.g., stalled
car, crash).
. Pay attention to special road signs
(e.g., falling rocks area, winding
roads, long grades, passing or
no-passing zones) and take
appropriate action.
Winter Driving
Driving on Snow or Ice
Snow or ice between the tires and the
road creates less traction or grip, so
drive carefully. Wet ice can occur at
about 0 °C (32 °F) when freezing rain
begins to fall. Avoid driving on wet ice
or in freezing rain until roads can be
treated.
For Slippery Road Driving:
.
Accelerate gently. Accelerating too
quickly causes the wheels to spin
and makes the surface under the
tires slick.
Page 172 of 384

DRIVING AND OPERATING 171
Warning (Continued)
also reduce stopping distance,
damage the tires, and shorten
the life of the vehicle.
Tire and Loading Information Label
Example Label
A vehicle-specific Tire and
Loading Information label is
attached to the center pillar
(B-pillar). The tire and loading
information label shows the
number of occupant seatingpositions (1), and the maximum
vehicle capacity weight (2) in
kilograms and pounds.
The Tire and Loading Information
label also shows the size of the
original equipment tires (3) and
the recommended cold tire
inflation pressures (4). For more
information on tires and inflation
see
Tires 0282 and
Tire Pressure 0289.
There is also important loading
information on the vehicle
Certification/Tire label. It may
show the Gross Vehicle Weight
Rating (GVWR) and the Gross Axle
Weight Rating (GAWR) for the
front and rear axle. See
“Certification/Tire Label” later in
this section.“Steps for Determining Correct Load
Limit–
1.
Locate the statement "The
combined weight of
occupants and cargo should never exceed XXX kg or
XXX lbs." on your vehicle’s
placard.
2.Determine the combined
weight of the driver and
passengers that will be riding
in your vehicle.
3.Subtract the combined weight
of the driver and passengers
from XXX kg or XXX lbs.
4.The resulting figure equals
the available amount of cargo
and luggage load capacity. For
example, if the "XXX" amount
equals 1400 lbs. and there
will be five 150 lb passengers
in your vehicle, the amount
of available cargo and luggage
load capacity is 650 lbs.
(1400-750 (5 x 150) =
650 lbs.)
5.Determine the combined
weight of luggage and cargo
being loaded on the vehicle.
That weight may not safely
Page 174 of 384
DRIVING AND OPERATING 173
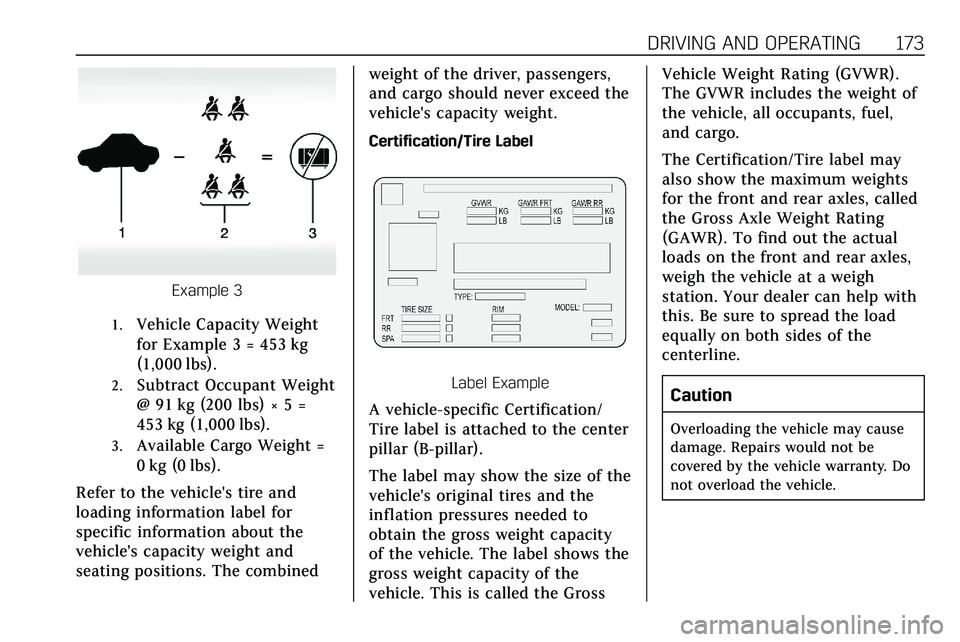
Example 3
1.Vehicle Capacity Weight
for Example 3 = 453 kg
(1,000 lbs).
2.Subtract Occupant Weight
@ 91 kg (200 lbs) × 5 =
453 kg (1,000 lbs).
3.Available Cargo Weight =
0 kg (0 lbs).
Refer to the vehicle's tire and
loading information label for
specific information about the
vehicle's capacity weight and
seating positions. The combined weight of the driver, passengers,
and cargo should never exceed the
vehicle's capacity weight.
Certification/Tire Label
Label Example
A vehicle-specific Certification/
Tire label is attached to the center
pillar (B-pillar).
The label may show the size of the
vehicle's original tires and the
inflation pressures needed to
obtain the gross weight capacity
of the vehicle. The label shows the
gross weight capacity of the
vehicle. This is called the GrossVehicle Weight Rating (GVWR).
The GVWR includes the weight of
the vehicle, all occupants, fuel,
and cargo.
The Certification/Tire label may
also show the maximum weights
for the front and rear axles, called
the Gross Axle Weight Rating
(GAWR). To find out the actual
loads on the front and rear axles,
weigh the vehicle at a weigh
station. Your dealer can help with
this. Be sure to spread the load
equally on both sides of the
centerline.
Caution
Overloading the vehicle may cause
damage. Repairs would not be
covered by the vehicle warranty. Do
not overload the vehicle.
Page 244 of 384

DRIVING AND OPERATING 243
Tires
.Do not tow a trailer while using a
compact spare tire on the vehicle.
. Tires must be properly inflated to
support loads while towing a
trailer. See Tires0282 for
instructions on proper tire
inflation.
Safety Chains
Always attach chains between the
vehicle and the trailer, and attach the
chains to the holes on the trailer hitch
platform. Instructions about safety
chains may be provided by the hitch
manufacturer or by the trailer
manufacturer.
Cross the safety chains under the
tongue of the trailer to help prevent
the tongue from contacting the road if
it becomes separated from the hitch.
Always leave just enough slack so the
combination can turn. Never allow
safety chains to drag on the ground.
Trailer Brakes
Loaded trailers over 450 kg (1,000 lb)
must be equipped with brake systems
and with brakes for each axle. Trailer braking equipment conforming to
Canadian Standards Association (CSA)
requirement CAN3-D313, or its
equivalent, is recommended.
State or local regulations may require
trailers to have their own braking
system if the loaded weight of the
trailer exceeds certain requirements
that can vary from state to state.
Read and follow the instructions for
the trailer brakes so they are installed,
adjusted, and maintained properly.
Never attempt to tap into your
vehicle's hydraulic brake system.
If you do, both the vehicle anti-lock
brakes and the trailer brakes may not
function and could result in a crash.
Trailer Wiring
The trailer wiring harness (if
equipped), with a seven-pin connector
is located at the rear of the vehicle,
and it is tied to the vehicle's frame.
If the vehicle is not equipped with a
seven-pin trailer connector, the body
harness has provisions to connect a
trailer harness and a seven-pin trailer
connector which is available through
your dealer.
Use only a round, seven-wire
connector with flat blade terminals
meeting SAE J2863 specifications for
proper electrical connectivity.
The seven-wire harness contains the
following trailer circuits:
Stop/Turn
Signal Left Yellow/Blue
Stop/Turn Signal
Right Green/Brown
Page 246 of 384
DRIVING AND OPERATING 245
If TSC is enabled, the Traction Control
System (TCS)/StabiliTrak/ESC warning
light will flash on the instrument
cluster. Reduce vehicle speed by
gradually removing your foot from the
accelerator. If trailer sway continues,
StabiliTrak/ESC can reduce engine
torque to help slow the vehicle. TSC
will not function if StabiliTrak/ESC is
turned off. SeeTraction Control/
Electronic Stability Control 0193.
{Warning
Trailer sway can result in a crash
and in serious injury or death, even
if the vehicle is equipped with TSC.
If the trailer begins to sway, reduce
vehicle speed by gradually removing
your foot from the accelerator. Then
pull over to check the trailer and
vehicle to help correct possible
causes, including an improperly or
overloaded trailer, unrestrained
cargo, improper trailer hitch
configuration, or improperly
inflated or incorrect vehicle or
(Continued)
Warning (Continued)
trailer tires. SeeTowing Equipment
0 241 for trailer ratings and hitch
setup recommendations.
Trailer Tires
Special Trailer (ST) tires differ from
vehicle tires. Trailer tires are designed
with stiff sidewalls to help prevent
sway and to support heavy loads.
These features can make it difficult to
determine if the trailer tire pressures
are low only based on a visual
inspection.
Always check all trailer tire pressures
before each trip when the tires are
cool. Low trailer tire pressure is a
leading cause of trailer tire blow-outs.
Trailer tires deteriorate over time. The
trailer tire sidewall will show the week
and year the tire was manufactured.
Many trailer tire manufacturers
recommend replacing tires more than
six years old. Overloading is another leading cause
of trailer tire blow-outs. Never load
your trailer with more weight than the
tires are designed to support. The load
rating is located on the trailer tire
sidewall.
Always know the maximum speed
rating for the trailer tires before
driving. This may be significantly
lower than the vehicle tire speed
rating. The speed rating may be on
the trailer tire sidewall. If the speed
rating is not shown, the default trailer
tire speed rating is 105 km/h
(65 mph).