keyless CHEVROLET CAMARO 1998 4.G User Guide
[x] Cancel search | Manufacturer: CHEVROLET, Model Year: 1998, Model line: CAMARO, Model: CHEVROLET CAMARO 1998 4.GPages: 402, PDF Size: 21.2 MB
Page 88 of 402
Downloaded from www.Manualslib.com manuals search engine ‘To program features, your vehicle must be in the
programming mode. Follow these steps:
1.
2.
3.
4.
5.
Put your key in the ignition.
Turn the ignition to RUN to disarm the Vehicle
and Content Theft-DeterrentIAlarm System.
Turn
the ignition to OFF position.
Remove the RADIO
fuse. This fuse is in the
main fuse block, located on the left side
of your
instrument panel. When the main fuse block is
open, the RADIO fuse
is located in the lower
right corner side
of the fuse panel. See “Fuses and
Circuit Breakers” in the Index.
Turn the ignition to ACC.
You should hear a chime
to verify that the system
is in programming mode.
If the chime sounds once,
you will be able to program Exit Lighting, Delayed
Illumination, Last Door Closed Locking and Lockout
Prevention only. If the chime sounds twice and your
vehicle is equipped with the Vehicle and Content
Theft-Deterrent System, you will also be able to
set Keyless Entry Verification, Arming Method,
Arming Verification, Driver’s Door Delay and
Shock Sensor Enable.
Exit Lighting and Delayed Illumination
With Exit Lighting, your interior lamps will come on
for up to
25 seconds when the key is removed from
the ignition.
With Delayed Illumination, your interior lamps will come
on and stay
on for up to 25 seconds when entering the
vehicle and up
to 5 seconds when leaving your vehicle.
Your vehicle comes with both features enabled (Mode
4).
To change the factory setting, do the following:
1. Turn the courtesy lamps on by turning the instrument
panel brightness control knob all the way up.
2. Count the number of chimes you hear. The number of
chimes tells you which mode your vehicle is set for.
3. Turn the courtesy lamp switch to off.
4. Turn the courtesy lamp switch from on to off until
you hear the number
of chimes that corresponds to
the mode selection you want.
Mode 1: Both Off
Mode 2: Delayed Illumination Only
Mode 3: Exit Lighting Only
Mode 4: Both On
2-20
Page 89 of 402
Downloaded from www.Manualslib.com manuals search engine Last Door Closed Locking and
Lockout Prevention
Your vehicle comes with this feature set in Mode 2. This
means that your power door locks will
not lock when
the keys are in the ignition and a door is open. To
change the factory setting,
do the following:
1. Press the LOCK switch on the door.
2. Count the number of chimes you hear. The number of
chimes tells
you which mode your vehicle is set for.
3. Press the LOCK switch on the door until you hear
the number of chimes that correspond to the mode
selection you want.
Mode 1: Both Off (Doors will lockhnlock when you
press the power door lock switch).
Mode 2: Lockout Prevention Only (If you leave your
keys in the ignition and get out the driver’s door, you
won’t be able to lock the doors with the power door
lock switch).
Mode 3: Last Door Closed Locking Only (If the power
door lock switch is used to lock the vehicle while any
door is open, you will hear three chimes. The doors
will
not lock until after all doors are closed).
Mode 4: Both On (This combines Mode 2 and 3).
Keyless Entry Verification
Your vehicle comes with this feature set in Mode 5. This
means that when you use the keyless entry transmitter
to
1ocWunlock your vehicle, your parking lamps will flash
briefly upon the first press on
LOCK. Your horn will
sound briefly and your parking lamps will flash briefly
upon the second press on LOCK. Your parking lamps
will flash briefly upon any press on UNLOCK.
To
change the factory setting, do the following:
1. Press the UNLOCK button on the keyless
entry transmitter.
2. Count the number of chimes you hear. The number of
chimes tells you which mode your vehicle is set for.
3. Press the UNLOCK button on the keyless entry
transmitter until
you hear the number of chimes that
correspond to the mode selection you want.
Mode 1: All Off (The headlamps will not flash and the
horn will not sound to provide you feedback that a
1ocWunlock command has been received by the keyless
entry transmitter).
Mode 2: Horn and LampsLamps (Your horn will sound
briefly and your parking lamps will flash when you
press LOCK on the keyless entry transmitter. Only your
parking lamps will flash when you press UNLOCK).
2-21
Page 90 of 402
Downloaded from www.Manualslib.com manuals search engine Mode 3: Horn and Lamps (Your horn will sound briefly
and your parking lamps will flash every time you push
LOCK and UNLOCK).
Mode 4: Lamps (Your parking lamps will flash every
time you press LOCK and
UNLOCK).
Mode 5: Lamps/Horn and LampsLamps (Your lamps
will flash upon the first press on LOCK, your lamps
will flash and your horn will sound upon the second
press on LOCK and your lamps will flash upon any
press on UNLOCK).
Theft-Deterrent Arming Method
Your vehicle comes with this feature set in Mode 3. This
means that both your keyless entry transmitter and the
power door lock switch will actively arm the system.
To change the factory setting, do the following:
1. Press the UNLOCK switch on the door.
2. Count the number of chimes you hear. The number
of chimes tells you which mode your vehicle is
set for.
3. Press the UNLOCK switch on the door until you
hear the number
of chimes that correspond to the
mode selection you want.
Mode 1: Alarm System Off (The system will not arm).
Mode 2: Keyless Entry Transmitter Lock (When you
lock your doors using the keyless entry transmitter,
the system will arm itself).
Mode 3: Keyless Entry TransmitterRower Door Lock
Switch
(If you use either the keyless entry transmitter
or the power door lock switch to lock the doors, the
system will arm itself).
Mode 4: Passive arming and Keyless Entry
TransmitterPower
Door Lock Switch Arming (The
system will arm itself after all doors are closed, plus
arming per mode
3).
2-22
Page 91 of 402
Downloaded from www.Manualslib.com manuals search engine Theft-Deterrent Arming Verification
Your vehicle comes with this feature set in Mode 3.
This means that if you arm the system using the keyless
entry transmitter, your parking lamps will flash and your
horn will chirp twice to verify that the system is armed.
If it only chirps once, the hatch is open or unlatched.
If
you arm the system using either the power door lock
switch or by passive arming, only the parking lamps
will flash for verification.
To change the factory setting,
do the following:
1. Press the LOCK switch on the keyless
entry transmitter.
2. Count the number of chimes you hear. The number of
chimes tells you which mode your vehicle is set for.
3. Press the LOCK switch on the keyless entry
transmitter until you hear the number of chimes that
corresponds to the mode selection you want.
Mode 1: All Off (No horn chirps or parking lamp flash).
Mode 2: Horn and Lamps (Your parking lamps will
flash and your horn will chirp twice to verify the system
is armed using any arming method).
Mode 3: Horn and LampsLamps (If you use the keyless
entry transmitter to
arm the system, your parking lamps
will flash and your horn will chirp twice to verify that
the system
is armed. If you use either the power door
lock switch or passive arming, only your lamps will
flash for verification).
Mode 4: Lamps (When your vehicle arms, only your
parking lamps will flash for verification).
Driver’s Door Alarm Delay and Shock
Sensor Enable
Your vehicle comes with this feature set in Mode 4.
This means that if you open the driver’s door using
your key, the alarm will not sound for eight seconds.
Also the shock sensor, able to detect sharp blows to
your vehicle
is active. To change the factory setting,
do the following:
1. Turn the parking lamps on and off.
2. Count the number
of chimes you hear. The number of
chimes tells you which mode your vehicle is set for.
3. Turn the parking lamps on and off until you hear the
number of chimes that corresponds to the mode
selection you want.
2-23
Page 112 of 402
Downloaded from www.Manualslib.com manuals search engine Power Windows
Switches on the driver’s door control each window
when the ignition is on or when RAP is present. (See
“Retained Accessory Power” in the Index.)
You can open the passenger’s window any amount by
pressing the switch and releasing it when the window
has lowered to the position you want.
The driver’s window has an auto-down feature. This
switch is labeled AUTO. Tap the bottom
of the switch
and the driver’s window will open a small amount.
If the
lower part
of the switch is pressed all the way down and
released, the window will go all the way down.
To stop the window while it is lowering, press the top
of the switch. To raise the window, press and hold the
top of the switch.
Horn
To sound the horn, press either horn symbol on your
steering wheel.
If your
horn sounds two or three chirps when unlocking
your vehicle with the keyless entry transmitter (if
you
have that option), the alarm was triggered while you
were away. Check the vehicle before entering.
Tilt Steering Wheel
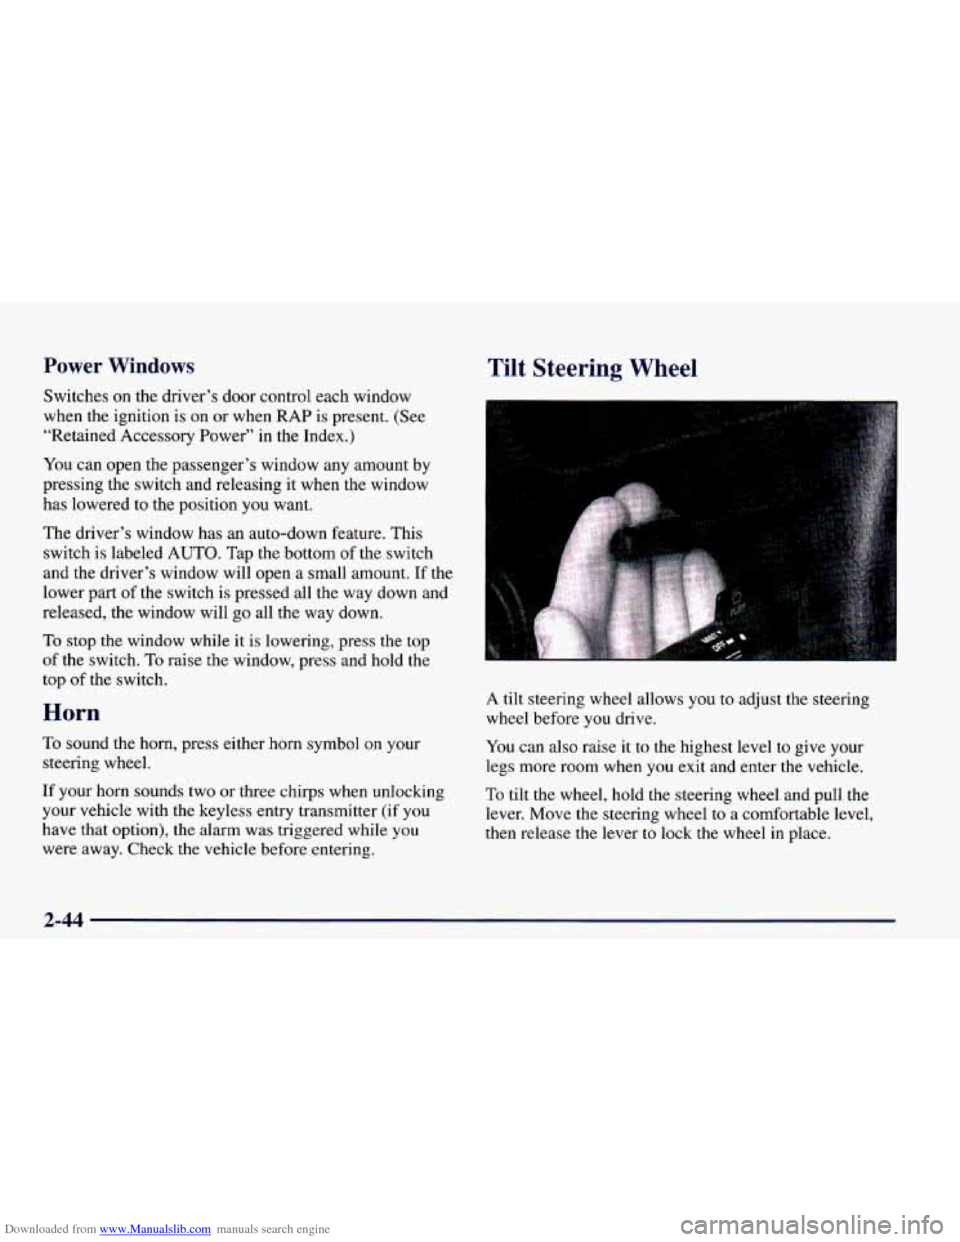
A tilt steering wheel allows you to adjust the steering
wheel before you drive.
You can also raise it to the highest level to give your
legs more room when
you exit and enter the vehicle.
To tilt the wheel, hold the steering wheel and pull the
lever. Move the steering wheel to a comfortable level,
then release
the lever to lock the wheel in place.
2-44
Page 120 of 402
Downloaded from www.Manualslib.com manuals search engine If your vehicle is equipped with the Vehicle and
Content Theft-DetenentlAlarm System and your fog
lamp switch
is on, the fog lamps may flash, along
with the parking lamps, to indicate operation
of the
Vehicle and Content Theft-DetemenVAlarm System.
See ‘Vehicle and Content Theft-DeterrendAlarm
System” in the Index.
Interior Lamps
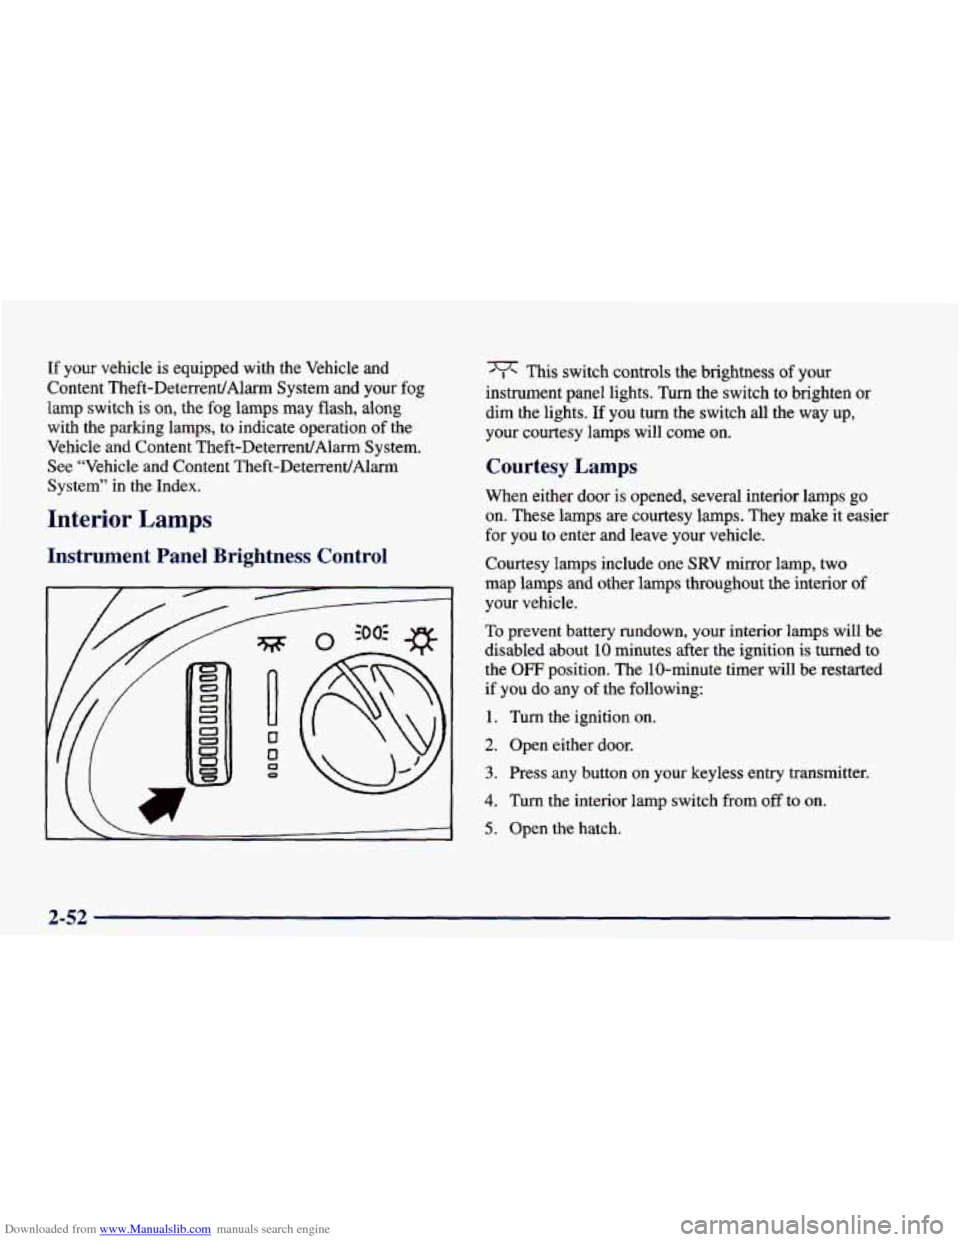
Instrument Panel Brightness Control
This switch controls the brightness of your
instrument panel lights. Turn the switch to brighten or
dim the lights.
If you turn the switch all the way up,
your courtesy lamps will come
on.
Courtesy Lamps
When either door is opened, several interior lamps go
on. These lamps are courtesy lamps. They make it easier
for you to enter and leave your vehicle.
Courtesy lamps include one
SRV mirror lamp, two
map lamps and other lamps throughout the interior of
your vehicle.
To prevent battery rundown, your interior lamps will be
disabled about
10 minutes after the ignition is turned to
the OFF position. The 10-minute timer will be restarted
if you do
any of the following:
1. Turn the ignition on.
2. Open either door.
3. Press any button on your keyless entry transmitter.
4. Turn the interior lamp switch from off to on.
5. Open the hatch.
2-52
Page 386 of 402
Downloaded from www.Manualslib.com manuals search engine Battery ...................................... 6-37
Jump Starting
................................. 5-3
Replacement. Keyless Entry .................... 2- 11
Warnings
........................... 5.3.5.4. 6.37
BBB Auto Line
................................. 8-9
Before Leaving on a Long Trip
.................... 4-21
Better Business Bureau Mediation
................... 8-9
Blizzard
...................................... 4-27
Brake Adjustment
.................................. 6-36
Checking Fluid
............................... 6-34
Fluid
....................................... 6-33
Master Cylinder
.............................. 6-33
Parking
..................................... 2-37
Pedal Travel
................................. 6-36
Replacing System Parts
........................ 6-36
System Warning Light
......................... 2-77
Trailer
...................................... 4-34
Transmission Shift Interlock
.................... 2-43
Wear
....................................... 6-35
Brakes. Anti-Lock
............................... 4-7
Braking
........................................ 4-6
Braking
in Emergencies .......................... 4- 10
Break-In. New Vehicle
.......................... 2-24
Brightness Control
.............................. 2-52
BTSICheck
................................... 7-34
Bulb Replacement
.............................. 6-37
BTSI
......................................... 2-43 Canadian
Roadside Assistance
.................... 8-7
Capacities and Specifications
...................... 6-69
Carbon Monoxide
.......... 2.12.2.41.2.42.4.28. 4.33
Cassette Deck Service
........................... 7-32
Cassette Storage
................................ 2-56
Cassette Tape Player
......................... 3.7. 3.9
Care
of
Your Cassette Tape Player .................. 3-24
Cassette Tape Player Care
........................ 3-24
CD Player Theft-Deterrent Feature
................. 3-21
Center High-Mounted Stoplamp Bulb Replacement
.... 6-39
Certification Label
.............................. 4-29
Chains. Safety
................................. 4-34
Chains. Tire
................................... 6-51
Changing a Flat Tire
............................. 5-27
Check Gages Light
.............................. 2-85
Checking Your Restraint Systems
.................. 1-46
Chemical Paint Spotting
.......................... 6-60
Child Restraints
................................ 1-33
Securing
in a Rear Seat Position ................. 1-39
Securing in the Right Front Seat Position
.......... 1-41
WheretoPut
................................ 1-37
Cigarette Lighter
............................... 2-57
Circuit Breakers and Fuses
....................... 6-63
Cleaner. Air
................................... 6-18
Cleaning
Aluminurnwheels
............................ 6-58
Convertible Top
.............................. 6-58
Fabric
...................................... 6-53
TopStrap
................................... 1-38
9-2
Page 389 of 402
Downloaded from www.Manualslib.com manuals search engine Fabric Cleaning ............................... 6-53
Fabric Protection
............................... 6-54
Fancontrol
.................................... 3-2
Feature Customization
........................... 2- 19
Driver’s Door Alarm Delay/Shock Sensor Enable
... 2-23
Exit Lightingmelayed Illumination
............... 2-20
Keyless Entry Verification
...................... 2-21
Last Door Closed LockingLockout Prevention
..... 2-21
Theft-Deterrent Arming Method
................. 2-22
Theft-Deterrent Arming Verification
.............. 2-23
Fifth Gear. Manual Transmission
.............. 2.34. 2.35
Filling a Portable Fuel Container
.................... 6-8
Filter. Air
..................................... 6- 19
Filter. Engine Oil
............................... 6- 17
Finish Care .................................... 6-57
Finish Damage
................................. 6-59
First Gear. Automatic Transmission
................ 2-33
First Gear. Manual Transmission
.............. 2.34. 2.35
Fixed Antenna Mast Care
........................ 3-25
Flashers. Hazard Warning
......................... 5-2
Flat Tire. Changing ............................. 5-27
Floor Mats
.................................... 2-59
Fluids and Lubricants
............................ 7-37
FogLamps
.................................... 2-51
Folding Rear Seatback
............................ 1-6
Foreign Countries. Fuel ........................... 6-5
Fourth Gear. Manual Transmission
............ 2.34. 2.35
Four-Way Manual Seat
........................... 1-3
FillingYourTank
................................ 6-6
French
LanguageManual
11
FrontConsole .................................. 2-56
FrontTowing
................................... 5-9
Front Turn Signal Bulb Replacement
................ 6-39
Fuel
.......................................... 6-3
Filling Your Tank
.............................. 6-6
Gage
....................................... 2-85
In Foreign Countries
........................... 6-5
Fuses and Circuit Breakers ....................... 6-63
.. ...........................
Gages Engine Coolant Temperature
.................... 2-80
Engine Oil Pressure ........................... 2-83
Fuel
....................................... 2-85
GAWR ....................................... 4-29
Gear Positions. Automatic Transmission
............. 2-30
Gear Positions. Manual Transmission
.......... 2-34. 2-35
GloveBox
.................................... 2-55
Gross Axle Weight Rating
........................ 4-29
Gross Vehicle Weight Rating
...................... 4-29
Guide en FranGais 11
GVWR ....................................... 4-29
.. .................................
Halogen Bulbs ................................ 6-37
Hatch
........................................ 2-12
Hatch Release
.................................. 2-12
Hatch Release. Remote
.......................... 2-13
Hazard Warning Flashers .......................... 5-2
9-5
Page 390 of 402
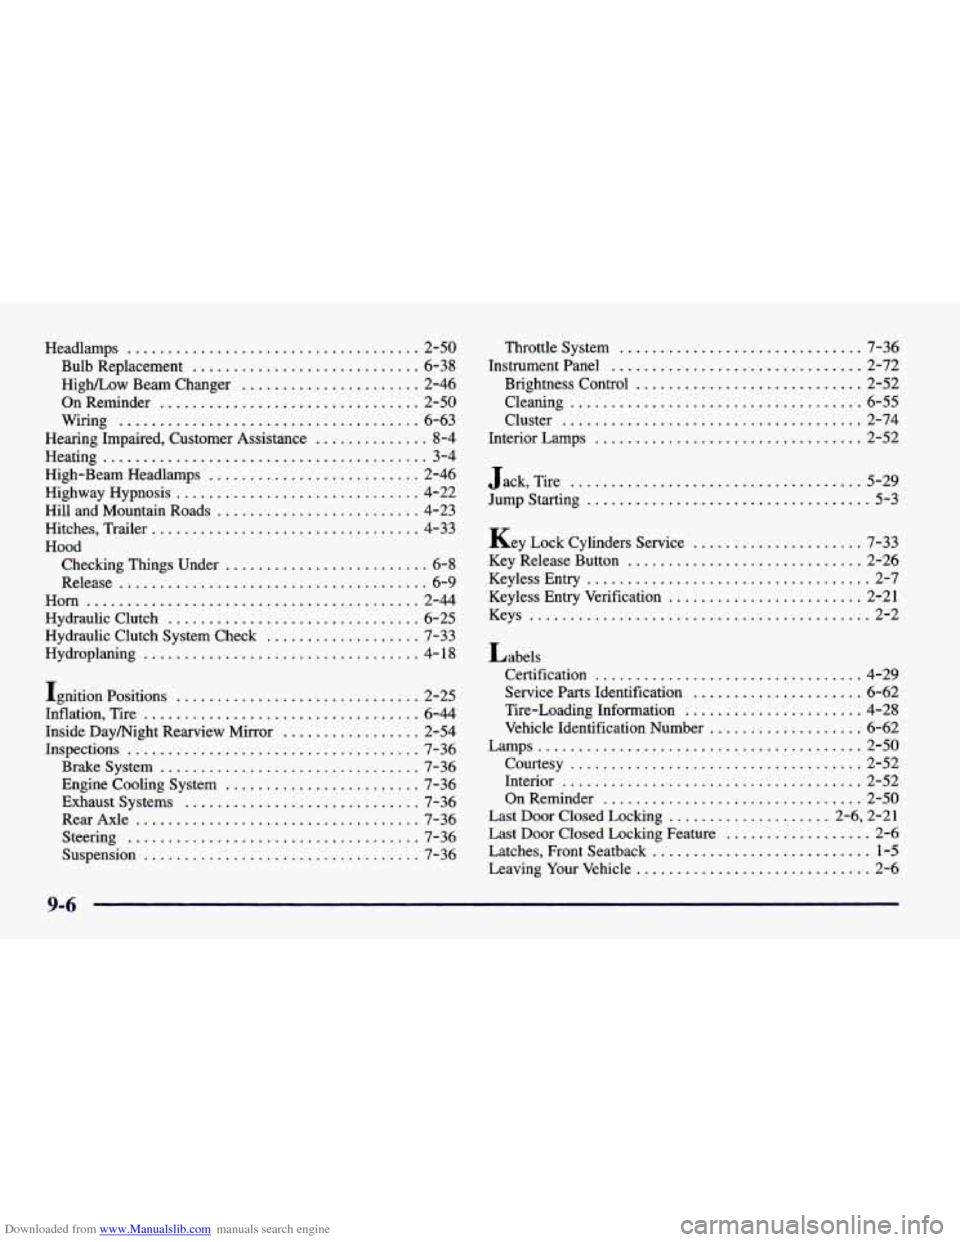
Downloaded from www.Manualslib.com manuals search engine Headlamps .................................... 2-50
Bulb Replacement
............................ 6-38
High/Low Beamchanger
...................... 2-46
OnReminder
................................ 2-50
Wiring
..................................... 6-63
Hearing Impaired. Customer Assistance
.............. 8-4
Heating
........................................ 3-4
High-Beam Headlamps
.......................... 2-46
Highway Hypnosis
.............................. 4-22
Hill and Mountain Roads
......................... 4-23
Hitches. Trailer
................................. 4-33
Hood Checking Things Under
......................... 6-8
Release
...................................... 6-9
Horn
......................................... 2-44
Hydraulic Clutch
............................... 6-25
Hydraulic Clutch System Check
................... 7-33
Hydroplaning
.................................. 4- 18
Ignition Positions .............................. 2-25
Inflation. Tire
.................................. 6-44
Inside Daymight Rearview Mirror ................. 2-54
Inspections
.................................... 7-36
Brakesystem
................................ 7-36
Engine Cooling System
........................ 7-36
Exhaust Systems
............................. 7-36
RearAxle
................................... 7-36
Steering
.................................... 7-36
Suspension
.................................. 7-36 Throttle System
.............................. 7-36
Instrument Panel
............................... 2-72
Brightness Control
............................ 2-52
Cleaning
.................................... 6-55
Cluster
..................................... 2-74
Interior Lamps
................................. 2-52
Jack. Tire
.................................... 5-29
Jump Starting
................................... 5-3
Key Lock Cylinders Service
..................... 7-33
Key Release Button
............................. 2-26
Keyless Entry
................................... 2-7
Keyless Entry Verification
........................ 2-21
Keys
.......................................... 2-2
Labels Certification
................................. 4-29
Service Parts Identification
..................... 6-62
Tire-Loading Information
...................... 4-28
Vehicle Identification Number
................... 6-62
Lamps
........................................ 2-50
Courtesy
.................................... 2-52
Interior
..................................... 2-52
OnReminder
................................ 2-50
Last Door Closed Locking Feature
.................. 2-6
Latches. Front Seatback
........................... 1-5
Last Door Closed Locking
.................... 2-6. 2-21
Leaving
Your Vehicle ............................. 2-6
9-6
Page 396 of 402
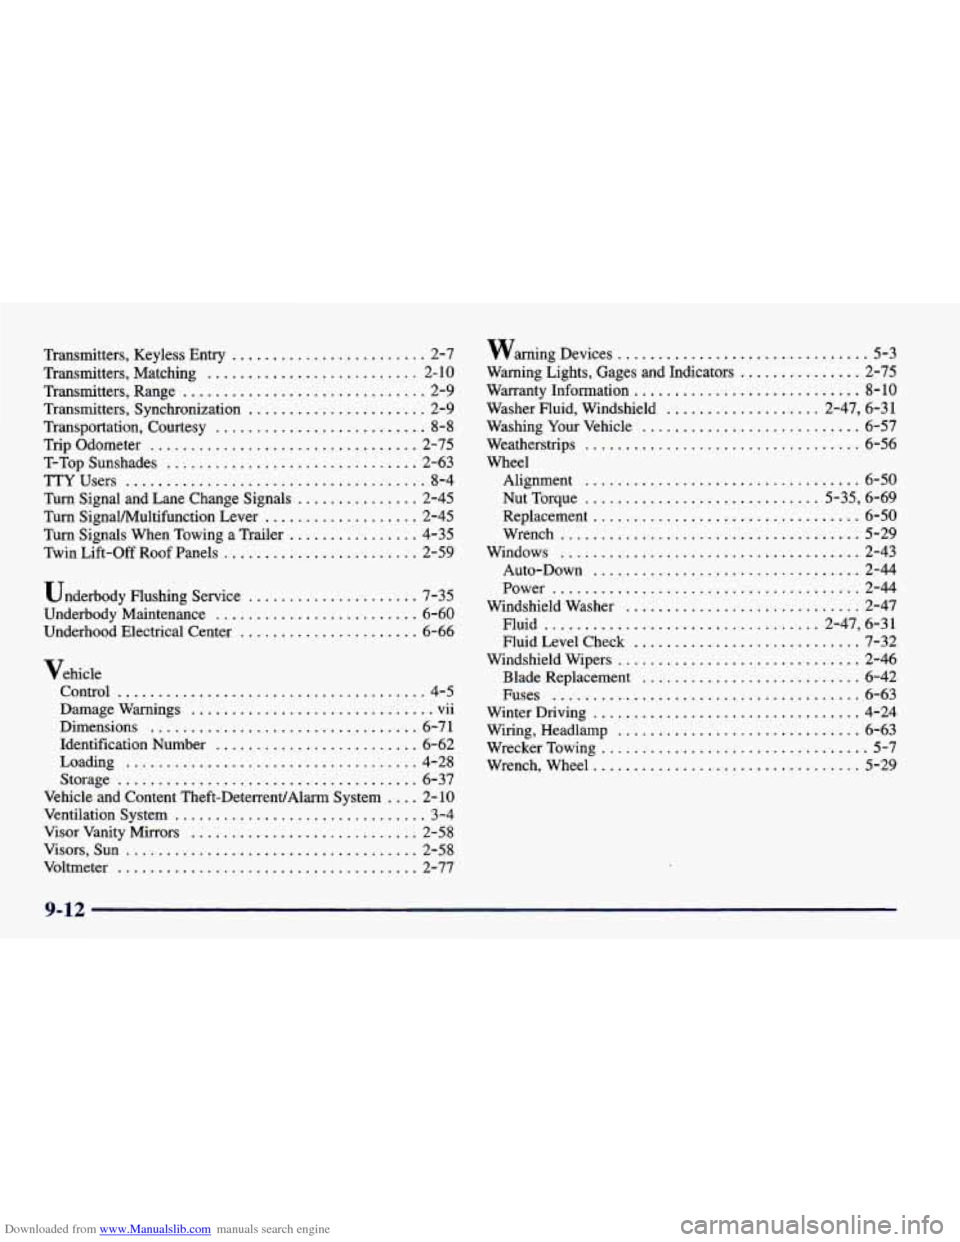
Downloaded from www.Manualslib.com manuals search engine Transmitters. Keyless Entry ........................ 2-7
Transmitters. Matching
.......................... 2- 10
Transmitters. Range
.............................. 2-9
Trip Odometer
................................. 2-75
T-Top Sunshades
............................... 2-63
Transmitters. Synchronization
...................... 2-9
Transportation. Courtesy
.......................... 8- 8
'ITYUsers ..................................... 8-4
Turn Signal and Lane Change Signals
............... 2-45
Turn SignaUMultifunction Lever
................... 2-45
Turn Signals When Towing a Trailer
................ 4-35
Twin Lift-off Roof Panels
........................ 2-59
Underbody Flushing Service
..................... 7-35
Underbody Maintenance
......................... 6-60
Underhood Electrical Center
...................... 6-66
Vehicle Control
...................................... 4-5
Damagewarnings
.............................. vii
Dimensions
................................. 6-71
Identification Number
......................... 6-62
Loading
.................................... 4-28
Storage
..................................... 6-37
Vehicle and Content Theft-DeterrentfAlarm System
.... 2-10
Ventilation System
............................... 3-4
Visor Vanity Mirrors
............................. 2-58
Visors, Sun
.................................... 2-58
Voltmeter
..................................... 2-77 warning
Devices
............................... 5-3
Warning Lights. Gages and Indicators
............... 2-75
Warranty Information
............................ 8-10
Washer Fluid. Windshield
................... 2-47. 6-31
Washing Your Vehicle
........................... 6-57
Wheel Weatherstrips
.................................. 6-56
Alignment
.................................. 6-50
Nut Torque
............................. 5-35. 6-69
Replacement
................................. 6-50
Wrench
..................................... 5-29
Windows
..................................... 2-43
Auto-Down
................................. 2-44
Power
...................................... 2-44
Windshield Washer
............................. 2-47
Fluid
.................................. 2-47. 6-31
Fluid Level Check
............................ 7-32
Windshield Wipers
.............................. 2-46
Blade Replacement
........................... 6-42
Fuses
...................................... 6-63
Winter Driving
................................. 4-24
Wiring. Headlamp
.............................. 6-63
WreckerTowing
................................. 5-7
Wrench. Wheel
................................. 5-29
9-12