CHEVROLET CRUZE 2014 1.G Owners Manual
Manufacturer: CHEVROLET, Model Year: 2014, Model line: CRUZE, Model: CHEVROLET CRUZE 2014 1.GPages: 420, PDF Size: 5.92 MB
Page 141 of 420
Black plate (35,1)Chevrolet Cruze Owner Manual (GMNA-Localizing-U.S./Canada-6007168) -
2014 - 2nd Edition - 7/15/13
Instruments and Controls 5-35
SPEED LIMITED TO 88 KM/H
(55 MPH)
This message will be displayed
along with other messages. These
messages include EXHAUST FLUID
EMPTY REFILL NOW, EXHAUST
FLUID QUALITY POOR, SERVICE
EMISSION SYSTEM, or SERVICE
EXHAUST FLUID SYSTEM. When
this message is displayed, the
vehicle speed is being limited to
88 km/h (55 mph).
SPEED LIMITED TO 7 KM/H
(4 MPH)
This message will be displayed
along with other messages. These
messages include EXHAUST FLUID
EMPTY REFILL NOW, EXHAUST
FLUID QUALITY POOR,
or SERVICE EXHAUST FLUID
SYSTEM. When this message is
displayed, the vehicle speed is
being limited to 7 km/h (4 mph).
TRANSITIONING TO XX KM/H
(XX MPH) MAX SPEED
This message will be displayed
along with other messages. These
messages include EXHAUST FLUID
EMPTY REFILL NOW, EXHAUST
FLUID QUALITY POOR, SERVICE
EMISSION SYSTEM, or SERVICE
EXHAUST FLUID SYSTEM. When
this message is displayed, the end
of the countdown has been reached
and the vehicle speed is being
limited.
Vehicle
Personalization
The audio system controls are used
to access the personalization
menus for customizing vehicle
features.
CONFIG (Configuration):Press to
access the Configuration
Settings menu.
MENU/SEL: Press the center of
this knob to enter the menus and
select menu items. Turn the knob to
scroll through the menus.
BACK: Press to exit or move
backward in a menu.
Entering the Personalization
Menus
1. Press CONFIG to access the
Configuration Settings menu.
2. Turn the MENU/SEL knob to highlight Vehicle Settings. Press
the CONFIG button until Vehicle
is highlighted on vehicles with a
navigation system only.
Page 142 of 420
Black plate (36,1)Chevrolet Cruze Owner Manual (GMNA-Localizing-U.S./Canada-6007168) -
2014 - 2nd Edition - 7/15/13
5-36 Instruments and Controls
3. Press the center of the MENU/SEL knob to select the Vehicle
Settings menu. The ignition must
be in ON/RUN.
The following list of menu items may
be available:
.Climate and Air Quality
.Comfort and Convenience
.Collision/Detection Systems
.Languages
.Lighting
.Power Door Locks
.Remote Locking, Unlocking,
Starting
.Return to Factory Settings
Turn the MENU/SEL knob to
highlight the menu. Press the knob
to select it. Each of the menus is
detailed in the following information.
Vehicles with a navigation system
will display a check mark to indicate
this feature is on.
Climate and Air Quality
If equipped, select the Climate and
Air Quality menu and the following
will be displayed:
.Auto Fan Speed
.Air Quality Sensor
.Remote Start Auto Heat Seats
.Auto Defog
.Auto Rear Defog
Auto Fan Speed
This feature sets the climate control
fan speed to maintain the interior
temperature.
Press the MENU/SEL knob when
Auto Fan Speed is highlighted to
open the menu. Turn the knob to
highlight High, Medium, or Low.
Press the BACK button to confirm
the selection and move back to the
last menu. Air Quality Sensor
Allows the selecting low or high
sensitivity of the air quality sensor.
Only vehicles with the automatic
climate control will have this option.
Press the MENU/SEL knob when
Air Quality Sensor is highlighted to
open the menu. Turn the knob to
highlight High Sensitivity or Low
Sensitivity. Press the BACK button
to confirm the selection and move
back to the last menu.
Remote Start Auto Heat Seats
On vehicles with remote start and
heated seats, the heated seats can
be set to on or off.
Press the MENU/SEL knob when
Remote Start Auto Heat Seats is
highlighted to open the menu. Turn
the knob to highlight On or Off.
Press the BACK button to confirm
the selection and move back to the
last menu.
Page 143 of 420
Black plate (37,1)Chevrolet Cruze Owner Manual (GMNA-Localizing-U.S./Canada-6007168) -
2014 - 2nd Edition - 7/15/13
Instruments and Controls 5-37
Auto Defog
When turned on and high humidity
is detected, the climate control
system may adjust to outside air
supply and turn on the air
conditioner or the heater. The fan
speed may slightly increase to help
prevent fogging. When high
humidity is no longer detected, the
system will return to its prior
operation.
Press the MENU/SEL knob when
Auto Defog is highlighted to open
the menu. Turn the knob to highlight
On or Off. Press the BACK button to
confirm the selection and move
back to the last menu.
Auto Rear Defog
When on, this feature turns on the
rear defogger at vehicle start when
the interior temperature is cold and
fog is likely. The auto rear defog
function can be disabled by
pressing
1. When off, the feature
can be turned on by pressing
1. See
“Rear Window Defogger” under
Climate Control Systems on
page 8-1.
Press the MENU/SEL knob when
Auto Rear Defog is highlighted to
open the menu. Turn the knob to
highlight On or Off. Press the knob
to confirm the selection and move
back to the last menu.
Comfort and Convenience
Select the Comfort and
Convenience menu and Chime
Volume will be displayed.
Chime Volume
This allows the selection of the
chime volume level.
Press the MENU/SEL knob when
Chime Volume is highlighted. Turn
the knob to select Normal or High.
Press the BACK button to confirm
and go back to the last menu.
Collision/Detection Systems
If equipped, select the Collision/
Detection Systems menu and the
following may be displayed.
.Park Assist
.Side Blind Zone Alert
Park Assist
This allows the Ultrasonic Parking
Assist feature, to be turned on
or off.
Press the MENU/SEL knob when
Park Assist is highlighted. Turn the
knob to select On or Off. Press the
knob to confirm and go back to the
last menu.
Side Blind Zone Alert
This allows the Side Blind Zone
Alert feature to be turned on or off.
Press the MENU/SEL knob when
Side Blind Zone Alert is highlighted.
Turn the knob to select On or Off.
Press the knob to confirm and go
back to the last menu.
Page 144 of 420
Black plate (38,1)Chevrolet Cruze Owner Manual (GMNA-Localizing-U.S./Canada-6007168) -
2014 - 2nd Edition - 7/15/13
5-38 Instruments and Controls
Languages
Select the Language menu and the
following will be displayed:
.English
.Francais
.Espanol
Turn the MENU/SEL knob to select
the language. Press BACK to return
to the last menu.
Lighting
Select the Lighting menu and the
following will be displayed:
.Exit Lighting
.Vehicle Locator Lights
Exit Lighting
This allows the selection of how
long the exterior lamps stay on
when leaving the vehicle when it is
dark outside.
Press the MENU/SEL knob when
Exit Lighting is highlighted. Turn the
knob to select Off, 30 Seconds, 1 Minute, or 2 Minutes. Press the
BACK button to confirm and go
back to the last menu.
Vehicle Locator Lights
This allows the vehicle locator lights
to be turned on or off. When on, the
headlamps, parking lamps,
taillamps, back-up lamps, and most
of the interior lamps will flash when
Kis pressed.
Press the MENU/SEL knob when
Vehicle Locator Lights is highlighted
to open the menu. Turn the MENU/
SEL knob to highlight On or Off.
Press MENU/SEL to select On or
Off. Press the BACK button to
confirm the selection and move
back to the last menu.
Power Door Locks
Select Power Door Locks and the
following will be displayed:
.Auto Door Unlock
.Delayed Door Lock
.Unlocked Door Anti Lock Out Auto Door Unlock
This allows selection of which of the
doors will automatically unlock when
the vehicle is shifted into P (Park)
with a automatic transmission or
when the key is removed from the
ignition with a manual transmission.
Press the MENU/SEL knob when
Auto Door Unlock is highlighted.
Turn the knob to select All Doors,
Driver Door, or Off. Press the knob
to confirm and go back to the
last menu.
Delayed Door Lock
When on, this feature will delay the
locking of the doors until
five seconds after the last door is
closed. Three chimes signal
delayed locking is in use. Press
either the power lock button or
Qon
the RKE transmitter twice to
override the delayed locking feature
and immediately lock all of the
doors.
Page 145 of 420
Black plate (39,1)Chevrolet Cruze Owner Manual (GMNA-Localizing-U.S./Canada-6007168) -
2014 - 2nd Edition - 7/15/13
Instruments and Controls 5-39
Press the MENU/SEL knob when
Delayed Door Lock is highlighted to
select On or Off. Press BACK to
return to the last menu.
Unlocked Door Anti Lock Out
When on, all doors will lock. The
driver door will then unlock if door
locking is requested while the driver
door is open, and disable the
Delayed Door Lock feature.
Even when this feature is off, the
driver is protected from accidental
lockouts when the key is in the
ignition.
If Off is selected, the Unlocked Door
Anti Lock Out feature may be
enabled through an additional menu
selection.
Press the MENU/SEL knob when
Unlocked Door Anti Lock Out is
highlighted to select On or Off.
Press BACK to return to the
last menu.Remote Locking, Unlocking,
Starting
Select Remote Locking, Unlocking,
Starting and the following will be
displayed (depending on the
system):
.Remote Lock Feedback
.Door Unlock or Remote Door
Unlock
.Remote Unlock Light Feedback
.Passive Door Unlock
.Passive Door Lock
Remote Lock Feedback
This allows selection of what type of
feedback is given when locking the
vehicle with the RKE transmitter.
Press the MENU/SEL knob when
Remote Lock Feedback is
highlighted. Turn the knob to select
Lights and Horn, Lights Only, Horn
Only, or Off. Press the knob to
confirm and go back to the
last menu. Door Unlock or Remote Door
Unlock
This allows selection of which doors
will unlock when pressing
Kon the
RKE transmitter.
Press the MENU/SEL knob when
Door Unlock is highlighted. Turn the
knob to select All Doors or Driver
Door Only. When set to Driver Door
Only, the driver door will unlock the
first time
Kis pressed and all doors
will unlock when
Kis pressed a
second time. When set to All Doors,
all of the doors will unlock at the first
press of
K. Press the knob to
confirm and go back to the
last menu.
Remote Unlock Light Feedback
If equipped, this allows selection of
what type of feedback is given when
unlocking the vehicle with the RKE
transmitter.
Page 146 of 420
Black plate (40,1)Chevrolet Cruze Owner Manual (GMNA-Localizing-U.S./Canada-6007168) -
2014 - 2nd Edition - 7/15/13
5-40 Instruments and Controls
Press the MENU/SEL knob when
Remote Unlock Light Feedback is
highlighted. Turn the knob to select
On or Off. Press the knob to confirm
and go back to the last menu.
Passive Door Unlock
This allows selection of which doors
are unlocked by pressing the button
on the outside door handle.
Press the MENU/SEL knob when
Passive Door Unlock is highlighted.
Turn the knob to select All Doors or
Driver Door. Press the knob to
confirm and go back to the
last menu.
Passive Door Lock
This allows passive locking to be
turned on or off and select what
type of feedback.
Press the MENU/SEL knob when
Passive Door Lock is highlighted.
Turn the knob to select Off, On,
or On with Active Horn Chirp. Press
the knob to confirm and go back to
the last menu.Return to Factory Settings
Select Return to Factory Settings to
return all vehicle personalization to
the default settings. Turn the knob
to select Yes or No. Press the knob
to confirm and go back to the
last menu.
Page 147 of 420
Black plate (1,1)Chevrolet Cruze Owner Manual (GMNA-Localizing-U.S./Canada-6007168) -
2014 - 2nd Edition - 7/15/13
Lighting 6-1
Lighting
Exterior Lighting
Exterior Lamp Controls . . . . . . . . 6-1
Headlamp High/Low-BeamChanger . . . . . . . . . . . . . . . . . . . . . 6-2
Flash-to-Pass . . . . . . . . . . . . . . . . . 6-2
Daytime Running Lamps (DRL) . . . . . . . . . . . . . . . . 6-2
Automatic Headlamp System . . . . . . . . . . . . . . . . . . . . . . 6-3
Hazard Warning Flashers . . . . . 6-3
Turn and Lane-Change Signals . . . . . . . . . . . . . . . . . . . . . . 6-3
Front Fog Lamps . . . . . . . . . . . . . . 6-4
Interior Lighting
Instrument Panel Illumination Control . . . . . . . . . . . . . . . . . . . . . . 6-4
Courtesy Lamps . . . . . . . . . . . . . . 6-5
Dome Lamps . . . . . . . . . . . . . . . . . 6-5
Reading Lamps . . . . . . . . . . . . . . . 6-5
Lighting Features
Entry Lighting . . . . . . . . . . . . . . . . . 6-5
Exit Lighting . . . . . . . . . . . . . . . . . . . 6-6
Battery Power Protection . . . . . . 6-6
Exterior Lighting
Exterior Lamp Controls
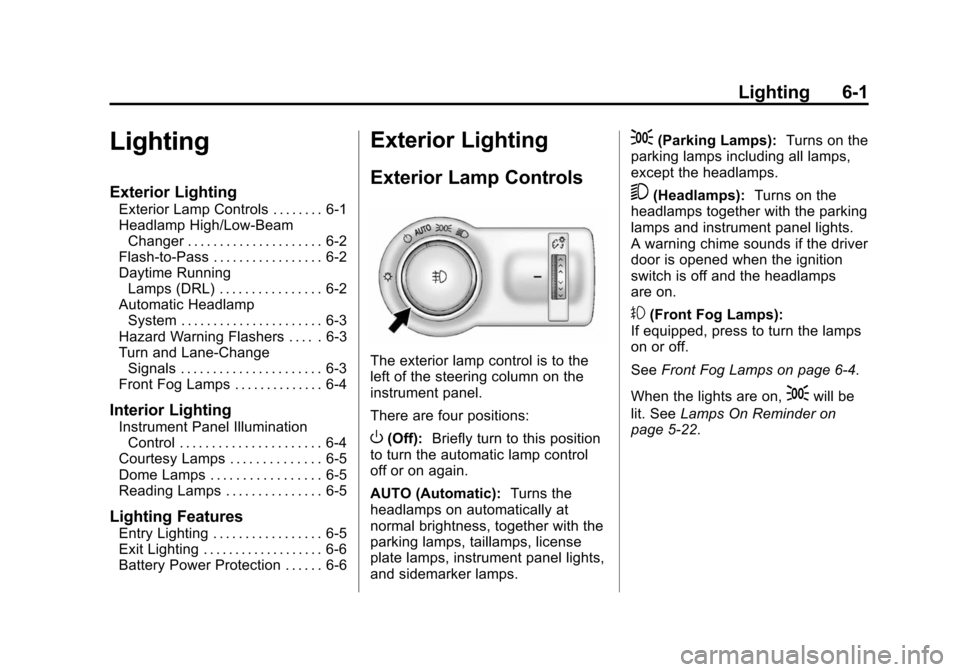
The exterior lamp control is to the
left of the steering column on the
instrument panel.
There are four positions:
O(Off): Briefly turn to this position
to turn the automatic lamp control
off or on again.
AUTO (Automatic): Turns the
headlamps on automatically at
normal brightness, together with the
parking lamps, taillamps, license
plate lamps, instrument panel lights,
and sidemarker lamps.
;(Parking Lamps): Turns on the
parking lamps including all lamps,
except the headlamps.
5(Headlamps): Turns on the
headlamps together with the parking
lamps and instrument panel lights.
A warning chime sounds if the driver
door is opened when the ignition
switch is off and the headlamps
are on.
#(Front Fog Lamps):
If equipped, press to turn the lamps
on or off.
See Front Fog Lamps on page 6-4.
When the lights are on,
;will be
lit. See Lamps On Reminder on
page 5-22.
Page 148 of 420
Black plate (2,1)Chevrolet Cruze Owner Manual (GMNA-Localizing-U.S./Canada-6007168) -
2014 - 2nd Edition - 7/15/13
6-2 Lighting
Headlamp High/
Low-Beam Changer
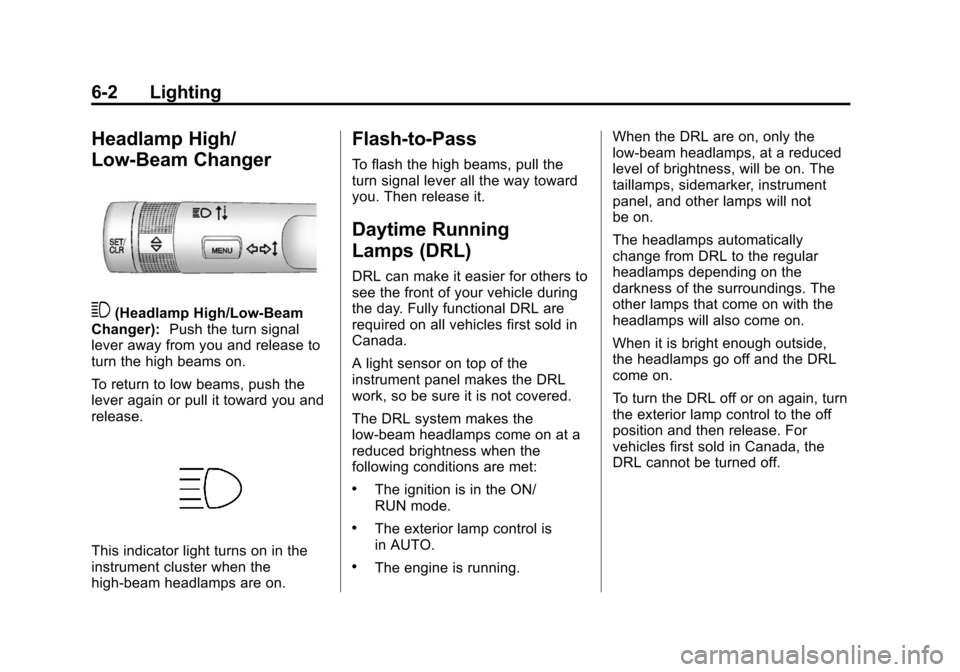
3(Headlamp High/Low-Beam
Changer): Push the turn signal
lever away from you and release to
turn the high beams on.
To return to low beams, push the
lever again or pull it toward you and
release.
This indicator light turns on in the
instrument cluster when the
high-beam headlamps are on.
Flash-to-Pass
To flash the high beams, pull the
turn signal lever all the way toward
you. Then release it.
Daytime Running
Lamps (DRL)
DRL can make it easier for others to
see the front of your vehicle during
the day. Fully functional DRL are
required on all vehicles first sold in
Canada.
A light sensor on top of the
instrument panel makes the DRL
work, so be sure it is not covered.
The DRL system makes the
low-beam headlamps come on at a
reduced brightness when the
following conditions are met:
.The ignition is in the ON/
RUN mode.
.The exterior lamp control is
in AUTO.
.The engine is running. When the DRL are on, only the
low-beam headlamps, at a reduced
level of brightness, will be on. The
taillamps, sidemarker, instrument
panel, and other lamps will not
be on.
The headlamps automatically
change from DRL to the regular
headlamps depending on the
darkness of the surroundings. The
other lamps that come on with the
headlamps will also come on.
When it is bright enough outside,
the headlamps go off and the DRL
come on.
To turn the DRL off or on again, turn
the exterior lamp control to the off
position and then release. For
vehicles first sold in Canada, the
DRL cannot be turned off.
Page 149 of 420
Black plate (3,1)Chevrolet Cruze Owner Manual (GMNA-Localizing-U.S./Canada-6007168) -
2014 - 2nd Edition - 7/15/13
Lighting 6-3
Automatic Headlamp
System
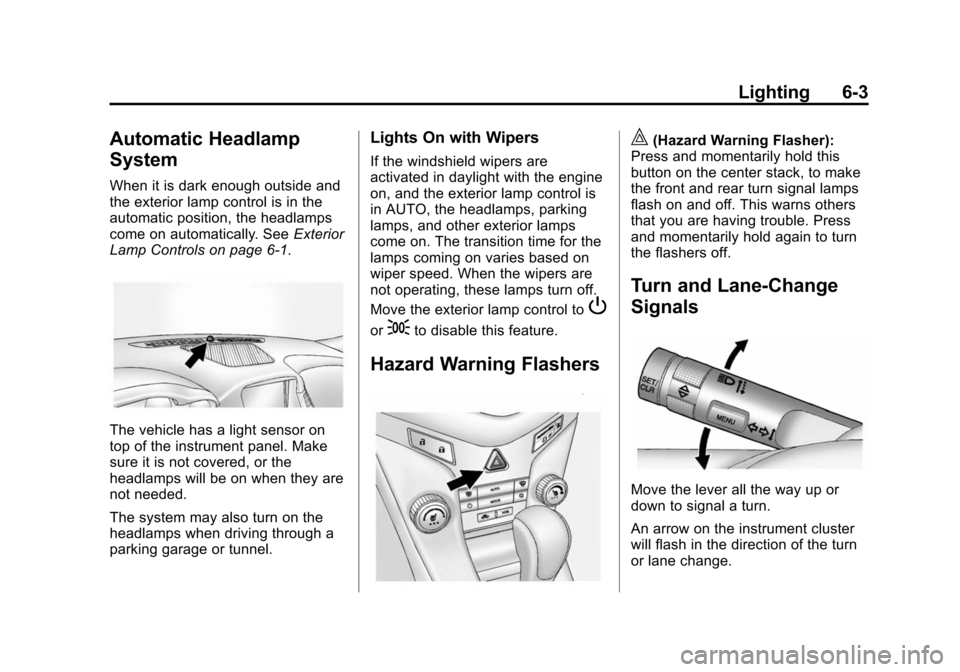
When it is dark enough outside and
the exterior lamp control is in the
automatic position, the headlamps
come on automatically. SeeExterior
Lamp Controls on page 6-1.
The vehicle has a light sensor on
top of the instrument panel. Make
sure it is not covered, or the
headlamps will be on when they are
not needed.
The system may also turn on the
headlamps when driving through a
parking garage or tunnel.
Lights On with Wipers
If the windshield wipers are
activated in daylight with the engine
on, and the exterior lamp control is
in AUTO, the headlamps, parking
lamps, and other exterior lamps
come on. The transition time for the
lamps coming on varies based on
wiper speed. When the wipers are
not operating, these lamps turn off.
Move the exterior lamp control to
P
or;to disable this feature.
Hazard Warning Flashers
|(Hazard Warning Flasher):
Press and momentarily hold this
button on the center stack, to make
the front and rear turn signal lamps
flash on and off. This warns others
that you are having trouble. Press
and momentarily hold again to turn
the flashers off.
Turn and Lane-Change
Signals
Move the lever all the way up or
down to signal a turn.
An arrow on the instrument cluster
will flash in the direction of the turn
or lane change.
Page 150 of 420
Black plate (4,1)Chevrolet Cruze Owner Manual (GMNA-Localizing-U.S./Canada-6007168) -
2014 - 2nd Edition - 7/15/13
6-4 Lighting
Raise or lower the lever until the
arrow starts to flash to signal a lane
change. The turn signal flashes
three times.
The lever returns to its starting
position when it is released.
If after signaling a turn or lane
change the arrow flashes rapidly or
does not come on, a signal bulb
may be burned out. Replace any
burned out bulbs. If a bulb is not
burned out, check the fuse. See
Fuses and Circuit Breakers on
page 10-38.
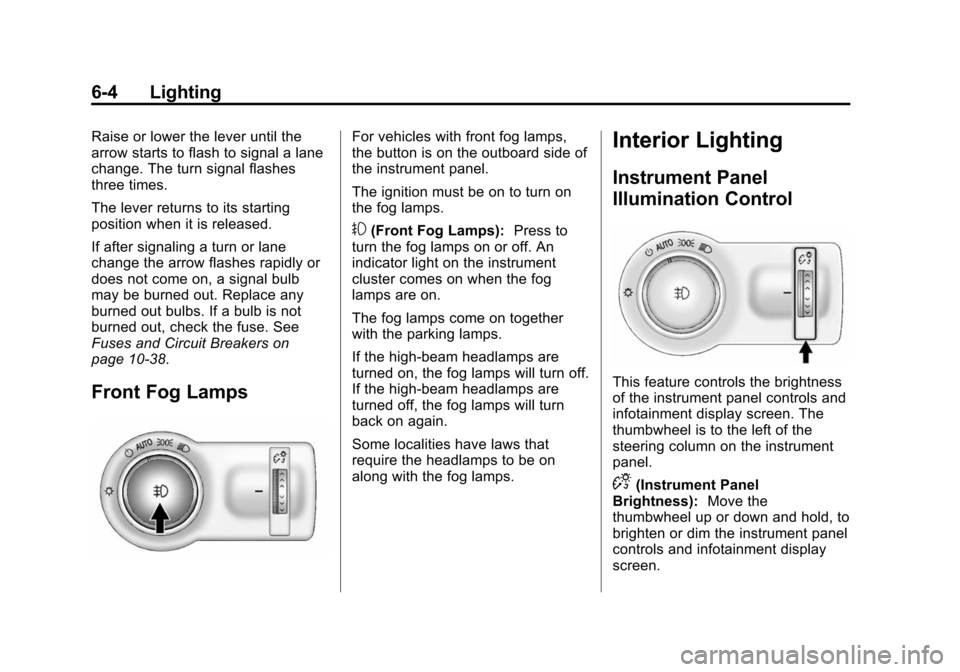
Front Fog Lamps
For vehicles with front fog lamps,
the button is on the outboard side of
the instrument panel.
The ignition must be on to turn on
the fog lamps.
#(Front Fog Lamps):Press to
turn the fog lamps on or off. An
indicator light on the instrument
cluster comes on when the fog
lamps are on.
The fog lamps come on together
with the parking lamps.
If the high-beam headlamps are
turned on, the fog lamps will turn off.
If the high-beam headlamps are
turned off, the fog lamps will turn
back on again.
Some localities have laws that
require the headlamps to be on
along with the fog lamps.
Interior Lighting
Instrument Panel
Illumination Control
This feature controls the brightness
of the instrument panel controls and
infotainment display screen. The
thumbwheel is to the left of the
steering column on the instrument
panel.
D(Instrument Panel
Brightness): Move the
thumbwheel up or down and hold, to
brighten or dim the instrument panel
controls and infotainment display
screen.