Controls CHEVROLET EQUINOX 2023 Owners Manual
[x] Cancel search | Manufacturer: CHEVROLET, Model Year: 2023, Model line: EQUINOX, Model: CHEVROLET EQUINOX 2023Pages: 360, PDF Size: 14.71 MB
Page 2 of 360
Chevrolet Equinox Owner Manual (GMNA-Localizing-U.S./Canada-
16540728) - 2023 - crc - 6/16/22
Contents
Introduction . . . . . . . . . . . . . . . . . . . . . . . . . . . . . . 1
Keys, Doors, and Windows . . . . . . . . . . . . . . . 7
Seats and Restraints . . . . . . . . . . . . . . . . . . . . . 30
Storage . . . . . . . . . . . . . . . . . . . . . . . . . . . . . . . . . . 75
Instruments and Controls . . . . . . . . . . . . . . . 79
Lighting . . . . . . . . . . . . . . . . . . . . . . . . . . . . . . . . . 114
Infotainment System . . . . . . . . . . . . . . . . . . . 121
Climate Controls . . . . . . . . . . . . . . . . . . . . . . . 169
Driving and Operating . . . . . . . . . . . . . . . . . . 176
Vehicle Care . . . . . . . . . . . . . . . . . . . . . . . . . . . . 247
Service and Maintenance . . . . . . . . . . . . . . . 315
Technical Data . . . . . . . . . . . . . . . . . . . . . . . . . . 323
Customer Information . . . . . . . . . . . . . . . . . . 327
Reporting Safety Defects . . . . . . . . . . . . . . . 335
OnStar . . . . . . . . . . . . . . . . . . . . . . . . . . . . . . . . . 339
Connected Services . . . . . . . . . . . . . . . . . . . . . 344
Index . . . . . . . . . . . . . . . . . . . . . . . . . . 347
Introduction
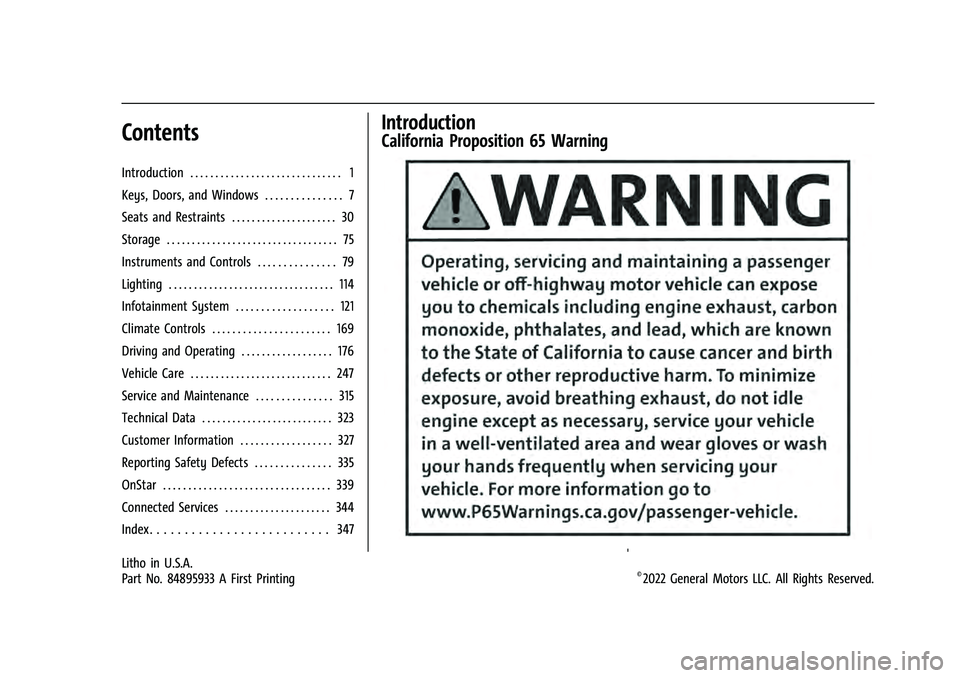
California Proposition 65 Warning
Litho in U.S.A.
Part No. 84895933 A First Printing©2022 General Motors LLC. All Rights Reserved.
Page 7 of 360
Chevrolet Equinox Owner Manual (GMNA-Localizing-U.S./Canada-
16540728) - 2023 - crc - 6/16/22
6 Introduction
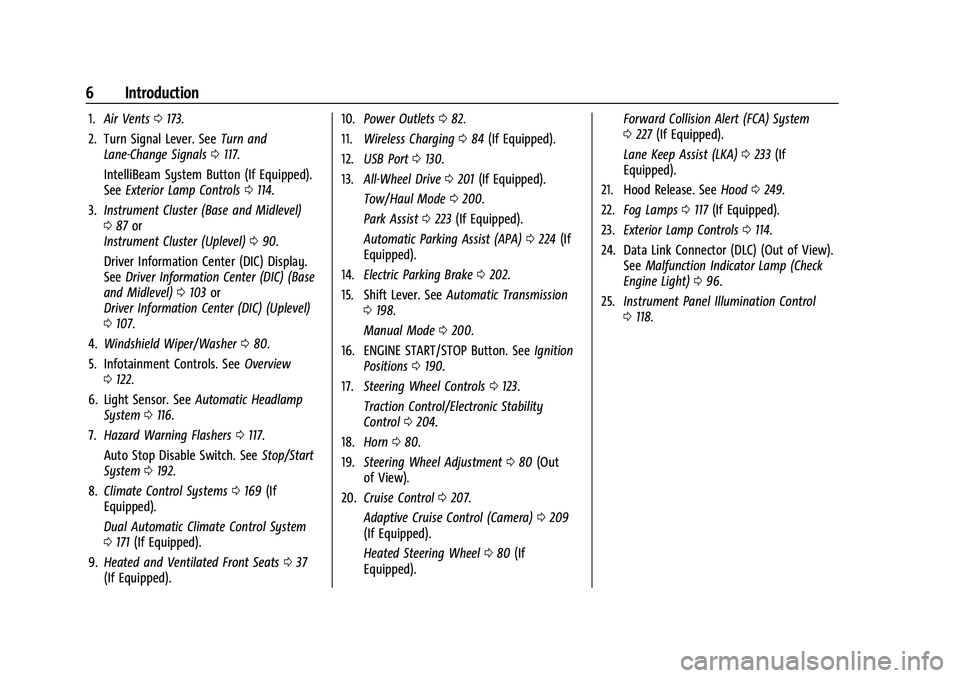
1.Air Vents 0173.
2. Turn Signal Lever. See Turn and
Lane-Change Signals 0117.
IntelliBeam System Button (If Equipped).
See Exterior Lamp Controls 0114.
3. Instrument Cluster (Base and Midlevel)
087 or
Instrument Cluster (Uplevel) 090.
Driver Information Center (DIC) Display.
See Driver Information Center (DIC) (Base
and Midlevel) 0103 or
Driver Information Center (DIC) (Uplevel)
0 107.
4. Windshield Wiper/Washer 080.
5. Infotainment Controls. See Overview
0 122.
6. Light Sensor. See Automatic Headlamp
System 0116.
7. Hazard Warning Flashers 0117.
Auto Stop Disable Switch. See Stop/Start
System 0192.
8. Climate Control Systems 0169 (If
Equipped).
Dual Automatic Climate Control System
0 171 (If Equipped).
9. Heated and Ventilated Front Seats 037
(If Equipped). 10.
Power Outlets 082.
11. Wireless Charging 084 (If Equipped).
12. USB Port 0130.
13. All-Wheel Drive 0201 (If Equipped).
Tow/Haul Mode 0200.
Park Assist 0223 (If Equipped).
Automatic Parking Assist (APA) 0224 (If
Equipped).
14. Electric Parking Brake 0202.
15. Shift Lever. See Automatic Transmission
0 198.
Manual Mode 0200.
16. ENGINE START/STOP Button. See Ignition
Positions 0190.
17. Steering Wheel Controls 0123.
Traction Control/Electronic Stability
Control 0204.
18. Horn 080.
19. Steering Wheel Adjustment 080 (Out
of View).
20. Cruise Control 0207.
Adaptive Cruise Control (Camera) 0209
(If Equipped).
Heated Steering Wheel 080 (If
Equipped). Forward Collision Alert (FCA) System
0
227 (If Equipped).
Lane Keep Assist (LKA) 0233 (If
Equipped).
21. Hood Release. See Hood0249.
22. Fog Lamps 0117 (If Equipped).
23. Exterior Lamp Controls 0114.
24. Data Link Connector (DLC) (Out of View). SeeMalfunction Indicator Lamp (Check
Engine Light) 096.
25. Instrument Panel Illumination Control
0118.
Page 8 of 360
Chevrolet Equinox Owner Manual (GMNA-Localizing-U.S./Canada-
16540728) - 2023 - crc - 6/16/22
Keys, Doors, and Windows 7
Keys, Doors, and
Windows
Keys and Locks
Keys . . . . . . . . . . . . . . . . . . . . . . . . . . . . . . . . . . . . . 7
Remote Key . . . . . . . . . . . . . . . . . . . . . . . . . . . . . 8
Remote Key Operation . . . . . . . . . . . . . . . . . . 8
Remote Vehicle Start . . . . . . . . . . . . . . . . . . . 14
Door Locks . . . . . . . . . . . . . . . . . . . . . . . . . . . . . . 15
Power Door Locks . . . . . . . . . . . . . . . . . . . . . . . 17
Delayed Locking . . . . . . . . . . . . . . . . . . . . . . . . 17
Automatic Door Locks . . . . . . . . . . . . . . . . . . . 17
Lockout Protection . . . . . . . . . . . . . . . . . . . . . . 18
Safety Locks . . . . . . . . . . . . . . . . . . . . . . . . . . . . 18
Doors
Liftgate . . . . . . . . . . . . . . . . . . . . . . . . . . . . . . . . . 19
Vehicle Security
Vehicle Security . . . . . . . . . . . . . . . . . . . . . . . . 23
Vehicle Alarm System . . . . . . . . . . . . . . . . . . 23
Immobilizer . . . . . . . . . . . . . . . . . . . . . . . . . . . . . 24
Immobilizer Operation . . . . . . . . . . . . . . . . . . 24
Exterior Mirrors
Convex Mirrors . . . . . . . . . . . . . . . . . . . . . . . . . 24
Power Mirrors . . . . . . . . . . . . . . . . . . . . . . . . . . 25
Folding Mirrors . . . . . . . . . . . . . . . . . . . . . . . . . 25
Heated Mirrors . . . . . . . . . . . . . . . . . . . . . . . . . 25
Automatic Dimming Mirror . . . . . . . . . . . . . 25Reverse Tilt Mirrors . . . . . . . . . . . . . . . . . . . . 26
Interior Mirrors
Interior Rearview Mirrors . . . . . . . . . . . . . . . 26
Manual Rearview Mirror . . . . . . . . . . . . . . . . 26
Automatic Dimming Rearview Mirror . . . 26
Windows
Windows . . . . . . . . . . . . . . . . . . . . . . . . . . . . . . . 26
Power Windows . . . . . . . . . . . . . . . . . . . . . . . . 26
Sun Visors . . . . . . . . . . . . . . . . . . . . . . . . . . . . . . 28
Roof
Sunroof . . . . . . . . . . . . . . . . . . . . . . . . . . . . . . . . . 28
Keys and Locks
Keys
{Warning
Leaving children in a vehicle with a
Remote Keyless Entry (RKE) transmitter is
dangerous and children or others could
be seriously injured or killed. They could
operate the power windows or other
controls or make the vehicle move. The
windows will function with the RKE
transmitter in the vehicle, and children or
others could be caught in the path of a
closing window. Do not leave children in
a vehicle with an RKE transmitter.
Page 53 of 360
Chevrolet Equinox Owner Manual (GMNA-Localizing-U.S./Canada-
16540728) - 2023 - crc - 6/16/22
52 Seats and Restraints
Airbags should never be regarded as
anything more than a supplement to seat
belts.
What Will You See after an
Airbag Inflates?
After frontal and seat-mounted side impact
airbags inflate, they quickly deflate, so
quickly that some people may not even
realize the airbags inflated. Roof-rail airbags
may still be at least partially inflated for
some time after they inflate. Some
components of the airbag module may be
hot for several minutes. For location of the
airbags, seeWhere Are the Airbags? 049.
The parts of the airbag that come into
contact with you may be warm, but not too
hot to touch. There may be some smoke
and dust coming from the vents in the
deflated airbags. Airbag inflation does not
prevent the driver from seeing out of the
windshield or being able to steer the
vehicle, nor does it prevent people from
leaving the vehicle.
{Warning
When an airbag inflates, there may be
dust in the air. This dust could cause
breathing problems for people with a
history of asthma or other breathing
trouble. To avoid this, everyone in the
vehicle should get out as soon as it is
safe to do so. If you have breathing
problems but cannot get out of the
vehicle after an airbag inflates, then get
fresh air by opening a window or a door.
If you experience breathing problems
following an airbag deployment, you
should seek medical attention.
The vehicle has a feature that may
automatically unlock the doors, turn on the
interior lamps and hazard warning flashers,
and shut off the fuel system after the
airbags inflate. The feature may also
activate, without airbag inflation, after an
event that exceeds a predetermined
threshold. After turning the ignition off and
then on again, the fuel system will return to
normal operation; the doors can be locked,
the interior lamps can be turned off, and
the hazard warning flashers can be turned off using the controls for those features.
If any of these systems are damaged in the
crash they may not operate as normal.
{Warning
A crash severe enough to inflate the
airbags may have also damaged
important functions in the vehicle, such
as the fuel system, brake and steering
systems, etc. Even if the vehicle appears
to be drivable after a moderate crash,
there may be concealed damage that
could make it difficult to safely operate
the vehicle.
Use caution if you should attempt to
restart the engine after a crash has
occurred.
In many crashes severe enough to inflate
the airbag, windshields are broken by
vehicle deformation. Additional windshield
breakage may also occur from the front
outboard passenger airbag.
.Airbags are designed to inflate only once.
After an airbag inflates, you will need
some new parts for the airbag system.
If you do not get them, the airbag
system will not be there to help protect
you in another crash. A new system will
Page 80 of 360
Chevrolet Equinox Owner Manual (GMNA-Localizing-U.S./Canada-
16540728) - 2023 - crc - 6/16/22
Instruments and Controls 79
Instruments and Controls
Controls
Steering Wheel Adjustment . . . . . . . . . . . . 80
Heated Steering Wheel . . . . . . . . . . . . . . . . . 80
Horn . . . . . . . . . . . . . . . . . . . . . . . . . . . . . . . . . . . 80
Windshield Wiper/Washer . . . . . . . . . . . . . 80
Rear Window Wiper/Washer . . . . . . . . . . . 81
Compass . . . . . . . . . . . . . . . . . . . . . . . . . . . . . . . . 82
Clock . . . . . . . . . . . . . . . . . . . . . . . . . . . . . . . . . . . 82
Power Outlets . . . . . . . . . . . . . . . . . . . . . . . . . . 82
Wireless Charging . . . . . . . . . . . . . . . . . . . . . . 84
Warning Lights, Gauges, and Indicators
Warning Lights, Gauges, andIndicators . . . . . . . . . . . . . . . . . . . . . . . . . . . . . 86
Instrument Cluster (Base and Midlevel) . . . . . . . . . . . . . . . . . . . . . . . . . . . . . 87
Instrument Cluster (Uplevel) . . . . . . . . . . . 90
Speedometer . . . . . . . . . . . . . . . . . . . . . . . . . . . 92
Odometer . . . . . . . . . . . . . . . . . . . . . . . . . . . . . . 92
Trip Odometer . . . . . . . . . . . . . . . . . . . . . . . . . 92
Tachometer . . . . . . . . . . . . . . . . . . . . . . . . . . . . 92
Fuel Gauge . . . . . . . . . . . . . . . . . . . . . . . . . . . . . 92
Engine Coolant Temperature Gauge . . . . 93
Seat Belt Reminders . . . . . . . . . . . . . . . . . . . . 94
Airbag Readiness Light . . . . . . . . . . . . . . . . . 94
Passenger Airbag Status Indicator . . . . . . 95
Charging System Light . . . . . . . . . . . . . . . . . 95 Malfunction Indicator Lamp (Check
Engine Light) . . . . . . . . . . . . . . . . . . . . . . . . . 96
Brake System Warning Light . . . . . . . . . . . 97
Electric Parking Brake Light . . . . . . . . . . . . . 98
Service Electric Parking Brake Light . . . . . 98
Antilock Brake System (ABS) Warning Light . . . . . . . . . . . . . . . . . . . . . . . . . . . . . . . . . 98
Tow/Haul Mode Light . . . . . . . . . . . . . . . . . . 99
Lane Keep Assist (LKA) Light . . . . . . . . . . . 99
Vehicle Ahead Indicator . . . . . . . . . . . . . . . . 99
Pedestrian Ahead Indicator . . . . . . . . . . . . . 99
Traction Off Light . . . . . . . . . . . . . . . . . . . . . . 99
StabiliTrak OFF Light . . . . . . . . . . . . . . . . . . 100
Traction Control System (TCS)/ StabiliTrak Light . . . . . . . . . . . . . . . . . . . . . 100
Tire Pressure Light . . . . . . . . . . . . . . . . . . . . 100
Engine Oil Pressure Light . . . . . . . . . . . . . . 101
Low Fuel Warning Light . . . . . . . . . . . . . . . 101
Security Light . . . . . . . . . . . . . . . . . . . . . . . . . . 102
High-Beam On Light . . . . . . . . . . . . . . . . . . . 102
Front Fog Lamp Light . . . . . . . . . . . . . . . . . . 102
Lamps On Reminder . . . . . . . . . . . . . . . . . . . 102
Cruise Control Light . . . . . . . . . . . . . . . . . . . 103
Information Displays
Driver Information Center (DIC) (Base and Midlevel) . . . . . . . . . . . . . . . . . . . . . . . . 103
Driver Information Center (DIC) (Uplevel) . . . . . . . . . . . . . . . . . . . . . . . . . . . . . 107
Vehicle Messages
Vehicle Messages . . . . . . . . . . . . . . . . . . . . . . 110
Engine Power Messages . . . . . . . . . . . . . . . 110
Vehicle Speed Messages . . . . . . . . . . . . . . . . 111
Universal Remote System
Universal Remote System . . . . . . . . . . . . . . 111
Universal Remote SystemProgramming . . . . . . . . . . . . . . . . . . . . . . . . . 111
Universal Remote System Operation . . . 113
Page 81 of 360
Chevrolet Equinox Owner Manual (GMNA-Localizing-U.S./Canada-
16540728) - 2023 - crc - 6/16/22
80 Instruments and Controls
Controls
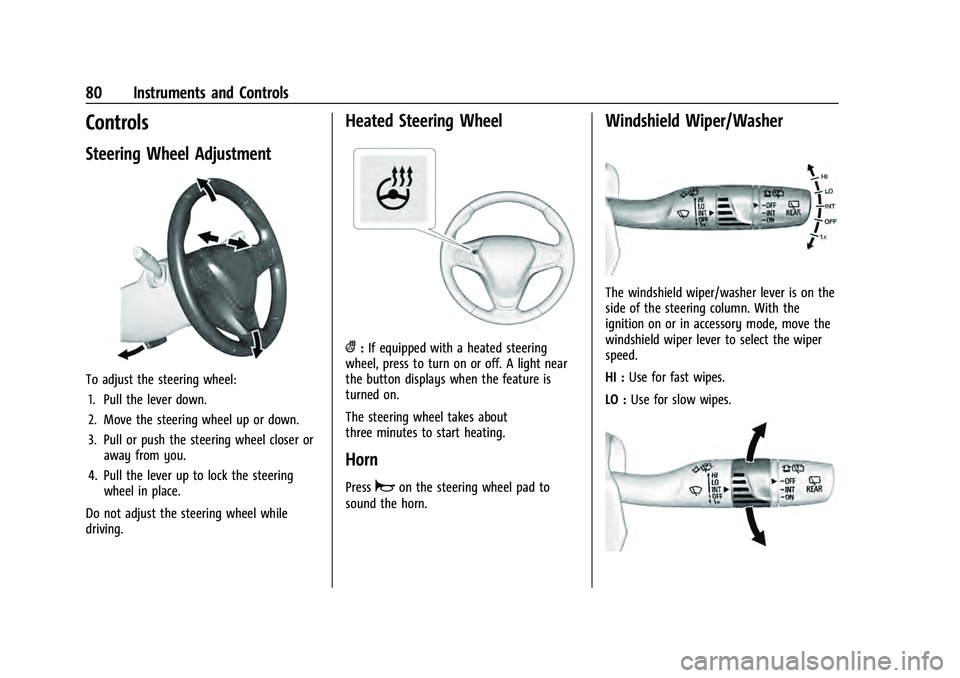
Steering Wheel Adjustment
To adjust the steering wheel:1. Pull the lever down.
2. Move the steering wheel up or down.
3. Pull or push the steering wheel closer or away from you.
4. Pull the lever up to lock the steering wheel in place.
Do not adjust the steering wheel while
driving.
Heated Steering Wheel
(: If equipped with a heated steering
wheel, press to turn on or off. A light near
the button displays when the feature is
turned on.
The steering wheel takes about
three minutes to start heating.
Horn
Pressaon the steering wheel pad to
sound the horn.
Windshield Wiper/Washer
The windshield wiper/washer lever is on the
side of the steering column. With the
ignition on or in accessory mode, move the
windshield wiper lever to select the wiper
speed.
HI : Use for fast wipes.
LO : Use for slow wipes.
Page 82 of 360
Chevrolet Equinox Owner Manual (GMNA-Localizing-U.S./Canada-
16540728) - 2023 - crc - 6/16/22
Instruments and Controls 81
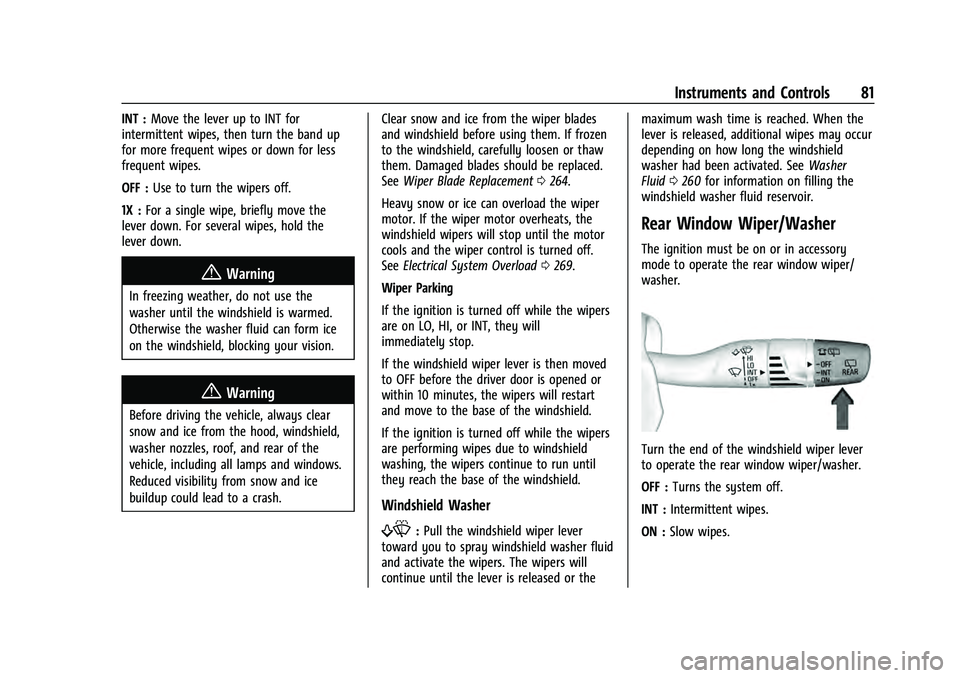
INT :Move the lever up to INT for
intermittent wipes, then turn the band up
for more frequent wipes or down for less
frequent wipes.
OFF : Use to turn the wipers off.
1X : For a single wipe, briefly move the
lever down. For several wipes, hold the
lever down.
{Warning
In freezing weather, do not use the
washer until the windshield is warmed.
Otherwise the washer fluid can form ice
on the windshield, blocking your vision.
{Warning
Before driving the vehicle, always clear
snow and ice from the hood, windshield,
washer nozzles, roof, and rear of the
vehicle, including all lamps and windows.
Reduced visibility from snow and ice
buildup could lead to a crash. Clear snow and ice from the wiper blades
and windshield before using them. If frozen
to the windshield, carefully loosen or thaw
them. Damaged blades should be replaced.
See
Wiper Blade Replacement 0264.
Heavy snow or ice can overload the wiper
motor. If the wiper motor overheats, the
windshield wipers will stop until the motor
cools and the wiper control is turned off.
See Electrical System Overload 0269.
Wiper Parking
If the ignition is turned off while the wipers
are on LO, HI, or INT, they will
immediately stop.
If the windshield wiper lever is then moved
to OFF before the driver door is opened or
within 10 minutes, the wipers will restart
and move to the base of the windshield.
If the ignition is turned off while the wipers
are performing wipes due to windshield
washing, the wipers continue to run until
they reach the base of the windshield.
Windshield Washer
f: Pull the windshield wiper lever
toward you to spray windshield washer fluid
and activate the wipers. The wipers will
continue until the lever is released or the maximum wash time is reached. When the
lever is released, additional wipes may occur
depending on how long the windshield
washer had been activated. See
Washer
Fluid 0260 for information on filling the
windshield washer fluid reservoir.
Rear Window Wiper/Washer
The ignition must be on or in accessory
mode to operate the rear window wiper/
washer.
Turn the end of the windshield wiper lever
to operate the rear window wiper/washer.
OFF : Turns the system off.
INT : Intermittent wipes.
ON : Slow wipes.
Page 83 of 360
Chevrolet Equinox Owner Manual (GMNA-Localizing-U.S./Canada-
16540728) - 2023 - crc - 6/16/22
82 Instruments and Controls
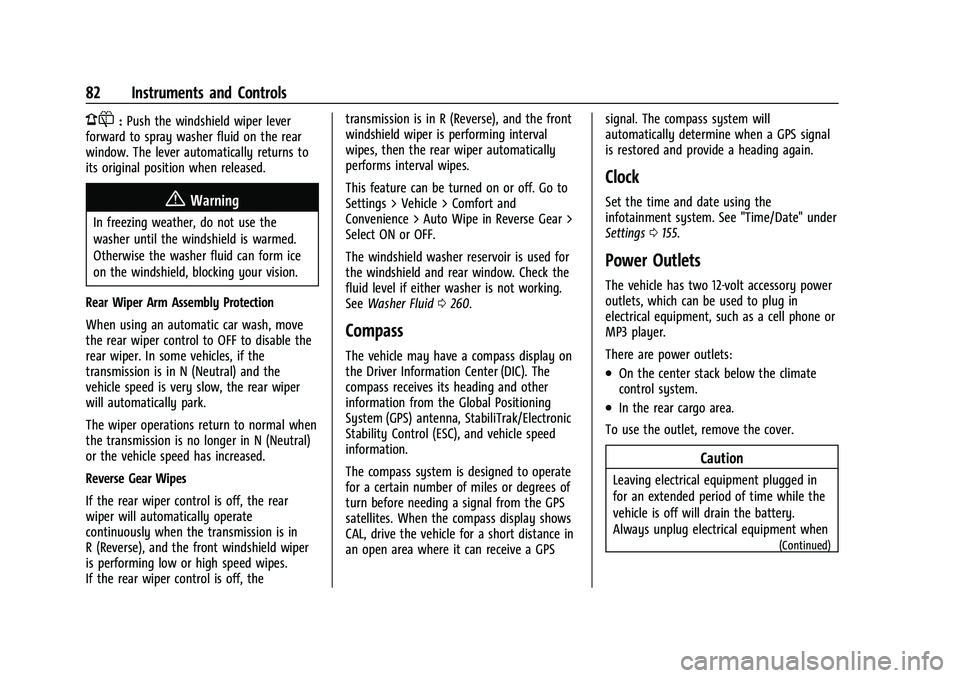
1:Push the windshield wiper lever
forward to spray washer fluid on the rear
window. The lever automatically returns to
its original position when released.
{Warning
In freezing weather, do not use the
washer until the windshield is warmed.
Otherwise the washer fluid can form ice
on the windshield, blocking your vision.
Rear Wiper Arm Assembly Protection
When using an automatic car wash, move
the rear wiper control to OFF to disable the
rear wiper. In some vehicles, if the
transmission is in N (Neutral) and the
vehicle speed is very slow, the rear wiper
will automatically park.
The wiper operations return to normal when
the transmission is no longer in N (Neutral)
or the vehicle speed has increased.
Reverse Gear Wipes
If the rear wiper control is off, the rear
wiper will automatically operate
continuously when the transmission is in
R (Reverse), and the front windshield wiper
is performing low or high speed wipes.
If the rear wiper control is off, the transmission is in R (Reverse), and the front
windshield wiper is performing interval
wipes, then the rear wiper automatically
performs interval wipes.
This feature can be turned on or off. Go to
Settings > Vehicle > Comfort and
Convenience > Auto Wipe in Reverse Gear >
Select ON or OFF.
The windshield washer reservoir is used for
the windshield and rear window. Check the
fluid level if either washer is not working.
See
Washer Fluid 0260.
Compass
The vehicle may have a compass display on
the Driver Information Center (DIC). The
compass receives its heading and other
information from the Global Positioning
System (GPS) antenna, StabiliTrak/Electronic
Stability Control (ESC), and vehicle speed
information.
The compass system is designed to operate
for a certain number of miles or degrees of
turn before needing a signal from the GPS
satellites. When the compass display shows
CAL, drive the vehicle for a short distance in
an open area where it can receive a GPS signal. The compass system will
automatically determine when a GPS signal
is restored and provide a heading again.
Clock
Set the time and date using the
infotainment system. See "Time/Date" under
Settings
0155.
Power Outlets
The vehicle has two 12-volt accessory power
outlets, which can be used to plug in
electrical equipment, such as a cell phone or
MP3 player.
There are power outlets:
.On the center stack below the climate
control system.
.In the rear cargo area.
To use the outlet, remove the cover.
Caution
Leaving electrical equipment plugged in
for an extended period of time while the
vehicle is off will drain the battery.
Always unplug electrical equipment when
(Continued)
Page 84 of 360
Chevrolet Equinox Owner Manual (GMNA-Localizing-U.S./Canada-
16540728) - 2023 - crc - 6/16/22
Instruments and Controls 83
Caution (Continued)
not in use and do not plug in equipment
that exceeds the maximum 20 amp
rating.
{Warning
Power is always supplied to the rear
cargo power outlet. Do not leave
electrical equipment plugged in when the
vehicle is not in use because the vehicle
could catch fire and cause injury or
death.
Certain accessory plugs may not be
compatible with the accessory power outlet
and could overload vehicle and adapter
fuses. If a problem is experienced, see your
dealer.
When adding electrical equipment, be sure
to follow the proper installation instructions
included with the equipment. See Add-On
Electrical Equipment 0246.
Caution
Hanging heavy equipment from the
power outlet can cause damage not
covered by the vehicle warranty. The
power outlets are designed for accessory
power plugs only, such as cell phone
charge cords.
Power Outlet 110/120 Volt Alternating
Current
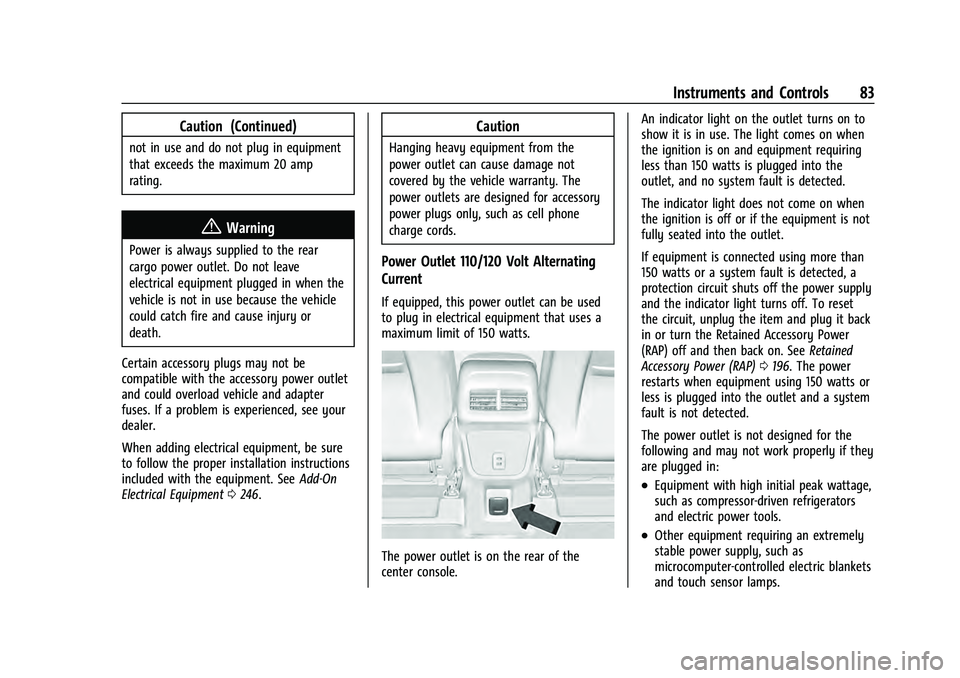
If equipped, this power outlet can be used
to plug in electrical equipment that uses a
maximum limit of 150 watts.
The power outlet is on the rear of the
center console. An indicator light on the outlet turns on to
show it is in use. The light comes on when
the ignition is on and equipment requiring
less than 150 watts is plugged into the
outlet, and no system fault is detected.
The indicator light does not come on when
the ignition is off or if the equipment is not
fully seated into the outlet.
If equipment is connected using more than
150 watts or a system fault is detected, a
protection circuit shuts off the power supply
and the indicator light turns off. To reset
the circuit, unplug the item and plug it back
in or turn the Retained Accessory Power
(RAP) off and then back on. See
Retained
Accessory Power (RAP) 0196. The power
restarts when equipment using 150 watts or
less is plugged into the outlet and a system
fault is not detected.
The power outlet is not designed for the
following and may not work properly if they
are plugged in:
.Equipment with high initial peak wattage,
such as compressor-driven refrigerators
and electric power tools.
.Other equipment requiring an extremely
stable power supply, such as
microcomputer-controlled electric blankets
and touch sensor lamps.
Page 85 of 360
Chevrolet Equinox Owner Manual (GMNA-Localizing-U.S./Canada-
16540728) - 2023 - crc - 6/16/22
84 Instruments and Controls
.Medical equipment.
Wireless Charging
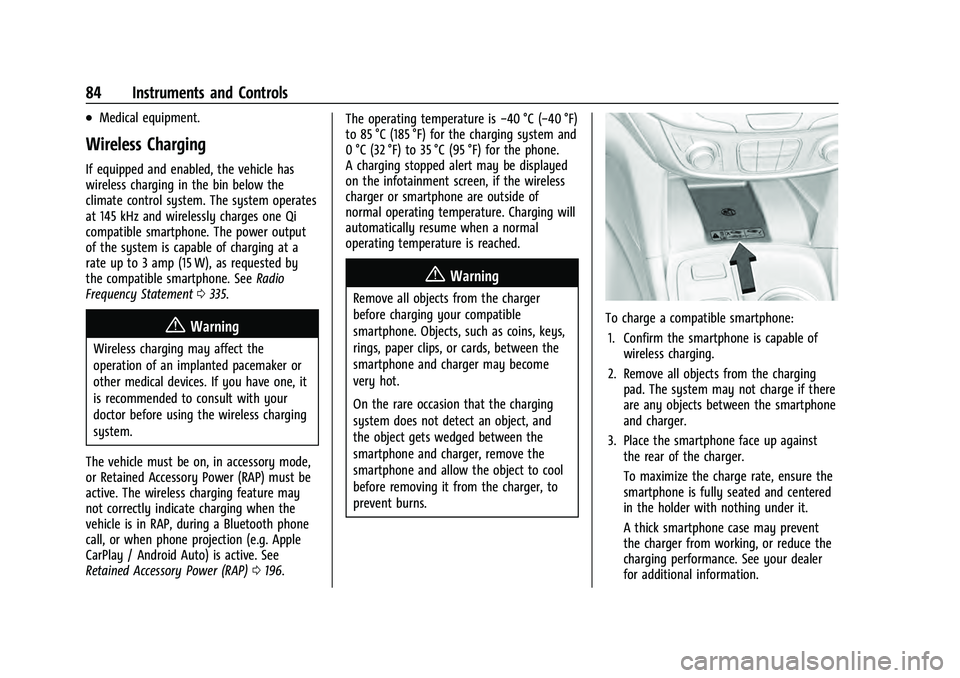
If equipped and enabled, the vehicle has
wireless charging in the bin below the
climate control system. The system operates
at 145 kHz and wirelessly charges one Qi
compatible smartphone. The power output
of the system is capable of charging at a
rate up to 3 amp (15 W), as requested by
the compatible smartphone. SeeRadio
Frequency Statement 0335.
{Warning
Wireless charging may affect the
operation of an implanted pacemaker or
other medical devices. If you have one, it
is recommended to consult with your
doctor before using the wireless charging
system.
The vehicle must be on, in accessory mode,
or Retained Accessory Power (RAP) must be
active. The wireless charging feature may
not correctly indicate charging when the
vehicle is in RAP, during a Bluetooth phone
call, or when phone projection (e.g. Apple
CarPlay / Android Auto) is active. See
Retained Accessory Power (RAP) 0196. The operating temperature is
−40 °C (−40 °F)
to 85 °C (185 °F) for the charging system and
0 °C (32 °F) to 35 °C (95 °F) for the phone.
A charging stopped alert may be displayed
on the infotainment screen, if the wireless
charger or smartphone are outside of
normal operating temperature. Charging will
automatically resume when a normal
operating temperature is reached.
{Warning
Remove all objects from the charger
before charging your compatible
smartphone. Objects, such as coins, keys,
rings, paper clips, or cards, between the
smartphone and charger may become
very hot.
On the rare occasion that the charging
system does not detect an object, and
the object gets wedged between the
smartphone and charger, remove the
smartphone and allow the object to cool
before removing it from the charger, to
prevent burns.
To charge a compatible smartphone:
1. Confirm the smartphone is capable of wireless charging.
2. Remove all objects from the charging pad. The system may not charge if there
are any objects between the smartphone
and charger.
3. Place the smartphone face up against the rear of the charger.
To maximize the charge rate, ensure the
smartphone is fully seated and centered
in the holder with nothing under it.
A thick smartphone case may prevent
the charger from working, or reduce the
charging performance. See your dealer
for additional information.