height CHEVROLET KODIAK 2007 Owners Manual
[x] Cancel search | Manufacturer: CHEVROLET, Model Year: 2007, Model line: KODIAK, Model: CHEVROLET KODIAK 2007Pages: 430, PDF Size: 6.06 MB
Page 7 of 430
Front Seats..................................................... 9
Bucket Seats................................................ 9
Split Bench Seat (80/20 Split)..................... 13
Air Suspension Seats.................................. 13
Rear Seats.................................................... 20
Rear Seat Operation................................... 20
Safety Belts.................................................. 21
Safety Belts: They Are for Everyone........... 21
Questions and Answers About
Safety Belts............................................. 25
How to Wear Safety Belts Properly............. 26
Driver Position............................................. 26
Shoulder Belt Height Adjustment................. 35
Safety Belt Use During Pregnancy.............. 36
Right Front Passenger Position................... 36
Center Passenger Position.......................... 37
Rear Outside Passenger Positions
(Crew Cab).............................................. 38
Safety Belt Extender................................... 41Child Restraints............................................ 42
Older Children............................................. 42
Infants and Young Children......................... 45
Child Restraint Systems.............................. 49
Where to Put the Restraint
(Regular Cab Models).............................. 54
Where to Put the Restraint
(Crew Cab Models).................................. 55
Lower Anchors and Tethers for
Children (LATCH).................................... 57
Securing a Child Restraint in a
Rear Outside Seat Position
(Crew Cab Models).................................. 58
Securing a Child Restraint in the
Center Rear Seat Position (Crew Cab)
or Center Front Position............................ 60
Securing a Child Restraint in the
Right Front Seat Position......................... 63
Section 1 Seats and Restraint Systems
7
Page 14 of 430
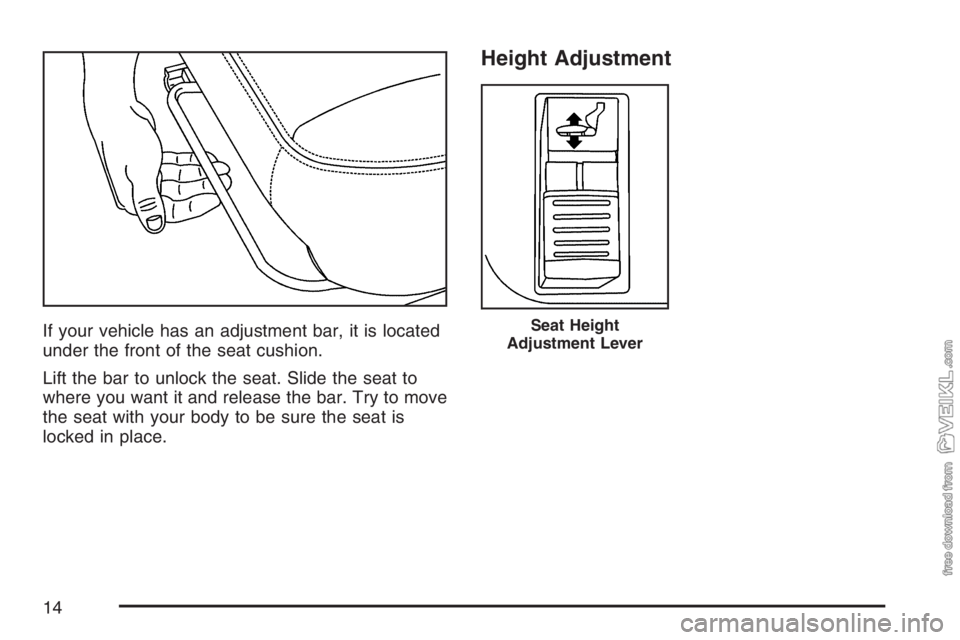
If your vehicle has an adjustment bar, it is located
under the front of the seat cushion.
Lift the bar to unlock the seat. Slide the seat to
where you want it and release the bar. Try to move
the seat with your body to be sure the seat is
locked in place.
Height Adjustment
Seat Height
Adjustment Lever
14
Page 15 of 430
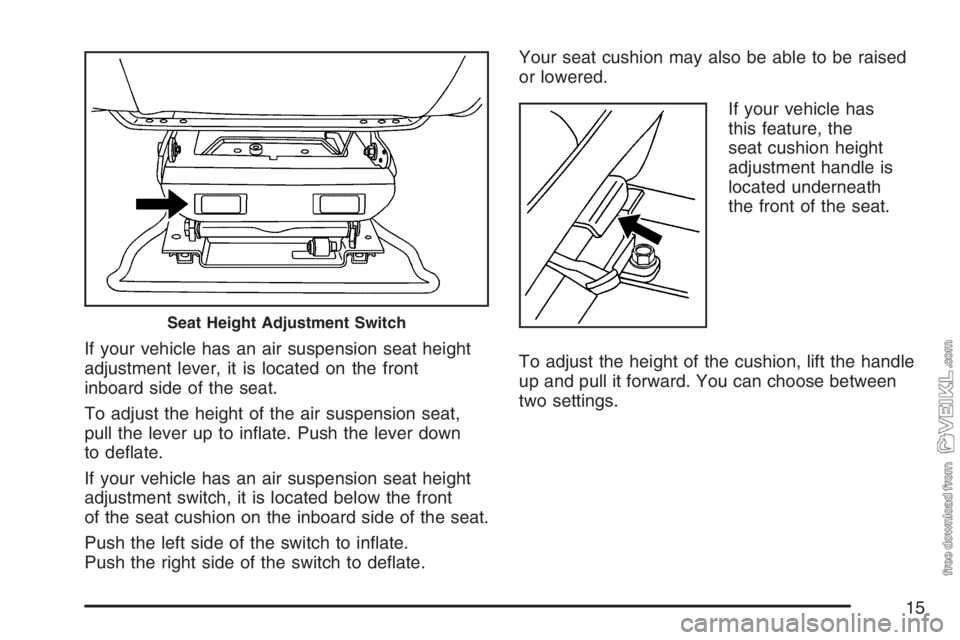
If your vehicle has an air suspension seat height
adjustment lever, it is located on the front
inboard side of the seat.
To adjust the height of the air suspension seat,
pull the lever up to inflate. Push the lever down
to deflate.
If your vehicle has an air suspension seat height
adjustment switch, it is located below the front
of the seat cushion on the inboard side of the seat.
Push the left side of the switch to inflate.
Push the right side of the switch to deflate.Your seat cushion may also be able to be raised
or lowered.
If your vehicle has
this feature, the
seat cushion height
adjustment handle is
located underneath
the front of the seat.
To adjust the height of the cushion, lift the handle
up and pull it forward. You can choose between
two settings.
Seat Height Adjustment Switch
15
Page 27 of 430
4. Push the latch plate into the buckle until
it clicks.
Pull up on the latch plate to make sure it is
secure. If the belt is not long enough,
seeSafety Belt Extender on page 41.
Make sure the release button on the buckle is
positioned so you would be able to unbuckle
the safety belt quickly if you ever had to.
5. Move the shoulder belt height adjuster to
the height that is right for you. Improper
shoulder belt height adjustment could reduce
the effectiveness of the safety belt in a
crash. SeeShoulder Belt Height Adjustment
on page 35.
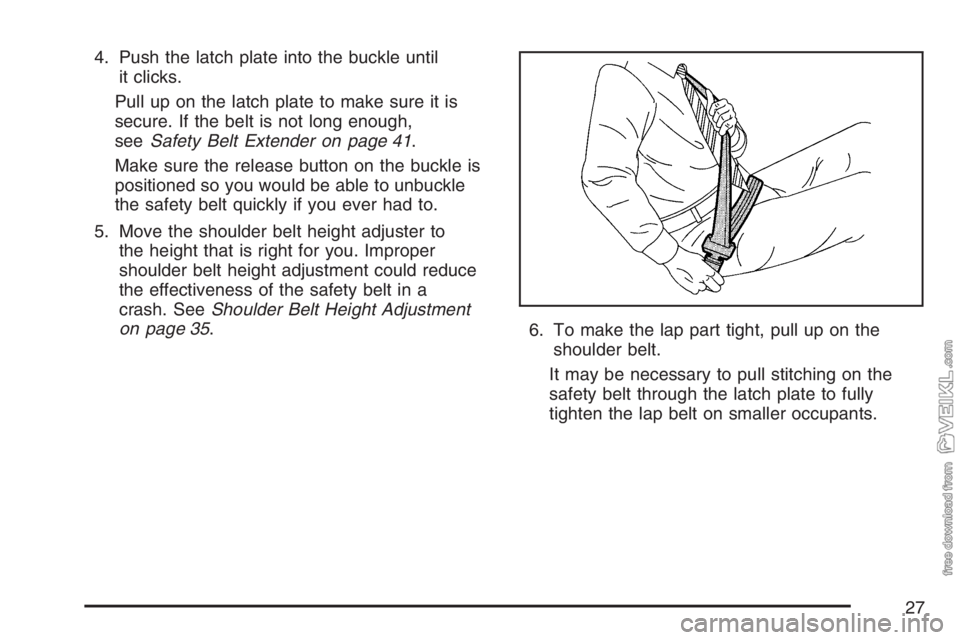
6. To make the lap part tight, pull up on the
shoulder belt.
It may be necessary to pull stitching on the
safety belt through the latch plate to fully
tighten the lap belt on smaller occupants.
27
Page 35 of 430
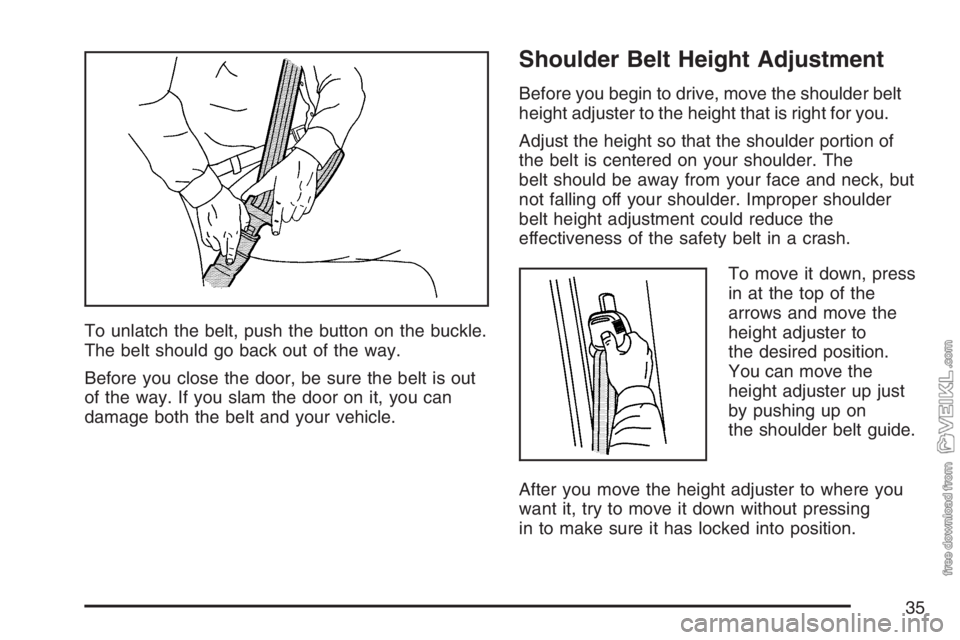
To unlatch the belt, push the button on the buckle.
The belt should go back out of the way.
Before you close the door, be sure the belt is out
of the way. If you slam the door on it, you can
damage both the belt and your vehicle.
Shoulder Belt Height Adjustment
Before you begin to drive, move the shoulder belt
height adjuster to the height that is right for you.
Adjust the height so that the shoulder portion of
the belt is centered on your shoulder. The
belt should be away from your face and neck, but
not falling off your shoulder. Improper shoulder
belt height adjustment could reduce the
effectiveness of the safety belt in a crash.
To move it down, press
in at the top of the
arrows and move the
height adjuster to
the desired position.
You can move the
height adjuster up just
by pushing up on
the shoulder belt guide.
After you move the height adjuster to where you
want it, try to move it down without pressing
in to make sure it has locked into position.
35
Page 40 of 430
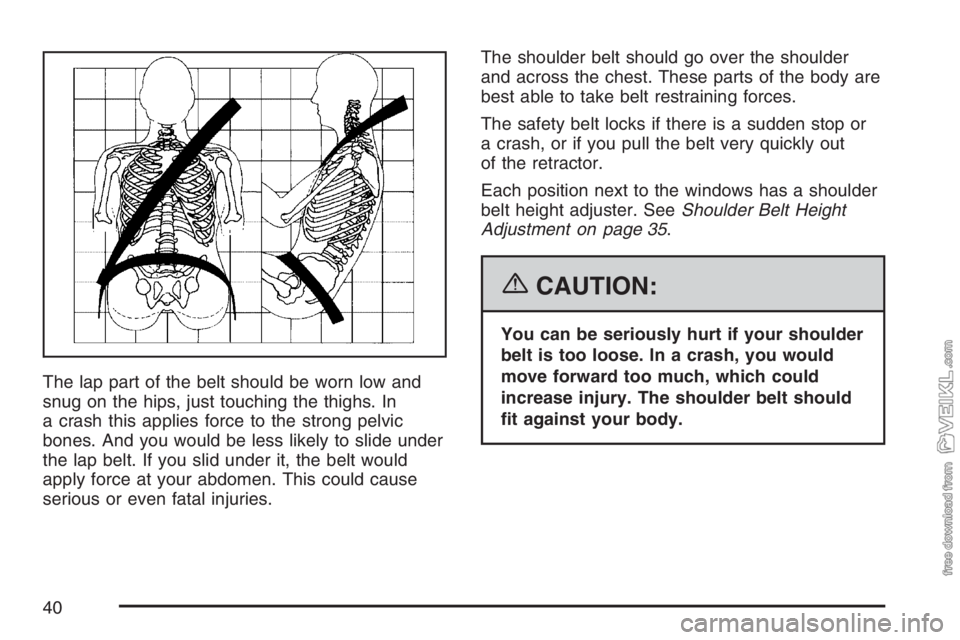
The lap part of the belt should be worn low and
snug on the hips, just touching the thighs. In
a crash this applies force to the strong pelvic
bones. And you would be less likely to slide under
the lap belt. If you slid under it, the belt would
apply force at your abdomen. This could cause
serious or even fatal injuries.The shoulder belt should go over the shoulder
and across the chest. These parts of the body are
best able to take belt restraining forces.
The safety belt locks if there is a sudden stop or
a crash, or if you pull the belt very quickly out
of the retractor.
Each position next to the windows has a shoulder
belt height adjuster. SeeShoulder Belt Height
Adjustment on page 35.
{CAUTION:
You can be seriously hurt if your shoulder
belt is too loose. In a crash, you would
move forward too much, which could
increase injury. The shoulder belt should
�t against your body.
40
Page 48 of 430
Q:What are the different types of add-on
child restraints?
A:Add-on child restraints, which are purchased by
the vehicle’s owner, are available in four basic
types. Selection of a particular restraint should
take into consideration not only the child’s
weight, height, and age but also whether or not
the restraint will be compatible with the motor
vehicle in which it will be used.
For most basic types of child restraints, there
are many different models available. When
purchasing a child restraint, be sure it is
designed to be used in a motor vehicle. If it is,
the restraint will have a label saying that it
meets federal motor vehicle safety standards.
The restraint manufacturer’s instructions
that come with the restraint state the weight
and height limitations for a particular child
restraint. In addition, there are many kinds
of restraints available for children with
special needs.
{CAUTION:
Newborn infants need complete support,
including support for the head and neck.
This is necessary because a newborn
infant’s neck is weak and its head weighs
so much compared with the rest of its
body. In a crash, an infant in a rear-facing
seat settles into the restraint, so the
crash forces can be distributed across
the strongest part of an infant’s body,
the back and shoulders. Infants always
should be secured in appropriate infant
restraints.
48
Page 81 of 430
Adding Equipment to Your
Airbag-Equipped Vehicle
Q:Is there anything I might add to the front
of the vehicle that could keep the airbags
from working properly?
A:Yes. If you add things that change your
vehicle’s frame, bumper system, height,
front end or side sheet metal, they may keep
the airbag system from working properly.
Also, the airbag system may not work properly
if you relocate any of the airbag sensors.
If you have any questions about this,
you should contact Customer Assistance
before you modify your vehicle. The phone
numbers and addresses for Customer
Assistance are in Step Two of theCustomer
Satisfaction Procedure on page 404.
Q:Because I have a disability, I have to get
my vehicle modi�ed. How can I �nd out
whether this will affect my airbag system?
A:Changing or moving any parts of the
front seats, safety belts, the airbag sensing
and diagnostic module, steering wheel,
the instrument panel, or airbag wiring can
affect the operation of the airbag system.
If you have questions, call Customer
Assistance. The phone numbers and
addresses for Customer Assistance are
in Step Two of the Customer Satisfaction
Procedure in this manual. SeeCustomer
Satisfaction Procedure on page 404.
81
Page 129 of 430
2. Repeat the burnishing procedure in Step 1 a
total of 10 times
3. Between stops, drive the vehicle about
2
1⁄2miles (4 km)
Notice:Driving with the parking brake on can
damage the transmission and brake system
parts. Verify that the parking brake is fully
released and the brake warning light is
off before driving.
Air Suspension
Your vehicle may have the Hendrickson HAS
Series single-axle air suspension which is
designed for a single-axle on-highway use. This
feature is available in 19,000 lb (8 613.3 kg),
21,000 lb (9 525.4 kg) and 23,000 lb (10 432.6 kg)
capacities.
Rear Air Suspension Dump Control
If your vehicle is equipped with the Hendrickson
HAS Series single-axle air suspension, you
may have this control. The air suspension dump
control allows the operator to lower the deck height
approximately 4.5 inches (11.5 cm) from the
normal frame height.
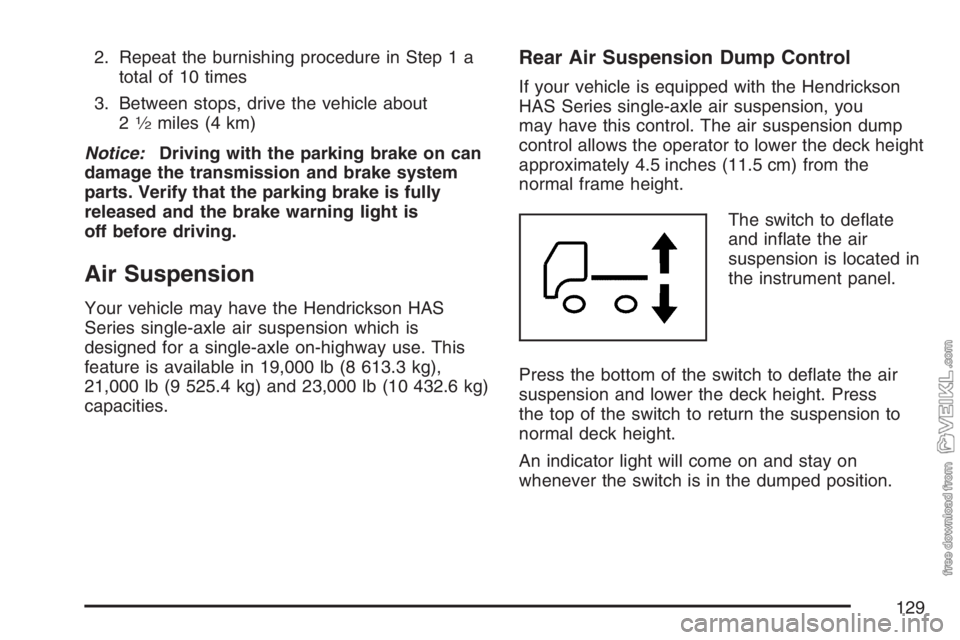
The switch to deflate
and inflate the air
suspension is located in
the instrument panel.
Press the bottom of the switch to deflate the air
suspension and lower the deck height. Press
the top of the switch to return the suspension to
normal deck height.
An indicator light will come on and stay on
whenever the switch is in the dumped position.
129
Page 299 of 430
Four-Wheel Disc Brakes
(Hydraulic Only)
Your vehicle has four-wheel disc brakes.
Some driving conditions or climates may cause a
brake squeal when the brakes are first applied
or lightly applied. This does not mean something
is wrong with the brakes.
Brake linings should always be replaced as
complete axle sets.
Four-Wheel and Six-Wheel Drum
Brakes (Air Only)
The brake drums should be removed and
inspected each time the tires are removed for
rotation or changing. When you have the
front brakes replaced, have the rear brakes
inspected, too.
Brake linings should always be replaced as
complete axle sets.
Brake Pedal Travel
See your dealer if the brake pedal does not return
to normal height, or if there is a rapid increase in
pedal travel. This could be a sign that brake service
is needed.
Brake Adjustment
Every time you make a brake stop, the brakes
adjust for wear.
Brake Adjustment on Air Braked
Vehicles
Your vehicle has automatic slack adjusters.
Every time you make a brake stop, the brakes
automatically adjust for wear. Slack adjusters
should never be manually adjusted to correct
excessive brake chamber pushrod stroke.
Excessive brake chamber pushrod stroke means
that the brake system needs to be serviced by
a qualified service technician.
Notice:Do not manually adjust automatic slack
adjusters. Manual adjustment of the automatic
slack adjusters can result in a degradation of
the slack adjuster performance over time.
If the brake chamber pushrod stroke is out of
adjustment, the brake system needs to be
serviced by a quali�ed service technician.
299