headlamp CHEVROLET TRAIL BLAZER 2008 1.G User Guide
[x] Cancel search | Manufacturer: CHEVROLET, Model Year: 2008, Model line: TRAIL BLAZER, Model: CHEVROLET TRAIL BLAZER 2008 1.GPages: 472, PDF Size: 2.57 MB
Page 146 of 472
There is a delay in the transition between the daytime
and nighttime operation of the Daytime Running
Lamps (DRL) and the automatic headlamp systems,
so that driving under bridges or bright overhead street
lights does not affect the system. The DRL and
automatic headlamp system are only affected when the
light sensor sees a change in lighting lasting longer
than the delay.
If you start your vehicle in a dark garage, the automatic
headlamp system comes on after the transmission is
shifted out of PARK (P). Once you leave the garage, it
will take about one minute for the automatic headlamp
system to change to DRL if it is light outside. During that
delay, the instrument panel cluster might not be as
bright as usual. Make sure the instrument panel
brightness control is in the full bright position.
If the vehicle is running and the automatic headlamp
system is already on, it can be turned off by turning and
releasing the headlamp control at the off position.
The automatic headlamp system stays off until you turn
and release the headlamp control at the off position
again. SeeHeadlamps on page 3-14.Fog Lamps
Your vehicle may have this feature. Use your fog lamps
for better vision in foggy or misty conditions. Your
ignition must be in RUN for your fog lamps to work.
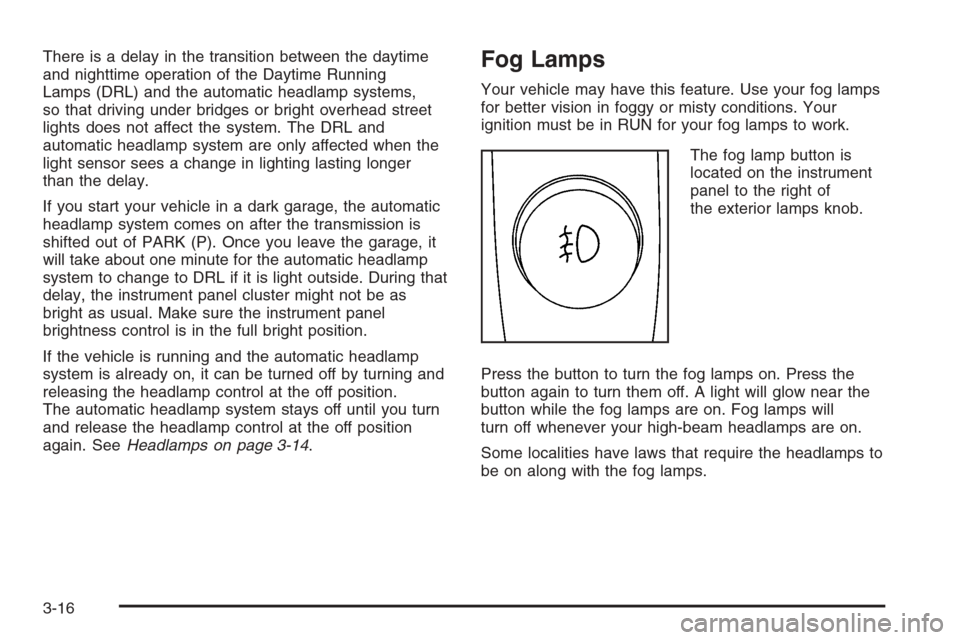
The fog lamp button is
located on the instrument
panel to the right of
the exterior lamps knob.
Press the button to turn the fog lamps on. Press the
button again to turn them off. A light will glow near the
button while the fog lamps are on. Fog lamps will
turn off whenever your high-beam headlamps are on.
Some localities have laws that require the headlamps to
be on along with the fog lamps.
3-16
Page 149 of 472
A high electrical load occurs when several of the
following loads are on: headlamps, high beams, fog
lamps, rear window defogger, climate control fan at high
speed, heated seats, engine cooling fans, trailer
loads, and loads plugged into accessory power outlets.
EPM works to prevent excessive discharge of the
battery. It does this by balancing the generator’s output
and the vehicle’s electrical needs. It can increase
engine idle speed to generate more power, whenever
needed. It can temporarily reduce the power demands of
some accessories.
Normally, these actions occur in steps or levels, without
being noticeable. In rare cases at the highest levels
of corrective action, this action may be noticeable to
the driver. If so, a Driver Information Center (DIC)
message might be displayed, such as Battery Saver
Active or Service Battery Charging System. If this
message is displayed, it is recommended that the
driver reduce the electrical loads as much as possible.
SeeDIC Warnings and Messages on page 3-53.Battery Run-Down Protection
This feature shuts off the dome, courtesy, and vanity
lamps if they are left on for more than 20 minutes
when the ignition is off. This will keep the battery from
running down.
If the battery run-down protection shuts off the interior
lamps, it may be necessary to do one of the following to
return to normal operation:
Shut off all lamps and close all doors.
Turn the ignition key to RUN.
This feature will also turn off the parking lamps and
headlamps under most circumstances, if they are left on.
If you would like to turn them back on, turn the exterior
lamps knob.
3-19
Page 177 of 472
Highbeam On Light
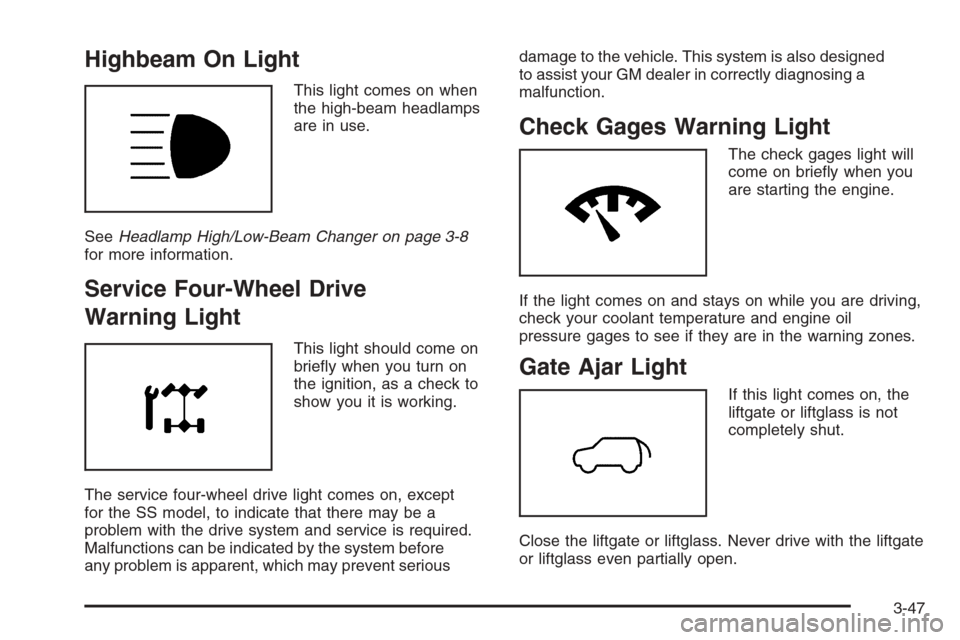
This light comes on when
the high-beam headlamps
are in use.
SeeHeadlamp High/Low-Beam Changer on page 3-8
for more information.
Service Four-Wheel Drive
Warning Light
This light should come on
brie�y when you turn on
the ignition, as a check to
show you it is working.
The service four-wheel drive light comes on, except
for the SS model, to indicate that there may be a
problem with the drive system and service is required.
Malfunctions can be indicated by the system before
any problem is apparent, which may prevent seriousdamage to the vehicle. This system is also designed
to assist your GM dealer in correctly diagnosing a
malfunction.
Check Gages Warning Light
The check gages light will
come on brie�y when you
are starting the engine.
If the light comes on and stays on while you are driving,
check your coolant temperature and engine oil
pressure gages to see if they are in the warning zones.
Gate Ajar Light
If this light comes on, the
liftgate or liftglass is not
completely shut.
Close the liftgate or liftglass. Never drive with the liftgate
or liftglass even partially open.
3-47
Page 188 of 472
DIC Vehicle Customization
Your vehicle may have customization capabilities that
allow you to program some features to one setting
based on your preference. All of the customizable
options listed may not be available on your vehicle.
Only the options available display on the Driver
Information Center (DIC).
The default settings for the customization features were
set when your vehicle left the factory, but may have
been changed from their default state since then.
To change feature preferences, make sure the ignition
is on and the vehicle is in PARK (P). To avoid
excessive drain on the battery, it is recommended that
the headlamps are turned off.
Press the customization button to scroll through the
available customizable options.
After pressing the customization button, VEHICLE
SETTINGS momentarily displays before going to a
customization option.
Lock Doors
Press the customization button until LOCK DOORS: IN
GEAR appears in the display. To select your preference
for automatic locking, press the select button while LOCK
DOORS: IN GEAR is displayed on the DIC. Pressing the
select button will scroll through the following settings:
LOCK DOORS: IN GEAR (default):The doors will lock
when the vehicle is shifted out of PARK (P).
LOCK DOORS: WITH SPEED:The doors will lock
when the vehicle speed is above 8 mph (13 km/h) for
three seconds.
To select a setting and move on to the next feature,
press the customization button while the desired setting
is displayed on the DIC.
SeeProgrammable Automatic Door Locks on page 2-8
for more information.
3-58
Page 190 of 472
Unlock Feedback
Press the customization button until UNLOCK
FEEDBACK: LAMPS appears in the display. To select
your preference for the feedback you will receive
when unlocking the vehicle with the Remote Keyless
Entry (RKE) transmitter, press the select button
while UNLOCK FEEDBACK: LAMPS is displayed on the
DIC. Pressing the select button will scroll through the
following settings:
UNLOCK FEEDBACK: LAMPS (default):The parking
lamps will �ash each time you press the button with
the unlock symbol on the RKE transmitter.
UNLOCK FEEDBACK: HORN:The horn will chirp the
second time you press the button with the unlock
symbol on the RKE transmitter.
UNLOCK FEEDBACK: BOTH:The parking lamps will
�ash each time you press the button with the unlock
symbol on the RKE transmitter and the horn will
chirp the second time you press the unlock button.
UNLOCK FEEDBACK: OFF:There will be no feedback
when unlocking the vehicle.
To select a setting and move on to the next feature,
press the customization button while the desired setting
is displayed on the DIC.
Headlamp Delay
Press the customization button until HEADLAMP
DELAY: 10 SEC appears in the display. To select your
preference for how long the headlamps will stay on
after you turn off the vehicle, press the select button
while HEADLAMP DELAY: 10 SEC is displayed on the
DIC. Pressing the select button will scroll through
the following settings:
HEADLAMP DELAY: 10 SEC (Seconds) (default):
The headlamps will stay on for 10 seconds.
HEADLAMP DELAY: 20 SEC:The headlamps will stay
on for 20 seconds.
HEADLAMP DELAY: 40 SEC:The headlamps will stay
on for 40 seconds.
HEADLAMP DELAY: 1 MIN (Minute):The headlamps
will stay on for 1 minute.
HEADLAMP DELAY: 2 MIN:The headlamps will stay
on for 2 minutes.
HEADLAMP DELAY: 3 MIN:The headlamps will stay
on for 3 minutes.
HEADLAMP DELAY: OFF:The headlamps will not
turn on.
To select a setting and move on to the next feature,
press the customization button while the desired setting
is displayed on the DIC.
3-60
Page 191 of 472
Perimeter Lights
Press the customization button until PERIMETER
LIGHTS: ON appears in the display. To select your
preference for perimeter lighting, press the select button
while PERIMETER LIGHTS: ON is displayed on the
DIC. Pressing the select button will scroll through
the following settings:
PERIMETER LIGHTS: ON (default):The headlamps
and back-up lamps will come on for 40 seconds,
if it is dark enough outside, when you unlock the vehicle
with the Remote Keyless Entry (RKE) transmitter.
PERIMETER LIGHTS: OFF:The perimeter lights will
not come on when you unlock the vehicle with the
RKE transmitter.
To select a setting and move on to the next feature,
press the customization button while the desired setting
is displayed on the DIC.
Easy Exit Seat
Press the customization button until EASY EXIT SEAT:
OFF appears in the display. To select your preference
for seat position exit, press the select button while EASY
EXIT SEAT: OFF is displayed on the DIC. Pressing
the select button will scroll through the following settings:
EASY EXIT SEAT: OFF (default):No seat exit recall
will occur.
EASY EXIT SEAT: ON:The driver’s seat will move to
the exit position when the key is removed from the
ignition.
To select a setting and move on to the next feature,
press the customization button while the desired setting
is displayed on the DIC.
See “Easy Exit Seat” underMemory Seat, Mirrors, and
Pedals on page 1-4for more information.
3-61
Page 193 of 472
Alarm Warning
Press the customization button until ALARM WARNING:
BOTH appears in the display. To select your preference
for alarm warning, press the select button while
ALARM WARNING: BOTH is displayed on the DIC.
Pressing the select button will scroll through the
following settings:
ALARM WARNING: BOTH (default):The headlamps
will �ash and the horn will chirp when the alarm is
active.
ALARM WARNING: HORN:The horn will chirp when
the alarm is active.
ALARM WARNING: LAMPS:The headlamps will �ash
when the alarm is active.
ALARM WARNING: OFF:There will be no alarm
warning on activation.
To select a setting and move on to the next feature,
press the customization button while the desired setting
is displayed on the DIC.
SeeContent Theft-Deterrent on page 2-15for more
information.
Language
Press the customization button until LANGUAGE:
ENGLISH appears in the display. To select your
preference for display language, press the select button
while LANGUAGE: ENGLISH is displayed on the
DIC. Pressing the select button will scroll through the
following settings:
ENGLISH (default):All messages will appear in English.
FRANCAIS:All messages will appear in French.
ESPANOL:All messages will appear in Spanish.
To select a setting and move on to the next feature,
press the customization button while the desired setting
is displayed on the DIC.
If you accidentally choose a language that you do not
want or understand, press and hold the customization
button and the trip information button at the same
time. The DIC will begin scrolling through the languages
in their particular language. English will be in English,
Francais will be in French, and Espanol will be in
Spanish. When you see the language that you would
like, release both buttons. The DIC will then display the
information in the language you chose.
You can also scroll through the different languages by
pressing and holding the trip reset stem for four
seconds, as long as you are in the odometer mode.
3-63
Page 257 of 472
Driving Uphill
Once you decide you can safely drive up the hill, you
need to take some special steps.
Use a low gear and get a �rm grip on the steering
wheel.
Get a smooth start up the hill and try to maintain
your speed. Do not use more power than you
need, because you do not want the wheels to start
spinning or sliding.
{CAUTION:
Turning or driving across steep hills can be
dangerous. You could lose traction, slide
sideways, and possibly roll over. You could be
seriously injured or killed. When driving up
hills, always try to go straight up.
Try to drive straight up the hill if at all possible. If
the path twists and turns, you might want to �nd
another route.
Ease up on your speed as you approach the top of
the hill.
Attach a �ag to the vehicle to make you more
visible to approaching traffic on trails or hills.
Sound the horn as you approach the top of the hill
to let opposing traffic know you are there.
Use your headlamps even during the day. They
make your vehicle more visible to oncoming
traffic.
{CAUTION:
Driving to the top (crest) of a hill at full speed
can cause an accident. There could be a
drop-off, embankment, cliff, or even another
vehicle. You could be seriously injured or
killed. As you near the top of a hill, slow down
and stay alert.
There are some things you should do if the vehicle stalls,
or is about to stall, and you cannot make it up the hill:
Push the brake pedal to stop the vehicle and keep it
from rolling backwards. Also, apply the parking
brake.
If the engine is still running, shift the transmission to
REVERSE (R), release the parking brake, and slowly
back down the hill in REVERSE (R).
4-19
Page 264 of 472
Driving at Night
Night driving is more dangerous than day driving because
some drivers are likely to be impaired — by alcohol or
drugs, with night vision problems, or by fatigue.
Night driving tips include:
Drive defensively.
Do not drink and drive.
Reduce headlamp glare by adjusting the inside
rearview mirror.
Slow down and keep more space between you and
other vehicles because headlamps can only light up
so much road ahead.
Watch for animals.
When tired, pull off the road.
Do not wear sunglasses.
Avoid staring directly into approaching headlamps.
Keep the windshield and all glass on your vehicle
clean — inside and out.
Keep your eyes moving, especially during turns or
curves.
No one can see as well at night as in the daytime. But,
as we get older, these differences increase. A
50-year-old driver might need at least twice as much
light to see the same thing at night as a 20-year-old.
Driving in Rain and on Wet Roads
Rain and wet roads can reduce vehicle traction
and affect your ability to stop and accelerate. Always
drive slower in these types of driving conditions
and avoid driving through large puddles and
deep-standing or �owing water.
{CAUTION:
Wet brakes can cause crashes. They might not
work as well in a quick stop and could cause
pulling to one side. You could lose control of
the vehicle.
After driving through a large puddle of water or
a car/vehicle wash, lightly apply the brake pedal
until the brakes work normally.
Flowing or rushing water creates strong forces.
Driving through �owing water could cause your
vehicle to be carried away. If this happens, you
and other vehicle occupants could drown. Do
not ignore police warnings and be very cautious
about trying to drive through �owing water.
4-26
Page 270 of 472
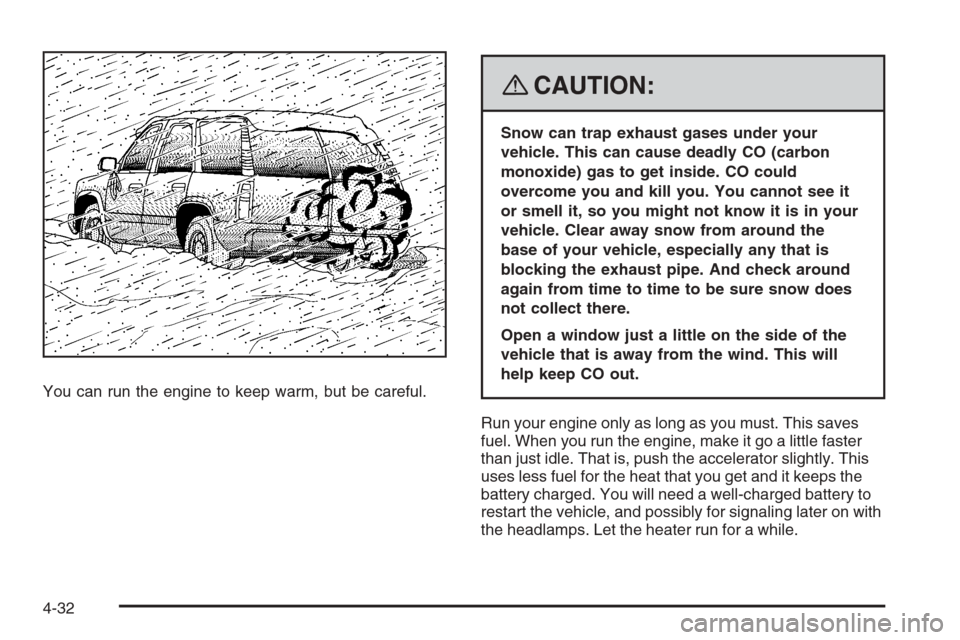
You can run the engine to keep warm, but be careful.
{CAUTION:
Snow can trap exhaust gases under your
vehicle. This can cause deadly CO (carbon
monoxide) gas to get inside. CO could
overcome you and kill you. You cannot see it
or smell it, so you might not know it is in your
vehicle. Clear away snow from around the
base of your vehicle, especially any that is
blocking the exhaust pipe. And check around
again from time to time to be sure snow does
not collect there.
Open a window just a little on the side of the
vehicle that is away from the wind. This will
help keep CO out.
Run your engine only as long as you must. This saves
fuel. When you run the engine, make it go a little faster
than just idle. That is, push the accelerator slightly. This
uses less fuel for the heat that you get and it keeps the
battery charged. You will need a well-charged battery to
restart the vehicle, and possibly for signaling later on with
the headlamps. Let the heater run for a while.
4-32