menu CHEVROLET TRAX 2023 Owners Manual
[x] Cancel search | Manufacturer: CHEVROLET, Model Year: 2023, Model line: TRAX, Model: CHEVROLET TRAX 2023Pages: 280, PDF Size: 12.13 MB
Page 35 of 280
Chevrolet TRAX Owner Manual (GMNA-Localizing-U.S./Canada-15498927) -
2022 - CRC - 5/27/21
34 Seats and Restraints
The passenger seat may take longer to
heat up.
Remote Start Heated Seats
If available, the heated seats can be turned
on automatically during a remote start
when it is cold outside. The heated seats
will be canceled when the ignition is turned
on. Press the control to use the heated seats
after the vehicle is started.
The heated seat indicator lights do not turn
on during a remote start.
The temperature performance of an
unoccupied seat may be reduced. This is
normal.
The heated seats will not turn on during a
remote start unless the heated seat feature
is enabled in the vehicle personalization
menu. SeeRemote Vehicle Start 018 and
Vehicle Personalization 092.
Rear Seats
Rear Seat Reminder
If equipped, the message REAR SEAT
REMINDER LOOK IN REAR SEAT displays
under certain conditions indicating there
may be an item or passenger in the rear
seat. Check before exiting the vehicle.
This feature will activate when a second row
door is opened while the vehicle is on or up
to 10 minutes before the vehicle is turned
on. There will be an alert when the vehicle
is turned off. The alert does not directly
detect objects in the rear seat; instead,
under certain conditions, it detects when a
rear door is opened and closed, indicating
that there may be something in the
rear seat.
The feature is active only once each time
the vehicle is turned on and off, and will
require reactivation by opening and closing
the second row doors. There may be an
alert even when there is nothing in the rear
seat; for example, if a child entered the
vehicle through the rear door and left the
vehicle without the vehicle being shut off.
The feature can be turned on or off. See
Vehicle Personalization 092.
Folding the Seatback
Either side of the seatback can be folded
down for more cargo space. Fold a seatback
only when the vehicle is not moving.
Caution
Folding a rear seat with the seat belts
still fastened may cause damage to the
seat or the seat belts. Always unbuckle
the seat belts and return them to their
normal stowed position before folding a
rear seat.
Caution
Folding the rear seatback prior to tilting
the seat cushion forward may damage
the rear seat. Always tilt the rear seat
cushion forward before folding the
seatback.
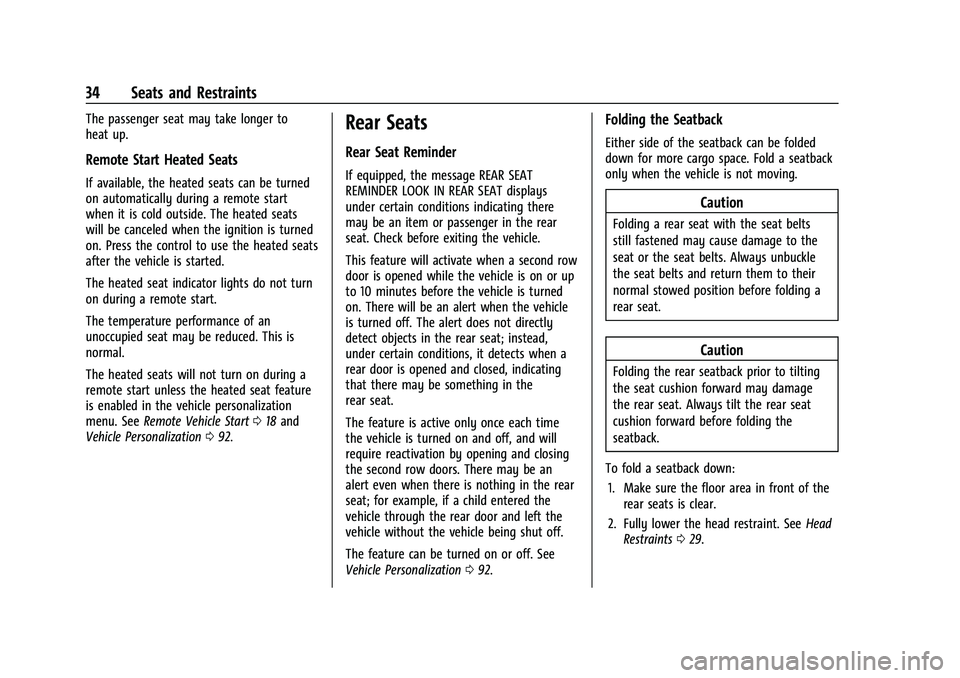
To fold a seatback down: 1. Make sure the floor area in front of the rear seats is clear.
2. Fully lower the head restraint. See Head
Restraints 029.
Page 79 of 280
Chevrolet TRAX Owner Manual (GMNA-Localizing-U.S./Canada-15498927) -
2022 - CRC - 5/27/21
78 Instruments and Controls
Compass
The vehicle may have a compass display in
the Driver Information Center (DIC).
Setting the Compass Zone
Under certain circumstances, such as during
a long trip or moving to a new area, the
compass zone will need to be reset. If the
compass is not set to the correct zone, it
may give false readings. The compass zone
should be set to the area in which the
vehicle is currently traveling.
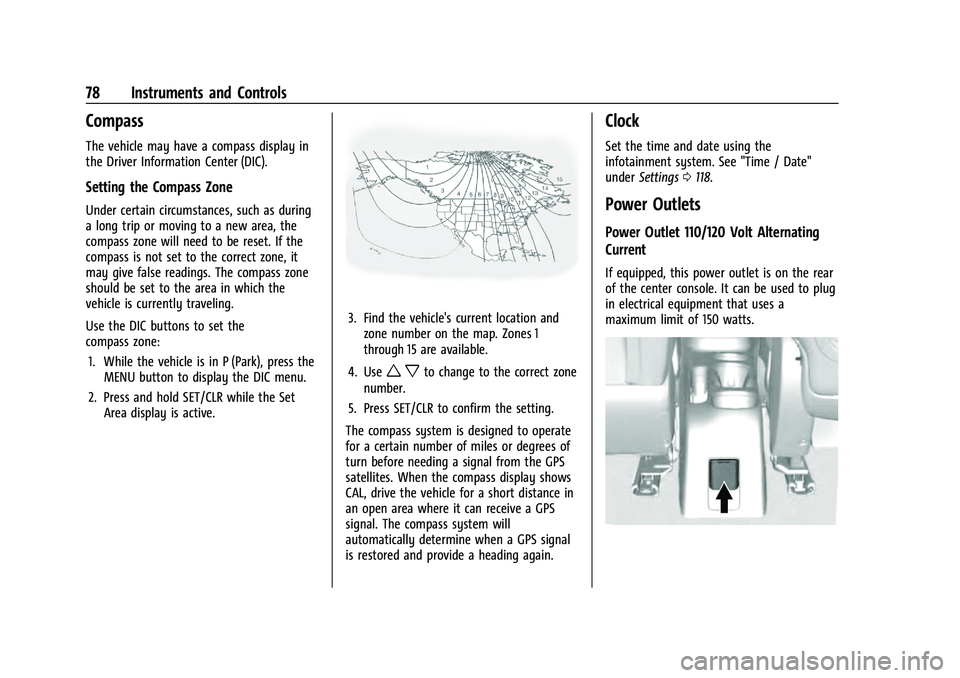
Use the DIC buttons to set the
compass zone:1. While the vehicle is in P (Park), press the MENU button to display the DIC menu.
2. Press and hold SET/CLR while the Set Area display is active.
3. Find the vehicle's current location andzone number on the map. Zones 1
through 15 are available.
4. Use
w xto change to the correct zone
number.
5. Press SET/CLR to confirm the setting.
The compass system is designed to operate
for a certain number of miles or degrees of
turn before needing a signal from the GPS
satellites. When the compass display shows
CAL, drive the vehicle for a short distance in
an open area where it can receive a GPS
signal. The compass system will
automatically determine when a GPS signal
is restored and provide a heading again.
Clock
Set the time and date using the
infotainment system. See "Time / Date"
under Settings 0118.
Power Outlets
Power Outlet 110/120 Volt Alternating
Current
If equipped, this power outlet is on the rear
of the center console. It can be used to plug
in electrical equipment that uses a
maximum limit of 150 watts.
Page 91 of 280
Chevrolet TRAX Owner Manual (GMNA-Localizing-U.S./Canada-15498927) -
2022 - CRC - 5/27/21
90 Instruments and Controls
Information Displays
Driver Information Center (DIC)
The DIC displays information about the
vehicle. It also displays warning messages if
a system problem is detected. All messages
appear in the DIC display in the instrument
cluster.
DIC Operation and Displays
On some models, the trip odometer reset
stem is used to operate the DIC. On other
models, the controls for the DIC are on the
turn signal lever.
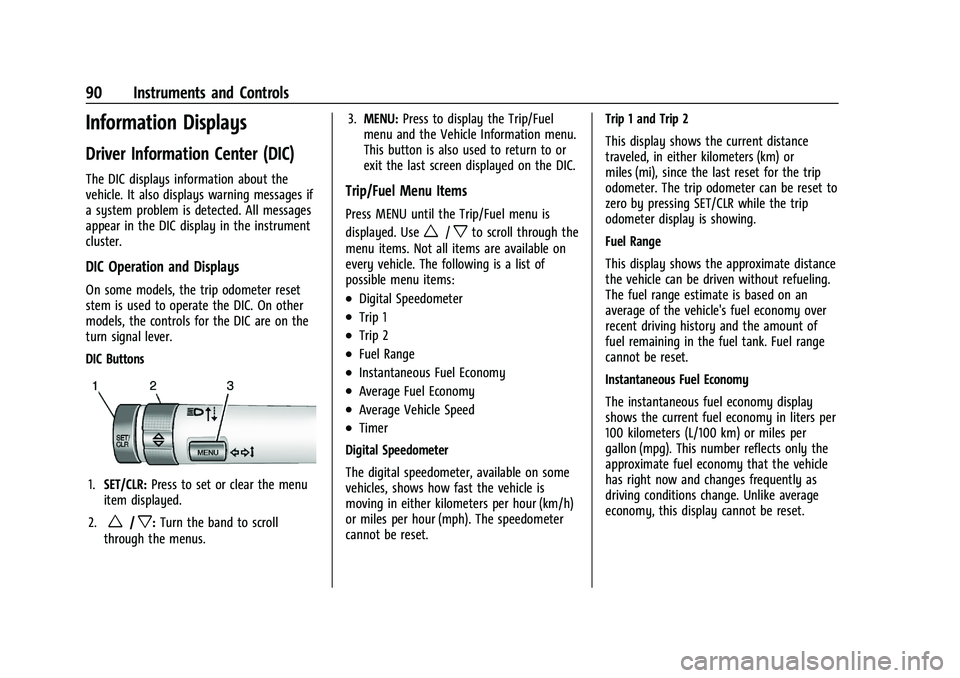
DIC Buttons
1.SET/CLR: Press to set or clear the menu
item displayed.
2.
w/x: Turn the band to scroll
through the menus. 3.
MENU: Press to display the Trip/Fuel
menu and the Vehicle Information menu.
This button is also used to return to or
exit the last screen displayed on the DIC.
Trip/Fuel Menu Items
Press MENU until the Trip/Fuel menu is
displayed. Use
w/xto scroll through the
menu items. Not all items are available on
every vehicle. The following is a list of
possible menu items:
.Digital Speedometer
.Trip 1
.Trip 2
.Fuel Range
.Instantaneous Fuel Economy
.Average Fuel Economy
.Average Vehicle Speed
.Timer
Digital Speedometer
The digital speedometer, available on some
vehicles, shows how fast the vehicle is
moving in either kilometers per hour (km/h)
or miles per hour (mph). The speedometer
cannot be reset. Trip 1 and Trip 2
This display shows the current distance
traveled, in either kilometers (km) or
miles (mi), since the last reset for the trip
odometer. The trip odometer can be reset to
zero by pressing SET/CLR while the trip
odometer display is showing.
Fuel Range
This display shows the approximate distance
the vehicle can be driven without refueling.
The fuel range estimate is based on an
average of the vehicle's fuel economy over
recent driving history and the amount of
fuel remaining in the fuel tank. Fuel range
cannot be reset.
Instantaneous Fuel Economy
The instantaneous fuel economy display
shows the current fuel economy in liters per
100 kilometers (L/100 km) or miles per
gallon (mpg). This number reflects only the
approximate fuel economy that the vehicle
has right now and changes frequently as
driving conditions change. Unlike average
economy, this display cannot be reset.
Page 92 of 280
Chevrolet TRAX Owner Manual (GMNA-Localizing-U.S./Canada-15498927) -
2022 - CRC - 5/27/21
Instruments and Controls 91
Average Fuel Economy
This display shows the approximate average
liters per 100 kilometers (L/100 km) or miles
per gallon (mpg). This number is calculated
based on the number of L/100 km (mpg)
recorded since the last time this menu item
was reset. This number reflects only the
approximate average fuel economy that the
vehicle has right now, and will change as
driving conditions change. The fuel economy
can be reset by pressing SET/CLR while the
Average Fuel Economy display is showing.
Average Vehicle Speed
This display shows the average speed of the
vehicle in kilometers per hour (km/h) or
miles per hour (mph). This average is
calculated based on the various vehicle
speeds recorded since the last reset of this
value. The average speed can be reset by
pressing SET/CLR while the Average Vehicle
Speed display is showing.
Timer
Available on some vehicles, this display can
be used as a timer. To start the timer, press
SET/CLR while Timer is displayed. The
display will show the amount of time that
has passed since the timer was last reset,
not including time the ignition is off. Timewill continue to be counted as long as the
ignition is on, even if another display is
being shown on the DIC. The timer will
record up to 99 hours, 59 minutes, and
59 seconds (99:59:59) after which the
display will return to zero. To stop the
timer, press SET/CLR briefly while Timer is
displayed. To reset the timer to zero, press
and hold SET/CLR.
Vehicle Information Menu Items
Press MENU on the turn signal lever until
Vehicle Information menu is displayed. Use
w/xto scroll through the following
possible menu items:
.Display Units
.Tire Pressure
.Remaining Oil Life
Display Units
Move
w/xto switch between metric or
US when the Unit display is active. Press
SET/CLR to confirm the setting. This will
change the displays on the cluster and DIC
to either metric or English (US)
measurements. Tire Pressure
The display will show a vehicle with the
approximate pressures of all four tires. Tire
pressure is displayed in either
kilopascal (kPa) or pounds per square
inch (psi). See
Tire Pressure Monitor System
0 206 and
Tire Pressure Monitor Operation 0206.
Remaining Oil Life
This menu is not available while the vehicle
is moving. This display shows an estimate of
the oil's remaining useful life. If REMAINING
OIL LIFE 99 % is displayed, that means 99%
of the current oil life remains.
When the remaining oil life is low, the
CHANGE ENGINE OIL SOON message will
appear on the display. The oil should
changed as soon as possible. See Engine Oil
0 172. In addition to the engine oil life
system monitoring the oil life, additional
maintenance is recommended. See
Maintenance Schedule 0235.
Remember, the Oil Life display must be
reset after each oil change. It will not reset
itself. Also, be careful not to reset the Oil
Life display accidentally at any time other
than when the oil has just been changed.
Page 93 of 280
Chevrolet TRAX Owner Manual (GMNA-Localizing-U.S./Canada-15498927) -
2022 - CRC - 5/27/21
92 Instruments and Controls
It cannot be reset accurately until the next
oil change. To reset, seeEngine Oil Life
System 0174.
Vehicle Messages
Messages displayed on the DIC indicate the
status of the vehicle or some action that
may be needed to correct a condition.
Multiple messages may appear one after
another.
The messages that do not require
immediate action can be acknowledged and
cleared by pressing SET/CLR. The messages
that require immediate action cannot be
cleared until that action is performed.
All messages should be taken seriously;
clearing the message does not correct the
problem.
If a SERVICE message appears, see your
dealer.
Follow the instructions given in the
messages. The system displays messages
regarding the following topics:
.Service Messages
.Fluid Levels
.Vehicle Security
.Brakes
.Ride Control Systems
.Driver Assistance Systems
.Cruise Control
.Lighting and Bulb Replacement
.Wiper/Washer Systems
.Doors and Windows
.Seat Belts
.Airbag Systems
.Engine and Transmission
.Tire Pressure
.Battery
Engine Power Messages
ENGINE POWER IS REDUCED
This message displays when the vehicle's
propulsion power is reduced. A reduction in
propulsion power can affect the vehicle's
ability to accelerate. If this message is on,
but there is no observed reduction in
performance, proceed to your destination.
Under certain conditions the performance
may be reduced the next time the vehicle is
driven. The vehicle may be driven while this
message is on, but maximum acceleration
and speed may be reduced. Anytime this message stays on, or displays repeatedly,
the vehicle should be taken to your dealer
for service as soon as possible.
Under certain operating conditions,
propulsion will be disabled. Try restarting
after the ignition has been off for
30 seconds.
Vehicle Speed Messages
SPEED LIMITED TO XXX KM/H (MPH)
This message shows that the vehicle speed
has been limited to the speed displayed. The
limited speed is a protection for various
propulsion and vehicle systems, such as
lubrication, thermal, brakes, suspension,
Teen Driver if equipped, or tires.
Vehicle Personalization
The following are all possible vehicle
personalization features. Depending on the
vehicle, some may not be available.
For System and Apps features and functions,
see
Settings 0118.
To access the vehicle personalization menu: 1. Touch the Settings icon on the Home Page on the infotainment display.
Page 94 of 280
Chevrolet TRAX Owner Manual (GMNA-Localizing-U.S./Canada-15498927) -
2022 - CRC - 5/27/21
Instruments and Controls 93
2. Touch the desired category to display alist of available options.
3. Touch to select the desired feature setting.
4. Touch
9orRto turn off or on a feature.
5. Touch
zto go to the top level of the
SETTINGS menu.
The menu may contain the following:
Rear Seat Reminder
This allows for a chime and a message when
the rear door has been opened before or
during operation of the vehicle.
Touch Off or On.
Collision / Detection Systems
Touch and the following may display:
.Park Assist
.Rear Camera Park Assist Symbols
.Rear Cross Traffic Alert
.Side Blind Zone Alert
Park Assist
This allows the feature to be turned on or
off. See Park Assist 0160.
Touch Off or On. Rear Camera Park Assist Symbols
This setting enables the Rear Camera Park
Assist Symbols. See
Park Assist0160.
Touch Off or On.
Rear Cross Traffic Alert
This allows the feature to be turned on or
off. See Rear Vision Camera (RVC) 0159.
Touch Off or On.
Side Blind Zone Alert
This allows the feature to be turned on or
off. See Side Blind Zone Alert (SBZA) 0161.
Touch Off or On.
Comfort and Convenience
Touch and the following may display:
.Chime Volume
.Auto Wipe in Reverse Gear
Chime Volume
This setting determines the chime volume
level.
Touch the controls to adjust the volume. Auto Wipe in Reverse Gear
This setting automatically turns on the rear
window wiper when the vehicle is in
R (Reverse) and the front wipers are on.
Touch Off or On.
Lighting
Touch and the following may display:
.Vehicle Locator Lights
.Exit Lighting
Vehicle Locator Lights
This setting flashes the headlamps when
you press
Kon the Remote Keyless Entry
(RKE) transmitter.
Touch Off or On.
Exit Lighting
This setting specifies how long the
headlamps stay on after you have turned
off and exited your vehicle.
Touch Off, 30 Seconds, 60 Seconds,
or 120 Seconds.
Power Door Locks
Touch and the following may display:
.Open Door Anti Lock Out
.Auto Door Unlock
Page 95 of 280
Chevrolet TRAX Owner Manual (GMNA-Localizing-U.S./Canada-15498927) -
2022 - CRC - 5/27/21
94 Instruments and Controls
.Delayed Door Lock
Open Door Anti Lock Out
This setting prevents the driver door from
locking when the door is open. If this
setting is on, the Delayed Door Lock menu
will not be available.
Touch Off or On.
Auto Door Unlock
This setting allows you to select which
doors will automatically unlock when the
vehicle is shifted into P (Park).
Touch Off, All Doors, or Driver Door.
Delayed Door Lock
This setting delays the locking of the
vehicle’s doors.
Touch Off or On.
Remote Lock, Unlock, and Start
Touch and the following may display:
.Remote Unlock Light Feedback
.Remote Lock Feedback
.Remote Door Unlock
.Remote Start Auto Heat Seats
.Passive Door Unlock
.Passive Door Lock
.Remote Left in Vehicle Alert
Remote Unlock Light Feedback
This setting flashes the exterior lamps when
you remotely unlock the vehicle.
Touch Off or Flash Lights.
Remote Lock Feedback
This setting specifies how the vehicle
responds when you remotely lock the
vehicle.
Touch Off, Lights and Horn, Lights Only,
or Horn Only.
Remote Door Unlock
This setting specifies whether all doors,
or just the driver door, unlock when pressing
Kon the RKE transmitter.
Touch All Doors or Driver Door.
Remote Start Auto Heat Seats
This setting automatically turns on the
heated seats when using the remote start
function on cold days. See Heated Front
Seats 033 and
Remote Vehicle Start 018.
Touch Off or On. Passive Door Unlock
This setting specifies which doors unlock
when using the button on the driver door
handle to unlock the vehicle.
Touch All Doors or Driver Door Only.
Passive Door Lock
This setting specifies whether the vehicle
will automatically lock, or lock and alert you
after all the doors are closed, and you walk
away from the vehicle with the RKE
transmitter. See
Remote Keyless Entry (RKE)
System Operation (Key Access) 09or
Remote Keyless Entry (RKE) System
Operation (Keyless Access) 012.
Touch Off, On with Horn Chirp, or On.
Remote Left in Vehicle Alert
This feature sounds an alert when the RKE
transmitter is left in the vehicle. This menu
also enables Remote No Longer in Vehicle
Alert.
Touch Off or On.
Teen Driver
See Teen Driver 0120.
Page 96 of 280
Chevrolet TRAX Owner Manual (GMNA-Localizing-U.S./Canada-15498927) -
2022 - CRC - 5/27/21
Instruments and Controls 95
Valet Mode
This will lock the infotainment system and
steering wheel controls. It may also limit
access to vehicle storage locations,
if equipped.
To enable valet mode:1. Enter a four-digit code on the keypad.
2. Touch Enter to go to the confirmation screen.
3. Re-enter the four-digit code.
Touch Lock or Unlock to lock or unlock the
system. Touch Back to go back to the
previous menu.
Page 106 of 280
Chevrolet TRAX Owner Manual (GMNA-Localizing-U.S./Canada-15498927) -
2022 - CRC - 5/27/21
Infotainment System 105
_SRC^:Press to select an audio source.
Toggle up or down to select the next or
previous favorite radio station, CD/MP3
track, USB file, iPod/iPhone song,
or Bluetooth music.
Toggle and hold up or down to fast forward
or reverse the radio stations, CD/MP3 tracks,
USB files, iPod/iPhone songs, or Bluetooth
music.
+
x− :Press + or −to increase or decrease
the volume.
Using the System
Infotainment Display Icons
Infotainment display icons show on the
screen when available. When a function is
unavailable, the icon may gray out. When a
function is selected, the icon may highlight.
Audio
Touch the Audio icon to display the active
audio source page. Examples of available
sources are AM, FM, SXM, MyMedia, USB,
and AUX.
Phone
Touch the Phone icon to display the Phone
main page. See Bluetooth (Overview) 0113
or
Bluetooth (Pairing and Using the Phone)
0 113.
Settings
Touch the Settings icon to display the
Settings menu. See Settings0118.
Apple CarPlay
Touch the Apple CarPlay icon to activate
Apple CarPlay (if equipped) after a
supported device is connected. See Apple
CarPlay and Android Auto 0117.
Android Auto
Touch the Android Auto icon to activate
Android Auto (if equipped) after a supported
device is connected. See Apple CarPlay and
Android Auto 0117.
OnStar Services
If equipped, touch the OnStar Services icon
to display the OnStar Services and Account
pages. See OnStar Overview 0261.
Shortcut Tray
The shortcut tray is at the bottom of the
screen. It displays three applications.
Infotainment Gestures
Use the following finger gestures to control
the infotainment system.
Touch/Tap
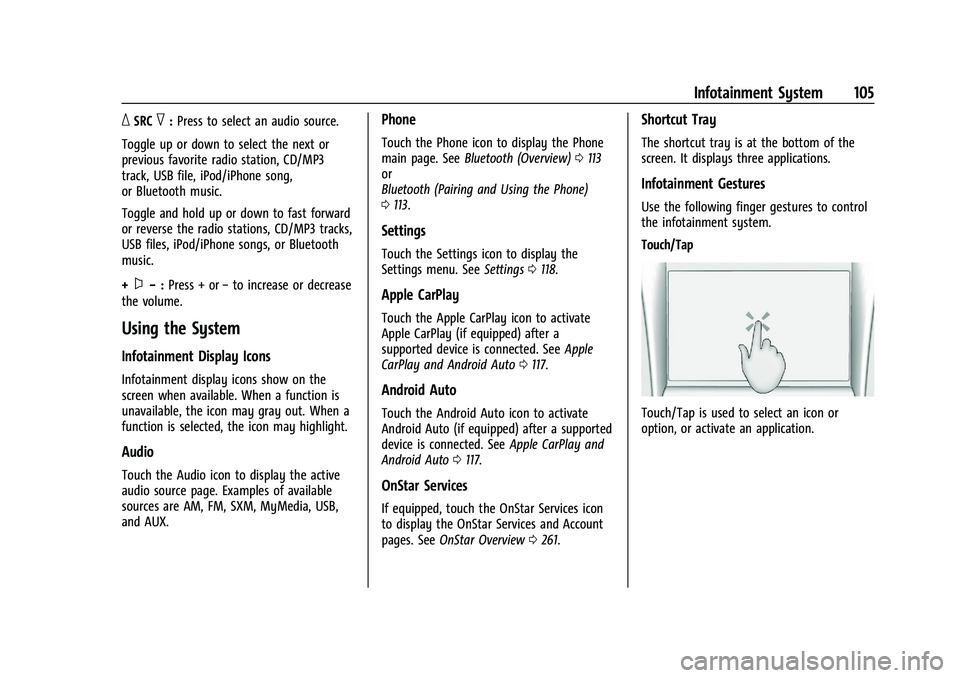
Touch/Tap is used to select an icon or
option, or activate an application.
Page 108 of 280
Chevrolet TRAX Owner Manual (GMNA-Localizing-U.S./Canada-15498927) -
2022 - CRC - 5/27/21
Infotainment System 107
Infotainment System Sound Menu
From any of the audio source main pages,
touch Sound to display the following:
Equalizer :Touch to adjust Bass, Midrange,
and Treble using the controls on the
infotainment display.
Fade/Balance : Touch to adjust using the
controls on the infotainment display or by
tapping/dragging the crosshair.
Finding a Station
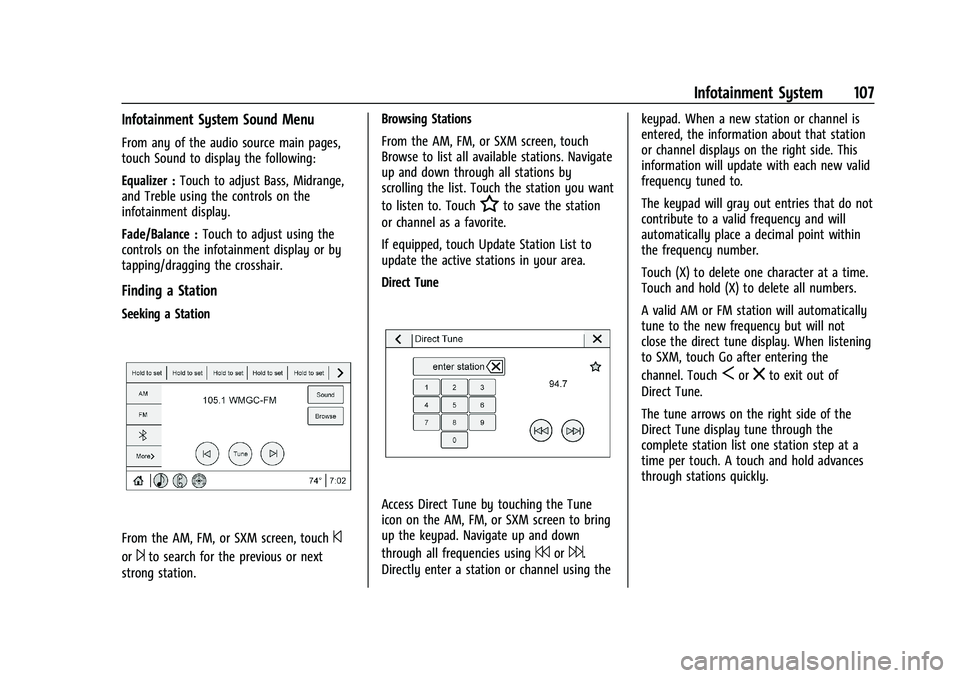
Seeking a Station
From the AM, FM, or SXM screen, touch©
or¨to search for the previous or next
strong station. Browsing Stations
From the AM, FM, or SXM screen, touch
Browse to list all available stations. Navigate
up and down through all stations by
scrolling the list. Touch the station you want
to listen to. Touch
Hto save the station
or channel as a favorite.
If equipped, touch Update Station List to
update the active stations in your area.
Direct Tune
Access Direct Tune by touching the Tune
icon on the AM, FM, or SXM screen to bring
up the keypad. Navigate up and down
through all frequencies using
7or6.
Directly enter a station or channel using the keypad. When a new station or channel is
entered, the information about that station
or channel displays on the right side. This
information will update with each new valid
frequency tuned to.
The keypad will gray out entries that do not
contribute to a valid frequency and will
automatically place a decimal point within
the frequency number.
Touch (X) to delete one character at a time.
Touch and hold (X) to delete all numbers.
A valid AM or FM station will automatically
tune to the new frequency but will not
close the direct tune display. When listening
to SXM, touch Go after entering the
channel. Touch
Sorzto exit out of
Direct Tune.
The tune arrows on the right side of the
Direct Tune display tune through the
complete station list one station step at a
time per touch. A touch and hold advances
through stations quickly.