window CHRYSLER SEBRING CONVERTIBLE 2010 3.G Owner's Manual
[x] Cancel search | Manufacturer: CHRYSLER, Model Year: 2010, Model line: SEBRING CONVERTIBLE, Model: CHRYSLER SEBRING CONVERTIBLE 2010 3.GPages: 457, PDF Size: 8.76 MB
Page 112 of 457
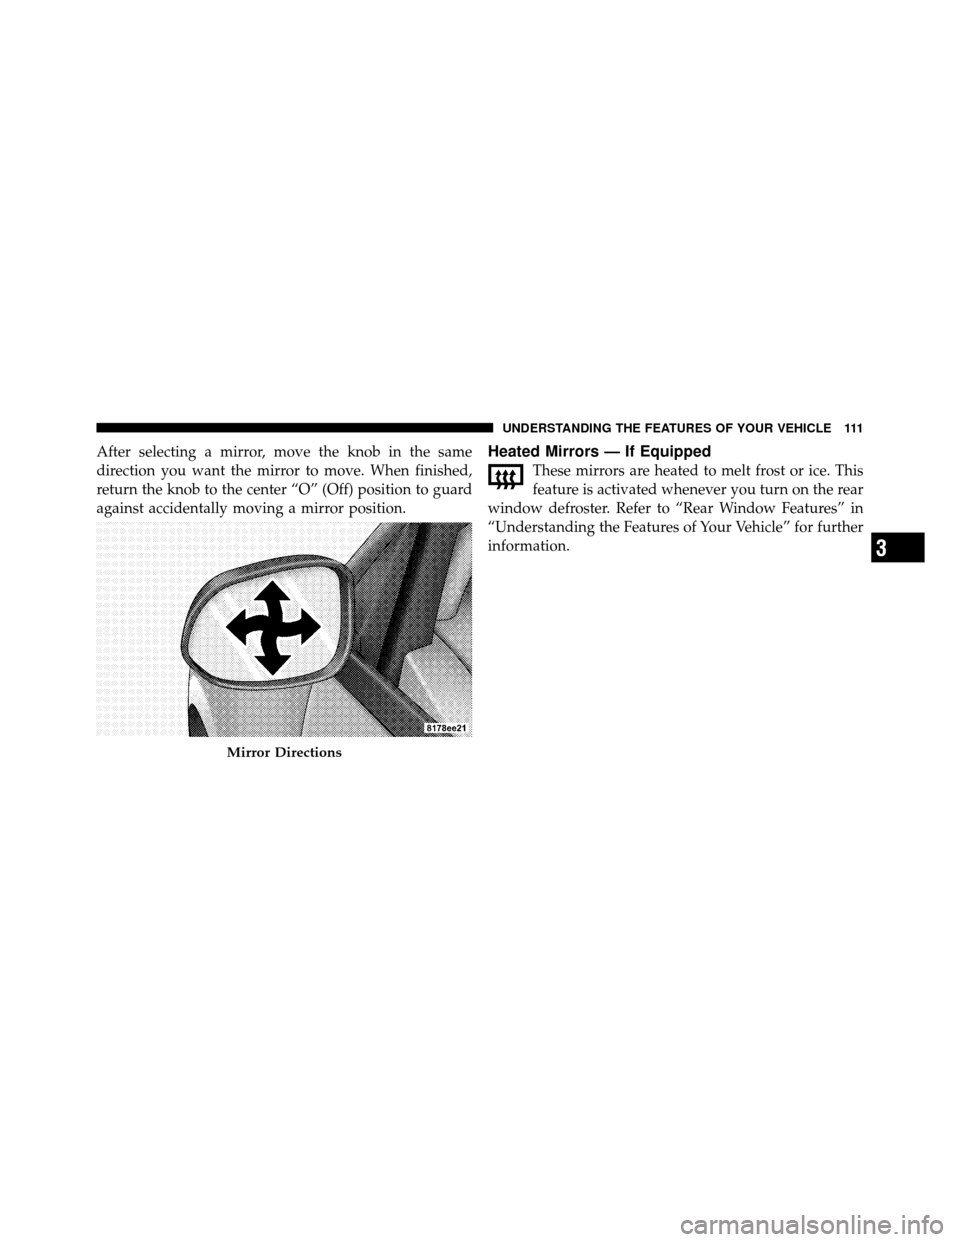
After selecting a mirror, move the knob in the same
direction you want the mirror to move. When finished,
return the knob to the center “O” (Off) position to guard
against accidentally moving a mirror position.Heated Mirrors — If Equipped
These mirrors are heated to melt frost or ice. This
feature is activated whenever you turn on the rear
window defroster. Refer to “Rear Window Features” in
“Understanding the Features of Your Vehicle” for further
information.
Mirror Directions
3
UNDERSTANDING THE FEATURES OF YOUR VEHICLE 111
Page 152 of 457
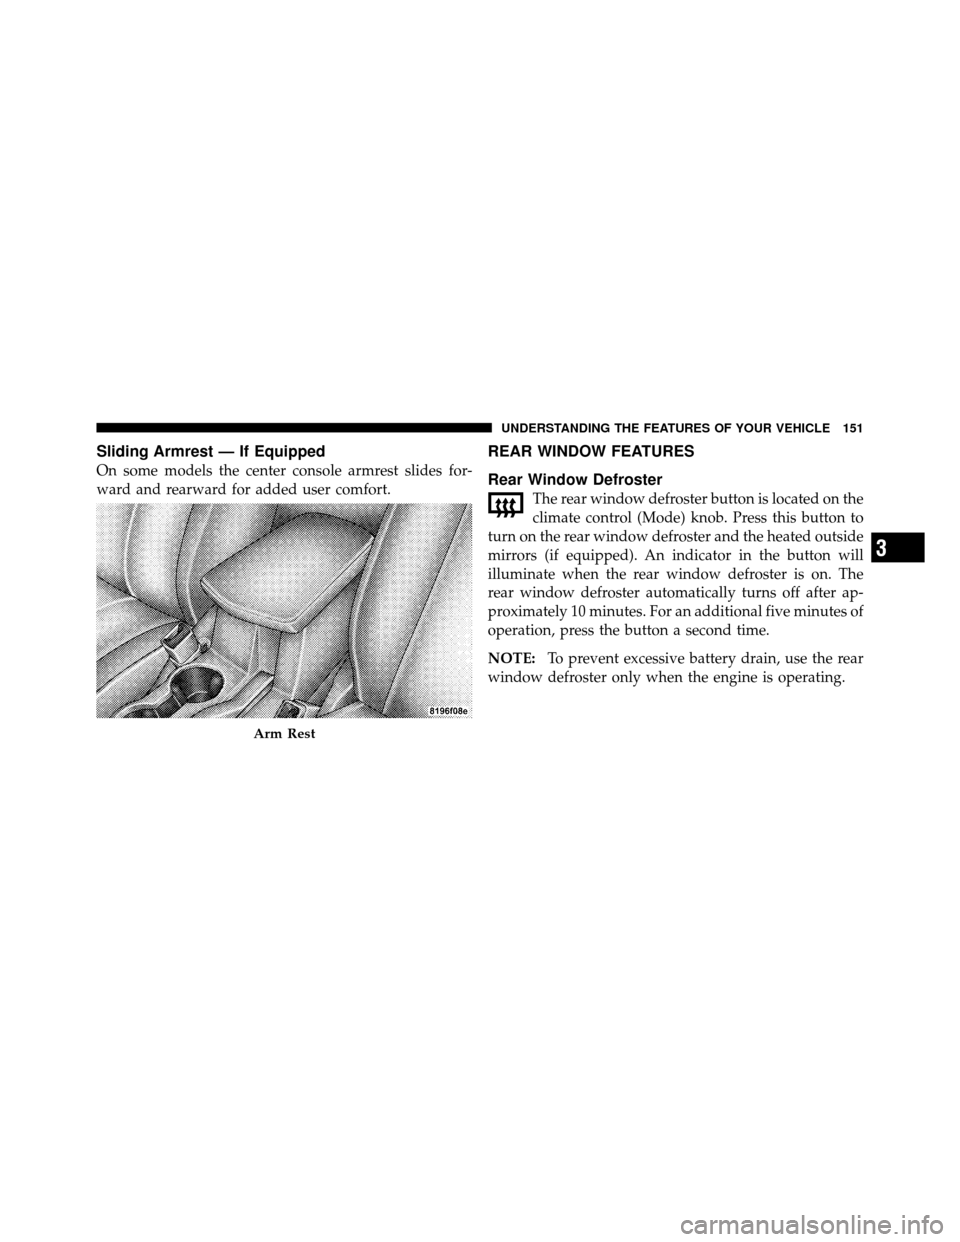
Sliding Armrest — If Equipped
On some models the center console armrest slides for-
ward and rearward for added user comfort.
REAR WINDOW FEATURES
Rear Window Defroster
The rear window defroster button is located on the
climate control (Mode) knob. Press this button to
turn on the rear window defroster and the heated outside
mirrors (if equipped). An indicator in the button will
illuminate when the rear window defroster is on. The
rear window defroster automatically turns off after ap-
proximately 10 minutes. For an additional five minutes of
operation, press the button a second time.
NOTE: To prevent excessive battery drain, use the rear
window defroster only when the engine is operating.
Arm Rest
3
UNDERSTANDING THE FEATURES OF YOUR VEHICLE 151
Page 153 of 457
CAUTION!
Failure to follow these cautions can cause damage to
the heating elements:
•Use care when washing the inside of the rear
window. Do not use abrasive window cleaners on
the interior surface of the window. Use a soft cloth
and a mild washing solution, wiping parallel to
the heating elements. Labels can be peeled off
after soaking with warm water.
•Do not use scrapers, sharp instruments, or abra-
sive window cleaners on the interior surface of the
window.
•Keep all objects a safe distance from the window.
152 UNDERSTANDING THE FEATURES OF YOUR VEHICLE
Page 157 of 457
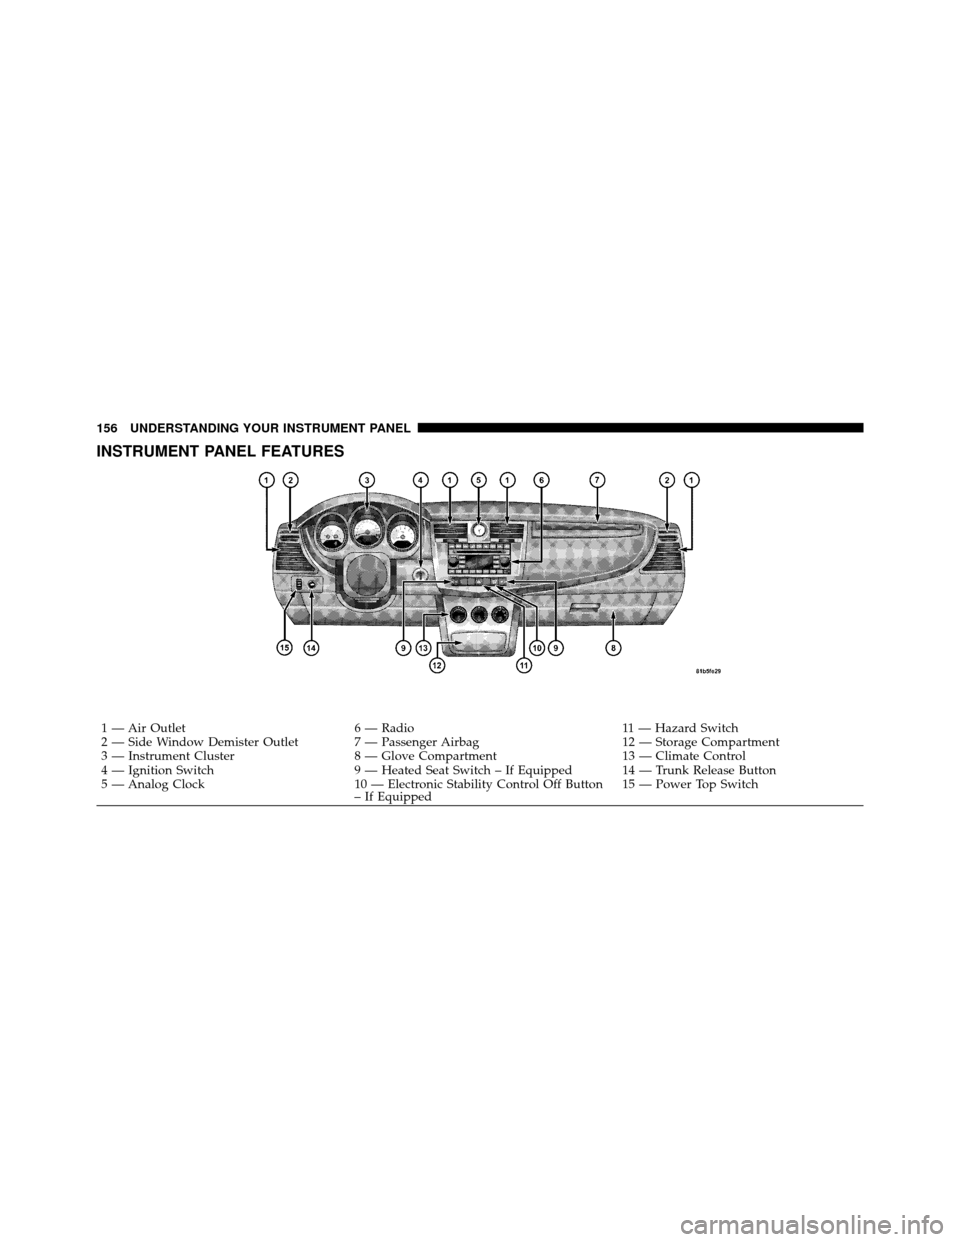
INSTRUMENT PANEL FEATURES
1 — Air Outlet6 — Radio 11 — Hazard Switch
2 — Side Window Demister Outlet 7 — Passenger Airbag 12 — Storage Compartment
3 — Instrument Cluster 8 — Glove Compartment 13 — Climate Control
4 — Ignition Switch 9 — Heated Seat Switch – If Equipped 14 — Trunk Release Button
5 — Analog Clock 10 — Electronic Stability Control Off Button
– If Equipped 15 — Power Top Switch
156 UNDERSTANDING YOUR INSTRUMENT PANEL
Page 160 of 457
5. Low Fuel LightWhen the fuel level drops to approximately 2.0 gal-
lons (7.6 Liters), the fuel symbol will light and a
single chime will sound.
NOTE: This light will remain on until a minimum of
approximately 3.0 gallons (11.3 Liters) of fuel is added.
6. Charging System Light This light shows the status of the electrical charg-
ing system. The light should come on briefly when
the ignition is first turned on and remain on briefly as a
bulb check. If the light stays on or comes on while
driving, turn off some of the vehicle’s electrical devices,
such as the Front Fog Lights or Rear Window Defroster.
If the Charging System Light remains on, it means that
the vehicle is experiencing a problem with the charging
system. Obtain SERVICE IMMEDIATELY. See your local
authorized dealer. If jump starting is required, refer to “Jump Starting
Procedures” in “What To Do In Emergencies”.
7. Airbag Warning Light
The light comes on and remains on for six to
eight seconds as a bulb check when the ignition
switch is first turned ON. If the light does not
turn on during starting, stays on, or turns on
while driving, have the system inspected by an autho-
rized dealer. Refer to “Occupant Restraints” in “Things
To Know Before Starting Your Vehicle” for further infor-
mation.
8. Seat Belt Reminder Light When the ignition switch is first turned ON, this
light will come on for about six seconds. A chime
will sound if you have not pulled the shoulder belt
out of the retractor. This is a reminder to “buckle up”. If
4
UNDERSTANDING YOUR INSTRUMENT PANEL 159
Page 177 of 457
and average fuel economy, according to the current fuel
tank level. DTE cannot be reset through the RESET
button.
NOTE:Significant changes in driving style or vehicle
loading will greatly affect the actual drivable distance of
the vehicle, regardless of the DTE display value.
When the DTE value is less than 30 miles (48 km)
estimated driving distance, the DTE display will change
to a text display of LOW FUEL. This display will con-
tinue until the vehicle runs out of fuel. Adding a signifi-
cant amount of fuel to the vehicle will turn off the LOW
FUEL text and a new DTE value will display.
•Elapsed Time
Shows the total elapsed time of travel since the last reset.
Elapsed time will increment when the ignition switch is
in the ON or START position.
•Display Units In:
To make your selection, press and release the RESET
button until “ENGLISH” or “METRIC” appears.
To Reset The Display
Reset will only occur if a resettable function is currently
displayed. Press and hold the RESET button once to clear
the function currently displayed.
To reset all resettable functions, press and release the
RESET button a second time within three seconds of
resetting the currently displayed function (Reset ALL will
display during this three-second window).
Compass Display
The compass heading indicates the direc-
tion the vehicle is facing. Press and re-
lease the compass button to display one
of eight compass heading and the outside
temperature.
COMPASS
Button
176 UNDERSTANDING YOUR INSTRUMENT PANEL
Page 182 of 457
off if they were turned on by this feature. To make your
selection, press and hold the RESET button until ON or
OFF appears.
NOTE:Turning the headlights on during the daytime
causes the instrument panel lights to dim. To increase the
brightness, refer to “Lights” in “Understanding The
Features Of Your Vehicle”.
Key Off Power Delay
When this feature is selected, the power window
switches, radio, Uconnect™ Phone (if equipped), and
power outlets will remain active for up to 10 minutes
after the ignition switch is turned to the LOCK position.
Opening a vehicle door will cancel this feature. To make
your selection, press and hold the RESET button until
OFF, 45 sec, 5 min, or 10 min appears.
Illuminated Approach
When this feature is selected, the headlights will activate
and remain on for up to 90 seconds when the doors are
unlocked with the remote keyless entry transmitter. To
make your selection, press and hold the RESET button
until “OFF,” “30 sec,” “60 sec,” or “90 sec” appears.
Hill Start Assist (HSA) — If Equipped
When on is selected, the HSA system is active. Refer to
“Electronic Brake Control System” in “Starting And
Operating” for system function and operating informa-
tion. To make your selection, press and release the RESET
button until “On” or “Off” appears.
Display Units In
The EVIC and odometer can be changed between English
and Metric units of measure. To make your selection,
press and release the RESET button until “ENGLISH” or
“METRIC” appears.
4
UNDERSTANDING YOUR INSTRUMENT PANEL 181
Page 191 of 457
a disc is loaded, changes will not be effective. Also, the
defaults are effective only if the disc supports the
customer-preferred settings.
AM and FM Buttons
Press the buttons to select AM or FM mode.
SET Button — To Set the Pushbutton Memory
When you are receiving a station that you wish to
commit to pushbutton memory, press the SET button.
The symbol SET 1 will now show in the display window.
Select the button (1-6) you wish to lock onto this station
and press and release that button. If a button is not
selected within five seconds after pressing the SET but-
ton, the station will continue to play but will not be
stored into pushbutton memory.
You may add a second station to each pushbutton by
repeating the above procedure with this exception: Press
the SET button twice and SET 2 will show in the display
window. Each button can be set for SET 1 and SET 2 inboth AM and FM. This allows a total of 12 AM, 12 FM,
and 12 Satellite (if equipped) stations to be stored into
pushbutton memory. The stations stored in SET 2
memory can be selected by pressing the pushbutton
twice.
Every time a preset button is used, a corresponding
button number will display.
Buttons 1 - 6
These buttons tune the radio to the stations that you
commit to pushbutton memory {12 AM, 12 FM, and 12
Satellite (if equipped) stations}.
DISC Button
Pressing the DISC button will allow you to switch from
AM/FM modes to Disc modes.
190 UNDERSTANDING YOUR INSTRUMENT PANEL
Page 206 of 457
SET/RND Button — To Set the Pushbutton
Memory
When you are receiving a station that you wish to
commit to pushbutton memory, press the SET/RND
button. The symbol SET 1 will now show in the display
window. Select the button (1 to 6) you wish to lock onto
this station and press and release that button. If a button
is not selected within five seconds after pressing the
SET/RND button, the station will continue to play but
will not be stored into pushbutton memory.
You may add a second station to each pushbutton by
repeating the above procedure with this exception: Press
the SET/RND button twice and SET 2 will show in the
display window. Each button can be set for SET 1 and
SET 2 in both AM and FM. This allows a total of 12 AM
and 12 FM stations to be stored into pushbutton memory.
The stations stored in SET 2 memory can be selected by
pressing the pushbutton twice.Every time a preset button is used, a corresponding
button number will display.Buttons 1 - 6
These buttons tune the radio to the stations that you
commit to pushbutton memory (12 AM and 12 FM
stations).
DISC Button
Pressing the DISC button will allow you to switch from
AM/FM modes to Disc modes.
Operation Instructions — CD MODE For CD And
MP3 Audio Play
NOTE:
•The ignition switch must be in the ON or ACC
position to operate the radio.
•This radio is capable of playing compact discs (CD),
recordable compact discs (CD-R), rewritable compact
4
UNDERSTANDING YOUR INSTRUMENT PANEL 205
Page 217 of 457
By pressing the SEEK button when the Music Type icon
is displayed, the radio will be tuned to the next frequency
station with the same selected Music Type name. The
Music Type function only operates when in the FM
mode.
If a preset button is activated while in the Music Type
(Program Type) mode, the Music Type mode will be
exited and the radio will tune to the preset station.
SETUP Button
Pressing the SETUP button allows you to select between
the following items:
•Set Clock— Pressing the SELECT button will allow
you to set the clock. Adjust the hours by turning the
TUNE/SCROLL control knob. After adjusting the
hours, press the TUNE/SCROLL control knob to set
the minutes. The minutes will begin to blink. Adjust the minutes using the right side TUNE/SCROLL
control knob. Press the TUNE/SCROLL control knob
to save time change.
AM/FM Button
Press the button to select either AM or FM mode.
SET/RND Button — To Set the Pushbutton
Memory
When you are receiving a station that you wish to
commit to pushbutton memory, press the SET/RND
button. The symbol SET 1 will now show in the display
window. Select the button (1–6) you wish to lock onto this
station and press and release that button. If a button is
not selected within five seconds after pressing the SET/
RND button, the station will continue to play but will not
be stored into pushbutton memory.
216 UNDERSTANDING YOUR INSTRUMENT PANEL