ECO mode Citroen BERLINGO 2012 2.G User Guide
[x] Cancel search | Manufacturer: CITROEN, Model Year: 2012, Model line: BERLINGO, Model: Citroen BERLINGO 2012 2.GPages: 208, PDF Size: 6.67 MB
Page 82 of 208
80
Mirrors and windows
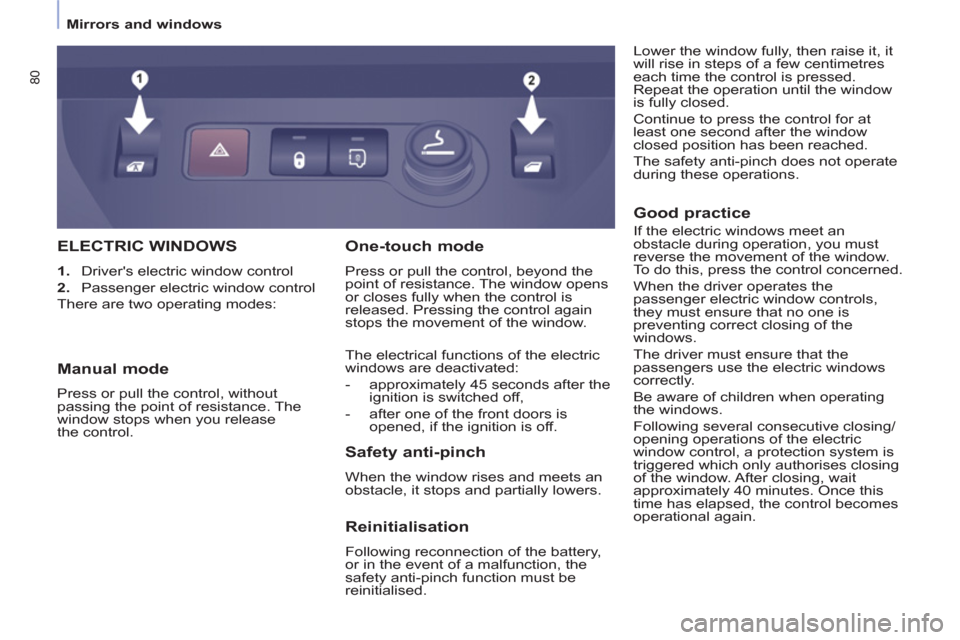
ELECTRIC WINDOWS
1.
Driver's electric window control
2.
Passenger electric window control
There are two operating modes:
Safety anti-pinch
When the window rises and meets an
obstacle, it stops and partially lowers.
One-touch mode
Press or pull the control, beyond the
point of resistance. The window opens
or closes fully when the control is
released. Pressing the control again
stops the movement of the window.
The electrical functions of the electric
windows are deactivated:
- approximately 45 seconds after the
ignition is switched off,
- after one of the front doors is
opened, if the ignition is off.
Manual mode
Press or pull the control, without
passing the point of resistance. The
window stops when you release
the control.
Reinitialisation
Following reconnection of the battery,
or in the event of a malfunction, the
safety anti-pinch function must be
reinitialised.
Good practice
If the electric windows meet an
obstacle during operation, you must
reverse the movement of the window.
To do this, press the control concerned.
When the driver operates the
passenger electric window controls,
they must ensure that no one is
preventing correct closing of the
windows.
The driver must ensure that the
passengers use the electric windows
correctly.
Be aware of children when operating
the windows.
Following several consecutive closing/
opening operations of the electric
window control, a protection system is
triggered which only authorises closing
of the window. After closing, wait
approximately 40 minutes. Once this
time has elapsed, the control becomes
operational again. Lower the window fully, then raise it, it
will rise in steps of a few centimetres
each time the control is pressed.
Repeat the operation until the window
is fully closed.
Continue to press the control for at
least one second after the window
closed position has been reached.
The safety anti-pinch does not operate
during these operations.
Page 87 of 208
ESP OFF
85
SAFETY
4
Driving safely
ANTI-SLIP REGULATION (ASR)
AND ELECTRONIC STABILITY
PROGRAMME (ESP)
These systems are linked and
complement the ABS.
The ASR system is very useful for
maintaining optimum drive and
avoiding losses of control of the vehicle
on acceleration.
The system optimises drive to prevent
the wheels skidding, by acting on the
brakes of the drive wheels and on the
engine. It also allows the directional
stability of the vehicle to be improved
on acceleration.
Use the ESP to hold your course
without attempting to countersteer.
If there is a variation between the
trajectory followed by the vehicle and
that required by the driver, the ESP
system automatically acts on the
engine and the brake of one or more
wheels, in order to put the vehicle back
on course.
Deactivating the ASR/ESP
systems
In certain exceptional conditions
(starting the vehicle when stuck in mud
or snow, or on loose ground...), it could
prove useful to deactivate the ASR and
ESP systems to make the wheels spin
and regain grip.
Operating check
Good practice
The ASR/ESP systems offer increased
safety during normal driving, but
should not incite the driver to take risks
or to drive at high speed.
The operation of these systems is
ensured if the recommendations
of the manufacturer regarding
the wheels (tyres and rims), the
braking components, the electronic
components and the fi tting and repair
procedures within the CITROËN
network are observed.
After an impact, have these systems
checked by a CITROËN dealer or a
qualifi ed workshop.
Operation of the ASR and ESP
systems
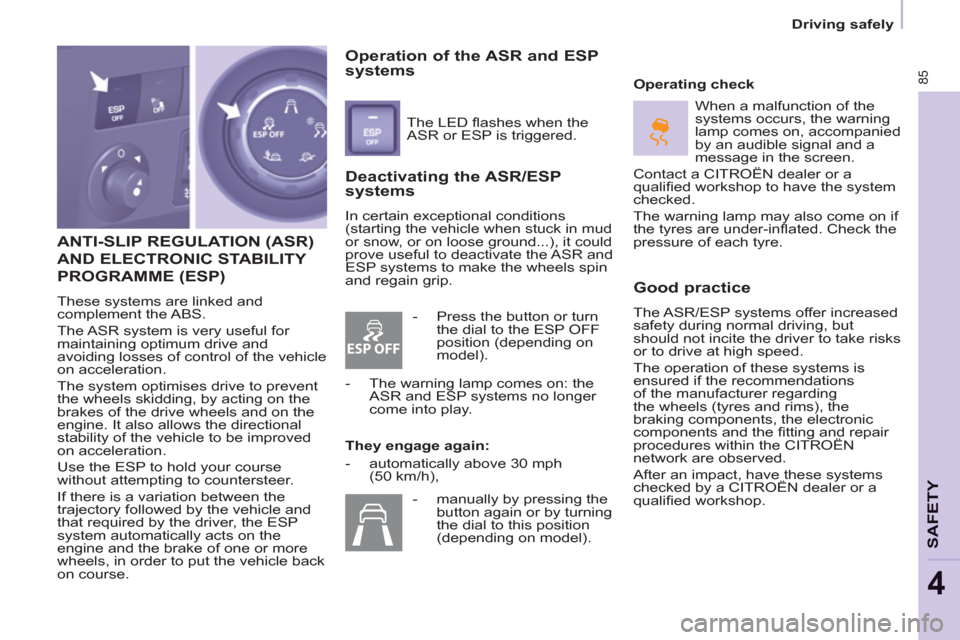
The LED fl ashes when the
ASR or ESP is triggered.
They engage again:
- automatically above 30 mph
(50 km/h), When a malfunction of the
systems occurs, the warning
lamp comes on, accompanied
by an audible signal and a
message in the screen.
Contact a CITROËN dealer or a
qualifi ed workshop to have the system
checked.
The warning lamp may also come on if
the tyres are under-infl ated. Check the
pressure of each tyre.
- Press the button or turn
the dial to the ESP OFF
position (depending on
model).
- The warning lamp comes on: the
ASR and ESP systems no longer
come into play.
- manually by pressing the
button again or by turning
the dial to this position
(depending on model).
Page 89 of 208
ESP OFF
87
SAFETY
4
Driving safely
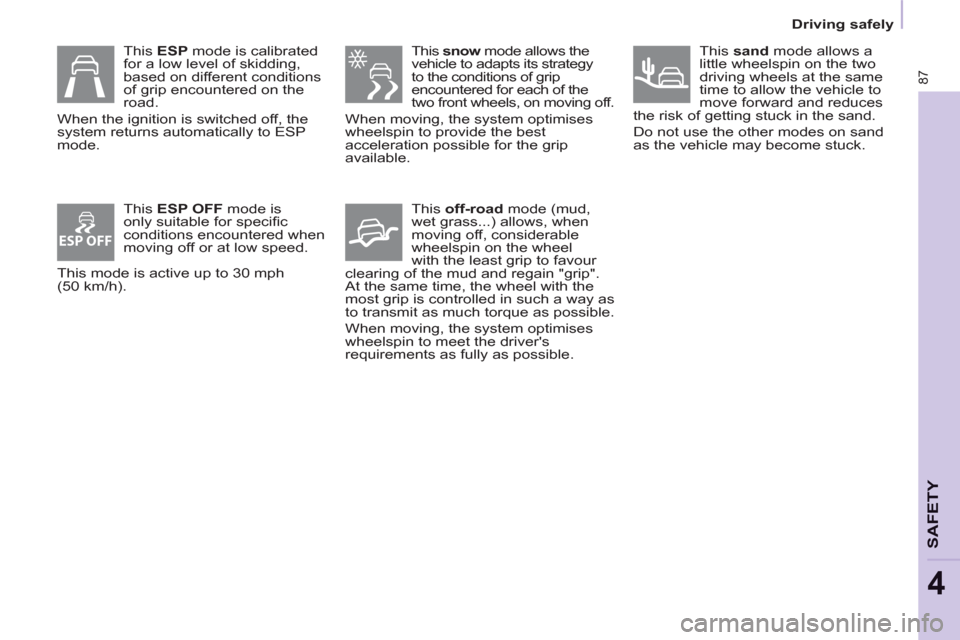
This snow
mode allows the
vehicle to adapts its strategy
to the conditions of grip
encountered for each of the
two front wheels, on moving off.
When moving, the system optimises
wheelspin to provide the best
acceleration possible for the grip
available.
This off-road
mode (mud,
wet grass...) allows, when
moving off, considerable
wheelspin on the wheel
with the least grip to favour
clearing of the mud and regain "grip".
At the same time, the wheel with the
most grip is controlled in such a way as
to transmit as much torque as possible.
When moving, the system optimises
wheelspin to meet the driver's
requirements as fully as possible.
This ESP mode is calibrated
for a low level of skidding,
based on different conditions
of grip encountered on the
road.
When the ignition is switched off, the
system returns automatically to ESP
mode.
This ESP OFF
mode is
only suitable for specifi c
conditions encountered when
moving off or at low speed.
This mode is active up to 30 mph
(50 km/h).
This sand
mode allows a
little wheelspin on the two
driving wheels at the same
time to allow the vehicle to
move forward and reduces
the risk of getting stuck in the sand.
Do not use the other modes on sand
as the vehicle may become stuck.
Page 103 of 208
101
Towing a trailer
ACCESSORIE
S
5
Good Practice
In certain cases of particularly arduous
use (towing the maximum load up a
steep slope in high temperatures), the
engine automatically limits its power.
In this case, the air conditioning is
automatically cut off to save engine
power.
Tyres
Check the tyre pressures of
the towing vehicle (see the
"Identifi cation markings" section of
chapter 8) and of the trailer, observing
the recommended pressures. See the "Levels" section of chapter 6. If the coolant temperature
warning lamp comes on, stop
the vehicle and switch off the
engine as soon as possible.
Brakes
Towing increases the braking distance.
Drive at a moderate speed, change
down early and brake gradually.
Towbar
We recommend the use of genuine
CITROËN towbars and their
harnesses, which have been tested
and approved from the design stage of
your vehicle, and that you entrust the
fi tting of this equipment to a CITROËN
dealer.
If this equipment is not fi tted by a
CITROËN dealer, it is imperative that
it is fi tted using the electrical pre-
equipment installed at the rear of the
vehicle and in accordance with the
manufacturer's instructions.
In accordance with the general
instructions a reminder of which has
been given above, we draw your
attention to the risk associated with
fi tting a towbar or electrical accessory
not recommended by CITROËN.
Fitting such equipment could result in
the failure of your vehicle's electronic
system. Please obtain information from
the Manufacturer before fi tting this type
of equipment.
Anti-theft alarm, window etching, fi rst
aid kit, high visibility vest, front and
rear parking sensors, warning triangle,
security bolts for alloy wheels...
Front seat covers compatible with
airbags, bench, rubber mats, carpet
mats, snow chains, blind, tailgate
bicycle carrier, ...
OTHER ACCESSORIES
These accessories and parts, having
been tested and approved for reliability
and safety, are all adapted to your
vehicle. A wide range of recommended
accessories and genuine parts is available.
Range of trade equipment
The parts department publishes an
accessory catalogue offering various
equipment and fi ttings, such as:
Load retainers (all models).
Loading roller.
Towbar, towbar harness: trailer towbar
which should preferably be fi tted by a
CITROËN dealer.
Separation partitions and grilles,
smooth, non-slip wooden protective
fl oor.
Protective grilles.
Side wind
Sensitivity to side wind is increased.
Drive smoothly and at a moderate
speed.
ABS/ESP
The ABS or ESP systems only control
the vehicle, not the trailer or caravan.
Rear parking sensors
The parking sensors system does not
function while the vehicle is towing.
Another range is also available,
structured around comfort, leisure and
maintenance:
Page 116 of 208
11 4
Battery
ECONOMY MODE
After the engine has stopped, with
the key in the ignition position, certain
functions (windscreen wiper, electric
windows, courtesy lamps, audio
equipment, etc.) can only be used for a
cumulative duration of thirty minutes, to
prevent discharging of the battery.
Once the thirty minutes are over, the
active functions are put on standby
and the battery warning lamp fl ashes
accompanied by a message in the
screen.
To resume the use of these functions
immediately, start the engine and let it
run for a few minutes.
The time available will then be double
the time for which the engine was left
running. However, this time will always
be between fi ve and thirty minutes.
A fl at battery will prevent the engine
from starting.
Page 143 of 208
9.3
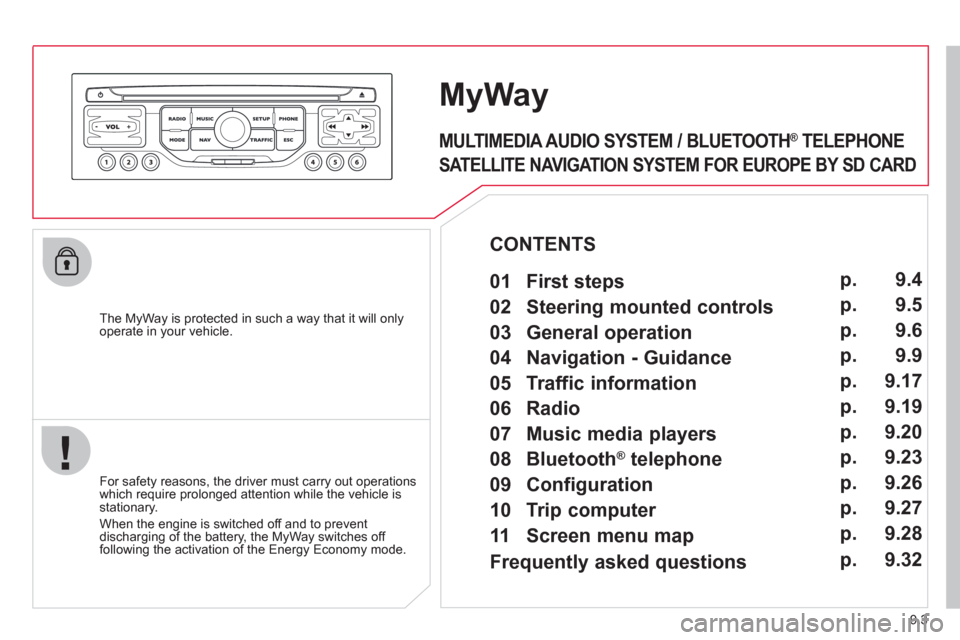
The MyWay is protected in such a way that it will onlyoperate in your vehicle.
MyWay
For safety reasons, the driver must carry out operations which require prolonged attention while the vehicle is stationary.
When the en
gine is switched off and to prevent
discharging of the battery, the MyWay switches off
following the activation of the Energy Economy mode.
MULTIMEDIA AUDIO SYSTEM / BLUETOOTH ®
TELEPHONE
SATELLITE NAVIGATION SYSTEM FOR EUROPE BY SD CARD
01 First steps
CONTENTS
02 Steering mounted controls
03 General operation
04 Navigation - Guidance
05 Traffic information
06 Radio
07 Music media players
08 Bluetooth
®
telephone
09 Configuration
10 Trip computer p.
p.
p.
p.
p.
p.
p.
p.
p.
p.
11 Screen menu map p. 9.4
9.5
9.6
9.9
9.17
9.19
9.20
9.23
9.26
9.27
9.28
Frequently asked questions p. 9.32
Page 146 of 208
03
9.6
GENERAL OPERATION
For a detailed global view of the menus available, refer to the"Screen menu map" section.
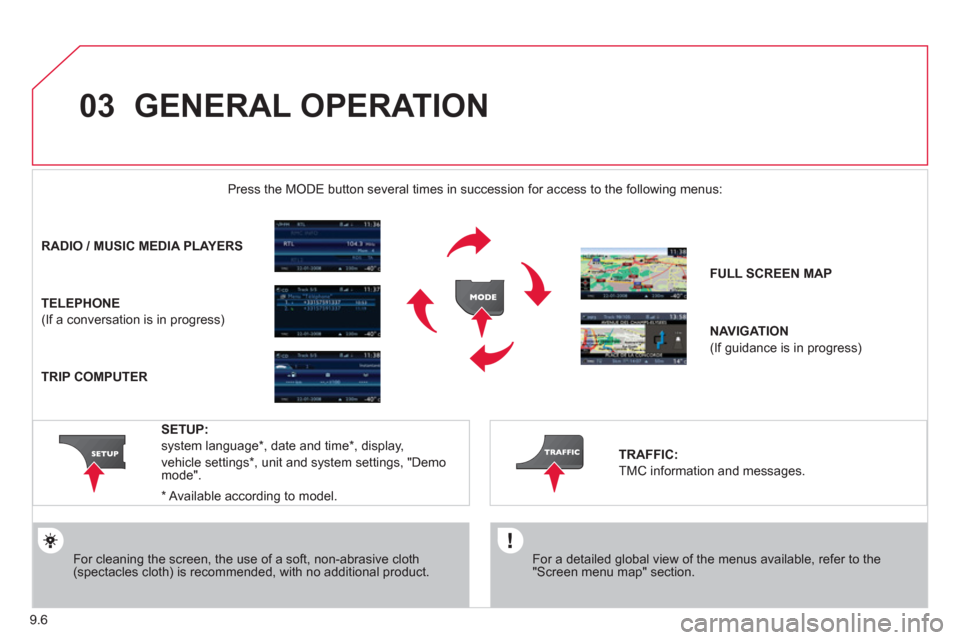
Press the M
ODE button several times in succession for access to the following menus:
For cleaning the screen, the use of a soft, non-abrasive cloth (spectacles cloth) is recommended, with no additional product.
RADIO/ MUSIC MEDIA PLAYERS
TELEPHONE
(If a conversation is in progress)
FULL SCREEN MA
P
NAVIGATION
(If guidance is in progress)
SETUP:
system language *
, date and time *
, display,
vehicle settings
* , unit and system settings, "Demo mode".
TRAFFIC:
TMC information and messages.
*
Available accordin
g to model.
TRIP COMPUTER
Page 159 of 208
06
3 2 1 1
9.19
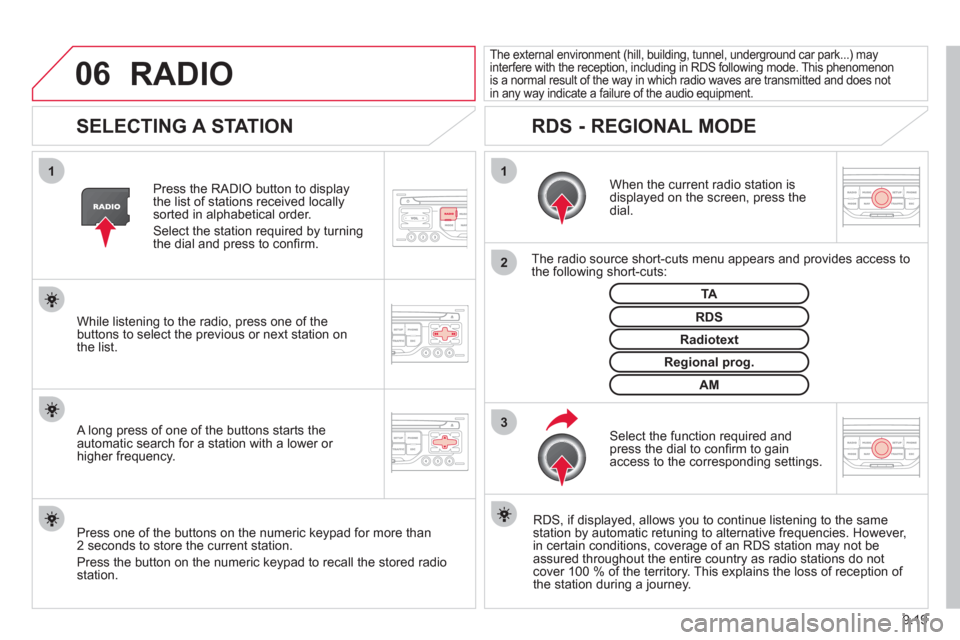
SELECTING A STATION
When the current radio station isdisplayed on the screen, press thedial.
The radio source short-cuts menu appears and provides access to
the following short-cuts:
Select the function re
quired and press the dial to confi rm to gain
access to the corresponding settings.
TA
RDS, if displayed, allows you to continue listening to the same station by automatic retuning to alternative frequencies. However,
in certain conditions, coverage of an RDS station may not be
assured throughout the entire country as radio stations do notcover 100 % of the territory. This explains the loss of reception of
the station during a journey.
The external environment (hill, building, tunnel, underground car park...) mayinterfere with the reception, including in RDS following mode. This phenomenonis a normal result of the way in which radio waves are transmitted and does notin any way indicate a failure of the audio equipment.
RDS - REGIONAL MODE
Press the RADIO button to display
the list of stations received locally sorted in alphabetical order.
Select the station required by turningthe dial and press to confi rm.
Re
gional prog.
Radiotext
RDSWhile listening to the radio, press one of the
buttons to select the previous or next station on
the list.
Press one o
f the buttons on the numeric keypad for more than
2 seconds to store the current station.
Press the button on the numeric keypad to recall the stored radio
station.
AM
A long press of one of the buttons starts theautomatic search for a station with a lower or
higher frequency.
RADIO
Page 160 of 208
07
9.20
MUSIC MEDIA PLAYERS
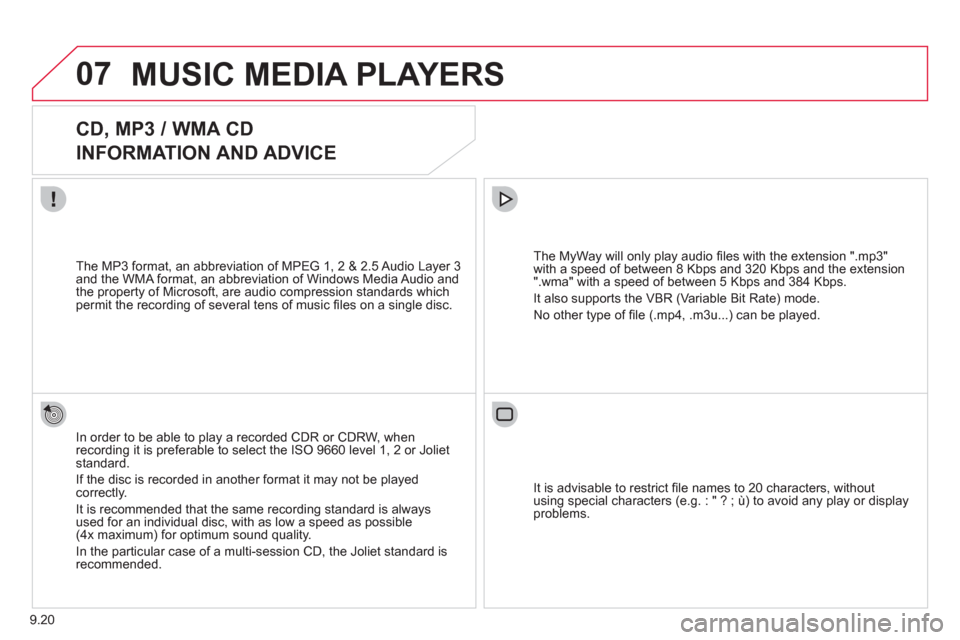
CD, MP3 / WMA CD
INFORMATION AND ADVICE
In order to be able to play a recorded CDR or CDRW, when recording it is preferable to select the ISO 9660 level 1, 2 or Jolietstandard.
I
f the disc is recorded in another format it may not be playedcorrectly.
It is recommended that the same recordin
g standard is alwaysused for an individual disc, with as low a speed as possible(4x maximum) for optimum sound quality.
In the particular case o
f a multi-session CD, the Joliet standard is recommended.
The M
yWay will only play audio fi les with the extension ".mp3"
with a speed of between 8 Kbps and 320 Kbps and the extension
".wma" with a speed of between 5 Kbps and 384 Kbps.
It also supports the VBR
(Variable Bit Rate) mode.
No other t
ype of fi le (.mp4, .m3u...) can be played. The MP3
format, an abbreviation of MPEG 1, 2 & 2.5 Audio Layer 3 and the WMA format, an abbreviation of Windows Media Audio and
the property of Microsoft, are audio compression standards which permit the recording of several tens of music fi les on a single disc.
It is advisable to restrict fi le names to 20 characters
, without
using special characters (e.g. : " ? ; ù) to avoid any play or display
problems.
Page 166 of 208
09
4 3 2 1
65
9.26
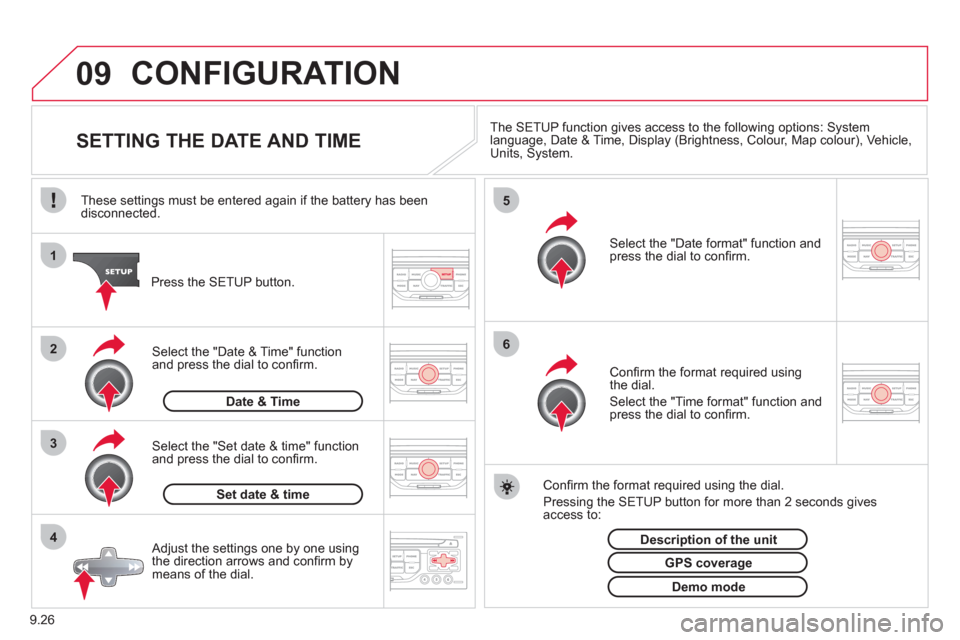
CONFIGURATION
SETTING THE DATE AND TIME The SETUP function gives access to the following options: Systemlanguage, Date & Time, Display (Brightness, Colour, Map colour), Vehicle,Units, System.
Adjust the settings one by one usingthe direction arrows and confi rm bymeans of the dial.
Select the "Date format" function andpress the dial to confi rm.
Select the "Set date
& time" function
and press the dial to confi rm.
Confi rm the format required using the dial.
Pressing the
SETUP button for more than 2 seconds gives access to: These settin
gs must be entered again if the battery has been disconnected.
Pr
ess the SETUP button.
Confi rm the format required usingthe dial.
Select the "Time format" function and press the dial to confi rm.
Set date & tim
e
Select the "Date & Time" function
and press the dial to confi rm.
Demo mode
GPS coverage
Description of the unit
Date & Time