key CITROEN BERLINGO VAN 2019 Handbook (in English)
[x] Cancel search | Manufacturer: CITROEN, Model Year: 2019, Model line: BERLINGO VAN, Model: CITROEN BERLINGO VAN 2019Pages: 320, PDF Size: 8.91 MB
Page 115 of 320
113
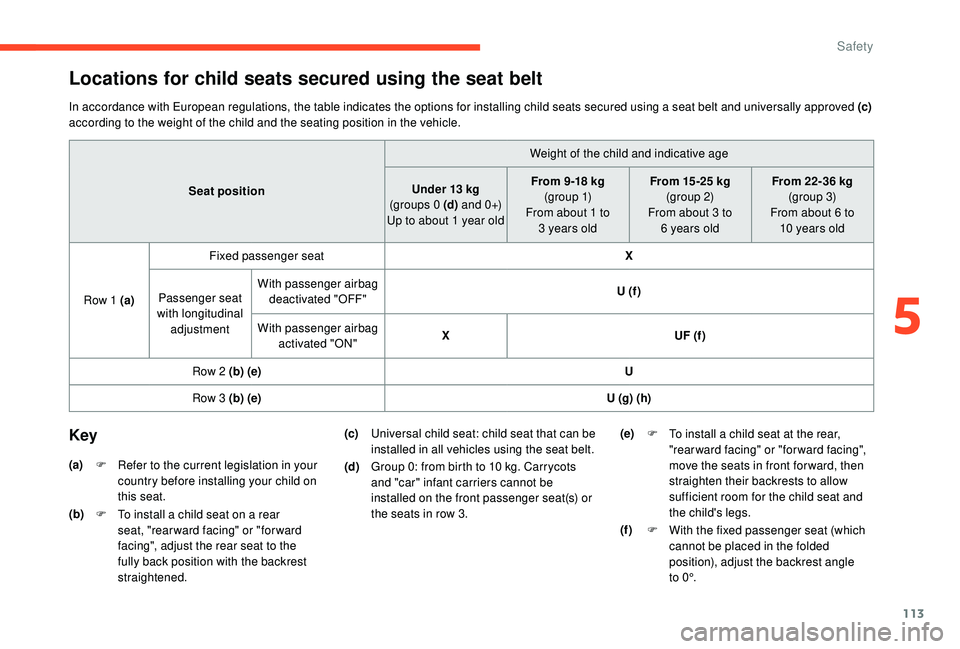
Locations for child seats secured using the seat belt
In accordance with European regulations, the table indicates the options for installing child seats secured using a seat belt and universally approved (c)
according to the weight of the child and the seating position in the vehicle.Weight of the child and indicative age
Seat position Under 13
kg
(groups
0 (d) a n d
0 +)
Up to about 1 year old From 9 -18 kg
(g r o u p 1)
From about 1 to 3
years oldFrom 15-25 kg
(group 2)
From about 3 to 6
years oldFrom 22-36
kg
(group 3)
From about 6 to 10
years old
Row 1 (a) Fixed passenger seat
X
Passenger seat
with longitudinal adjustment With passenger airbag
deactivated "OFF" U (f )
With passenger airbag activated "ON" X
UF (f )
Row
2 (b) (e) U
Row
3 (b) (e) U (g) (h)
Key
(a)
F R efer to the current legislation in your
country before installing your child on
this seat.
(b) F
T
o install a child seat on a rear
seat, "rear ward facing" or "for ward
facing", adjust the rear seat to the
fully back position with the backrest
straightened. (c)
Universal child seat: child seat that can be
installed in all vehicles using the seat belt.
(d) Group 0: from birth to 10
kg. Carrycots
and "car" infant carriers cannot be
installed on the front passenger seat(s) or
the seats in row 3. (e)
F
T
o install a child seat at the rear,
"rearward facing" or "forward facing",
move the seats in front for ward, then
straighten their backrests to allow
sufficient room for the child seat and
the child's legs.
(f ) F
W
ith the fixed passenger seat (which
cannot be placed in the folded
position), adjust the backrest angle
t o
0 °.
5
Safety
Page 119 of 320
117
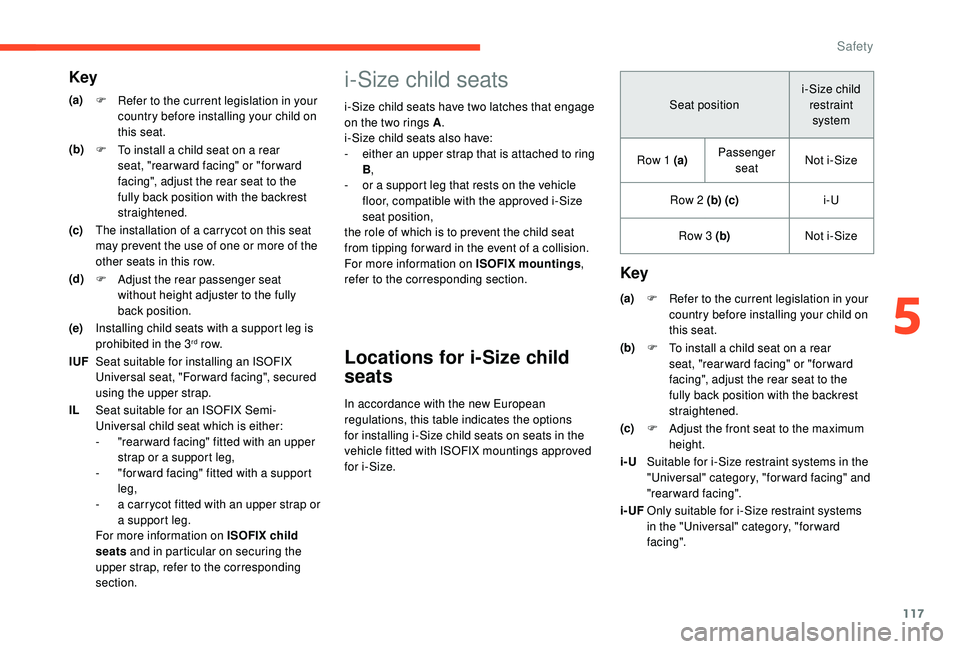
i-Size child seats
i-Size child seats have two latches that engage
on the two rings A.
i-Size child seats also have:
-
e
ither an upper strap that is attached to ring
B ,
-
o
r a support leg that rests on the vehicle
floor, compatible with the approved i-Size
seat position,
the role of which is to prevent the child seat
from tipping for ward in the event of a collision.
For more information on ISOFIX mountings ,
refer to the corresponding section.
Key
Seat position i-Size child
restraint system
Row 1 (a) Passenger
seat Not i-Size
Row 2 (b) (c) i-U
Row 3 (b) Not i-Size
(a) F
R
efer to the current legislation in your
country before installing your child on
this seat.
(b) F
T
o install a child seat on a rear
seat, "rear ward facing" or "for ward
facing", adjust the rear seat to the
fully back position with the backrest
straightened.
(c) F
A
djust the front seat to the maximum
height.
i-U Suitable for i-Size restraint systems in the
"Universal" category, "forward facing" and
"rearward facing".
i-UF Only suitable for i-Size restraint systems
in the "Universal" category, "forward
fac ing".
Key
(a)
F R efer to the current legislation in your
country before installing your child on
this seat.
(b) F
T
o install a child seat on a rear
seat, "rear ward facing" or "for ward
facing", adjust the rear seat to the
fully back position with the backrest
straightened.
(c) The installation of a carrycot on this seat
may prevent the use of one or more of the
other seats in this row.
(d) F
A
djust the rear passenger seat
without height adjuster to the fully
back position.
(e) Installing child seats with a support leg is
prohibited in the 3
rd row.
IUF Seat suitable for installing an ISOFIX
Universal seat, "Forward facing", secured
using the upper strap.
IL Seat suitable for an ISOFIX Semi-
Universal child seat which is either:
-
"
rear ward facing" fitted with an upper
strap or a support leg,
-
"
for ward facing" fitted with a support
leg,
-
a c
arrycot fitted with an upper strap or
a support leg.
For more information on ISOFIX child
seats and in particular on securing the
upper strap, refer to the corresponding
section.
Locations for i-Size child
seats
In accordance with the new European
regulations, this table indicates the options
for installing i-Size child seats on seats in the
vehicle fitted with ISOFIX mountings approved
for i-Size.
5
Safety
Page 120 of 320
118
Advice
The incorrect installation of a child seat in
a vehicle compromises the protection of
the child in the event of an accident.
Ensure that there is no seat belt or seat
belt buckle under the child seat, as this
could destabilise it.
Remember to fasten the seat belts or
the child seat harness keeping the slack
relative to the child's body to a minimum,
even for short journeys.
When installing a child seat using the seat
belt, ensure that the seat belt is tightened
correctly on the child seat and that it
secures the child seat firmly on the seat
of your vehicle. If your passenger seat is
adjustable, move it forwards if necessary.
The head restraint must be removed
before installing a child seat with a
backrest on a passenger seat.
Ensure that the head restraint is stored or
attached securely to prevent it from being
thrown around the vehicle in the event
of sharp braking. Refit the head restraint
when the child seat is removed.Children at the rear
At rear seating positions, always leave
sufficient space between the front seat
and:
-
a "
rear ward facing" child seat,
-
t
he child's feet for a child seat fitted
"forward facing".
To do this, move the front seat for wards
and, if necessary, move its backrest into
the upright position.
For optimal installation of the forward
facing child seat, verify that its backrest is
as close as possible to the backrest of the
vehicle seat, if possible in contact with it.
Children at the front
The legislation on carrying children on the
front passenger seat is specific to each
country. Refer to the legislation in force in
the country in which you are driving.
Deactivate the front passenger airbag
when a "rear ward facing" child seat is
installed on the front passenger seat.
Other wise, there is a risk of serious or
fatal injury to the child if the airbag is
deployed. Installing a booster seat
The chest part of the seat belt must be
positioned on the child's shoulder without
touching the neck.
Ensure that the lap part of the seat belt
passes correctly over the child's thighs.
We recommend using a booster seat with
a backrest, equipped with a belt guide at
shoulder level.
Additional protections
To prevent accidental opening of the doors
and rear windows, use the child lock.
Take care not to open the rear windows by
more than one third.
To protect young children from the rays
of the sun, fit side blinds on the rear
windows.
As a safety precaution, do not leave:
-
a c
hild or children alone and
unattended in a vehicle,
-
a c
hild or an animal in a vehicle
which is exposed to the sun, with the
windows closed,
-
t
he keys within reach of children inside
the vehicle.
Safety
Page 121 of 320
119
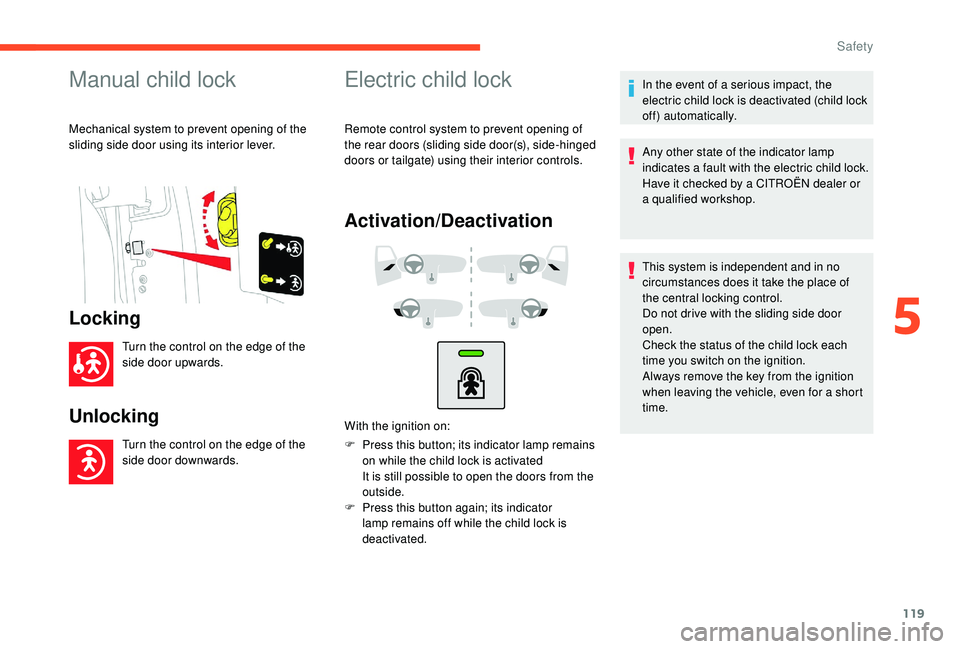
Manual child lock
Mechanical system to prevent opening of the
sliding side door using its interior lever.
Locking
Turn the control on the edge of the
side door upwards.
Unlocking
Turn the control on the edge of the
side door downwards.
Electric child lock
Remote control system to prevent opening of
the rear doors (sliding side door(s), side-hinged
doors or tailgate) using their interior controls.
Activation/Deactivation
In the event of a serious impact, the
electric child lock is deactivated (child lock
off) automatically.
Any other state of the indicator lamp
indicates a fault with the electric child lock.
Have it checked by a CITROËN dealer or
a qualified workshop.
This system is independent and in no
circumstances does it take the place of
the central locking control.
Do not drive with the sliding side door
open.
Check the status of the child lock each
time you switch on the ignition.
Always remove the key from the ignition
when leaving the vehicle, even for a short
time.
With the ignition on:
F
P
ress this button; its indicator lamp remains
on while the child lock is activated
It is still possible to open the doors from the
outside.
F
P
ress this button again; its indicator
lamp remains off while the child lock is
deactivated.
5
Safety
Page 123 of 320
121
Side wind
F Take into account the increased sensitivity to wind.
Cooling
Towing a trailer on a slope increases the
temperature of the coolant.
As the fan is electrically controlled, its cooling
capacity is not dependent on the engine speed.
F
T
o lower the engine speed, reduce your
speed.
The maximum towable load on an incline
depends on the gradient and the exterior
temperature.
In all cases, keep a check on the coolant
temperature.
F
I
f this warning lamp and the
STOP warning lamp come on,
stop the vehicle and switch off
the engine as soon as possible.
New vehicle
Do not pull a trailer before having driven at least
approximately 620
miles (1,000
kilometres).
Braking
Towing a trailer increases the braking distance.
To avoid overheating of the brakes, the use of
engine braking is recommended.
Ty r e s
F Check the tyre pressures of the towing vehicle and of the trailer, observing the
recommended pressures.
Lighting
F Check the electrical lighting and signalling on the trailer and the headlamp beam height
of your vehicle.
For more information on Headlamp
beam height adjustment , refer to the
corresponding section.
Certain driving or manoeuvring aid
functions are automatically disabled if an
approved towing system is used.
If the exterior temperature is high, it is
recommended that the engine be allowed
to idle for 1 to 2
minutes after the vehicle
comes to a stop, to facilitate its cooling.
Starting/switching off the
engine
Starting
The parking brake must be applied.
F
W
ith a manual gearbox, shift the gear lever
into neutral, fully depress the clutch pedal
and keep the pedal down until the engine
runs.
F
W
ith an automatic gearbox, place the
selector in position P and fully depress the
brake pedal.
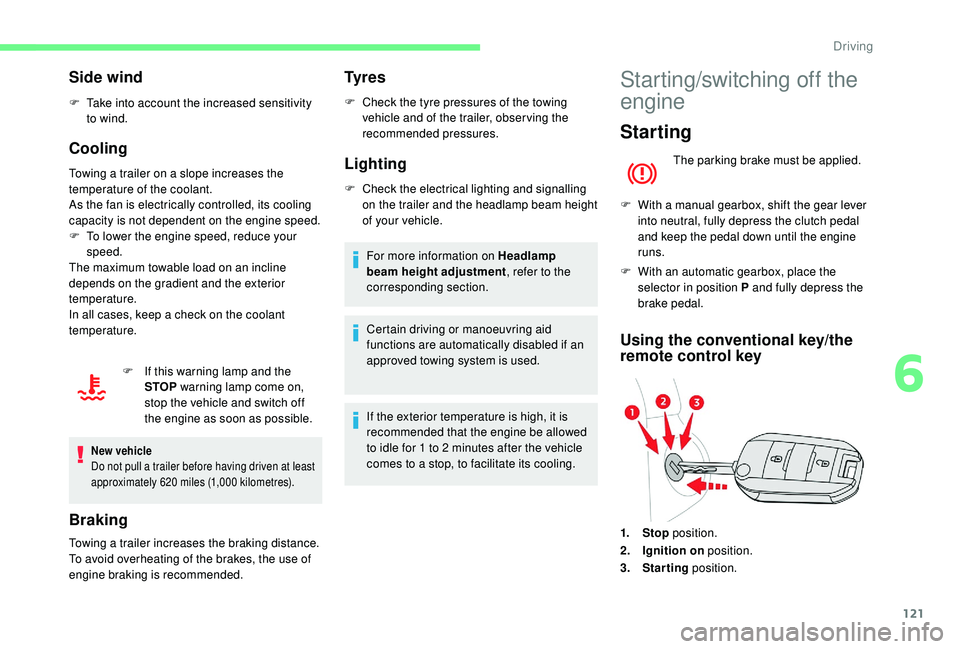
Using the conventional key/the
remote control key
1. Stop position.
2. Ignition on position.
3. Starting position.
6
Driving
Page 124 of 320
122
F Insert the key in the ignition switch. The system recognises the start code.
F
U
nlock the steering column by simultaneously
turning the steering wheel and the key.
In certain circumstances, you may have to
turn the steering wheel firmly to move the
wheels (if the wheels are against a kerb,
for example).
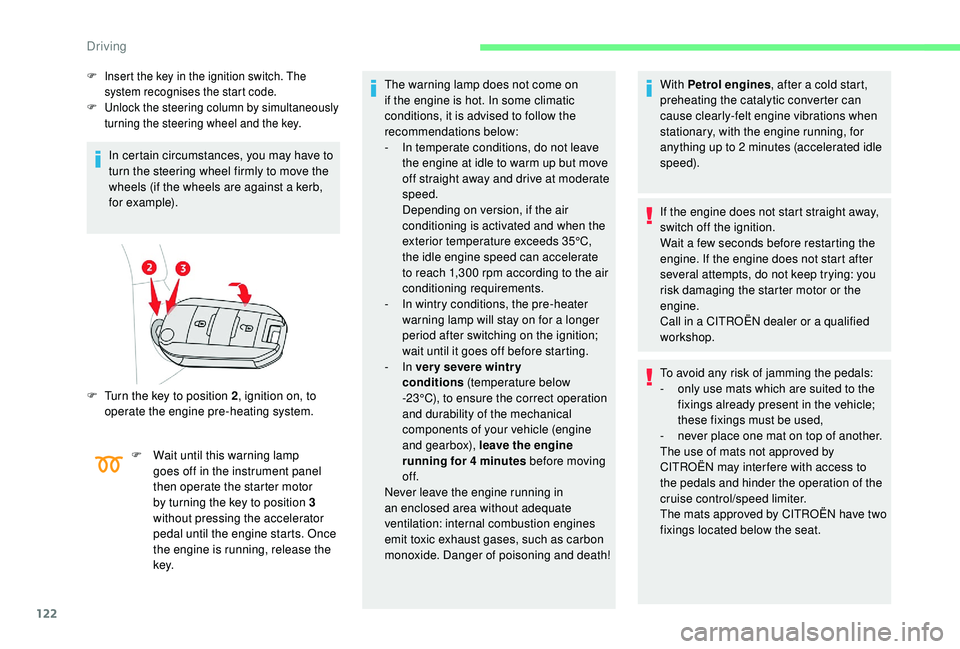
F
T
urn the key to position 2 , ignition on, to
operate the engine pre-heating system. The warning lamp does not come on
if the engine is hot. In some climatic
conditions, it is advised to follow the
recommendations below:
-
I n temperate conditions, do not leave
the engine at idle to warm up but move
off straight away and drive at moderate
speed.
Depending on version, if the air
conditioning is activated and when the
exterior temperature exceeds 35°C,
the idle engine speed can accelerate
to reach 1,300
rpm according to the air
conditioning requirements.
-
I
n wintry conditions, the pre-heater
warning lamp will stay on for a longer
period after switching on the ignition;
wait until it goes off before starting.
-
In ver y severe wintr y
conditions
(temperature below
-23°C), to ensure the correct operation
and durability of the mechanical
components of your vehicle (engine
and gearbox), leave the engine
running for 4
minutes before moving
of f.
Never leave the engine running in
an enclosed area without adequate
ventilation: internal combustion engines
emit toxic exhaust gases, such as carbon
monoxide. Danger of poisoning and death! With Petrol engines
, after a cold start,
preheating the catalytic converter can
cause clearly-felt engine vibrations when
stationary, with the engine running, for
anything up to 2 minutes (accelerated idle
speed).
If the engine does not start straight away,
switch off the ignition.
Wait a few seconds before restarting the
engine. If the engine does not start after
several attempts, do not keep trying: you
risk damaging the starter motor or the
engine.
Call in a CITROËN dealer or a qualified
workshop.
To avoid any risk of jamming the pedals:
-
o
nly use mats which are suited to the
fixings already present in the vehicle;
these fixings must be used,
-
n
ever place one mat on top of another.
The use of mats not approved by
CITROËN may inter fere with access to
the pedals and hinder the operation of the
cruise control/speed limiter.
The mats approved by CITROËN have two
fixings located below the seat.
F
W
ait until this warning lamp
goes off in the instrument panel
then operate the starter motor
by turning the key to position 3
without pressing the accelerator
pedal until the engine starts. Once
the engine is running, release the
key.
Driving
Page 125 of 320
123
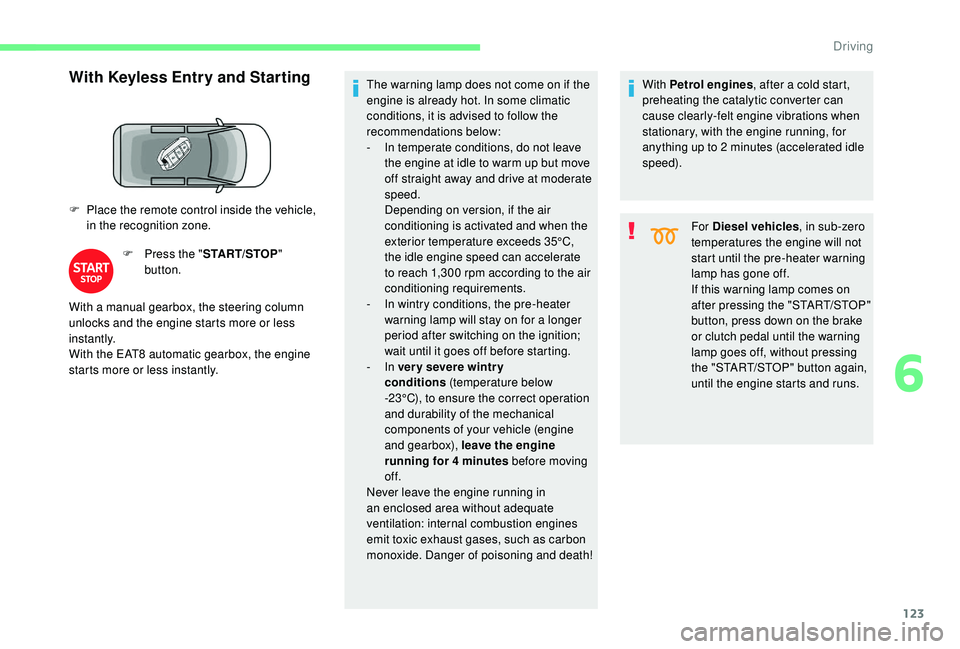
With Keyless Entry and Starting
F Place the remote control inside the vehicle, in the recognition zone.
F
P
ress the "START/STOP "
button. The warning lamp does not come on if the
engine is already hot. In some climatic
conditions, it is advised to follow the
recommendations below:
-
I
n temperate conditions, do not leave
the engine at idle to warm up but move
off straight away and drive at moderate
speed.
Depending on version, if the air
conditioning is activated and when the
exterior temperature exceeds 35°C,
the idle engine speed can accelerate
to reach 1,300
rpm according to the air
conditioning requirements.
-
I
n wintry conditions, the pre-heater
warning lamp will stay on for a longer
period after switching on the ignition;
wait until it goes off before starting.
-
In ver y severe wintr y
conditions
(temperature below
-23°C), to ensure the correct operation
and durability of the mechanical
components of your vehicle (engine
and gearbox), leave the engine
running for 4
minutes before moving
of f.
Never leave the engine running in
an enclosed area without adequate
ventilation: internal combustion engines
emit toxic exhaust gases, such as carbon
monoxide. Danger of poisoning and death!
With a manual gearbox, the steering column
unlocks and the engine starts more or less
instantly.
With the EAT8 automatic gearbox, the engine
starts more or less instantly. With Petrol engines
, after a cold start,
preheating the catalytic converter can
cause clearly-felt engine vibrations when
stationary, with the engine running, for
anything up to 2 minutes (accelerated idle
speed).
For Diesel vehicles , in sub-zero
temperatures the engine will not
start until the pre-heater warning
lamp has gone off.
If this warning lamp comes on
after pressing the "START/STOP"
button, press down on the brake
or clutch pedal until the warning
lamp goes off, without pressing
the "START/STOP" button again,
until the engine starts and runs.
6
Driving
Page 126 of 320
124
The presence of the " Keyless Entry and
Starting" system remote control in the
recognition zone is essential.
Never leave the vehicle with the engine
running and with the remote control on
your person.
If the remote control leaves the
recognition zone, a message is displayed.
Move the remote control into the zone in
order to be able to start the engine.
If one of the starting conditions is not met,
a message appears in the instrument
panel. In some cases, it is necessary to
turn the steering wheel while pressing the
"START/STOP" button to help unlock the
steering column; a message informs you
of this.
Switching off
F Immobilise the vehicle.
Using the conventional key/the
remote control key
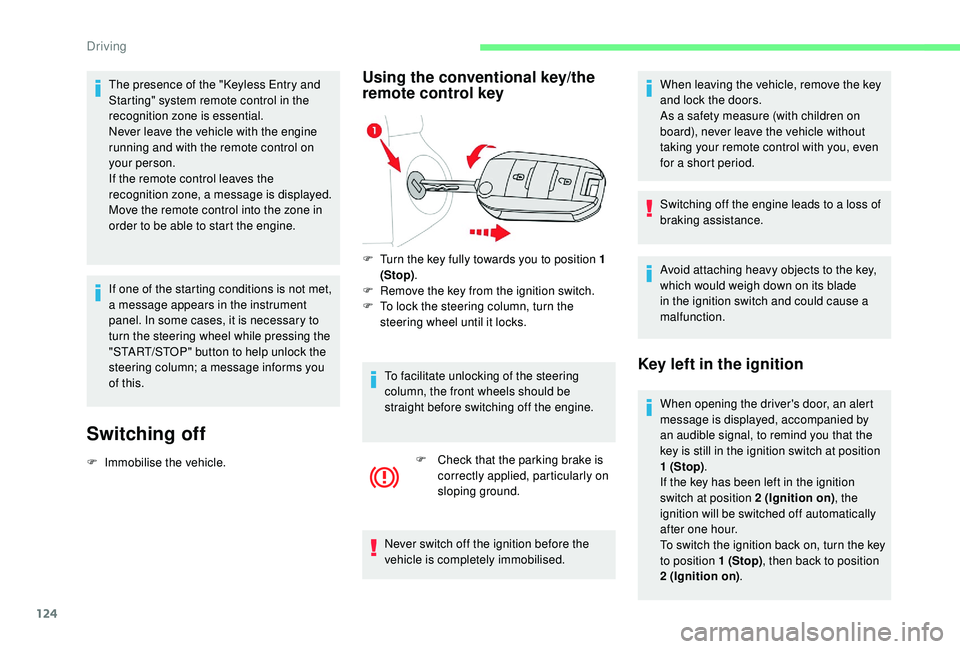
F Turn the key fully towards you to position 1 (Stop) .
F
R
emove the key from the ignition switch.
F
T
o lock the steering column, turn the
steering wheel until it locks.
To facilitate unlocking of the steering
column, the front wheels should be
straight before switching off the engine. F
C
heck that the parking brake is
correctly applied, particularly on
sloping ground.
Never switch off the ignition before the
vehicle is completely immobilised. When leaving the vehicle, remove the key
and lock the doors.
As a safety measure (with children on
board), never leave the vehicle without
taking your remote control with you, even
for a short period.
Switching off the engine leads to a loss of
braking assistance.
Avoid attaching heavy objects to the key,
which would weigh down on its blade
in the ignition switch and could cause a
malfunction.
Key left in the ignition
When opening the driver's door, an alert
message is displayed, accompanied by
an audible signal, to remind you that the
key is still in the ignition switch at position
1 (Stop)
.
If the key has been left in the ignition
switch at position 2 (Ignition on) , the
ignition will be switched off automatically
after one hour.
To switch the ignition back on, turn the key
to position 1 (Stop) , then back to position
2 (Ignition on) .
Driving
Page 127 of 320
125
Forced switch-off with
Keyless Entry and Starting
In the event of an emergency only and with the
vehicle stationary, you can switch off the engine.
With Keyless Entry and Starting
F With the remote control in the recognition zone, press the " START/STOP" button.
With a manual gearbox, the engine switches off
and the steering column locks.
With the EAT8 automatic gearbox, the engine
switches off. If the vehicle is not immobilised, the
engine will not switch off.
To avoid any risk of jamming the pedals:
-
o
nly use mats which are suited to the
fixings already present in the vehicle;
these fixings must be used,
-
n
ever place one mat on top of another.
The use of mats not approved by
CITROËN may inter fere with access to
the pedals and hinder the operation of the
cruise control/speed limiter.
The mats approved by CITROËN have two
fixings located below the seat.
Switching the ignition on
with
K
eyless Entry and
Starting
F Press the " START/STOP" button, the
instrument panel comes on but the engine
does not start.
F
P
ress this button again to switch off the
ignition and allow the vehicle to be locked.
With the ignition on, the system will
automatically go into energy economy
mode to maintain an adequate state of
charge in the battery.
Back-up starting with
K
eyless Entry and Starting
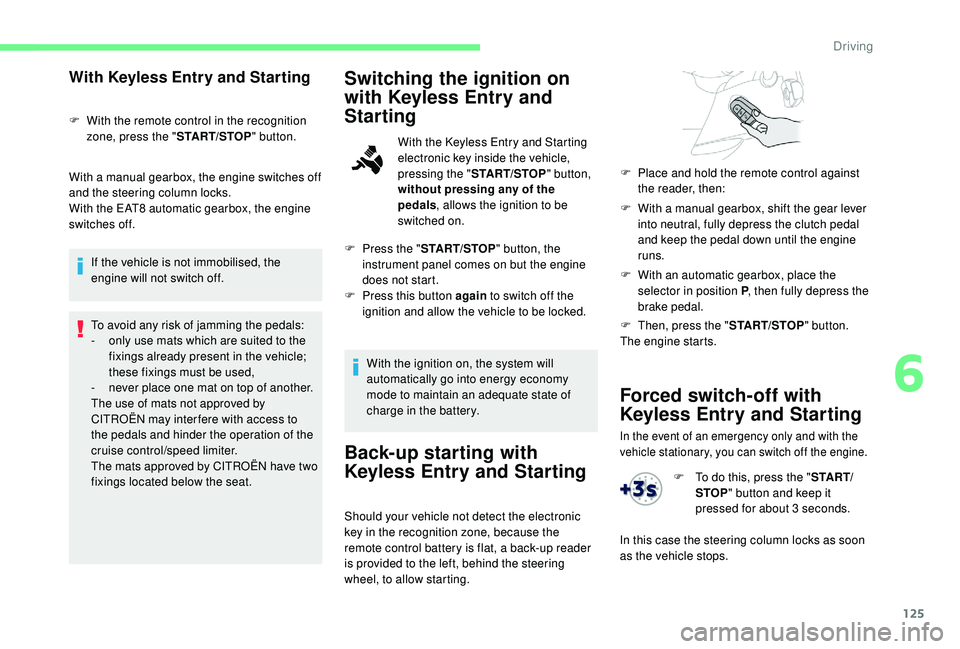
Should your vehicle not detect the electronic
key in the recognition zone, because the
remote control battery is flat, a back-up reader
is provided to the left, behind the steering
wheel, to allow starting. F
W
ith a manual gearbox, shift the gear lever
into neutral, fully depress the clutch pedal
and keep the pedal down until the engine
runs.
F
W
ith an automatic gearbox, place the
selector in position P , then fully depress the
brake pedal.
F
P
lace and hold the remote control against
the reader, then:
F
T
hen, press the "
START/STOP" button.
The engine starts.
With the
K
eyless Entry and Starting
electronic key inside the vehicle,
pressing the " START/STOP " button,
without pressing any of the
pedals , allows the ignition to be
switched on.
F
T
o do this, press the "
S TA R T/
STOP " button and keep it
pressed for about 3 seconds.
In this case the steering column locks as soon
as the vehicle stops.
6
Driving
Page 135 of 320
133
If P is displayed in the instrument panel
while the selector is in another position,
place the selector in position P to allow
the engine to be started.
If position N is selected inadvertently while
driving, allow the engine to return to idle,
then select position D to accelerate.
If your vehicle has an automatic gearbox,
never try to start the engine by pushing
the vehicle.Automatic operation
F Select position D for automatic
changing of the six gears.
Never select position N while the vehicle
is moving.
Never select position P or R unless the
vehicle is completely stationary.
Temporary manual control
of gear changes
You can temporarily take over control of gear
changes using the “ +” and “ -” steering mounted
control paddles. If the engine speed allows, the
gear change is carried out.
This function allows you to anticipate certain
situations, such as overtaking another vehicle
or approaching a bend in the road.
After a few moments with no action on the
control paddles, the gearbox returns to
automatic operation.
If position R
, D or M is selected when the
engine is running at idle, with the brakes
released, the vehicle moves even without
the accelerator being pressed.
Never leave children in the vehicle
unsupervised.
As a safety measure, never leave the
vehicle without taking your key or remote
control with you, even for a short time.
When carrying out maintenance with the
engine running, apply the parking brake
and select position P . The gearbox then operates in auto-adaptive
mode, without any inter vention on the part
of the driver. It continuously selects the most
suitable gear according to the style of driving,
the profile of the road and the load in the
vehicle.
For maximum acceleration without
touching the selector, press the
accelerator fully (kick-down).
The gearbox changes down
automatically or holds the gear
selected until the maximum engine
speed is reached.
When braking, the gearbox changes down
automatically to provide effective engine
braking.
For better safety, the gearbox will not shift up if
you release the accelerator sharply.
Creep function (moving without
using the accelerator)
This function facilitates manoeuvring of the
vehicle at low speed (when parking, in traffic
jams, etc.).
With the engine at idle, parking brake released
and position D , M or R selected, the vehicle
moves
as soon as you take your foot off
the brake pedal (even without pressing the
accelerator).
As a safety measure (with children on
board), never leave the vehicle with the
engine running and the doors closed.
6
Driving