tow Citroen C1 RHD 2015 1.G User Guide
[x] Cancel search | Manufacturer: CITROEN, Model Year: 2015, Model line: C1 RHD, Model: Citroen C1 RHD 2015 1.GPages: 260, PDF Size: 6.35 MB
Page 72 of 260

70
If you use the accessories for a
prolonged period, the vehicle will
automatically switch to "OFF" mode
after about 20 minutes.
Be aware in order to avoid discharging
the battery.
Starting - switching off the engine with the
Keyless Entry and Starting system
Changing the mode of
the vehicle
With the electronic key inside the
vehicle; each press on the " S TA R T/
STOP " button, with no action on
the pedals , changes the vehicle's
mode:
F
F
irst press (" ACC" mode).
T
he accessories (radio, 12V socket...) can
be used.
F
S
econd press (" ON" mode).
I
gnition on.
F
T
hird press (" OFF" mode).
Avoid attaching heavy objects to the
key, which would weigh down on its
blade in the ignition switch and could
cause a malfunction.
Key in ignition
If the key has been left in the ignition,
an audible signal is heard on opening
the driver's door.
F
I
mmobilise the vehicle.
Switching off
F With a manual gearbox: put the gear lever
into neutral.
F
W
ith an ETG gearbox: place the selector at
position N .
F
T
urn the key towards you to position 2
(ACC) .
F
P
ress in and turn the key to position 1
(LOCK) .
F
R
emove the key from the ignition switch.
F
T
urn the steering until the steering column
locks.
Driving
Page 86 of 260

84
The speed limiter cannot, in any
circumstances, replace the need to
observe speed limits, nor can it replace the
need for vigilance on the part of the driver.
Speed limiter (PureTech 82 engine)
The speed limiter is switched on manually:
this can be done whatever the speed of the
vehicle. However, if you are driving at less than
20 mph (30 km/h), the programmed speed will
be fixed at 20 mph (30 km/h).
The speed limiter is paused by operation of the
control.
The programmed speed can be exceeded
temporarily by pressing the accelerator firmly
beyond the point of resistance.
To return to the programmed speed, simply
release the accelerator pedal until the vehicle
returns to the programmed speed limit. System which prevents the vehicle from exceeding the speed programmed by the driver.Steering mounted controls
The controls are grouped together on this
control stalk at the steering wheel.
1.
S
peed limiter on / off: by pressing the end
of the control stalk.
2.
D
ecrease setting: by pushing the control
stalk down.
3.
I
ncrease setting: by pushing the control
stalk up.
4.
S
peed limiter on / pause: by pulling the
control stalk towards you.
Displays in the instrument
panel
The information is grouped together in the
instrument panel screen.
5.
S
peed limiter mode selection indication.
6.
S
peed limiter on / pause indication.
7.
S
peed value setting.
The programmed speed remains in the
memory when the ignition is switched off.
Driving
Page 87 of 260

85
Switching on
F Press the end of the control stalk: the speed limiter mode is selected but is not
switched on.
F
S
witch the speed limiter on by pulling the
control stalk towards you, if the speed
displayed is suitable (by default, the last
speed programmed). Once the function is selected, you can modify
the speed setting by:
-
b
y pushing the control stalk up to increase
the setting,
-
b
y pushing the control stalk down to
decrease the setting.
A brief push on the control stalk modifies the
speed setting by + or - 1 km/h.
A maintained push on the control stalk modifies
the speed setting by + or - 5 km/h.
Adjusting the speed limit
setting
You do not have to switch the speed
limiter on in order to set the speed.
Pause
F You can temporarily stop the the speed limiter by pulling the control stalk towards
you again: the display confirms that it has
been stopped (Pause).
F
P
ull the control stalk towards you again to
restore the speed limiter.
5
Driving
Page 89 of 260

87
Speed limiter (VTi 68 engine)
System which prevents the vehicle from exceeding the speed programmed by the driver.
The speed limiter is switched on manually:
this can be done whatever the speed of the
vehicle. However, if you are driving at less than
20 mph (30 km/h), the programmed speed will
be fixed at 20 mph (30 km/h).
The speed limiter is paused by operation of the
control.
The programmed speed can be exceeded
temporarily by pressing the accelerator firmly
beyond the point of resistance.
To return to the programmed speed, simply
release the accelerator pedal until the vehicle
returns to the programmed speed limit.
The programmed limit speed is erased
when switching off the ignition.
Steering mounted controls
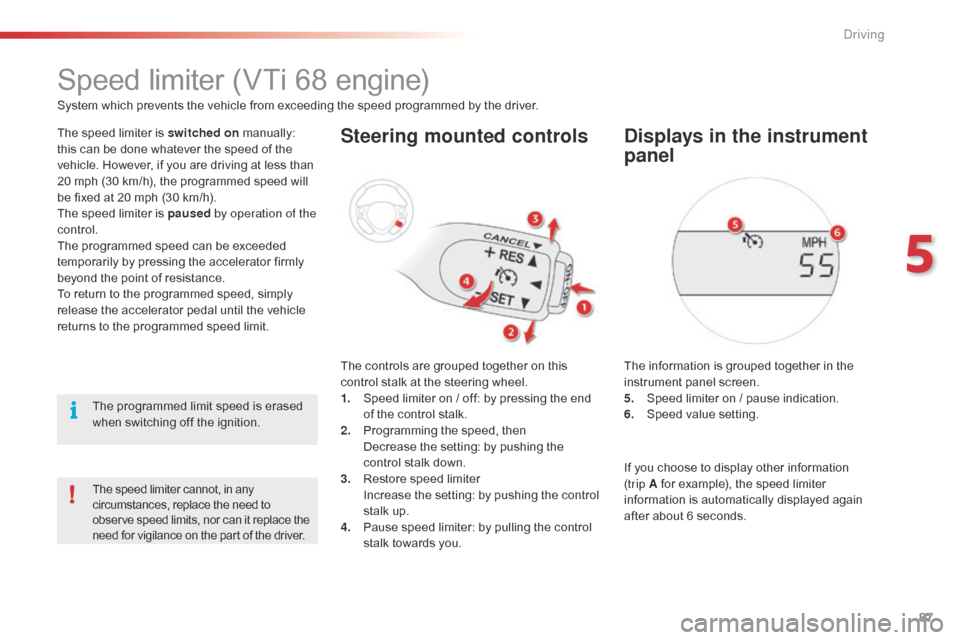
The controls are grouped together on this
control stalk at the steering wheel.
1.
S
peed limiter on / off: by pressing the end
of the control stalk.
2.
P
rogramming the speed, then
D
ecrease the setting: by pushing the
control stalk down.
3.
R
estore speed limiter
I
ncrease the setting: by pushing the control
stalk up.
4.
P
ause speed limiter: by pulling the control
stalk towards you.
Displays in the instrument
panel
The information is grouped together in the
instrument panel screen.
5.
S
peed limiter on / pause indication.
6.
S
peed value setting.
The speed limiter cannot, in any
circumstances, replace the need to
observe speed limits, nor can it replace the
need for vigilance on the part of the driver.
If you choose to display other information
(trip A for example), the speed limiter
information is automatically displayed again
after about 6
seconds.
5
Driving
Page 90 of 260

88
F Press the end of the control stalk: the speed limiter is switched on.
F
A
ccelerate or decelerate to attain the
desired speed.
F
P
ush the control stalk down and release, to
programme the speed.
T
he speed at which the vehicle is running
at the moment when you release the
control stalk becomes the programmed
speed.
Adjusting the speed limit
setting
Once a speed is programmed, you can modify
it by pushing and releasing the control stalk:
-
u
p to increase the speed setting,
-
d
own to reduce the speed setting.
A brief push on the control stalk modifies the
speed setting by + or - 1 km/h.
A maintained push on the control stalk modifies
the speed setting by + or - 5 km/h.
Switching on
This indicator lamp comes on in the
instrument panel.
Pause
F You can temporarily stop the the speed limiter by pulling the control stalk towards
you.
F
P
ush the control stalk up to restore
operation of the speed limiter with the
same speed setting.
Driving
Page 96 of 260

94
Model without AUTO lighting
Model with AUTO lightingSelection ring for main lighting
mode
Turn the ring to position the symbol required
facing the mark.
Lighting off / Daytime running lamps.
Sidelamps only.
Dipped or main beam headlamps.
Automatic illumination of
headlamps.
Dipping the headlamps
With dipped beam on, push the control stalk
away from you to change to main beam. Pull
the stalk toward you change back to dipped
beam.
In the lighting off and sidelamps modes, the
driver can switch on the main beam headlamps
temporarily ("headlamp flash") by maintaining a
pull on the stalk.
Displays
Illumination of the corresponding indicator lamp
in the instrument panel confirms the lighting
switched on.
Visibility
Page 102 of 260

100
Rear wiperRear screenwash
Wiper off, turn the control stalk towards you to
operate the rear screenwash, accompanied by
several sweeps of the rear wiper.
Windscreen wash
Turn the ring to this position for a
steady wipe.
Pushing the stalk away from you operates the
wash during wiping.
Pull the wiper stalk towards you.
The
windscreen wash, then the windscreen
wipers, operate for a pre-determined time.
Do not use the front or rear screenwash
when the screenwash reservoir is
empty. You risk damaging the pump.
Visibility
Page 104 of 260

102
Under-inflation detection
The system monitors the pressures in the four
tyres, once the vehicle is moving.
It compares the information given by the four
wheel speed sensors with reference values,
which must be reinitialised ever y time the
tyre pressures are adjusted or a wheel
changed.
The system triggers an alert as soon as it
detects a drop in the inflation pressure of one
or more tyres. The under-inflation detection system
does not replace the need for vigilance
on the part of the driver.
This system does not avoid the need to
check the tyre pressures (including the
spare wheel) every month as well as
before a long journey.
Driving with under-inflated tyres impairs
road holding, extends braking distances
and causes premature tyre wear,
particularly under arduous condition
(high loading, high speed, long journey).
System which automatically checks the pressures of the tyres while driving.
Hazard warning lamps
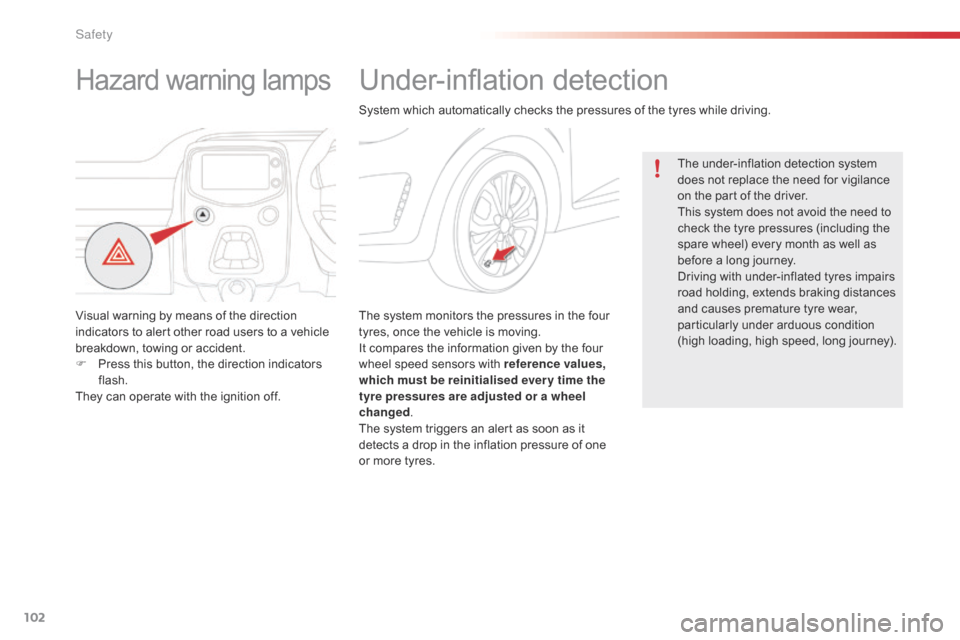
Visual warning by means of the direction
indicators to alert other road users to a vehicle
breakdown, towing or accident.
F
P
ress this button, the direction indicators
flash.
They can operate with the ignition off.
Safety
Page 107 of 260

105
Electronic Stability Control (ESC) incorporating
the following systems:
-
a
nti-lock braking system (ABS) and the
electronic brake force distribution (EBFD),
-
em
ergency braking assistance,
-
t
raction control (TRC),
-
d
ynamic stability control (DSC).
Electronic stability control (ESC)
Definitions
Anti-lock braking system (ABS)
and electronic brake force
distribution (EBFD)
These systems improve the stability and
manoeuvrability of your vehicle when braking
and contribute towards better control in
corners, in particular on poor or slippery road
surfaces.
The ABS prevents wheel lock in the event of
emergency braking.
The electronic brake force distribution system
manages the braking pressure wheel by wheel.
Emergency braking assistance
In an emergency, this system enables you to
reach the optimum braking pressure more
quickly and therefore reduce the stopping
distance.
It is triggered according to the speed at which
the brake pedal is pressed. This is felt by a
reduction in the resistance of the pedal and an
increase in the effectiveness of the braking.
Traction control (TRC)
This system optimises traction in order to limit
wheel slip by acting on the brakes of the driving
wheels and on the engine. It also improves
the directional stability of the vehicle on
acceleration.
Dynamic stability control (DSC)
If there is a difference between the path
followed by the vehicle and that required by the
driver, this system monitors each wheel and
automatically acts on the brake of one or more
wheels and on the engine to return the vehicle
to the required path, within the limits of the laws
of physics.
7
Safety
Page 117 of 260

115
The driver must ensure that passengers use
the seat belts correctly and that they are all
restrained securely before setting off.
Wherever you are seated in the vehicle,
always fasten your seat belt, even for short
journeys.
Do not interchange the seat belt buckles as
they will not fulfil their role fully.
The seat belts are fitted with an inertia reel
permitting automatic adjustment of the
length of the strap to your size. The seat belt
is stowed automatically when not in use.
Before and after use, ensure that the seat
belt is reeled in correctly.
The lower part of the strap must be
positioned as low as possible on the pelvis.
The upper part must be positioned in the
hollow of the shoulder.
The inertia reels are fitted with an automatic
locking device which comes into operation in
the event of a collision, emergency braking
or if the vehicle rolls over. You can release
the device by pulling the strap firmly and
then releasing it so that it reels in slightly.Recommendations for children
Use a suitable child seat if the passenger is
less than 12 years old or shorter than one
and a half metres.
Never use the same seat belt to secure more
than one person.
Never allow a child to travel on your lap.
For more information, refer to the "Child
seats" section.
In order to be effective, a seat belt must:
-
b
e tightened as close to the body as
possible,
-
b
e pulled in front of you with a smooth
movement, checking that it does not
twist,
-
b
e used to restrain only one person,
-
n
ot bear any trace of cuts or fraying,
-
n
ot be converted or modified to avoid
affecting its performance.
In the event of an impact
Depending on the nature and
seriousness of the impact , the
pretensioning device may be deployed
before and independently of the airbags.
Deployment of the pretensioners is
accompanied by a slight discharge of
harmless smoke and a noise, due to the
activation of the pyrotechnic cartridge
incorporated in the system.
In all cases, the airbag warning lamp
comes on.
Following an impact, have the seat belts
system checked, and if necessary replaced,
by a CITROËN dealer or a qualified
workshop.
In accordance with current safety
regulations, for all repairs on your vehicle's
seat belts, go to a qualified workshop with
the skills and equipment needed, which a
CITROËN dealer is able to provide.
Have your seat belts checked regularly by
a CITROËN dealer or a qualified workshop,
particularly if the straps show signs of
damage.
Clean the seat belt straps with soapy
water or a textile cleaning product, sold by
CITROËN dealers.
After folding or moving a seat or rear bench
seat, ensure that the seat belt is positioned
and reeled in correctly.
7
Safety