warning CITROEN C3 AIRCROSS 2022 Repair Manual
[x] Cancel search | Manufacturer: CITROEN, Model Year: 2022, Model line: C3 AIRCROSS, Model: CITROEN C3 AIRCROSS 2022Pages: 308, PDF Size: 9.13 MB
Page 164 of 308
162
Checking tyre pressures
This check should be done when the tyres
are "cold" (vehicle stopped for 1 hour or
after a journey of less than 6
miles (10 km)
at moderate speeds).
Other wise, add 0.3
bar to the pressures
shown on the label.
Snow chains
The system does not have to be
reinitialised after fitting or removing snow
chains.
Under-inflation alert
This warning is indicated by
continuous illumination of this
warning lamp, an audible signal
and, depending on equipment, a
message displayed on the screen.
F
R
educe speed immediately, avoid excessive
steering movements and sudden braking.
F
S
top the vehicle as soon as it is safe to do
so. The loss of pressure detected does not
always cause visible bulging of the tyre.
Do not satisfy yourself with just a visual
check.
F
I
f you have a compressor, such as the one
in the temporary puncture repair kit, check
the pressures of the four tyres when cold.
F
I
f it is not possible to make this check
immediately, drive carefully at reduced
speed.
or
F
I
n case of a puncture, use the temporary
tyre repair kit or the spare wheel (depending
on equipment).
The alert is kept active until the system is
reinitialised.
Reinitialisation
The system must be reinitialised after any
adjustment to the pressures of one or more
tyres, and after changing one or more wheels. Before reinitialising the system, ensure
that the pressures of the four tyres
are correct for the conditions of use
of the vehicle and conform to the
recommendations on the tyre pressure
label.
The under-inflation alert can only be relied
on if the reinitialisation of the system has
been done with the pressures in the four
tyres correctly adjusted.
The under-inflation detection system
does not give a warning if a pressure is
incorrect at the time of reinitialisation.
The system must be reinitialised with the
ignition on and the vehicle stationary:
-
i
n the vehicle configuration menu for
vehicles fitted with a touch screen.
-
v
ia the button on the dashboard for vehicles
without a touch screen.
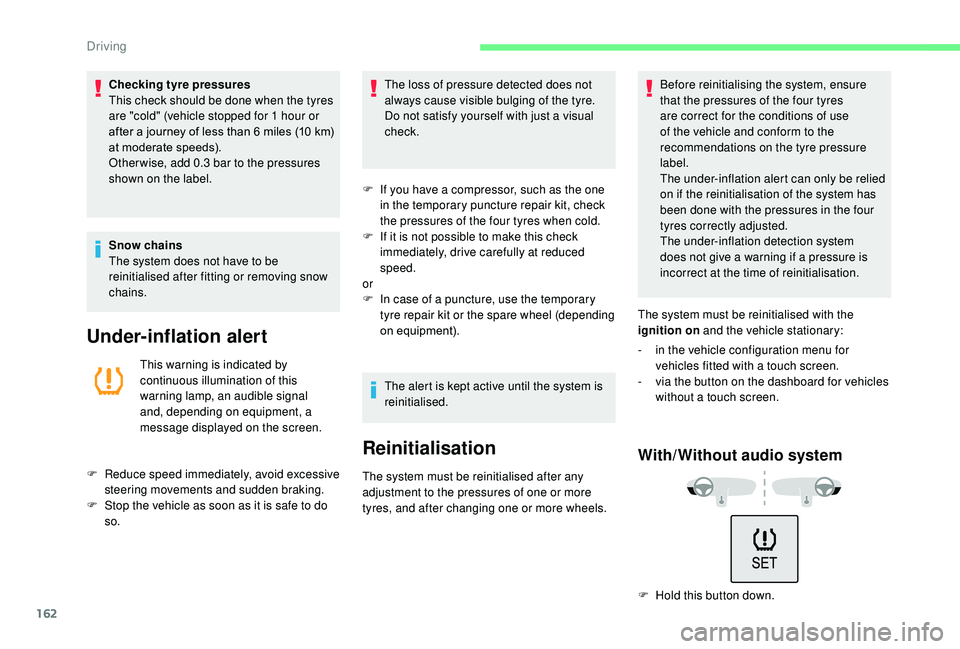
With/Without audio system
F Hold this button down.
Driving
Page 165 of 308
163
Reinitialisation is confirmed by a high-pitched
audible signal.
A deep tone audible signal indicates that the
reinitialisation has not been carried out.
With touch screen
F In the Driving/Vehicle menu,
select the " Driving functions "
tab, then " Reset under-
inflation detection ".
F
Sel
ect " Ye s" to confirm.
A message is displayed and an audible signal
sounds to confirm the reset operation.
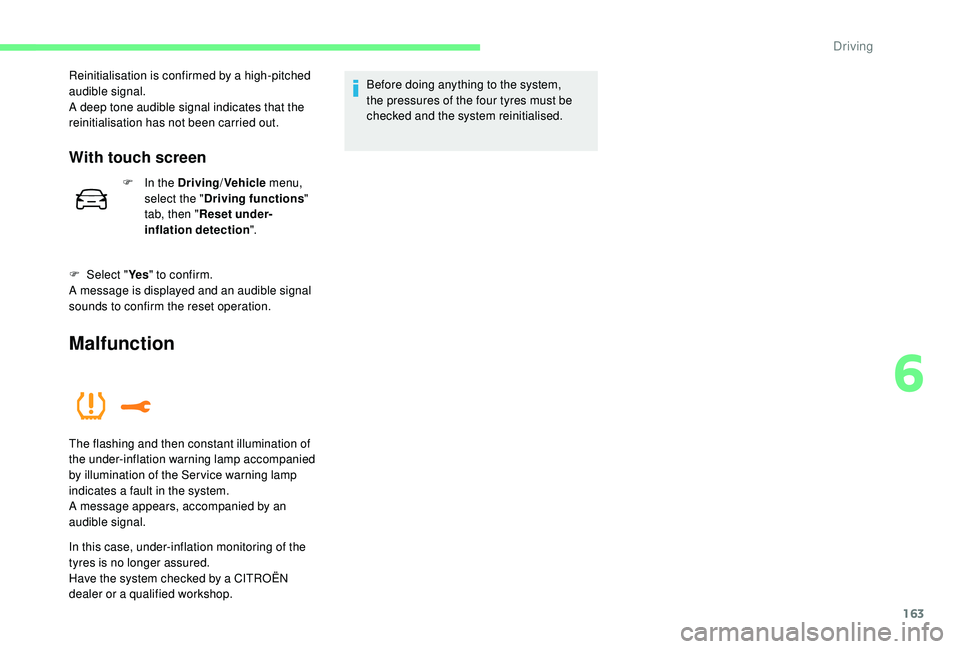
Malfunction
In this case, under-inflation monitoring of the
tyres is no longer assured.
Have the system checked by a CITROËN
dealer or a qualified workshop. Before doing anything to the system,
the pressures of the four tyres must be
checked and the system reinitialised.
The flashing and then constant illumination of
the under-inflation warning lamp accompanied
by illumination of the Ser vice warning lamp
indicates a fault in the system.
A message appears, accompanied by an
audible signal.
6
Driving
Page 168 of 308
166
Fuel tank
Tank capacity: approximately 45 litres.
I f you have put the wrong fuel in your
vehicle, you must have the fuel tank
drained and filled with the correct fuel
before star ting the engine.
Low fuel level
When the low fuel level in the
tank is reached, this warning lamp
comes on in the instrument panel,
accompanied by an audible warning
and a message.
When it first comes on, about 5
litres of fuel
remain in the tank.
This warning lamp will come on every time
the ignition is switched on, accompanied
by a message and an audible signal, until
a sufficient addition of fuel is made. This
audible signal and message are repeated with
increasing frequency as the fuel level drops
and approaches " 0".
Refuel as soon as possible to avoid running
out.
For more information on Running out of
fuel (Diesel) , refer to the corresponding
section.
Refilling
A self-adhesive label on the inner face of the
filler flap reminds you of the type of fuel to use,
depending on your engine.
Additions of fuel must be of at least 5
litres, in
order to be registered by the fuel gauge.
Opening the filler cap may create a noise
caused by an inrush of air. This vacuum is
entirely normal, resulting from the sealing of the
fuel system.
To refuel in complete safety:
F
Y
ou must switch off the engine.
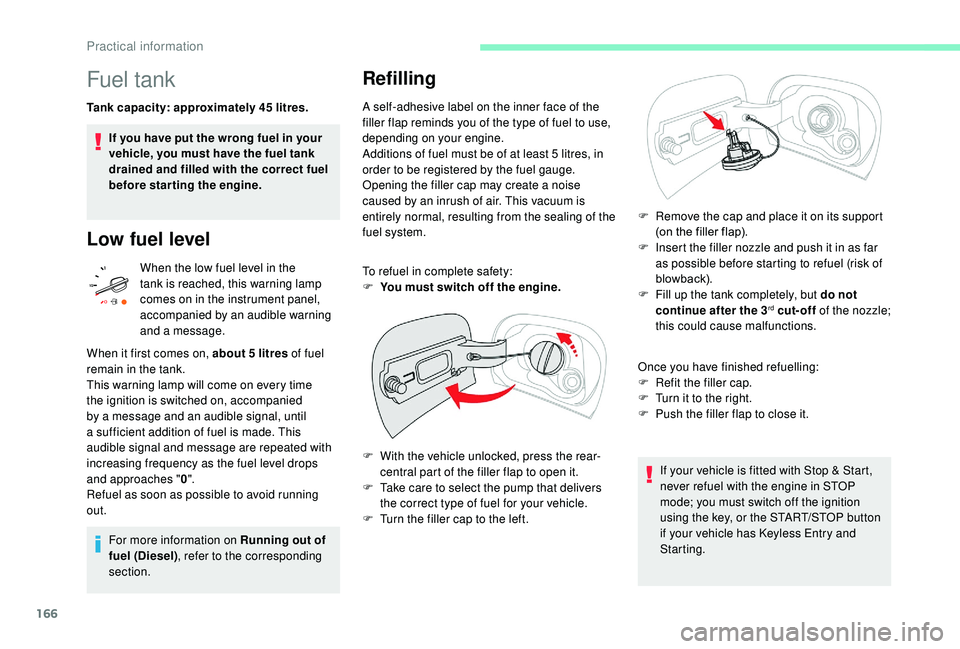
F
W
ith the vehicle unlocked, press the rear-
central part of the filler flap to open it.
F
T
ake care to select the pump that delivers
the correct type of fuel for your vehicle.
F
T
urn the filler cap to the left. F
R
emove the cap and place it on its support
(on the filler flap).
F
I
nsert the filler nozzle and push it in as far
as possible before starting to refuel (risk of
blowback).
F
F
ill up the tank completely, but do not
continue after the 3
rd cut-off of the nozzle;
this could cause malfunctions.
Once you have finished refuelling:
F
R
efit the filler cap.
F
T
urn it to the right.
F
P
ush the filler flap to close it.
If your vehicle is fitted with Stop & Start,
never refuel with the engine in STOP
mode; you must switch off the ignition
using the key, or the START/STOP button
if your vehicle has
K
eyless Entry and
Starting.
Practical information
Page 176 of 308

174
Version with longitudinal
bars
You must fit the transverse bars to the
longitudinal bars at the fixing points under the
longitudinal bars.Sunroof
Check that the load does not pass below
the roof bars so that it does not impede
the movements of the sunroof.
Recommendations
F D istribute the load uniformly, taking care
to avoid overloading one of the sides.
F
A
rrange the heaviest part of the load as
close as possible to the roof.
F
S
ecure the load securely and fit a
warning flag if it overhangs the vehicle.
F
D
rive gently: the vehicle will be more
susceptible to the effects of side winds
(the stability of the vehicle may be
affected).
F
R
emove the roof bars once they are no
longer needed.
Maximum load, distributed over the roof
bars, for a loading height not exceeding
40
cm:
-
w
ithout longitudinal bars: 50 kg,
-
w
ith longitudinal bars: 45 kg.
As this value may be changed, please
verify the maximum load quoted in the
user guide supplied with the roof bars.
If the height exceeds 40
cm, adapt the
speed of the vehicle to the profile of the
road to avoid damaging the roof bars and
the fixings on the vehicle.
Be sure to refer to national legislation in
order to comply with the regulations for
transporting objects which are longer than
the vehicle.
Bonnet
Opening
F Open the left-hand front door.
F
S
hift the lever to the left and raise the
bonnet.
F
P
ull the lever, located at the bottom of the
door aperture, towards you.
Practical information
Page 180 of 308
178
When the engine is warm, the temperature of
the coolant is regulated by the fan.
In addition, as the cooling system is
pressurised, wait at least one hour after
switching off the engine before carrying out any
work.
To avoid the risk of scalding when you need to
top up in an emergency, place a cloth around
the cap and unscrew the cap by two turns to
allow the pressure to drop.
Once the pressure has dropped, remove the
cap and top up the coolant.The cooling fan may star t after
switching off the engine: take care
with articles and clothing that might be
caught by the fan blades.
Fluid specification
The fluid must conform to the manufacturer's
recommendations.
Screenwash fluid level
A low coolant level presents a risk of serious
damage to your engine.
Top up the fluid when necessary.Fluid specification
The screenwash fluid must be topped up with a
ready for use mix.
In winter (temperatures below zero), a fluid with
antifreeze must be used that is appropriate for
the prevailing conditions, in order to preser ve
the elements of the system (pump, tank, ducts,
e t c .) .
Filling with pure water is prohibited under all
circumstances (risk of freezing, limestone
deposits, etc.).
Diesel fuel additive level
(Diesel with particle filter)
The additive tank minimum level is
indicated by fixed illumination of this
warning lamp, accompanied by an
audible signal and a message that
the particle filter additive level is
too low.
To p p i n g u p
The reser voir must be topped up without delay
by a CITROËN dealer or a qualified workshop.
AdBlue level
An alert is triggered once the reser ve level is
reached.
To avoid the vehicle being immobilised as per
regulations, you must top up with AdBlue.
For more information on AdBlue
® and the SCR
system, and, in particular, topping it up, refer to
the corresponding section.
Checks
Unless otherwise indicated, check these
components in accordance with the
manufacturer's service schedule and according
to your engine.
Other wise, have them checked by a CITROËN
dealer or a qualified workshop.
12 V battery
The battery does not require any
maintenance.
However, check regularly that the
terminals are correctly tightened
(versions without quick release
terminals) and that the connections
are clean.
Practical information
Page 181 of 308
179
For more information on the precautions
to take before starting work on the 12 V
battery , refer to the corresponding
section.
Versions equipped with Stop & Start are
fitted with a 12
V lead-acid battery of
specific technology and specification.
Its replacement should be carried out
only by a CITROËN dealer or a qualified
workshop.
Air filter
Depending on the environment
(e.g. dusty atmosphere) and the
use of the vehicle (e.g. city driving),
replace it twice as often if
necessary .
Passenger compartment filter
Depending on the environment
(e.g. dusty atmosphere) and the
use of the vehicle (e.g. city driving),
replace it twice as often if
necessary. A clogged passenger compartment
filter may have an adverse effect on
the per formance of the air conditioning
system and generate undesirable odours.
Oil filter
Replace the oil filter each time the
engine oil is changed.
Particle filter (Diesel)
The start of saturation of the particle
filter is indicated by the constant
illumination of this warning lamp
accompanied by an alert message.
As soon as the traffic conditions permit,
regenerate the filter by driving at a speed
of at least 37
mph (60 km/h) until the
warning lamp goes off.
If the warning lamp stays on, this indicates
a low Diesel additive level.
For more information on Checking levels
and particularly on the level of Diesel
additive, refer to the corresponding
section.
On a new vehicle, the first particle
filter regeneration operations may be
accompanied by a "burning" smell, which
is per fectly normal.
Following prolonged operation of the
vehicle at very low speed or at idle,
you may, in exceptional circumstances,
notice the emission of water vapour at the
exhaust on acceleration. This does not
affect the behaviour of the vehicle or the
environment.
Manual gearbox
The gearbox does not require any
maintenance (no oil change).
7
Practical information
Page 183 of 308
181
During each scheduled ser vice of your vehicle
by a CITROËN dealer or a qualified workshop,
the AdBlue
® tank is refilled in order to allow
normal operation of the SCR system.
If the estimated mileage of your vehicle
between two ser vices is greater than around
12,000
miles (20,000 km), it will be necessary
to top up the AdBlue
®.
Once the AdBlue
® tank is empty, a system
r
equired by regulations prevents starting
of the engine.
If the SCR
system is faulty, the level of
emissions from your vehicle will no longer
meet the Euro 6 standard: your vehicle
becomes polluting.
In the event of a confirmed fault with the
SCR system, you must go to a CITROËN
dealer or a qualified workshop as soon
as possible: after a running distance of
680
miles (1,100
km), a system will be
triggered automatically to prevent engine
starting.
In either case, a range indicator gives you
the distance you can travel before the
vehicle is immobilised.
For more information on the Warning
and indicator lamps and the associated
alerts, refer to the corresponding section. Freezing of AdBlue
®
AdBlue® freezes at temperatures below
around -11°C.
The SCR system includes a heater for the
AdBlue
® tank, allowing you to continue
driving in all weather conditions.
Topping up with AdBlue®
Before topping up, please read the
following warnings carefully.
Precautions for use
The AdBlue® solution is based on urea. This
liquid is non-flammable, colourless and
odourless (when kept in a cool place).
In the event of contact with the skin, wash the
affected area with soap and water. In the event
of contact with the eyes, wash (irrigate) the
eyes with large amounts of water or with an eye
wash solution for at least 15
minutes. If you feel
a persistent burning sensation or irritation, get
medical attention.
If swallowed, immediately wash out the mouth
with clean water and then drink plenty of water. Keep AdBlue
® out of the reach of children,
in its original container.
Never transfer AdBlue
® to another
container: it would become contaminated.
Use only AdBlue
® fluid that meets the
ISO
22241 standard.
Never dilute AdBlue
® with water.
Never pour AdBlue® into the Diesel fuel
tank.
Containers are available from a
CITROËN
dealer or a qualified workshop.
In certain conditions (at high temperature,
for example), the risk of release of ammonia
cannot be excluded: do not inhale the vapour.
Ammonia has an irritant effect on mucous
membranes (eyes, nose and throat).
You can also visit a ser vice station
equipped with AdBlue pumps specially
designed for private vehicles and light
goods vehicles.
7
Practical information
Page 186 of 308

184
Running out of fuel
(Diesel)
On vehicles fitted with Diesel engines, the fuel
system must be primed if you run out of fuel.
If the engine does not start first time, do not
keep trying but start the procedure again from
the beginning.For more information on Misfuel
prevention (Diesel) , refer to the
corresponding section.
BlueHDi engines
F Fill the fuel tank with at least five litres of Diesel fuel.
F
S
witch on the ignition (without starting the
engine).
F
W
ait around 6 seconds and switch off the
ignition.
F
R
epeat the operation 10 times.
F
O
perate the starter to run the engine.
Other HDi engines
(Except BlueHDi version)
F
F
ill the fuel tank with at least five litres of
Diesel fuel. F
O
perate the priming pump repeatedly until
resistance is felt (there may be resistance at
the first press).
F
O
perate the starter to start the engine (if the
engine does not start at the first attempt,
wait around 15 seconds before trying
again).
F
I
f the engine does not start after a few
attempts, operate the priming pump again,
then start the engine.
F
P
ut the cover in place and clip it in.
F
C
lose the bonnet.
Temporary puncture
repair kit
Scan the QR code on page 3 to view
explanatory videos.Comprising a compressor and a sealant
cartridge, it allows the temporary repair
of
a tyre so that you can drive to the nearest
garage.
It is designed to repair most punctures which
could affect the tyre, located on the tyre tread
or shoulder.
Only the 12 V socket at the front of
the vehicle allows the compressor to be
connected for long enough to repair or
inflate the vehicle tyre.
The other 12 V sockets of the vehicle
are not designed to be used with the
compressor.
Under-inflation detection
After repair of the tyre, the warning
lamp will remain on until the system is
reinitialised.
For more information on Under-inflation
detection , refer to the corresponding
section.
F
O
pen the bonnet.
F
I
f necessary, unclip the cover to access the
priming pump.
In the event of a breakdown
Page 187 of 308
185
Repair procedure
F Park the vehicle without obstructing any traffic and apply the parking brake.
F
F
ollow the safety instructions (hazard warning
lamps, warning triangle, wearing high visibility
vest, etc.) according to the legislation in force
in the country where you are driving.
F
S
witch off the ignition.
F Uncoil the pipe stowed under the compressor.
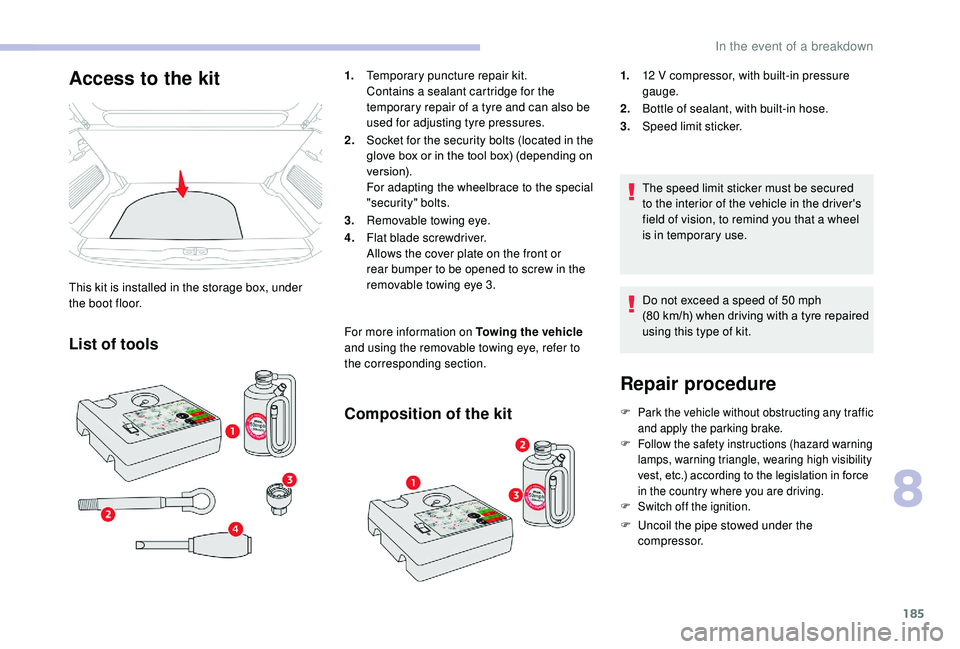
Access to the kit
This kit is installed in the storage box, under
the boot floor.
List of tools
1. Temporary puncture repair kit.
Contains a sealant cartridge for the
temporary repair of a tyre and can also be
used for adjusting tyre pressures.
2. Socket for the security bolts (located in the
glove box or in the tool box) (depending on
ve r s i o n).
For adapting the wheelbrace to the special
"security" bolts.
3. Removable towing eye.
4. Flat blade screwdriver.
Allows the cover plate on the front or
rear bumper to be opened to screw in the
removable towing eye 3.
For more information on Towing the vehicle
and using the removable towing eye, refer to
the corresponding section.
Composition of the kit
1. 12 V compressor, with built-in pressure
gauge.
2. Bottle of sealant, with built-in hose.
3. Speed limit sticker.
The speed limit sticker must be secured
to the interior of the vehicle in the driver's
field of vision, to remind you that a wheel
is in temporary use.
Do not exceed a speed of 50
mph
(80
km/h) when driving with a tyre repaired
using this type of kit.
8
In the event of a breakdown
Page 192 of 308
190
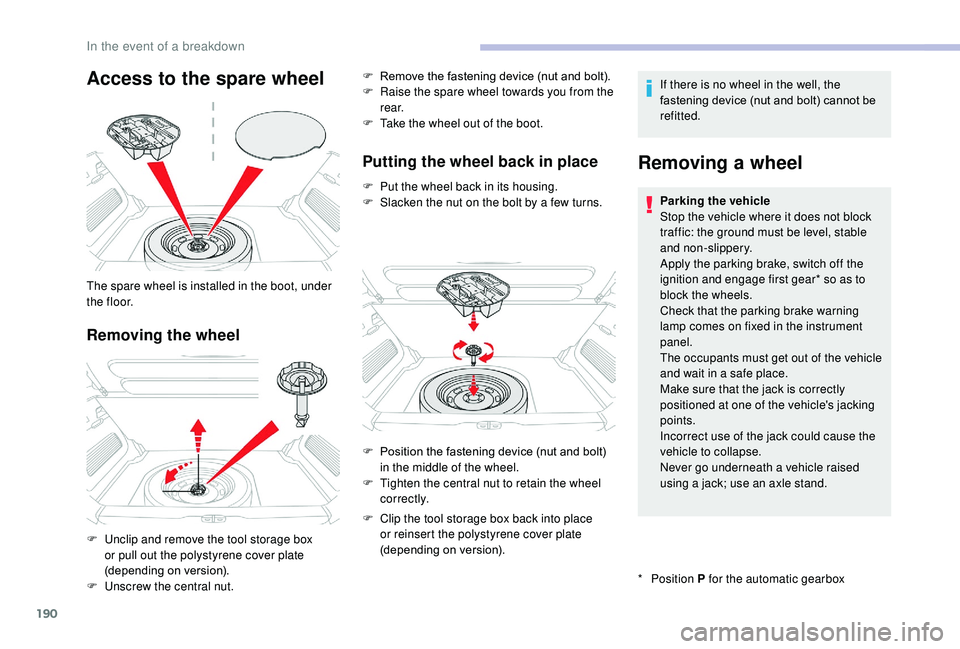
Access to the spare wheel
Removing the wheel
The spare wheel is installed in the boot, under
t h e f l o o r.
F
U
nclip and remove the tool storage box
or pull out the polystyrene cover plate
(depending on version).
F
U
nscrew the central nut. F
R
emove the fastening device (nut and bolt).
F
R
aise the spare wheel towards you from the
r e a r.
F
T
ake the wheel out of the boot.
Putting the wheel back in place
F Put the wheel back in its housing.
F
S lacken the nut on the bolt by a few turns. If there is no wheel in the well, the
fastening device (nut and bolt) cannot be
refitted.
Removing a wheel
* Position
P for the automatic gearbox
Parking the vehicle
Stop the vehicle where it does not block
traffic: the ground must be level, stable
and non-slippery.
Apply the parking brake, switch off the
ignition and engage first gear* so as to
block the wheels.
Check that the parking brake warning
lamp comes on fixed in the instrument
panel.
The occupants must get out of the vehicle
and wait in a safe place.
Make sure that the jack is correctly
positioned at one of the vehicle's jacking
points.
Incorrect use of the jack could cause the
vehicle to collapse.
Never go underneath a vehicle raised
using a jack; use an axle stand.
F
P
osition the fastening device (nut and bolt)
in the middle of the wheel.
F
T
ighten the central nut to retain the wheel
c o r r e c t l y.
F
C
lip the tool storage box back into place
or reinsert the polystyrene cover plate
(depending on version).
In the event of a breakdown