warning light Citroen C3 PICASSO DAG 2009.5 1.G User Guide
[x] Cancel search | Manufacturer: CITROEN, Model Year: 2009.5, Model line: C3 PICASSO DAG, Model: Citroen C3 PICASSO DAG 2009.5 1.GPages: 200, PDF Size: 9.96 MB
Page 63 of 200
i
69
VISIBILITY
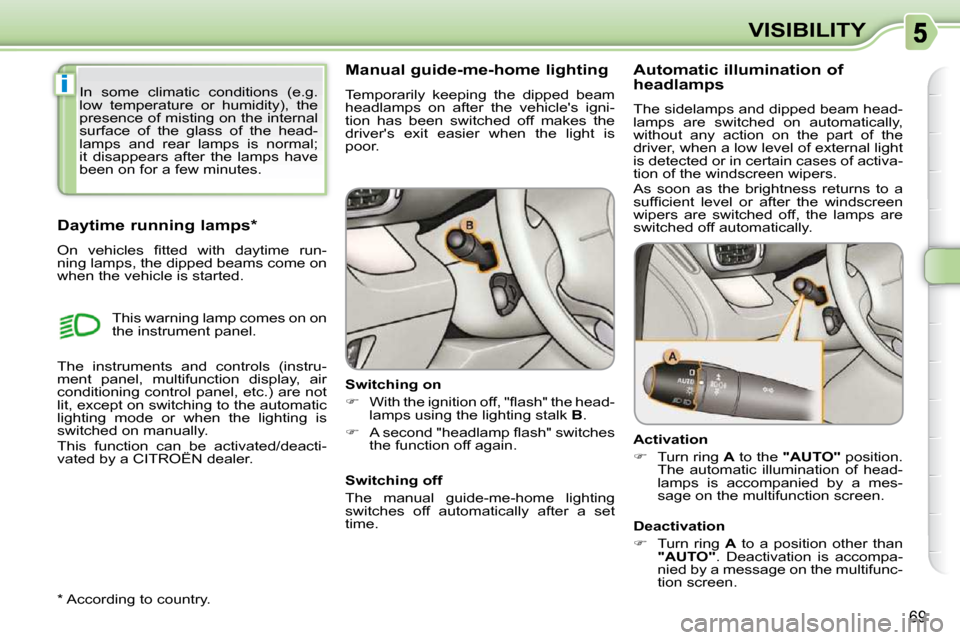
Manual guide-me-home lighting
Temporarily keeping the dipped beam
headlamps on after the vehicle's igni-
tion has been switched off makes the
driver's exit easier when the light is
poor.
Switching on
� � � �W�i�t�h� �t�h�e� �i�g�n�i�t�i�o�n� �o�f�f�,� �"�fl� �a�s�h�"� �t�h�e� �h�e�a�d�-
lamps using the lighting stalk B .
� � � �A� �s�e�c�o�n�d� �"�h�e�a�d�l�a�m�p� �fl� �a�s�h�"� �s�w�i�t�c�h�e�s�
the function off again.
Switching off
The manual guide-me-home lighting
switches off automatically after a set
time.
Daytime running lamps *
� �O�n� �v�e�h�i�c�l�e�s� �fi� �t�t�e�d� �w�i�t�h� �d�a�y�t�i�m�e� �r�u�n�-
ning lamps, the dipped beams come on
when the vehicle is started.
* According to country.
This warning lamp comes on on
the instrument panel.
Automatic illumination of
headlamps
The sidelamps and dipped beam head-
lamps are switched on automatically,
without any action on the part of the
driver, when a low level of external light
is detected or in certain cases of activa-
tion of the windscreen wipers.
As soon as the brightness returns to a
�s�u�f�fi� �c�i�e�n�t� �l�e�v�e�l� �o�r� �a�f�t�e�r� �t�h�e� �w�i�n�d�s�c�r�e�e�n�
wipers are switched off, the lamps are
switched off automatically.
Activation
� Turn ring A to the "AUTO" position.
The automatic illumination of head-
lamps is accompanied by a mes-
sage on the multifunction screen.
Deactivation
� Turn ring A to a position other than
"AUTO" . Deactivation is accompa-
nied by a message on the multifunc-
tion screen.
The instruments and controls (instru-
ment panel, multifunction display, air
�c�o�n�d�i�t�i�o�n�i�n�g� �c�o�n�t�r�o�l� �p�a�n�e�l�,� �e�t�c�.�)� �a�r�e� �n�o�t�
lit, except on switching to the automatic
lighting mode or when the lighting is
switched on manually.
This function can be activated/deacti-
vated by a CITROËN dealer. In some climatic conditions (e.g.
�l�o�w� �t�e�m�p�e�r�a�t�u�r�e� �o�r� �h�u�m�i�d�i�t�y�)�,� �t�h�e�
presence of misting on the internal
surface of the glass of the head-
lamps and rear lamps is normal;
it disappears after the lamps have
been on for a few minutes.
Page 64 of 200
i
69
VISIBILITY
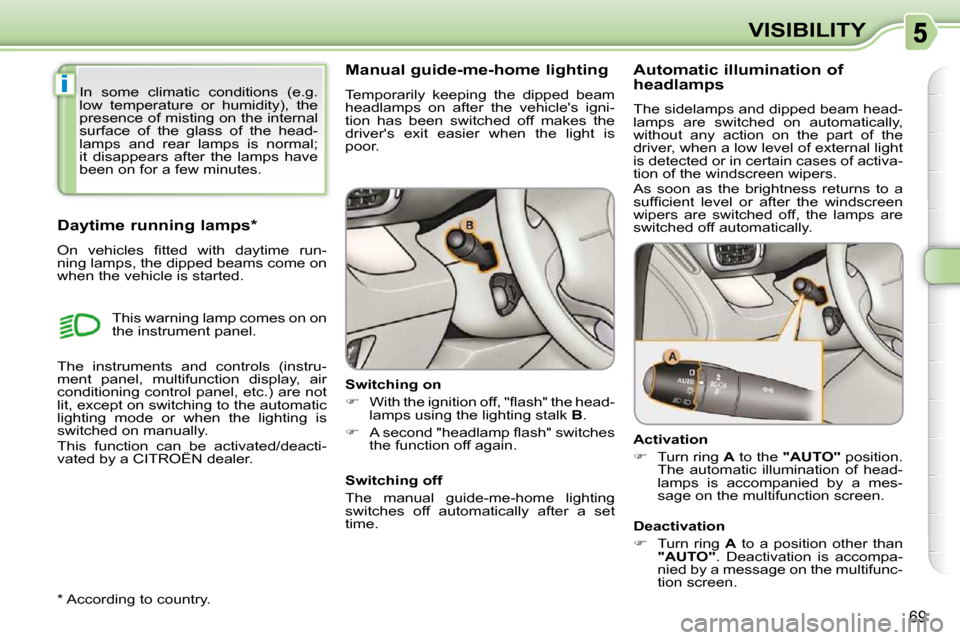
Manual guide-me-home lighting
Temporarily keeping the dipped beam
headlamps on after the vehicle's igni-
tion has been switched off makes the
driver's exit easier when the light is
poor.
Switching on
� � � �W�i�t�h� �t�h�e� �i�g�n�i�t�i�o�n� �o�f�f�,� �"�fl� �a�s�h�"� �t�h�e� �h�e�a�d�-
lamps using the lighting stalk B .
� � � �A� �s�e�c�o�n�d� �"�h�e�a�d�l�a�m�p� �fl� �a�s�h�"� �s�w�i�t�c�h�e�s�
the function off again.
Switching off
The manual guide-me-home lighting
switches off automatically after a set
time.
Daytime running lamps *
� �O�n� �v�e�h�i�c�l�e�s� �fi� �t�t�e�d� �w�i�t�h� �d�a�y�t�i�m�e� �r�u�n�-
ning lamps, the dipped beams come on
when the vehicle is started.
* According to country.
This warning lamp comes on on
the instrument panel.
Automatic illumination of
headlamps
The sidelamps and dipped beam head-
lamps are switched on automatically,
without any action on the part of the
driver, when a low level of external light
is detected or in certain cases of activa-
tion of the windscreen wipers.
As soon as the brightness returns to a
�s�u�f�fi� �c�i�e�n�t� �l�e�v�e�l� �o�r� �a�f�t�e�r� �t�h�e� �w�i�n�d�s�c�r�e�e�n�
wipers are switched off, the lamps are
switched off automatically.
Activation
� Turn ring A to the "AUTO" position.
The automatic illumination of head-
lamps is accompanied by a mes-
sage on the multifunction screen.
Deactivation
� Turn ring A to a position other than
"AUTO" . Deactivation is accompa-
nied by a message on the multifunc-
tion screen.
The instruments and controls (instru-
ment panel, multifunction display, air
�c�o�n�d�i�t�i�o�n�i�n�g� �c�o�n�t�r�o�l� �p�a�n�e�l�,� �e�t�c�.�)� �a�r�e� �n�o�t�
lit, except on switching to the automatic
lighting mode or when the lighting is
switched on manually.
This function can be activated/deacti-
vated by a CITROËN dealer. In some climatic conditions (e.g.
�l�o�w� �t�e�m�p�e�r�a�t�u�r�e� �o�r� �h�u�m�i�d�i�t�y�)�,� �t�h�e�
presence of misting on the internal
surface of the glass of the head-
lamps and rear lamps is normal;
it disappears after the lamps have
been on for a few minutes.
Page 95 of 200
!
!
93
This system is independent and in
no circumstances does it take the
place of the central locking control.
Check the status of the child lock
each time you switch on the ignition.
Always remove the key from the
ignition when leaving the vehicle,
even for a short time.
In the event of a serious impact,
the electric child lock is deactivated
automatically to permit the exit of
the rear passengers.
MANUAL CHILD LOCK
� �M�e�c�h�a�n�i�c�a�l� �s�y�s�t�e�m� �t�o� �p�r�e�v�e�n�t� �o�p�e�n�i�n�g�
of the rear door using its interior control.
The control is located on the edge of
each rear door.
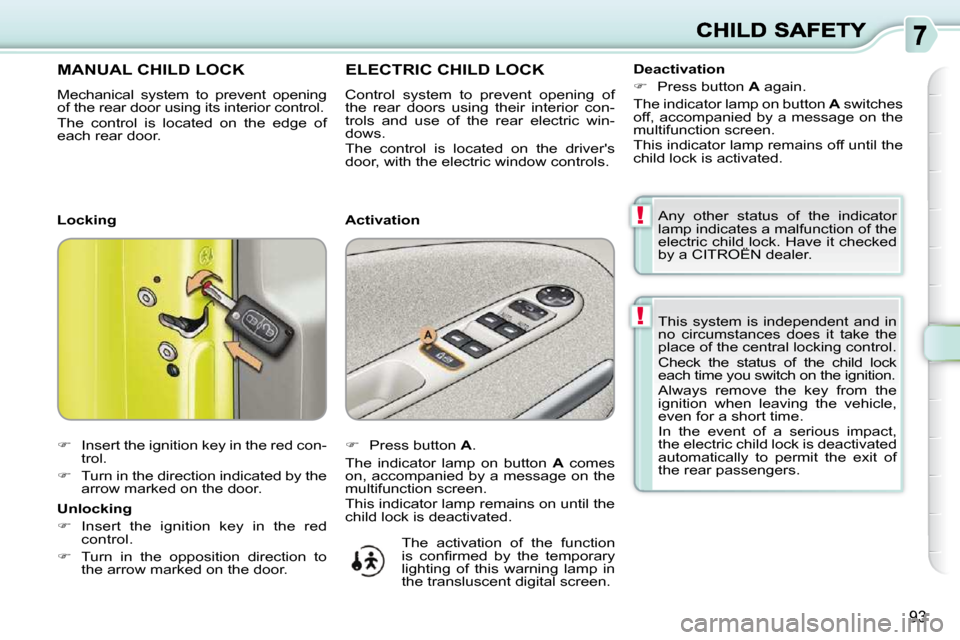
� Insert the ignition key in the red con-
trol.
� Turn in the direction indicated by the
arrow marked on the door.
ELECTRIC CHILD LOCK
Control system to prevent opening of
the rear doors using their interior con-
trols and use of the rear electric win-
dows.
The control is located on the driver's
door, with the electric window controls.
� Press button A .
The indicator lamp on button A comes
on, accompanied by a message on the
multifunction screen.
This indicator lamp remains on until the
child lock is deactivated.
Locking
Unlocking
� Insert the ignition key in the red
control.
� Turn in the opposition direction to
the arrow marked on the door. Activation
Deactivation
� Press button A again.
The indicator lamp on button A switches
off, accompanied by a message on the
multifunction screen.
This indicator lamp remains off until the
child lock is activated.
Any other status of the indicator
lamp indicates a malfunction of the
electric child lock. Have it checked
�b�y� �a� �C�I�T�R�O��N� �d�e�a�l�e�r�.�
The activation of the function
�i�s� �c�o�n�fi� �r�m�e�d� �b�y� �t�h�e� �t�e�m�p�o�r�a�r�y�
lighting of this warning lamp in
the transluscent digital screen.
Page 96 of 200
ii
94
DIRECTION INDICATORS
Selection of the left or right direction indi-
cators to signal a change of direction of
the vehicle. If you forget to cancel the direc-
tion indicators for more than twenty
seconds, the volume of the audible
signal will increase if the speed is
above 40 mph (60 km/h).
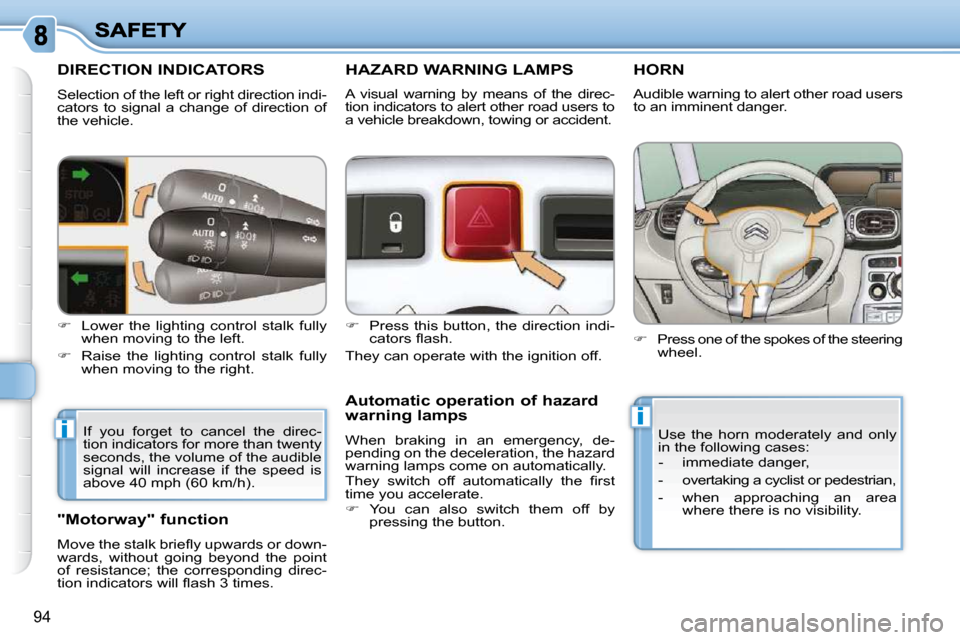
� Lower the lighting control stalk fully
when moving to the left.
� Raise the lighting control stalk fully
when moving to the right.
HAZARD WARNING LAMPS
� Press this button, the direction indi-
�c�a�t�o�r�s� �fl� �a�s�h�.� �
They can operate with the ignition off.
Automatic operation of hazard warning lamps
When braking in an emergency, de-
pending on the deceleration, the hazard
warning lamps come on automatically.
� �T�h�e�y� �s�w�i�t�c�h� �o�f�f� �a�u�t�o�m�a�t�i�c�a�l�l�y� �t�h�e� �fi� �r�s�t�
time you accelerate.
� You can also switch them off by
pressing the button.
HORN
� Press one of the spokes of the steering
wheel.
Use the horn moderately and only
in the following cases:
- immediate danger,
- overtaking a cyclist or pedestrian,
- when approaching an area where there is no visibility.
Audible warning to alert other road users
to an imminent danger.
"Motorway" function
� �M�o�v�e� �t�h�e� �s�t�a�l�k� �b�r�i�e�fl� �y� �u�p�w�a�r�d�s� �o�r� �d�o�w�n�-
wards, without going beyond the point
of resistance; the corresponding direc-
�t�i�o�n� �i�n�d�i�c�a�t�o�r�s� �w�i�l�l� �fl� �a�s�h� �3� �t�i�m�e�s�.� � A visual warning by means of the direc-
tion indicators to alert other road users to
a vehicle breakdown, towing or accident.
Page 97 of 200
!
i
!
95
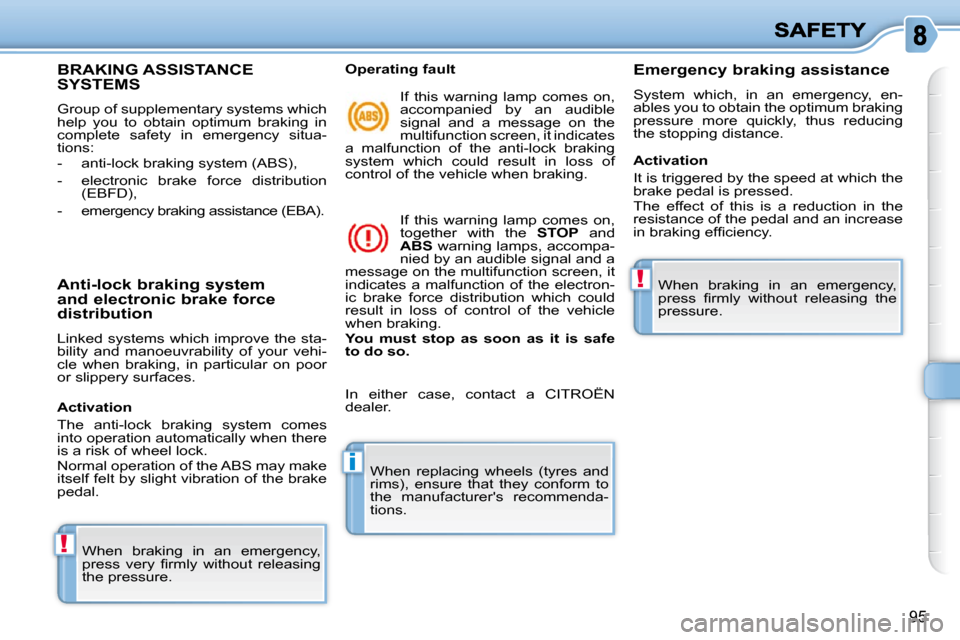
BRAKING ASSISTANCE SYSTEMS
Group of supplementary systems which
help you to obtain optimum braking in
complete safety in emergency situa-
tions:
- anti-lock braking system (ABS),
- electronic brake force distribution (EBFD),
- emergency braking assistance (EBA).
Anti-lock braking system and electronic brake force distribution
Linked systems which improve the sta-
bility and manoeuvrability of your vehi-
cle when braking, in particular on poor
or slippery surfaces.
When braking in an emergency,
�p�r�e�s�s� �v�e�r�y� �fi� �r�m�l�y� �w�i�t�h�o�u�t� �r�e�l�e�a�s�i�n�g�
the pressure. When replacing wheels (tyres and
rims), ensure that they conform to
the manufacturer's recommenda-
tions.
Operating fault
If this warning lamp comes on,
accompanied by an audible
signal and a message on the
multifunction screen, it indicates
a malfunction of the anti-lock braking
system which could result in loss of
control of the vehicle when braking.
If this warning lamp comes on,
together with the STOP and
ABS warning lamps, accompa-
nied by an audible signal and a
message on the multifunction screen, it
indicates a malfunction of the electron-
ic brake force distribution which could
result in loss of control of the vehicle
when braking.
You
must
stop as soon as it is safe
to do so.
Emergency braking assistance
System which, in an emergency, en-
ables you to obtain the optimum braking
pressure more quickly, thus reducing
the stopping distance.
Activation
The anti-lock braking system comes
into operation automatically when there
is a risk of wheel lock.
Normal operation of the ABS may make
itself felt by slight vibration of the brake
pedal. Activation
It is triggered by the speed at which the
brake pedal is pressed.
The effect of this is a reduction in the
resistance of the pedal and an increase
�i�n� �b�r�a�k�i�n�g� �e�f�fi� �c�i�e�n�c�y�.�
In either case, contact a CITROËN
dealer. When braking in an emergency,
�p�r�e�s�s� �fi� �r�m�l�y� �w�i�t�h�o�u�t� �r�e�l�e�a�s�i�n�g� �t�h�e�
pressure.
Page 102 of 200
i
100
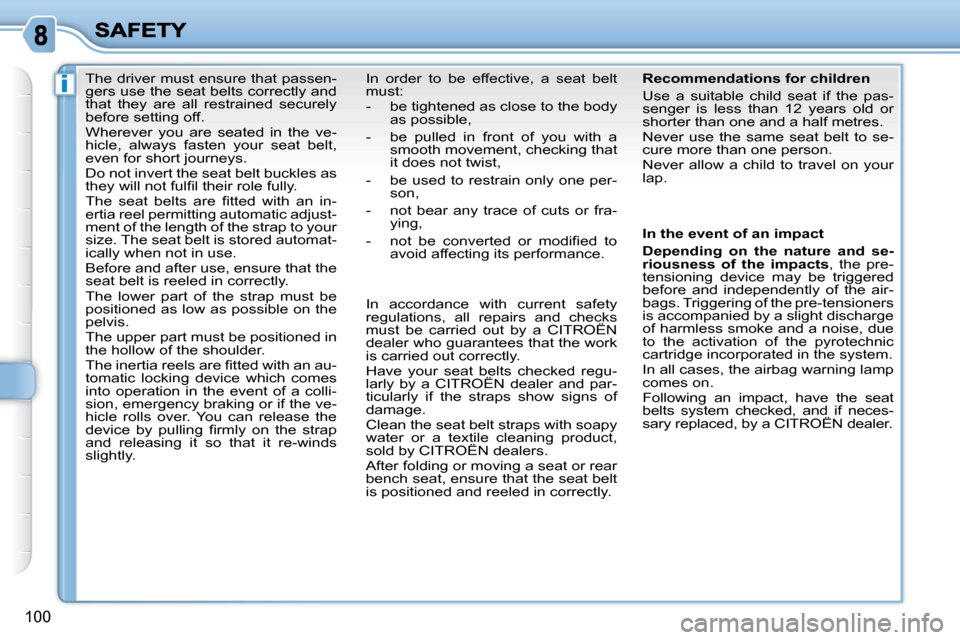
The driver must ensure that passen-
gers use the seat belts correctly and
that they are all restrained securely
before setting off.
Wherever you are seated in the ve-
hicle, always fasten your seat belt,
even for short journeys.
Do not invert the seat belt buckles as
�t�h�e�y� �w�i�l�l� �n�o�t� �f�u�l�fi� �l� �t�h�e�i�r� �r�o�l�e� �f�u�l�l�y�.�
� �T�h�e� �s�e�a�t� �b�e�l�t�s� �a�r�e� �fi� �t�t�e�d� �w�i�t�h� �a�n� �i�n�-
ertia reel permitting automatic adjust-
ment of the length of the strap to your
size. The seat belt is stored automat-
ically when not in use.
Before and after use, ensure that the
seat belt is reeled in correctly.
The lower part of the strap must be
positioned as low as possible on the
pelvis.
The upper part must be positioned in
the hollow of the shoulder.
� �T�h�e� �i�n�e�r�t�i�a� �r�e�e�l�s� �a�r�e� �fi� �t�t�e�d� �w�i�t�h� �a�n� �a�u�-
tomatic locking device which comes
into operation in the event of a colli-
sion, emergency braking or if the ve-
hicle rolls over. You can release the
�d�e�v�i�c�e� �b�y� �p�u�l�l�i�n�g� �fi� �r�m�l�y� �o�n� �t�h�e� �s�t�r�a�p�
and releasing it so that it re-winds
slightly. In order to be effective, a seat belt
must:
- be tightened as close to the body
as possible,
- be pulled in front of you with a smooth movement, checking that
it does not twist,
- be used to restrain only one per- son,
- not bear any trace of cuts or fra- ying,
� � �-� � �n�o�t� �b�e� �c�o�n�v�e�r�t�e�d� �o�r� �m�o�d�i�fi� �e�d� �t�o� avoid affecting its performance.
In accordance with current safety
regulations, all repairs and checks
must be carried out by a CITROËN
dealer who guarantees that the work
is carried out correctly.
Have your seat belts checked regu-
larly by a CITROËN dealer and par-
ticularly if the straps show signs of
damage.
Clean the seat belt straps with soapy
water or a textile cleaning product,
sold by CITROËN dealers.
After folding or moving a seat or rear
bench seat, ensure that the seat belt
is positioned and reeled in correctly. Recommendations for children
Use a suitable child seat if the pas-
senger is less than 12 years old or
shorter than one and a half metres.
Never use the same seat belt to se-
cure more than one person.
Never allow a child to travel on your
lap.
In the event of an impact
Depending on the nature and se-
riousness of the impacts , the pre-
tensioning device may be triggered
before and independently of the air-
bags. Triggering of the pre-tensioners
is accompanied by a slight discharge
of harmless smoke and a noise, due
to the activation of the pyrotechnic
cartridge incorporated in the system.
In all cases, the airbag warning lamp
comes on.
Following an impact, have the seat
belts system checked, and if neces-
sary replaced, by a CITROËN dealer.
Page 119 of 200
10
i!
117
CHECKS
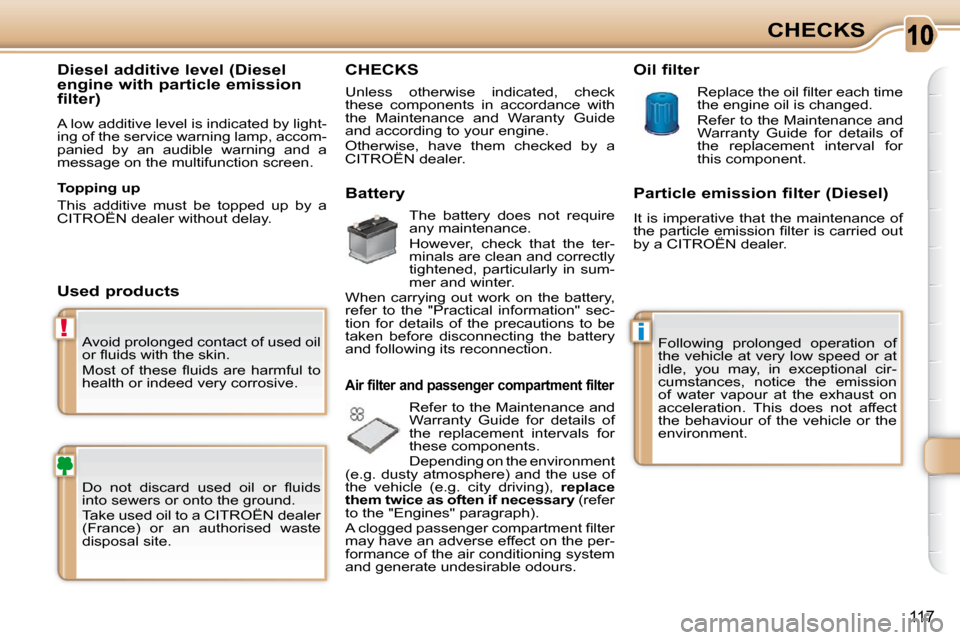
Avoid prolonged contact of used oil
�o�r� �fl� �u�i�d�s� �w�i�t�h� �t�h�e� �s�k�i�n�.�
� �M�o�s�t� �o�f� �t�h�e�s�e� �fl� �u�i�d�s� �a�r�e� �h�a�r�m�f�u�l� �t�o�
health or indeed very corrosive.
� �D�o� �n�o�t� �d�i�s�c�a�r�d� �u�s�e�d� �o�i�l� �o�r� �fl� �u�i�d�s�
into sewers or onto the ground.
Take used oil to a CITROËN dealer
(France) or an authorised waste
disposal site.
Diesel additive level (Diesel
engine with particle emission
filter)
A low additive level is indicated by light-
ing of the service warning lamp, accom-
panied by an audible warning and a
message on the multifunction screen.
Used products
CHECKS
� � �B�a�t�t�e�r�y�
The battery does not require
any maintenance.
� �H�o�w�e�v�e�r�,� �c�h�e�c�k� �t�h�a�t� �t�h�e� �t�e�r�-
minals are clean and correctly
tightened, particularly in sum-
mer and winter.
When carrying out work on the battery,
refer to the "Practical information" sec-
tion for details of the precautions to be
taken before disconnecting the battery
and following its reconnection.
Air filter and passenger compartment filter
Refer to the Maintenance and
Warranty Guide for details of
the replacement intervals for
these components.
Depending on the environment
(e.g. dusty atmosphere) and the use of
the vehicle (e.g. city driving), replace
�t�h�e�m� �t�w�i�c�e� �a�s� �o�f�t�e�n� �i�f� �n�e�c�e�s�s�a�r�y (refer
to the "Engines" paragraph).
� �A� �c�l�o�g�g�e�d� �p�a�s�s�e�n�g�e�r� �c�o�m�p�a�r�t�m�e�n�t� �fi� �l�t�e�r�
may have an adverse effect on the per-
formance of the air conditioning system
and generate undesirable odours. Particle emission filter (Diesel)
It is imperative that the maintenance of
�t�h�e� �p�a�r�t�i�c�l�e� �e�m�i�s�s�i�o�n� �fi� �l�t�e�r� �i�s� �c�a�r�r�i�e�d� �o�u�t�
by a CITROËN dealer.
Oil filter
� �R�e�p�l�a�c�e� �t�h�e� �o�i�l� �fi� �l�t�e�r� �e�a�c�h� �t�i�m�e�
the engine oil is changed.
Refer to the Maintenance and
Warranty Guide for details of
the replacement interval for
this component.
Following prolonged operation of
the vehicle at very low speed or at
idle, you may, in exceptional cir-
cumstances, notice the emission
of water vapour at the exhaust on
acceleration. This does not affect
the behaviour of the vehicle or the
environment.
Topping up
This additive must be topped up by a
CITROËN dealer without delay.
Unless otherwise indicated, check
these components in accordance with
the Maintenance and Waranty Guide
and according to your engine.
Otherwise, have them checked by a
CITROËN dealer.
Page 120 of 200
10
i!
117
CHECKS
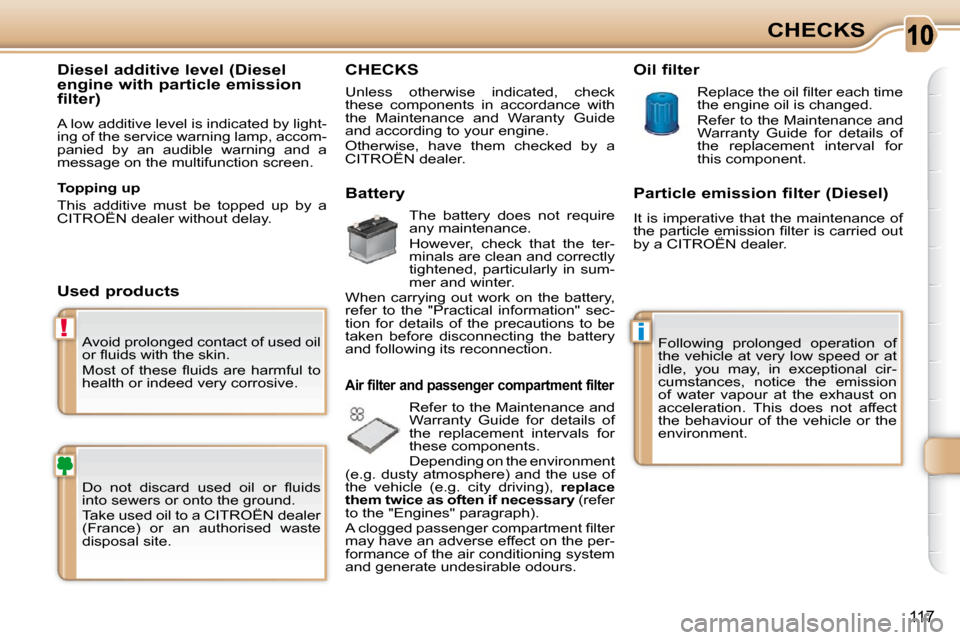
Avoid prolonged contact of used oil
�o�r� �fl� �u�i�d�s� �w�i�t�h� �t�h�e� �s�k�i�n�.�
� �M�o�s�t� �o�f� �t�h�e�s�e� �fl� �u�i�d�s� �a�r�e� �h�a�r�m�f�u�l� �t�o�
health or indeed very corrosive.
� �D�o� �n�o�t� �d�i�s�c�a�r�d� �u�s�e�d� �o�i�l� �o�r� �fl� �u�i�d�s�
into sewers or onto the ground.
Take used oil to a CITROËN dealer
(France) or an authorised waste
disposal site.
Diesel additive level (Diesel
engine with particle emission
filter)
A low additive level is indicated by light-
ing of the service warning lamp, accom-
panied by an audible warning and a
message on the multifunction screen.
Used products
CHECKS
� � �B�a�t�t�e�r�y�
The battery does not require
any maintenance.
� �H�o�w�e�v�e�r�,� �c�h�e�c�k� �t�h�a�t� �t�h�e� �t�e�r�-
minals are clean and correctly
tightened, particularly in sum-
mer and winter.
When carrying out work on the battery,
refer to the "Practical information" sec-
tion for details of the precautions to be
taken before disconnecting the battery
and following its reconnection.
Air filter and passenger compartment filter
Refer to the Maintenance and
Warranty Guide for details of
the replacement intervals for
these components.
Depending on the environment
(e.g. dusty atmosphere) and the use of
the vehicle (e.g. city driving), replace
�t�h�e�m� �t�w�i�c�e� �a�s� �o�f�t�e�n� �i�f� �n�e�c�e�s�s�a�r�y (refer
to the "Engines" paragraph).
� �A� �c�l�o�g�g�e�d� �p�a�s�s�e�n�g�e�r� �c�o�m�p�a�r�t�m�e�n�t� �fi� �l�t�e�r�
may have an adverse effect on the per-
formance of the air conditioning system
and generate undesirable odours. Particle emission filter (Diesel)
It is imperative that the maintenance of
�t�h�e� �p�a�r�t�i�c�l�e� �e�m�i�s�s�i�o�n� �fi� �l�t�e�r� �i�s� �c�a�r�r�i�e�d� �o�u�t�
by a CITROËN dealer.
Oil filter
� �R�e�p�l�a�c�e� �t�h�e� �o�i�l� �fi� �l�t�e�r� �e�a�c�h� �t�i�m�e�
the engine oil is changed.
Refer to the Maintenance and
Warranty Guide for details of
the replacement interval for
this component.
Following prolonged operation of
the vehicle at very low speed or at
idle, you may, in exceptional cir-
cumstances, notice the emission
of water vapour at the exhaust on
acceleration. This does not affect
the behaviour of the vehicle or the
environment.
Topping up
This additive must be topped up by a
CITROËN dealer without delay.
Unless otherwise indicated, check
these components in accordance with
the Maintenance and Waranty Guide
and according to your engine.
Otherwise, have them checked by a
CITROËN dealer.
Page 137 of 200
134
PRACTICAL INFORMATION
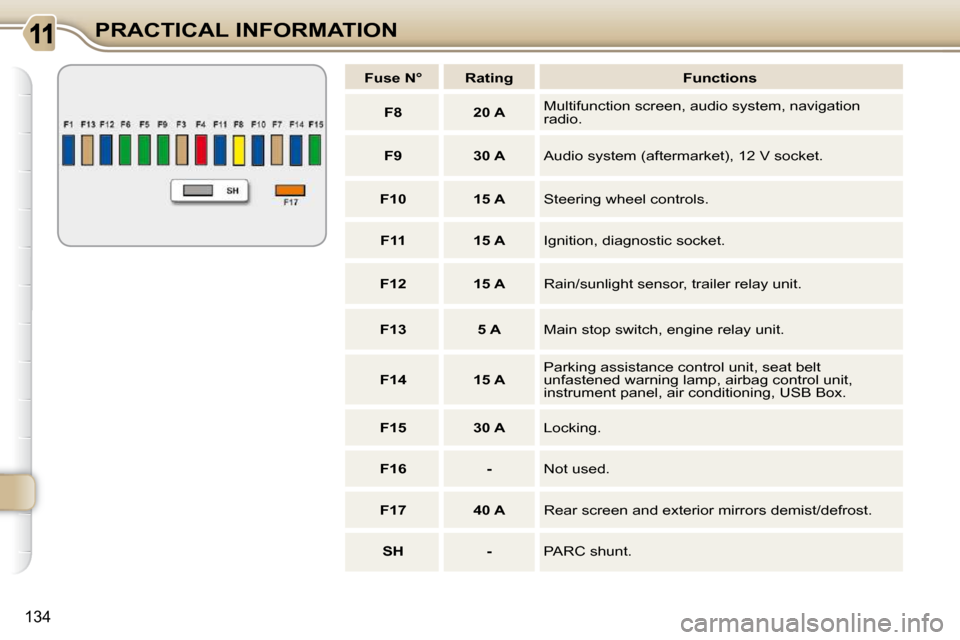
Fuse N° Rating Functions
F8 20 A Multifunction screen, audio system, navigation
radio.
F9 30 A � �A�u�d�i�o� �s�y�s�t�e�m� �(�a�f�t�e�r�m�a�r�k�e�t�)�,� �1�2� �V� �s�o�c�k�e�t�.�
F10 15 A Steering wheel controls.
F11 15 A Ignition, diagnostic socket.
F12 15 A Rain/sunlight sensor, trailer relay unit.
F13 5 A Main stop switch, engine relay unit.
F14 15 A Parking assistance control unit, seat belt
unfastened warning lamp, airbag control unit,
�i�n�s�t�r�u�m�e�n�t� �p�a�n�e�l�,� �a�i�r� �c�o�n�d�i�t�i�o�n�i�n�g�,� �U�S�B� �B�o�x�.�
F15 30 A Locking.
F16 - Not used.
F17 40 A � �R�e�a�r� �s�c�r�e�e�n� �a�n�d� �e�x�t�e�r�i�o�r� �m�i�r�r�o�r�s� �d�e�m�i�s�t�/�d�e�f�r�o�s�t�.�
SH - PARC shunt.
Page 146 of 200
i
i
142
PRACTICAL INFORMATION
TOWING A TRAILER, A CARAVAN, ETC.
Your vehicle is primarily designed for
transporting people and luggage, but it
may also be used for towing a trailer. Driving advice
� �T�h�e� �m�a�x�i�m�u�m� �t�o�w�i�n�g� �l�o�a�d� �o�n� �a� �l�o�n�g�
slope depends on the gradient and the
ambient temperature.
In all cases, pay attention to the coolant
temperature.
Side wind
� Take into account the increased
sensitivity to side wind.
Cooling
Towing a trailer on a slope increases
the temperature of the coolant.
As the fan is electrically controlled, its
cooling capacity is not dependent on
the engine speed.
� To lower the engine speed, reduce
your speed. Braking
Towing a trailer increases the braking
distance.
Tyres
� Check the tyre pressures of the
towing vehicle and of the trailer,
observing the recommended pres-
sures.
Lighting
� Check the electrical lighting and
signalling on the trailer.
The rear parking sensors will be de-
activated automatically if a genuine
CITROËN towbar is used.
� If the warning lamp and the
STOP warning lamp come
on, stop the vehicle and
switch off the engine as
soon as possible.
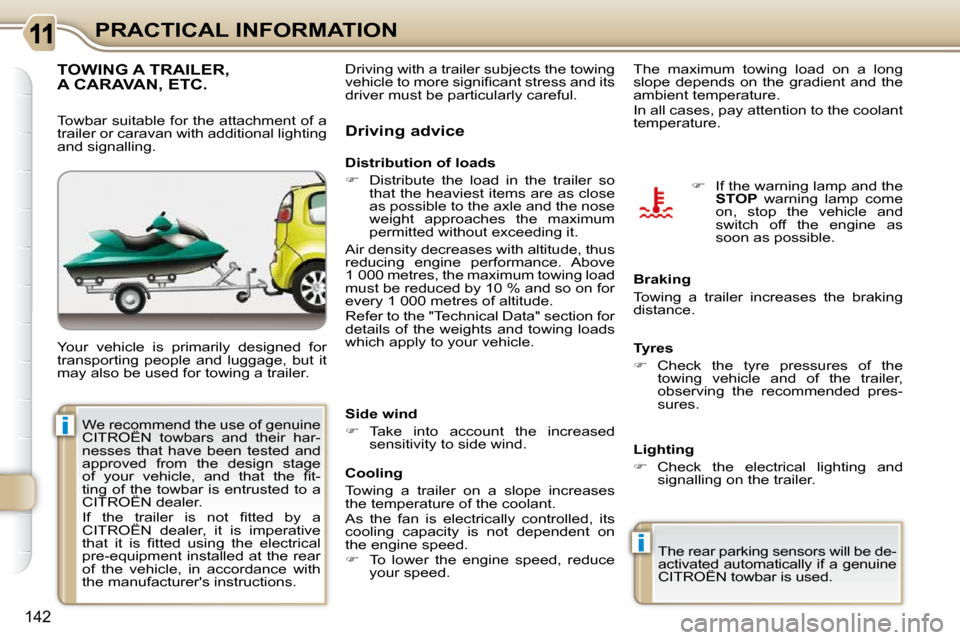
Towbar suitable for the attachment of a
trailer or caravan with additional lighting
and signalling.
Distribution of loads
� Distribute the load in the trailer so
that the heaviest items are as close
�a�s� �p�o�s�s�i�b�l�e� �t�o� �t�h�e� �a�x�l�e� �a�n�d� �t�h�e� �n�o�s�e�
�w�e�i�g�h�t� �a�p�p�r�o�a�c�h�e�s� �t�h�e� �m�a�x�i�m�u�m�
�p�e�r�m�i�t�t�e�d� �w�i�t�h�o�u�t� �e�x�c�e�e�d�i�n�g� �i�t�.� �
Air density decreases with altitude, thus
reducing engine performance. Above
�1� �0�0�0� �m�e�t�r�e�s�,� �t�h�e� �m�a�x�i�m�u�m� �t�o�w�i�n�g� �l�o�a�d�
must be reduced by 10 % and so on for
every 1 000 metres of altitude.
Refer to the "Technical Data" section for
details of the weights and towing loads
which apply to your vehicle.
Driving with a trailer subjects the towing
�v�e�h�i�c�l�e� �t�o� �m�o�r�e� �s�i�g�n�i�fi� �c�a�n�t� �s�t�r�e�s�s� �a�n�d� �i�t�s�
driver must be particularly careful.
We recommend the use of genuine
CITROËN towbars and their har-
nesses that have been tested and
approved from the design stage
�o�f� �y�o�u�r� �v�e�h�i�c�l�e�,� �a�n�d� �t�h�a�t� �t�h�e� �fi� �t�-
ting of the towbar is entrusted to a
CITROËN dealer.
� �I�f� �t�h�e� �t�r�a�i�l�e�r� �i�s� �n�o�t� �fi� �t�t�e�d� �b�y� �a�
CITROËN dealer, it is imperative
�t�h�a�t� �i�t� �i�s� �fi� �t�t�e�d� �u�s�i�n�g� �t�h�e� �e�l�e�c�t�r�i�c�a�l�
�p�r�e�-�e�q�u�i�p�m�e�n�t� �i�n�s�t�a�l�l�e�d� �a�t� �t�h�e� �r�e�a�r�
of the vehicle, in accordance with
the manufacturer's instructions.