ignition Citroen C4 CACTUS RHD 2014.5 1.G Workshop Manual
[x] Cancel search | Manufacturer: CITROEN, Model Year: 2014.5, Model line: C4 CACTUS RHD, Model: Citroen C4 CACTUS RHD 2014.5 1.GPages: 326, PDF Size: 8.49 MB
Page 173 of 326
171
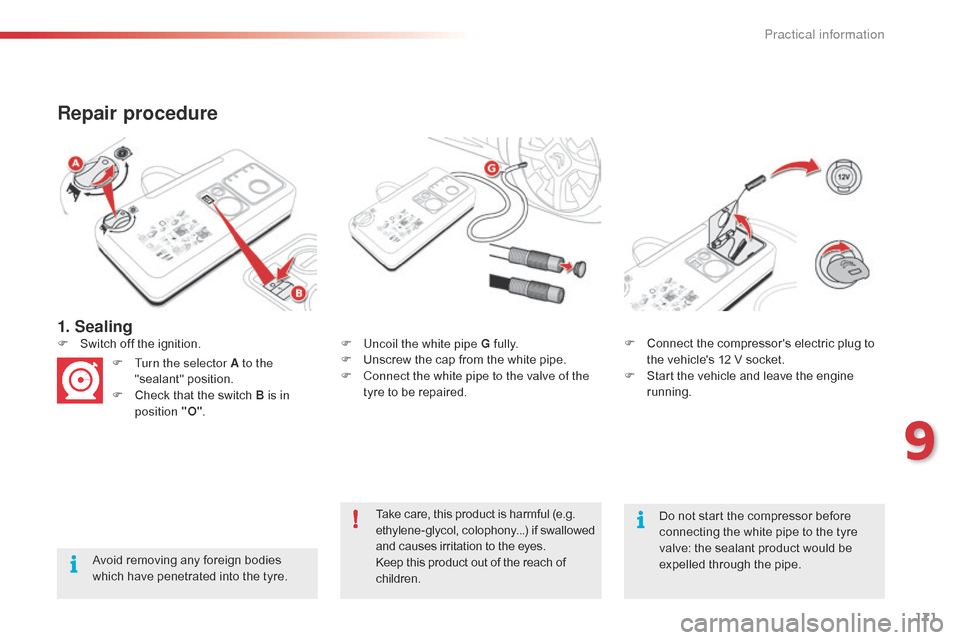
1. Sealing
Repair procedure
Avoid removing any foreign bodies which have penetrated into the tyre.F
U
ncoil the white pipe G
f
ully.
F
U
nscrew the cap from the white pipe.
F
C
onnect the white pipe to the valve of the
tyre to be repaired.
F
S
witch off the ignition.
F
T
urn the selector A to the
"sealant"
p
osition.
F
C
heck that the switch B is in
position "O" . F
C
onnect the compressor's electric plug to
t
he vehicle's 12 V socket.
F
S
tart the vehicle and leave the engine
r
unning.
Take care, this product is harmful (e.g.
e
thylene-glycol, colophony...) if swallowed
a
nd causes irritation to the eyes.
Keep this product out of the reach of c
hildren.Do
not start the compressor before
c
onnecting the white pipe to the tyre v
alve: the sealant product would be e
xpelled through the pipe.
9
Practical information
Page 196 of 326
194
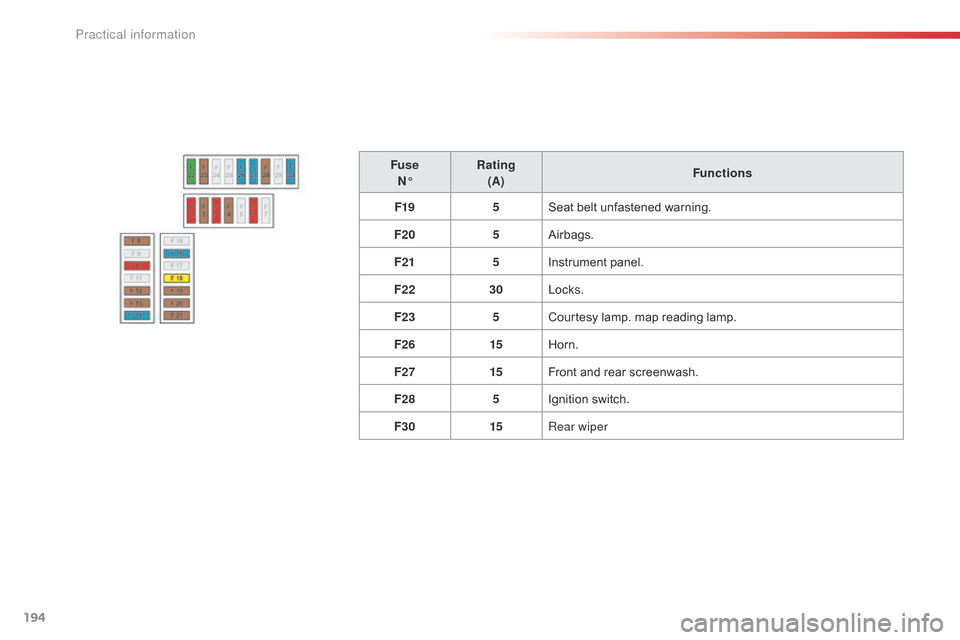
FuseN° Rating
(A) Functions
F19 5Seat
belt unfastened warning.
F20 5Airbags.
F21 5Instrument
panel.
F22 30Locks.
F23 5Courtesy
lamp. map reading lamp.
F26 15Horn.
F27 15Front
and rear screenwash.
F28 5Ignition
s
witch.
F30 15Rear wiper
Practical information
Page 200 of 326
198
12 V battery
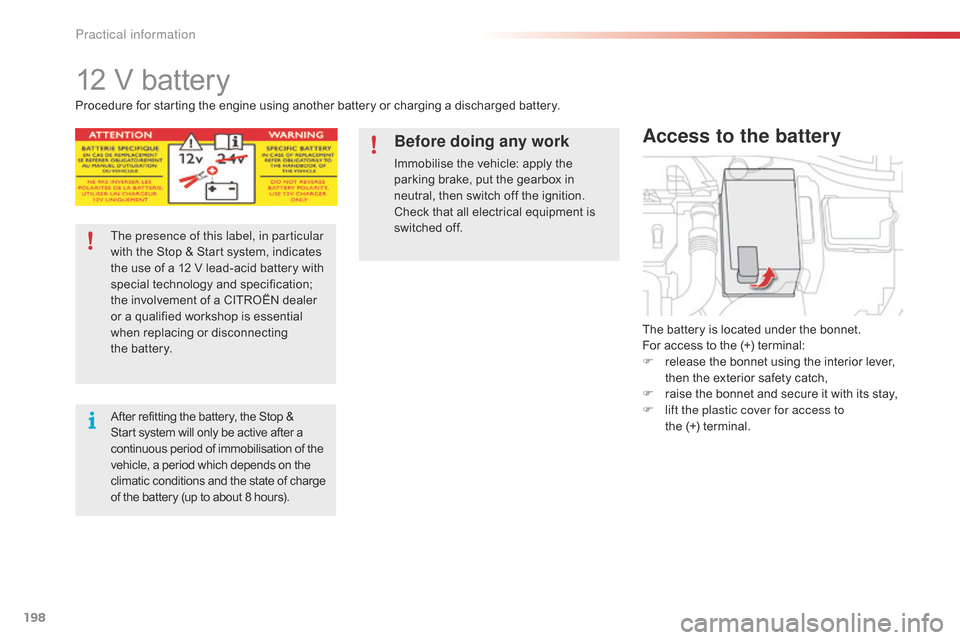
The battery is located under the bonnet.
F or access to the (+) terminal:
F
r
elease the bonnet using the interior lever,
t
hen the exterior safety catch,
F
r
aise the bonnet and secure it with its stay,
F
l
ift the plastic cover for access to
the
(+) terminal.
Access to the battery
Procedure for starting the engine using another battery or charging a discharged battery.
T he presence of this label, in particular
with
the Stop & Start system, indicates
t
he use of a 12 V lead-acid battery with
s
pecial
t
echnology
a
nd
s
pecification;
t
he involvement of a CITROËN dealer
o
r a qualified workshop is essential
w
hen replacing or disconnecting
t
he battery.
After
refitting the battery, the Stop &
S
tart system will only be active after a
c
ontinuous period of immobilisation of the
v
ehicle, a period which depends on the
c
limatic conditions and the state of charge
o
f the battery (up to about 8 hours).
Before doing any work
Immobilise the vehicle: apply the parking brake, put the gearbox in
n
eutral, then switch off the ignition.
Check
that all electrical equipment is
s
witched off.
Practical information
Page 202 of 326
200
When your vehicle's battery is discharged, the engine can be started using a slave battery
(
external or on another vehicle) and jump lead
c
ables.
Starting using another
battery
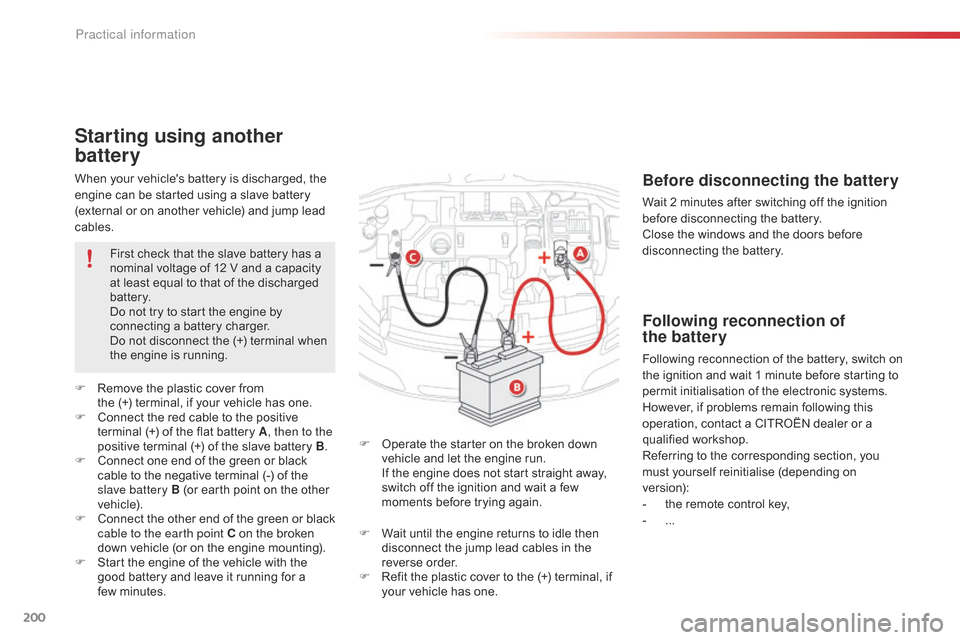
F Operate the starter on the broken down v
ehicle and let the engine run.
I
f the engine does not start straight away,
s
witch off the ignition and wait a few
m
oments before trying again.
F
R
emove
the
plastic
cover
from
the
(+)
terminal,
if
your
vehicle
has
one.
F
C
onnect
the
red
cable
to
the
positive
t
erminal
(+)
of
the
flat
battery
A
, then to the
positive
terminal
(+)
of
the
slave
battery
B.
F
C
onnect
one
end
of
the
green
or
black
c
able
to
the
negative
terminal
(-)
of
the
s
lave battery B
(or
earth
point
on
the
other
v
ehicle).
F
C
onnect
t
he
o
ther
e
nd
o
f
t
he
g
reen
o
r
b
lack
c
able to the earth point C
on
the
broken
d
own
vehicle
(or
on
the
engine
mounting).
F
S
tart
the
engine
of
the
vehicle
with
the
g
ood
battery
and
leave
it
running
for
a
f
ew minutes. First
check
that
the
slave
battery
has
a
n
ominal
voltage
of
12
V
and
a
capacity
a
t
least
equal
to
that
of
the
discharged
b
attery.
Do
not
try
to
start
the
engine
by
c
onnecting
a
battery
charger.
Do
not
disconnect
the
(+)
terminal
when
t
he
engine
is
running.
Before disconnecting the battery
Wait 2 minutes after switching off the ignition b
efore disconnecting the battery.
Close
the windows and the doors before
d
isconnecting the battery.
Following reconnection of
the battery
Following reconnection of the battery, switch on t
he ignition and wait 1 minute before starting to
p
ermit initialisation of the electronic systems.
H
owever, if problems remain following this
o
peration, contact a CITROËN dealer or a
q
ualified
w
orkshop.
Referring
to the corresponding section, you
m
ust
y
ourself
r
einitialise
(
depending
o
n
ve
rsion):
-
t
he remote control key,
-
...
F
W
ait
until
the
engine
returns
to
idle
then
d
isconnect
the
jump
lead
cables
in
the
r
everse
o
rder.
F
R
efit
the
plastic
cover
to
the
(+)
terminal,
if
y
our
vehicle
has
one.
Practical information
Page 205 of 326
203
Changing a wiper blade
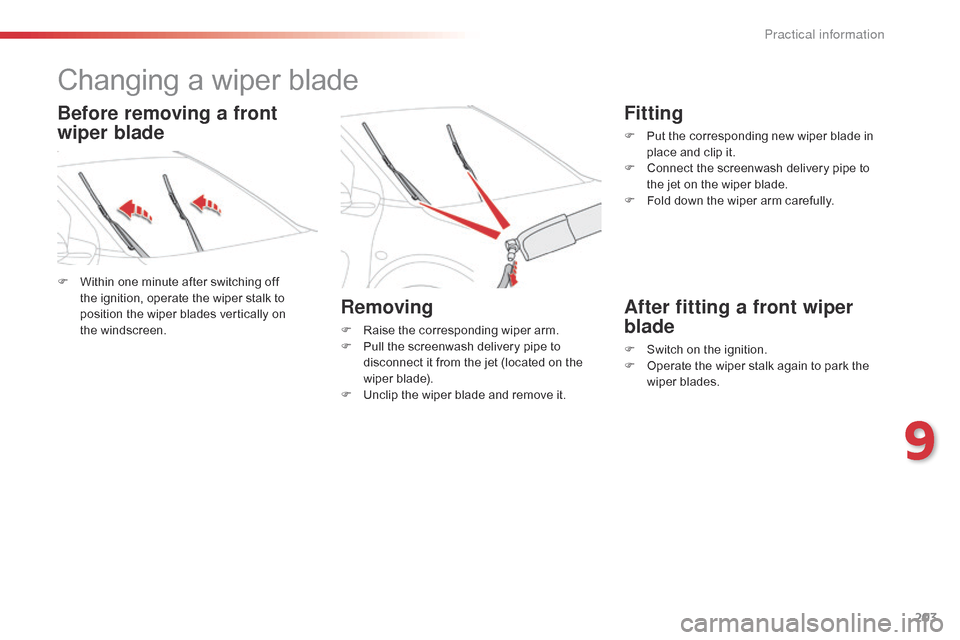
F Within one minute after switching off t
he ignition, operate the wiper stalk to
p
osition the wiper blades vertically on
t
he windscreen.
Removing
F Raise the corresponding wiper arm.
F P ull the screenwash delivery pipe to
d
isconnect it from the jet (located on the
w
iper blade).
F
U
nclip the wiper blade and remove it.
Fitting
F Put the corresponding new wiper blade in p
lace and clip it.
F
C
onnect the screenwash delivery pipe to
t
he jet on the wiper blade.
F
F
old down the wiper arm carefully.
After fitting a front wiper
blade
F Switch on the ignition.
F O perate the wiper stalk again to park the
w
iper blades.
Before removing a front
wiper blade
9
Practical information
Page 207 of 326
205
Towing another vehicle
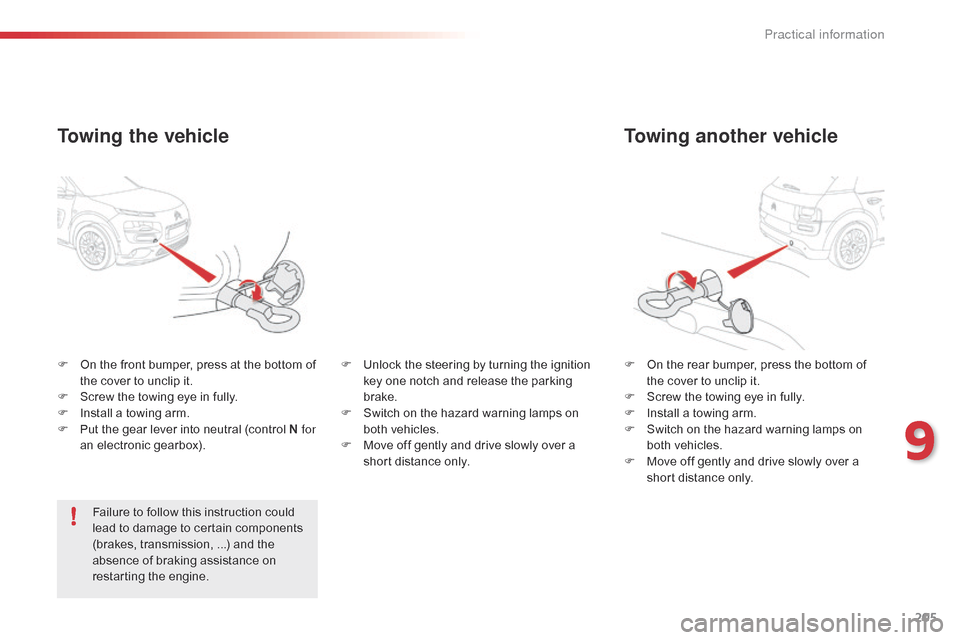
F On the rear bumper, press the bottom of t
he cover to unclip it.
F
S
crew the towing eye in fully.
F
I
nstall a towing arm.
F
S
witch on the hazard warning lamps on
b
oth vehicles.
F
M
ove off gently and drive slowly over a
s
hort distance only.
F
O
n
the
front
bumper,
press
at
the
bottom
of
t
he
cover
to
unclip
it.
F
S
crew
the
towing
eye
in
fully.
F
I
nstall
a
towing
arm.
F
P
ut
the
gear
lever
into
neutral
(control
N for
an
electronic
gearbox).
Towing the vehicle
Failure to follow this instruction could l ead to damage to certain components
(
brakes, transmission, ...) and the
a
bsence of braking assistance on
r
estarting the engine. F
U
nlock the steering by turning the ignition
k
ey one notch and release the parking
b
rake.
F
S
witch on the hazard warning lamps on
b
oth vehicles.
F
M
ove off gently and drive slowly over a
s
hort distance only.
9
Practical information
Page 221 of 326

219
Checking levels
Take care when working under the bonnet, as certain areas of the engine may be extremely hot (risk of burns) and the cooling fan could start at any time (even with the ignition off).
Engine oil level
The check is carried out either when the ignition is switched on using the
o
il level indicator in the instrument
p
anel for vehicles so equipped, or
u
sing the dipstick.Checking using the dipstick
Refer to the "Petrol engine" or "Diesel engine" section for the location of the dipstick in the
e
ngine compartment of your vehicle.
F
T
ake the dipstick by its coloured grip and
r
emove it completely.
F
W
ipe the end of the dipstick using a clean
n
on-fluffy cloth.
F
R
efit the dipstick and push fully down, then
p
ull it out again to make the visual check:
t
he correct level is between the marks A
and
B.
Check
all
of
these
levels
regularly,
in
line
with
the
manufacturer's service schedule. Top them up if necessary, unless other wise indicated.
If
a
level
drops
significantly,
have
the
corresponding system checked by a CITROËN dealer or a qualified workshop.
If you find that the level is above the A mark or
belo
w the B mark, do not star t the engine.
-
I
f the level is above the MAX
mark (risk
o
f damage to the engine), contact a
C
ITROËN dealer or a qualified workshop.
-
I
f the level is below the MIN
mark, you
m
ust top up the engine oil.
A = M
aX
B
= MI
nT
o
ensure
that
the
reading
is
correct,
y
our
vehicle
must
be
parked
on
a
level
s
ur face
with
the
engine
having
been
off
f
or
more
than
30
minutes.
It
is
normal
to
top
up
the
oil
level
between
t
wo
services
(or
oil
changes).
CITROËN
r
ecommends
that
you
check
the
level,
and
top
u
p
if
necessary,
every
3
000
miles
(5
000
kms).
10
Checks
Page 222 of 326

220
After topping up the oil, the check when switching on the ignition with the oil
l
evel indicator in the instrument panel
i
s not valid during the 30 minutes after
t
opping up.Oil grade
Before topping-up the oil or changing the oil, check that the oil is the correct grade for your
e
ngine and conforms to the manufacturer's
r
ecommendations.
Topping up the engine oil level
Refer to the "Petrol engine" or "Diesel engine" s ection for the location of the oil filler cap in the
engine
compartment of your vehicle.
F
U
nscrew the oil filler cap to reveal the filler
aperture.
F
A
dd oil in small quantities, avoiding any
s
pills on engine components (risk of fire).
F
W
ait a few minutes before checking the
l
evel again using the dipstick.
F
A
dd more oil if necessary.
F
A
fter checking the level, carefully refit the
o
il filler cap and the dipstick in its tube.
Engine oil change
Refer to the manufacturer's service schedule for details of the interval for this operation.
In
order to maintain the reliability of the engine
a
nd emission control system, never use
a
dditives in the engine oil.
Checks
Page 234 of 326
232
EMERGENCY OR ASSIST ANCE CALL
CITROËN Localised Emergency Call
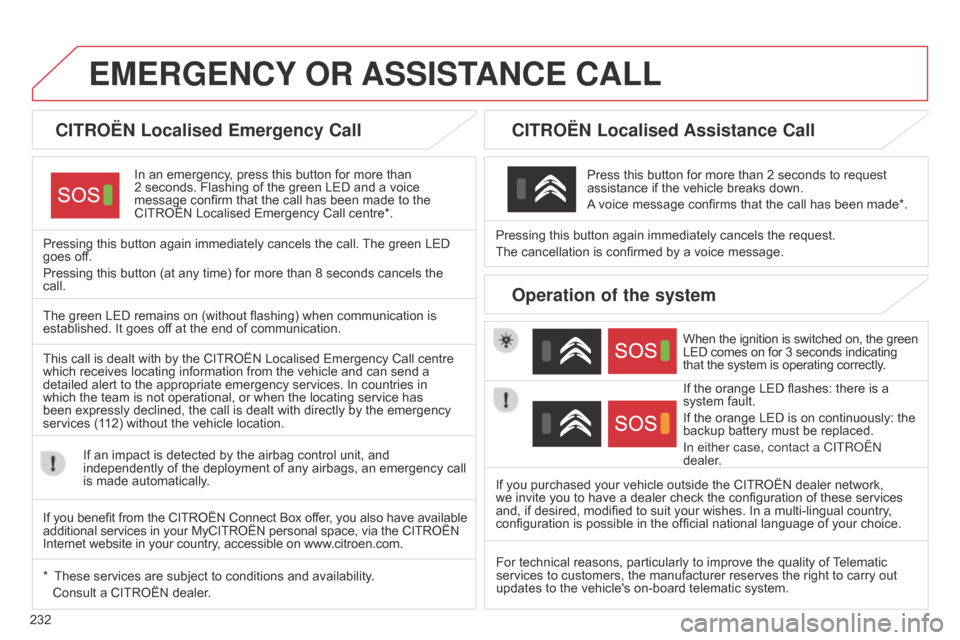
In an emergency, press this button for more than 2 seconds.
Flashing of the green LED and a voice
message
confirm that the call has been made to the
CITROËN
Localised Emergency Call centre*.
Pressing
this
button again immediately cancels the call.
The
green LED
goes
off.
Pressing
this
button (at any time) for more than 8 seconds cancels the
call.
CITROËN Localised Assistance Call
When the ignition is switched on, the green LED comes on for 3 seconds indicating that
the system is operating correctly.
If
the orange LED flashes: there is a
system
fault.
If
the orange LED is on continuously: the
backup
battery must be replaced.
In either case, contact a CITR
o Ë n
dealer.
Pressing
this
button
again
immediately cancels the request.
The
cancellation
is
confirmed
by
a voice message.
Press
this
button for more than 2 seconds to request
assistance
if
the
vehicle breaks down.
A
voice
message confirms that the call has been made*.
Operation of the system
The green LED remains on (without flashing) when communication is established.
It goes off at the end of communication.
This
call is dealt with by the CITROËN Localised Emergency Call centre
which
receives locating information from the vehicle and can send a
detailed
alert to the appropriate emergency services. In countries in
which
the team is not operational, or when the locating service has
been
expressly declined, the call is dealt with directly by the emergency
services
(112) without the vehicle location.
If
an impact is detected by the airbag control unit, and
independently
of the deployment of any airbags, an emergency call
is
made automatically.
*
These
services are subject to conditions and availability.
Consult
a CITROËN dealer. If
you purchased your vehicle outside the CITROËN dealer network,
we
invite you to have a dealer check the configuration of these services
and,
if desired, modified to suit your wishes. In a multi-lingual country,
configuration
is possible in the official national language of your choice.
For
technical reasons, particularly to improve the quality of
T
elematic
services
to customers, the manufacturer reserves the right to carry out
updates
to the vehicle's on-board telematic system.
If
you benefit from the CITROËN Connect Box offer, you also have available
additional
services in your MyCITROËN personal space, via the CITROËN
Internet
website in your country, accessible on www.citroen.com.
Page 238 of 326

02
236Selecting the audio source (depending on version):
-
"FM"
/ "AM" / "DAB"* stations.
-
"USB"
memory stick.
-
Jukebox*,
after first copying audio files to the internal memory of the system.
-
T
elephone connected by Bluetooth* and audio streaming Bluetooth* (streaming).
-
Media
player connected to the auxiliary socket (jack, cable not supplied).
The screen is of the "resistive" type, it is necessary to press firmly, particularly for "flick" gestures (scrolling through a list, moving the map...).
A
simple wipe will not be enough. Pressing with more than one finger is not recognised.
The screen can be used when wearing gloves.
This
technology allows use at all temperatures.
FIRST STEPS
* Depending on equipment.
T o clean the screen, use a soft non-abrasive cloth (spectacles cloth) without any additional product.
Do not use pointed objects on the screen.
Do not touch the screen with wet hands.
With the engine running, press to mute
the
sound.
With the ignition off, press to switch the
system
on.
Volume adjustment (each source
is
independent, including
T
raffic
announcements
(TA) and navigation
instructions).
Following
prolonged operation in
sunny
conditions, the volume may
be
limited to protect the system.
The
return
to normal takes place when
the
temperature in the passenger
compartment
drops.
Short-cuts: using the touch buttons in the
upper
band of the touch screen tablet, it is
possible
to go directly to the selection of
audio
source, the list of stations
(or
titles, depending on the source) or to
the
temperature setting.