service indicator Citroen C4 RHD 2015 2.G User Guide
[x] Cancel search | Manufacturer: CITROEN, Model Year: 2015, Model line: C4 RHD, Model: Citroen C4 RHD 2015 2.GPages: 328, PDF Size: 12.72 MB
Page 122 of 328

88
120
The trajectory control systems of
fer increased safety in normal
driving,
but
this
should
not
en
-
courage
the
driver
to
take
extra
risks
or drive at high speed.
The
correct
functioning
of
these
systems
is
assured
provided
that
manufacturer's
recommen
-
dations
are observed on:
-
wheels
(tyres and rims),
-
braking
components,
-
electronic
components,
-
assembly
and
repair
proce
-
dures.
After
an
impact,
have
these
sys
-
tems
checked
by
a
CITROËN
dealer
or a qualified workshop.
Reactivation
These
systems
are
reactivated
automati
-
cally
each
time
the
ignition
is
switched back
on
or
from
30
mph
(50
km/h).
F
Press
this
button
again
to
reactivate
them
manually.
The
illu
mination
of
the
indicator
lamps
in
the
instrument
panel
and
in
this
button,
accompa
-
nied
by
an
audible
signal
and
a
message
in
the
screen,
indicates
a
fault
with
these
systems.
Have
it
checked
by
a
CITROËN
dealer
or
a
qualified
workshop.
Operating faultEMERGENCY
OR ASSIST
ANCE CALL
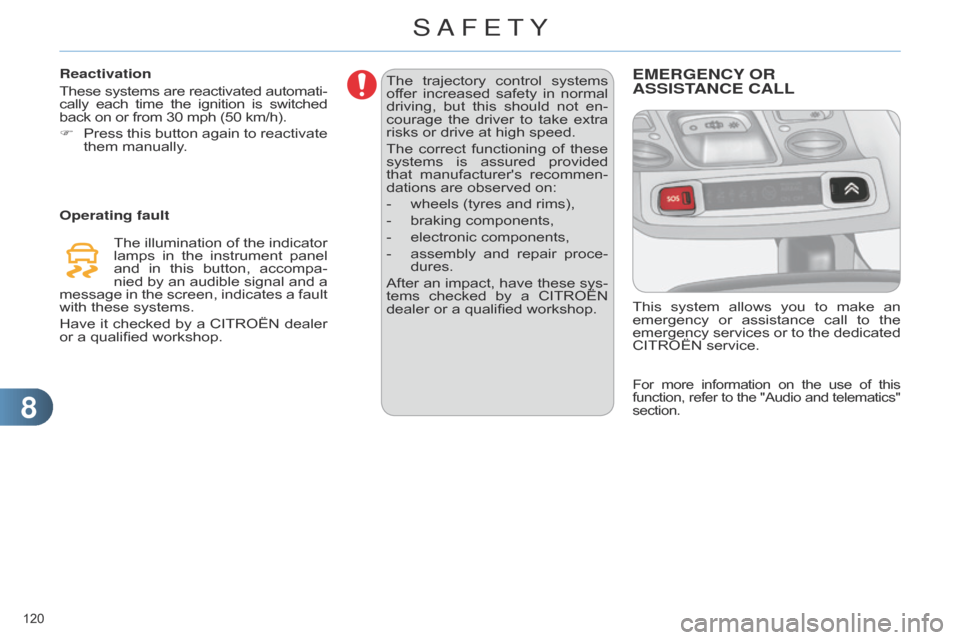
This system allows you to make an emergency
or assistance call to the
emergency
services
or
to
the
dedicated
CITROËN
service.
For more information on the use of this function,
refer to the "Audio and telematics" section.
SAFETY
Page 174 of 328

1010
172
CHECKING LEVELS
Take care when working under the bonnet, as certain areas of
the
engine
may
be
extremely
hot
(risk
of
burns)
and
the
cooling
fan
could
start
at
any
time
(even
with
the ignition off).
The
check
is
carried
out
either
when
the
ignition
is
switched
on
using
the
oil
level
indicator
in
the
instrument
panel
for
ve
-
hicles with an electric oil level
gauge,
or using the dipstick.
Engine oil level
Checking using the dipstick
Refer
to
the
"Petrol
engine"
or
"Diesel
engine"
section
for
the
location
of
the
dipstick
in
the
engine
compartment
of
your
vehicle.
F
T
ake
the
dipstick
by
its
coloured
grip
and
remove it completely.
F
Wipe
the
end
of
the
dipstick
using
a
clean
non-fluffy cloth.
F
Refit
the
dipstick
and
push
fully
down,
then
pull
it
out
again
to
make
the
visual
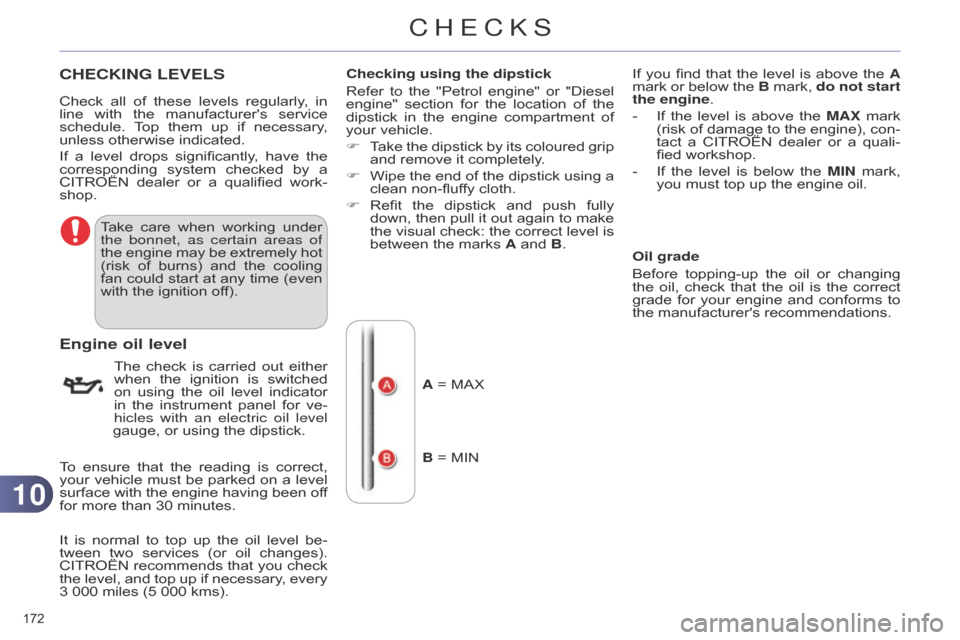
check:
the
correct
level
is
between
the marks A and B.
Check
all
of
these
levels
regularly
,
in
line
with
the
manufacturer's
service
schedule.
T
op
them
up
if
necessary
,
unless
otherwise
indicated.
If
a
level
drops
significantly
,
have
the
corresponding
system
checked
by
a
CITROËN
dealer
or
a
qualified
work
-
shop.
To
ensure
that
the
reading
is
correct,
your
vehicle
must
be
parked
on
a
level
surface
with
the
engine
having
been
of
f
for
more
than
30
minutes.
It
is
normal
to
top
up
the
oil
level
be
-
tween
two
services
(or
oil
changes).
CITROËN
recommends
that
you
check
the
level,
and
top
up
if
necessary
,
every
3
000
miles
(5
000
kms). A
= MAX
B
= MIN If
you find that the level is above the A
mark or below the B mark, do not start
the engine.
-
If
the
level
is
above
the
MAX
mark
(risk
of
damage
to
the
engine),
con
-
tact
a
CITROËN
dealer
or
a
quali
-
fied
workshop.
-
If
the
level
is
below
the
MIN
mark,
you
must top up the engine oil.
Oil grade
Before
topping-up
the
oil
or
changing
the
oil,
check
that
the
oil
is
the
correct
grade
for
your
engine
and
conforms
to
the
manufacturer's recommendations.
CHECKS
Page 175 of 328

1010
173
Brake fluid level
Changing the fluid
Refer
to
the
manufacturer's
service
schedule
for
details
of
the
interval
for
this
operation.
Fluid specification
The
brake
fluid
must
conform
to
the
manufacturer's
recommendations.
Power steering fluid level
The power steering fluid level should
be close to the "MAX" mark.
With
the
engine
cold,
un
-
screw
the
cap
to
check
the
level.
Coolant level
The coolant level should be close
to the "MAX" mark but
should
never exceed it.
When
the
engine
is
warm,
the
temperature
of
the
coolant
is
regulated
by
the
fan.
In
addition,
as
the
cooling
system
is
pressurised,
wait
at
least
one
hour
after
switching
of
f
the
engine
before
carrying
out
any
work.
To
avoid
any
risk
of
scalding,
unscrew
the cap by two turns to allow the pres
-
sure
to
drop.
When
the
pressure
has
dropped,
remove
the
cap
and
top
up
the
level.
Fluid specification
The
coolant
must
conform
to
the
manu
-
facturer's
recommendations.
The cooling fan may start after
switching off the engine: take
care with articles and clothing
that might be caught by the
fan blades.
The
brake
fluid
level
should
be
close
to
the
"MAX"
mark.
If
it
is
not,
check
the
brake
pad
wear.
Topping up the engine oil level
Refer
to
the
"Petrol
engine"
or
"Diesel
engine"
section
for
the
location
of
the
oil
filler
cap
in
the
engine
compartment
of
your
vehicle.
F
Unscrew
the
oil
filler
cap
to
reveal
the
filler
aperture.
F
Add
oil
in
small
quantities,
avoiding
any
spills
on
engine
components
(risk
of
fire).
F
W
ait
a
few
minutes
before
checking
the
level
again
using
the
dipstick.
F
Add
more
oil
if
necessary.
F
After
checking
the
level,
carefully
refit
the
oil
filler
cap
and
the
dipstick
in
its
tube.
After
topping
up
the
oil,
the
check
when
switching
on
the
ignition
with
the
oil
level
indicator
in
the
instrument
panel
is
not
valid
during
the
30
minutes
after
topping
up.
Engine oil change
Refer
to
the
manufacturer's
service
schedule
for
details
of
the
interval
for
this
operation.
In
order
to
maintain
the
reliability
of
the
engine
and
emission
control
system,
never
use
additives
in
the
engine
oil.
CHECKS
Page 324 of 328

322
Regeneration of the particle emissions filter ........................ 175
Reinitialising
the electric
windows
.................................... 75
Reinitialising
the remote
control
....................................... 67
Remote
control
................ 65,
66, 68
Removable
screen
(snow
shield)
.......................... 210
Removing
a wheel
..................... 192
Removing
the mat
....................... 98
Repair
kit, puncture
................... 184
Replacing
bulbs
................. 196,
200
Replacing
fuses
......................... 202
Replacing
the air filter
................ 175
Replacing
the oil filter
................ 175
Replacing
the passenger
compartment
filter
................... 175
Replacing
wiper blades
....... 89,
209
Resetting
the service indicator
.... 31
Resetting
the trip recorder
........... 32
Rev counter
............................ 12-15
Reversing
lamps
........................ 200
Risk
areas (update)
................... 240
Roof bars
................................... 210
Roof
blind
.................................... 77
Routine
checks
.................. 175,
176
Running
out of fuel (Diesel)
....... 168Screenwash, front
........................ 88
SCR (Selective Catalytic
Reduction)
.............................. 177
SCR
system
............................... 177
Seat
adjustment..................... 57, 58
Seat belts .................... 109,
121-123
Seat, rear bench
.......................... 61
Seats, electric
.............................. 58
Seats, rear
................................... 61
Selector lever
, electronic
gearbox
system
.............. 139,
176
Serial
number, vehicle
............... 226
Service
indicator
.......................... 30
Service
warning light
................... 19
Servicing
...................................... 10
Setting
the clock
........ 32,
35, 37, 42
Short-cut
menus
........................ 234
Sidelamps
...... 78,
81, 196, 198, 200
Side
repeater
............................. 199
Ski
flap
......................................... 99
Snow chains
.............................. 195
Spare wheel ............................... 189
Speakers
(fitting)
....................... 214
Speed
limiter...................... 155, 156
Speedometer
.......................... 12-14
Spotlamps,
side
................... 83,
199
Start
........................................... 206
Starting
the engine
.................... 129
Starting
the vehicle
.... 129,
139, 142
Steering
mounted controls
....232,
287
Stopping
the
vehicle
.................... 129,
139, 142
Stop & Start
............ 46,
53, 56, 149,
165,
169, 175, 206
Storage
............... 92,
93, 95-97, 100
Storage
compartments
.......... 92,
95
Storage
drawer
............................ 98
Storage
net
................................ 100Stowing
rings ............................. 100
Sun visor ...................................... 93
Switching
off the engine
............ 129
Synchronising
the remote
control
....................................... 67
Synthesiser
, voice...................... 246
System,
navigation
.................... 236
T T
able of weights
................. 217,
221
Tables
of engines............... 217, 221
Tables of fuses ........................... 202
Tank,
AdBlue® additive ....... 177, 181
Tank,
fuel
................................... 167
T
echnical
data.................... 217, 221
Telephone
.......................... 252,
256
Temperature
control
for
heated
seats
........................ 59
T
emporary
tyre repair kit
............ 184
T
icket
holder
................................ 92
TMC
(Traffic
info)
....................... 249
T
ools
.......................................... 189
T
orch
.......................................... 102
T
otal
distance
recorder
................ 32
T
owbar
....................................... 213
T
owed
loads....................... 217, 221
Towing
another vehicle
............... 2
11
Traction control (
a SR)
................ 11
9
Traffic
information
(T
a
)
......................... 250,
263, 290
Traffic
information (TMC)
... 249,
250
Trailer
........................................ 213
T
rajectory
control
systems
................................... 11
9
Trip
computer
......................... 43-46
T
rip
distance
recorder
.................. 32
T
yre pressures
........................... 226
Safety
for
children.................75,
116
Satellite
navigation
system
.......... 41
Screen,
colour
and
mapping
.............. 42,
45,
233,
274
Screen
menu
map
.......274,
311-313
Screen,
monochrome
.....35,
37,
311
Screen,
multifunction
(with
audio
equipment)............ 35,
37,
41,
288
S
aLPHabETICaL IndEx