electrical Citroen CX 1985 1.G Workshop Manual
[x] Cancel search | Manufacturer: CITROEN, Model Year: 1985, Model line: CX, Model: Citroen CX 1985 1.GPages: 394
Page 2 of 394
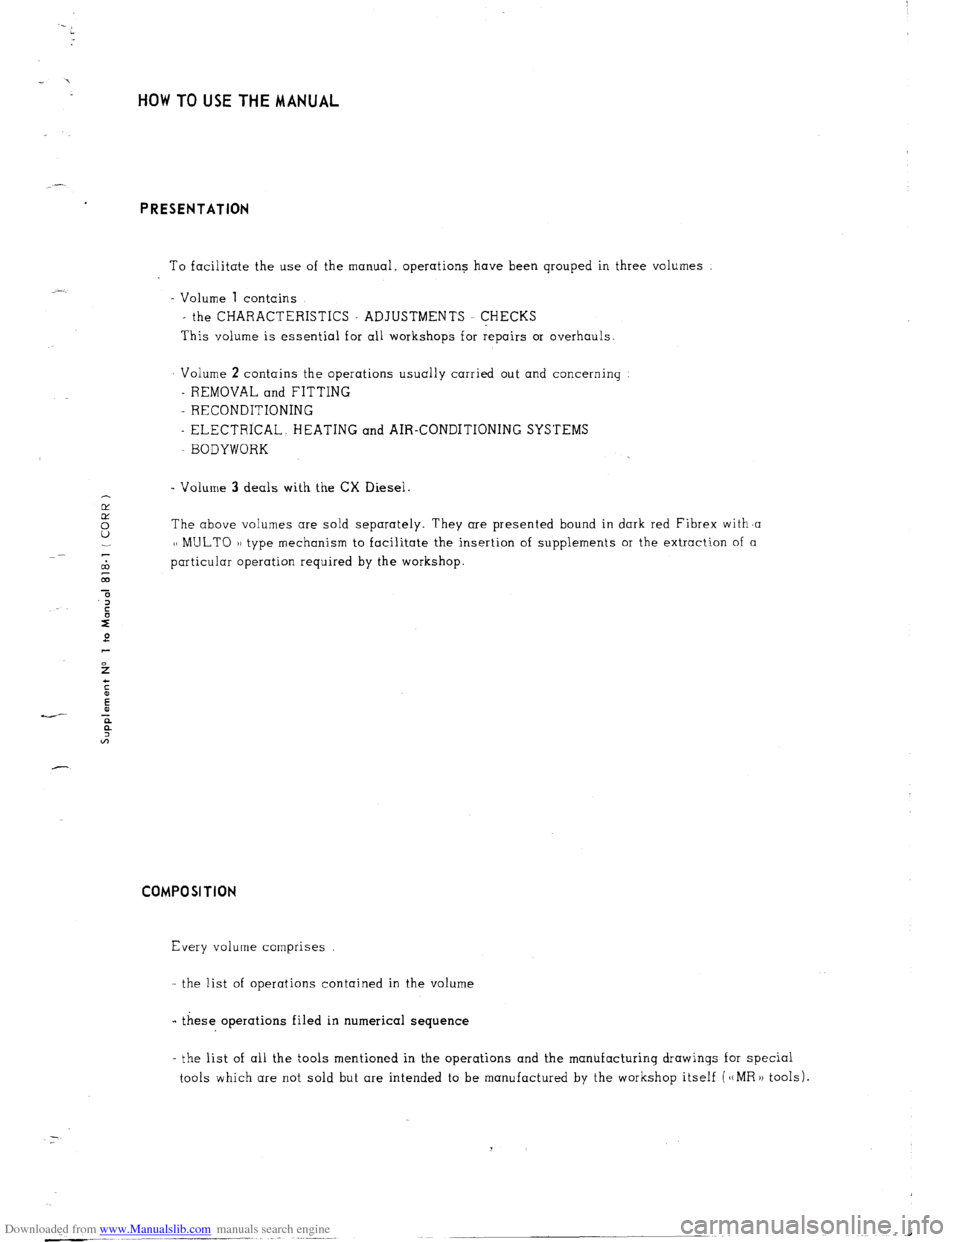
Downloaded from www.Manualslib.com manuals search engine HOW TO USE THE MANUAL
PRESENTATION
To facilitate the use of the manual. operations have been qrouped in three volumes
- Volume 1 contains
- the CHARACTERISTICS ADJUSTMENTS CHECKS
This volume is essential for all workshops for repairs or overhauls
Volume 2 contains the operations usually carried out and concerning
- REMOVAL and FITTlNG
- RECONDITIONING
- ELECTRICAL. HEATING and AIR-CONDITIONING SYSTEMS
BODYWORK
- Volume 3 deals with the CX Diesel.
cd
E The above volumes are sold separately. They are presented bound in dark red Fibrex with,a
1~ MULTO 1) type mechanism to facilitate the insertion of supplements or the extraction of a
-
cl3 particular operation required by the workshop
L
a COMPOSITION
Every volume comprises
- the list of operations contained in the volume
- these operations filed in numerical sequence
- the list of all the tools mentioned in the operations and the manufacturing drawings for special
tools which are not sold but are intended to be manufactured by the workshop itself (‘(MR)) tools).
Page 4 of 394
Downloaded from www.Manualslib.com manuals search engine Operation
number
VIA. 000
VIA. 00
VIA. 00-600
vlA. 00-655
VIA. 01
WA. 02
MA. 03
MA. 100-00
MA. 112-O
MA. 120-O
MA. 142-000
MA. 142-00
MA. 142-00 a
MA. 142-00 b
MA. 142-00 SI
MA. 142-O
MA. 142-O SD
MA. 144-00
MA. 144-O
MA. 173-O
MA. 210-00
MA. 210-00 a
MA. 210-O
MA. 210-O a
MA. 220-O
MA. 221-O
MA. 230-00
MA. 230-O
MA. 236-O
MA. 312-00
MA. 314-O
MA. 320-00
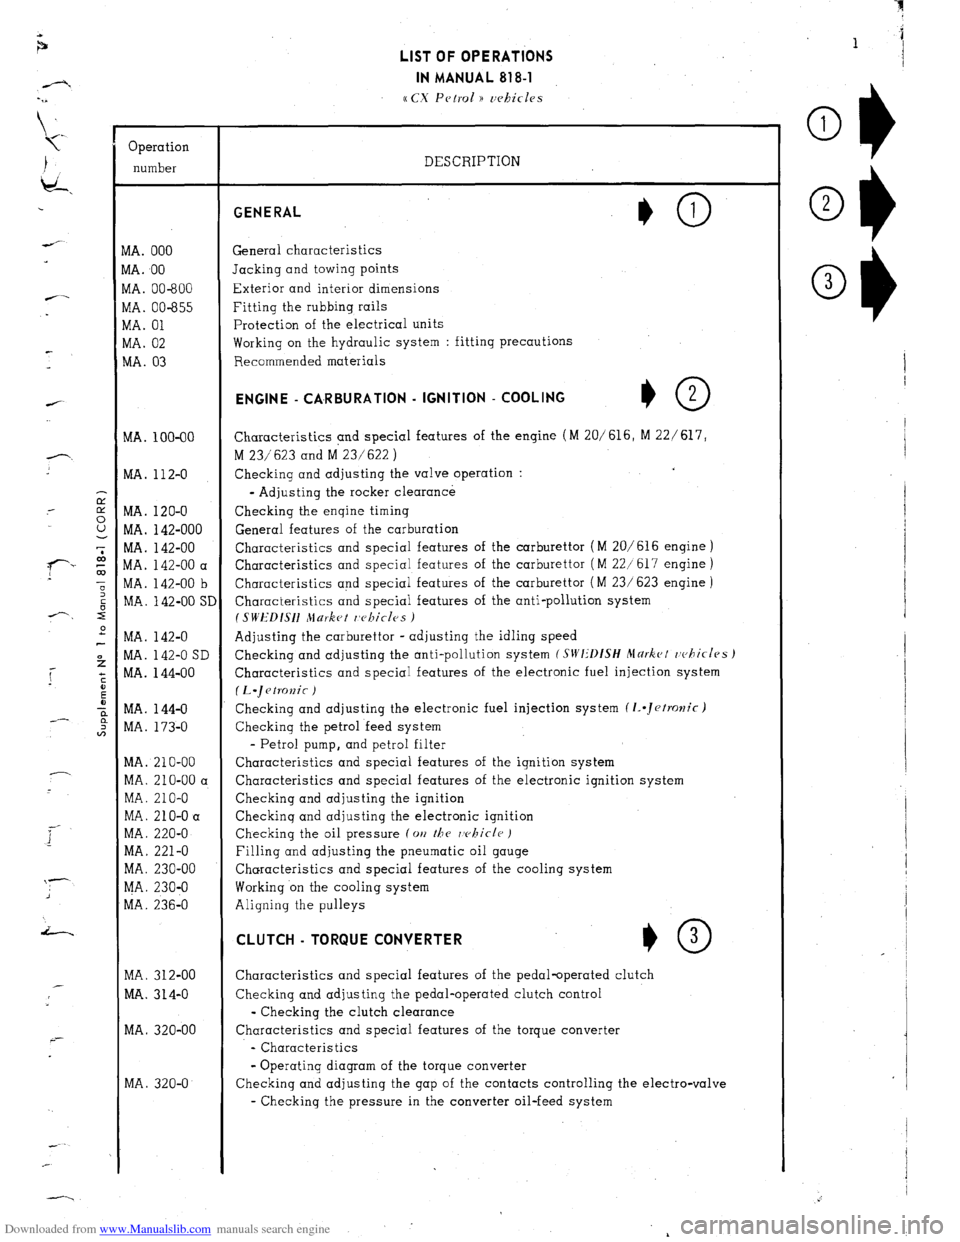
MA. 320-O LIST OF OPERATIONS
IN MANUAL 818-l
cc CX Petrol )) uehicles
DESCRIPTION GENERAL
General characteristics
Jacking and towing points
Exterior and interior dimensions
Fitting the rubbing rails
Protection of the electrical units
Working on the hydraulic system : fitting precautions
Recommended materials ENGINE - CA,RBURATlON - IGNITION - COOLING
+O 2
Characteristics and special features of the engine (M 20/616, M 22/ 617,
M 23/623 and M 23/622 )
Checking and adjusting the valve operation :
- Adjusting the rocker clearance
Checking the engine timing
General features of the carburation
Characteristics and special features of the carburettor (M 20/616 engine )
Characteristics and special features of the carburettor ( M 22/617 engine )
Characteristics and special features of the carburettor ( M 23/ 623 engine )
Characteristics and special features of the anti-pollution system
I SWEDISH Jlurket r,c~kicles )
Adjusting the carburettor - adjusting the idling speed
Checking and adjusting the anti-pollution system
(SIVI:‘DfSH Mdrkct rvhicles J
Characteristics and special features of the electronic fuel injection system
(L.~etKJnic )
Checking and adjusting the electronic fuel injection system (1..Jetrolzic)
Checking the petrol feed system
- Petrol pump, and petrol filter
Characteristics and special features of the ignition system
Characteristics and special features of the electronic ignition system
Checking and adjusting the ignition
Checkinq and adjusting the electronic ignition
Checking the oil pressure (on
the rvhicle )
Filling and adjusting the pneumatic oil gauge
Characteristics and special features of the cooling system
Working on the cooling system
Aligning the pulleys CLUTCH - TORQUE CONVERTER
*O 3
Characteristics and special features of the pedal-operated clutch
Checking and adjusting the pedal-operated clutch control
- Checking the clutch clearance
Characteristics and special features of the torque converter
- Characteristics
- Operating diagram of the torque converter
Checking and adjusting the gap of the contacts controlling the electro-valve
- Checking the pressure in the converter oil-feed system
Page 6 of 394
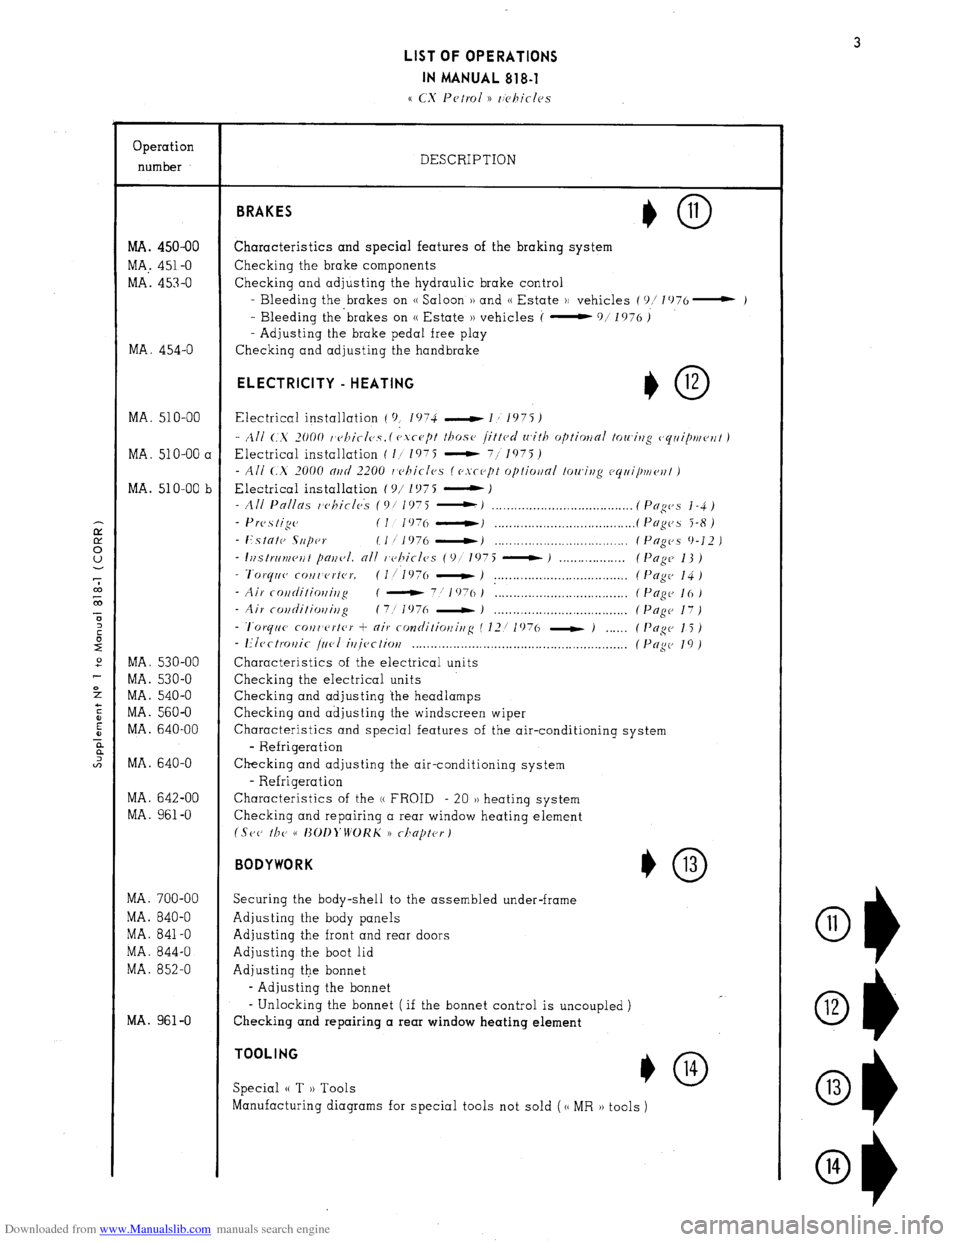
Downloaded from www.Manualslib.com manuals search engine LIST OF OPERATIONS
IN MANUAL 818-l
Operation
number
MA. 450-00
MA,. 451-O
MA. 453-O
MA. 454-O
MA. 510-00
MA. 51 O-00 a
MA. 510-00 b
MA. 530-00
MA. 530-O
MA. 540-O
MA. 560-O
MA. 640-00
MA. 640-O
MA. 642-00
MA. 961-O
MA. 700-00
MA. 840-O
MA. 841-O
MA. 844-O
MA. 852-O
MA. 961-O DESCRIPTION BRAKES
Characteristics and special features of the braking system
Checking the brake components
Checking and adjusting the hydraulic brake control
- Bleeding the brakes on (( Saloon )) and (( Estate H vehicles (‘)/ lO76- )
- Bleeding the’brakes on (( Estate )) vehicles (
-911976)
- Adjusting the brake pedal free play
Checking and adjusting the handbrake ELECTRICITY - HEATING
I,0 12
Electrical installation ( 9, 1074 -1,1975)
- All C..X 2000 t’cJllicl0.Y. ( cJ.vc-u[)t those 1.ittcd with optimnl towitzg (,rjriiptueflt )
Electrical installation ( I/ 1975 - 711975)
- All <.X 2000 nrtcl 2200 I c>hiclcs (esrept optiwnl towing ccjrli/mv~~t )
Electrical installation ( c)/ 1 !J7 5 - J
- All Pnllas whirlck (Of 1975 :.I __._._.___............................ (Pfiges j-4)
- Prc,.s tige (I 1976 ----tJ . . . . . . . . . . . . . . . . .._.................. (Pngc~s 5-8)
- Estntc SIIpw IIf 1976 -1 . . . . . . . . . . . . . . . . . . . . . . . . . . . . . . . . . . . . (Pugc,s 9-12 )
- I~~strriv~cut pajf~,I. nil r~c~hicles (9!’ 1975 - ) . ( Page 13 )
- Tvrqrl~~ COIlI erter. (l/l976 - ) . . . . . . . . . . . . . . . . . . . . . . . . . . . . . . . . . . . . ( I’ogc, 14 )
- Air rotiditioffir~g ( - 7:
1076 ) : . . . (PcIgc- 16)
- Air covditiorli,lg (7! 1976 - J . . . .
- ‘l’orytrc~ coilr’f’rter + air contlitiotfirfg ( 12/ 1976 - )
- I?Iect~~r~ic j&l
if~iectiov . . . . . . . . . . . . . . . . . . . . . . . . . . . . . . . . . . . . . . . . . . . . . . . . . .
Characteristics of the electrical units
Checking the electrical units
Checking and adjusting the headlamps
Checking and adjusting the windscreen wiper
Pngc 17)
Pogc 15 )
Pup 19)
Characteristics and special features of the air-conditioning system
- Refrigeration
Checking and adjusting the air-conditioning system
- Refrigeration
Characteristics of the (( FROID - 20 )) heating system
Checking and repairing a rear window heating element
(Set, r/JP cc I~OI~~‘WOKK 1) rilnptc~rj
BODYWORK
*0 13
Securing the body-shell to the assembled under-frame
Adjusting the body panels
Adjusting the front and rear doors
Adjusting the boot lid
Adjusting the bonnet
- Adjusting the bonnet
- Unlocking the bonnet ( if the bonnet control is uncoupled )
Checking and repairing a rear window heating element TOOLING
Special (( T )) Tools *O 14
Manufacturing diagrams for special tools not sold (cc MR )) tools )
O1)
11
Ol) 12
Ok 13
O1) 14
Page 41 of 394
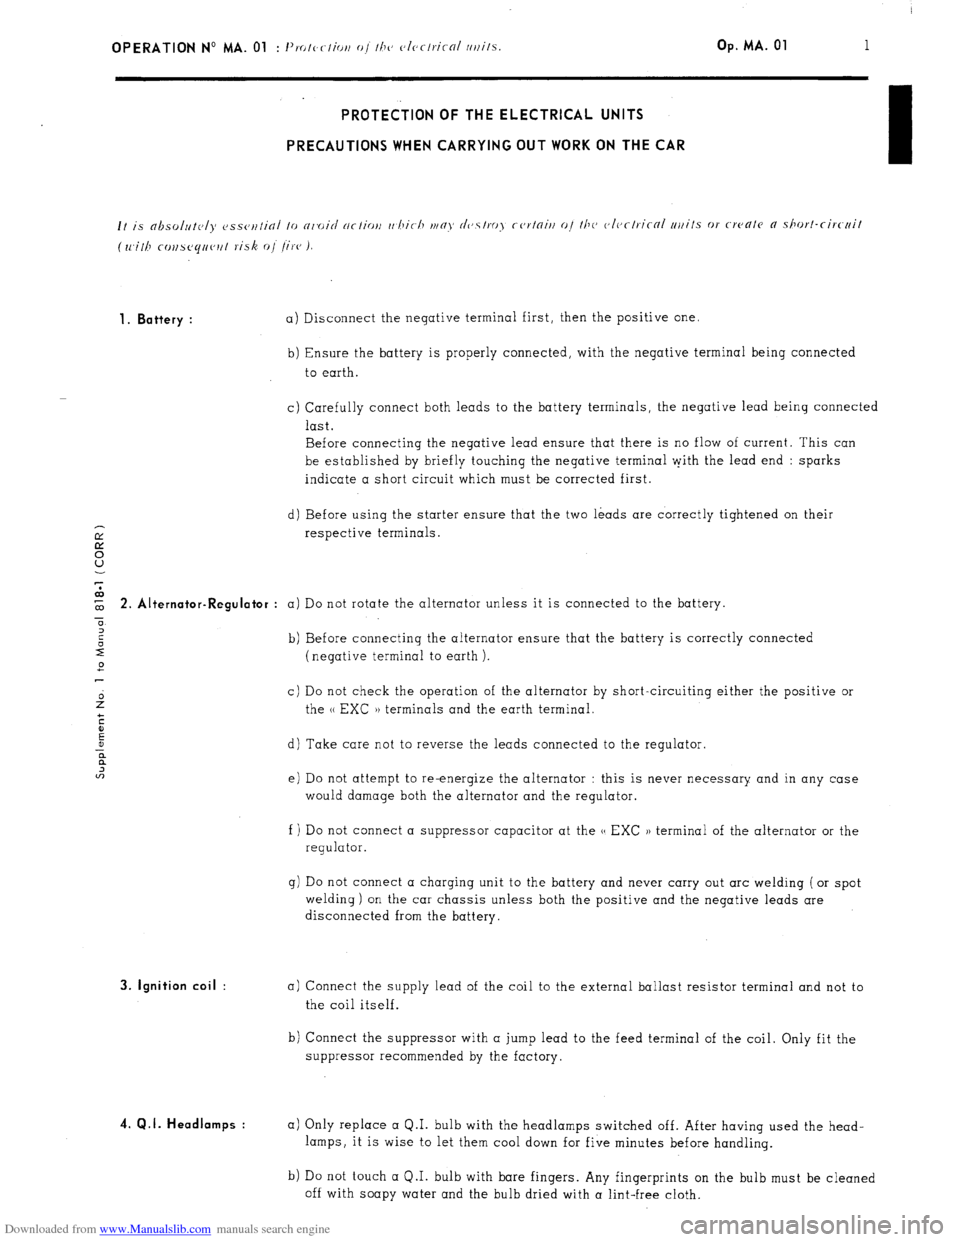
Downloaded from www.Manualslib.com manuals search engine OPERATION No MA. 01 : 1’. I, -1’ IO c ( lOi, o/ I/J<, c~lcrlricnl /l/lilS. Op. MA. 01 1 PROTECTION OF THE ELECTRICAL UNITS
PRECAUTIONS WHEN CARRYING OUT WORK ON THE CAR
1. Battery :
a) Disconnect the negative terminal first, then the positive one.
b) Ensure the battery is properly connected, with the negative terminal being connected
to earth.
c) Carefully connect both leads to the battery terminals, the negative lead being connected
last.
Before connecting the negative lead ensure that there is no flow of current. This can
be established by briefly touching the negative terminal pith the lead end : sparks
indicate a short circuit which must be corrected first.
d) Before using the starter ensure that the two leads are correctly tightened on their
respective terminals. $ 2. Alt ernator-Regulator :
a) Do not rotate the alternator unless it is connected to the battery.
0
2
2 b) Before connecting the alternator ensure that the battery is correctly connected
2 (negative terminal to earth ).
c) Do not check the operation of the alternator by short-circuiting either the positive or
the u EXC )) terminals and the earth terminal.
d) Take care not to reverse the leads connected to the regulator.
e) Do not attempt to re-energize the alternator : this is never necessary and in any case
would damage both the alternator and the regulator.
f ) Do not connect a suppressor capacitor at the u EXC )) terminal of the alternator or the
regulator.
g) Do not connect a charging unit to the battery and never carry out arc welding ( or spot
welding) on the car chassis unless both the positive and the negative leads are
disconnected from the battery. 3. Ignition coil :
4. Q.I. Headlamps :
a) Connect the supply lead of the coil to the external ballast resistor terminal and not to
the coil itself.
b) Connect the suppressor with a jump lead to the feed terminal of the coil. Only fit the
suppressor recommended by the factory.
a) Only replace a Q.I. bulb with the headlamps switched off. After having used the head-
lamps, it is wise to let them cool down for five minutes before handling.
b) Do not touch a Q.I. bulb with bare fingers. Any fingerprints on the bulb must be cleaned
off with soapy water and the bulb dried with a lint-free cloth.
Page 84 of 394
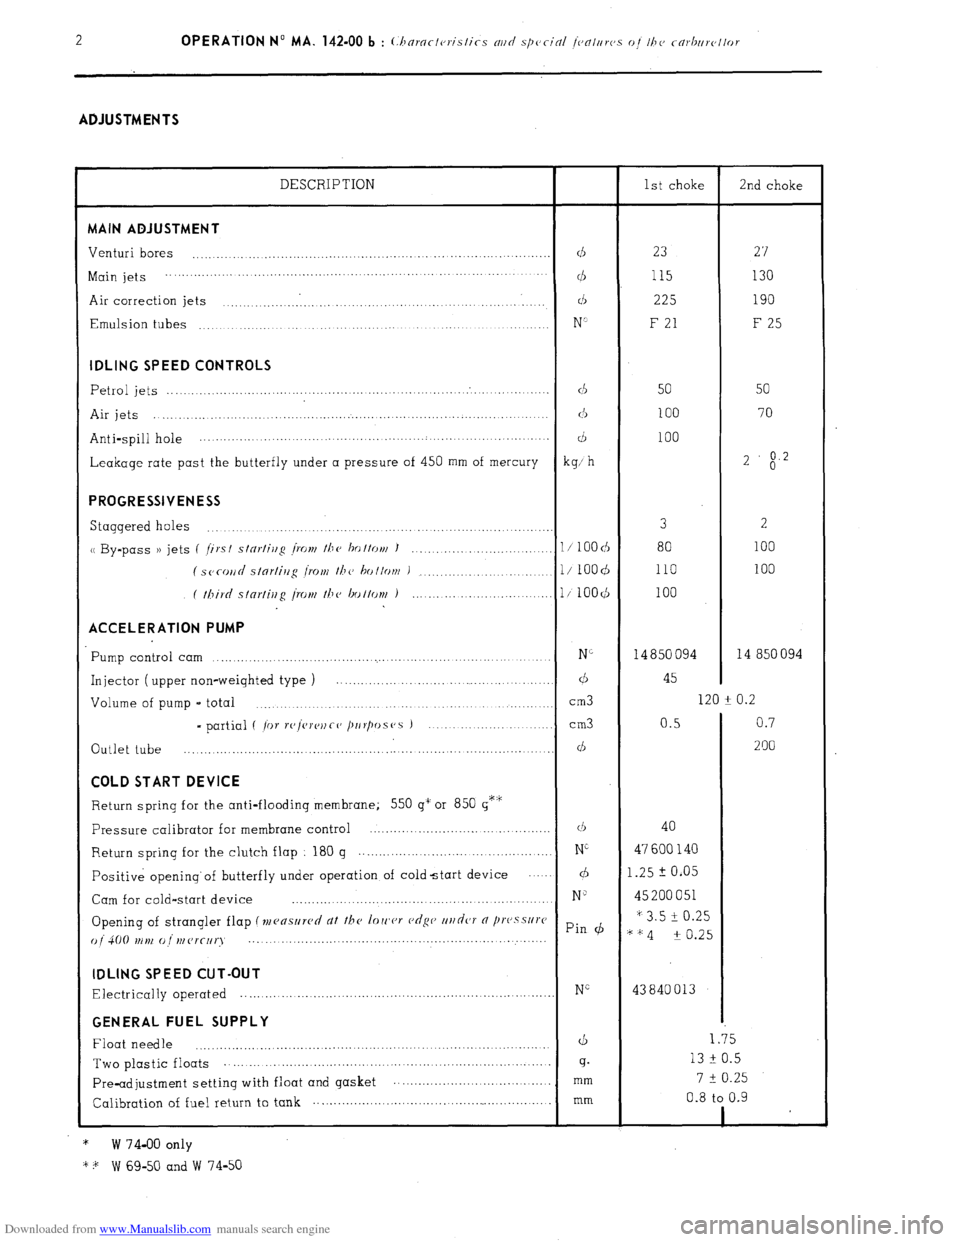
Downloaded from www.Manualslib.com manuals search engine ADJUSTMENTS
DESCRIPTION
1st choke
2nd choke MAIN ADJUSTMENT
Venturi bores
...................................................................................
d 23
27
Main jets ................. ...........................
... ................. ... ....... ...............
cl5 115 130
Air correction jets ..............................................................
d 225 190
Emulsion tubes
...............................................................
......
N’ F 21
F 25 IDLING SPEED CONTROLS
Petrol jets
.......................................................................................
d
50 50
Air jets .....................................................................................
(3
100 70
Anti-spill hole ............... ..............................................
....... ........
d 100
Leakage rate past the butterfly under a pressure of 450 mm of mercury
kg; h 2
$2 PROGRESSIVENESS
Staggered holes 3
2 ...............................................................................
u By-pass )) jets (
/irst stnrtiug /row the ho ttott/ J
100 ............................ 1 / 100 cb 80
( SC~COII~ slnrlirrg I.0Nf the bottom )
...................... l/ 1OOd 110 100
( third stnrfiug [row the bottov~ )
........................... l/100($
100 ACCELERATION PUMP
Pump control cam N”
14 850 094 14 850 094 ...............................................................................
Injector ( upper non-weighted type ) ............................................
d 45
Volume of pump - total
cm3 120 -t 0.2
.......................................................................
- partial ( /or r(‘/vre)~Co /~IIr/wS(‘S ) ................... ...........
cm3 0.5 0.7
Outlet tube
200 ................................................. ....... ...........
............... ... d COLD START DEVICE
Return spring for the anti-flooding membrane; 550 g” or 850 g*‘i;
Pressure calibrator for membrane control ...........................................
(1, 40
Return
spring for the clutch flap
180 g ...............................................
Ni 47 600 140
Positive opening’of butterfly under operation of coldstart device
.... d 1.25 2 0.05
Cam for cold-start device
N” 45 200 051
..............................................................
Opening of strangler flap (mensllrcd dt the loIc,cr c,dgc’ ur/dcJT 0 /lI’(‘.sSlI)‘C * 3.5 i 0.25
() j 4(j(J tr ,),, (J ,,, (Jr(-[,q Pin (b
““4 -t 0.25
..... ... .....................................................
... ...... IDLING SPEED CUT-OUT
Electrically operated NG 43840013 ............................................................................. GENERAL FUEL SUPPLY
Float needle
d 1.35
..................................................................................
Two plastic floats 13 F 0.5 ...................................
............... .............................
g.
7 t 0.25
Pre-adjustment setting with float and gasket ...............................
....... mm
Calibration of fuel return to tank .................................
......................... mm 0.8 to 0.9
1
*
W 74-00 only
* + W 69-50 and W 74-50 .
Page 92 of 394
Downloaded from www.Manualslib.com manuals search engine OPERATION No MA. 142-O SD : (I k’ II c ,r,g m,d or/j,,r/ii,,~ /he m/i /dllllior, 5, Cl<‘,,i Op. MA. 142-O SD 1
f SIi’III)ISH \IAKKl:‘/ ,‘1,,,( 1.1’) ,
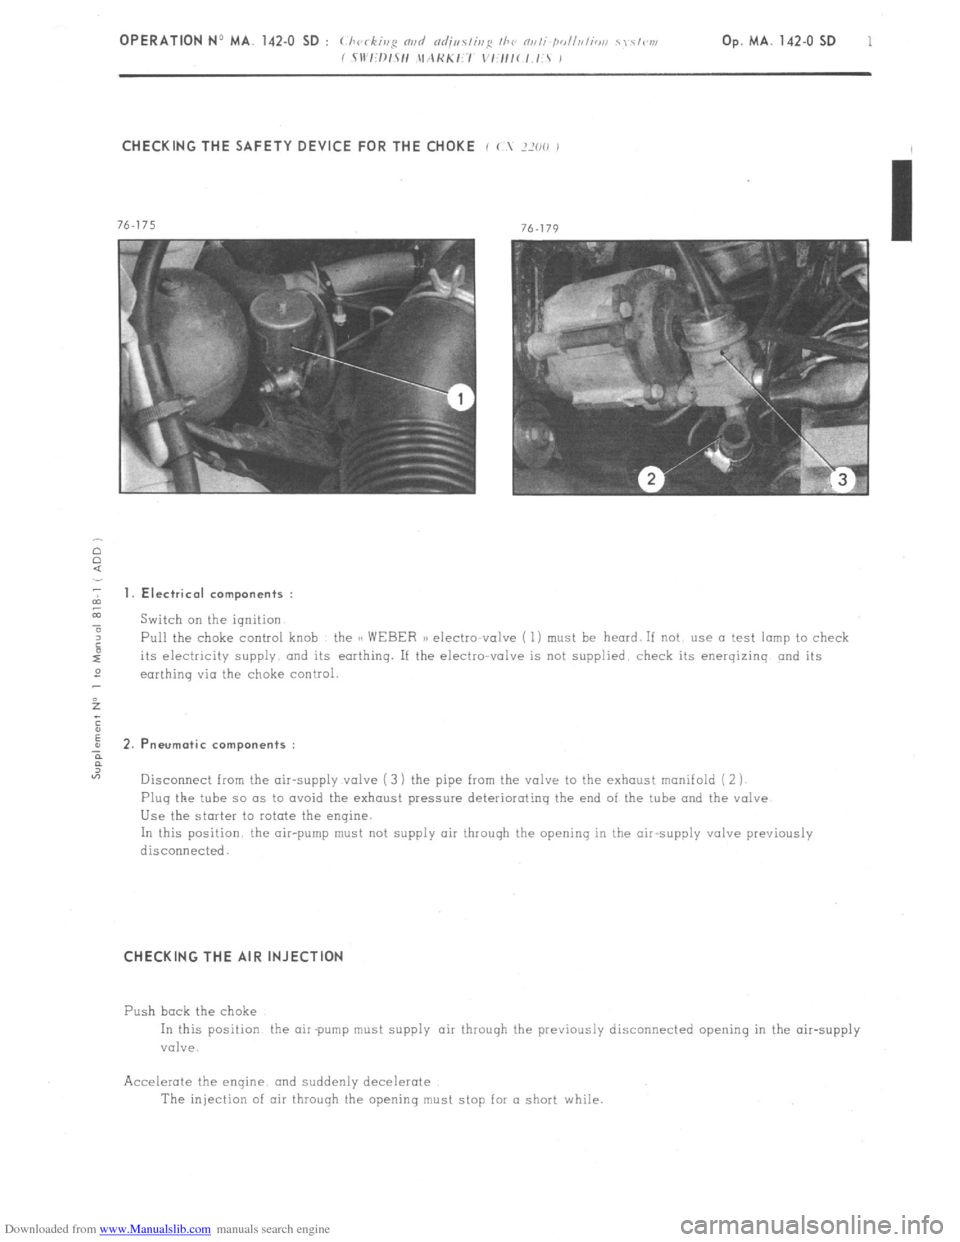
CHECKING THE SAFETY DEVICE FOR THE CHOKE i ( ?XO ,
2 1. Electrical components :
z
a Switch on the ignition
4 Pull the choke control knob the CC WEBER a) electto-valve ( 1) must be heard. If not use a test lamp to check
its electricity supply and its earthing. If the electro-valve is not supplied. check its energizinq and its
2
earthinq via the choke control.
5
;
E
; 2.P neurotic components :
?
“7
Disconnect from the air-supply valve ( 3 ) the pipe from the valve to the exhaust manifold ( 2 j
Plug the tube so as to avoid the exhaust pressure deteriorating the end of the tube and the valve
Use the starter to rotate the engine.
In this position the air-pump must not supply air through the opening in the air-supply valve previously
disconnecied.
CHECKING THE AIR INJECTION
Push bock the choke
In this position the air pump must supply air throuqh the previously disconnected opening in the air-supply
valve.
Accelerate the enqine. and suddenly decelerate
The injection of air through the openinq must stop for a short while.
Page 94 of 394
Downloaded from www.Manualslib.com manuals search engine CHECKING THE SAFETY DEVICE FOR THE CHOKE
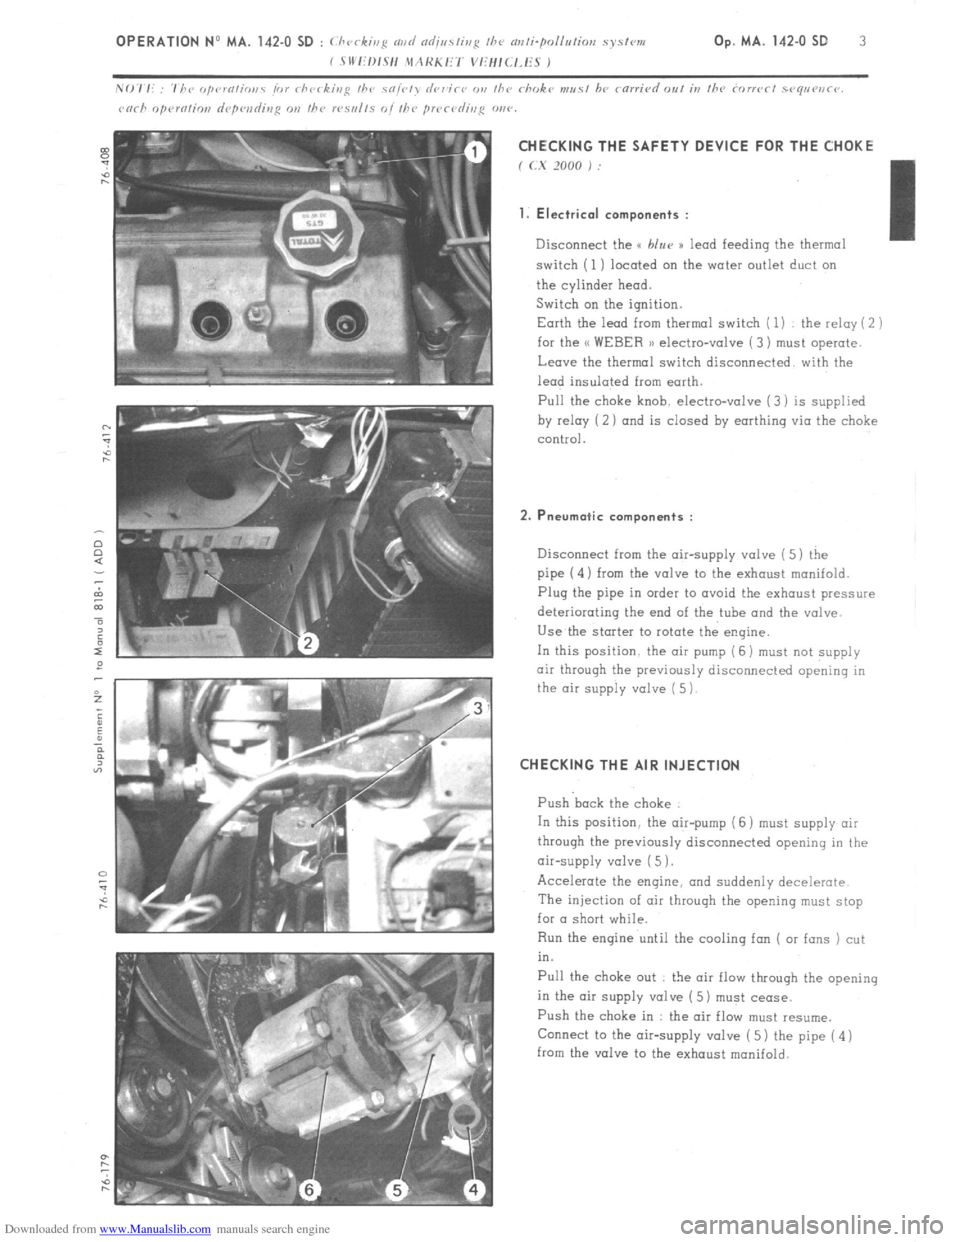
f (.X 2000 j :
1. Electrical components :
Disconnect the u blur )) lead feeding the thermal
switch (1) located on the water outlet duct on
the cylinder head.
Switch on the ignition.
Earth the lead from thermal switch ( 1) the relay ( 2 )
for the << WEBER 1) electro-valve ( 3) must operate.
Leave the thermal switch disconnected with the
lead insulated from earth.
Pull the
choke knob. electro-valve (3) is supplied
by relay (2 ) and is closed by earthing via the choke
control.
2. Pneumatic components :
Disconnect from the air-supply valve ( 5) the
pipe (4) from the valve to the exhaust manifold.
Plug the pipe in order to avoid the exhaust pressure
deteriorating the end of the tube and the valve
Use the starter to rotate the engine.
In this position. the air pump (6 j must
not supply
air through the previously disconnected opening in
the air supply valve ( 5)
CHECKING THE AIR INJECTION
Push back the choke
In this position. the air-pump (6 ) must supply air
through the previously disconnected opening in the
air-supply valve ( 5 1.
Accelerate the engine, and suddenly decelerate
The injection of air throuqh the opening must stop
for a short while.
Run the engine until the cooling fan ( or fans ) cut
in.
Pull the choke out : the air flow through the opening
in the air supply valve ( 5) must cease.
Push the choke in : the air flow must resume.
Connect to the air-supply valve ( 5) the pipe ( 4 )
from the valve to the exhaust manifold.
Page 95 of 394
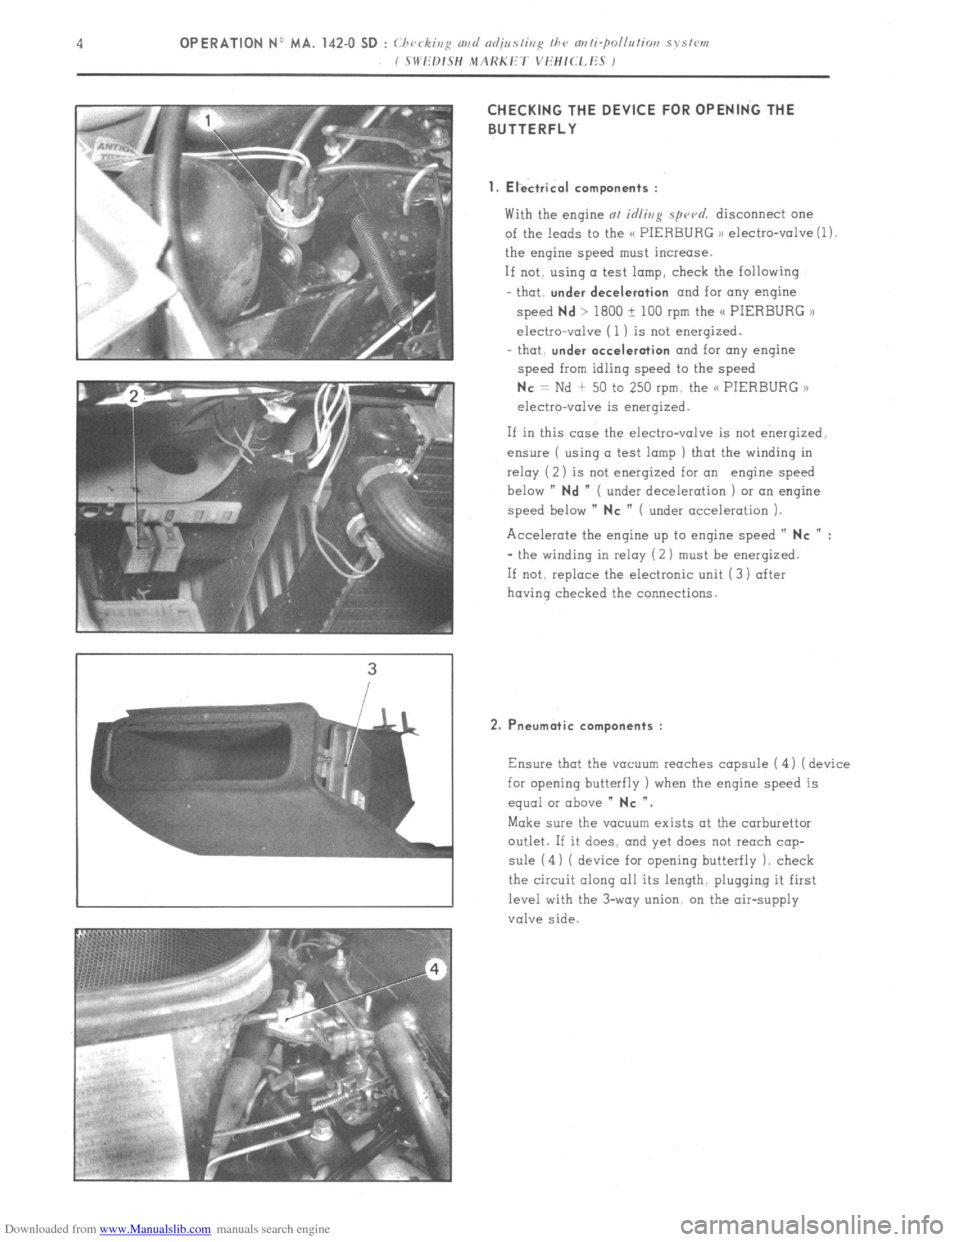
Downloaded from www.Manualslib.com manuals search engine CHECKING THE DEVICE FOR OPENING THE
BUTTERFLY
1. Electrical components :
With the engine at idling spu~d. disconnect one
of the leads to the C< PIERBURG ,) electro-valve (1).
the engine speed must increase.
If not. using a test lamp, check the following
that.
under deceleration and for any engine
speed
Nd > 1800 ? 100 rpm the /C PIERBURG >l
electro-valve (1 ) is not energized.
- that.
under acceleration and for any engine
speed from idling speed to the speed
Nc = Nd + 50 to 250 rpm. the C< PIERBURG ,,
electro-valve is energized.
If in this case the electro-valve is not energized.
ensure ( using a test lamp ) that the winding in
relay ( 2) is not enerqized for an engine speed
below ”
Nd ” ( under deceleration ) or an engine
speed below ”
NC ” ( under acceleration ).
Accelerate the engine up to engine speed ”
NC n :
- the winding in relay (2 ) must be enerqized.
If not. replace the electronic unit (3) after
having checked the connections.
2. Pneumatic components :
Ensure that the vacuum reaches capsule ( 4 1 ( device
for opening butterfly ) when the engine speed is
equal or above ”
NC “.
Make sure the vacuum exists at the carburettor
outlet. If it does. and yet does not reach cap-
sule (4) ( device for opening butterfly 1. check
the circuit along all its length. plugging it first
level with the 3-way union. on the air-supply
valve side.
Page 105 of 394
Downloaded from www.Manualslib.com manuals search engine 10 OPERATION No MA.IE. 144-00 : Characteristics o/ the K L=Jetronic )) electronic
/uel iujectian system. AIR-FLOW SENSOR ( 1) :
The role of the air-flow sensor is to supply the E.C.U. with a signal proportional in voltage to the quantity of air
drawn in.
With the engine running, the sensor flap is maintained at an angular position determined by the intensity of the-air- ,
flow, against the resistive action of a spiral spring. The resistance to deflection of the sensor flap, produced by the
spiral spring, is calculated so as to compensate for any mechanical friction ( bearings, bushes ) and to limit the
pressure drop at the flap.
The movement of the sensor flap is damped by a blade rigidly attached to it. This damping blade rotates inside a
housing in which it is a close fit. The operating clearance determines the degree of damping. The use of a damping
blade cancels the effects on the angular position of the sensor flap of pressure variation’s in the inlet collector.
A potentiometer, actuated by the sensor flap spindle, transforms movement of the sensor flap into an electrical circuit which is transtiitted to the E.C.U.. The voltage of the electrical ‘current is inversely proportional to the
amount of air drawn-in.
In order to cancel the effects of any combustion taking place in the inlet manifold, a one-way valve is incorporated in the sensor flap.
Thanks to a by-pass channel, a small quantity of the air drawn ,in by-passes the sensor flap. This offers the possibility
of determining the air/lfuel mixture at idling speed by’varying the diameter of the by-pass channel, since the air going
through the by-pass is not measured. The switch for the pump ( engine running ) and the air temperature sensor are
located in the air-flow sensor.
Page 108 of 394
Downloaded from www.Manualslib.com manuals search engine INJECTORS ( i ) :
Each cylinder is supplied by an electro-magnetically controlled injector which is fitted in the inlet duct;
the injector vaporises the fuel upstream of the inlet valve. In the case of the (( L-Jetronic )) system. all the
injectors operate simultaneously. However, in order to ensure regular fuel supply to the cylinders, there are
two injections for each rotation of the camshaft, each one supplying half the metered quantity of fuel required I
for the complete engine cycle.
The injector consists of a valve housing and an injector needle fitted with a magnetic core. The mobile magnetic
/
core is in one piece with the needle which in turn is compressed against the air-tight injector housing seat by
a helicoidal spring. At the rear end of the injector, there is a solenoid. and at the front a guide for the injector
needle.
Impulses coming from the E.C.U. create a magnetic.field in the solenoid; the magnetic core is attracted, and the
needle lifts off its seat the fuel under pressure is free to pass through, The movement of the magnetic core is
approximately 0.15 mm.
The duration of opening is determined by the E.C.U. as a function of the operating conditions of the engine at the
moment in question{. TEMPERATURE SENSORS t(
When the engine is started, for a temperature of approximately - 20” C, it needs two to three times more fuel than
when it has reached normal operating temperature. The enrichment of the mixture must be reduced as the engine
warms up, and must cease as soon as the engine has reached normal operating temperature. In’order to start off
this regulating procedure, the engine temperature must be communicated to the E.C.U. ( Electronic Control Unit ).
This is the object .of the temperature sensors.
The temperature sensor consists of a hollow threaded rod in which is located an NTC Thermistor made in semi-
conducting material. The letters .NTC, which signify (( negative temperature coefficient )) characterise its specific
property : its electrical resistance decreases as the temperature increases.
The (( L-Jetronic 1) system is fitted with.a water temperature sensor ( 2) and an air temperature sensor, the latter
situated in the air-flow sensor.