boot Citroen GRAND C4 PICASSO RHD 2016 2.G User Guide
[x] Cancel search | Manufacturer: CITROEN, Model Year: 2016, Model line: GRAND C4 PICASSO RHD, Model: Citroen GRAND C4 PICASSO RHD 2016 2.GPages: 523, PDF Size: 13.63 MB
Page 69 of 523
67
Reinitialising the motorised
tailgate
This operation is necessary where there is
no movement - after detection of an obstacle,
c
onnecting or recharging the battery, ...
F
O
pen the tailgate manually, if necessary.
F
M
anually close the tailgate fully.
If
the problem persists, contact a CITROËN
d
ealer or a qualified workshop.
Precautions in use
In wintry conditions
In the event of an accumulation of snow on the tailgate, clear the snow before
c
ommanding a motorised opening of
t
he tailgate.
The
formation of ice can block the
t
ailgate and prevent its opening: wait
u
ntil the ice melts with the heating of
t
he
p
assenger
c
ompartment.
When washing the vehicle
When washing the vehicle in an automatic car wash, don't forget to
l
ock your vehicle to avoid the risk of
u
nexpected
ope
ning.
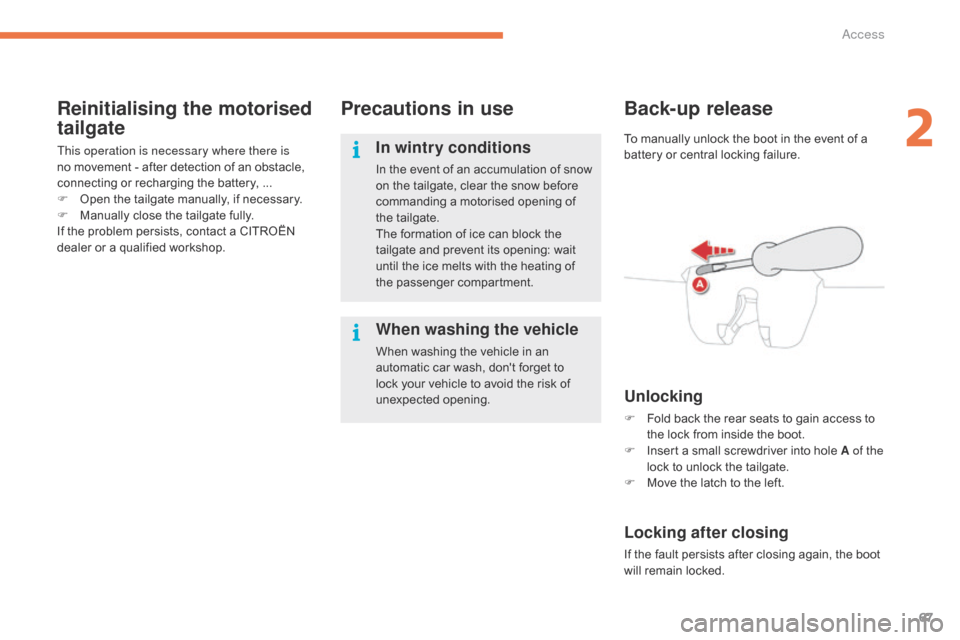
Back-up release
Unlocking
F Fold back the rear seats to gain access to t
he lock from inside the boot.
F
I
nsert a small screwdriver into hole A of the
lock
to unlock the tailgate.
F
M
ove the latch to the left.
Locking after closing
If the fault persists after closing again, the boot will remain locked.
To
manually unlock the boot in the event of a
b
attery or central locking failure.
2
Access
Page 72 of 523
70
For all work on the alarm system, contact a CITROËN dealer or a
q
ualified
w
orkshop.
AlarmSystem which protects and provides a deterrent against theft and break-ins. It provides the following types of monitoring:
- Exterior perimeter
The system checks for opening of the vehicle.
T he alarm is triggered if anyone tries to open a
d
oor, the boot or the bonnet...
- Interior volumetric
The system checks for any variation in the volume in the passenger compartment.
The
alarm is triggered if anyone breaks a
w
indow, enters the passenger compartment or
m
oves inside the vehicle.
Self-protection function
The system checks for the disconnection of any of its components.
The
alarm is triggered if the battery,
t
he button or the siren wiring is
d
isconnected
o
r
d
amaged.
Locking the vehicle with full
alarm system
Activation
If an opening (door, boot, bonnet...) is not closed fully, the vehicle is not locked but the
e
xterior perimeter monitoring will be activated
a
fter a delay of 45 seconds, at the same time
a
s the interior volumetric monitoring.
F
L
ock the vehicle using the
r
emote control.
F
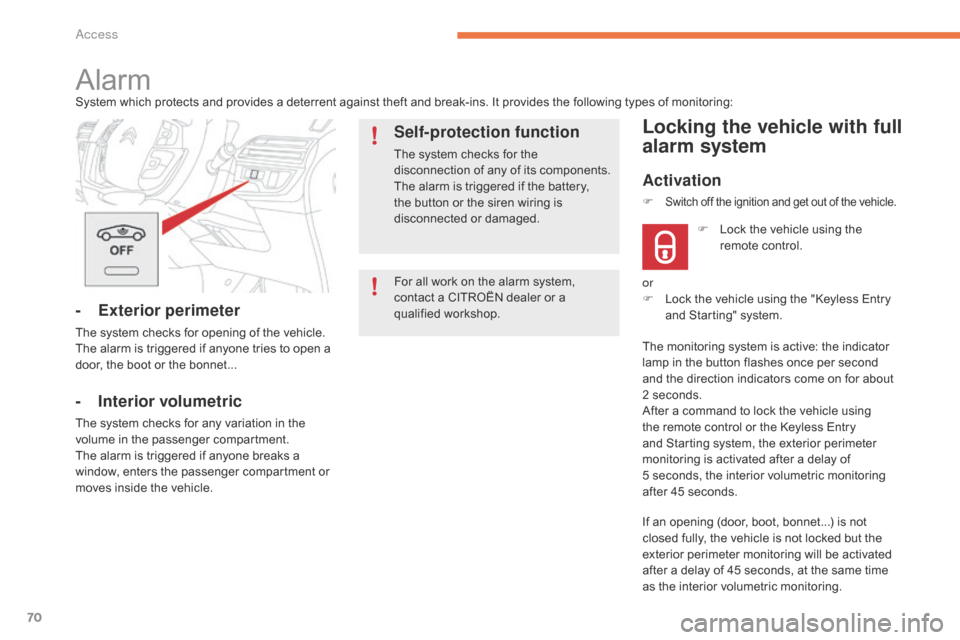
Switch off the ignition and get out of the vehicle.
or
F
L ock the vehicle using the "Keyless Entry
a
nd Starting" system.
The
monitoring system is active: the indicator
l
amp in the button flashes once per second
a
nd the direction indicators come on for about
2
seconds.
After
a command to lock the vehicle using
t
he remote control or the Keyless Entry
a
nd Starting system, the exterior perimeter
m
onitoring is activated after a delay of
5 s
econds, the interior volumetric monitoring
a
fter 45 seconds.
Access
Page 73 of 523
71
OFF
Locking the vehicle with exterior perimeter
monitoring only
Deactivate the interior volumetric monitoring to avoid unwanted triggering of the alarm in
c
ertain cases such as:
-
l
eaving a window partially open,
-
w
ashing your vehicle,
-
c
hanging a wheel,
-
t
owing your vehicle,
-
t
ransport on a ferry.
Deactivating the volumetric
monitoring
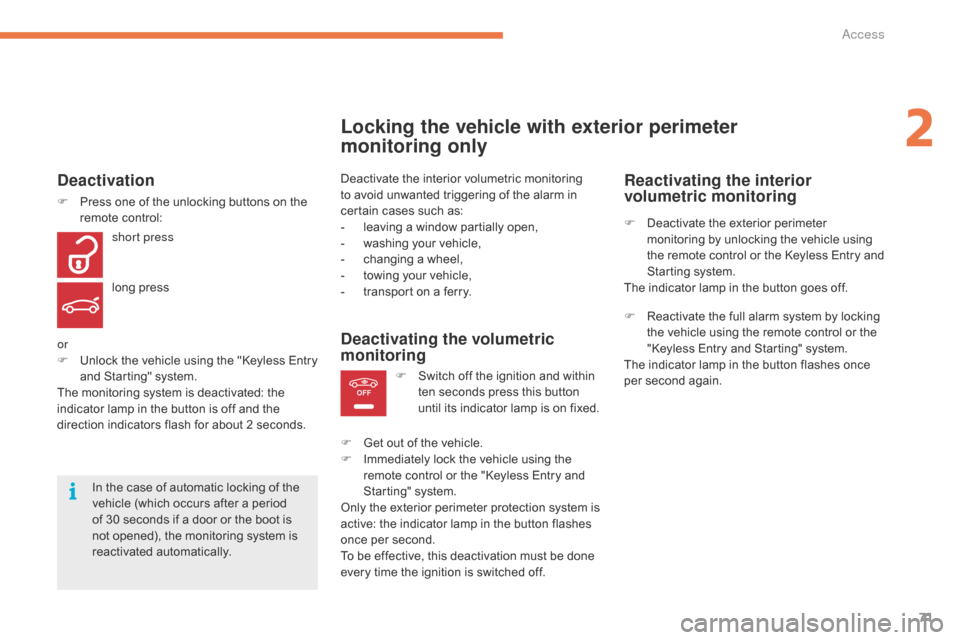
F Switch off the ignition and within t
en seconds press this button
u
ntil its indicator lamp is on fixed.
F
G
et
out of the vehicle.
F
I
mmediately lock the vehicle using the
r
emote control or the "Keyless Entry and
S
tarting" system.
Only
the
exterior perimeter protection system is
a
ctive:
the indicator lamp in the button flashes
o
nce
per
second.
To
be
effective, this deactivation must be done
e
very
time the ignition is switched off.
In
the
case
of
automatic
locking
of
the
v
ehicle
(which
occurs
after
a
period
o
f
30
seconds
if
a
door
or
the
boot
is
n
ot
opened),
the
monitoring
system
is
r
eactivated
a
utomatically.
Deactivation
F Press one of the unlocking buttons on the r
emote control:
short press
long
press
or
F
U
nlock the vehicle using the "Keyless Entry
a
nd Starting" system.
The
monitoring system is deactivated: the
i
ndicator lamp in the button is off and the
d
irection indicators flash for about 2 seconds.
Reactivating the interior
volumetric monitoring
F Deactivate the exterior perimeter m
onitoring by unlocking the vehicle using
t
he remote control or the Keyless Entry and
S
tarting system.
The
indicator lamp in the button goes off.
F
R
eactivate the full alarm system by locking
t
he vehicle using the remote control or the
"
Keyless Entry and Starting" system.
The
indicator lamp in the button flashes once
p
er second again.
2
Access
Page 74 of 523
72
Triggering of the alarm
This is indicated by sounding of the siren and flashing of the direction indicators for
t
hirty seconds.
The
monitoring functions remain active until
t
he alarm has been triggered eleven times in
s
uccession.
When
the vehicle is unlocked using the remote
c
ontrol or the Keyless Entry and Starting
s
ystem, rapid flashing of the indicator lamp
i
n the button informs you that the alarm was
t
riggered during your absence. When the
i
gnition is switched on, this flashing stops
i
mmediately.
Failure of the remote control
To deactivate the monitoring functions:
F
U
nlock the vehicle using the key (integral
w
ith the remote control) in the driver's door
l
ock.
F
O
pen the door; the alarm is triggered.
F
S
witch on the ignition; the alarm stops. The
i
ndicator lamp in the button goes off.
Locking the vehicle without
activating the alarm
F Lock or deadlock the vehicle using the key (
integral with the remote control) in the
d
river's door lock.
Operating fault
When the ignition is switched on, fixed illumination of the indicator lamp in the button
i
ndicates a fault in the system.
Have
it checked by a CITROËN dealer or a
q
ualified
w
orkshop.
Automatic activation*
2 minutes after the last door or the boot is closed, the system is activated automatically.
F
T
o avoid triggering the alarm on entering
t
he vehicle, first press the unlocking button
o
n the remote control or unlock the vehicle
u
sing the Keyless Entry and Starting
s
ystem.
*
Depending on the country of sale.
Access
Page 84 of 523
82
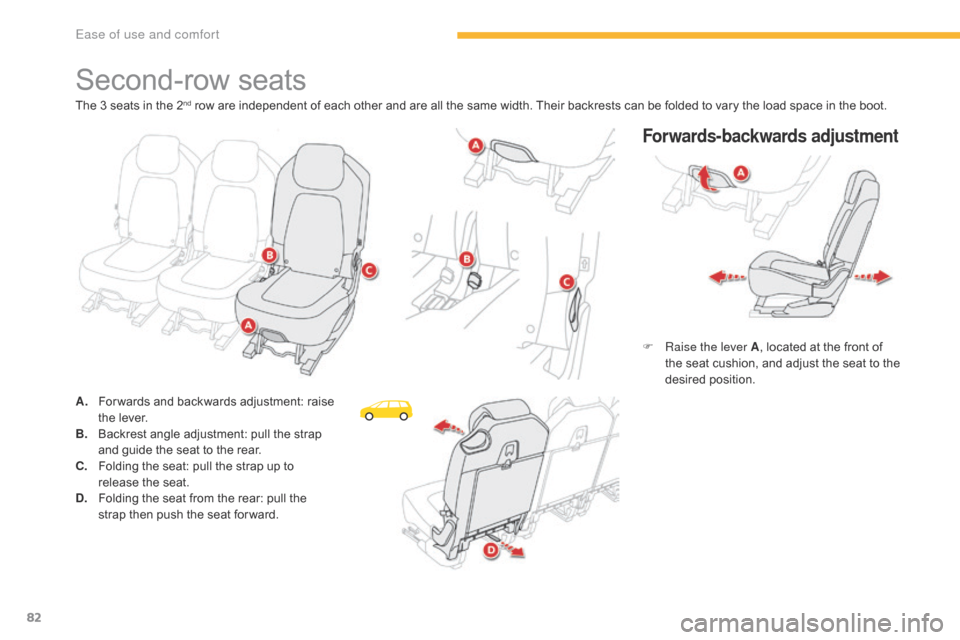
Second-row seats
Forwards-backwards adjustment
F Raise the lever A , located at the front of t
he seat cushion, and adjust the seat to the
de
sired
p
osition.
The
3
seats
in
the
2
nd row are independent of each other and are all the same width. Their backrests can be folded to vary the load space in the boot.
A.
F
or wards
and
backwards adjustment: raise
t
he
lever.
B.
B
ackrest
angle
adjustment: pull the strap
a
nd
guide
the
seat to the rear.
C.
F
olding
the
seat:
pull the strap up to
r
elease
t
he
sea
t.
D.
F
olding
the
seat
from the rear: pull the
s
trap
then
push
the seat for ward.
Ease of use and comfort
Page 86 of 523
84
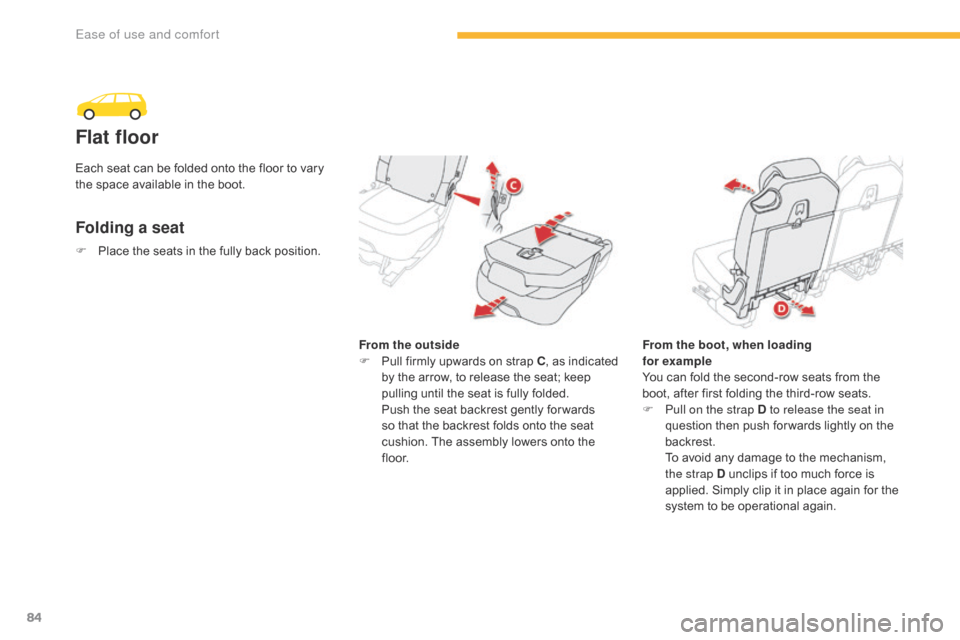
Flat floor
Folding a seat
From the outside
F P ull firmly upwards on strap C,
as indicated
b
y the arrow, to release the seat; keep
p
ulling until the seat is fully folded.
P
ush the seat backrest gently for wards
s
o that the backrest folds onto the seat
c
ushion. The assembly lowers onto the
f
l o o r. From the boot, when loading
for example
You
can fold the second-row seats from the
b
oot, after first folding the third-row seats.
F
P
ull on the strap D to release the seat in
question
then push for wards lightly on the
b
ackrest.
T
o avoid any damage to the mechanism,
t
he strap D unclips if too much force is
a
pplied. Simply clip it in place again for the
s
ystem to be operational again.
F
P
lace
the
seats
in
the
fully
back
position.
Each
seat
can
be
folded
onto
the
floor
to
vary
t
he
space
available
in
the
boot.
Ease of use and comfort
Page 95 of 523
93
In order for these systems to be fully effective, follow the operation and maintenance guidelines belo w:
F
T
o obtain an even air distribution, take care not to obstruct the exterior air intake grilles
l
ocated at the base of the windscreen, the nozzles, the vents and the air outlets, as well
a
s the air extractor located in the boot.
F
D
o not cover the sunshine sensor, located on the dashboard; this is used for regulation
o
f the air conditioning system.
F
O
perate the air conditioning system for at least 5 to 10 minutes, once or twice a month
t
o keep it in per fect working order.
F
E
nsure that the passenger compartment filter is in good condition and have the filter
e
lements replaced regularly.
W
e recommend the use of a combined passenger compartment filter. Thanks to its
s
pecial active additive, it contributes to the purification of the air breathed by the
o
ccupants and the cleanliness of the passenger compartment (reduction of allergic
s
ymptoms, bad odours and greasy deposits).
F
T
o ensure correct operation of the air conditioning system, you are also advised to have
i
t checked regularly as recommended in the maintenance and warranty guide.
F
I
f the system does not produce cold air, switch it off and contact a CITROËN dealer or a
q
ualified
w
orkshop.
Recommendations for ventilation and air conditioning
If after an extended stop in sunshine, the i nterior t emperature i s v ery h igh, f irst
v
entilate the passenger compartment for
a
few moments.
Put
the air flow control at a setting high
e
nough to quickly change the air in the
p
assenger
c
ompartment.
The
air conditioning system does not
c
ontain chlorine and does not present
a
ny danger to the ozone layer.
The
condensation created by the air
c
onditioning results in a discharge
o
f water under the vehicle which is
p
er fectly normal.
When
towing
the
maximum
load
on
a
steep
gradient
in
high
temperatures,
switching
off
the
a
ir
conditioning
increases
the
available
engine
power
and
so
improves
the
towing
ability.
Stop & Start
The heating and air conditioning s ystems only work when the engine is
r
unning.
To
maintain a comfortable temperature
i
n the passenger compartment, you can
t
emporarily deactivate the Stop & Start
s
ystem.
For
more information on Stop & Star t,
refer
to the corresponding section.
3
Ease of use and comfort
Page 109 of 523
107
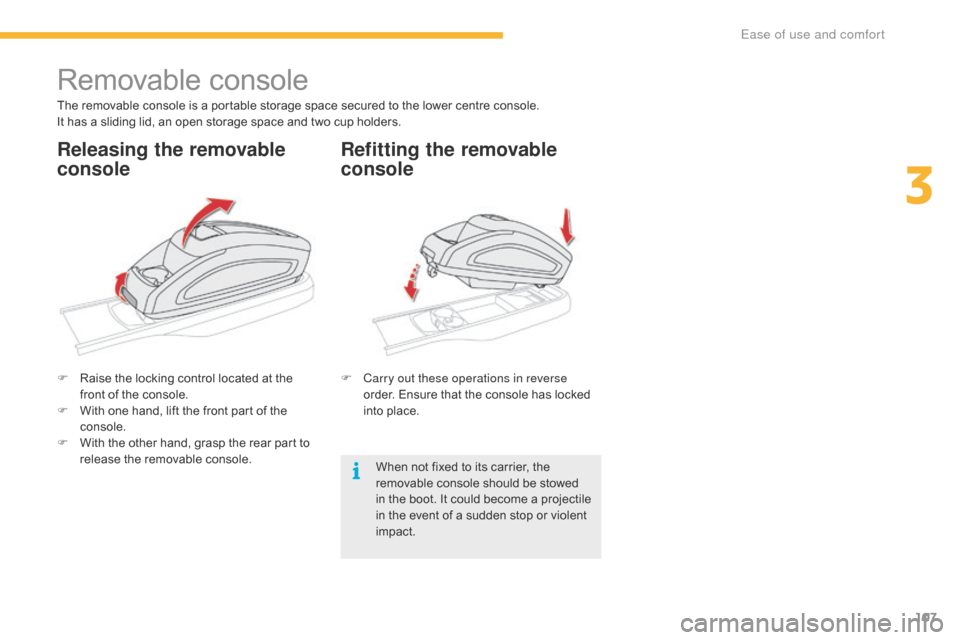
Removable console
The removable console is a portable storage space secured to the lower centre console.
I t has a sliding lid, an open storage space and two cup holders.
F
R
aise the locking control located at the
f
ront of the console.
F
W
ith one hand, lift the front part of the
c
onsole.
F
W
ith the other hand, grasp the rear part to
r
elease the removable console.F
C
arry out these operations in reverse
order.
Ensure that the console has locked
i
nto place.
When
not fixed to its carrier, the
r
emovable console should be stowed
i
n the boot. It could become a projectile
i
n the event of a sudden stop or violent
im
pact.
Releasing the removable
consoleRefitting the removable
console
3
Ease of use and comfort
Page 115 of 523
113
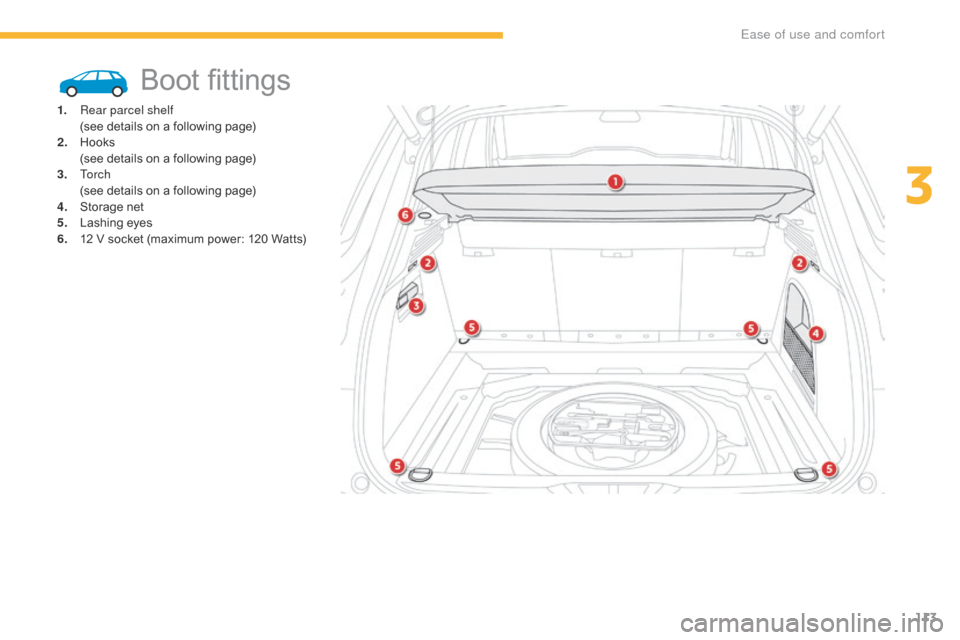
Boot fittings
1. Rear parcel shelf (see details on a following page)
2.
H
ooks
(
see details on a following page)
3.
To r c h
(
see details on a following page)
4.
St
orage
n
et
5.
L
ashing eyes
6.
1
2 V socket (maximum power: 120 Watts)
3
Ease of use and comfort
Page 116 of 523
114
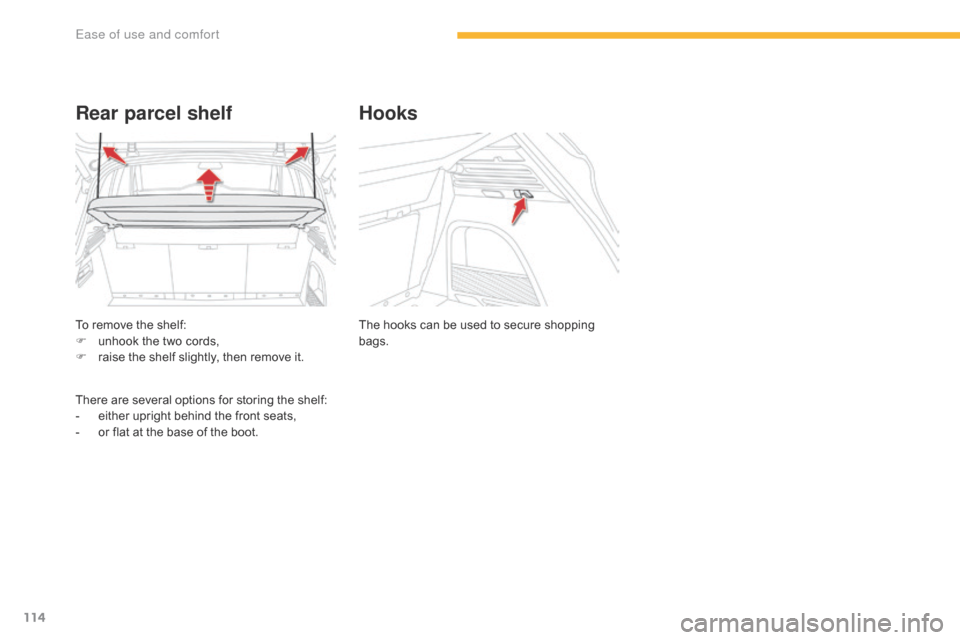
To remove the shelf:
F u nhook the two cords,
F
r
aise the shelf slightly, then remove it.
Rear parcel shelf
There are several options for storing the shelf:
- e ither upright behind the front seats,
-
o
r flat at the base of the boot.The
hooks can be used to secure shopping
b
ags.
Hooks
Ease of use and comfort