sensor Citroen JUMPY MULTISPACE 2009.5 2.G Owner's Manual
[x] Cancel search | Manufacturer: CITROEN, Model Year: 2009.5, Model line: JUMPY MULTISPACE, Model: Citroen JUMPY MULTISPACE 2009.5 2.GPages: 231, PDF Size: 11.45 MB
Page 23 of 231
33
Instruments and controls
READY TO SET OFF
2
The points at which a service is due are
calculated from the last indicator zero reset.
The point at which a service is due is
determined by two parameters:
- the distance travelled,
- the time which has elapsed since the last service.
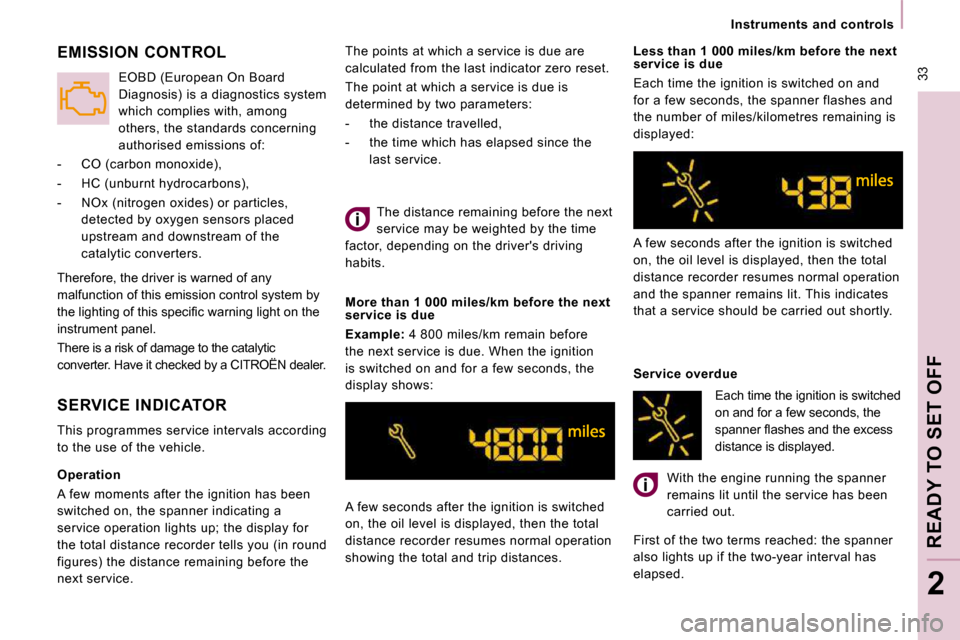
A few seconds after the ignition is switched
on, the oil level is displayed, then the total
distance recorder resumes normal operation
showing the total and trip distances. Less than 1 000 miles/km before the next
service is due
Each time the ignition is switched on and
for a few seconds, the spanner flashes and
the number of miles/kilometres remaining is
displayed:
A few seconds after the ignition is switched
on, the oil level is displayed, then the total
distance recorder resumes normal operation
and the spanner remains lit. This indicates
that a service should be carried out shortly.
Service overdue
With the engine running the spanner
remains lit until the service has been
carried out.
First of the two terms reached: the spanner
also lights up if the two-year interval has
elapsed.
The distance remaining before the next
service may be weighted by the time
factor, depending on the driver's driving
habits.
More than 1 000 miles/km before the next
service is due
Example: 4 800 miles/km remain before
the next service is due. When the ignition
is switched on and for a few seconds, the
display shows:
SERVICE INDICATOR
This programmes service intervals according
to the use of the vehicle.
EMISSION CONTROL
Therefore, the driver is warned of any
malfunction of this emission control system by
�t�h�e� �l�i�g�h�t�i�n�g� �o�f� �t�h�i�s� �s�p�e�c�i�fi� �c� �w�a�r�n�i�n�g� �l�i�g�h�t� �o�n� �t�h�e�
instrument panel.
There is a risk of damage to the catalytic
converter. Have it checked by a CITROËN dealer. EOBD (European On Board
Diagnosis) is a diagnostics system
which complies with, among
others, the standards concerning
authorised emissions of:
- CO (carbon monoxide),
- HC (unburnt hydrocarbons),
- NOx (nitrogen oxides) or particles, detected by oxygen sensors placed
upstream and downstream of the
catalytic converters.
Each time the ignition is switched
on and for a few seconds, the
�s�p�a�n�n�e�r� �fl� �a�s�h�e�s� �a�n�d� �t�h�e� �e�x�c�e�s�s�
distance is displayed.
Operation
A few moments after the ignition has been
switched on, the spanner indicating a
service operation lights up; the display for
the total distance recorder tells you (in round
figures) the distance remaining before the
next service.
Page 24 of 231
33
Instruments and controls
READY TO SET OFF
2
The points at which a service is due are
calculated from the last indicator zero reset.
The point at which a service is due is
determined by two parameters:
- the distance travelled,
- the time which has elapsed since the last service.
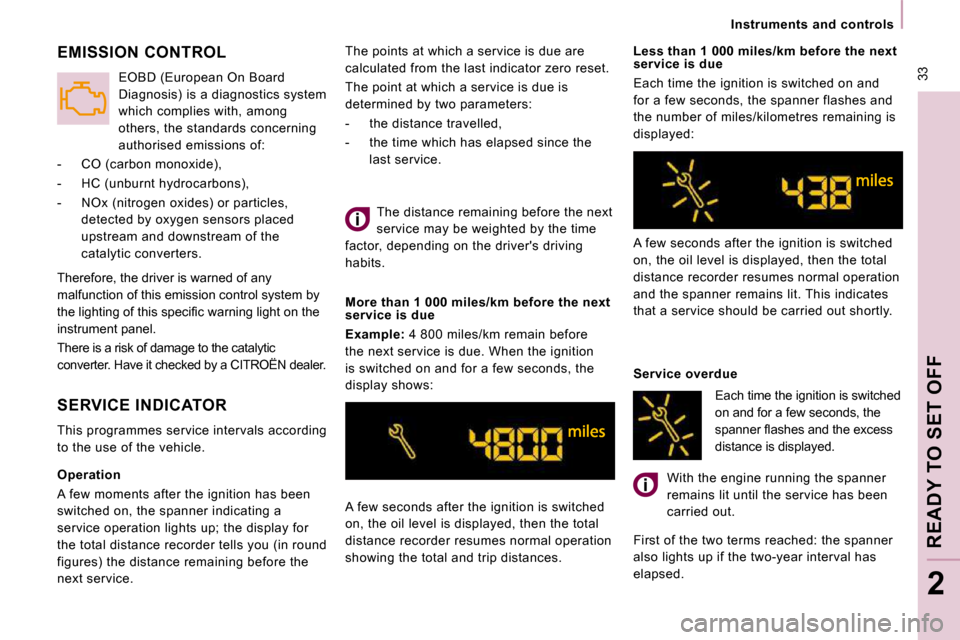
A few seconds after the ignition is switched
on, the oil level is displayed, then the total
distance recorder resumes normal operation
showing the total and trip distances. Less than 1 000 miles/km before the next
service is due
Each time the ignition is switched on and
for a few seconds, the spanner flashes and
the number of miles/kilometres remaining is
displayed:
A few seconds after the ignition is switched
on, the oil level is displayed, then the total
distance recorder resumes normal operation
and the spanner remains lit. This indicates
that a service should be carried out shortly.
Service overdue
With the engine running the spanner
remains lit until the service has been
carried out.
First of the two terms reached: the spanner
also lights up if the two-year interval has
elapsed.
The distance remaining before the next
service may be weighted by the time
factor, depending on the driver's driving
habits.
More than 1 000 miles/km before the next
service is due
Example: 4 800 miles/km remain before
the next service is due. When the ignition
is switched on and for a few seconds, the
display shows:
SERVICE INDICATOR
This programmes service intervals according
to the use of the vehicle.
EMISSION CONTROL
Therefore, the driver is warned of any
malfunction of this emission control system by
�t�h�e� �l�i�g�h�t�i�n�g� �o�f� �t�h�i�s� �s�p�e�c�i�fi� �c� �w�a�r�n�i�n�g� �l�i�g�h�t� �o�n� �t�h�e�
instrument panel.
There is a risk of damage to the catalytic
converter. Have it checked by a CITROËN dealer. EOBD (European On Board
Diagnosis) is a diagnostics system
which complies with, among
others, the standards concerning
authorised emissions of:
- CO (carbon monoxide),
- HC (unburnt hydrocarbons),
- NOx (nitrogen oxides) or particles, detected by oxygen sensors placed
upstream and downstream of the
catalytic converters.
Each time the ignition is switched
on and for a few seconds, the
�s�p�a�n�n�e�r� �fl� �a�s�h�e�s� �a�n�d� �t�h�e� �e�x�c�e�s�s�
distance is displayed.
Operation
A few moments after the ignition has been
switched on, the spanner indicating a
service operation lights up; the display for
the total distance recorder tells you (in round
figures) the distance remaining before the
next service.
Page 29 of 231
37
Steering wheel controls
ERGONOMICS and COMFORT
3
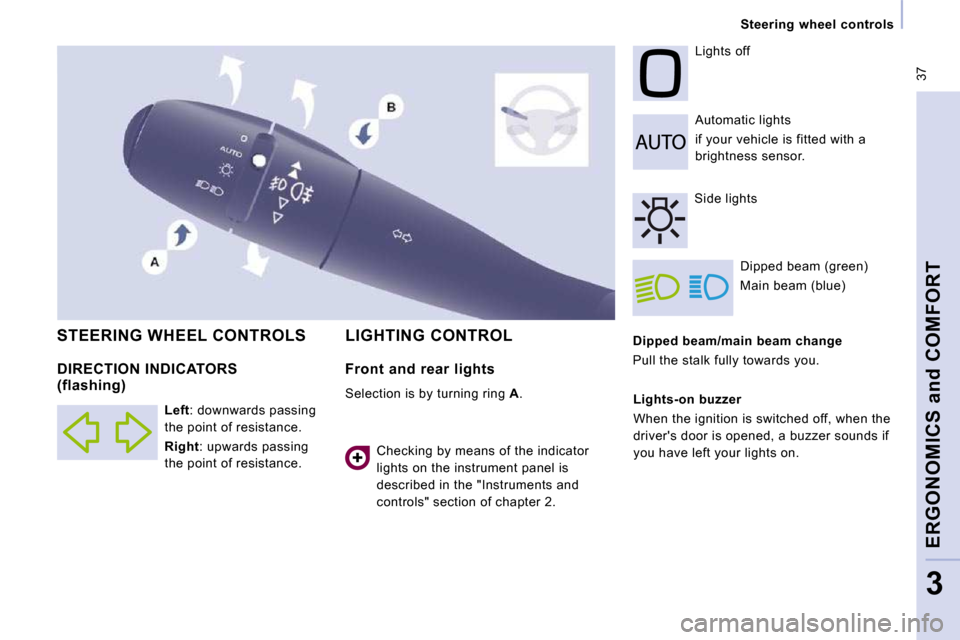
Dipped beam/main beam change
Pull the stalk fully towards you. Automatic lights
if your vehicle is fitted with a
brightness sensor.
Lights off
Dipped beam (green)
Main beam (blue) LIGHTING CONTROL STEERING WHEEL CONTROLS
Side lights
Lights-on buzzer
When the ignition is switched off, when the
driver's door is opened, a buzzer sounds if
you have left your lights on.
DIRECTION INDICATORS (flashing)
Left : downwards passing
the point of resistance.
Right : upwards passing
the point of resistance.
Front and rear lights
Selection is by turning ring A .
Checking by means of the indicator
lights on the instrument panel is
described in the "Instruments and
controls" section of chapter 2.
Page 30 of 231
37
Steering wheel controls
ERGONOMICS and COMFORT
3
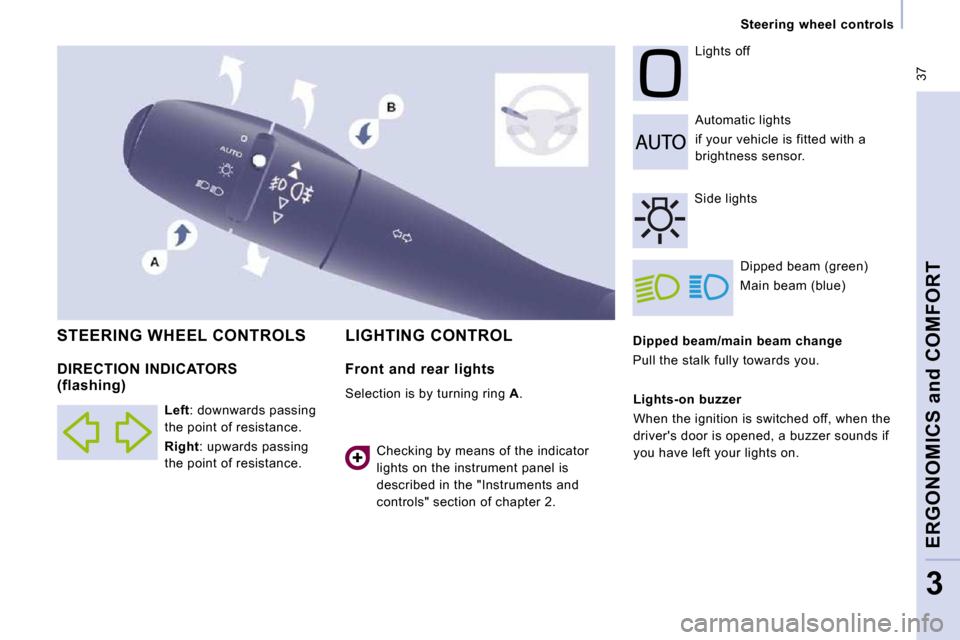
Dipped beam/main beam change
Pull the stalk fully towards you. Automatic lights
if your vehicle is fitted with a
brightness sensor.
Lights off
Dipped beam (green)
Main beam (blue) LIGHTING CONTROL STEERING WHEEL CONTROLS
Side lights
Lights-on buzzer
When the ignition is switched off, when the
driver's door is opened, a buzzer sounds if
you have left your lights on.
DIRECTION INDICATORS (flashing)
Left : downwards passing
the point of resistance.
Right : upwards passing
the point of resistance.
Front and rear lights
Selection is by turning ring A .
Checking by means of the indicator
lights on the instrument panel is
described in the "Instruments and
controls" section of chapter 2.
Page 32 of 231
39
Steering wheel controls
ERGONOMICS and COMFORT
3
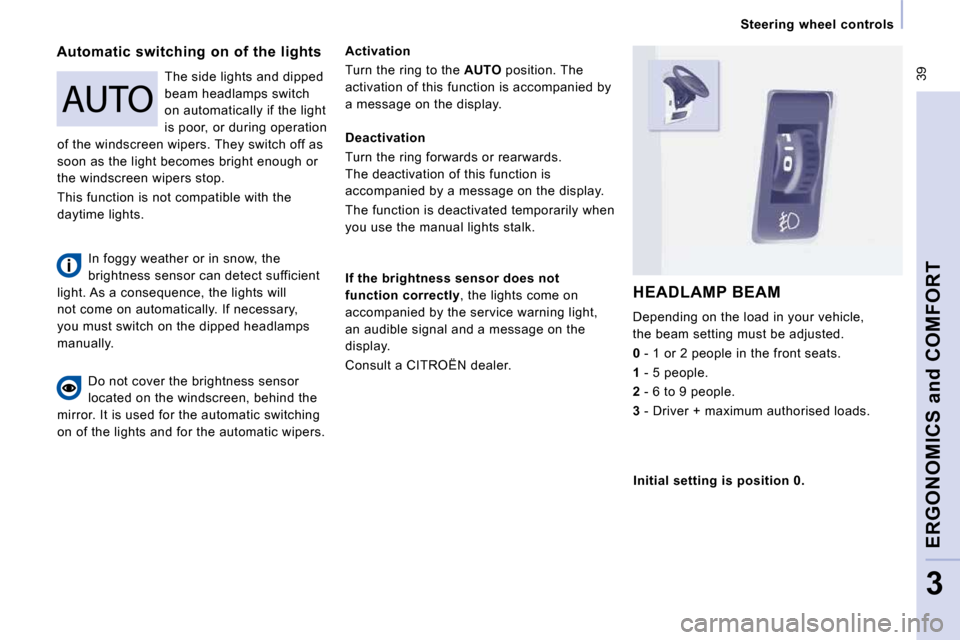
Automatic switching on of the lights Activation
Turn the ring to the AUTO position. The
activation of this function is accompanied by
a message on the display.
If the brightness sensor does not
function correctly , the lights come on
accompanied by the service warning light,
an audible signal and a message on the
display.
Consult a CITROËN dealer.
HEADLAMP BEAM
Depending on the load in your vehicle,
the beam setting must be adjusted.
0 - 1 or 2 people in the front seats.
1 - 5 people.
2 - 6 to 9 people.
3 - Driver + maximum authorised loads.
Do not cover the brightness sensor
located on the windscreen, behind the
mirror. It is used for the automatic switching
on of the lights and for the automatic wipers. The side lights and dipped
beam headlamps switch
on automatically if the light
is poor, or during operation
of the windscreen wipers. They switch off as
soon as the light becomes bright enough or
the windscreen wipers stop.
This function is not compatible with the
daytime lights. Deactivation
Turn the ring forwards or rearwards.
The deactivation of this function is
accompanied by a message on the display.
The function is deactivated temporarily when
you use the manual lights stalk.
Initial setting is position 0.
In foggy weather or in snow, the
brightness sensor can detect sufficient
light. As a consequence, the lights will
not come on automatically. If necessary,
you must switch on the dipped headlamps
manually.
Page 33 of 231
40
Steering wheel controls
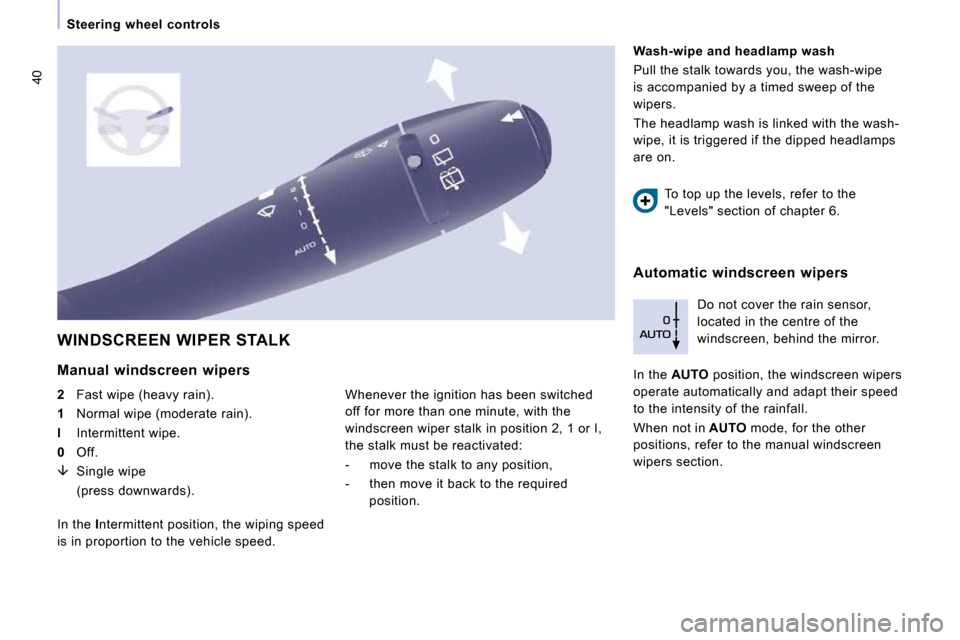
WINDSCREEN WIPER STALK
Manual windscreen wipers
2 Fast wipe (heavy rain).
1 Normal wipe (moderate rain).
l Intermittent wipe.
0 Off.
� Single wipe
(press downwards). Do not cover the rain sensor,
located in the centre of the
windscreen, behind the mirror.
In the AUTO position, the windscreen wipers
operate automatically and adapt their speed
to the intensity of the rainfall.
When not in AUTO mode, for the other
positions, refer to the manual windscreen
wipers section.
In the I ntermittent position, the wiping speed
is in proportion to the vehicle speed.
Wash-wipe and headlamp wash
Pull the stalk towards you, the wash-wipe
is accompanied by a timed sweep of the
wipers.
The headlamp wash is linked with the wash-
wipe, it is triggered if the dipped headlamps
are on.
To top up the levels, refer to the
"Levels" section of chapter 6.
Automatic windscreen wipers
Whenever the ignition has been switched
off for more than one minute, with the
windscreen wiper stalk in position 2, 1 or I,
the stalk must be reactivated:
- move the stalk to any position,
- then move it back to the required position.
Page 44 of 231
51
Ventilation
ERGONOMICS and COMFORT
3
Driver or passenger side comfort value
The value indicated on the display
corresponds to a level of comfort and not a
temperature in degrees Celsius or Fahrenheit. Automatic operation Do not cover the sunshine sensor,
located on the windscreen behind the
mirror, it is used for regulation of the air
conditioning.
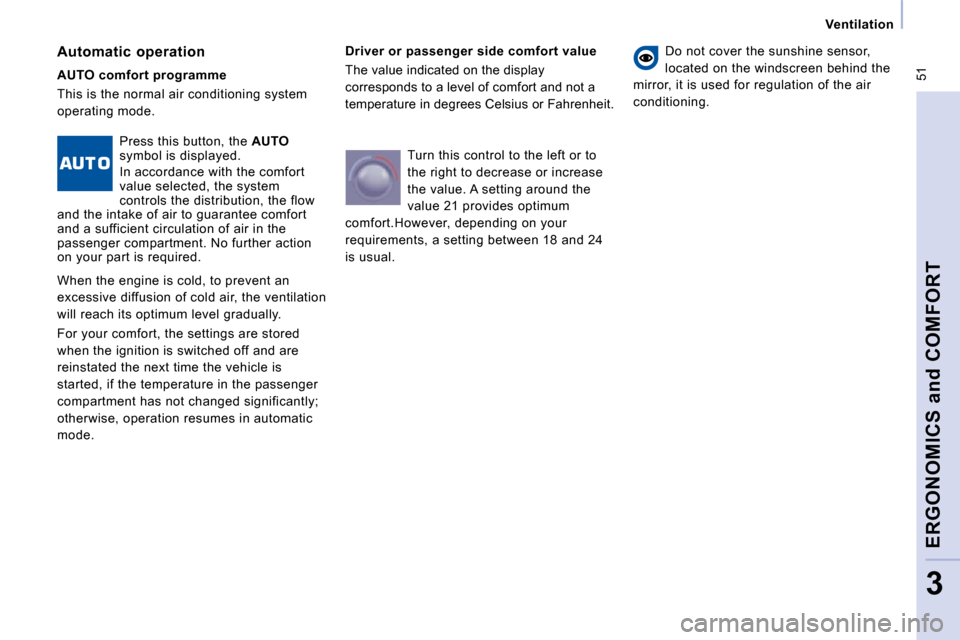
AUTO comfort programme
This is the normal air conditioning system
operating mode.
Press this button, the AUTO
symbol is displayed.
In accordance with the comfort
value selected, the system
controls the distribution, the flow
and the intake of air to guarantee comfort
and a sufficient circulation of air in the
passenger compartment. No further action
on your part is required.
When the engine is cold, to prevent an
excessive diffusion of cold air, the ventilation
will reach its optimum level gradually.
For your comfort, the settings are stored
when the ignition is switched off and are
reinstated the next time the vehicle is
started, if the temperature in the passenger
compartment has not changed significantly;
otherwise, operation resumes in automatic
mode. Turn this control to the left or to
the right to decrease or increase
the value. A setting around the
value 21 provides optimum
comfort.However, depending on your
requirements, a setting between 18 and 24
is usual.
Page 72 of 231
79
Rear suspension
ERGONOMICS and COMFORT
3
Metal suspension
This equipment adopts long movement limiters
which make it possible to guarantee stable
behaviour both when loaded and when empty.
No action on your part is required except to
ensure that maintenance is carried out and that
the authorised loads are complied with. On board, the increasing or lightening of the
load on the vehicle's platform is detected by
two height sensors. When all of the doors
are closed, the sensors trigger the automatic
compensation and determine the optimum
height of the sill for the vehicle's driving
conditions.
Deactivation of the automatic correction
The control which permits deactivation of the
automatic control is located on the right-
hand side, at the rear of the vehicle.
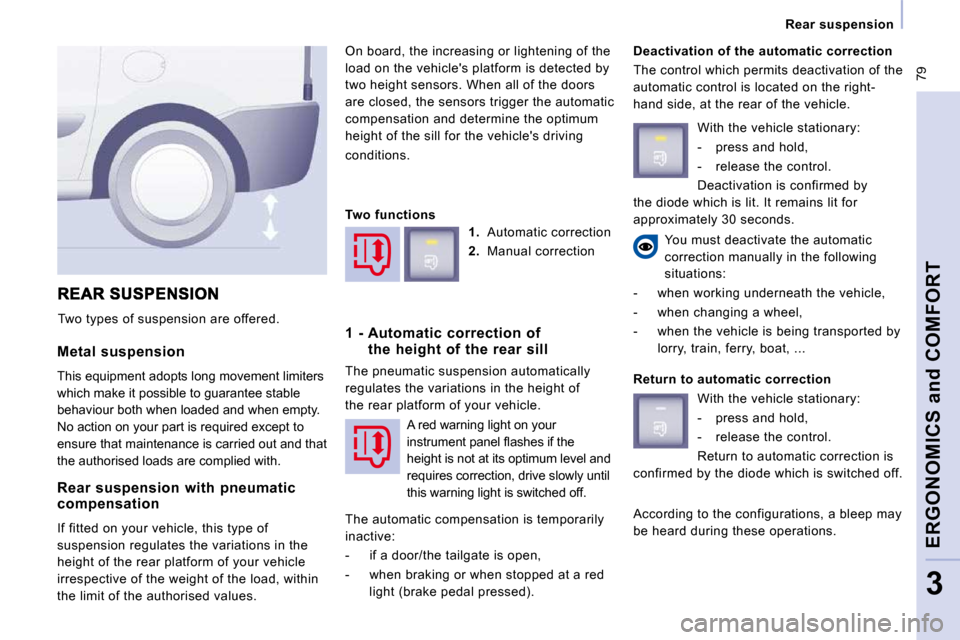
Two types of suspension are offered.
You must deactivate the automatic
correction manually in the following
situations:
- when working underneath the vehicle,
- when changing a wheel,
- when the vehicle is being transported by lorry, train, ferry, boat, ...
Rear suspension with pneumatic compensation
If fitted on your vehicle, this type of
suspension regulates the variations in the
height of the rear platform of your vehicle
irrespective of the weight of the load, within
the limit of the authorised values. Two functions
1. Automatic correction
2. Manual correction
1 - Automatic correction ofthe height of the rear sill
The pneumatic suspension automatically
regulates the variations in the height of
the rear platform of your vehicle.
The automatic compensation is temporarily
inactive:
- if a door/the tailgate is open,
- when braking or when stopped at a red
light (brake pedal pressed). With the vehicle stationary:
- press and hold,
- release the control.
Deactivation is confirmed by
the diode which is lit. It remains lit for
approximately 30 seconds.
Return to automatic correction
With the vehicle stationary:
- press and hold,
- release the control.
Return to automatic correction is
confirmed by the diode which is switched off.
According to the configurations, a bleep may
be heard during these operations.
A red warning light on your
�i�n�s�t�r�u�m�e�n�t� �p�a�n�e�l� �fl� �a�s�h�e�s� �i�f� �t�h�e�
height is not at its optimum level and
requires correction, drive slowly until
this warning light is switched off.
Page 79 of 231
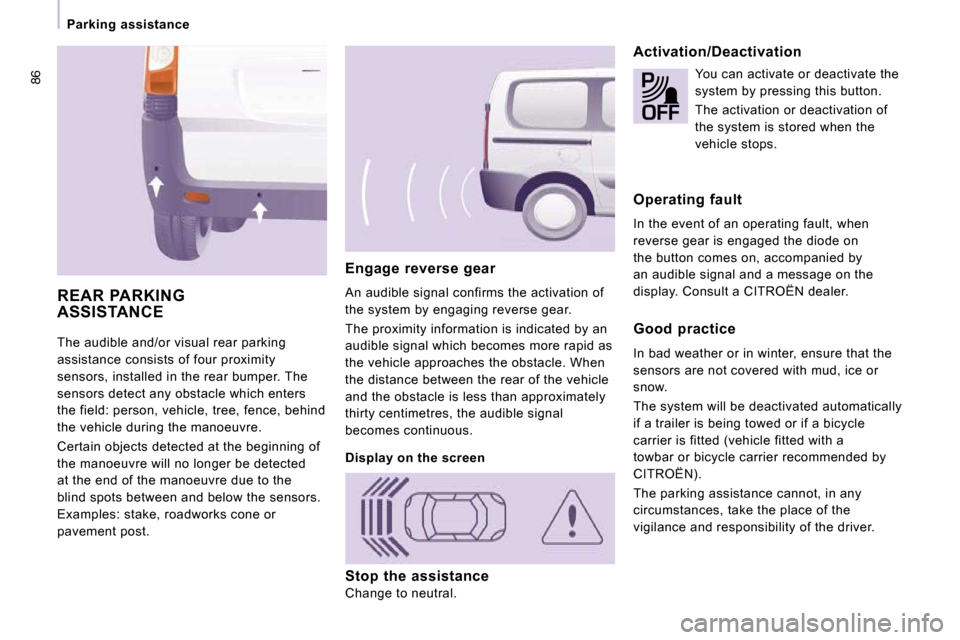
86
Parking assistance
The audible and/or visual rear parking
assistance consists of four proximity
sensors, installed in the rear bumper. The
sensors detect any obstacle which enters
the field: person, vehicle, tree, fence, behind
the vehicle during the manoeuvre.
Certain objects detected at the beginning of
the manoeuvre will no longer be detected
at the end of the manoeuvre due to the
blind spots between and below the sensors.
Examples: stake, roadworks cone or
pavement post.
Engage reverse gear
An audible signal confirms the activation of
the system by engaging reverse gear.
The proximity information is indicated by an
audible signal which becomes more rapid as
the vehicle approaches the obstacle. When
the distance between the rear of the vehicle
and the obstacle is less than approximately
thirty centimetres, the audible signal
becomes continuous.
Activation/Deactivation
REAR PARKING ASSISTANCE
Display on the screen You can activate or deactivate the
system by pressing this button.
The activation or deactivation of
the system is stored when the
vehicle stops.
Operating fault
In the event of an operating fault, when
reverse gear is engaged the diode on
the button comes on, accompanied by
an audible signal and a message on the
display. Consult a CITROËN dealer.
Good practice
In bad weather or in winter, ensure that the
sensors are not covered with mud, ice or
snow.
The system will be deactivated automatically
if a trailer is being towed or if a bicycle
carrier is fitted (vehicle fitted with a
towbar or bicycle carrier recommended by
CITROËN).
The parking assistance cannot, in any
circumstances, take the place of the
vigilance and responsibility of the driver.
Stop the assistance
Change to neutral.
Page 125 of 231
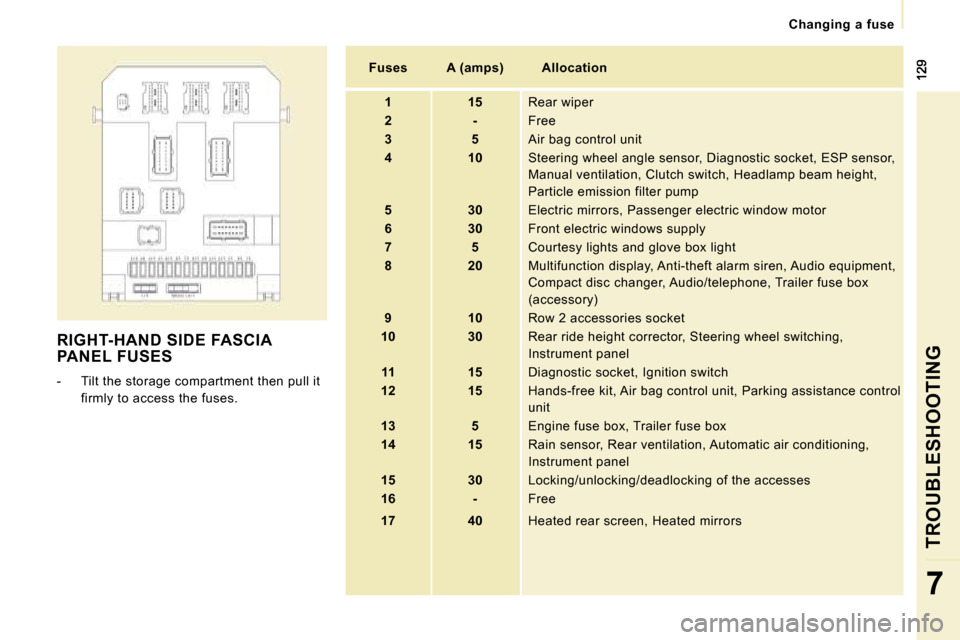
Changing a fuse
TROUBLESHOOTING
7
RIGHT-HAND SIDE FASCIA PANEL FUSES
- Tilt the storage compartment then pull it firmly to access the fuses.
Fuses A (amps) Allocation
1 15 Rear wiper
2 - Free
3 5 Air bag control unit
4 10 Steering wheel angle sensor, Diagnostic socket, ESP sensor,
Manual ventilation, Clutch switch, Headlamp beam he ight,
Particle emission filter pump
5 30 Electric mirrors, Passenger electric window mot or
6 30 Front electric windows supply
7 5 Courtesy lights and glove box light
8 20 Multifunction display, Anti-theft alarm siren, Audio equipment,
Compact disc changer, Audio/telephone, Trailer fuse box
(accessory)
9 10 Row 2 accessories socket
10 30 Rear ride height corrector, Steering wheel swit ching,
Instrument panel
11 15 Diagnostic socket, Ignition switch
12 15 Hands-free kit, Air bag control unit, Parking a ssistance control
unit
13 5 Engine fuse box, Trailer fuse box
14 15 Rain sensor, Rear ventilation, Automatic air co nditioning,
Instrument panel
15 30 Locking/unlocking/deadlocking of the accesses
16 - Free
17 40 Heated rear screen, Heated mirrors