Citroen JUMPY MULTISPACE 2012 2.G Owner's Manual
Manufacturer: CITROEN, Model Year: 2012, Model line: JUMPY MULTISPACE, Model: Citroen JUMPY MULTISPACE 2012 2.GPages: 276, PDF Size: 10.22 MB
Page 111 of 276

Child safety
SAFETY
4
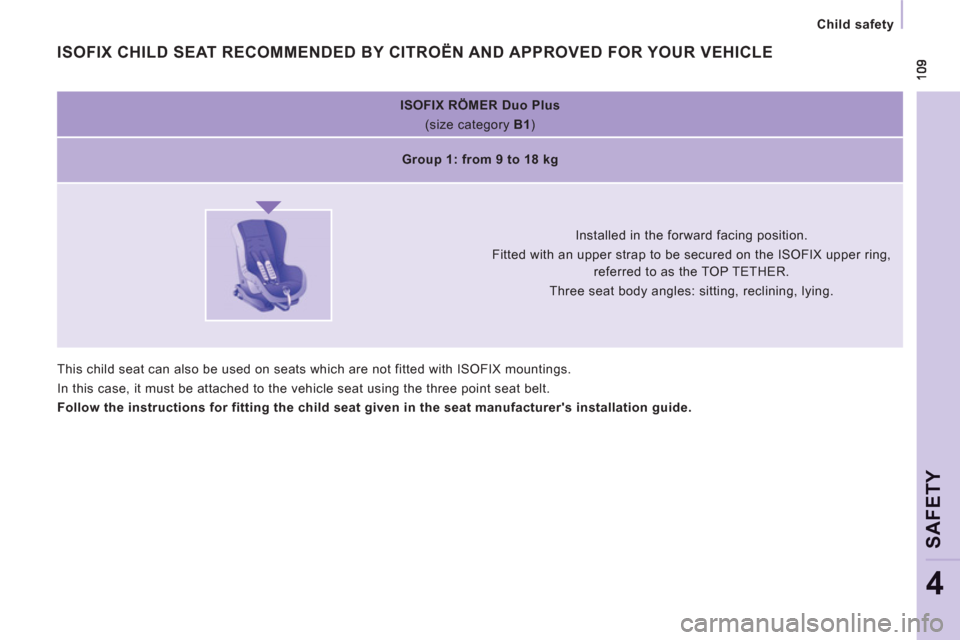
ISOFIX
RÖMER Duo Plus
(size category B1
)
Group 1: from 9 to 18 kg
Installed in the forward facing position.
Fitted with an upper strap to be secured on the ISOFIX upper ring,
referred to as the TOP TETHER.
Three seat body angles: sitting, reclining, lying.
This child seat can also be used on seats which are not fitted with ISOFIX mountings.
In this case, it must be attached to the vehicle seat using the three point seat belt.
Follow the instructions for fitting the child seat given in the seat manufacturer's installation guide.
ISOFIX CHILD SEAT RECOMMENDED BY CITROËN AND APPROVED FOR YOUR VEHICLE
Page 112 of 276

11 0
Child safety
IUF:
Seat suitable for the installation of an
ISOFIX child seat of the universal category.
"Forward facing" ISOFIX child seat fitted
with an upper strap secured to the upper
ring of the vehicle seats equipped with
ISOFIX mountings.
LOCATIONS FOR ISOFIX CHILD SEATS
This table indicates the options for the installation of ISOFIX child seats on the vehicle seats fitted with ISOFIX mountings.
In the case of the universal and semi-universal ISOFIX child seats, the child seat's ISOFIX size category, determined by a letter from A
to G
,
is indicated on the child seat next to the ISOFIX logo.
IL-SU:
Seat suitable for the installation of a
semi-universal ISOFIX child seat. "Forward
facing" ISOFIX child seat fitted with a stay.
"Rear facing" ISOFIX child seat or infant car
seat, fitted with an upper strap or a stay.
X:
No restraining system for children.
Weight of the child
/indicative age
Less than
10 kg
(group 0)
Up to
6 months
approx
Less than 10 kg
(group 0)
Less than 13 kg
(group 0+)
Up to 1 year approx
From 9 to 18 kg
(group 1)
From 1 to 3 years approx
Type of ISOFIX child seat
Infant car
seat
"rear facing"
"rear facing"
"forward facing"
ISOFIX size category
F
G
C
D
E
C
D
A
B
B1
Row 2
outer
rear
seats
with individual seats in Row 1
IL-SU
IL-SU
IL-SU
IUF, IL-SU
Row 2
outer
rear
seats
with 2-seat bench in Row 1
IL-SU
X
IL-SU
X
IL-SU
IUF, IL-SU
Rear seats in Row 3
IL-SU
X
IL-SU
X
IL-SU
IUF, IL-SU
Infant car seat:
this is fixed to the lower
rings of a seat equipped with ISOFIX
mountings and occupies two rear seats.
Page 113 of 276

111
Child safety
SAFETY
4
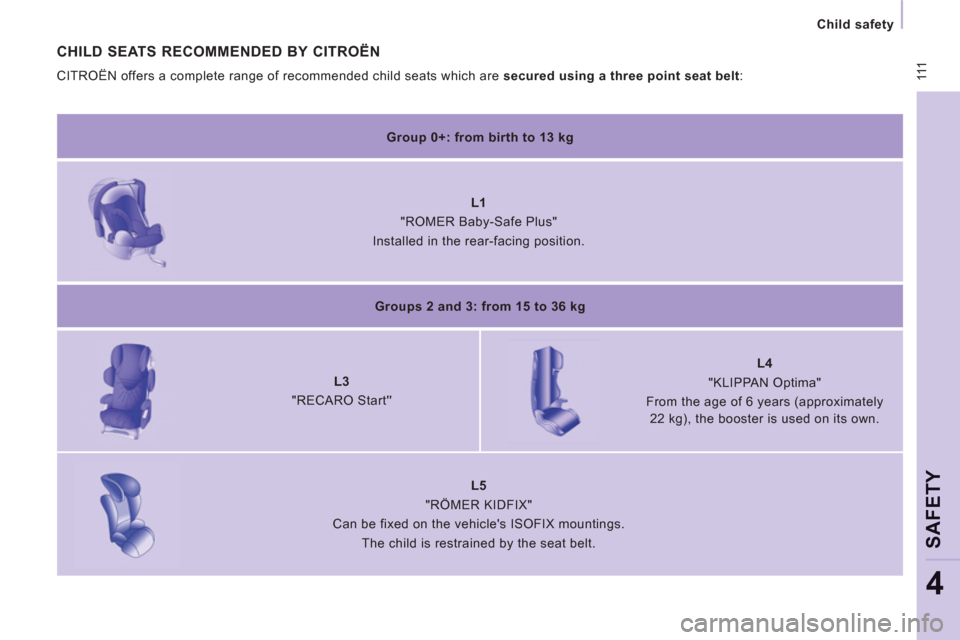
CHILD SEATS RECOMMENDED BY CITROËN
CITROËN offers a complete range of recommended child seats which are secured using a three point seat belt
:
Group 0+: from birth to 13 kg
L1
"ROMER Baby-Safe Plus"
Installed in the rear-facing position.
Groups 2 and 3: from 15 to 36 kg
L3
"RECARO Start''
L4
"KLIPPAN Optima"
From the age of 6 years (approximately
22 kg), the booster is used on its own.
L5
"RÖMER KIDFIX"
Can be fixed on the vehicle's ISOFIX mountings.
The child is restrained by the seat belt.
Page 114 of 276

11 2
Child safety
Row 2
Outer seats
U
U
U
U
Centre seat
U
U
U
U
Row 3
Outer seats
U
U
U
U
Centre seat
U
U
U
U
a: Group 0: from birth to 13 kg. Infant car seats and "car cots" cannot be installed on the front passenger seat.
b: consult the legislation in force in your country before installing your child on this seat.
U: seat suitable for the installation of a child seat secured using a seat belt and universally approved, "rear facing" and/or "forward facing".
INSTALLING CHILD SEATS ATTACHED USING THE SEAT BELT
This table indicates the options for installing child seats secured using a seat belt and universally approved in accordance with the weight of
the child and the seat in the vehicle.
Seat
Weight of the child and indicative age
Under 13 kg
(groups 0 (a) and
0+)
Up to approx 1 year
From 9 to 18 kg
(group 1)
1 to 3 years approx
From 15 to 25 kg
(group 2)
3 to 6 years approx
From 22 to 36 kg
(group 3)
6 to 10 years
approx
Row 1 (b)
Individual seat
U
U
U
U
Bench,
outer seat
U
U
U
U
Bench,
centre seat
L1
-
L3, L4, L5
L3, L4, L5
Page 115 of 276

11 3
Child safety
SAFETY
4
Deactivate the passenger's airbag when a
"rear facing" child seat is installed on the
front seat.
Otherwise, the child would risk being
seriously injured or killed if the airbag were
to inflate. Installing a booster seat
The chest part of the seat belt must be
positioned on the child's shoulder without
touching the neck.
Ensure that the lap part of the seat belt
passes correctly over the child's thighs.
CITROËN recommends the use of a booster
seat which has a back, fitted with a seat belt
guide at shoulder level.
ADVICE ON CHILD SEATS
The incorrect installation of a child seat in a
vehicle compromises the child's protection in
the event of an accident.
Remember to fasten the seat belts or the
child seat harnesses keeping the slack
in
relation to the child's body to a minimum
,
even for short journeys.
For optimum installation of the "forward
facing" child seat, ensure that the back of
the child seat is in contact with the back of
the vehicle's seat and that the head restraint
does not cause any discomfort.
If the head restraint has to be removed,
ensure that it is stored or attached securely
to prevent it from being thrown around the
vehicle in the event of sharp braking.
Children under the age of 10 must not travel
in the "forward facing" position on the front
passenger seat, unless the rear seats are
already occupied by other children, cannot
be used or are absent.
As a safety precaution, do not leave:
- one or more children alone and
unsupervised in a vehicle,
- a child or an animal in a vehicle which is
exposed to the sun, with the windows closed,
- the keys within reach of children inside
the vehicle.
To prevent accidental opening of the doors,
use the "Child Lock".
Take care not to open the rear windows by
more than one third.
To protect young children from the rays of
the sun, fit side blinds to the rear windows.
Page 116 of 276

114
Towing a trailer
For more information about weights,
refer to the administrative documents
(registration document, ...) or to the
"Weights" section of chapter 8.
TOWING A TRAILER, CARAVAN, BOAT, ETC...
Distribution of loads
Distribute the load in the trailer so that the
heaviest objects are as close as possible
to the axle and the nose weight is close to
the maximum authorised without, however,
exceeding it.
Cooling
Towing a trailer on a slope increases the
coolant temperature.
As the fan is electrically controlled, its
cooling capacity is not dependent on the
engine speed.
Driving advice
A towed vehicle must free wheel: gearbox in
neutral.
Page 117 of 276

11 5
Towing a trailer
ACCE
SS
ORIE
S
5
You should therefore use a high gear to
lower the engine speed and reduce your
speed.
In all cases, pay attention to the coolant
temperature.
Ty r e s
Check the tyre pressures of the towing
vehicle (see the "Identification markings"
section of chapter 8) and of the trailer,
observing the recommended pressures. Towbar
We recommend the use of genuine
CITROËN towbars and their harnesses,
which have been tested and approved from
the design stage of your vehicle, and that
you entrust the fitting of this equipment to a
CITROËN dealer.
If this equipment is not fitted by a CITROËN
dealer, it is imperative that it is fitted using
the electrical pre-equipment installed at the
rear of the vehicle and in accordance with
the manufacturer's instructions.
In accordance with the general instructions
a reminder of which has been given above,
we draw your attention to the risk associated
with fitting a towbar or electrical accessory
not recommended by CITROËN. Fitting such
equipment could result in the failure of your
vehicle's electronic system. Please obtain
information from the Manufacturer before
fitting this type of equipment. If the coolant temperature warning
lamp comes on, stop the vehicle
and switch off the engine as soon
as possible.
Good Practice
In certain cases of particularly arduous
use (towing the maximum load up a steep
slope in high temperatures), the engine
automatically limits its power. In this
case, the air conditioning is automatically
cut off to save engine power.
See the "Levels" section of chapter 6.
Brakes
Towing increases the braking distance. Drive
at a moderate speed, change down early
and brake gradually.
Side wind
Sensitivity to side wind is increased. Drive
smoothly and at a moderate speed.
ABS/ESP
The ABS or ESP systems only control the
vehicle, not the trailer or caravan.
Rear parking sensors
The parking sensors system does not
function while the vehicle is towing.
Page 118 of 276

11 6
Equipment
OTHER ACCESSORIES
For any work on your vehicle, use
a qualified workshop that has the
technical information, competence and
equipment required, which a CITROËN
dealer is able to provide.
Installation of radiocommunication
transmitters
Before installing accessory
radiocommunication transmitters with an
external aerial on your vehicle, you are
advised to contact a representative of the
CITROËN marque.
The CITROËN Network will inform you of the
specifications (frequency band, maximum
output power, aerial position, specific
installation conditions) of the transmitters
which can be fitted, in accordance with the
Motor Vehicle Electromagnetic Compatibility
Directive (2004/104/CE).
This range is also available, structured
around comfort, leisure and maintenance: Trims (except for 163 hp engine), front mud
flaps, rear mud flaps, spoilers, sill, ... Audio equipment, hands-free kit, speakers,
CD changer, navigation, ...
Regardless of the audio and telematic
equipment offered on the market, the
technical constraints linked with the
fitting of equipment of these families of
products mean that the special features
of the equipment and its compatibility with
the capacities of your vehicle's standard
equipment must be taken into account.
Please contact a dealer for information
before fitting such equipment.
Front seat covers compatible with airbags,
benches, rubber mats, carpet mats, boot
tray, roof bars, side blinds, snow chains.
To prevent the mat from becoming caught
under the pedals:
- ensure that the mat and its fixings are
positioned correctly,
- never fit one mat on top of another. Screenwash, replacement fuses,
wiper blades, interior and exterior cleaning
and maintenance products, replacement
bulbs, ...
The fitting of electrical equipment
or accessories which are not
recommended by CITROËN may result in a
failure of your vehicle's electronic system.
Please note this specific warning. You
are advised to contact a representative
of the Marque to be shown the range of
recommended equipment and accessories.
Depending on the country in which the
vehicle is sold or operated, it is compulsory
to have a high visibility safety vest, warning
triangle and replacement bulbs available in
the vehicle. Anti-theft alarm, window engraving, first aid
kit, high visibility safety vest, rear parking
sensors, warning triangle, ...
Page 119 of 276

11 7
Opening the bonnet
CHECK
S
6
OPENING THE BONNET
From inside:
- lift the cover located at the foot of the
front left seat.
- pull the release lever upwards.
To close
Lower the bonnet and release it at the end of its
travel. Check that the bonnet is properly latched.
From outside:
partially open the bonnet, lift
the safety catch and raise the bonnet.
Bonnet stay
Secure the stay in one of the two notches,
according to the height required, to hold the
bonnet open.
Before closing the bonnet, replace the stay
in its housing.
"Bonnet open" warning
This warning is linked to the alarm option
only.
With the engine running or the
vehicle moving, a warning lamp
and a diagram in the screen,
accompanied by an audible
signal, warn you that the bonnet
is not properly closed.
Page 120 of 276

118
Under the bonnet
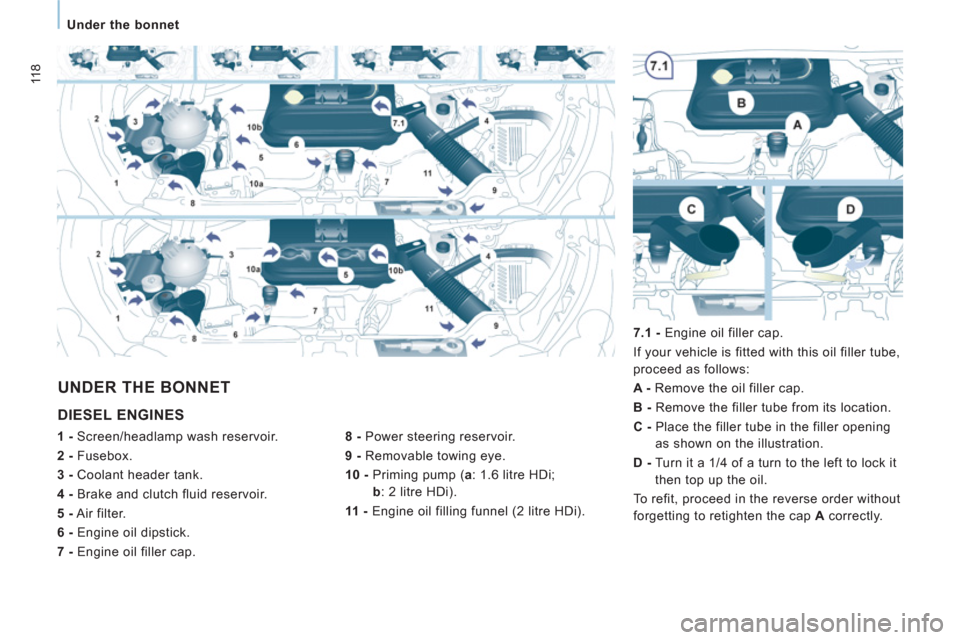
DIESEL ENGINES
8 -
Power steering reservoir.
9 -
Removable towing eye.
10 -
Priming pump ( a
: 1.6 litre HDi;
b
: 2 litre HDi).
11 -
Engine oil filling funnel (2 litre HDi).
UNDER THE BONNET
1 -
Screen/headlamp wash reservoir.
2 -
Fusebox.
3 -
Coolant header tank.
4 -
Brake and clutch fluid reservoir.
5 -
Air filter.
6 -
Engine oil dipstick.
7 -
Engine oil filler cap.
7.1 -
Engine oil filler cap.
If your vehicle is fitted with this oil filler tube,
proceed as follows:
A -
Remove the oil filler cap.
B -
Remove the filler tube from its location.
C -
Place the filler tube in the filler opening
as shown on the illustration.
D -
Turn it a 1/4 of a turn to the left to lock it
then top up the oil.
To refit, proceed in the reverse order without
forgetting to retighten the cap A
correctly.