DODGE DART 2014 PF / 1.G Owner's Guide
Manufacturer: DODGE, Model Year: 2014, Model line: DART, Model: DODGE DART 2014 PF / 1.GPages: 140, PDF Size: 4.57 MB
Page 31 of 140
To Decrease Speed
• When the Electronic Speed Control is set, you can decrease speed by pushing the SET-
button.
The speed decrement shown is dependant on the speed of U.S. (mph) or Metric (km/h) units:
U.S. Speed (mph)
• Pressing the SET -button once will result i n a 1 mph decrease in set speed. Each
subsequent tap of the button results in a decrease of 1 mph.
• If the button is continually pressed, the set speed will continue to decrease until the button is released, then the new set speed will be established.
Metric Speed (km/h)
• Pressing the SET -button once will result i n a 2 km/h decrease in set speed. Each
subsequent tap of the button results in a decrease of 2 km/h.
• If the button is continually pressed, the set speed will continue to decrease until the button is released, then the new set speed will be established.
Resume
• To resume a previously selected set speed in memory, push the RES + button andrelease.
Cancel
• Push the CANCEL button, or apply the brakes to cancel the set speed and maintain theset speed memory.
• Push the ON/OFF button to turn the system off and erase the set speed memory.
WARNING!
• Leaving the Electronic Speed Control system on when not in use is dangerous. You could accidentally set the system or cause it to go faster than you want. You could
lose control and have a collision. Always leave the Electronic Speed Control system
off when you are not using it.
• Electronic Speed Control can be dangerous where the system cannot maintain a constant speed. Your vehicle could go too fast for the conditions, and you could lose
control. A collision could be the result. Do not use Electronic Speed Control in heavy
traffic or on roads that are winding, icy, snow-covered or slippery.
OPERATING YOUR VEHICLE
29
Page 32 of 140
MANUAL CLIMATE CONTROLS
Air Recirculation
• Use Recirculation for maximum A/C operation.
• For window defogging, turn the Recirculation button off.
• Recirculation is allowed in floor and defrost/floor (mix modes) for approximately fiveminutes.
Heated Mirrors
• The mirrors are heated to melt frost or ice. This feature is activated whenever you turn onthe rear window defroster.
OPERATING YOUR VEHICLE
30
Page 33 of 140
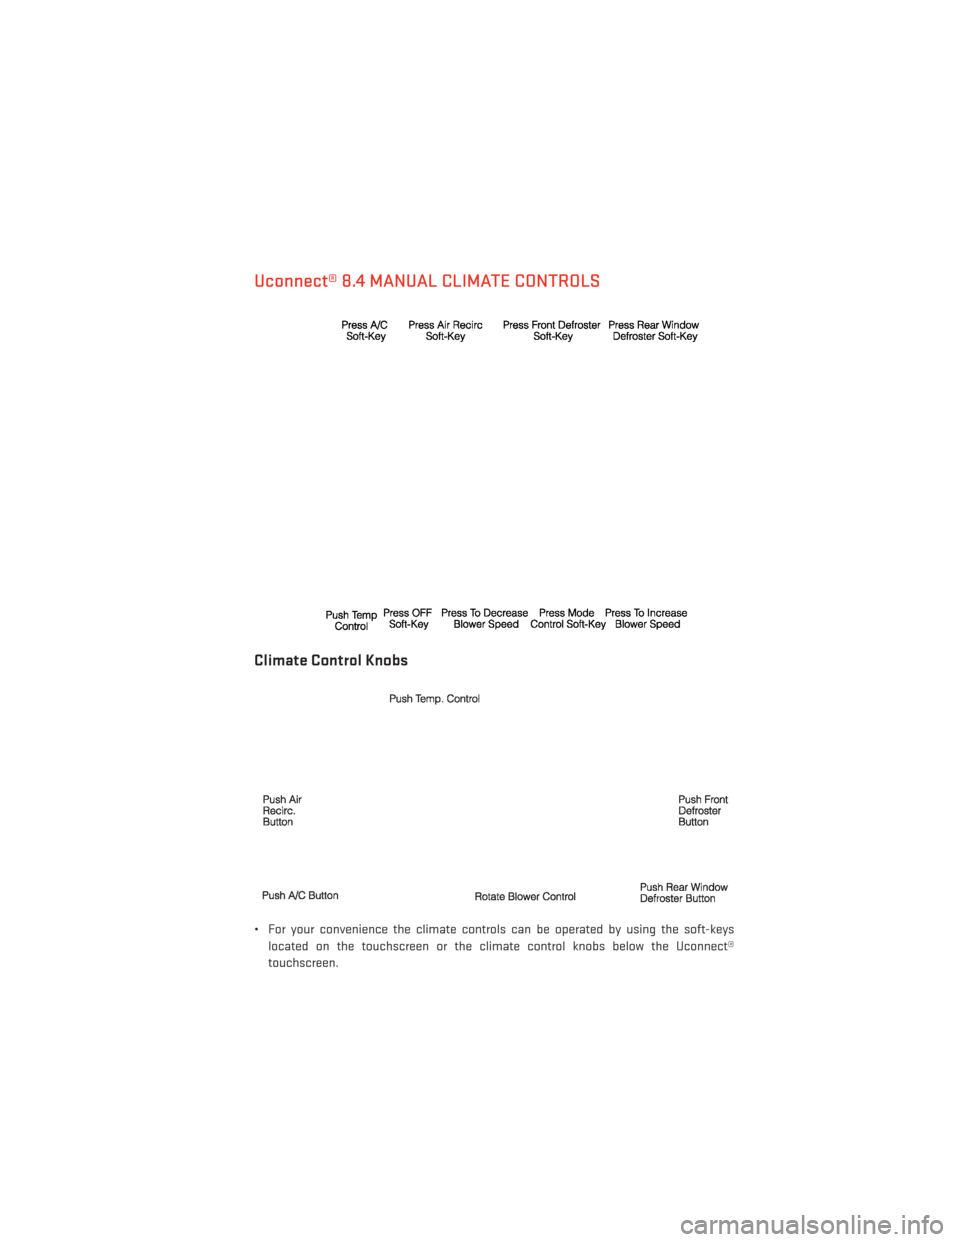
Uconnect® 8.4 MANUAL CLIMATE CONTROLS
Climate Control Knobs
• For your convenience the climate controls can be operated by using the soft-keyslocated on the touchscreen or the climate control knobs below the Uconnect®
touchscreen.
OPERATING YOUR VEHICLE
31
Page 34 of 140
Air Recirculation
• Use Recirculation for maximum A/C operation.
• For window defogging, turn the Recirculation button off.
• Recirculated air is not allowed in Defrost modes. If the Recirculation button is pressedwhile in this mode, the LED indicator will flash several times then go out. Recirculation
will be disabled automatically is this mode is selected.
Heated Mirrors
• The mirrors are heated to melt frost or ice. This feature is activated whenever you turn onthe rear window defroster.
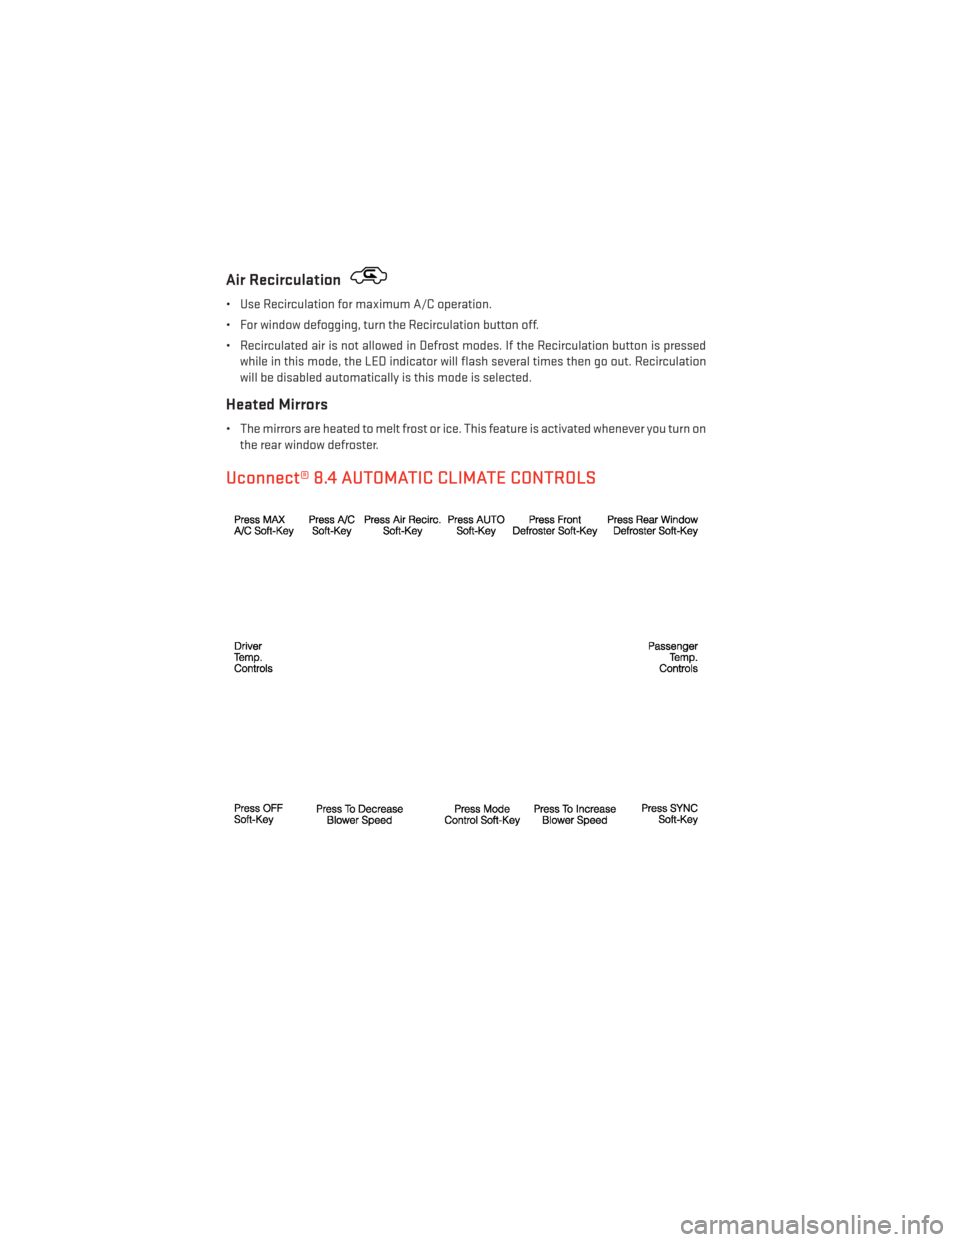
Uconnect® 8.4 AUTOMATIC CLIMATE CONTROLS
OPERATING YOUR VEHICLE
32
Page 35 of 140
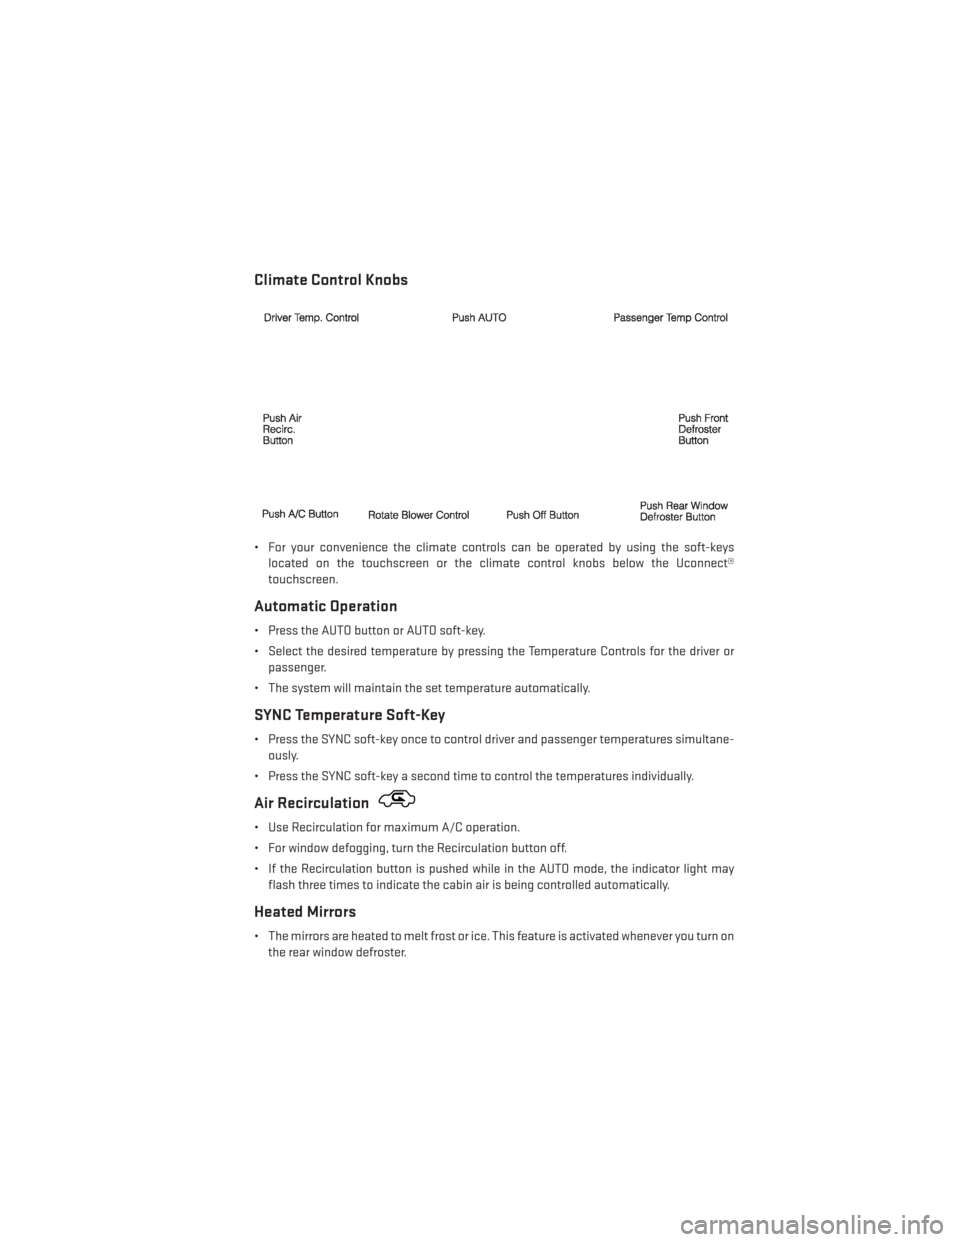
Climate Control Knobs
• For your convenience the climate controls can be operated by using the soft-keyslocated on the touchscreen or the climate control knobs below the Uconnect®
touchscreen.
Automatic Operation
• Press the AUTO button or AUTO soft-key.
• Select the desired temperature by pressing the Temperature Controls for the driver orpassenger.
• The system will maintain the set temperature automatically.
SYNC Temperature Soft-Key
• Press the SYNC soft-key once to control driver and passenger temperatures simultane- ously.
• Press the SYNC soft-key a second time to control the temperatures individually.
Air Recirculation
• Use Recirculation for maximum A/C operation.
• For window defogging, turn the Recirculation button off.
• If the Recirculation button is pushed while in the AUTO mode, the indicator light may flash three times to indicate the cabin air is being controlled automatically.
Heated Mirrors
• The mirrors are heated to melt frost or ice. This feature is activated whenever you turn onthe rear window defroster.
OPERATING YOUR VEHICLE
33
Page 36 of 140
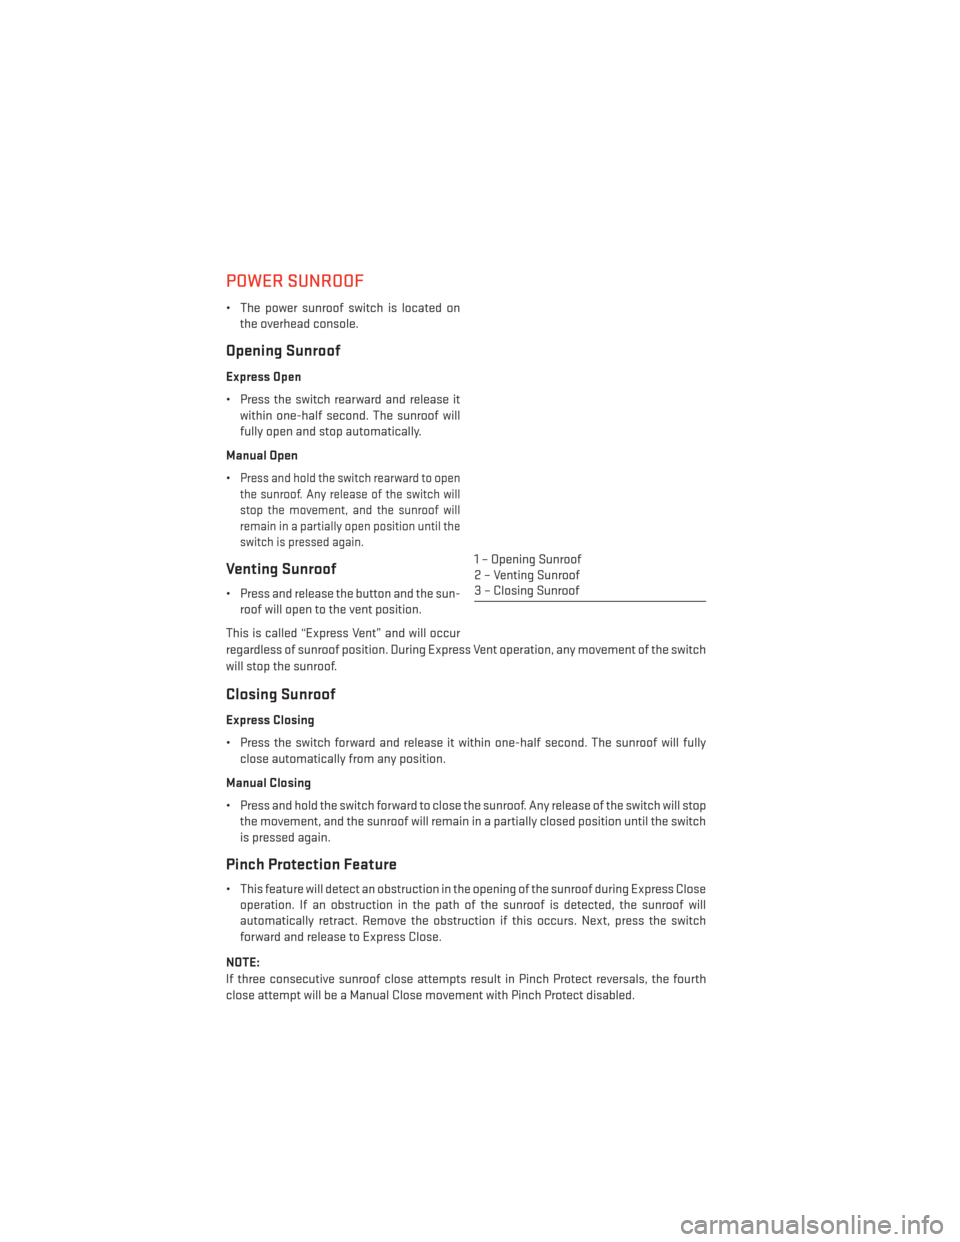
POWER SUNROOF
• The power sunroof switch is located onthe overhead console.
Opening Sunroof
Express Open
• Press the switch rearward and release itwithin one-half second. The sunroof will
fully open and stop automatically.
Manual Open
•
Press and hold the switch rearward to open
the sunroof. Any release of the switch will
stop the movement, and the sunroof will
remain in a partially open position until the
switch is pressed again.
Venting Sunroof
• Press and release the button and the sun- roof will open to the vent position.
This is called “Express Vent” and will occur
regardless of sunroof position. During Express Vent operation, any movement of the switch
will stop the sunroof.
Closing Sunroof
Express Closing
• Press the switch forward and release it within one-half second. The sunroof will fully close automatically from any position.
Manual Closing
• Press and hold the switch forward to close the sunroof. Any release of the switch will stop the movement, and the sunroof will remain in a partially closed position until the switch
is pressed again.
Pinch Protection Feature
• This feature will detect an obstruction in the opening of the sunroof during Express Closeoperation. If an obstruction in the path of the sunroof is detected, the sunroof will
automatically retract. Remove the obstruction if this occurs. Next, press the switch
forward and release to Express Close.
NOTE:
If three consecutive sunroof close attempts result in Pinch Protect reversals, the fourth
close attempt will be a Manual Close movement with Pinch Protect disabled.
1 – Opening Sunroof
2 – Venting Sunroof
3 – Closing Sunroof
OPERATING YOUR VEHICLE
34
Page 37 of 140
WARNING!
• Do not let children play with the sunroof. Never leave children unattended in a vehicle,or with access to an unlocked vehicle. Do not leave the Key Fob in or near the vehicle,
and do not leave the ignition of a vehicle equipped with Keyless Enter-N-Go™ in the
ACC or ON/RUN mode. Occupants, particularly unattended children, can become
entrapped by the power sunroof while operating the power sunroof switch. Such
entrapment may result in serious injury or death.
• In a collision, there is a greater risk of being thrown from a vehicle with an open
sunroof. You could also be severely injured or killed. Always fasten your seat belt
properly and make sure all passengers are properly secured.
• Do not allow small children to operate the sunroof. Never allow your fingers, other
body parts, or any object to project through the sunroof opening. Injury may result.
WIND BUFFETING
Wind buffeting can be described as a helicopter-type percussion sound. If buffeting occurs
with the rear windows open, adjust the front and rear windows together.
If buffeting occurs with the sunroof open, adjust the sunroof opening, or adjust any window.
This will minimize buffeting.
SIX-SPEED AUTOMATIC TRANSMISSION
• This vehicle may be equipped with a fuel efficient Dual-Dry Clutch, Six Speed Automatic
Transmission. This transmission offers a sportier driving experience with faster
AutoStick® shifting.
• During low-speed driving conditions in first gear, vehicle momentum changes may feel exaggerated in response to changes in accelerator pedal position. This behavior is
normal and is similar to vehicles equipped with a manual transmission.
NOTE:
• Very aggressive driving may result in some clutch odor similar to a manual transmission. An active warning message will display in the Instrument Cluster if cool down actions are
needed.
• The first few shifts on a new vehicle may be somewhat abrupt. This is a normal condition, and precision shifts will develop within a few hundred miles (kilometers).
• At low speeds you may hear mechanical noises similar to a manual transmission as the transmission changes gears. These noises are normal and will not damage the trans-
mission.
• Before and after the engine is started, you may hear a hydraulic pump for a short period of time. This noise is normal and will not damage the transmission.
OPERATING YOUR VEHICLE
35
Page 38 of 140
Shifting The Transmission
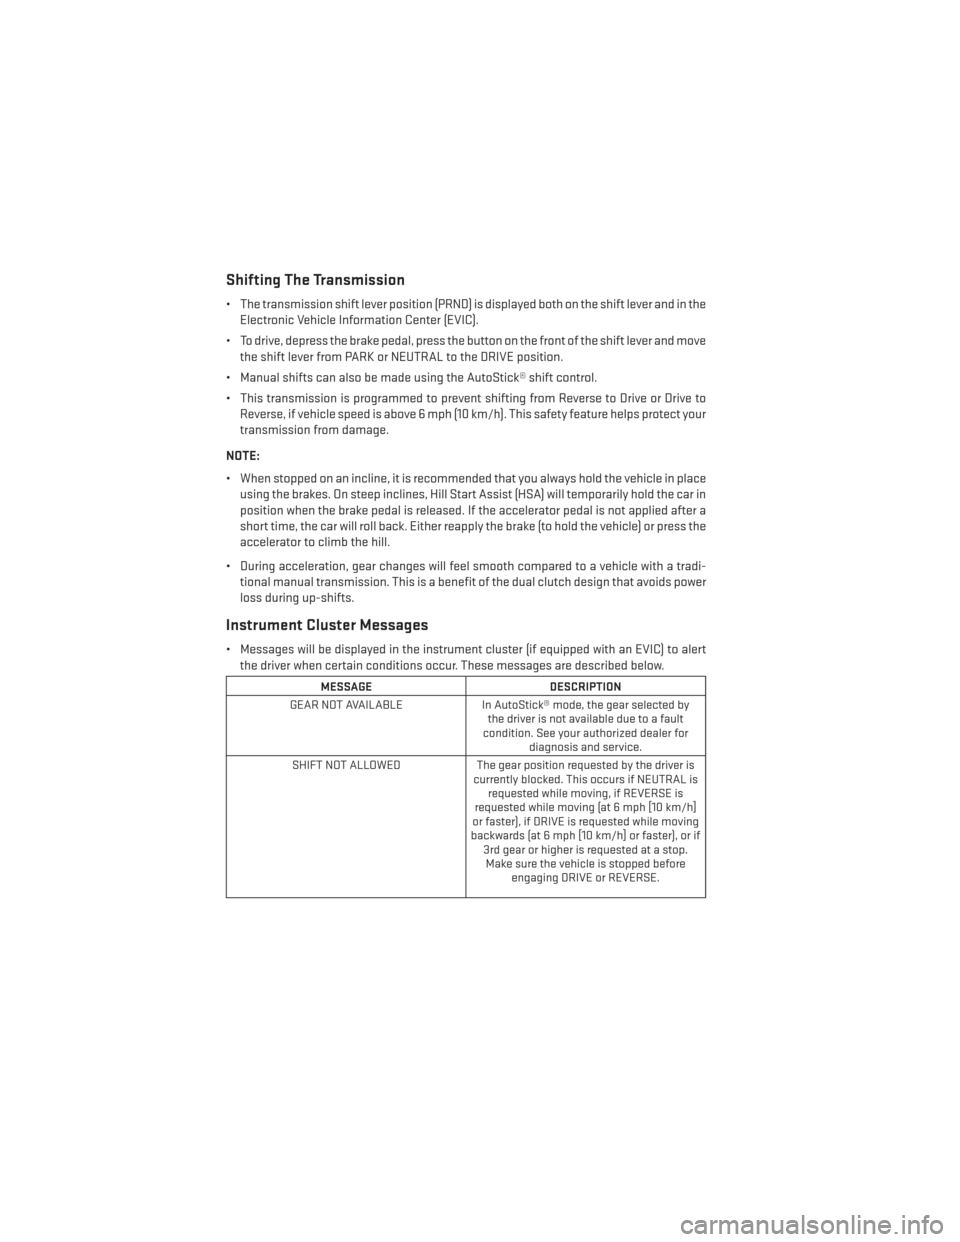
• The transmission shift lever position (PRND) is displayed both on the shift lever and in theElectronic Vehicle Information Center (EVIC).
• To drive, depress the brake pedal, press the button on the front of the shift lever and move the shift lever from PARK or NEUTRAL to the DRIVE position.
• Manual shifts can also be made using the AutoStick® shift control.
• This transmission is programmed to prevent shifting from Reverse to Drive or Drive to Reverse, if vehicle speed is above 6 mph (10 km/h). This safety feature helps protect your
transmission from damage.
NOTE:
• When stopped on an incline, it is recommended that you always hold the vehicle in place using the brakes. On steep inclines, Hill Start Assist (HSA) will temporarily hold the car in
position when the brake pedal is released. If the accelerator pedal is not applied after a
short time, the car will roll back. Either reapply the brake (to hold the vehicle) or press the
accelerator to climb the hill.
• During acceleration, gear changes will feel smooth compared to a vehicle with a tradi- tional manual transmission. This is a benefit of the dual clutch design that avoids power
loss during up-shifts.
Instrument Cluster Messages
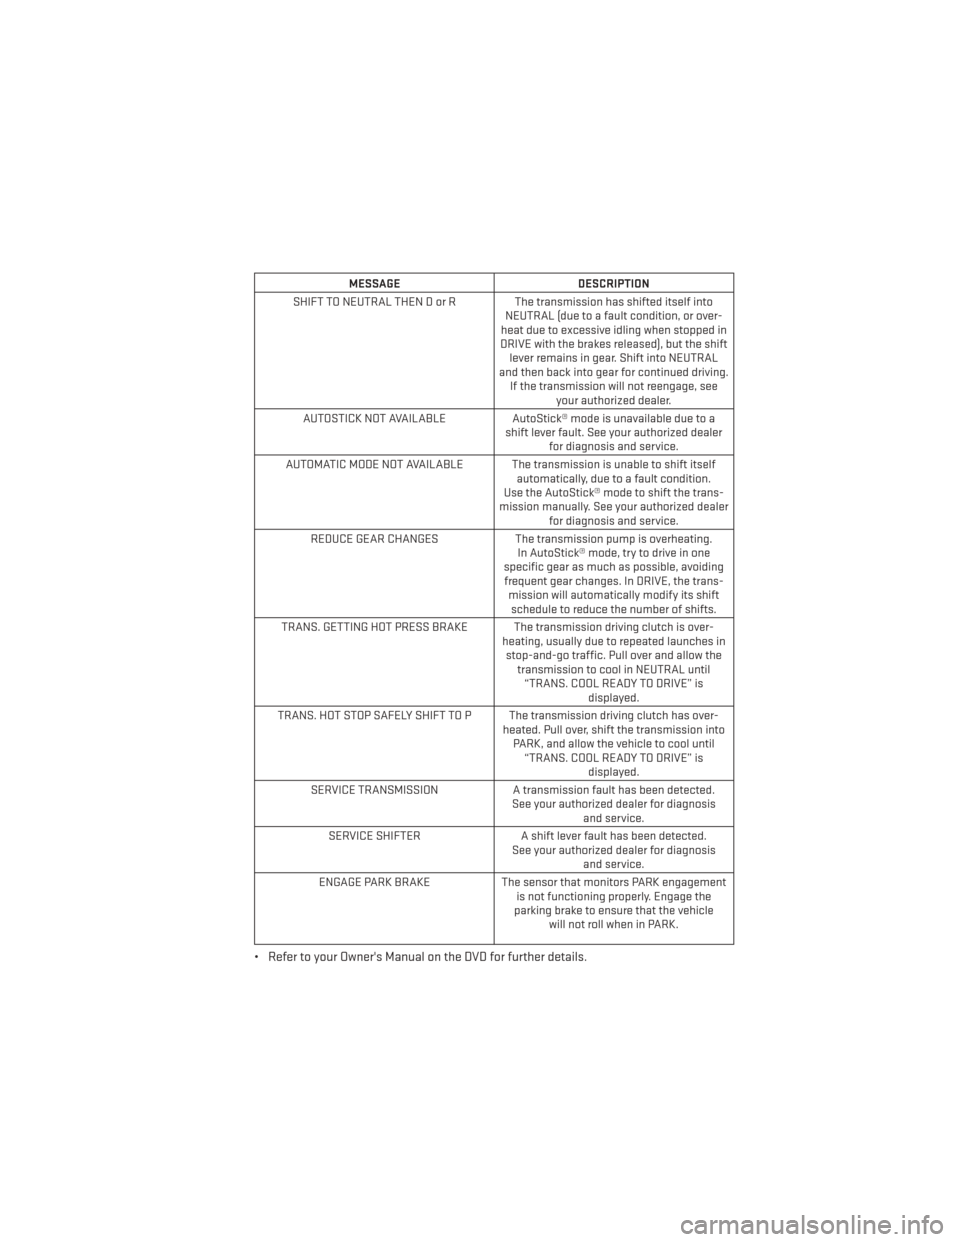
• Messages will be displayed in the instrument cluster (if equipped with an EVIC) to alertthe driver when certain conditions occur. These messages are described below.
MESSAGE DESCRIPTION
GEAR NOT AVAILABLE In AutoStick® mode, the gear selected by
the driver is not available due to a fault
condition. See your authorized dealer for diagnosis and service.
SHIFT NOT ALLOWED The gear position requested by the driver is
currently blocked. This occurs if NEUTRAL is requested while moving, if REVERSE is
requested while moving (at 6 mph [10 km/h]
or faster), if DRIVE is requested while moving
backwards (at 6 mph [10 km/h] or faster), or if 3rd gear or higher is requested at a stop.Make sure the vehicle is stopped before engaging DRIVE or REVERSE.
OPERATING YOUR VEHICLE
36
Page 39 of 140
MESSAGEDESCRIPTION
SHIFT TO NEUTRAL THEN D or R The transmission has shifted itself into NEUTRAL (due to a fault condition, or over-
heat due to excessive idling when stopped in
DRIVE with the brakes released), but the shift lever remains in gear. Shift into NEUTRAL
and then back into gear for continued driving. If the transmission will not reengage, see your authorized dealer.
AUTOSTICK NOT AVAILABLE AutoStick® mode is unavailable due to a
shift lever fault. See your authorized dealer for diagnosis and service.
AUTOMATIC MODE NOT AVAILABLE The transmission is unable to shift itself automatically, due to a fault condition.
Use the AutoStick® mode to shift the trans-
mission manually. See your authorized dealer for diagnosis and service.
REDUCE GEAR CHANGES The transmission pump is overheating.
In AutoStick® mode, try to drive in one
specific gear as much as possible, avoiding frequent gear changes. In DRIVE, the trans- mission will automatically modify its shiftschedule to reduce the number of shifts.
TRANS. GETTING HOT PRESS BRAKE The transmission driving clutch is over- heating, usually due to repeated launches instop-and-go traffic. Pull over and allow the transmission to cool in NEUTRAL until“TRANS. COOL READY TO DRIVE” is displayed.
TRANS. HOT STOP SAFELY SHIFT TO P The transmission driving clutch has over- heated. Pull over, shift the transmission intoPARK, and allow the vehicle to cool until “TRANS. COOL READY TO DRIVE” is displayed.
SERVICE TRANSMISSION A transmission fault has been detected.
See your authorized dealer for diagnosis and service.
SERVICE SHIFTER A shift lever fault has been detected.
See your authorized dealer for diagnosis and service.
ENGAGE PARK BRAKE The sensor that monitors PARK engagement
is not functioning properly. Engage the
parking brake to ensure that the vehicle will not roll when in PARK.
• Refer to your Owner's Manual on the DVD for further details.
OPERATING YOUR VEHICLE
37
Page 40 of 140
YOUR VEHICLE'S SOUND SYSTEM
1. Uconnect® Voice Command Button pg. 70
2. Uconnect® Phone Button pg. 65
3. Steering Wheel Audio Controls (Left) pg. 72
4. Steering Wheel Audio Controls (Right) pg. 72
ELECTRONICS
38