center console DODGE VIPER 2015 VX / 3.G User Guide
[x] Cancel search | Manufacturer: DODGE, Model Year: 2015, Model line: VIPER, Model: DODGE VIPER 2015 VX / 3.GPages: 148, PDF Size: 21.7 MB
Page 39 of 148
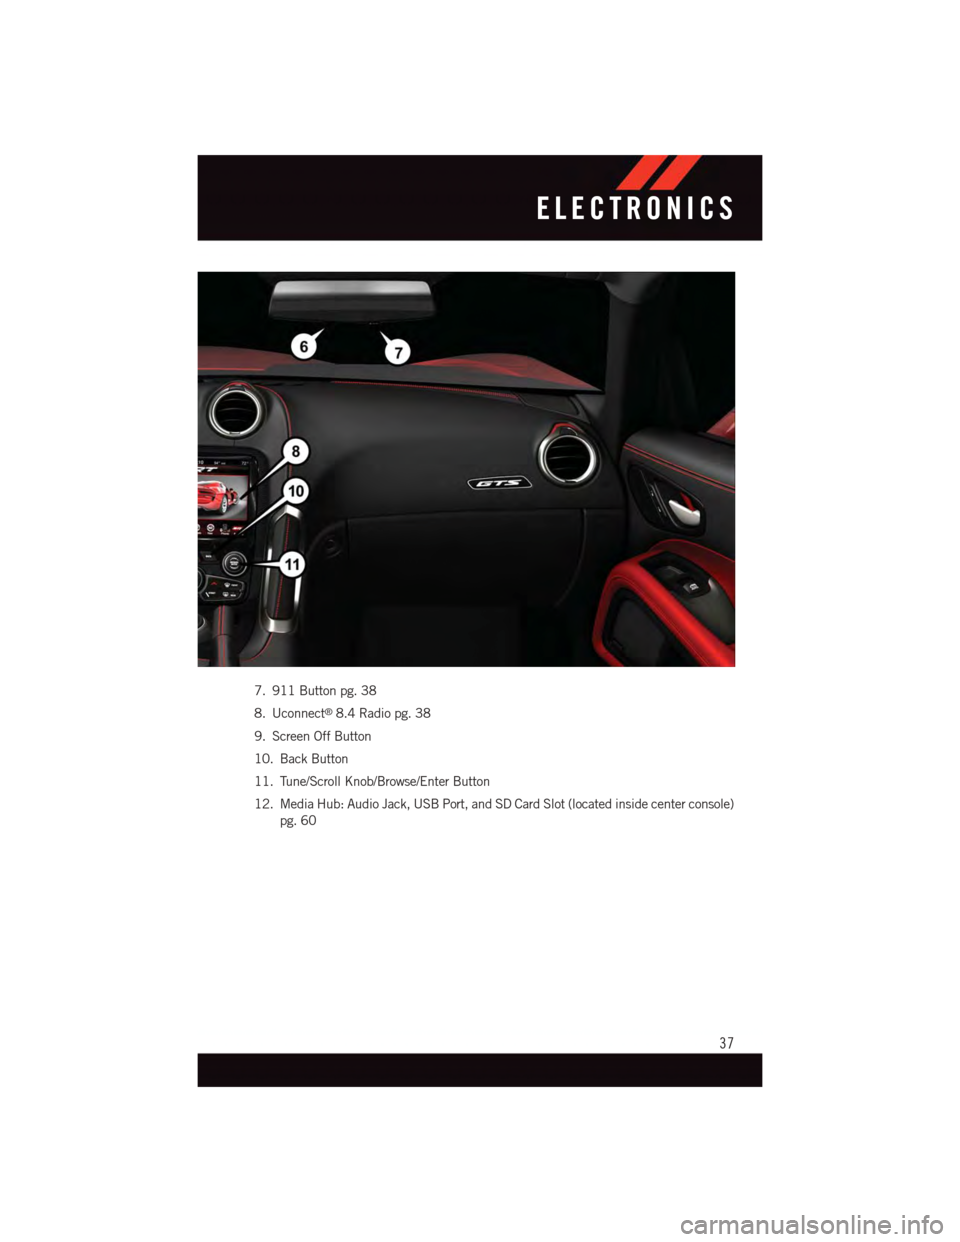
7. 911 Button pg. 38
8. Uconnect®8.4 Radio pg. 38
9. Screen Off Button
10. Back Button
11. Tune/Scroll Knob/Browse/Enter Button
12. Media Hub: Audio Jack, USB Port, and SD Card Slot (located inside center console)
pg. 60
ELECTRONICS
37
Page 61 of 148
Replay
Lets you replay up to 44 minutes of the content of the current SiriusXM channel.
Replay Option Option Description
Play/Pause Press to Pause content playback. Press Pause/Play again to resumeplayback.
Rewind/RW Rewinds the channel content in steps of five seconds. Press and hold torewind continuously, then release to begin playing content at that point.
Fast Forward/FW Forwards the content, and works similarly to Rewind/RW. However, FastForward/FW can only be used when content has been previouslyrewound.
Replay Time Displays the amount of time in the upper center of the screen by whichyour content lags the Live channel.
Live Resumes playback of Live content at any time while replaying rewoundcontent.
•SiriusXMservicesrequiresubscriptions,soldseparatelyafterthe12-monthtrial
included with the new vehicle purchase.If you decide to continue your service at the
end of your trial subscription, the plan you choose will automatically renew and bill at
then-current rates until you call SiriusXM at 1-866-635-2349 for U.S. residents and
1-888-539-7474 for Canadian residents to cancel. See SiriusXM Customer Agreement
for complete terms at www.siriusxm.com (US residents) or siriusxm.ca (Canadian
residents).All fees and programming subject to change. Our satellite service is
available only to those at least 18 and older in the 48 contiguous USA and D.C. Our
Sirius satellite service is also available in PR (with coverage limitations). Our Internet
radio service is available throughout our satellite service area and in AK and HI. ©2014
Sirius XM Radio Inc. Sirius, XM and all related marks and logos are trademarks of Sirius
XM Radio Inc.
Disc Operation (If Equipped)
•YourvehiclemayhavearemoteCDplayerlocatedinthelowercenterconsolestorage
bin, or in the lower center bench seat bin.
•CD/DiscModeisenteredbyeitherinsertingaCD/DiscorbypressingtheMEDIAbutton
located on the side of the display. Once in Media Mode, select “Disc.”
•GentlyinsertoneCDintotheCDplayerwiththeCDlabelfacingasindicatedonthe
illustration located on the Disc player.
Seek Up/Down Buttons
•PresstoseekthroughDisctracks.
•Holdeitherbuttontobypasstrackswithoutstopping.
Browse
•Pressthe“Browse”buttononthetouchscreentoscrollthroughandselectadesired
track on the Disc. Press the “Exit” button on the touchscreen if you wish to cancel the
browse function.
ELECTRONICS
59
Page 62 of 148
MEDIA HUB – PLAYING iPod®/USB/MP3 DEVICES
•There are many ways to play music from
iPod®/MP3 players or USB devices
through your vehicle's sound system.
Press your Media button on the touch-
screen to begin.
Audio Jack (AUX)
•TheAUXallowsaportabledevice,such
as an MP3 player or an iPod®,tobe
plugged into the radio and utilize the
vehicle’s sound system, using a 3.5 mm
audio cable, to amplify the source and
play through the vehicle speakers.
•PressingtheAUXbuttononthetouch-
screen will change the mode to auxiliary
device if the audio jack is connected,
allowing the music from your portable
device to be heard through the vehicle's
speakers. To activate the AUX, plug in
the audio jack.
•Thefunctionsoftheportabledeviceare
controlled using the device buttons. The volume may be controlled using the radio or
portable device.
•Toroutetheaudiocableoutofthecenterconsole,usetheaccesscutoutinthefront
of the console.
USB Port
•ConnectyouriPod®or compatible device using a USB cable into the USB Port. USB
Memory sticks with audio files can also be used. Audio from the device can be played
on the vehicle’s sound system while providing metadata (artist, track title, album, etc.)
information on the radio display.
•Whenconnected,theiPod®/compatible USB device can be controlled using the radio
or Steering Wheel Audio Controls to play, skip to the next or previous track, browse, and
list the contents.
•TheiPod®battery charges when plugged into the USB port (if supported by the specific
device).
•ToroutetheUSB/iPod®cable out of the center console, use the access cut out.
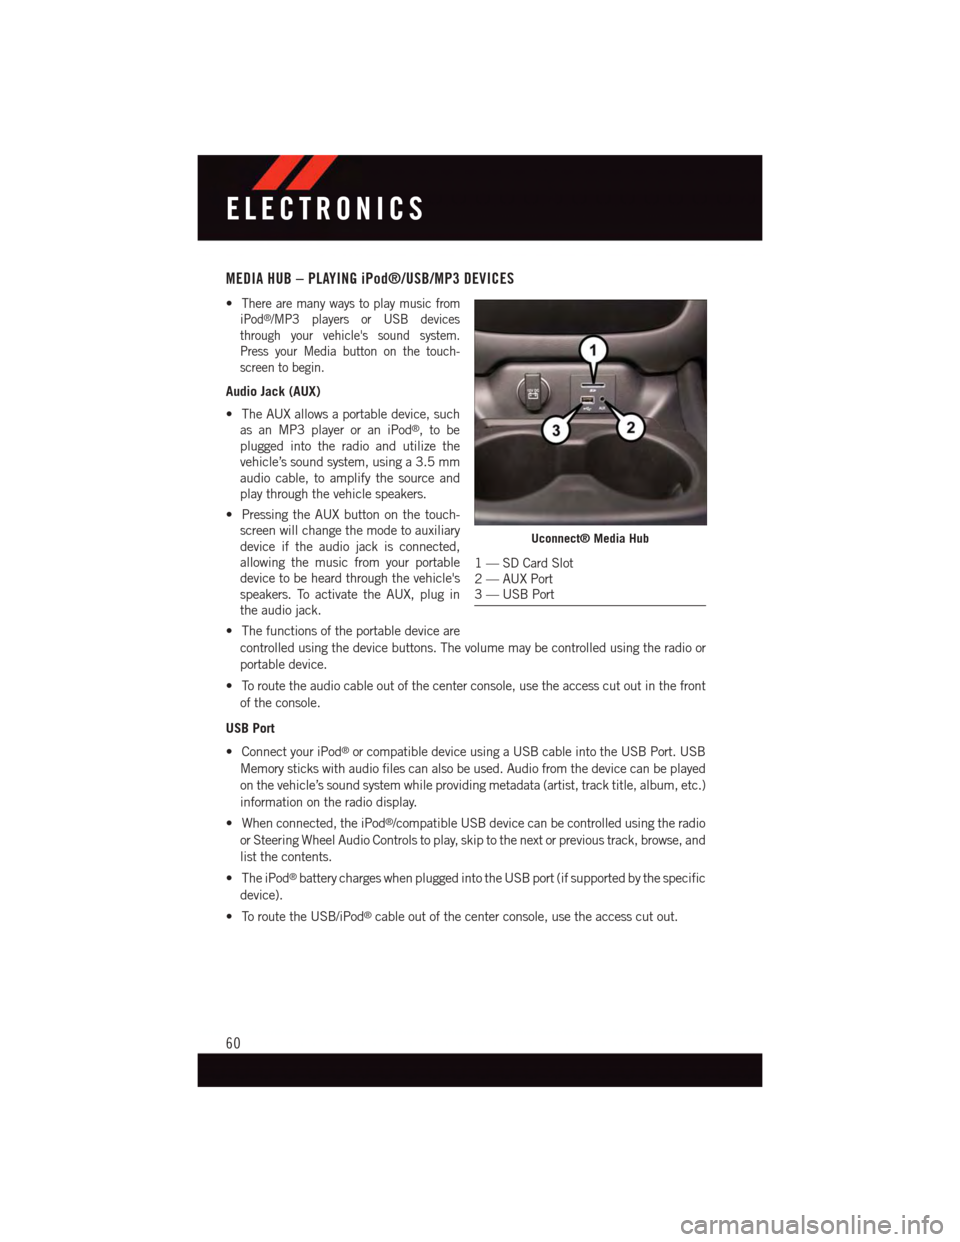
Uconnect® Media Hub
1—SDCardSlot2—AUXPort3—USBPort
ELECTRONICS
60
Page 96 of 148
PROGRAMMABLE FEATURES
Uconnect® Customer Programmable Features
The Uconnect®system allows you to access Customer Programmable feature settings
such as Display, Voice, Clock, Safety & Driving Assistance, Lights, Doors & Locks, Engine
Off Options, Audio, Phone / Bluetooth, SiriusXM Setup, Restore Settings, Clear Personal
Data, and System Information through buttons on the touchscreen.
•Pressthe“SRT&Apps”buttononthetouchscreen,thenpressthe“Settings”button
on the touchscreen to access the Settings screen. When making a selection, scroll up
or down until the preferred setting is highlighted, then press and release the preferred
setting until a check-mark appears next to the setting, showing that setting has been
selected. The following feature settings are available:
•Display•Audio
•Voice•Phone/Bluetooth
•Clock•SiriusXMSetup
•Safety&DrivingAssistance•RestoreSettings
•Lights•ClearPersonalData
•Doors&Locks•SystemInformation
•EngineOffOptions
UNIVERSAL GARAGE DOOR OPENER (HomeLink®)
HomeLink®replaces up to three hand-held transmitters that operate devices such as
garage door openers, motorized gates, lighting or home security systems. The HomeLink®
unit is powered by your vehicles 12 Volt battery.
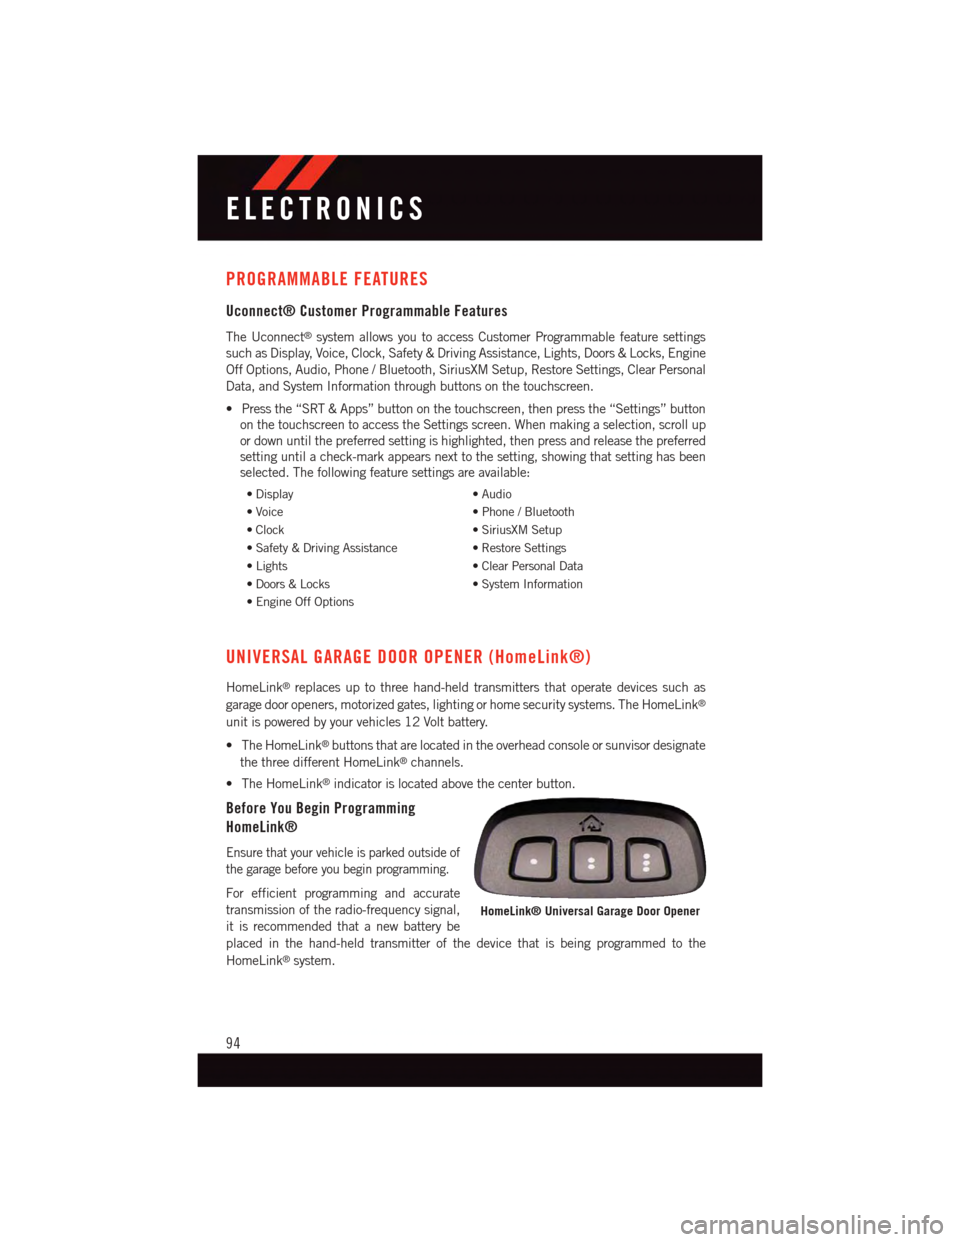
•TheHomeLink®buttons that are located in the overhead console or sunvisor designate
the three different HomeLink®channels.
•TheHomeLink®indicator is located above the center button.
Before You Begin Programming
HomeLink®
Ensure that your vehicle is parked outside of
the garage before you begin programming.
For efficient programming and accurate
transmission of the radio-frequency signal,
it is recommended that a new battery be
placed in the hand-held transmitter of the device that is being programmed to the
HomeLink®system.
HomeLink® Universal Garage Door Opener
ELECTRONICS
94
Page 99 of 148
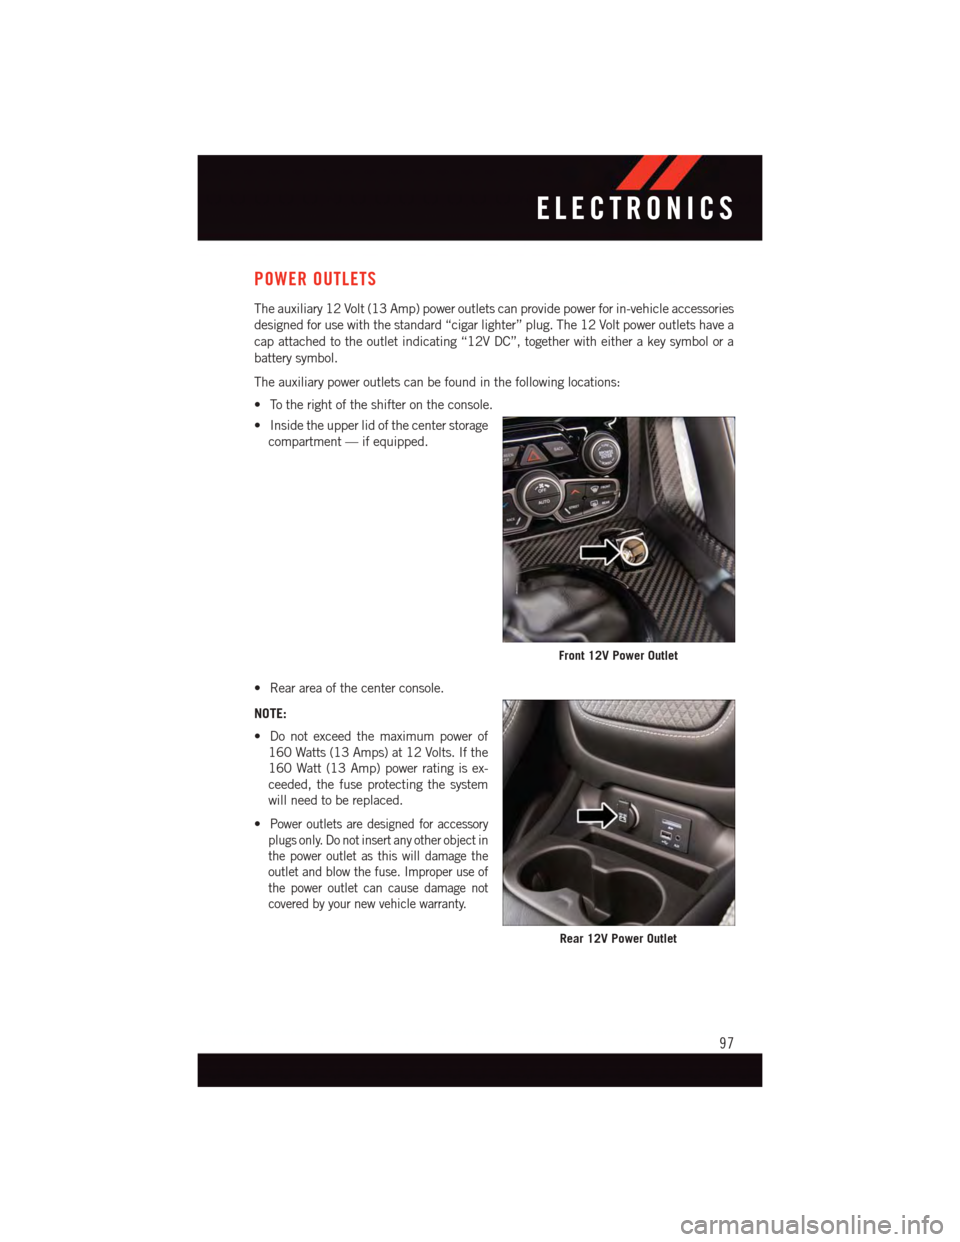
POWER OUTLETS
The auxiliary 12 Volt (13 Amp) power outlets can provide power for in-vehicle accessories
designed for use with the standard “cigar lighter” plug. The 12 Volt power outlets have a
cap attached to the outlet indicating “12V DC”, together with either a key symbol or a
battery symbol.
The auxiliary power outlets can be found in the following locations:
•Totherightoftheshifterontheconsole.
•Insidetheupperlidofthecenterstorage
compartment — if equipped.
•Rearareaofthecenterconsole.
NOTE:
•Donotexceedthemaximumpowerof
160 Watts (13 Amps) at 12 Volts. If the
160 Watt (13 Amp) power rating is ex-
ceeded, the fuse protecting the system
will need to be replaced.
•Power outlets are designed for accessory
plugs only. Do not insert any other object in
the power outlet as this will damage the
outlet and blow the fuse. Improper use of
the power outlet can cause damage not
covered by your new vehicle warranty.
Front 12V Power Outlet
Rear 12V Power Outlet
ELECTRONICS
97