buttons FIAT 500L 2018 Owner handbook (in English)
[x] Cancel search | Manufacturer: FIAT, Model Year: 2018, Model line: 500L, Model: FIAT 500L 2018Pages: 268, PDF Size: 4.87 MB
Page 112 of 268
IMPORTANT The device cannot be
engaged in 1stor reverse gear: it is
advisable to engage it in 4rdgear or
higher.
IMPORTANT It is dangerous to leave
the device on when it is not used. There
is a risk of inadvertently activating it
and losing control of the vehicle due to
unexpected excessive speed.
SETTING THE DESIRED
SPEED
Proceed as follows:
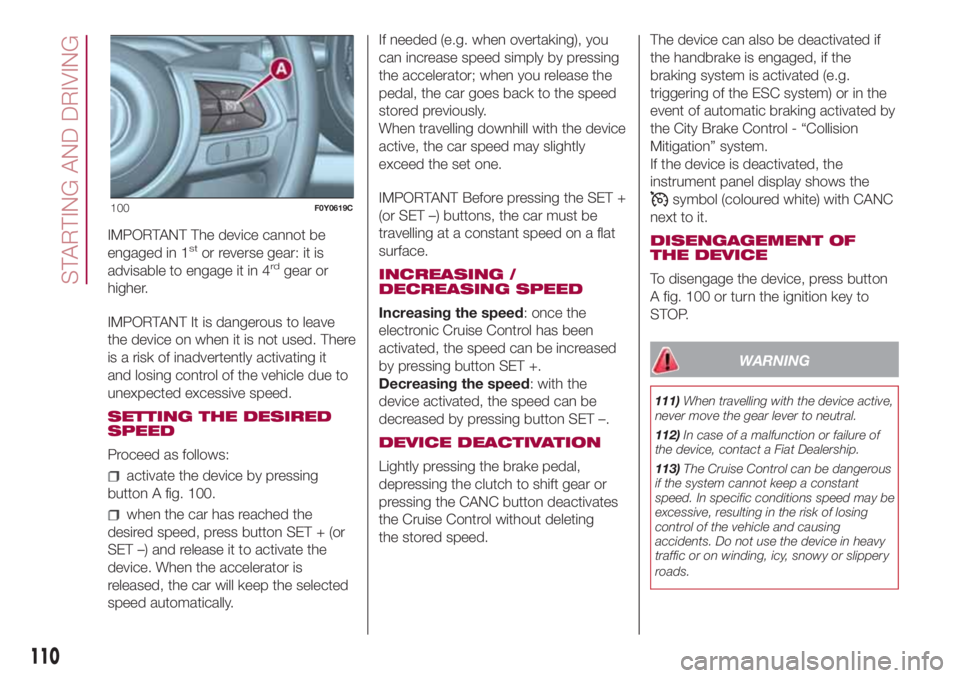
activate the device by pressing
button A fig. 100.
when the car has reached the
desired speed, press button SET + (or
SET –) and release it to activate the
device. When the accelerator is
released, the car will keep the selected
speed automatically.If needed (e.g. when overtaking), you
can increase speed simply by pressing
the accelerator; when you release the
pedal, the car goes back to the speed
stored previously.
When travelling downhill with the device
active, the car speed may slightly
exceed the set one.
IMPORTANT Before pressing the SET +
(or SET –) buttons, the car must be
travelling at a constant speed on a flat
surface.
INCREASING /
DECREASING SPEED
Increasing the speed: once the
electronic Cruise Control has been
activated, the speed can be increased
by pressing button SET +.
Decreasing the speed: with the
device activated, the speed can be
decreased by pressing button SET –.
DEVICE DEACTIVATION
Lightly pressing the brake pedal,
depressing the clutch to shift gear or
pressing the CANC button deactivates
the Cruise Control without deleting
the stored speed.The device can also be deactivated if
the handbrake is engaged, if the
braking system is activated (e.g.
triggering of the ESC system) or in the
event of automatic braking activated by
the City Brake Control - “Collision
Mitigation” system.
If the device is deactivated, the
instrument panel display shows the
symbol (coloured white) with CANC
next to it.
DISENGAGEMENT OF
THE DEVICE
To disengage the device, press button
A fig. 100 or turn the ignition key to
STOP.
WARNING
111)When travelling with the device active,
never move the gear lever to neutral.
112)In case of a malfunction or failure of
the device, contact a Fiat Dealership.
113)The Cruise Control can be dangerous
if the system cannot keep a constant
speed. In specific conditions speed may be
excessive, resulting in the risk of losing
control of the vehicle and causing
accidents. Do not use the device in heavy
traffic or on winding, icy, snowy or slippery
roads.
100F0Y0619C
110
STARTING AND DRIVING
Page 113 of 268
SPEED LIMITER
(for versions/markets, where provided)
This a driving assistance device that
limits the speed of the car as set by the
driver. The maximum speed can be
set both with vehicle stationary and in
motion. The speed is programmable
between 30 and 130 km/h.
When the device is active, the car
speed depends on the pressure at the
accelerator pedal, until the
programmed speed limit is reached
(see "Speed limit programming"
paragraph).
DEVICE ACTIVATION
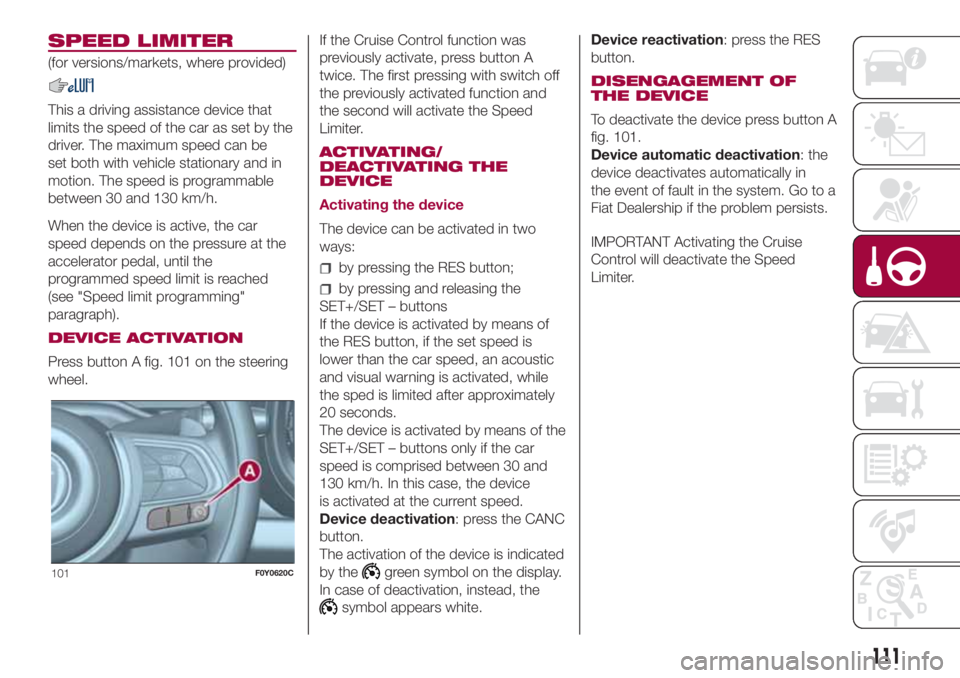
Press button A fig. 101 on the steering
wheel.If the Cruise Control function was
previously activate, press button A
twice. The first pressing with switch off
the previously activated function and
the second will activate the Speed
Limiter.
ACTIVATING/
DEACTIVATING THE
DEVICE
Activating the device
The device can be activated in two
ways:
by pressing the RES button;
by pressing and releasing the
SET+/SET – buttons
If the device is activated by means of
the RES button, if the set speed is
lower than the car speed, an acoustic
and visual warning is activated, while
the sped is limited after approximately
20 seconds.
The device is activated by means of the
SET+/SET – buttons only if the car
speed is comprised between 30 and
130 km/h. In this case, the device
is activated at the current speed.
Device deactivation: press the CANC
button.
The activation of the device is indicated
by the
green symbol on the display.
In case of deactivation, instead, the
symbol appears white.Device reactivation: press the RES
button.
DISENGAGEMENT OF
THE DEVICE
To deactivate the device press button A
fig. 101.
Device automatic deactivation: the
device deactivates automatically in
the event of fault in the system. Go to a
Fiat Dealership if the problem persists.
IMPORTANT Activating the Cruise
Control will deactivate the Speed
Limiter.
101F0Y0620C
111
Page 228 of 268
SYSTEM ON / OFF
The system is switched on/off by
pressing the
(ON/OFF) button/knob.
Turn the button/knob clockwise to
increase the radio volume or
anticlockwise to decrease it.
USB/iPod/AUX SUPPORT
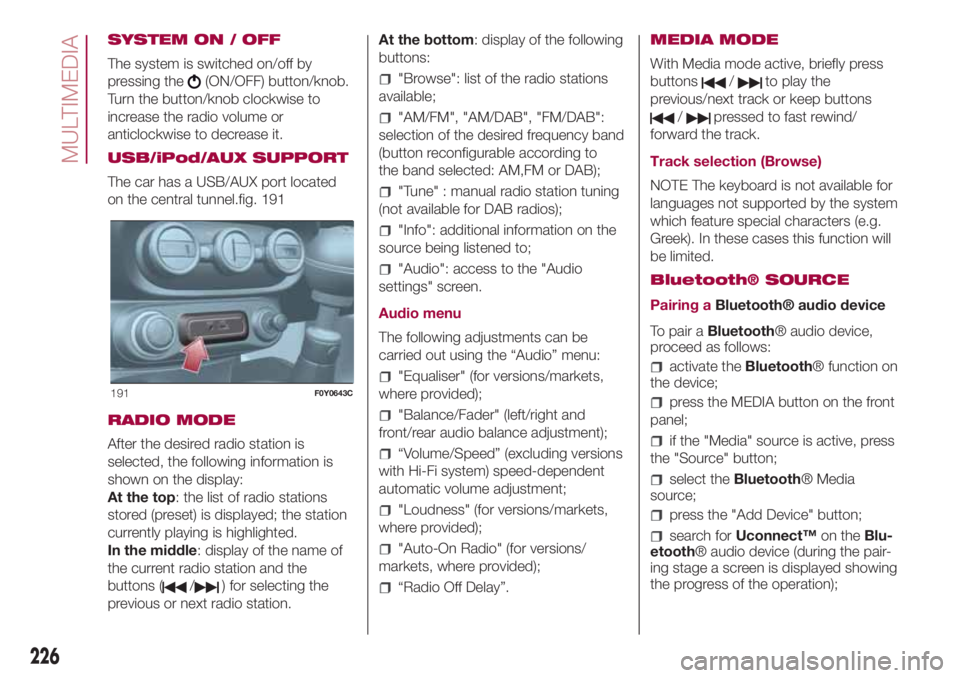
The car has a USB/AUX port located
on the central tunnel.fig. 191
RADIO MODE
After the desired radio station is
selected, the following information is
shown on the display:
At the top: the list of radio stations
stored (preset) is displayed; the station
currently playing is highlighted.
In the middle: display of the name of
the current radio station and the
buttons (
/) for selecting the
previous or next radio station.At the bottom: display of the following
buttons:
"Browse": list of the radio stations
available;
"AM/FM", "AM/DAB", "FM/DAB":
selection of the desired frequency band
(button reconfigurable according to
the band selected: AM,FM or DAB);
"Tune" : manual radio station tuning
(not available for DAB radios);
"Info": additional information on the
source being listened to;
"Audio": access to the "Audio
settings" screen.
Audio menu
The following adjustments can be
carried out using the “Audio” menu:
"Equaliser" (for versions/markets,
where provided);
"Balance/Fader" (left/right and
front/rear audio balance adjustment);
“Volume/Speed” (excluding versions
with Hi-Fi system) speed-dependent
automatic volume adjustment;
"Loudness" (for versions/markets,
where provided);
"Auto-On Radio" (for versions/
markets, where provided);
“Radio Off Delay”.MEDIA MODE
With Media mode active, briefly press
buttons
/to play the
previous/next track or keep buttons
/pressed to fast rewind/
forward the track.
Track selection (Browse)
NOTE The keyboard is not available for
languages not supported by the system
which feature special characters (e.g.
Greek). In these cases this function will
be limited.
Bluetooth® SOURCE
Pairing aBluetooth® audio device
To pair aBluetooth® audio device,
proceed as follows:
activate theBluetooth® function on
the device;
press the MEDIA button on the front
panel;
if the "Media" source is active, press
the "Source" button;
select theBluetooth® Media
source;
press the "Add Device" button;
search forUconnect™on theBlu-
etooth® audio device (during the pair-
ing stage a screen is displayed showing
the progress of the operation);
191F0Y0643C
226
MULTIMEDIA
Page 229 of 268
when requested by the audio
device, enter the PIN code shown on
the system display or confirm on the
device the PIN displayed;
if the pairing procedure is completed
successfully, a screen is displayed.
Answer "Yes" to the question to pair the
Bluetooth® audio device as favourite
(the device will have priority over all
other devices to be paired subse-
quently). Selecting "No" will mean the
priority will be determined by the order
in which they were connected. The last
device connected will have the highest
priority;
an audio device can also be paired
by pressing the PHONE button on
the front panel and by selecting
"Settings" or, from the "Settings" menu,
selecting "Phone/Bluetooth".
IMPORTANT If theBluetooth® con-
nection between mobile phone and
system is lost, consult the mobile
phone handbook.
PHONE MODE
Phone mode activation:
Press the PHONE button on the front
panel to activate the Phone mode.
Use the buttons on the display to:
dial the phone number (using the
graphic keypad on the display);
display and call the contacts in the
mobile phone phonebook;
display and call contacts from the
registers of previous calls;
pair up to 10 phones/audio devices
to make access and connection easier
and quicker;
transfer calls from the system to the
mobile phone and vice versa and
deactivate the microphone audio for
private conversations.
The mobile phone audio is transmitted
through the car’s audio system; the
system automatically mutes the
Uconnect™system audio when the
Phone function is used.
NOTE To consult the list of mobile
phones and supported functions, visit
the www.driveuconnect.eu website
Pairing a mobile phone
Proceed as follows:
activate theBluetooth® function on
the mobile phone;
press the PHONE button on the
front panel;
if no phone is paired with the system
yet, the display shows a dedicated
screen;
select “Yes” to start the pairing
procedure, then search for the
Uconnect™device on the mobile
phone (if "No" is selected, the Phone
main screen is displayed);
when prompted by the mobile
phone, use its keypad to enter the PIN
code shown on the system display
or confirm on the mobile phone the PIN
displayed;
from the “Phone” screen you can
always pair a mobile phone by pressing
the “Settings” button: press the “Add
Device” button and proceed as
described above.
During the pairing stage a screen is
displayed showing the progress of the
operation. When the pairing procedure
is completed successfully, a screen is
displayed: answer “Yes” to the question
to pair the mobile phone as favourite
(the mobile phone will have priority over
all other mobile phones to be paired
subsequently). If no other devices are
paired, the system will consider the first
associated device as favourite.
NOTE After updating the phone
software, for proper operation, it is
recommended to remove the phone
from the list of devices linked to the
radio, delete the previous system
pairing also from the list ofBluetooth®
devices on the phone and make a new
pairing.
227
Page 237 of 268
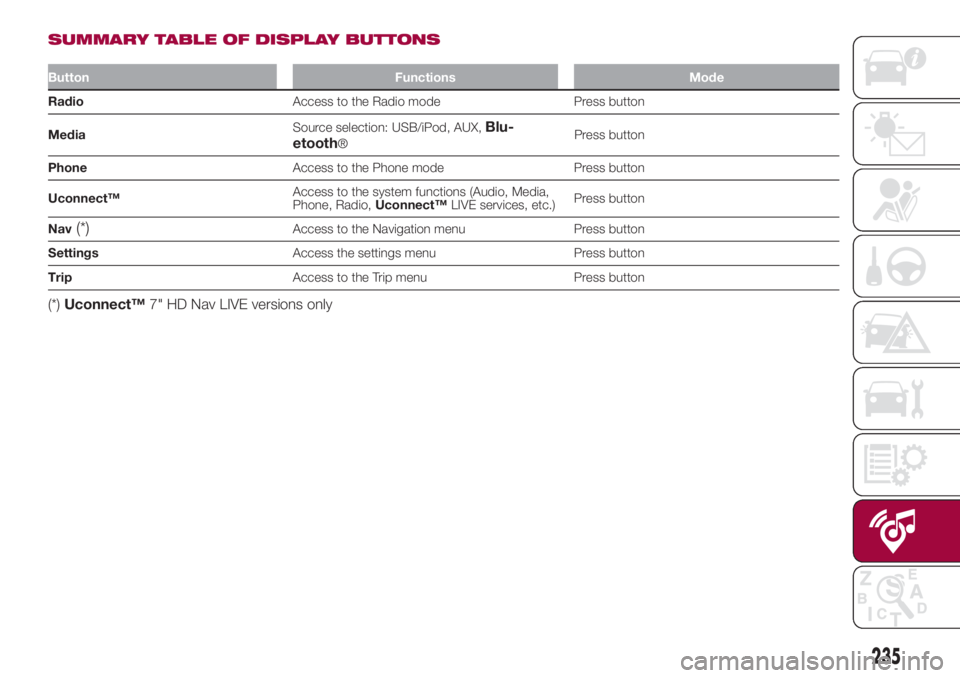
SUMMARY TABLE OF DISPLAY BUTTONS
Button Functions Mode
RadioAccess to the Radio mode Press button
MediaSource selection: USB/iPod, AUX,
Blu-
etooth®Press button
PhoneAccess to the Phone mode Press button
Uconnect™Access to the system functions (Audio, Media,
Phone, Radio,Uconnect™LIVE services, etc.)Press button
Nav
(*)Access to the Navigation menu Press button
SettingsAccess the settings menu Press button
TripAccess to the Trip menu Press button
(*)Uconnect™7" HD Nav LIVE versions only
235
Page 241 of 268
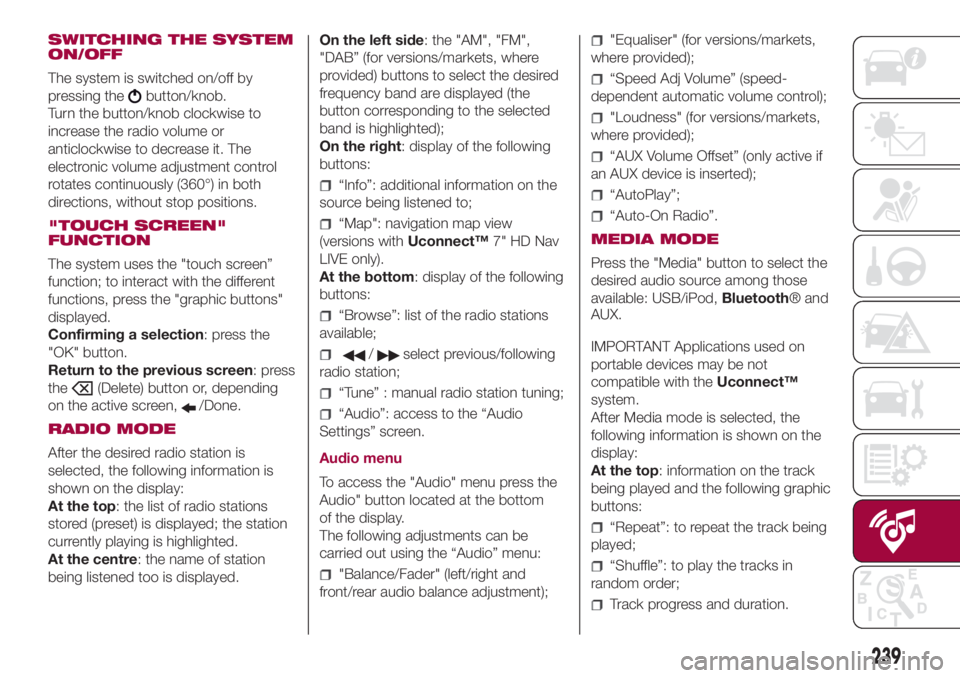
SWITCHING THE SYSTEM
ON/OFF
The system is switched on/off by
pressing the
button/knob.
Turn the button/knob clockwise to
increase the radio volume or
anticlockwise to decrease it. The
electronic volume adjustment control
rotates continuously (360°) in both
directions, without stop positions.
"TOUCH SCREEN"
FUNCTION
The system uses the "touch screen”
function; to interact with the different
functions, press the "graphic buttons"
displayed.
Confirming a selection: press the
"OK" button.
Return to the previous screen: press
the
(Delete) button or, depending
on the active screen,
/Done.
RADIO MODE
After the desired radio station is
selected, the following information is
shown on the display:
At the top: the list of radio stations
stored (preset) is displayed; the station
currently playing is highlighted.
At the centre: the name of station
being listened too is displayed.On the left side: the "AM", "FM",
"DAB” (for versions/markets, where
provided) buttons to select the desired
frequency band are displayed (the
button corresponding to the selected
band is highlighted);
On the right: display of the following
buttons:
“Info”: additional information on the
source being listened to;
“Map": navigation map view
(versions withUconnect™7" HD Nav
LIVE only).
At the bottom: display of the following
buttons:
“Browse”: list of the radio stations
available;
/select previous/following
radio station;
“Tune” : manual radio station tuning;
“Audio”: access to the “Audio
Settings” screen.
Audio menu
To access the "Audio" menu press the
Audio" button located at the bottom
of the display.
The following adjustments can be
carried out using the “Audio” menu:
"Balance/Fader" (left/right and
front/rear audio balance adjustment);
"Equaliser" (for versions/markets,
where provided);
“Speed Adj Volume” (speed-
dependent automatic volume control);
"Loudness" (for versions/markets,
where provided);
“AUX Volume Offset” (only active if
an AUX device is inserted);
“AutoPlay”;
“Auto-On Radio”.
MEDIA MODE
Press the "Media" button to select the
desired audio source among those
available: USB/iPod,Bluetooth® and
AUX.
IMPORTANT Applications used on
portable devices may be not
compatible with theUconnect™
system.
After Media mode is selected, the
following information is shown on the
display:
At the top: information on the track
being played and the following graphic
buttons:
“Repeat”: to repeat the track being
played;
“Shuffle”: to play the tracks in
random order;
Track progress and duration.
239
Page 242 of 268
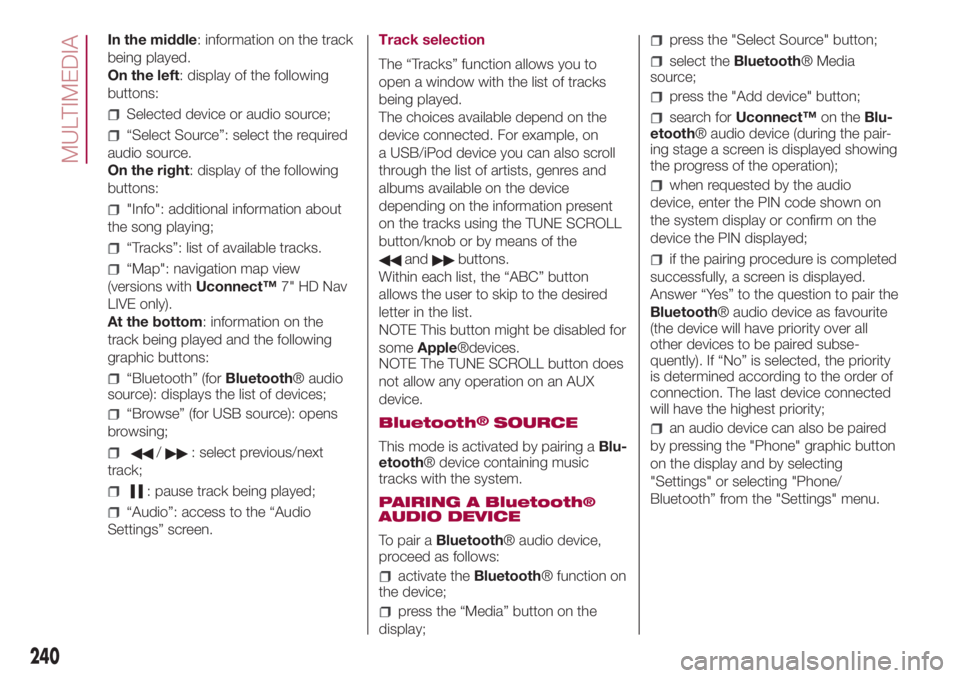
In the middle: information on the track
being played.
On the left: display of the following
buttons:
Selected device or audio source;
“Select Source”: select the required
audio source.
On the right: display of the following
buttons:
"Info": additional information about
the song playing;
“Tracks”: list of available tracks.
“Map": navigation map view
(versions withUconnect™7" HD Nav
LIVE only).
At the bottom: information on the
track being played and the following
graphic buttons:
“Bluetooth” (forBluetooth® audio
source): displays the list of devices;
“Browse” (for USB source): opens
browsing;
/: select previous/next
track;
: pause track being played;
“Audio”: access to the “Audio
Settings” screen.Track selection
The “Tracks” function allows you to
open a window with the list of tracks
being played.
The choices available depend on the
device connected. For example, on
a USB/iPod device you can also scroll
through the list of artists, genres and
albums available on the device
depending on the information present
on the tracks using the TUNE SCROLL
button/knob or by means of the
andbuttons.
Within each list, the “ABC” button
allows the user to skip to the desired
letter in the list.
NOTE This button might be disabled for
someApple®devices.
NOTE The TUNE SCROLL button does
not allow any operation on an AUX
device.
Bluetooth
®SOURCE
This mode is activated by pairing aBlu-
etooth® device containing music
tracks with the system.
PAIRING A Bluetooth
®AUDIO DEVICE
To pair aBluetooth® audio device,
proceed as follows:
activate theBluetooth® function on
the device;
press the “Media” button on the
display;
press the "Select Source" button;
select theBluetooth® Media
source;
press the "Add device" button;
search forUconnect™on theBlu-
etooth® audio device (during the pair-
ing stage a screen is displayed showing
the progress of the operation);
when requested by the audio
device, enter the PIN code shown on
the system display or confirm on the
device the PIN displayed;
if the pairing procedure is completed
successfully, a screen is displayed.
Answer “Yes” to the question to pair the
Bluetooth® audio device as favourite
(the device will have priority over all
other devices to be paired subse-
quently). If “No” is selected, the priority
is determined according to the order of
connection. The last device connected
will have the highest priority;
an audio device can also be paired
by pressing the "Phone" graphic button
on the display and by selecting
"Settings" or selecting "Phone/
Bluetooth” from the "Settings" menu.
240
MULTIMEDIA
Page 243 of 268
NOTE The Radio may change the track
being played by modifying the
name-device in theBluetooth® set-
tings of the phone (where provided), if
the device is connected via USB after
theBluetooth® connection. After
updating the phone software, for proper
operation, it is recommended to
remove the phone from the list of
devices linked to the radio, delete the
previous system pairing also from the
list ofBluetooth® devices on the
phone and make a new pairing.
IMPORTANT If theBluetooth® con-
nection between mobile phone and
system is lost, consult the mobile
phone handbook.
USB/iPod/AUX SUPPORT
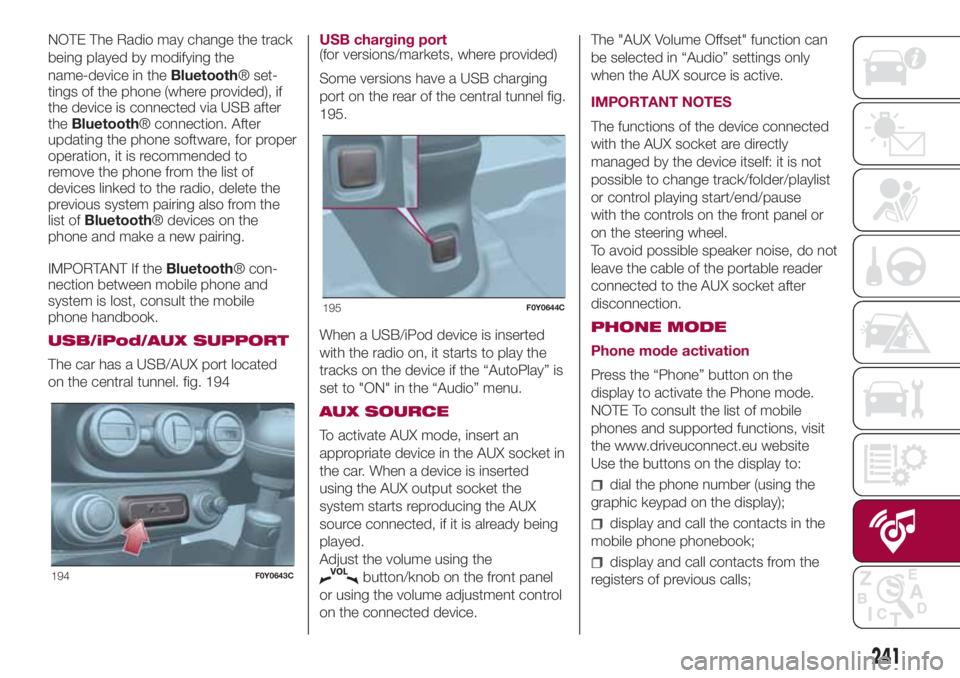
The car has a USB/AUX port located
on the central tunnel. fig. 194USB charging port
(for versions/markets, where provided)
Some versions have a USB charging
port on the rear of the central tunnel fig.
195.
When a USB/iPod device is inserted
with the radio on, it starts to play the
tracks on the device if the “AutoPlay” is
set to "ON" in the “Audio” menu.
AUX SOURCE
To activate AUX mode, insert an
appropriate device in the AUX socket in
the car. When a device is inserted
using the AUX output socket the
system starts reproducing the AUX
source connected, if it is already being
played.
Adjust the volume using the
button/knob on the front panel
or using the volume adjustment control
on the connected device.The "AUX Volume Offset" function can
be selected in “Audio” settings only
when the AUX source is active.
IMPORTANT NOTES
The functions of the device connected
with the AUX socket are directly
managed by the device itself: it is not
possible to change track/folder/playlist
or control playing start/end/pause
with the controls on the front panel or
on the steering wheel.
To avoid possible speaker noise, do not
leave the cable of the portable reader
connected to the AUX socket after
disconnection.
PHONE MODE
Phone mode activation
Press the “Phone” button on the
display to activate the Phone mode.
NOTE To consult the list of mobile
phones and supported functions, visit
the www.driveuconnect.eu website
Use the buttons on the display to:
dial the phone number (using the
graphic keypad on the display);
display and call the contacts in the
mobile phone phonebook;
display and call contacts from the
registers of previous calls;194F0Y0643C
195F0Y0644C
241
Page 244 of 268
pair up to 10 phones/audio devices
to make access and connection easier
and quicker;
transfer calls from the system to the
mobile phone and vice versa and
deactivate the microphone audio for
private conversations.
The mobile phone audio is transmitted
through the vehicle’s audio system;
the system automatically mutes the
radio when the Phone function is used.
Pairing a mobile phone
IMPORTANT Carry out this operation
only with vehicle stationary and in safety
conditions; this function is deactivated
when the vehicle is moving.
The pairing procedure for a mobile
phone is described below: always
consult the handbook for the mobile
phone in any case.
To pair the mobile phone, proceed as
follows:
activate theBluetooth® function on
the mobile phone;
press the “Phone” button on the
display;
if no phone is paired with the system
yet, the display shows a dedicated
screen;
access “Settings” and select “Add
device” to start the pairing procedure,
then search for theUconnect™device
on the mobile phone;
when prompted by the mobile
phone, use its keypad to enter the PIN
code shown on the system display
or confirm on the mobile phone the PIN
displayed;
during the pairing stage a screen is
displayed showing the progress of
the operation;
when the pairing procedure is
completed successfully, a screen is
displayed: answer “Yes” to the question
to pair the mobile phone as favourite
(the mobile phone will have priority over
all other mobile phones to be paired
subsequently). If no other devices are
paired, the system will consider the first
associated device as favourite.
NOTE After updating the phone
software, for proper operation, it is
recommended to remove the phone
from the list of devices linked to the
radio, delete the previous system
pairing also from the list ofBluetooth®
devices on the phone and make a new
pairing.Making a phone call
The operations described below can
only be accessed if supported by
the mobile phone in use. For all
functions available, refer to the mobile
phone owner's handbook.
A call can be made by:
selecting "Phonebook";
selecting "Recent";
selecting "Dial";
selecting "Redial".
Favourites
You can add a number or a contact (if
already in Contacts) to the favourite
list during a call by pressing one of the
5 "Empty" buttons on the upper part
of the display. The favourites can also
be managed by using the Phone Book
options.
Text message reader
The system can read the messages
received by the mobile phone.
To use this function the mobile phone
must support the SMS exchange
function throughBluetooth®.
If this function is not supported by the
phone, the corresponding "Text" button
is deactivated (greyed out).
242
MULTIMEDIA
Page 263 of 268
INDEX
A
BS (system).......................73
Active safety systems................73
ASR (system).......................74
Automatic dual-zone climate
control system....................22
Battery (electrolyte level check).....166
Battery (recharging)................168
Bodywork (cleaning and
maintenance)....................172
Bonnet.............................35
Brake fluid (level check).............166
Bulb replacement..................130
Cargo Magic Space................36
Carrying children safely..............84
Changes/alterations to the car........5
Checking levels....................160
Child protection systems.............84
Child safety device..................32
City Brake Control - Collision
Mitigation system.................76
Climate control system..............21
CO2 emissions....................214
Control buttons (display).............47
Cornering lights (light activation)......25
Courtesy lights......................26
Cruise Control (constant speed
regulator)........................109
Dashboard.........................10Dashboard and instrument panel . . . . .45
Dashboard fusebox;................138
Daytime running lights (DRL)
(activation)........................24
Demanding use of the car..........149
Dimensions........................188
Dipped headlights (bulb
replacement)....................132
Direction indicators (activation).......25
Direction indicators (bulb
replacement)....................132
Display.............................47
Door emergency device.............32
Door locking / unlocking.............32
Doors...............................32
Driver knee bag.....................98
Driving assistance systems..........76
DST (system)........................74
Dualdrive (electric power
steering)..........................38
Dualogic (transmission).............106
Dusk sensor........................25
Electric sunroof.....................30
Electric windows....................33
Engine compartment...............160
Engine compartment junction
unit.............................137
Engine coolant fluid (level check).................................166
Engine oil (consumption)............166
ERM (system).......................74ESC (system).......................73
Exterior lights.......................24
Fiat CODE (system).................12
Fix&Go Automatic (kit)..............127
Fixed glass roof.....................29
Flashing (activation)..................25
Fluids and lubricants...............207
Fog lights (bulb replacement).......134
Fog lights / rear fog light
(activation)........................24
Follow Me Home (device)............26
Front airbag driver's side.............97
Front airbags........................96
Front ceiling light....................26
Front lower light cluster.............132
Front seats..........................15
Fuel consumption..................210
Fuel cut-off system.................145
Fuses (replacement)................137
Gear Shift Indicator (system)........47
Gravity Control (function).............73
Handbrake........................105
Hazard warning lights..............123
Head restraints......................18
Hill Holder (system)..................74
i-Size child restraint systems.........91
Identification data..................175
Ignition device.......................14