FIAT DUCATO 2010 Owner handbook (in English)
Manufacturer: FIAT, Model Year: 2010, Model line: DUCATO, Model: FIAT DUCATO 2010Pages: 286, PDF Size: 12.53 MB
Page 11 of 286
IMPORTANT The engine lock function is guaranteed by
the Fiat CODE, which is automatically activated when
the ignition key is extracted from the starter device.
TURNING THE ALARM ON
With the doors and bonnet closed and the ignition key
either turned to STOP or removed, point the key with
the remote control towards the vehicle and press and
release the lock button.
Excluding some markets, the system produces an
acoustic warning (beep) and enables door locking.
The switching on of the alarm is preceded by an self-
diagnosis stage: if a fault is detected, the system
produces another acoustic signal.
In this case, turn the alarm off by pressing the “release
doors/release load compartment” button, check that the
doors and bonnet are properly closed and turn the
alarm back on by pressing the lock button.
If a door or the bonnet is not properly shut, it will be
excluded from the testing by the alarm system.
If the alarm produces an acoustic signal even when the
doors and bonnet are correctly closed, a fault has
occurred in the operation of the system. Contact a Fiat
Dealership.ELECTRONIC ALARM
(for versions/markets where provided)
The alarm, in addition to all the remote control
functions described previously, is controlled by the
receiver located under the dashboard near the fuse box.
ALARM TRIPPING
The alarm intervenes in the following cases:
❒when one of the doors or bonnet is opened
illegitimately (perimeter protection);
❒when the ignition system is started up (ignition key
rotated to MAR-ON);
❒when the battery cables are cut;
❒when the vehicle is lifted or tilted.
Depending on the market, the activation of the alarm
causes the activation of the siren and the direction
indicators (for about 26 seconds). Alarm tripping and
the number of cycles depend on the sales market.
There is a maximum number of acoustic/visual cycles.
When this is reached the system returns to normal
operation.
The antilift protection may be turned off by means of
the appropriate button (see “Antilift protection”
paragraph overleaf).
10
KNOWING
YOUR CAR
SAFETY
STARTING
AND
DRIVING
WARNING
LIGHTS AND
MESSAGES
IN AN
EMERGENCY
MAINTENANCE
AND CARE
TECHNICAL
SPECIFICATIONS
INDEX
001-036 DUCATO LUM EN 7ed 6/21/10 2:08 PM Page 10
Page 12 of 286
11
KNOWING
YOUR CAR
SAFETY
STARTING
AND
DRIVING
WARNING
LIGHTS AND
MESSAGES
IN AN
EMERGENCY
MAINTENANCE
AND CARE
TECHNICAL
SPECIFICATIONS
INDEX
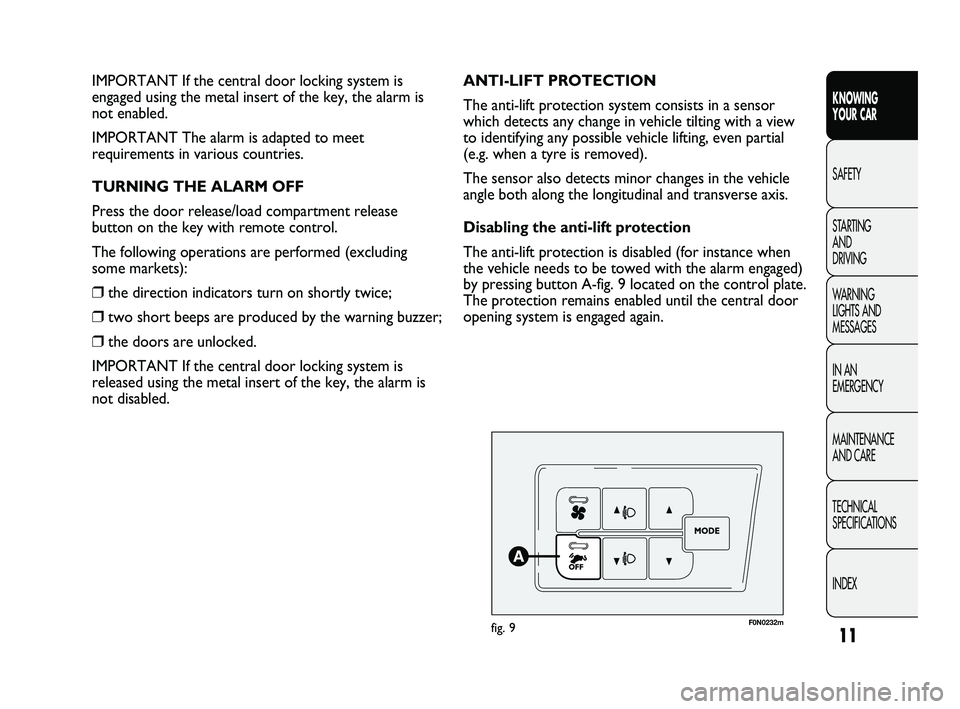
F0N0232mfig. 9
ANTI-LIFT PROTECTION
The anti-lift protection system consists in a sensor
which detects any change in vehicle tilting with a view
to identifying any possible vehicle lifting, even partial
(e.g. when a tyre is removed).
The sensor also detects minor changes in the vehicle
angle both along the longitudinal and transverse axis.
Disabling the anti-lift protection
The anti-lift protection is disabled (for instance when
the vehicle needs to be towed with the alarm engaged)
by pressing button A-fig. 9 located on the control plate.
The protection remains enabled until the central door
opening system is engaged again. IMPORTANT If the central door locking system is
engaged using the metal insert of the key, the alarm is
not enabled.
IMPORTANT The alarm is adapted to meet
requirements in various countries.
TURNING THE ALARM OFF
Press the door release/load compartment release
button on the key with remote control.
The following operations are performed (excluding
some markets):
❒the direction indicators turn on shortly twice;
❒two short beeps are produced by the warning buzzer;
❒the doors are unlocked.
IMPORTANT If the central door locking system is
released using the metal insert of the key, the alarm is
not disabled.
001-036 DUCATO LUM EN 7ed 6/21/10 2:08 PM Page 11
Page 13 of 286
BREAK IN ATTEMPT INDICATION
Any break in attempt is indicated by the turning on of
warning light
Yon the instrument panel together with
the message on the multifunction display (where
provided), (see section “Warning lights and messages”).
DISABLING THE ALARM
To permanently disable the alarm (e.g. during a lengthy
period of idleness), simply lock the vehicle by turning
the metal insert of the key with remote control in the
lock.
IMPORTANT If the battery of the key with the remote
control goes flat or the system fails, the alarm can be
switched off by placing the key in the ignition switch and
turning it to MAR-ON.
12
KNOWING
YOUR CAR
SAFETY
STARTING
AND
DRIVING
WARNING
LIGHTS AND
MESSAGES
IN AN
EMERGENCY
MAINTENANCE
AND CARE
TECHNICAL
SPECIFICATIONS
INDEX
IGNITION DEVICE
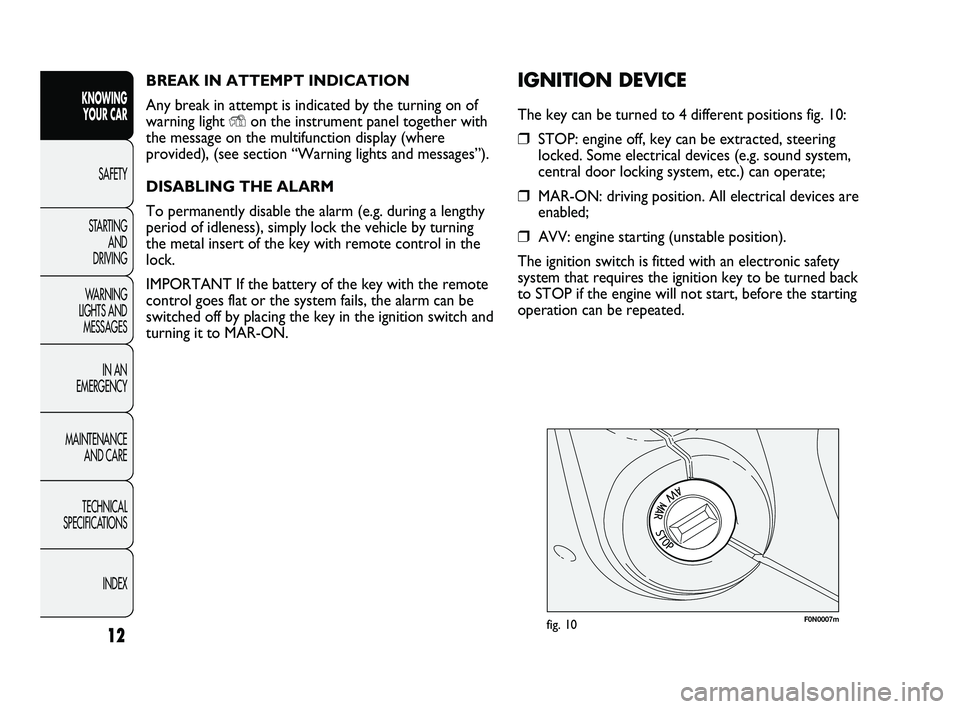
The key can be turned to 4 different positions fig. 10:
❒STOP: engine off, key can be extracted, steering
locked. Some electrical devices (e.g. sound system,
central door locking system, etc.) can operate;
❒MAR-ON: driving position. All electrical devices are
enabled;
❒AVV: engine starting (unstable position).
The ignition switch is fitted with an electronic safety
system that requires the ignition key to be turned back
to STOP if the engine will not start, before the starting
operation can be repeated.
F0N0007mfig. 10
001-036 DUCATO LUM EN 7ed 6/21/10 2:08 PM Page 12
Page 14 of 286
13
KNOWING
YOUR CAR
SAFETY
STARTING
AND
DRIVING
WARNING
LIGHTS AND
MESSAGES
IN AN
EMERGENCY
MAINTENANCE
AND CARE
TECHNICAL
SPECIFICATIONS
INDEX
Never extract the key while the vehicle
is moving. The steering wheel would
automatically lock as soon as you try to turn it.
This is always the case, even when the vehicle is
being towed.
WARNING
It is absolutely forbidden to carry out
any after-sales operation involving
steering system or steering column
modifications (e.g. installing an anti-theft
device) that could badly affect performance and
safety, invalidate the warranty and also result in
the vehicle failing to comply with regulations.
WARNING
If the ignition device is tampered with
(e.g.: attempted theft), have it checked
over by a Fiat Dealership as soon as possible.
WARNING
Always remove the key from the vehicle
when leaving it in order to prevent
accidental engagement of the control.
Remember to engage the handbrake. Engage
first gear if the vehicle is parked uphill or
reverse gear if the vehicle is parked downhill.
Never leave children unattended in the vehicle.
WARNING
STEERING LOCK
Engagement
When the key is at STOP, remove the key and turn the
steering wheel until it locks.
Disengagement
Move the steering wheel slightly as you turn the ignition
key to MAR-ON.
001-036 DUCATO LUM EN 7ed 6/21/10 2:08 PM Page 13
Page 15 of 286
14
KNOWING
YOUR CAR
SAFETY
STARTING
AND
DRIVING
WARNING
LIGHTS AND
MESSAGES
IN AN
EMERGENCY
MAINTENANCE
AND CARE
TECHNICAL
SPECIFICATIONS
INDEX
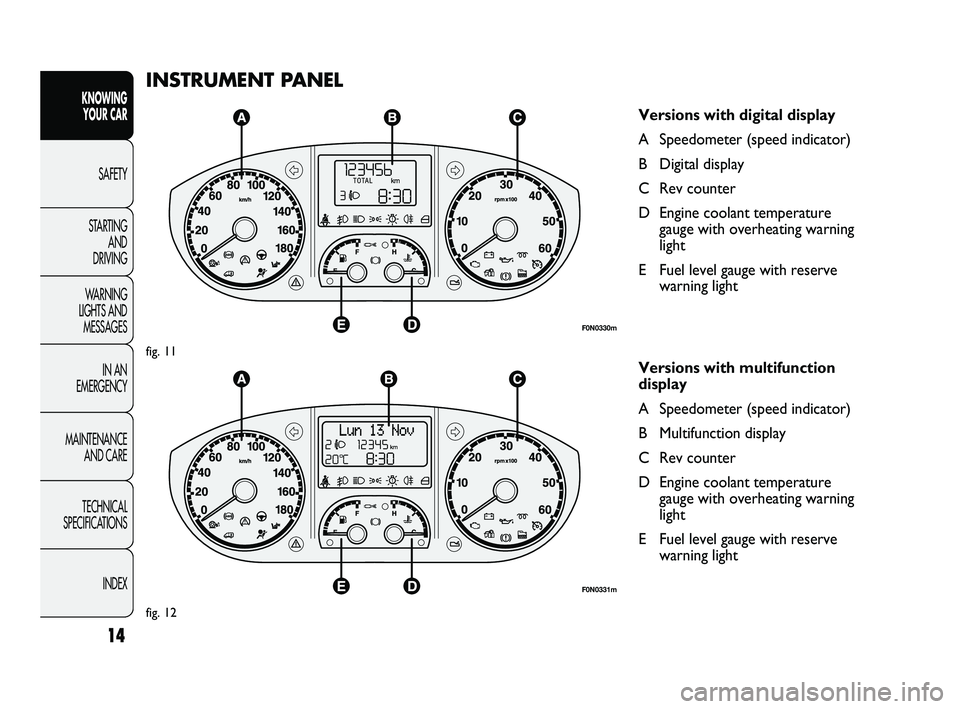
INSTRUMENT PANEL
Versions with digital display
A Speedometer (speed indicator)
B Digital display
C Rev counter
D Engine coolant temperature
gauge with overheating warning
light
E Fuel level gauge with reserve
warning light
Versions with multifunction
display
A Speedometer (speed indicator)
B Multifunction display
C Rev counter
D Engine coolant temperature
gauge with overheating warning
light
E Fuel level gauge with reserve
warning light
F0N0330m
fig. 11
F0N0331m
fig. 12
001-036 DUCATO LUM EN 7ed 6/21/10 2:08 PM Page 14
Page 16 of 286
15
KNOWING
YOUR CAR
SAFETY
STARTING
AND
DRIVING
WARNING
LIGHTS AND
MESSAGES
IN AN
EMERGENCY
MAINTENANCE
AND CARE
TECHNICAL
SPECIFICATIONS
INDEX
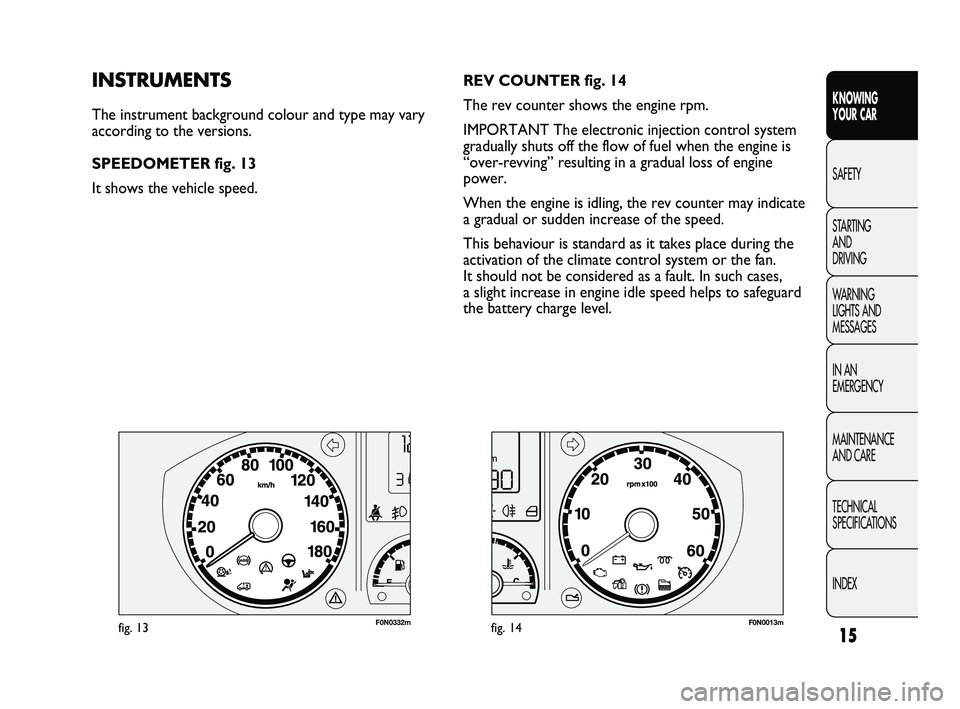
F0N0332mfig. 13F0N0013mfig. 14
REV COUNTER fig. 14
The rev counter shows the engine rpm.
IMPORTANT The electronic injection control system
gradually shuts off the flow of fuel when the engine is
“over-revving” resulting in a gradual loss of engine
power.
When the engine is idling, the rev counter may indicate
a gradual or sudden increase of the speed.
This behaviour is standard as it takes place during the
activation of the climate control system or the fan.
It should not be considered as a fault. In such cases,
a slight increase in engine idle speed helps to safeguard
the battery charge level.INSTRUMENTS
The instrument background colour and type may vary
according to the versions.
SPEEDOMETER fig. 13
It shows the vehicle speed.
001-036 DUCATO LUM EN 7ed 6/21/10 2:08 PM Page 15
Page 17 of 286
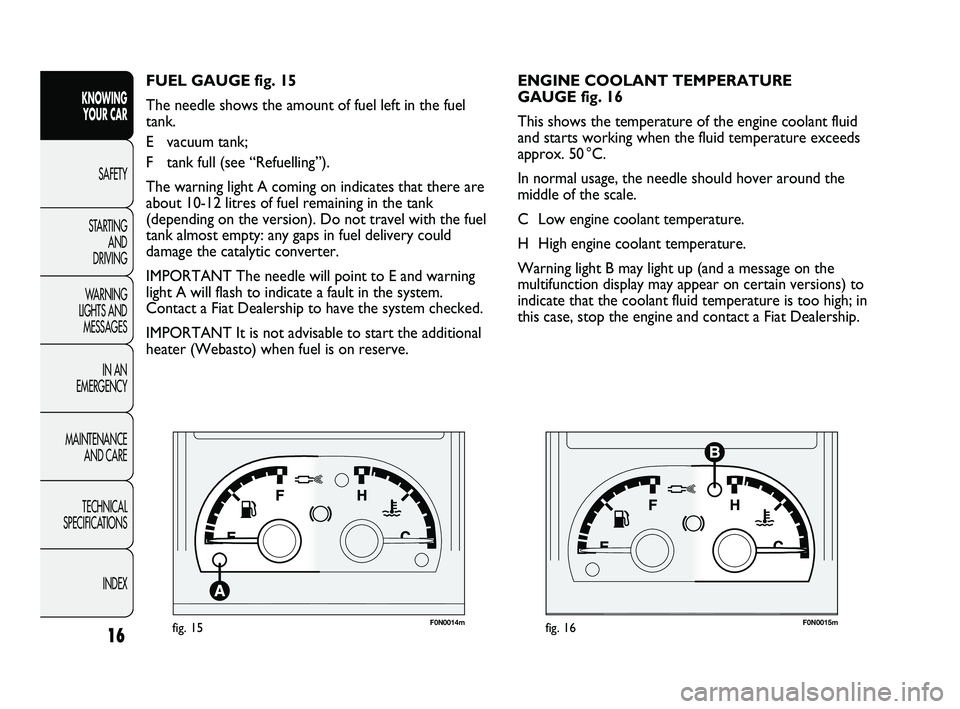
F0N0014mfig. 15F0N0015mfig. 16
ENGINE COOLANT TEMPERATURE
GAUGE fig. 16
This shows the temperature of the engine coolant fluid
and starts working when the fluid temperature exceeds
approx. 50 °C.
In normal usage, the needle should hover around the
middle of the scale.
C Low engine coolant temperature.
H High engine coolant temperature.
Warning light B may light up (and a message on the
multifunction display may appear on certain versions) to
indicate that the coolant fluid temperature is too high; in
this case, stop the engine and contact a Fiat Dealership. FUEL GAUGE fig. 15
The needle shows the amount of fuel left in the fuel
tank.
E vacuum tank;
F tank full (see “Refuelling”).
The warning light A coming on indicates that there are
about 10-12 litres of fuel remaining in the tank
(depending on the version). Do not travel with the fuel
tank almost empty: any gaps in fuel delivery could
damage the catalytic converter.
IMPORTANT The needle will point to E and warning
light A will flash to indicate a fault in the system.
Contact a Fiat Dealership to have the system checked.
IMPORTANT It is not advisable to start the additional
heater (Webasto) when fuel is on reserve.
16
KNOWING
YOUR CAR
SAFETY
STARTING
AND
DRIVING
WARNING
LIGHTS AND
MESSAGES
IN AN
EMERGENCY
MAINTENANCE
AND CARE
TECHNICAL
SPECIFICATIONS
INDEX
001-036 DUCATO LUM EN 7ed 6/21/10 2:08 PM Page 16
Page 18 of 286
17
KNOWING
YOUR CAR
SAFETY
STARTING
AND
DRIVING
WARNING
LIGHTS AND
MESSAGES
IN AN
EMERGENCY
MAINTENANCE
AND CARE
TECHNICAL
SPECIFICATIONS
INDEX
If the needle reaches the red area, stop
the engine immediately and contact
a Fiat Dealership.The failure of the fifth symbol to come on should not be
taken as a fault or the fact that there is not enough oil in
the sump.
IMPORTANT To find out the correct oil quantity,
always check using the dipstick (see paragraph
“Checking levels” in the section “Maintenance and
care”).
After a few seconds, the symbol display indicating the
amount of engine oil disappears and:
❒if the next service is due, the time to the next
service is displayed and the warning light õlights up
on the instrument panel. When the service date is
reached, the display shows some dashes;
❒then, if it is nearly time to change the engine oil, the
time to the next oil change is shown on the top row
of the display and the message “OIL” appears in the
lower part of the display. When the service date is
reached, the display shows five dashes.
Versions with multifunction display
When the ignition key is turned to MAR-ON the display
shows the oil level on the first row by turning five
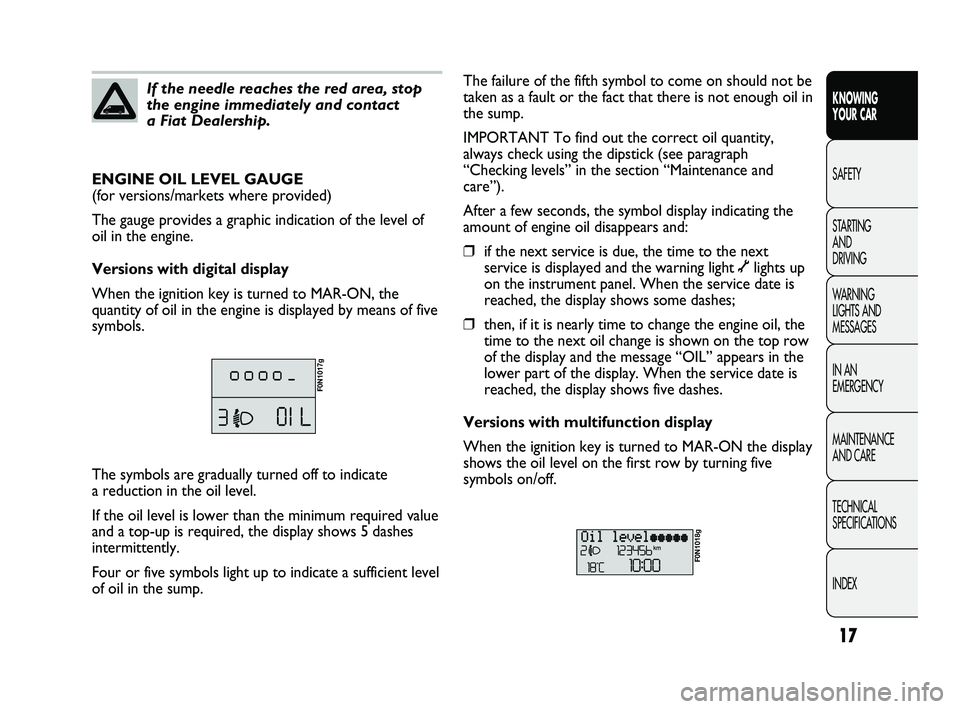
symbols on/off. ENGINE OIL LEVEL GAUGE
(for versions/markets where provided)
The gauge provides a graphic indication of the level of
oil in the engine.
Versions with digital display
When the ignition key is turned to MAR-ON, the
quantity of oil in the engine is displayed by means of five
symbols.
F0N1017g
The symbols are gradually turned off to indicate
a reduction in the oil level.
If the oil level is lower than the minimum required value
and a top-up is required, the display shows 5 dashes
intermittently.
Four or five symbols light up to indicate a sufficient level
of oil in the sump.
F0N1018g
001-036 DUCATO LUM EN 7ed 6/21/10 2:08 PM Page 17
Page 19 of 286
F0N0016mfig. 17
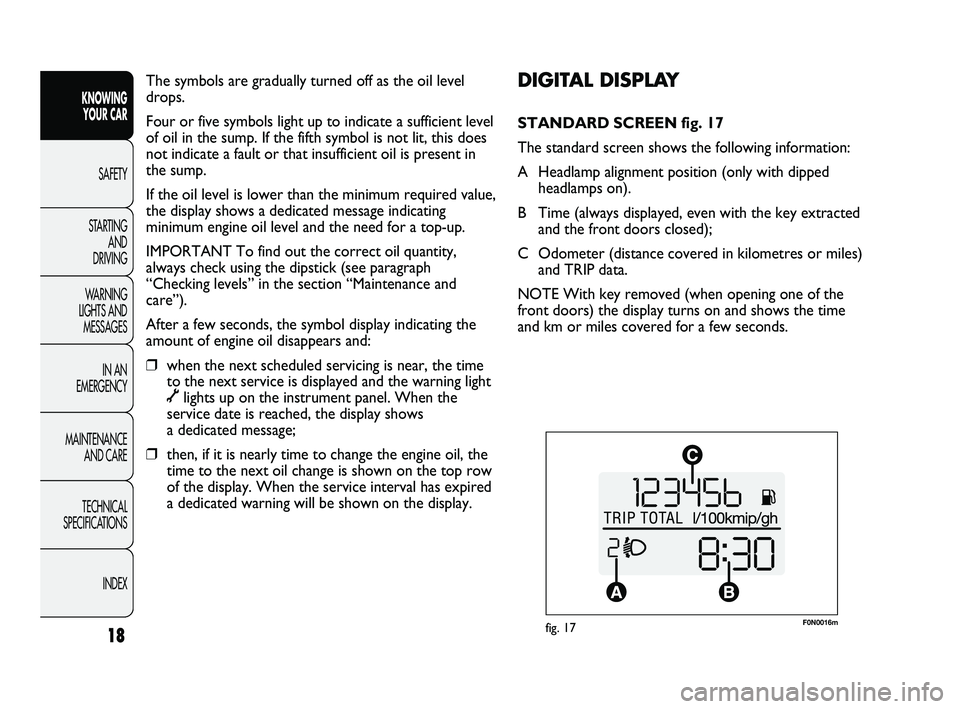
DIGITAL DISPLAY
STANDARD SCREEN fig. 17
The standard screen shows the following information:
A Headlamp alignment position (only with dipped
headlamps on).
B Time (always displayed, even with the key extracted
and the front doors closed);
C Odometer (distance covered in kilometres or miles)
and TRIP data.
NOTE With key removed (when opening one of the
front doors) the display turns on and shows the time
and km or miles covered for a few seconds. The symbols are gradually turned off as the oil level
drops.
Four or five symbols light up to indicate a sufficient level
of oil in the sump. If the fifth symbol is not lit, this does
not indicate a fault or that insufficient oil is present in
the sump.
If the oil level is lower than the minimum required value,
the display shows a dedicated message indicating
minimum engine oil level and the need for a top-up.
IMPORTANT To find out the correct oil quantity,
always check using the dipstick (see paragraph
“Checking levels” in the section “Maintenance and
care”).
After a few seconds, the symbol display indicating the
amount of engine oil disappears and:
❒when the next scheduled servicing is near, the time
to the next service is displayed and the warning light
õlights up on the instrument panel. When the
service date is reached, the display shows
a dedicated message;
❒then, if it is nearly time to change the engine oil, the
time to the next oil change is shown on the top row
of the display. When the service interval has expired
a dedicated warning will be shown on the display.
18
KNOWING
YOUR CAR
SAFETY
STARTING
AND
DRIVING
WARNING
LIGHTS AND
MESSAGES
IN AN
EMERGENCY
MAINTENANCE
AND CARE
TECHNICAL
SPECIFICATIONS
INDEX
001-036 DUCATO LUM EN 7ed 6/21/10 2:08 PM Page 18
Page 20 of 286
19
KNOWING
YOUR CAR
SAFETY
STARTING
AND
DRIVING
WARNING
LIGHTS AND
MESSAGES
IN AN
EMERGENCY
MAINTENANCE
AND CARE
TECHNICAL
SPECIFICATIONS
INDEX
fig. 18
SETUP MENU fig. 19
The menu comprises a series of functions arranged in
a cycle which can be selected through buttons
▲and▼
to access the different select operations and settings
(setup) given in the following paragraphs.
The setup menu can be activated by briefly pressing
button
MODE.
By pressing buttons ▲and ▼you can scroll through the
setup menu options.
Handling modes differ with each other according to the
characteristic of the option selected.
Selecting a menu option
– briefly press button
MODEto select the menu option
that needs to be changed;
– press buttons ▲and ▼(by single presses) to select
the new setting;
– Briefly press button
MODEto store the new setting
and at the same time go back to the previously selected
menu option.
Selecting “Set Clock”
– briefly press button
MODEto select the first value to
change (hours);
– press buttons ▲and ▼(by single presses) to select
the new setting;
– briefly press button
MODEto store the new setting
and go to the next setup menu option (minutes);
– after setting the values with the same procedure, go
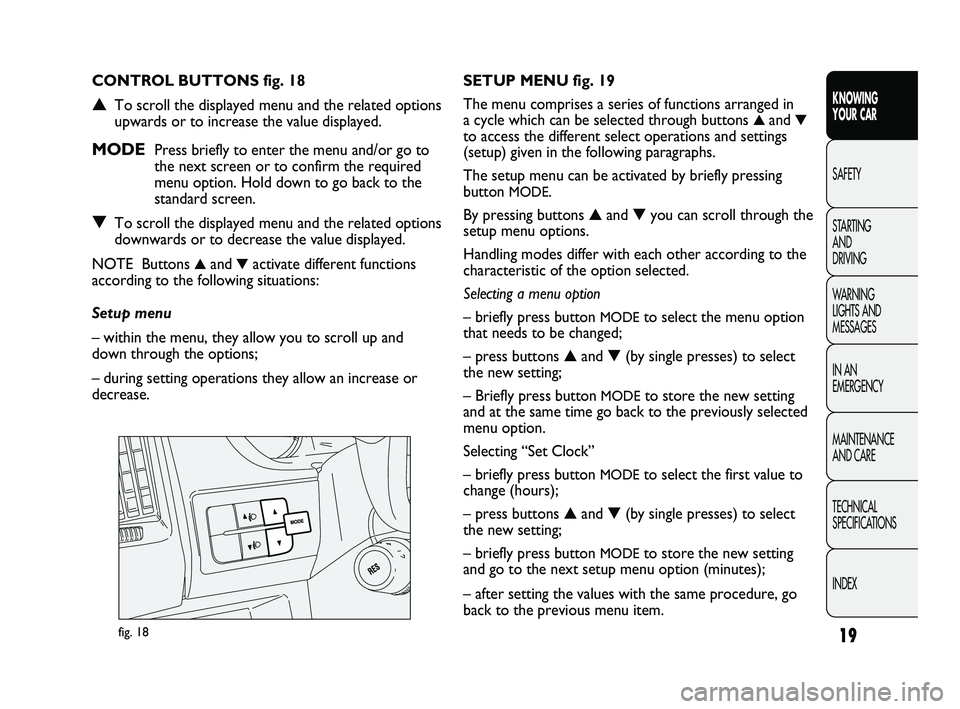
back to the previous menu item. CONTROL BUTTONS fig. 18
▲To scroll the displayed menu and the related options
upwards or to increase the value displayed.
MODE Press briefly to enter the menu and/or go to
the next screen or to confirm the required
menu option. Hold down to go back to the
standard screen.
▼To scroll the displayed menu and the related options
downwards or to decrease the value displayed.
NOTE Buttons
▲and▼activate different functions
according to the following situations:
Setup menu
– within the menu, they allow you to scroll up and
down through the options;
– during setting operations they allow an increase or
decrease.
001-036 DUCATO LUM EN 7ed 6/21/10 2:08 PM Page 19