FORD CONTOUR 2000 2.G Repair Manual
Manufacturer: FORD, Model Year: 2000, Model line: CONTOUR, Model: FORD CONTOUR 2000 2.GPages: 248, PDF Size: 2.23 MB
Page 61 of 248
Controls and features
61
Res
Set
Acc
Coast
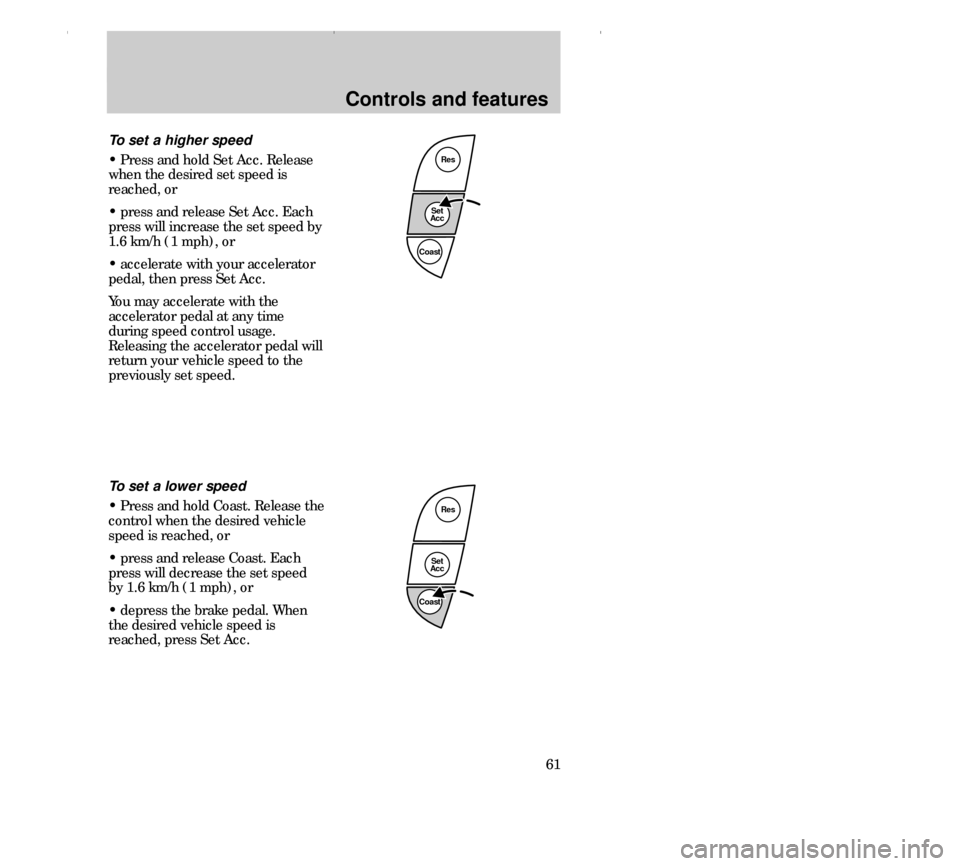
To set a lower speed
• Press and hold Coast. Release the
control when the desired vehicle
speed is reached, or
• press and release Coast. Each
press will decrease the set speed
by 1.6 km/h (1 mph), or
• depress the brake pedal. When
the desired vehicle speed is
reached, press Set Acc. To set a higher speed
• Press and hold Set Acc. Release
when the desired set speed is
reached, or
• press and release Set Acc. Each
press will increase the set speed by
1.6 km/h (1 mph), or
• accelerate with your accelerator
pedal, then press Set Acc.
You may accelerate with the
accelerator pedal at any time
during speed control usage.
Releasing the accelerator pedal will
return your vehicle speed to the
previously set speed.
Res
Set
Acc
Coast
13CCfen 17.6.99 10:53 Uhr Seite 61
Page 62 of 248
Controls and features
62
Res
Set
Acc
Coast
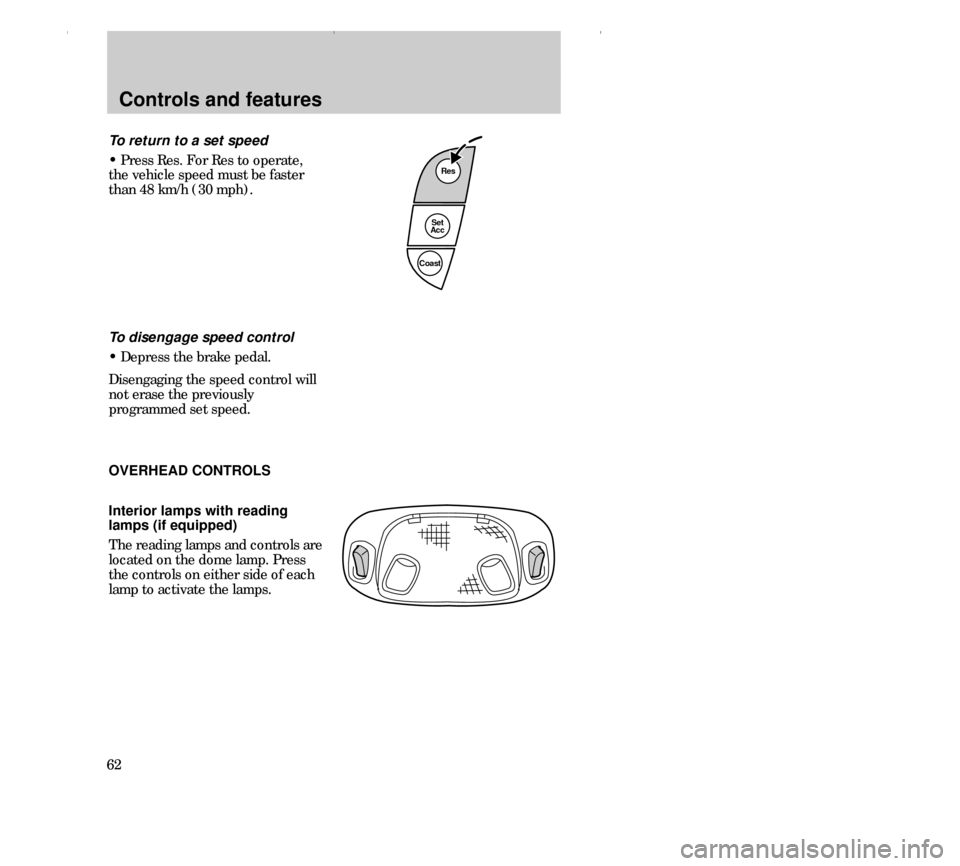
To return to a set speed
• Press Res. For Res to operate,
the vehicle speed must be faster
than 48 km/h (30 mph).
To disengage speed control
• Depress the brake pedal.
Disengaging the speed control will
not erase the previously
programmed set speed.
OVERHEAD CONTROLS
Interior lamps with reading
lamps (if equipped)
The reading lamps and controls are
located on the dome lamp. Press
the controls on either side of each
lamp to activate the lamps.
13CCfen 17.6.99 10:53 Uhr Seite 62
Page 63 of 248
Controls and features
63
12
SEC
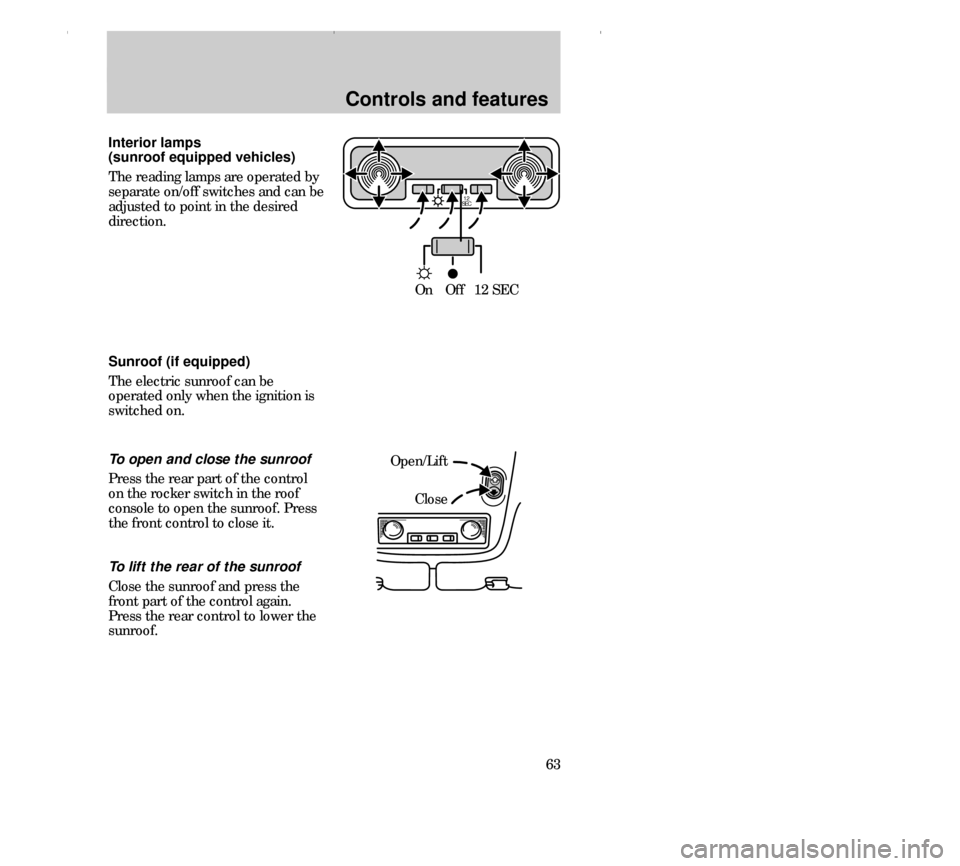
On Off 12 SEC Interior lamps
(sunroof equipped vehicles)
The reading lamps are operated by
separate on/off switches and can be
adjusted to point in the desired
direction.
Open/Lift
Close Sunroof (if equipped)
The electric sunroof can be
operated only when the ignition is
switched on.
To open and close the sunroof
Press the rear part of the control
on the rocker switch in the roof
console to open the sunroof. Press
the front control to close it.
To lift the rear of the sunroof
Close the sunroof and press the
front part of the control again.
Press the rear control to lower the
sunroof.
13CCfen 17.6.99 10:53 Uhr Seite 63
Page 64 of 248
Controls and features
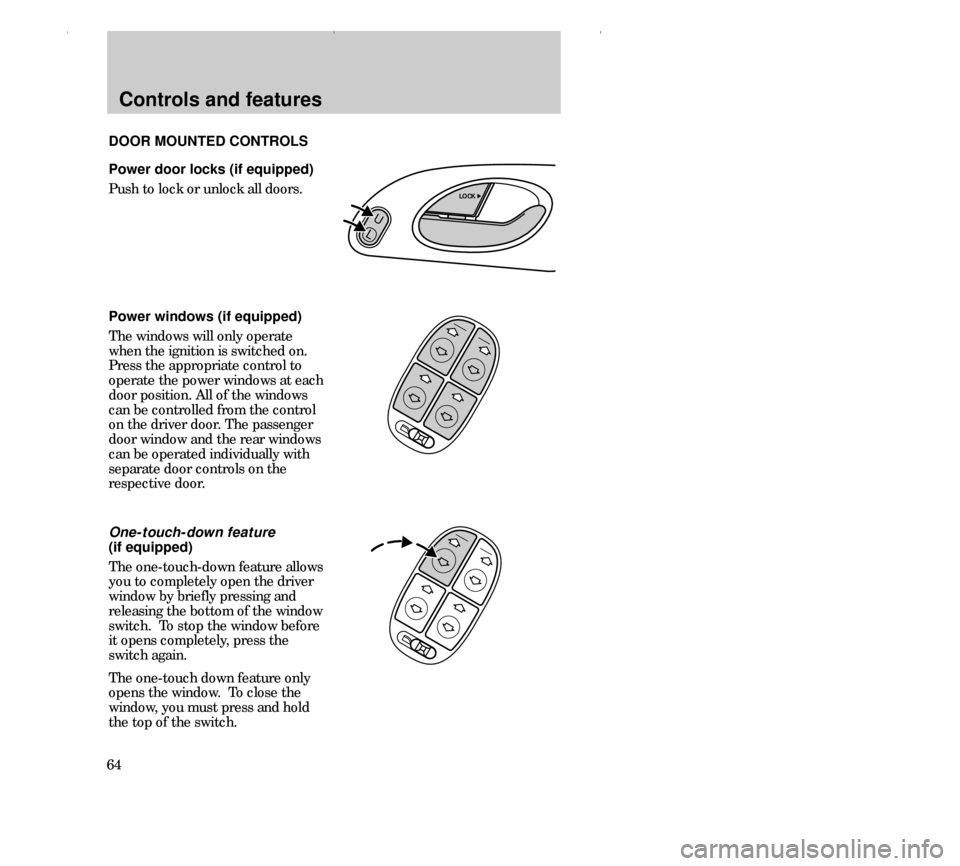
64Power door locks (if equipped)
Push to lock or unlock all doors.
Power windows (if equipped)
The windows will only operate
when the ignition is switched on.
Press the appropriate control to
operate the power windows at each
door position. All of the windows
can be controlled from the control
on the driver door. The passenger
door window and the rear windows
can be operated individually with
separate door controls on the
respective door.
One-touch-down feature
(if equipped)
The one-touch-down feature allows
you to completely open the driver
window by briefly pressing and
releasing the bottom of the window
switch. To stop the window before
it opens completely, press the
switch again.
The one-touch down feature only
opens the window. To close the
window, you must press and hold
the top of the switch. DOOR MOUNTED CONTROLS
U
L
LOCK
13CCfen 17.6.99 10:53 Uhr Seite 64
Page 65 of 248
Controls and features
65
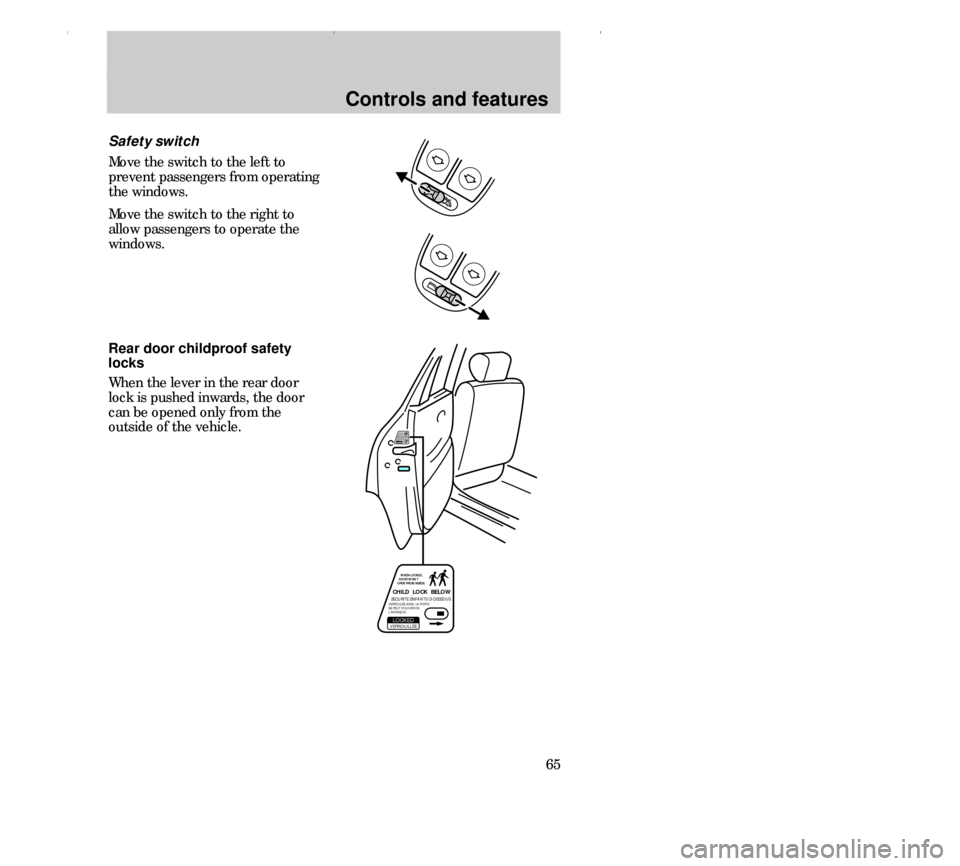
Safety switch
Move the switch to the left to
prevent passengers from operating
the windows.
Move the switch to the right to
allow passengers to operate the
windows.
CHILD LOCK BELOWSECURITE ENFANTS CI-DESSOUS´VERROUILLEE,LOCKED WHEN LOCKED,
DOOR WON`T
OPEN FROM INSIDE.´VERROULEE AINSI, LA PORTE
NE PEUT S´OUVRIR DE
L´INTERIEUR.
CHILD LOCK BELOWSECURITE ENFANTS CI-DESSOUS´
VERROUILLEE,LOCKED
WHEN LOCKED,
DOOR WON`T
OPEN FROM INSIDE.
´VERROULEE AINSI, LA PORTE
NE PEUT S´OUVRIR DE
L´INTERIEUR.
Rear door childproof safety
locks
When the lever in the rear door
lock is pushed inwards, the door
can be opened only from the
outside of the vehicle.
13CCfen 17.6.99 10:53 Uhr Seite 65
Page 66 of 248
Controls and features
66
PULL
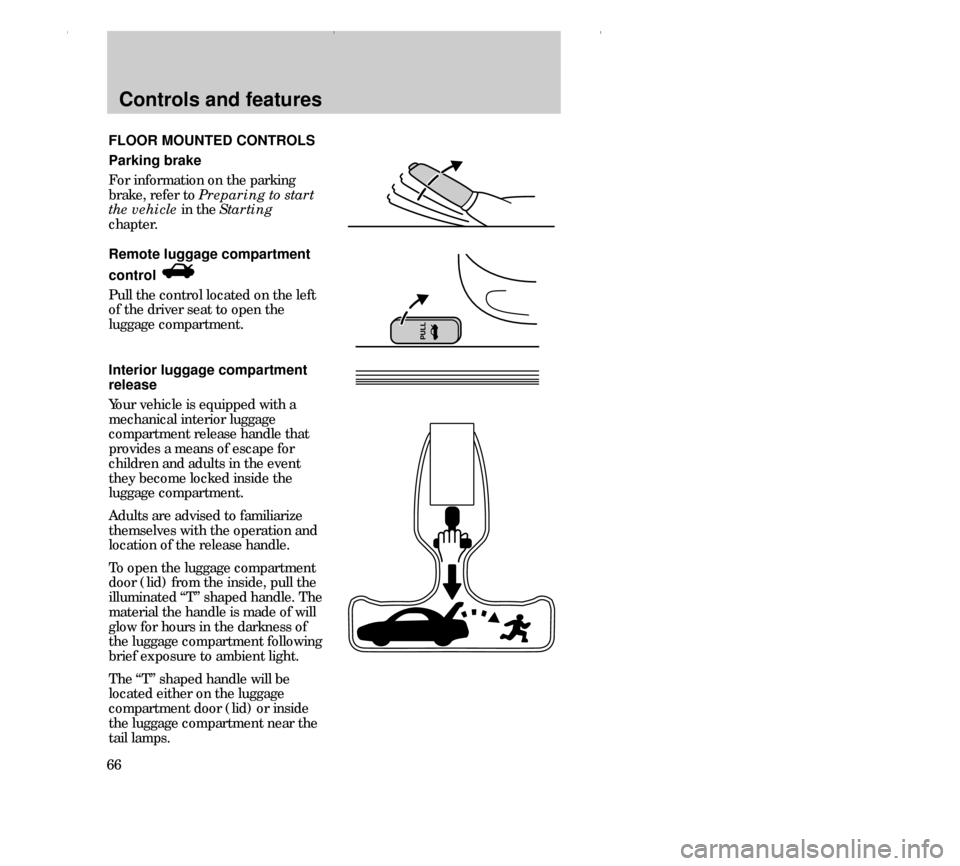
Remote luggage compartment
control
Pull the control located on the left
of the driver seat to open the
luggage compartment.
FLOOR MOUNTED CONTROLS
Parking brake
For information on the parking
brake, refer to Preparing to start
the vehicle in the Starting
chapter.
Interior luggage compartment
release
Your vehicle is equipped with a
mechanical interior luggage
compartment release handle that
provides a means of escape for
children and adults in the event
they become locked inside the
luggage compartment.
Adults are advised to familiarize
themselves with the operation and
location of the release handle.
To open the luggage compartment
door (lid) from the inside, pull the
illuminated “T” shaped handle. The
material the handle is made of will
glow for hours in the darkness of
the luggage compartment following
brief exposure to ambient light.
The “T” shaped handle will be
located either on the luggage
compartment door (lid) or inside
the luggage compartment near the
tail lamps.
13CCfen 17.6.99 10:53 Uhr Seite 66
Page 67 of 248
Controls and features
67 Fuel pump shut-off switch
For information on the fuel pump
shut-off switch, refer to Fuel
pump shut-off switch in the
Roadside emergencies chapter.
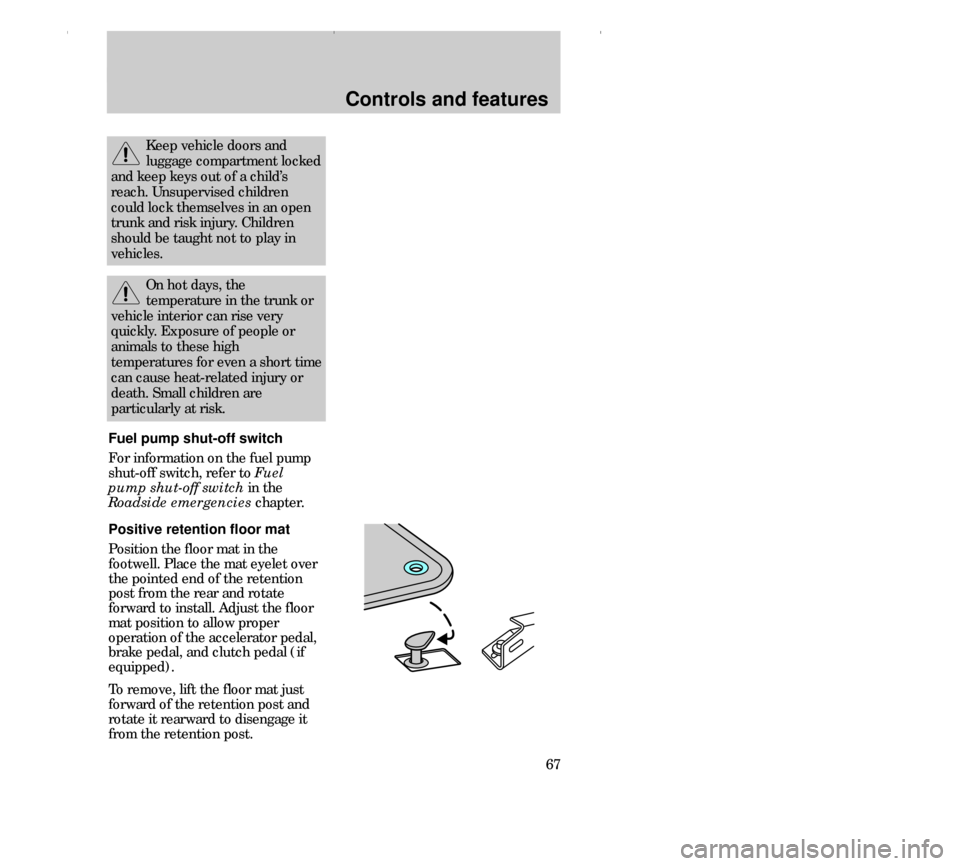
Positive retention floor mat
Position the floor mat in the
footwell. Place the mat eyelet over
the pointed end of the retention
post from the rear and rotate
forward to install. Adjust the floor
mat position to allow proper
operation of the accelerator pedal,
brake pedal, and clutch pedal (if
equipped).
To remove, lift the floor mat just
forward of the retention post and
rotate it rearward to disengage it
from the retention post.
Keep vehicle doors and
luggage compartment locked
and keep keys out of a child’s
reach. Unsupervised children
could lock themselves in an open
trunk and risk injury. Children
should be taught not to play in
vehicles.
On hot days, the
temperature in the trunk or
vehicle interior can rise very
quickly. Exposure of people or
animals to these high
temperatures for even a short time
can cause heat-related injury or
death. Small children are
particularly at risk.
13CCfen 17.6.99 10:53 Uhr Seite 67
Page 68 of 248
Controls and features
68
TRUNKUN
LOCK
PANIC LOCK
REMOTE KEYLESS ENTRY
SYSTEM
(if equipped)
If your vehicle has a remote entry
system, you can lock and unlock
the vehicle doors and open the
luggage compartment without
using a key. The remote also has a
personal alarm feature.
The remote entry feature only
operates with the ignition in the off
position.
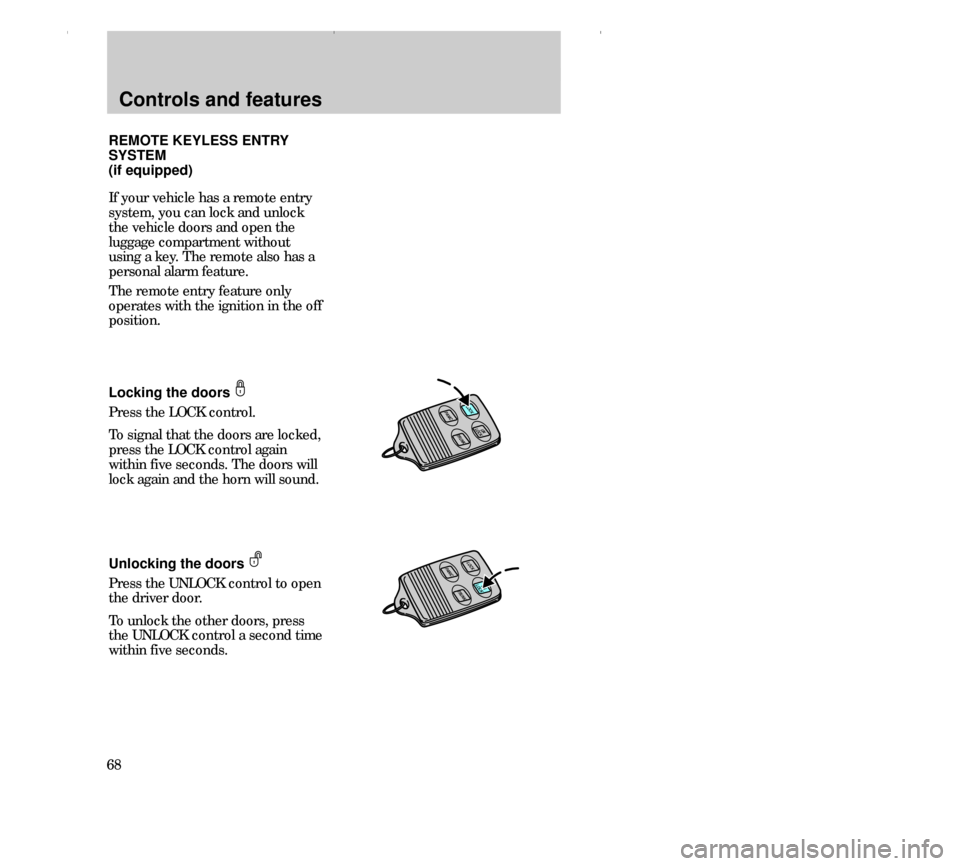
Locking the doors
Press the LOCK control.
To signal that the doors are locked,
press the LOCK control again
within five seconds. The doors will
lock again and the horn will sound.
Unlocking the doors
Press the UNLOCK control to open
the driver door.
To unlock the other doors, press
the UNLOCK control a second time
within five seconds.
TRUNK
LOCKPANICUN
LOCK
13CCfen 17.6.99 10:54 Uhr Seite 68
Page 69 of 248
Controls and features
69 Opening the luggage
compartment
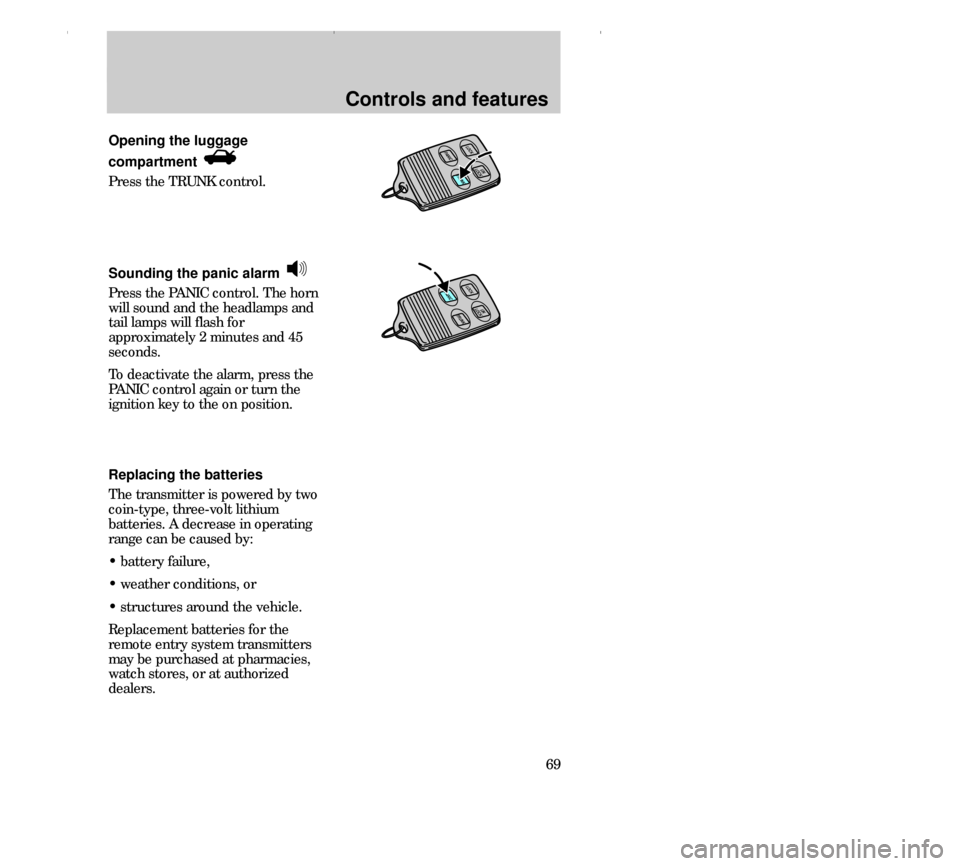
Press the TRUNK control.
Sounding the panic alarm
Press the PANIC control. The horn
will sound and the headlamps and
tail lamps will flash for
approximately 2 minutes and 45
seconds.
To deactivate the alarm, press the
PANIC control again or turn the
ignition key to the on position.
Replacing the batteries
The transmitter is powered by two
coin-type, three-volt lithium
batteries. A decrease in operating
range can be caused by:
• battery failure,
• weather conditions, or
• structures around the vehicle.
Replacement batteries for the
remote entry system transmitters
may be purchased at pharmacies,
watch stores, or at authorized
dealers.
UN
LOCK
LOCKPANIC
TRUNK
TRUNKUN
LOCK
LOCKPANIC
13CCfen 17.6.99 10:54 Uhr Seite 69
Page 70 of 248
Controls and features
70Replacing lost transmitters
Take your transmitters to the
dealer for reprogramming if:
• a transmitter is lost, or
• you want to purchase additional
transmitters.
This device complies with part 15
of the FCC rules. Operation is
subject to the two following
conditions: (1) The device may not
cause harmful interference, and
(2) This device must accept any
interference received, including
interference that may cause
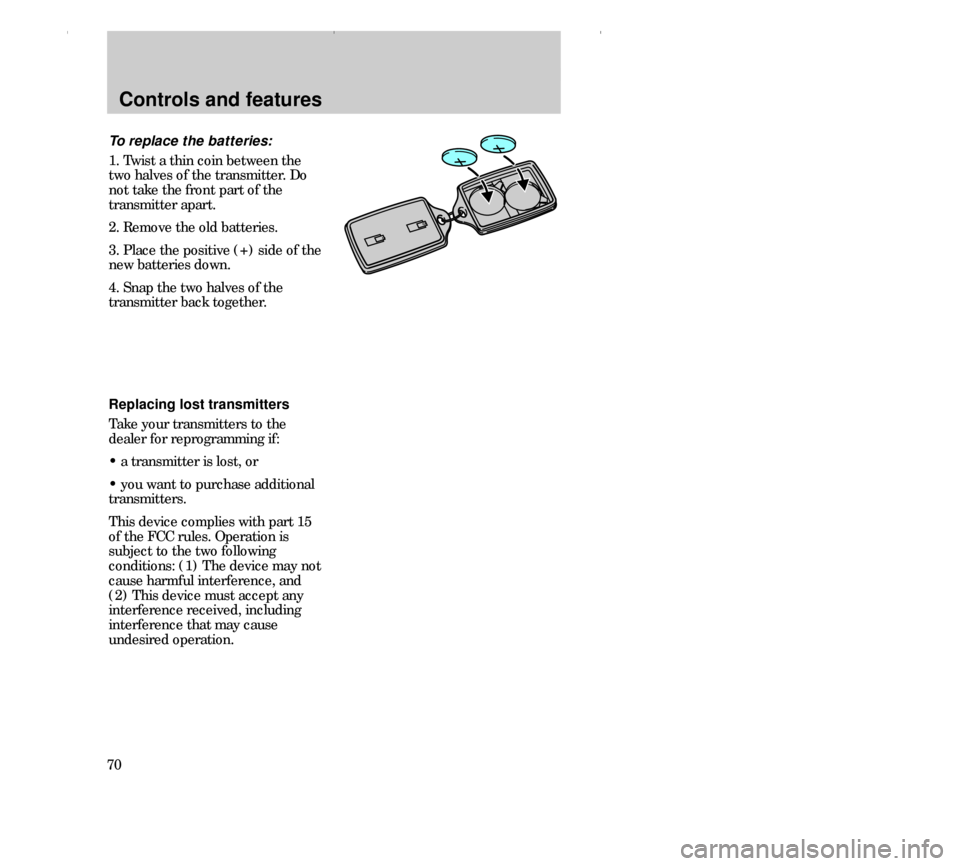
undesired operation. To replace the batteries:
1. Twist a thin coin between the
two halves of the transmitter. Do
not take the front part of the
transmitter apart.
2. Remove the old batteries.
3. Place the positive (+) side of the
new batteries down.
4. Snap the two halves of the
transmitter back together.
13CCfen 17.6.99 10:54 Uhr Seite 70