hood open FORD EXPEDITION 2001 1.G Owners Manual
[x] Cancel search | Manufacturer: FORD, Model Year: 2001, Model line: EXPEDITION, Model: FORD EXPEDITION 2001 1.GPages: 280, PDF Size: 1.79 MB
Page 189 of 280
Spare tire information
Your vehicle is equipped with a spare tire that may be used as a spare or
a regular tire. The spare is identical to the other tires on your vehicle,
although the wheel trim may not match.
Location of the spare tire and tools
The spare tire and tools for your vehicle are stowed in the following
locations:
Item Location
Spare tire Under the vehicle, just forward of
the rear bumper
Jack, wheel nut wrench,
instructionsBehind the access panel located
on the right rear quarter panel
interior trim
Jack handle On top of the radiator support at
the front of the engine
compartment
Removing the jack handle
1. Open the hood.
2. Unsnap the end of the handle that is retained by the clip on the top of
the windshield washer bottle.
3. Unsnap the shaft of the handle from the two retaining clips attached
to the top of the radiator shroud.
Removing the jack and tools
1. Locate the access panel on the right rear quarter panel interior trim.
Lift the two panel retaining clips and remove the panel.
2. Unsnap the wheel lug nut wrench and instructions from their retaining
bracket.
3. Remove the jack by turning the thumbwheel counterclockwise to
relieve tension against the stowage bracket.
4. If equipped with a two piece lug wrench, assemble the lug wrench as
shown in the illustration.
Roadside emergencies
189
Page 202 of 280
Do not start your engine with the air cleaner removed and do
not remove it while the engine is running.
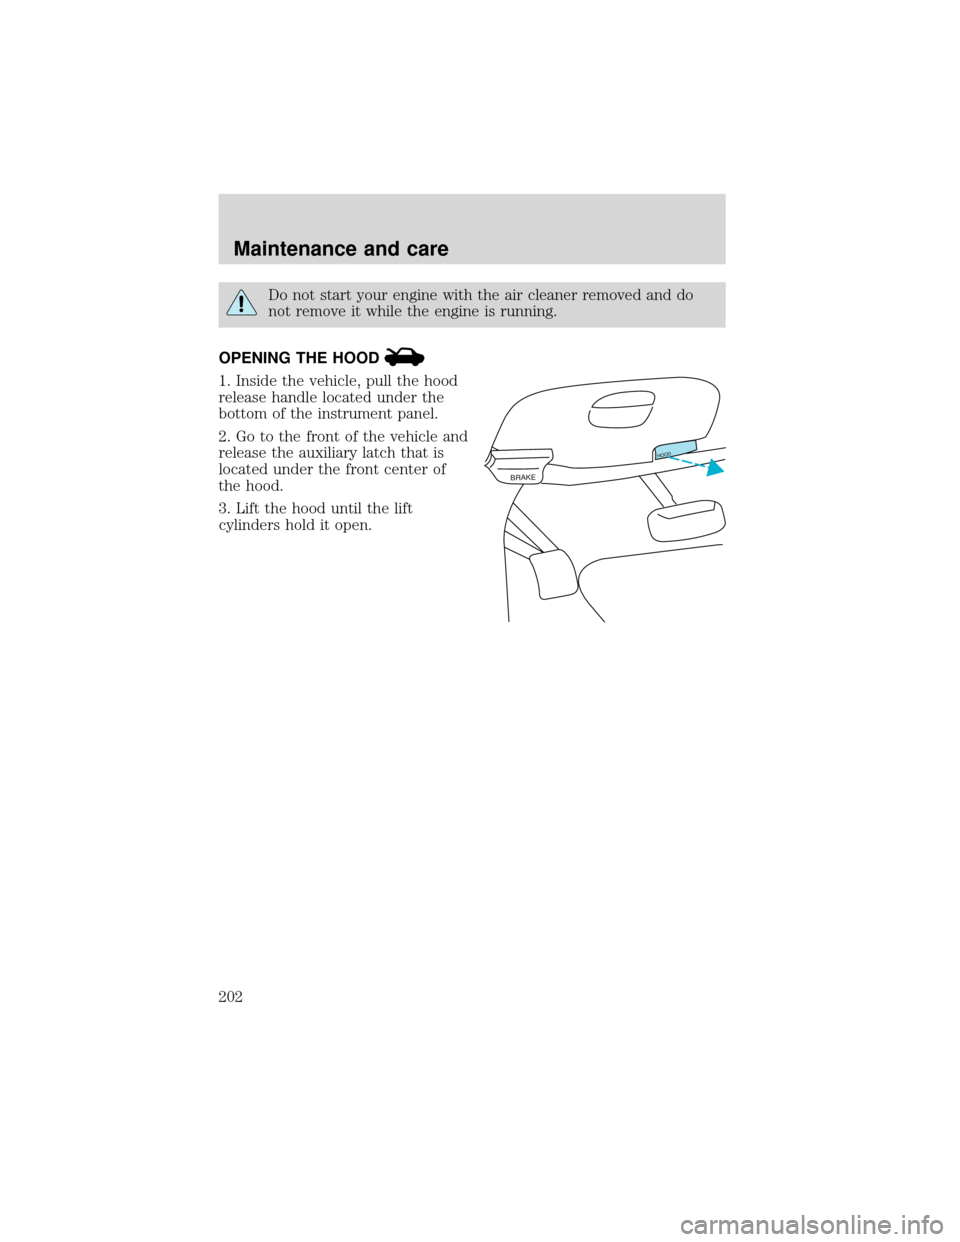
OPENING THE HOOD
1. Inside the vehicle, pull the hood
release handle located under the
bottom of the instrument panel.
2. Go to the front of the vehicle and
release the auxiliary latch that is
located under the front center of
the hood.
3. Lift the hood until the lift
cylinders hold it open.
BRAKE
HOOD
Maintenance and care
202
Page 204 of 280
2. Turn the engine off and wait a few minutes for the oil to drain into the
oil pan.
3. Set the parking brake and ensure the gearshift is securely latched in P
(Park).
4. Open the hood. Protect yourself from engine heat.
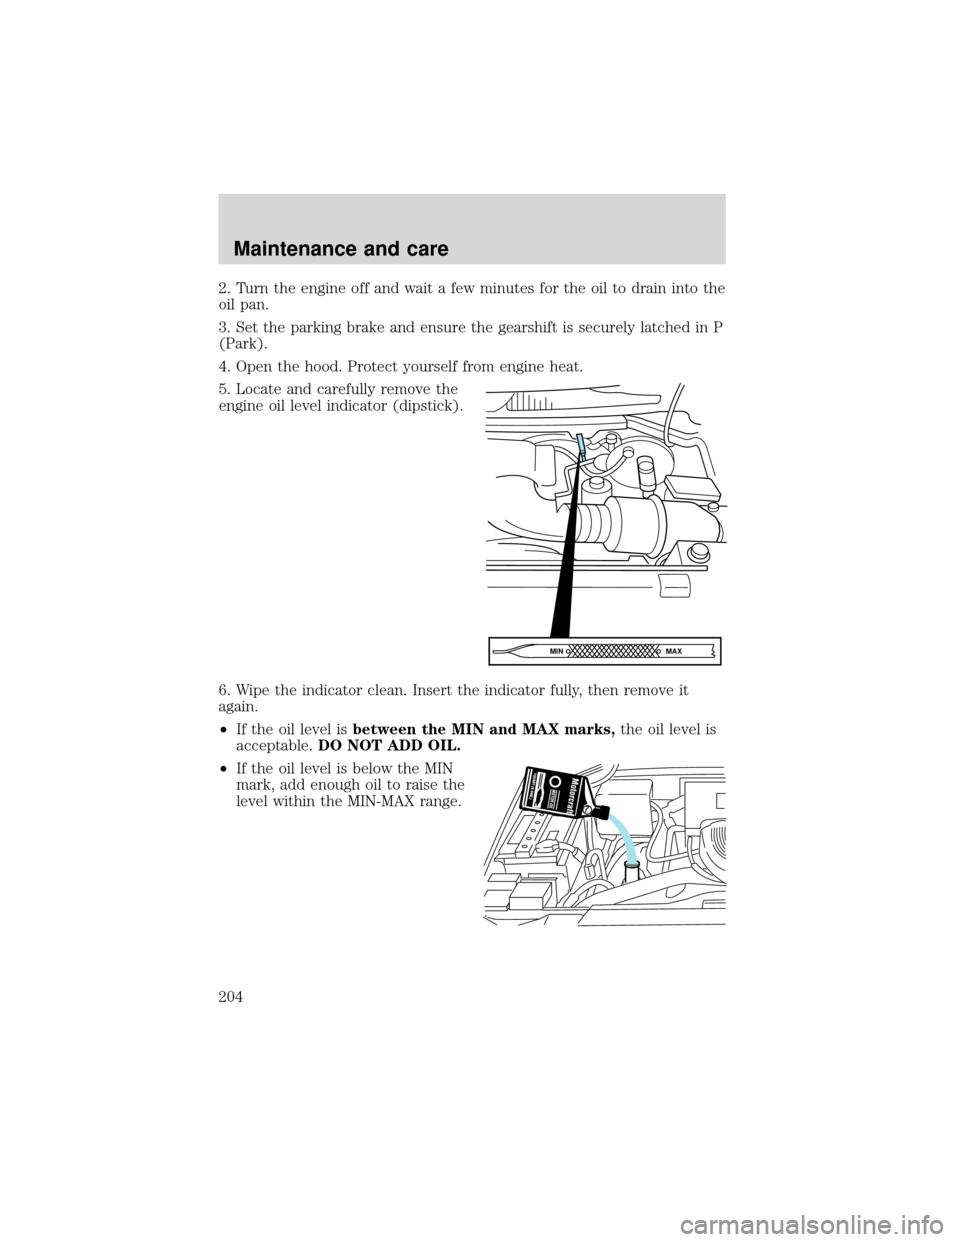
5. Locate and carefully remove the
engine oil level indicator (dipstick).
6. Wipe the indicator clean. Insert the indicator fully, then remove it
again.
•If the oil level isbetween the MIN and MAX marks,the oil level is
acceptable.DO NOT ADD OIL.
•If the oil level is below the MIN
mark, add enough oil to raise the
level within the MIN-MAX range.
MAX MIN
Maintenance and care
204
Page 237 of 280
•Foglamps
•High-mount brakelamp
•Brakelamps
•Parking lamps
•Turn signals
•License plate lamp
•Tail lamps
•Back-up lamps
Do not remove lamp bulbs unless they can be replaced immediately with
new ones. If a bulb is removed for an extended period of time,
contaminants may enter the lamp housings and affect lamp performance.
Replacing headlamp bulbs
1. Make sure that the headlamp control is in the OFF position.
2. Open the hood.
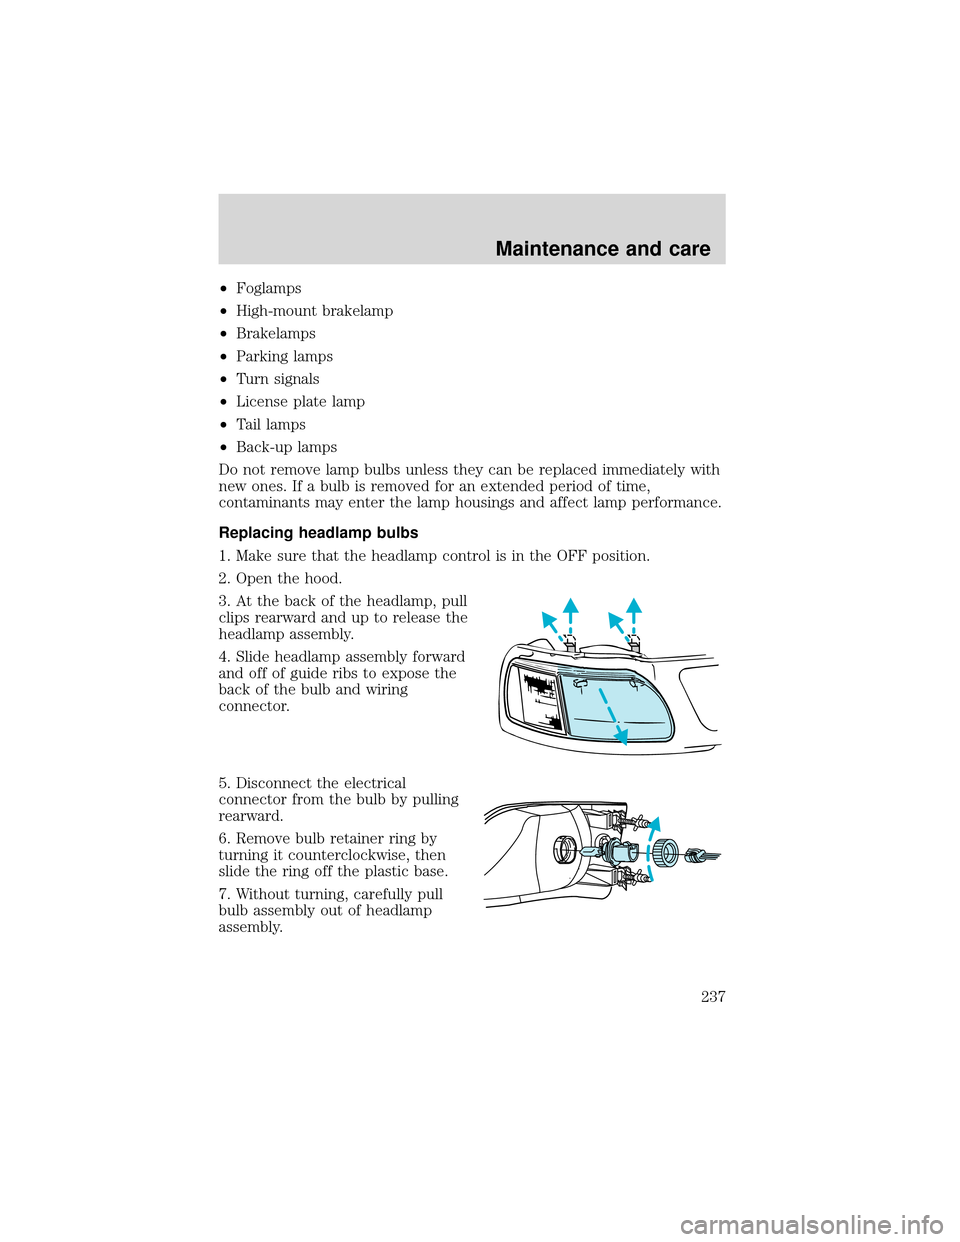
3. At the back of the headlamp, pull
clips rearward and up to release the
headlamp assembly.
4. Slide headlamp assembly forward
and off of guide ribs to expose the
back of the bulb and wiring
connector.
5. Disconnect the electrical
connector from the bulb by pulling
rearward.
6. Remove bulb retainer ring by
turning it counterclockwise, then
slide the ring off the plastic base.
7. Without turning, carefully pull
bulb assembly out of headlamp
assembly.
Maintenance and care
237
Page 238 of 280
Handle a halogen headlamp bulb carefully and keep out of
children’s reach. Grasp the bulb only by its plastic base and do
not touch the glass. The oil from your hand could cause the bulb to
break the next time the headlamps are operated.
8. Insert the glass end of the new bulb into the headlamp assembly.
When the grooves in the plastic base are aligned, push the bulb into the
lamp assembly until the plastic base contacts the rear of the lamp
assembly.
9. Install bulb retaining ring over the plastic base and lock the ring into
the socket by turning it clockwise until you feel a“stop.”
10. Connect the electrical connector into the plastic base until it“snaps.”
11. Straighten alignment pins, making them parallel with the outer edges
of the attachment standoff.
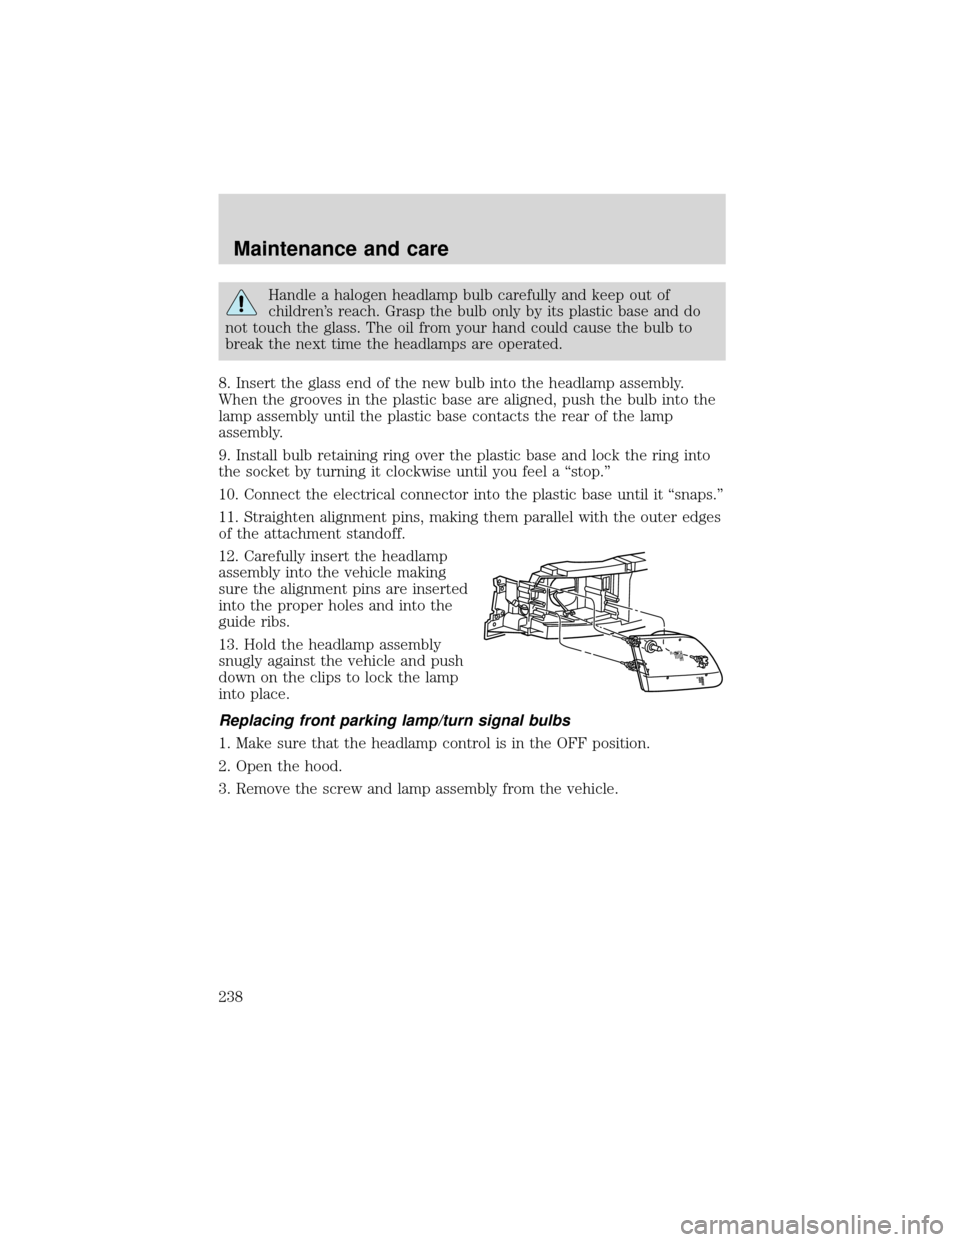
12. Carefully insert the headlamp
assembly into the vehicle making
sure the alignment pins are inserted
into the proper holes and into the
guide ribs.
13. Hold the headlamp assembly
snugly against the vehicle and push
down on the clips to lock the lamp
into place.
Replacing front parking lamp/turn signal bulbs
1. Make sure that the headlamp control is in the OFF position.
2. Open the hood.
3. Remove the screw and lamp assembly from the vehicle.
Maintenance and care
238
Page 274 of 280
Gas mileage (see Fuel
economy) ...................................232
Gauges .........................................16
battery voltage gauge ...............18
engine coolant temperature
gauge .........................................17
engine oil pressure gauge ........19
fuel gauge ..................................16
odometer ...................................17
speedometer .............................17
tachometer ................................18
trip odometer ............................18
GAWR (Gross Axle Weight
Rating) .......................................168
calculating ...............................170
definition .................................168
driving with a heavy load ......168
location ....................................168
GVWR (Gross Vehicle Weight
Rating) .......................................168
calculating .......................168, 170
definition .................................168
driving with a heavy load ......168
location ....................................168
H
Hazard flashers .........................179
Head restraints .................104, 109
Headlamps ...................................21
aiming ......................................242
autolamp system .......................23
bulb specifications ..................241
daytime running lights .............21
flash to pass ..............................21
high beam ...........................13, 21
replacing bulbs .......................237
turning on and off ....................21
warning chime ..........................15Heating ........................................56
heating and air conditioning
system .......................................56
HomeLink universal
transceiver (see Garage door
opener) ............................84, 86–87
Hood ..........................................202
I
Ignition .................................68, 254
Infant seats
(see Safety seats) .....................138
Inspection/maintenance (I/M)
testing ........................................236
Instrument panel
cleaning ...................................246
cluster ................................10, 246
lighting up panel and
interior .......................................22
location of components ............10
J
Jack ............................................188
positioning ...............................188
storage .....................................188
Jump-starting your vehicle ......194
K
Keyless entry system
autolock ...................................101
locking and unlocking doors ..102
programming entry code .......101
Keys .......................................93, 95
key in ignition chime ...............15
positions of the ignition ...........68
Index
274