child lock FORD EXPLORER 1999 2.G Owners Manual
[x] Cancel search | Manufacturer: FORD, Model Year: 1999, Model line: EXPLORER, Model: FORD EXPLORER 1999 2.GPages: 264, PDF Size: 1.83 MB
Page 100 of 264
CHILDPROOF DOOR LOCKS
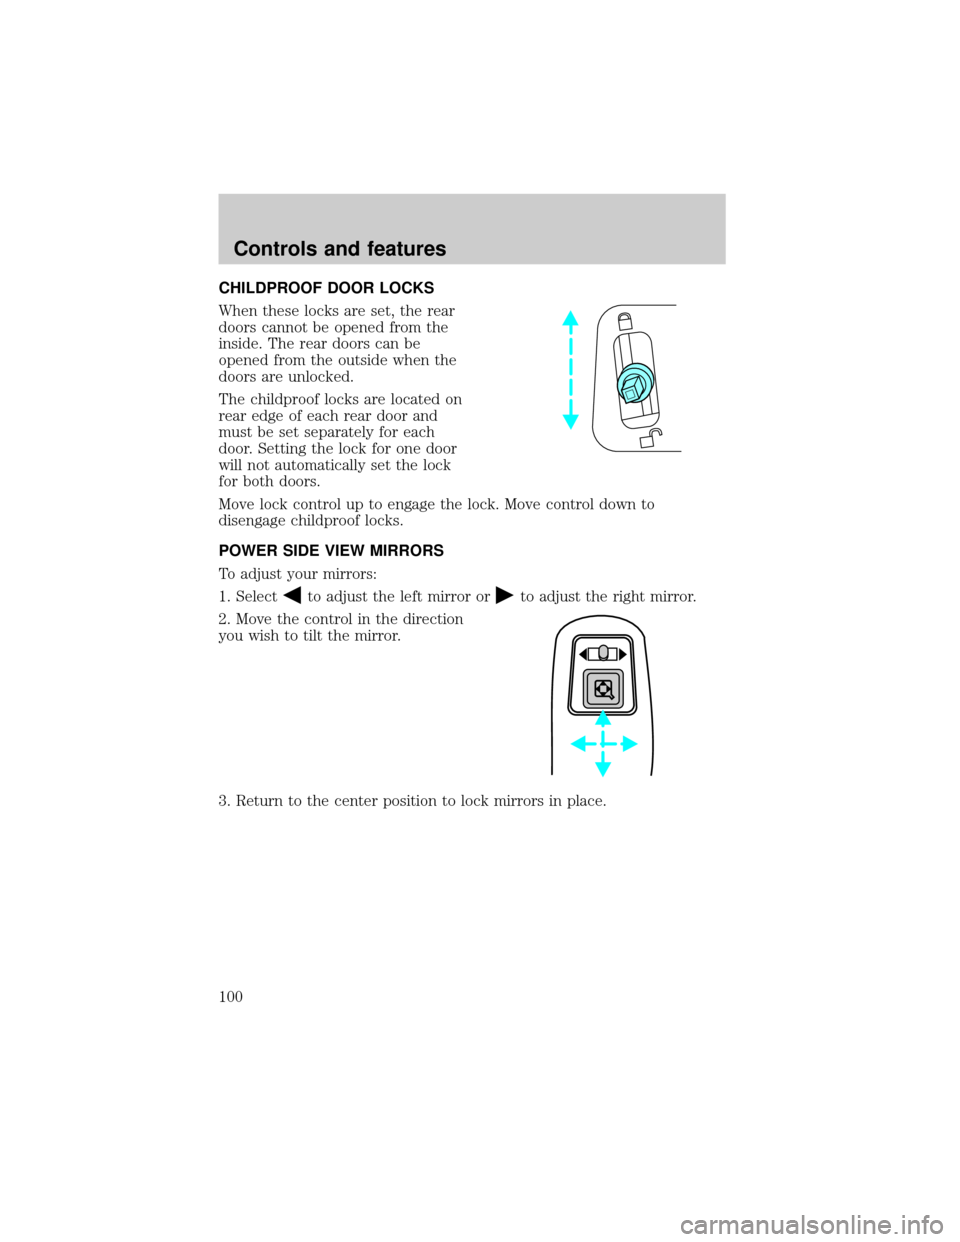
When these locks are set, the rear
doors cannot be opened from the
inside. The rear doors can be
opened from the outside when the
doors are unlocked.
The childproof locks are located on
rear edge of each rear door and
must be set separately for each
door. Setting the lock for one door
will not automatically set the lock
for both doors.
Move lock control up to engage the lock. Move control down to
disengage childproof locks.
POWER SIDE VIEW MIRRORS
To adjust your mirrors:
1. Select
to adjust the left mirror orto adjust the right mirror.
2. Move the control in the direction
you wish to tilt the mirror.
3. Return to the center position to lock mirrors in place.
Controls and features
100
Page 120 of 264
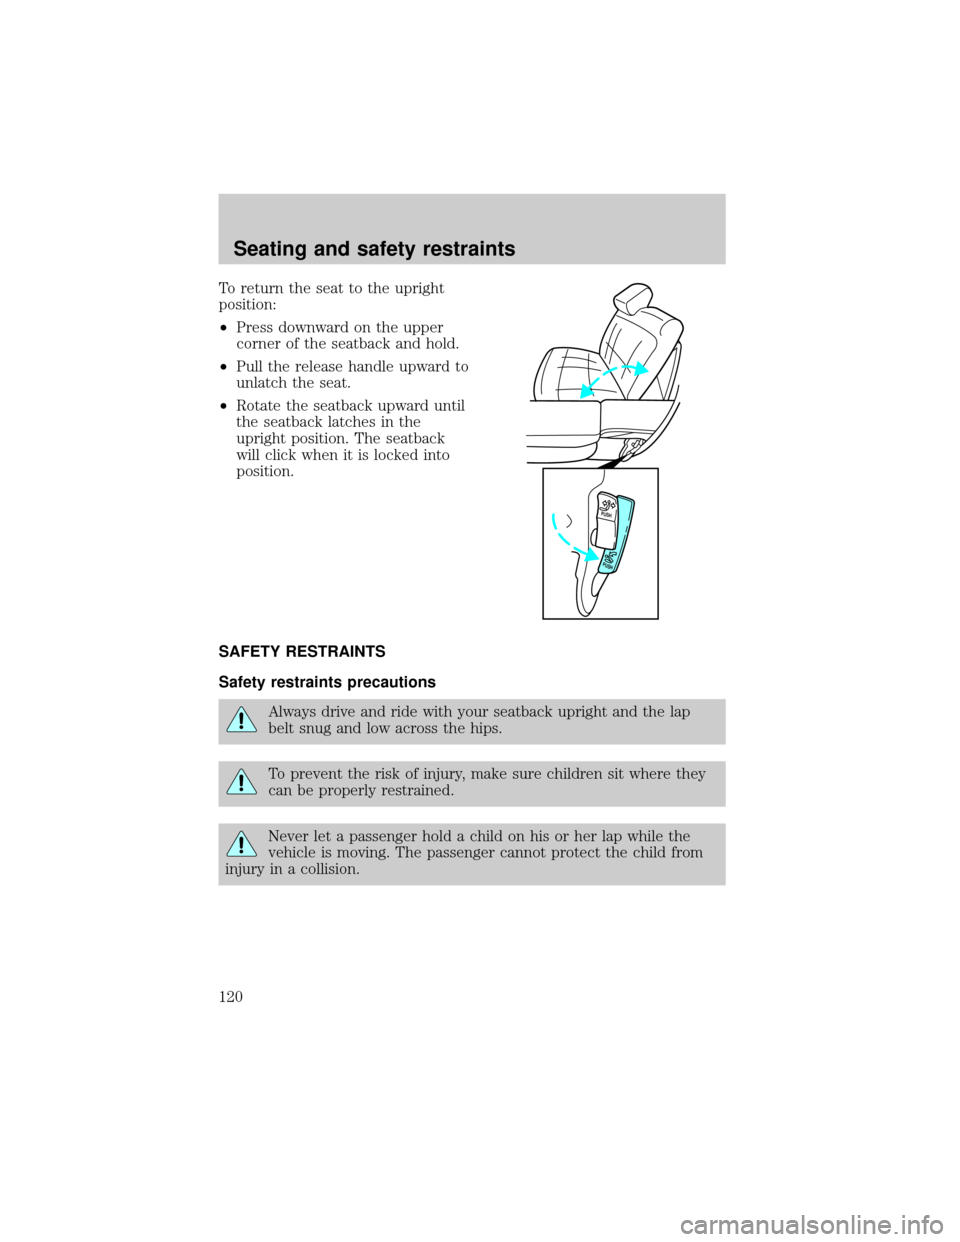
To return the seat to the upright
position:
²Press downward on the upper
corner of the seatback and hold.
²Pull the release handle upward to
unlatch the seat.
²Rotate the seatback upward until
the seatback latches in the
upright position. The seatback
will click when it is locked into
position.
SAFETY RESTRAINTS
Safety restraints precautions
Always drive and ride with your seatback upright and the lap
belt snug and low across the hips.
To prevent the risk of injury, make sure children sit where they
can be properly restrained.
Never let a passenger hold a child on his or her lap while the
vehicle is moving. The passenger cannot protect the child from
injury in a collision.
PUSH
PUSH
Seating and safety restraints
120
Page 122 of 264
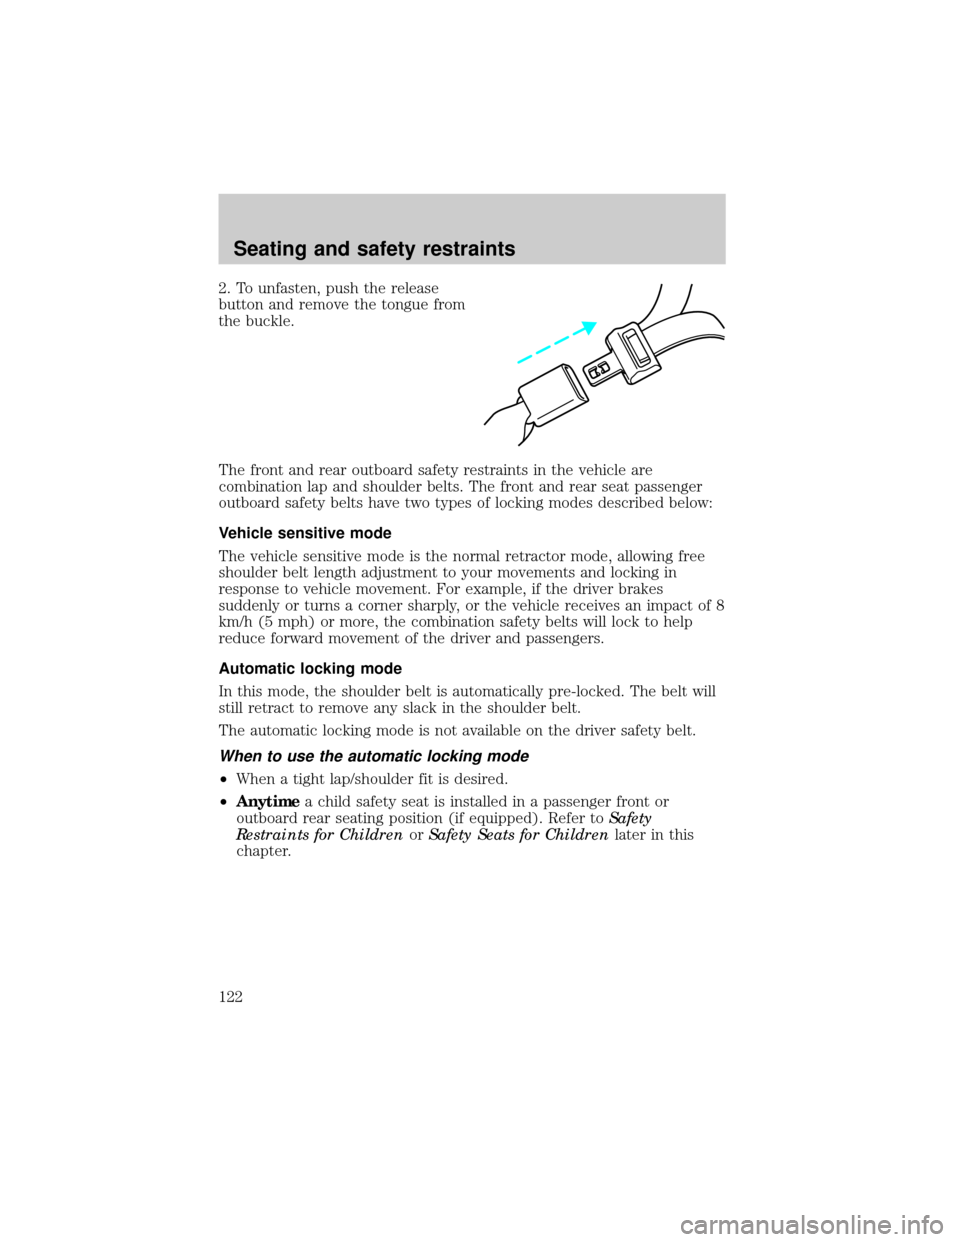
2. To unfasten, push the release
button and remove the tongue from
the buckle.
The front and rear outboard safety restraints in the vehicle are
combination lap and shoulder belts. The front and rear seat passenger
outboard safety belts have two types of locking modes described below:
Vehicle sensitive mode
The vehicle sensitive mode is the normal retractor mode, allowing free
shoulder belt length adjustment to your movements and locking in
response to vehicle movement. For example, if the driver brakes
suddenly or turns a corner sharply, or the vehicle receives an impact of 8
km/h (5 mph) or more, the combination safety belts will lock to help
reduce forward movement of the driver and passengers.
Automatic locking mode
In this mode, the shoulder belt is automatically pre-locked. The belt will
still retract to remove any slack in the shoulder belt.
The automatic locking mode is not available on the driver safety belt.
When to use the automatic locking mode
²When a tight lap/shoulder fit is desired.
²Anytimea child safety seat is installed in a passenger front or
outboard rear seating position (if equipped). Refer toSafety
Restraints for ChildrenorSafety Seats for Childrenlater in this
chapter.
Seating and safety restraints
122
Page 124 of 264
²This seat belt system has a retractor assembly that is designed to pay
out webbing in a controlled manner. This feature is designed to help
reduce the belt force acting on the occupant's chest.
After any vehicle collision, the seat belt system at all outboard
seating positions (except driver, which has no ªautomatic locking
retractorº feature) must be checked by a qualified technician to verify
that the ªautomatic locking retractorº feature for child seats is still
functioning properly, in addition to other checks for proper seat belt
system function.
BELT AND RETRACTOR ASSEMBLY MUST BE REPLACED if
the seat belt assembly ªautomatic locking retractorº feature or
any other seat belt function is not operating properly when checked
according to the procedures in Workshop Manual.
Failure to replace the Belt and Retractor assembly could
increase the risk of injury in collisions.
Front safety belt height adjustment
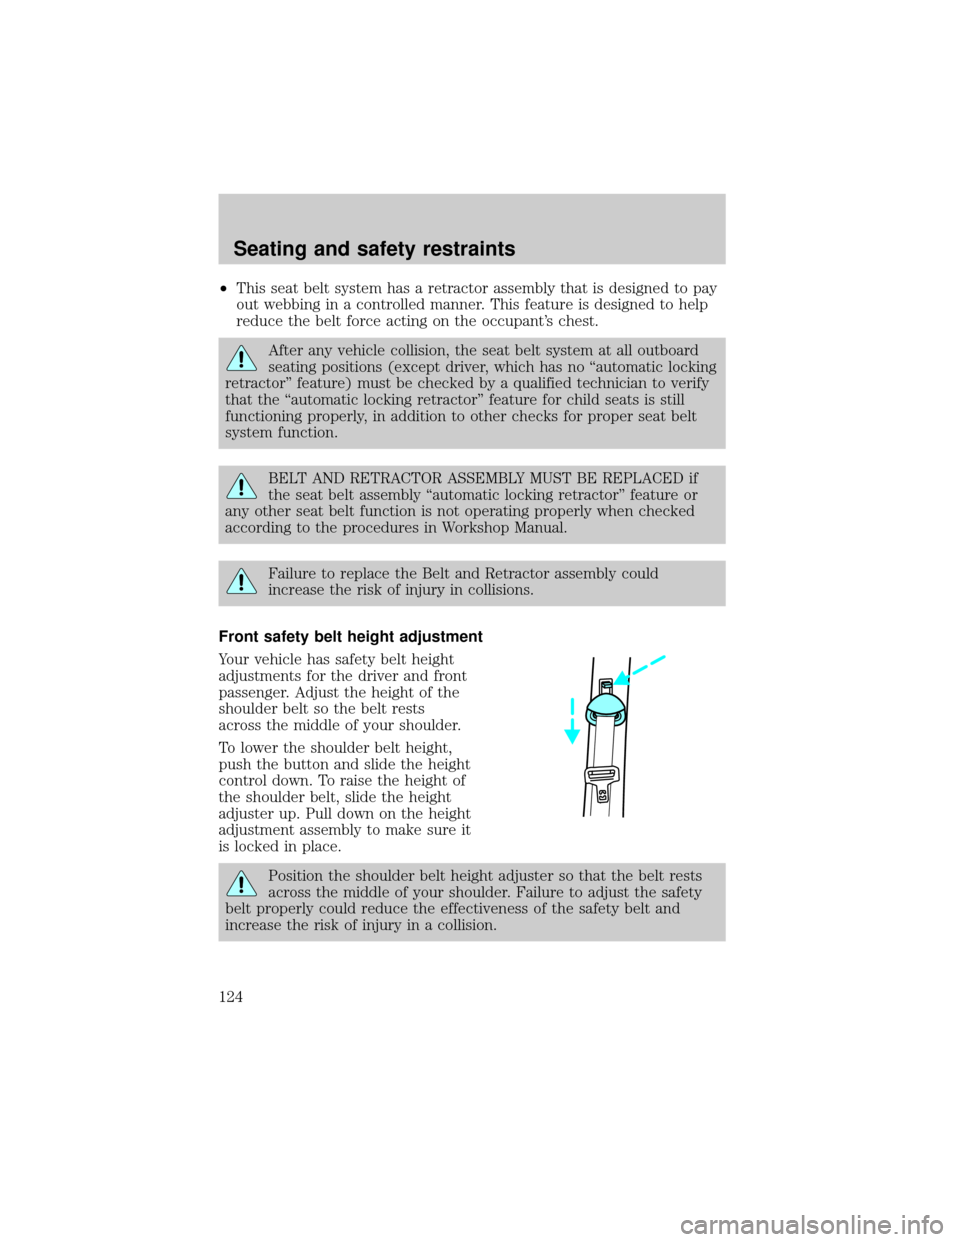
Your vehicle has safety belt height
adjustments for the driver and front
passenger. Adjust the height of the
shoulder belt so the belt rests
across the middle of your shoulder.
To lower the shoulder belt height,
push the button and slide the height
control down. To raise the height of
the shoulder belt, slide the height
adjuster up. Pull down on the height
adjustment assembly to make sure it
is locked in place.
Position the shoulder belt height adjuster so that the belt rests
across the middle of your shoulder. Failure to adjust the safety
belt properly could reduce the effectiveness of the safety belt and
increase the risk of injury in a collision.
Seating and safety restraints
124
Page 135 of 264
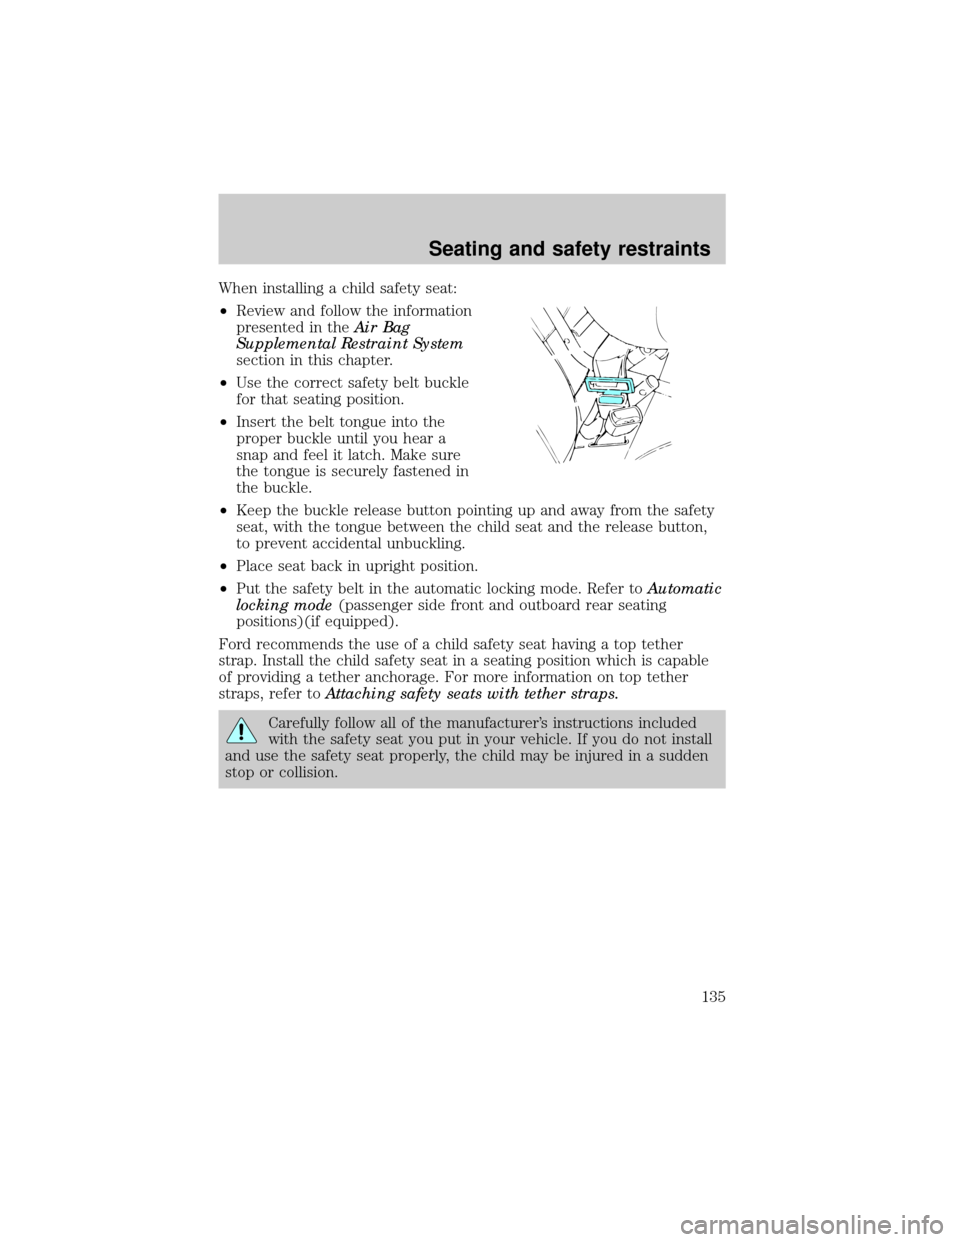
When installing a child safety seat:
²Review and follow the information
presented in theAir Bag
Supplemental Restraint System
section in this chapter.
²Use the correct safety belt buckle
for that seating position.
²Insert the belt tongue into the
proper buckle until you hear a
snap and feel it latch. Make sure
the tongue is securely fastened in
the buckle.
²Keep the buckle release button pointing up and away from the safety
seat, with the tongue between the child seat and the release button,
to prevent accidental unbuckling.
²Place seat back in upright position.
²Put the safety belt in the automatic locking mode. Refer toAutomatic
locking mode(passenger side front and outboard rear seating
positions)(if equipped).
Ford recommends the use of a child safety seat having a top tether
strap. Install the child safety seat in a seating position which is capable
of providing a tether anchorage. For more information on top tether
straps, refer toAttaching safety seats with tether straps.
Carefully follow all of the manufacturer's instructions included
with the safety seat you put in your vehicle. If you do not install
and use the safety seat properly, the child may be injured in a sudden
stop or collision.
Seating and safety restraints
135
Page 137 of 264
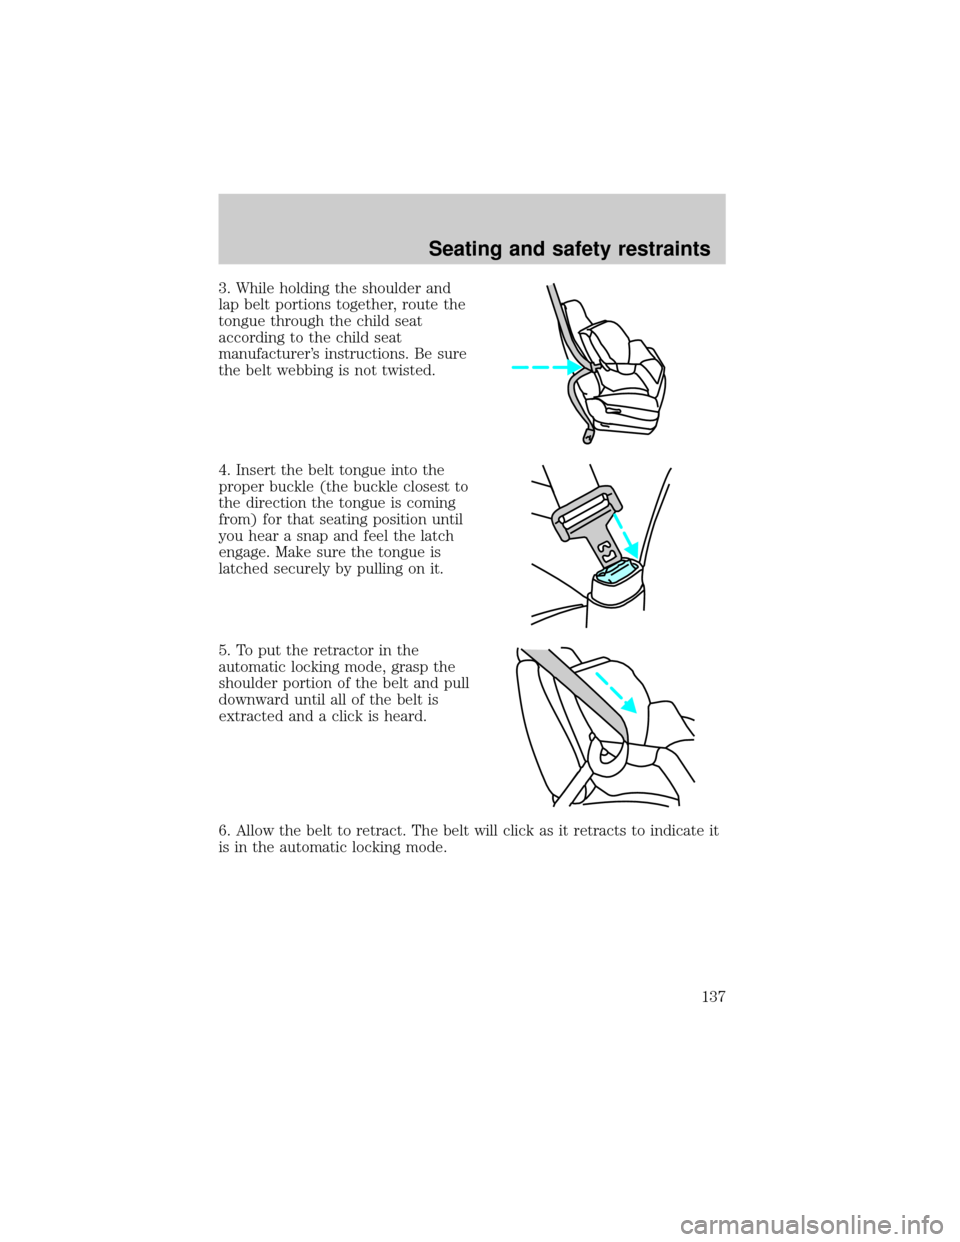
3. While holding the shoulder and
lap belt portions together, route the
tongue through the child seat
according to the child seat
manufacturer's instructions. Be sure
the belt webbing is not twisted.
4. Insert the belt tongue into the
proper buckle (the buckle closest to
the direction the tongue is coming
from) for that seating position until
you hear a snap and feel the latch
engage. Make sure the tongue is
latched securely by pulling on it.
5. To put the retractor in the
automatic locking mode, grasp the
shoulder portion of the belt and pull
downward until all of the belt is
extracted and a click is heard.
6. Allow the belt to retract. The belt will click as it retracts to indicate it
is in the automatic locking mode.
Seating and safety restraints
137
Page 138 of 264
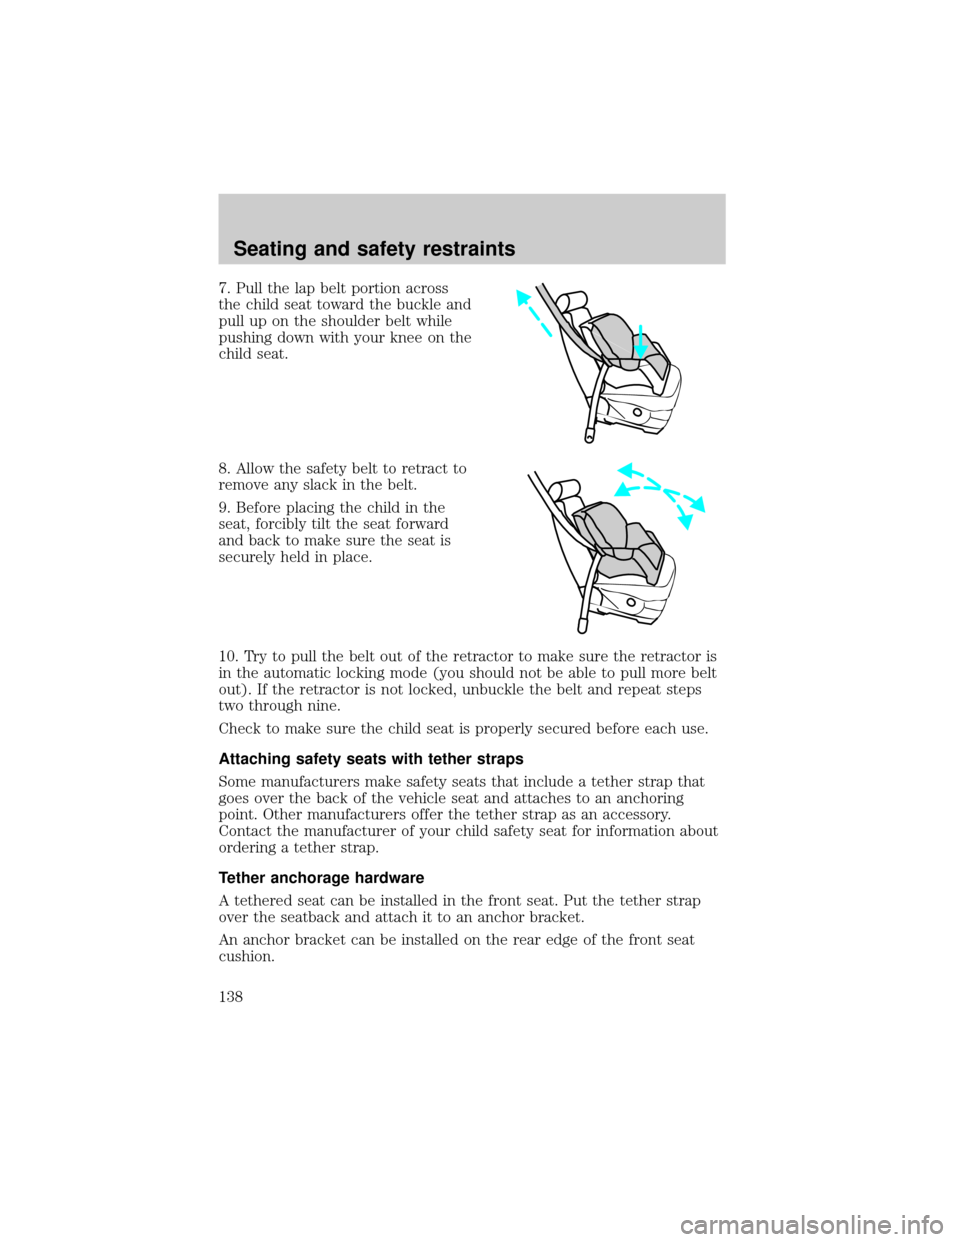
7. Pull the lap belt portion across
the child seat toward the buckle and
pull up on the shoulder belt while
pushing down with your knee on the
child seat.
8. Allow the safety belt to retract to
remove any slack in the belt.
9. Before placing the child in the
seat, forcibly tilt the seat forward
and back to make sure the seat is
securely held in place.
10. Try to pull the belt out of the retractor to make sure the retractor is
in the automatic locking mode (you should not be able to pull more belt
out). If the retractor is not locked, unbuckle the belt and repeat steps
two through nine.
Check to make sure the child seat is properly secured before each use.
Attaching safety seats with tether straps
Some manufacturers make safety seats that include a tether strap that
goes over the back of the vehicle seat and attaches to an anchoring
point. Other manufacturers offer the tether strap as an accessory.
Contact the manufacturer of your child safety seat for information about
ordering a tether strap.
Tether anchorage hardware
A tethered seat can be installed in the front seat. Put the tether strap
over the seatback and attach it to an anchor bracket.
An anchor bracket can be installed on the rear edge of the front seat
cushion.
Seating and safety restraints
138
Page 237 of 264
Replacing headlamp bulbs
Handle a halogen headlamp bulb carefully and keep out of
children's reach. Grasp the bulb only by its plastic base and do
not touch the glass. The oil from your hand could cause the bulb to
break the next time the headlamps are operated.
If the bulb is accidentally touched, it should be cleaned with rubbing
alcohol before being used.
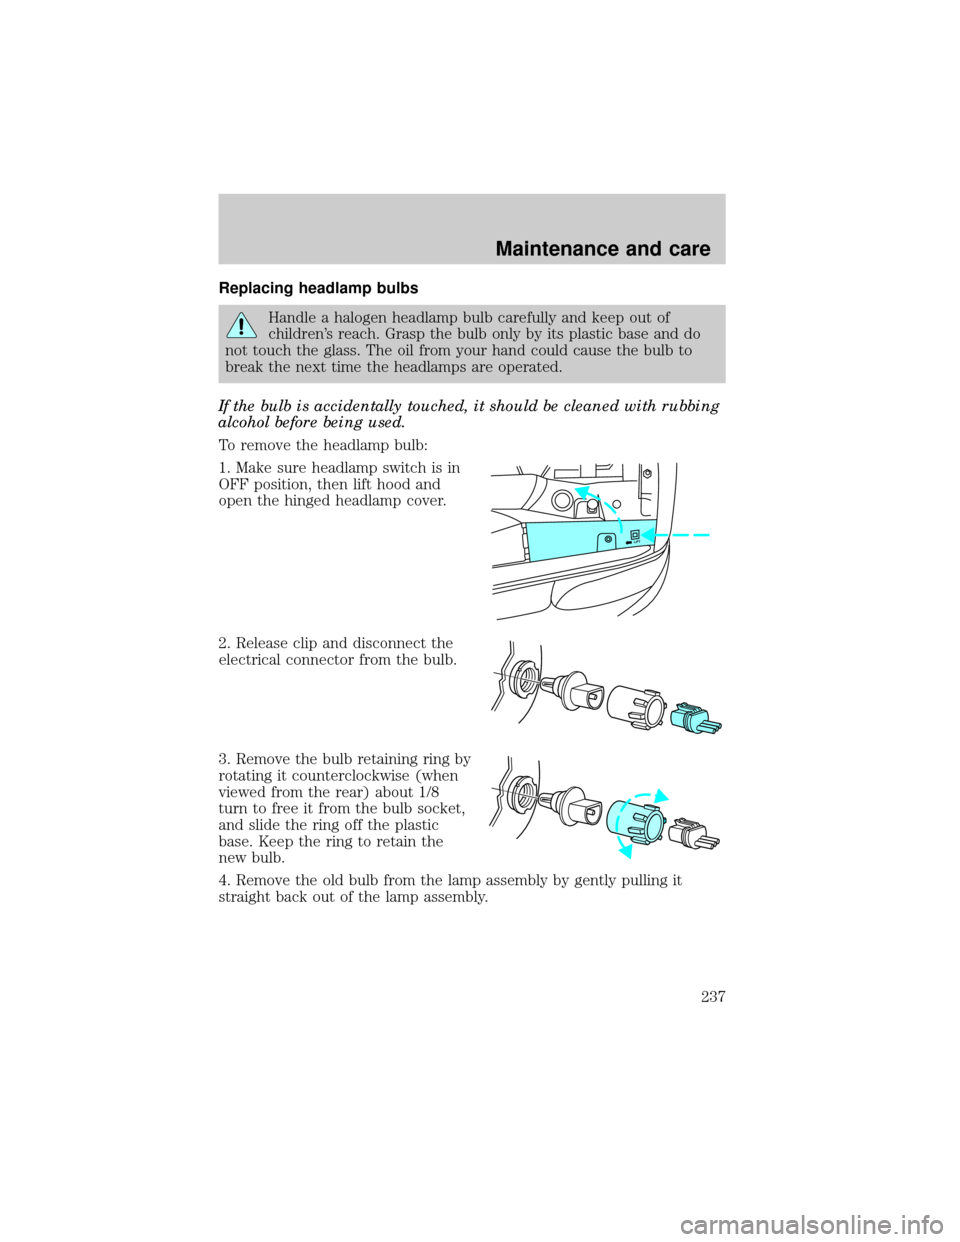
To remove the headlamp bulb:
1. Make sure headlamp switch is in
OFF position, then lift hood and
open the hinged headlamp cover.
2. Release clip and disconnect the
electrical connector from the bulb.
3. Remove the bulb retaining ring by
rotating it counterclockwise (when
viewed from the rear) about 1/8
turn to free it from the bulb socket,
and slide the ring off the plastic
base. Keep the ring to retain the
new bulb.
4. Remove the old bulb from the lamp assembly by gently pulling it
straight back out of the lamp assembly.
LIFT
Maintenance and care
237
Page 257 of 264

Air bag supplemental restraint
system ........................................126
and child safety seats ............128
description .......................127,130
disposal ....................................133
indicator light ..................130,132
passenger air bag ............128,131
Air conditioning
automatic temperature
control system .23,24,25,26,27,28
rear seat controls .....................29
Air suspension
description ..............................148
warning light .............................10
All Wheel Drive (AWD),
driving off road .........................162
Armrests ....................................102
Automatic transmission
driving an automatic
overdrive .....150,151,152,153,154
Axle
refill capacities ........................247
Battery
voltage gauge ............................14
Brakes ........................................145
anti-lock ............................145,146
anti-lock brake system (ABS)
warning light ...........................146
fluid, checking and adding ....208
shift interlock ..........................149
Break-in period ..........................2,3
Cargo area shade ......................104
Cargo cover ...............................104
CD player .....................75,77,78,79
Child safety seats
attaching with tether straps ..138
in rear seat ..............................136
tether anchorage hardware ...138
Cleaning your vehicle ...............241
engine compartment ..............242
exterior .............................242,244
exterior lamps .........................244interior ..............................245,246
plastic parts ............................244
washing ....................................241
waxing .....................................242
wheels ......................................244
windows ..................................246
wiper blades ............................245
woodtone trim ........................246
Clutch
fluid ..........................................209
operation while driving ...154,155
recommended shift speeds ....156
Compass, electronic ....................90
calibration .................................92
set zone adjustment .................91
Console ...............................101,102
overhead ...............................87,88
rear ..........................................102
Controls
power seat ...............................117
Coolant ...............................212,213
checking and adding ..............211
refill capacities ........................213
Defrost
rear window ..............................30
Driveline universal joint and
slip yoke ....................................219
Driving under special
conditions ...........................161,164
sand ..................................160,163
snow and ice ......160,162,163,164
through water ..................160,163
Emission control system ..........234
Engine
check engine/service engine
soon light ....................................6
coolant .....................................210
idle speed control ...................219
service points ............203,204,205
starting after a collision .........178
Engine block heater .................143
Index
257
Page 259 of 264

speed control ............................84
turn signal indicator ...................8
Locks
childproof ................................100
Lumbar support, seats ......116,118
Manual transmission
reverse .....................................156
Message center ...........................15
economy button ........................16
english/metric button ..........15,16
reset button ..............................16
system check button ...........17,18
Mirrors
automatic dimming rearview
mirror ........................................98
cleaning ...................................246
heated ......................................101
side view mirrors (power) .....100
Moon roof ....................................89
Motorcraft parts ........................231
Octane rating ............................229
Odometer .....................................13
Panic alarm feature, remote
entry system ..............................106
Parking brake ............................146
Power distribution box
(see Fuses) ...............................184
Power door locks ........................99
Power steering ..........................147
fluid, checking and adding ....213
Radio ...33,34,35,36,37,38,40,41,42,
43,44,46,47,48,49,50,51,52,
53,54,56,57,58,59,60,61,62,
63,64,65,66,67,68
Relays ........................................179
Remote entry system .105,113,114
illuminated entry ....................109
locking/unlocking doors .........106
replacement/additional
transmitters .............................109
replacing the batteries ...........108
Reverse sensing system .............31Roof rack ...................................177
Safety belts
(see Safety restraints) ...............11
Safety restraints
cleaning the safety belts .126,246
extension assembly ................125
for children .............................133
warning light and chime ...11,125
Seat belts (see Safety
restraints) ......120,121,122,123,124
Seats ..........................................116
child safety seats ....................134
cleaning ............................245,246
memory seat ....................107,118
Servicing your vehicle .......200,201
Snowplowing .................................3
Spark plugs, specifications .......247
Special notice ................................3
ambulance conversions ..............3
utility-type vehicles ....................3
Specification chart, lubricants .250
Speed control ..............................80
Speedometer ...............................12
Starting your vehicle .........140,142
jump starting ............192,193,195
Steering wheel ............................86
tilting .........................................85
Tachometer .................................13
Tires .............................222,223,224
changing ...........................187,188
checking the pressure ............224
replacing ..................................225
rotating ....................................224
snow tires and chains ............226
tire grades ...............................223
treadwear ................................223
Towing ...........168,173,174,175,176
recreational towing .................176
wrecker ....................................198
Traction-lok rear axle ...............165
Transfer case
fluid checking .........................218
Index
259