FORD F450 SUPER DUTY 2016 Owners Manual
Manufacturer: FORD, Model Year: 2016, Model line: F450 SUPER DUTY, Model: FORD F450 SUPER DUTY 2016Pages: 507, PDF Size: 8.13 MB
Page 181 of 507
Refer to the Information Displays foradditional Hill Descent Control messages.See Information Messages (page 100).
178
Super Duty (TFA) Canada/United States of America, enUSA, First Printing
Terrain Response (If Equipped)
Page 182 of 507
PARKING AID (If Equipped)
WARNINGS
The system does not relieve you ofyour responsibility to drive with duecare and attention.
If your vehicles has a non-Fordapproved trailer tow module thesystem may not correctly detectobjects.
The sensors may not detect objectsin heavy rain or other conditions thatcause disruptive reflections.
The sensors may not detect objectswith surfaces that absorb ultrasonicwaves.
The system does not detect objectsthat are moving away from yourvehicle. They will only be detectedshortly after they start to move towardyour vehicle.
Take particular care when reversingwith a tow ball arm or a rear fittedaccessory. For example, a bicyclecarrier. The rear parking aid will onlyindicate the approximate distance fromthe rear bumper to an object.
Note:If you use a high pressure spray towash your vehicle, only spray the sensorsbriefly from a distance not less than 8 in(20 cm).
Note:If your vehicle has a tow ball arm, thesystem is turned off automatically whentrailer lamps (or lighting boards) areconnected to the 13-pin socket through aFord approved trailer tow module.
Note:Keep the sensors free from dirt, iceor snow. Do not clean with sharp objects.
Note:The system may emit false alerts ifit detects a signal using the same frequencyas the sensors or if your vehicle is fullyloaded.
Note:The outer sensors may detect theside walls of a garage. If the distancebetween the outer sensors and the side wallremains constant for three seconds, thealert will turn off. As you continue the innersensors will detect objects directly behindyour vehicle.
Rear Parking Aid
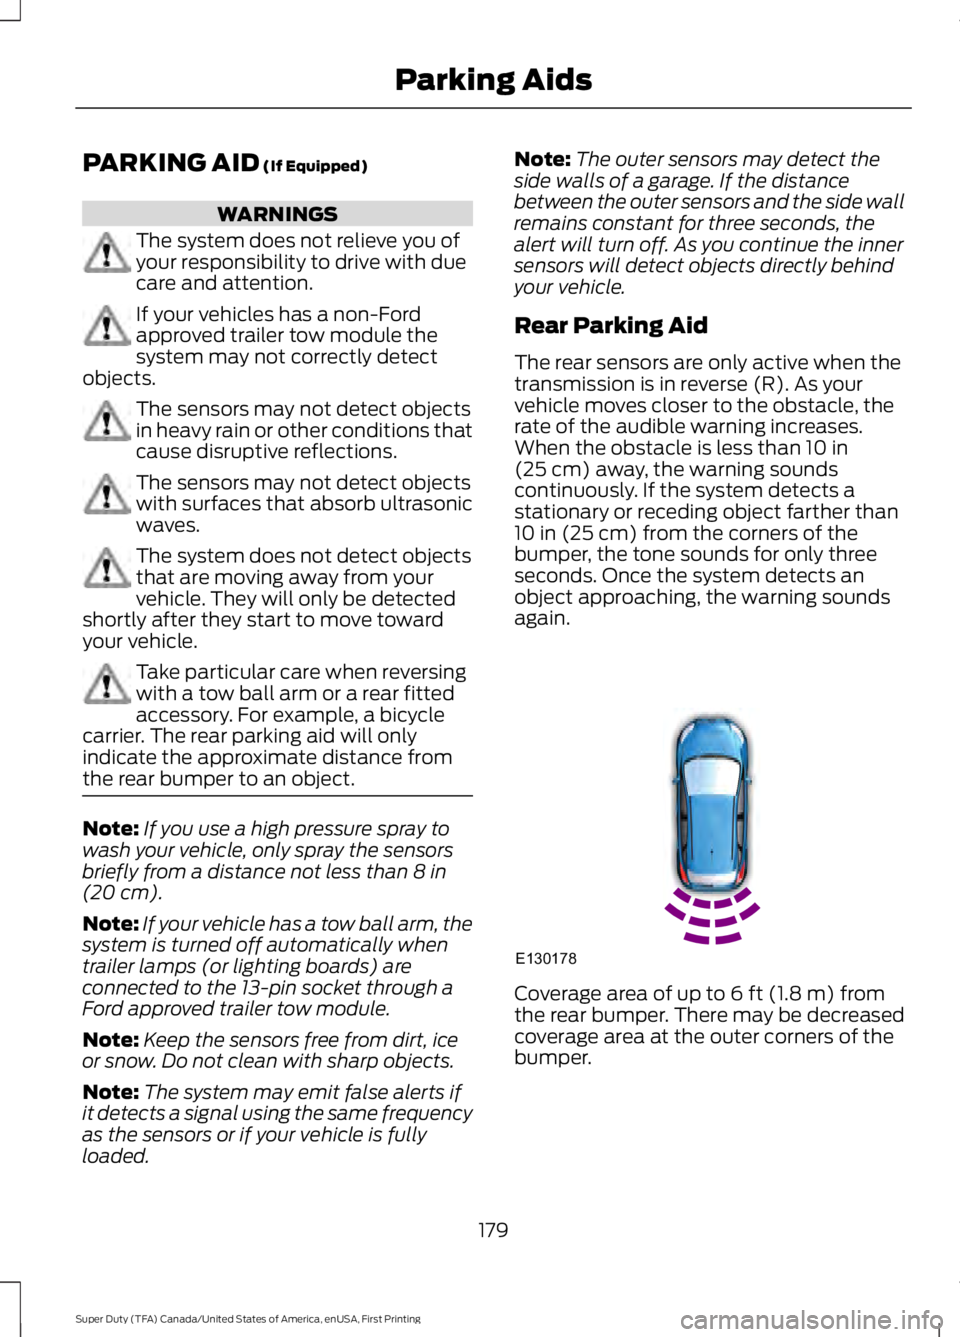
The rear sensors are only active when thetransmission is in reverse (R). As yourvehicle moves closer to the obstacle, therate of the audible warning increases.When the obstacle is less than 10 in(25 cm) away, the warning soundscontinuously. If the system detects astationary or receding object farther than10 in (25 cm) from the corners of thebumper, the tone sounds for only threeseconds. Once the system detects anobject approaching, the warning soundsagain.
Coverage area of up to 6 ft (1.8 m) fromthe rear bumper. There may be decreasedcoverage area at the outer corners of thebumper.
179
Super Duty (TFA) Canada/United States of America, enUSA, First Printing
Parking AidsE130178
Page 183 of 507
The system detects certain objects whilethe transmission is in reverse (R):
•Your vehicle is moving toward astationary object at a speed of 3 mph(5 km/h) or less.
•Your vehicle is not moving, but amoving object is approaching the rearof your vehicle at a speed of 3 mph(5 km/h) or less.
•Your vehicle is moving at a speed ofless than 3 mph (5 km/h) and a movingobject is approaching the rear of yourvehicle at a speed of less than 3 mph(5 km/h).
REAR VIEW CAMERA (If Equipped)
WARNINGS
The rear view camera system is areverse aid supplement device thatstill requires the driver to use it inconjunction with the interior and exteriormirrors for maximum coverage.
Objects that are close to eithercorner of the bumper or under thebumper, might not be seen on thescreen due to the limited coverage of thecamera system.
Back up as slow as possible sincehigher speeds might limit yourreaction time to stop the vehicle.
Use caution when using the rearvideo camera and the tailgate is ajar.If the tailgate is ajar, the camera willbe out of position and the video image maybe incorrect. All guidelines will be removedwhen the tailgate is ajar.
Use caution when turning camerafeatures on or off while in reverse(R). Make sure your vehicle is notmoving.
WARNINGS
When manual zoom is enabled(Level 1, Level 2 or Level 3), the fullarea behind your vehicle will not beshown. Be aware of your surroundingswhen using the manual zoom feature.
The rear view camera system provides avideo image of the area behind yourvehicle.
During operation, lines appear in thedisplay which represent your vehicle’s pathand proximity to objects behind yourvehicle.
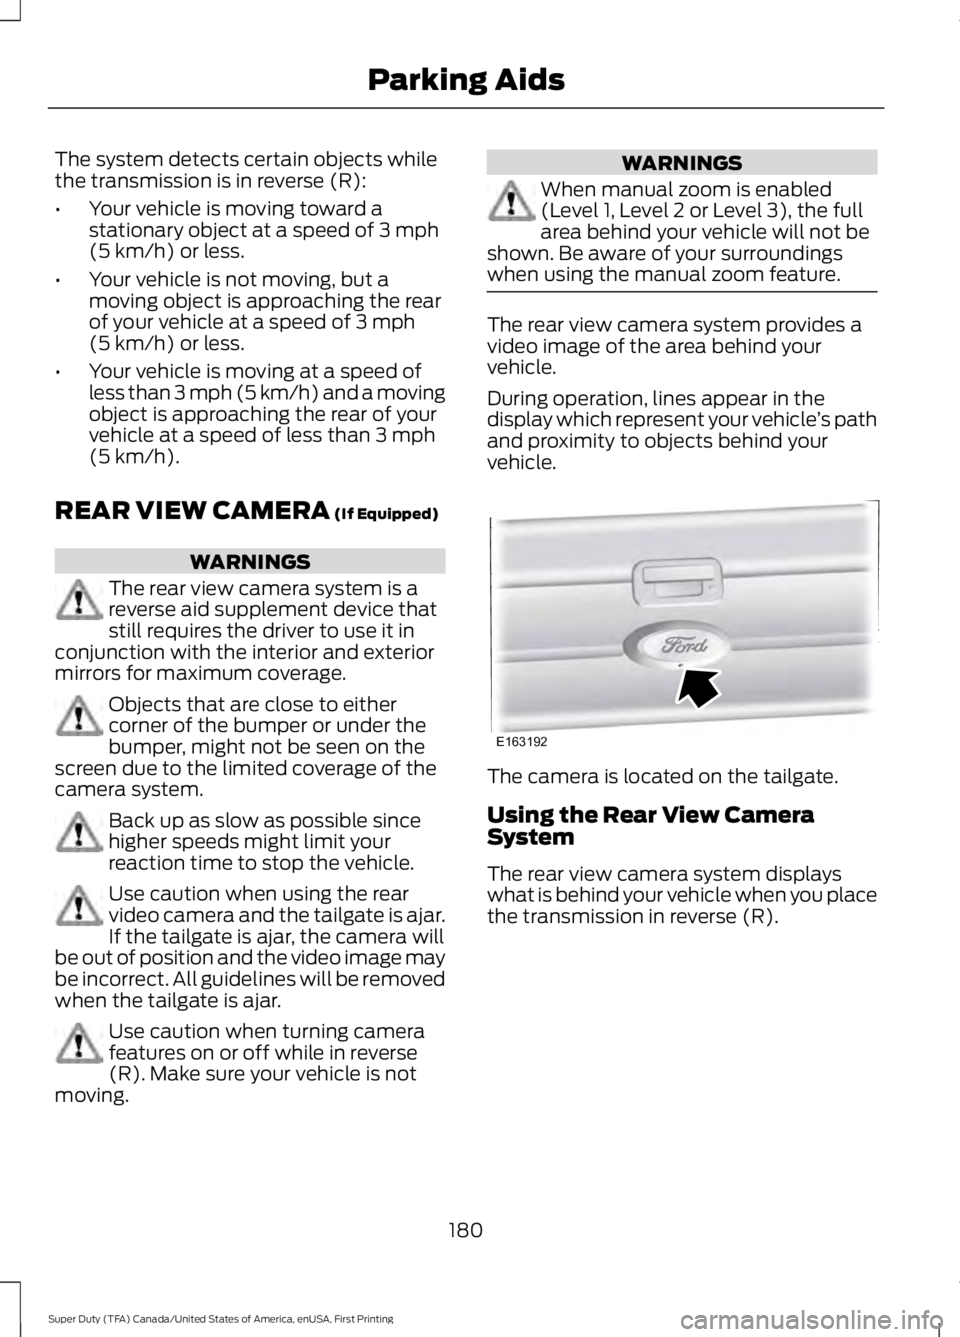
The camera is located on the tailgate.
Using the Rear View CameraSystem
The rear view camera system displayswhat is behind your vehicle when you placethe transmission in reverse (R).
180
Super Duty (TFA) Canada/United States of America, enUSA, First Printing
Parking AidsE163192
Page 184 of 507
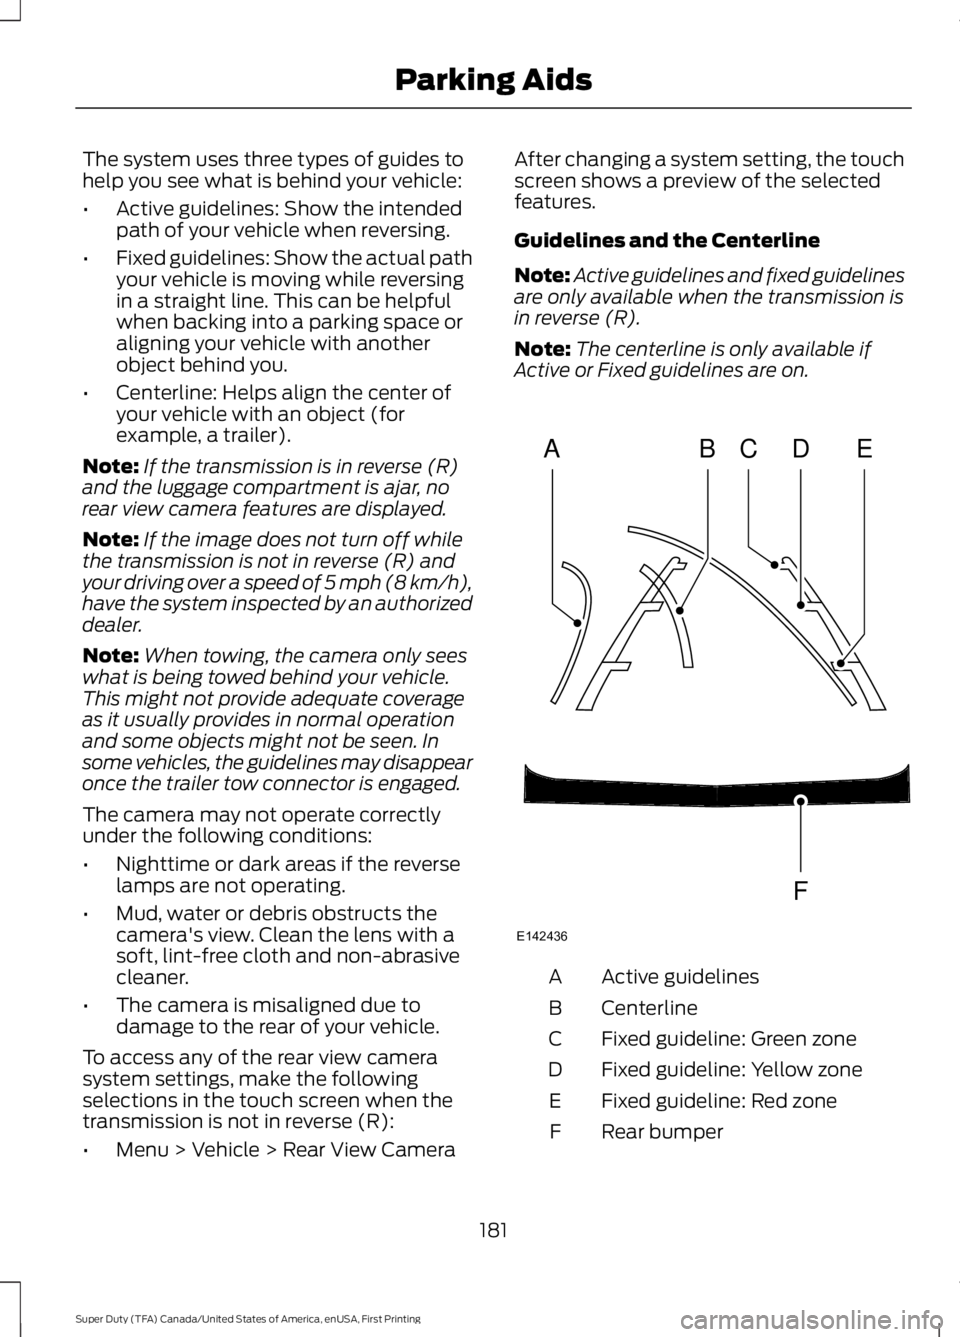
The system uses three types of guides tohelp you see what is behind your vehicle:
•Active guidelines: Show the intendedpath of your vehicle when reversing.
•Fixed guidelines: Show the actual pathyour vehicle is moving while reversingin a straight line. This can be helpfulwhen backing into a parking space oraligning your vehicle with anotherobject behind you.
•Centerline: Helps align the center ofyour vehicle with an object (forexample, a trailer).
Note:If the transmission is in reverse (R)and the luggage compartment is ajar, norear view camera features are displayed.
Note:If the image does not turn off whilethe transmission is not in reverse (R) andyour driving over a speed of 5 mph (8 km/h),have the system inspected by an authorizeddealer.
Note:When towing, the camera only seeswhat is being towed behind your vehicle.This might not provide adequate coverageas it usually provides in normal operationand some objects might not be seen. Insome vehicles, the guidelines may disappearonce the trailer tow connector is engaged.
The camera may not operate correctlyunder the following conditions:
•Nighttime or dark areas if the reverselamps are not operating.
•Mud, water or debris obstructs thecamera's view. Clean the lens with asoft, lint-free cloth and non-abrasivecleaner.
•The camera is misaligned due todamage to the rear of your vehicle.
To access any of the rear view camerasystem settings, make the followingselections in the touch screen when thetransmission is not in reverse (R):
•Menu > Vehicle > Rear View Camera
After changing a system setting, the touchscreen shows a preview of the selectedfeatures.
Guidelines and the Centerline
Note:Active guidelines and fixed guidelinesare only available when the transmission isin reverse (R).
Note:The centerline is only available ifActive or Fixed guidelines are on.
Active guidelinesA
CenterlineB
Fixed guideline: Green zoneC
Fixed guideline: Yellow zoneD
Fixed guideline: Red zoneE
Rear bumperF
181
Super Duty (TFA) Canada/United States of America, enUSA, First Printing
Parking AidsABCD
F
E
E142436
Page 185 of 507
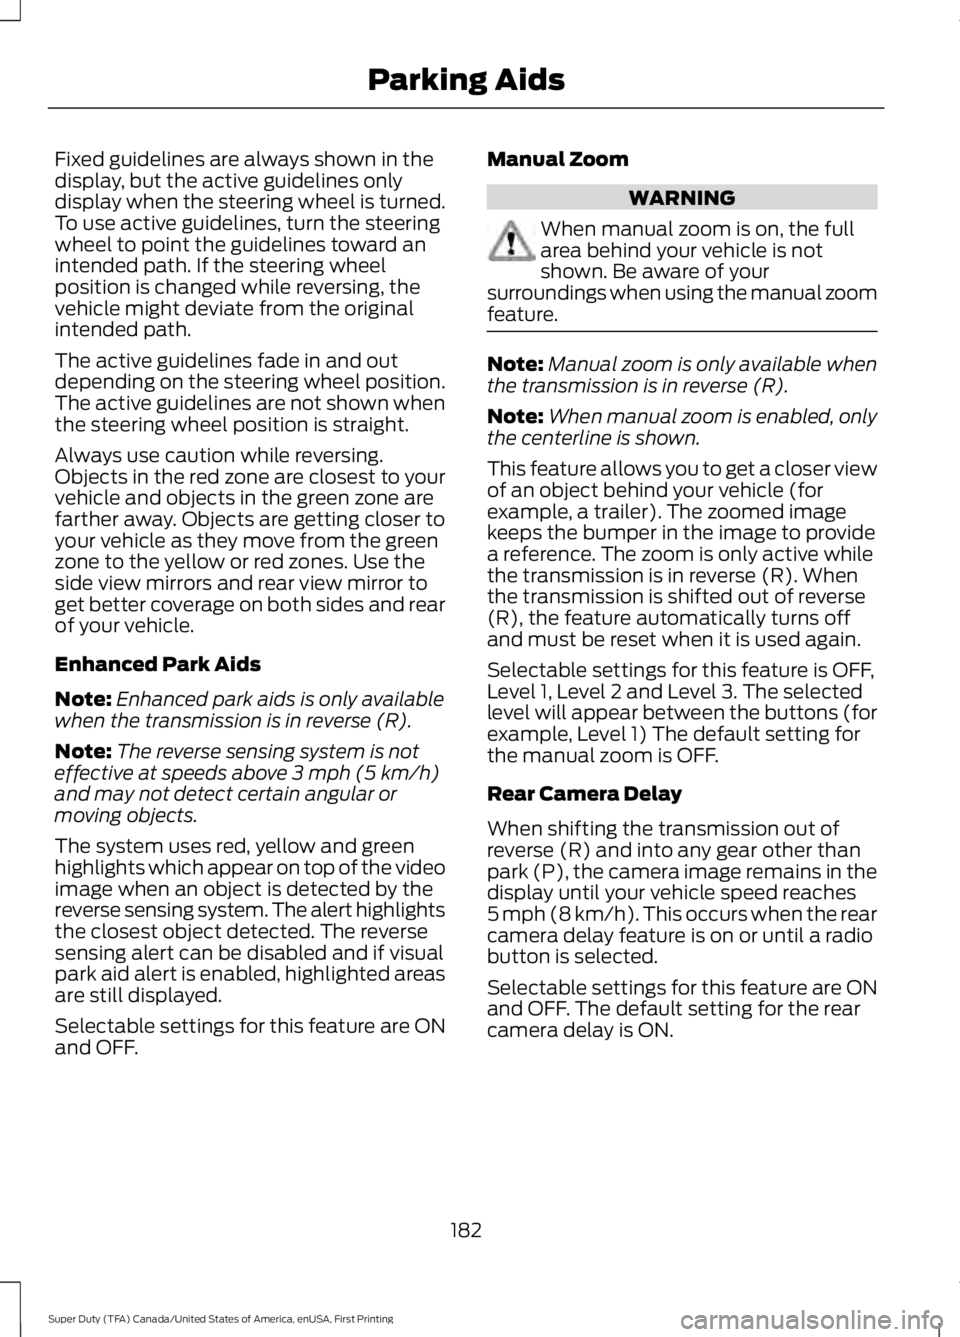
Fixed guidelines are always shown in thedisplay, but the active guidelines onlydisplay when the steering wheel is turned.To use active guidelines, turn the steeringwheel to point the guidelines toward anintended path. If the steering wheelposition is changed while reversing, thevehicle might deviate from the originalintended path.
The active guidelines fade in and outdepending on the steering wheel position.The active guidelines are not shown whenthe steering wheel position is straight.
Always use caution while reversing.Objects in the red zone are closest to yourvehicle and objects in the green zone arefarther away. Objects are getting closer toyour vehicle as they move from the greenzone to the yellow or red zones. Use theside view mirrors and rear view mirror toget better coverage on both sides and rearof your vehicle.
Enhanced Park Aids
Note:Enhanced park aids is only availablewhen the transmission is in reverse (R).
Note:The reverse sensing system is noteffective at speeds above 3 mph (5 km/h)and may not detect certain angular ormoving objects.
The system uses red, yellow and greenhighlights which appear on top of the videoimage when an object is detected by thereverse sensing system. The alert highlightsthe closest object detected. The reversesensing alert can be disabled and if visualpark aid alert is enabled, highlighted areasare still displayed.
Selectable settings for this feature are ONand OFF.
Manual Zoom
WARNING
When manual zoom is on, the fullarea behind your vehicle is notshown. Be aware of yoursurroundings when using the manual zoomfeature.
Note:Manual zoom is only available whenthe transmission is in reverse (R).
Note:When manual zoom is enabled, onlythe centerline is shown.
This feature allows you to get a closer viewof an object behind your vehicle (forexample, a trailer). The zoomed imagekeeps the bumper in the image to providea reference. The zoom is only active whilethe transmission is in reverse (R). Whenthe transmission is shifted out of reverse(R), the feature automatically turns offand must be reset when it is used again.
Selectable settings for this feature is OFF,Level 1, Level 2 and Level 3. The selectedlevel will appear between the buttons (forexample, Level 1) The default setting forthe manual zoom is OFF.
Rear Camera Delay
When shifting the transmission out ofreverse (R) and into any gear other thanpark (P), the camera image remains in thedisplay until your vehicle speed reaches5 mph (8 km/h). This occurs when the rearcamera delay feature is on or until a radiobutton is selected.
Selectable settings for this feature are ONand OFF. The default setting for the rearcamera delay is ON.
182
Super Duty (TFA) Canada/United States of America, enUSA, First Printing
Parking Aids
Page 186 of 507
PRINCIPLE OF OPERATION
Cruise control lets you maintain a setspeed without keeping your foot on theaccelerator pedal. You can use cruisecontrol when your vehicle speed is greaterthan 20 mph (30 km/h).
USING CRUISE CONTROL
WARNINGS
Do not use cruise control in heavytraffic, on winding roads or when theroad surface is slippery. This couldresult in loss of vehicle control, seriousinjury or death.
When you are going downhill, yourvehicle speed may increase abovethe set speed. The system will notapply the brakes. Change down a gear toassist the system in maintaining the setspeed. Failure to do so could result in lossof vehicle control, serious injury or death.
Note:Cruise control will disengage if thevehicle speed decreases more than 10 mph(16 km/h) below your set speed whiledriving uphill.
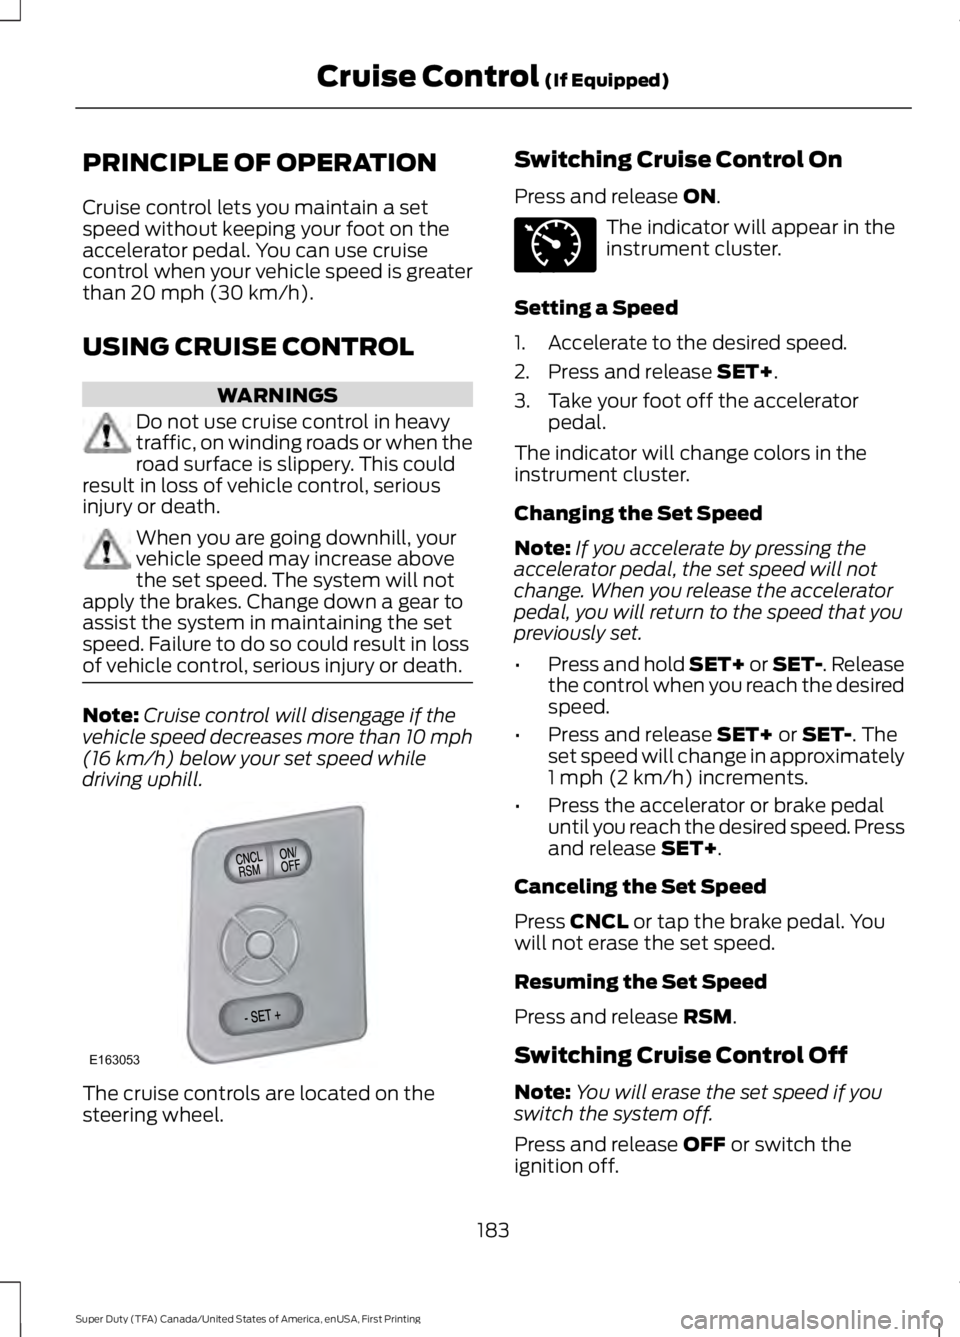
The cruise controls are located on thesteering wheel.
Switching Cruise Control On
Press and release ON.
The indicator will appear in theinstrument cluster.
Setting a Speed
1. Accelerate to the desired speed.
2. Press and release SET+.
3. Take your foot off the acceleratorpedal.
The indicator will change colors in theinstrument cluster.
Changing the Set Speed
Note:If you accelerate by pressing theaccelerator pedal, the set speed will notchange. When you release the acceleratorpedal, you will return to the speed that youpreviously set.
•Press and hold SET+ or SET-. Releasethe control when you reach the desiredspeed.
•Press and release SET+ or SET-. Theset speed will change in approximately1 mph (2 km/h) increments.
•Press the accelerator or brake pedaluntil you reach the desired speed. Pressand release SET+.
Canceling the Set Speed
Press CNCL or tap the brake pedal. Youwill not erase the set speed.
Resuming the Set Speed
Press and release RSM.
Switching Cruise Control Off
Note:You will erase the set speed if youswitch the system off.
Press and release OFF or switch theignition off.
183
Super Duty (TFA) Canada/United States of America, enUSA, First Printing
Cruise Control (If Equipped)E163053 E71340
Page 187 of 507
STEERING
To help prevent damage to the powersteering system:
•Never hold the steering wheel at itsfurthest turning points (until it stops)for more than three to five secondswhen the engine is running.
•Do not operate the vehicle with a lowpower steering pump fluid level (belowthe MIN mark on the reservoir).
•Some noise is normal during operation.If excessive, check for low powersteering pump fluid level beforeseeking service by your dealer.
•Heavy or uneven efforts may be causedby low power steering fluid. Check forlow power steering pump fluid levelbefore seeking service by your dealer.
•Do not fill the power steering pumpreservoir above the MAX mark on thereservoir, as this may result in leaksfrom the reservoir.
If the power steering system breaks down(or if the engine is turned off), you cansteer the vehicle manually, but it takesmore effort.
If the steering wanders or pulls, check for:
•an improperly inflated tire
•uneven tire wear
•loose or worn suspension components
•loose or worn steering components
•improper vehicle alignment
If any steering components are serviced orreplaced, install new fasteners (many arecoated with thread adhesive or haveprevailing torque features which may notbe re-used). Never re-use a bolt or nut.Torque fasteners to specifications.
A high crown in the road or high crosswindsmay also make the steering seem towander or pull.
184
Super Duty (TFA) Canada/United States of America, enUSA, First Printing
Driving Aids
Page 188 of 507
LOAD LIMIT
Vehicle Loading - with andwithout a Trailer
This section will guide you in theproper loading of your vehicle,trailer or both, to keep your loadedvehicle weight within its designrating capability, with or withouta trailer. Properly loading yourvehicle will provide maximumreturn of vehicle designperformance. Before loading yourvehicle, familiarize yourself with
the following terms fordetermining your vehicle’s weightratings, with or without a trailer,from the vehicle’s Tire Label orSafety Compliance CertificationLabel:
Base Curb Weight - is the weightof the vehicle including a full tankof fuel and all standardequipment. It does not includepassengers, cargo, or optionalequipment.
Vehicle Curb Weight - is theweight of your new vehicle whenyou picked it up from yourauthorized dealer plus anyaftermarket equipment.
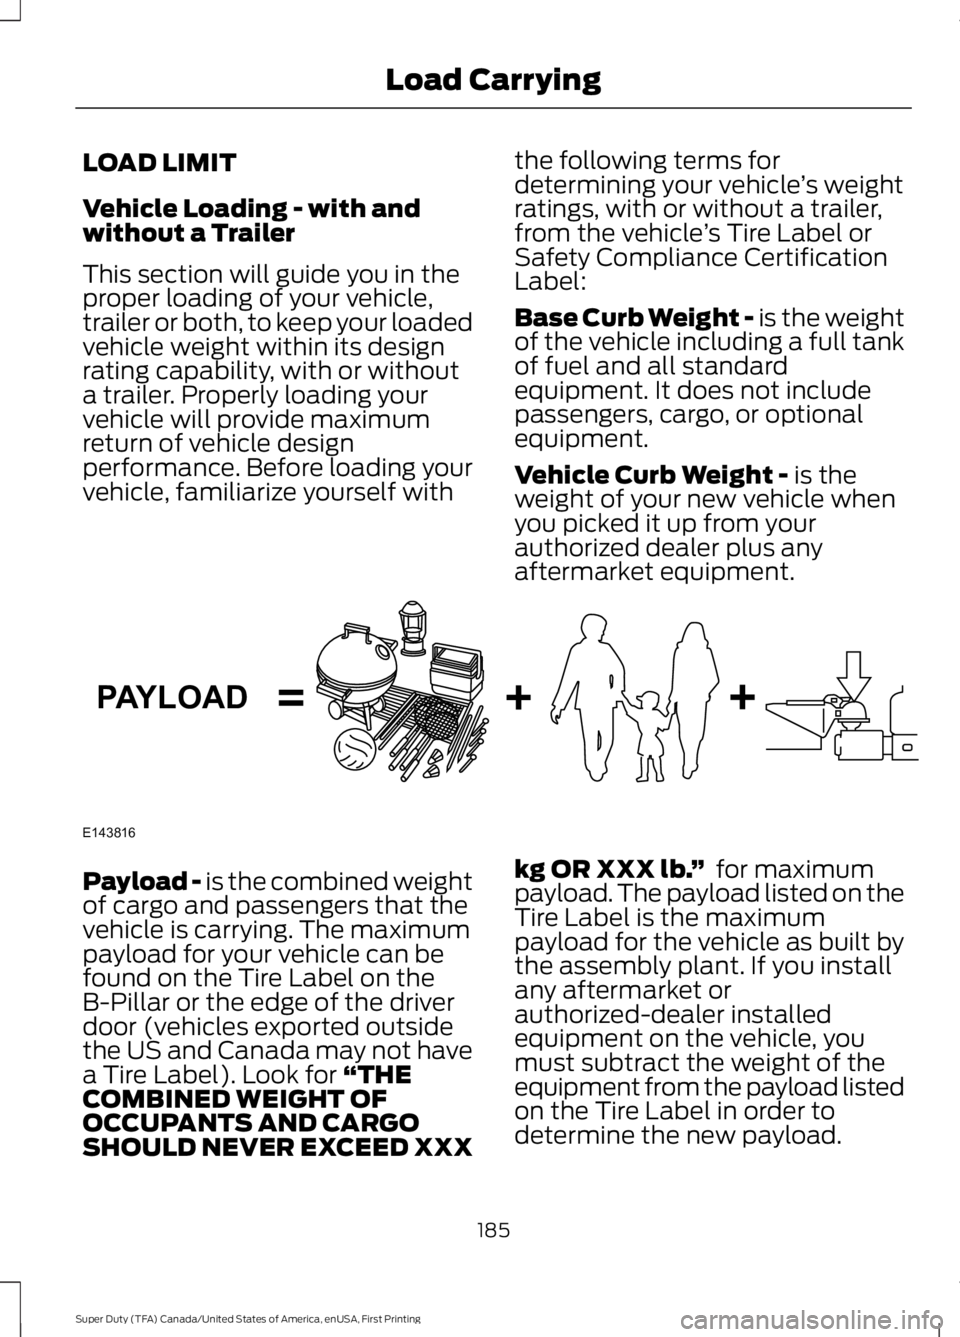
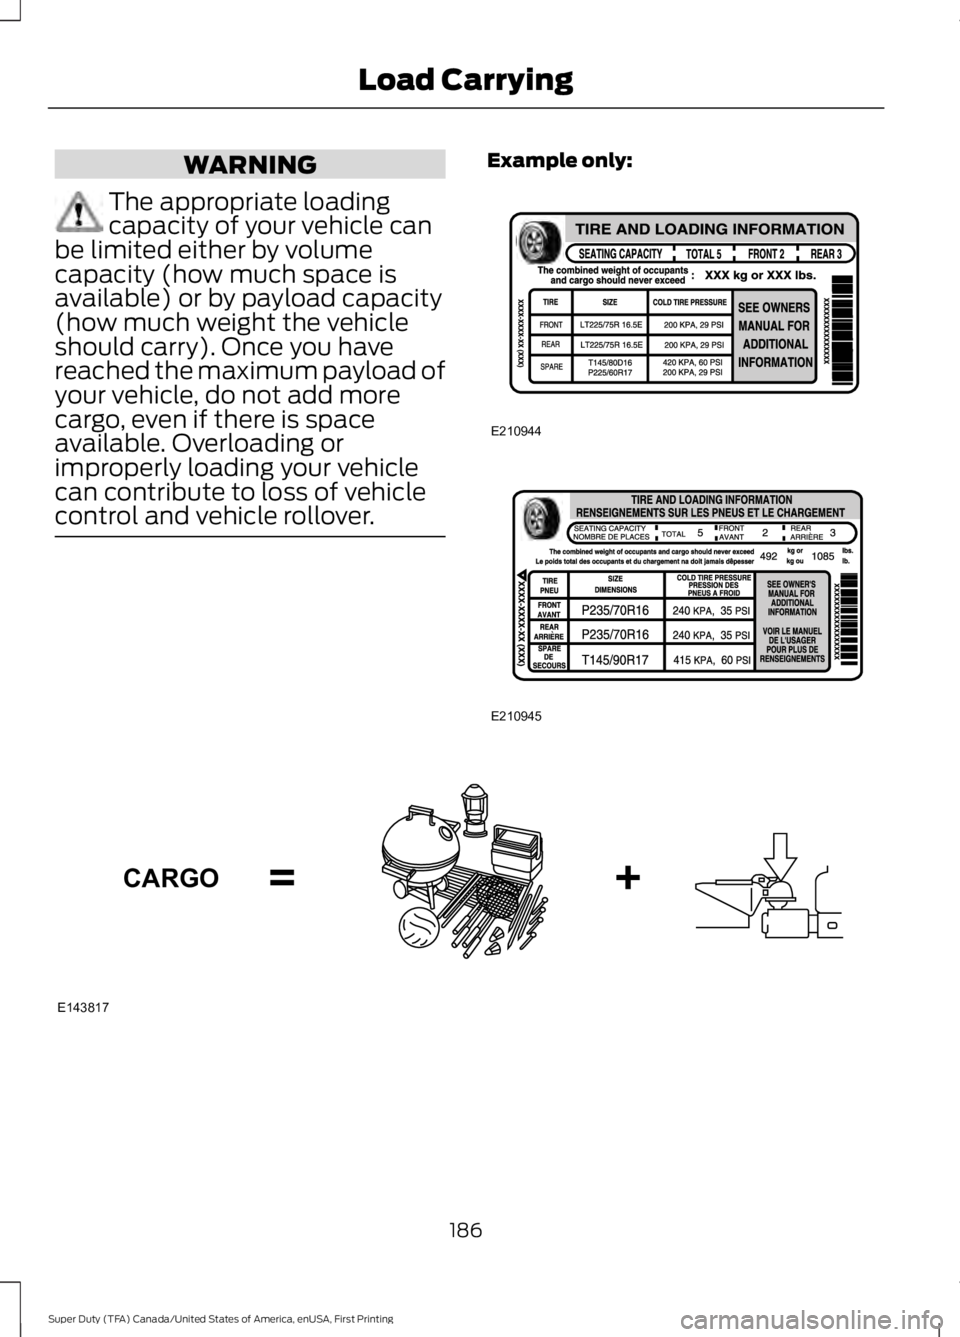
Payload - is the combined weightof cargo and passengers that thevehicle is carrying. The maximumpayload for your vehicle can be
found on the Tire Label on theB-Pillar or the edge of the driverdoor (vehicles exported outsidethe US and Canada may not havea Tire Label). Look for “THECOMBINED WEIGHT OFOCCUPANTS AND CARGOSHOULD NEVER EXCEED XXX
kg OR XXX lb.” for maximumpayload. The payload listed on theTire Label is the maximumpayload for the vehicle as built by
the assembly plant. If you installany aftermarket orauthorized-dealer installedequipment on the vehicle, youmust subtract the weight of theequipment from the payload listedon the Tire Label in order todetermine the new payload.
185
Super Duty (TFA) Canada/United States of America, enUSA, First Printing
Load CarryingE143816PAYLOAD
Page 189 of 507
WARNING
The appropriate loadingcapacity of your vehicle canbe limited either by volumecapacity (how much space isavailable) or by payload capacity(how much weight the vehicleshould carry). Once you havereached the maximum payload ofyour vehicle, do not add morecargo, even if there is spaceavailable. Overloading orimproperly loading your vehiclecan contribute to loss of vehiclecontrol and vehicle rollover.
Example only:
186
Super Duty (TFA) Canada/United States of America, enUSA, First Printing
Load CarryingE210944 E210945 E143817CARGO
Page 190 of 507
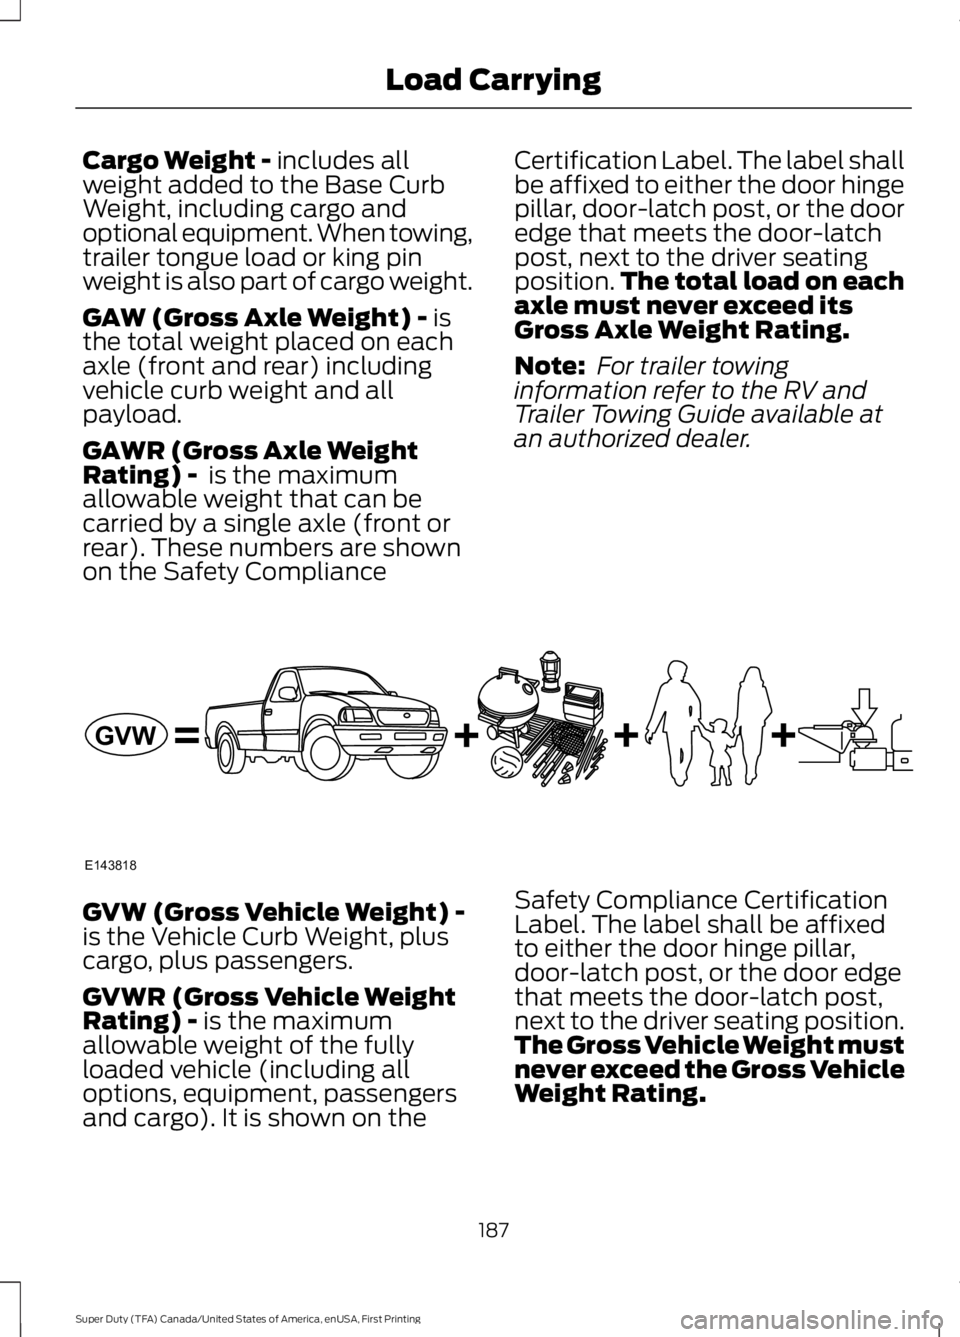
Cargo Weight - includes allweight added to the Base CurbWeight, including cargo andoptional equipment. When towing,trailer tongue load or king pinweight is also part of cargo weight.
GAW (Gross Axle Weight) - isthe total weight placed on eachaxle (front and rear) includingvehicle curb weight and allpayload.
GAWR (Gross Axle WeightRating) - is the maximumallowable weight that can becarried by a single axle (front orrear). These numbers are shownon the Safety Compliance
Certification Label. The label shallbe affixed to either the door hingepillar, door-latch post, or the dooredge that meets the door-latchpost, next to the driver seatingposition.The total load on eachaxle must never exceed itsGross Axle Weight Rating.
Note: For trailer towinginformation refer to the RV andTrailer Towing Guide available atan authorized dealer.
GVW (Gross Vehicle Weight) -is the Vehicle Curb Weight, pluscargo, plus passengers.
GVWR (Gross Vehicle WeightRating) - is the maximumallowable weight of the fullyloaded vehicle (including alloptions, equipment, passengersand cargo). It is shown on the
Safety Compliance CertificationLabel. The label shall be affixedto either the door hinge pillar,door-latch post, or the door edgethat meets the door-latch post,next to the driver seating position.The Gross Vehicle Weight mustnever exceed the Gross VehicleWeight Rating.
187
Super Duty (TFA) Canada/United States of America, enUSA, First Printing
Load CarryingE143818GVW