stop start FORD F750 2017 13.G User Guide
[x] Cancel search | Manufacturer: FORD, Model Year: 2017, Model line: F750, Model: FORD F750 2017 13.GPages: 382, PDF Size: 5.18 MB
Page 98 of 382
Do not use alcohol-based additives to
improve cetane quality, to prevent fuel
gelling or any other use. The use of alcohol
additives may result in damage to the fuel
injectors and system. See Capacities and
Specifications (page 263).
The Vehicle Warranty may not cover
repairs needed to correct the effects of
using an aftermarket product that does
not meet Ford specifications in your fuel.
RUNNING OUT OF FUEL -
GASOLINE
Avoid running out of fuel because this
situation may have an adverse effect on
powertrain components.
If you run out of fuel:
• You may need to switch the ignition
from off to on several times after
refueling to allow the fuel system to
pump the fuel from the tank to the
engine. When restarting, cranking time
takes a few seconds longer than
normal. With keyless ignition, just start
the engine. Crank time will be longer
than usual.
• Normally, adding 1 gal (3.8 L) of fuel is
enough to restart the engine. If the
vehicle is out of fuel and on a steep
grade, more than
1 gal (3.8 L) may be
required.
• The service engine soon indicator may
come on. See
Warning Lamps and
Indicators (page 58).
RUNNING OUT OF FUEL -
DIESEL
Avoid running out of fuel. This allows air to
enter the fuel system and may make it
difficult to restart your vehicle. If your vehicle runs out of fuel:
•
Normally adding
4–5 gal (15– 19 L) of
fuel is enough to restart the engine. If
your vehicle is out of fuel and on a
steep grade, more than
5 gal (19 L)
may be required.
• You must purge trapped air from the
system before restarting the engine.
Purging Air From the System
Switch the ignition on for 30 seconds and
then switch the ignition off. Repeat this
operation six times in a row to purge any
trapped air from the fuel system.
Any remaining air in the system self-purges
when the engine starts. The engine may
run rough or produce white smoke when
air remains in the fuel system. This is
normal and stops after a short period. If
the engine continues to run rough, have
your vehicle checked as soon as possible.
Starting the Engine
Do not crank the engine for more than 10
seconds as starter damage may occur. If
the engine fails to start, switch the ignition
off and wait 30 seconds before cranking
the engine again. See
Starting a Diesel
Engine (page 86).
SELECTIVE CATALYTIC
REDUCTION SYSTEM - DIESEL
Your vehicle may have a selective catalytic
reduction system. The system helps reduce
emission levels of oxides of nitrogen from
the exhaust system. The system
automatically injects diesel exhaust fluid
into the exhaust system to enable correct
selective catalytic reduction system
function.
Note: Selective catalytic reduction systems
are not fitted to vehicles in markets where
only high-sulfur diesel fuel is available.
95
F-650/750 (TBC) , enUSA, First Printing Fuel and Refueling
Page 101 of 382
WARNINGS
your vehicle becomes limited to engine idle
only once stopped. In these conditions, be
cautious where you stop your vehicle
because you may not be able to drive long
distances or maintain highway speeds until
you refill or replace the diesel exhaust fluid. Tampering with or disabling selective
catalytic reduction system results in
severe vehicle performance
limitation including eventual speed limiting
to 5 mph (5 km/h). The information display shows a series of
messages about the amount of diesel
exhaust fluid available. A systems check
displays messages indicating the amount
of diesel exhaust fluid available or displays
a warning message indicating the
approximate distance remaining as the
fluid in the diesel exhaust fluid tank nears
empty. See
Information Messages
(page 64). As the diesel exhaust fluid level
nears empty, the warning
symbol displays and a series of
tones and messages starting at
500 mi
(800 km) remaining before diesel exhaust
fluid is depleted. The warning symbol and
messages continue until you refill the
diesel exhaust fluid tank. Continued driving without refilling results
in the following actions as required by the
California Air Resources Board (CARB) and
the U.S. Environmental Protection Agency
(EPA):
•
Within a preset distance to empty,
speed is limited upon vehicle restart.
Prior to this occurring a message
appears in the information display.
• Further vehicle operation without
refilling the diesel exhaust fluid tank
causes the engine to enter an idle-only
condition. This only occurs upon vehicle
refueling or at an extended idle. A
message indicates the required actions
to resume normal operation. It is
required to add a minimum of
1.0 gal
(3.8 L) of diesel exhaust fluid to the
tank to exit the idle-only condition, but
your vehicle is still in the speed-limiting
mode until you refill the tank
completely.
Note: For either vehicle speed limiting or
idle-only condition, normal vehicle operation
resumes when you refill the diesel exhaust
fluid tank.
Note: When filling the diesel exhaust fluid
tank from empty, there may be a short delay
before detecting the increased level of fluid.
The increased level detection must occur
before your vehicle returns to full power.
Diesel Exhaust Fluid Guidelines
and Information
• Use only diesel exhaust fluid that
carries the American Petroleum
Institute (API) certified diesel exhaust
fluid trademark or ISO 22241.
• Do not put diesel exhaust fluid in the
diesel fuel tank.
• Do not overfill the diesel exhaust fluid
tank.
• Diesel exhaust fluid is corrosive.
• Do not re-use the diesel exhaust fluid
container once it is emptied.
98
F-650/750 (TBC) , enUSA, First Printing Fuel and RefuelingE163176
Page 104 of 382
4. Refuel your vehicle as required.
5. Replace the fuel filler cap, turn it
clockwise until you feel a strong
resistance.
If the fuel cap warning lamp or a warning
message appears in the instrument cluster,
you may not have installed the fuel filler
cap correctly.
If the fuel cap warning lamp remains on,
at the next opportunity, safely pull off of
the road, remove the fuel filler cap, align
the cap properly and reinstall it. The check
fuel cap warning lamp or warning message
may not reset immediately. It may take
several driving cycles for the indicators to
turn off. A driving cycle consists of an
engine start-up (after four or more hours
with the engine off) followed by normal
city and highway driving.
REFUELING - DIESEL
An engine that suddenly becomes noisy or
operates poorly after a fuel fill could be
using substandard fuel. We recommend
that you purchase diesel fuel from a
reputable fuel station.
Use only clean, approved containers that
will prevent the entry of dirt or water
whenever you store diesel fuel.
Do not store diesel fuel in a galvanized
container. The fuel dissolves the zinc in the
galvanized container. The zinc will then
remain in the fuel. If you run the
contaminated fuel through the engine, the
zinc damages the fuel injectors. Engine
damage caused may not be covered by
the vehicle Warranty. Fuel Filler Cap WARNINGS
The fuel system may be under
pressure. If you hear a hissing sound
near the fuel filler inlet, do not refuel
until the sound stops. Otherwise, fuel may
spray out, which could cause serious
personal injury. If you do not use the correct fuel filler
cap, excessive pressure or vacuum
in the fuel tank may damage the fuel
system or cause the fuel cap to disengage
in a crash. Failure to follow this warning
could result in serious personal injury. The fuel tank has a threaded fuel filler cap.
Note:
If you must replace the fuel filler cap,
replace it with a fuel filler cap that is
designed for your vehicle. The vehicle
Warranty may be void for any damage to
the fuel tank or fuel system if the correct
genuine Ford, Motorcraft or other certified
fuel filler cap is not used.
When refueling the vehicle fuel tank do the
following.
1. When your vehicle has stopped, shift into neutral (N) or park (P).
2. Apply the parking brake and switch the
ignition off.
3. Turn the fuel filler cap counterclockwise and remove it.
4. Refuel your vehicle as required.
5. Replace the fuel filler cap, turn it clockwise until you feel a strong
resistance.
If the fuel cap warning lamp or a warning
message appears in the instrument cluster,
you may not have installed the fuel filler
cap correctly.
101
F-650/750 (TBC) , enUSA, First Printing Fuel and Refueling
Page 105 of 382
If the fuel cap warning lamp remains on,
at the next opportunity, safely pull off of
the road, remove the fuel filler cap, align
the cap properly and reinstall it. The check
fuel cap warning lamp or warning message
may not reset immediately. It may take
several driving cycles for the indicators to
turn off. A driving cycle consists of an
engine start-up (after four or more hours
with the engine off) followed by normal
city and highway driving.
Fuel Fill Rate
Your vehicle has a fuel fill pipe that is able
to accept fuel up to 20 gal (75 L) per
minute from a fuel-dispensing nozzle.
Pumping fuel at greater flow rates may
result in premature nozzle shut-off or spit
back.
Truck stops have fuel pumps and nozzles
designed for larger, heavy-duty trucks. If
you are refueling your vehicle at a truck
stop and the nozzle shuts off repeatedly,
wait 5-10 seconds, then use a slower fill
rate.
FUEL CONSUMPTION
Real world fuel consumption is governed
by many factors, for example driving style,
high speed driving, stop-start driving, air
conditioning usage, the accessories fitted,
payload and towing. •
The usable capacity of the fuel tank is
the amount of fuel that can be added
into the tank after the gauge indicates
empty.
• The advertised capacity is the total fuel
tank size. See
Capacities and
Specifications (page 252). It is the
combined usable capacity plus the
empty reserve.
• Due to the empty reserve, you may not
be able to refuel the full amount of the
advertised capacity of the fuel tank
even when the fuel gauge reads empty.
Empty reserve is the amount of fuel
remaining in the tank after the fuel gauge
indicates empty. The amount of usable
fuel in the empty reserve varies and should
not be relied upon to increase driving range.
Filling the Tank
For consistent results when filling the fuel
tank:
• Turn the ignition off before refueling
your vehicle; a temporary inaccurate
reading may result if the engine is left
on when refueling your vehicle.
• Use the same fill rate
(low-medium-high) each time the tank
is refueled.
• Allow no more than two automatic
click-offs when refueling your vehicle.
Results are most accurate when the filling
method is consistent.
Calculating Fuel Economy
Do not measure fuel economy during the
first
900 mi (1,500 km) of driving (this is
your engine ’s break-in period); a more
accurate measurement is obtained after
1,900 mi (3,000 km)
.
Fuel expense, frequency of fill ups or fuel
gauge readings are not accurate ways to
measure fuel economy.
102
F-650/750 (TBC) , enUSA, First Printing Fuel and Refueling
Page 108 of 382
Readiness for Inspection and
Maintenance (I/M) Testing
Some state and provincial and local
governments may have
Inspection/Maintenance (I/M) programs
to inspect the emission control equipment
on your vehicle. Failure to pass this
inspection could prevent you from getting
a vehicle registration.
If the service engine soon
indicator is on or the bulb does
not work, your vehicle may need
service. See On-Board Diagnostics.
Your vehicle may not pass the I/M test if
the service engine soon indicator is on or
not working properly (bulb is burned out),
or if the OBD-II system has determined
that some of the emission control systems
have not been properly checked. In this
case, the vehicle is not ready for I/M
testing.
If the vehicle ’s engine or transmission has
just been serviced, or the battery has
recently run down or been replaced, the
OBD-II system may indicate that the
vehicle is not ready for I/M testing. To
determine if the vehicle is ready for I/M
testing, turn the ignition key to the on
position for 15 seconds without cranking
the engine. If the service engine soon
indicator blinks eight times, it means that
the vehicle is not ready for I/M testing; if
the service engine soon indicator stays on
solid, it means that your vehicle is ready
for I/M testing.
The OBD-II system checks the emission
control system during normal driving. A
complete check may take several days.
If the vehicle is not ready for I/M testing,
you can perform the following driving cycle
consisting of mixed city and highway
driving: 1. 15 minutes of steady driving on an
expressway or highway followed by 20
minutes of stop-and-go driving with at
least four 30-second idle periods.
2. Allow your vehicle to sit for at least eight hours with the ignition off. Then,
start the vehicle and complete the
above driving cycle. The vehicle must
warm up to its normal operating
temperature. Once started, do not turn
off the vehicle until the above driving
cycle is complete.
If the vehicle is still not ready for I/M
testing, you need to repeat the above
driving cycle.
EMISSION CONTROL SYSTEM
- DIESEL
Oxidation Catalytic Converter and
Diesel Particulate Filter System (If
Equipped) WARNING
The normal operating temperature
of the exhaust system is very high.
Never work around or attempt to
repair any part of the exhaust system until
it has cooled. Use special care when
working around the diesel oxidation
catalytic converter or the diesel particulate
filter. The diesel oxidation catalytic
converter and the diesel particulate filter
heat up to very high temperatures after
only a short period of engine operation and
remain hot after you switch the engine off. Your vehicle has a diesel particulate filter.
The diesel particulate filter is an inline filter
in the exhaust system that reduces carbon
emissions by trapping exhaust particles
before they reach the tailpipe. The diesel
particulate filter looks similar to a
traditional exhaust catalyst and is part of
the exhaust system under your vehicle. The
105
F-650/750 (TBC) , enUSA, First Printing Fuel and Refueling
Page 115 of 382
AUTOMATIC TRANSMISSION
WARNING
Always set the parking brake fully
and make sure you shift the gearshift
lever to park (P). Switch the ignition
off and remove the key whenever you leave
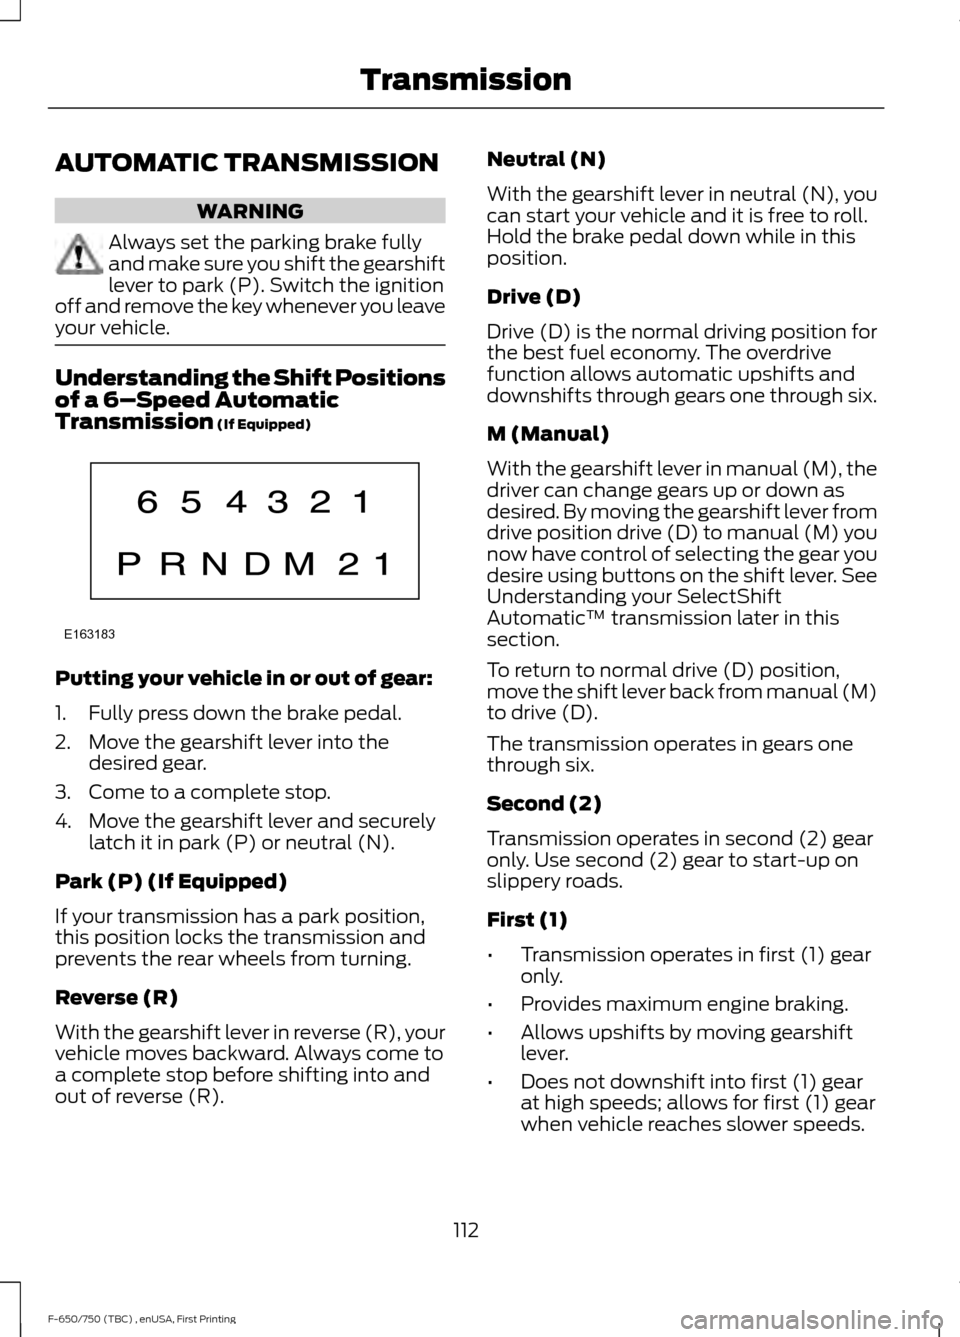
your vehicle. Understanding the Shift Positions
of a 6–
Speed Automatic
Transmission (If Equipped) Putting your vehicle in or out of gear:
1. Fully press down the brake pedal.
2. Move the gearshift lever into the
desired gear.
3. Come to a complete stop.
4. Move the gearshift lever and securely latch it in park (P) or neutral (N).
Park (P) (If Equipped)
If your transmission has a park position,
this position locks the transmission and
prevents the rear wheels from turning.
Reverse (R)
With the gearshift lever in reverse (R), your
vehicle moves backward. Always come to
a complete stop before shifting into and
out of reverse (R). Neutral (N)
With the gearshift lever in neutral (N), you
can start your vehicle and it is free to roll.
Hold the brake pedal down while in this
position.
Drive (D)
Drive (D) is the normal driving position for
the best fuel economy. The overdrive
function allows automatic upshifts and
downshifts through gears one through six.
M (Manual)
With the gearshift lever in manual (M), the
driver can change gears up or down as
desired. By moving the gearshift lever from
drive position drive (D) to manual (M) you
now have control of selecting the gear you
desire using buttons on the shift lever. See
Understanding your SelectShift
Automatic
™ transmission later in this
section.
To return to normal drive (D) position,
move the shift lever back from manual (M)
to drive (D).
The transmission operates in gears one
through six.
Second (2)
Transmission operates in second (2) gear
only. Use second (2) gear to start-up on
slippery roads.
First (1)
• Transmission operates in first (1) gear
only.
• Provides maximum engine braking.
• Allows upshifts by moving gearshift
lever.
• Does not downshift into first (1) gear
at high speeds; allows for first (1) gear
when vehicle reaches slower speeds.
112
F-650/750 (TBC) , enUSA, First Printing TransmissionE163183
Page 119 of 382
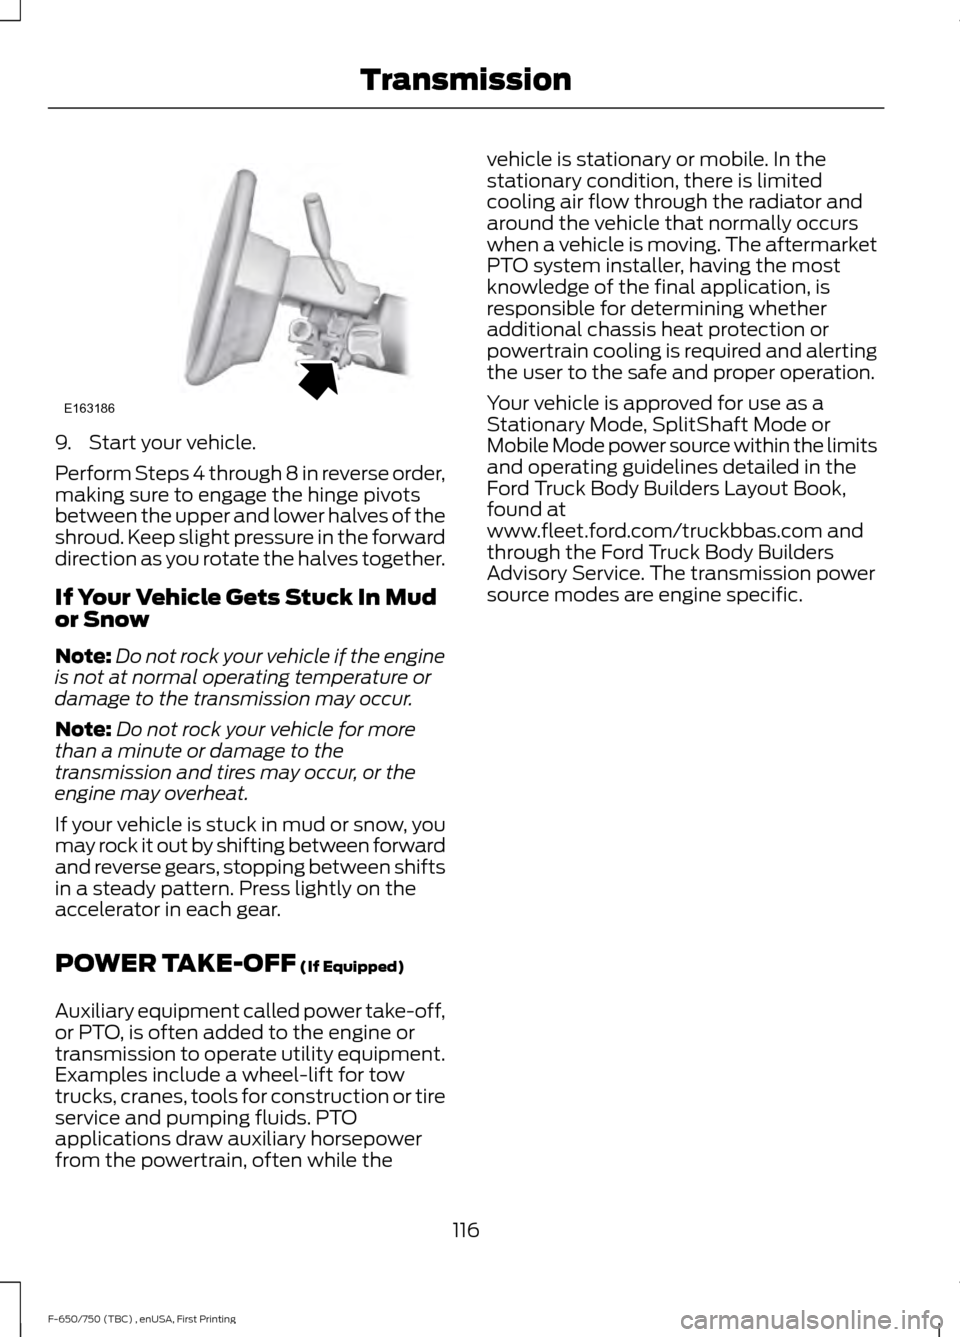
9. Start your vehicle.
Perform Steps 4 through 8 in reverse order,
making sure to engage the hinge pivots
between the upper and lower halves of the
shroud. Keep slight pressure in the forward
direction as you rotate the halves together.
If Your Vehicle Gets Stuck In Mud
or Snow
Note:
Do not rock your vehicle if the engine
is not at normal operating temperature or
damage to the transmission may occur.
Note: Do not rock your vehicle for more
than a minute or damage to the
transmission and tires may occur, or the
engine may overheat.
If your vehicle is stuck in mud or snow, you
may rock it out by shifting between forward
and reverse gears, stopping between shifts
in a steady pattern. Press lightly on the
accelerator in each gear.
POWER TAKE-OFF (If Equipped)
Auxiliary equipment called power take-off,
or PTO, is often added to the engine or
transmission to operate utility equipment.
Examples include a wheel-lift for tow
trucks, cranes, tools for construction or tire
service and pumping fluids. PTO
applications draw auxiliary horsepower
from the powertrain, often while the vehicle is stationary or mobile. In the
stationary condition, there is limited
cooling air flow through the radiator and
around the vehicle that normally occurs
when a vehicle is moving. The aftermarket
PTO system installer, having the most
knowledge of the final application, is
responsible for determining whether
additional chassis heat protection or
powertrain cooling is required and alerting
the user to the safe and proper operation.
Your vehicle is approved for use as a
Stationary Mode, SplitShaft Mode or
Mobile Mode power source within the limits
and operating guidelines detailed in the
Ford Truck Body Builders Layout Book,
found at
www.fleet.ford.com/truckbbas.com and
through the Ford Truck Body Builders
Advisory Service. The transmission power
source modes are engine specific.
116
F-650/750 (TBC) , enUSA, First Printing TransmissionE163186
Page 121 of 382
WARNING
Sudden accelerations on slippery
surfaces could cause the wheels to
spin, the vehicle to turn sideways on
a crowned road surface or in a turn,
possibly resulting in loss of vehicle control
and personal injury. Activating the Locking Differential
You can lock and unlock the differential
when your vehicle is moving at a constant
speed of less than 25 mph (40 km/h) and
while the wheels are not slipping. Do not
lock the differential when your vehicle is
traveling down steep grades and when
traction is minimal.
The differential lock and differential lock
light automatically disengage at speeds
above 25 mph (40 km/h). The differential
lock remains off until either you restart your
vehicle or you turn the differential lock
switch off then back on.
Servicing a Vehicle with a Locking
Differential
Turn the engine off and raise all drive
wheels of the locker differential axle in
order to prevent your vehicle from moving
when servicing the wheels, tires or brakes.
Axles equipped with a driver-controlled
differential deliver power to both wheels
even when only one wheel is on the ground. WARNING
Failure to raise all drive wheels with
this type of differential could cause
the vehicle to move unexpectedly,
resulting in property damage, personal
injury or death. 2-SPEED REAR AXLE
(If Equipped)
WARNING
Never shift a two-speed axle when
descending a steep grade as this
may cause loss of vehicle control and
result in personal injury. Note:
Do not shift between ranges when
the speed control is on.
A two-speed rear axle allows the driver to
select a low range for greater pulling power
and a high range for greater road speed
and fuel economy. You can also use these
ranges to provide extra steps between
transmission shifts when driving on steep
grades or fuel economy may be factors.
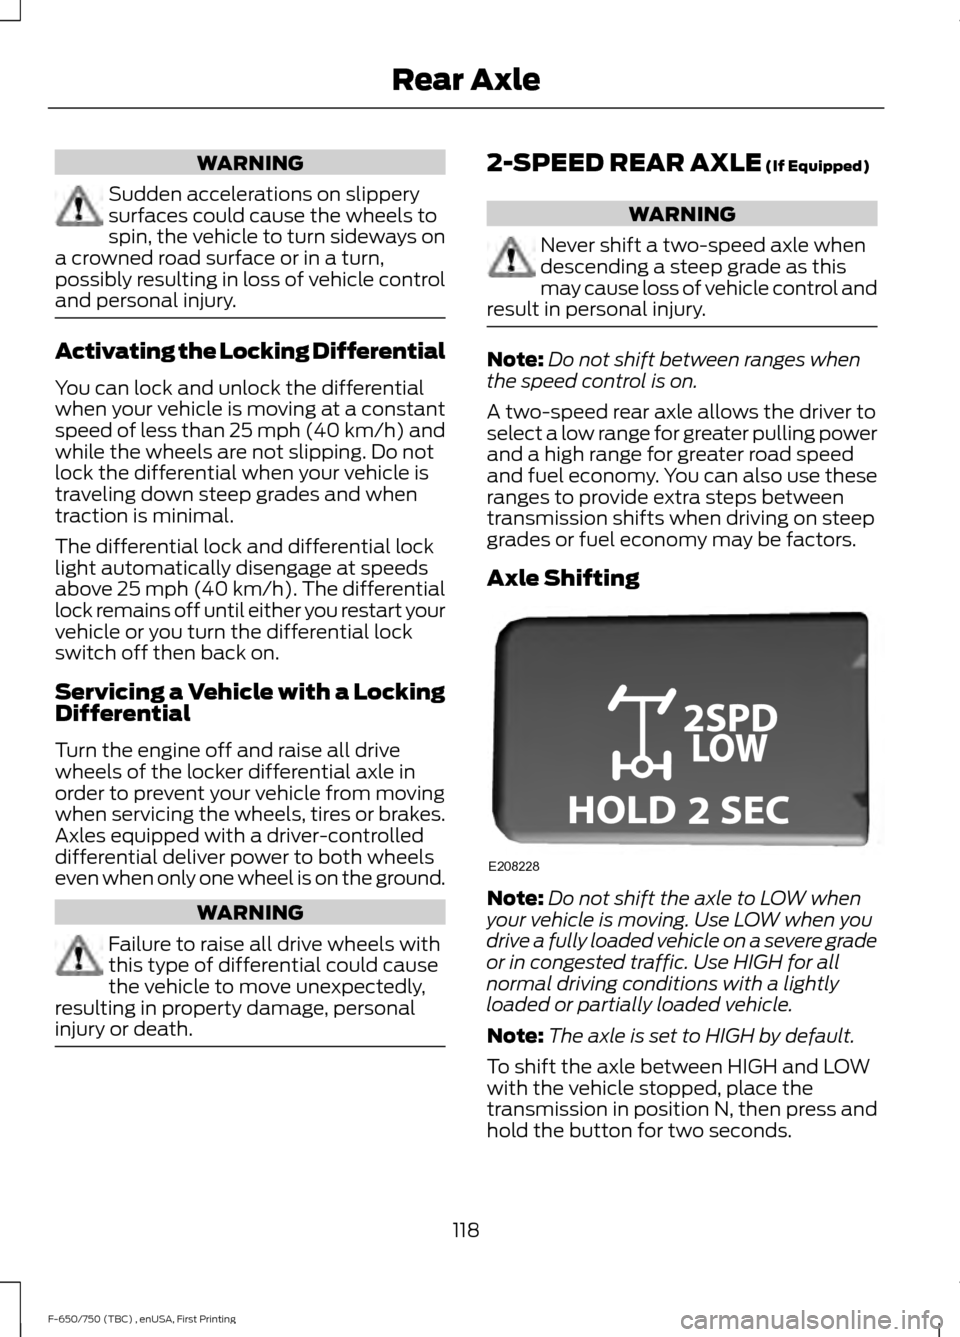
Axle Shifting Note:
Do not shift the axle to LOW when
your vehicle is moving. Use LOW when you
drive a fully loaded vehicle on a severe grade
or in congested traffic. Use HIGH for all
normal driving conditions with a lightly
loaded or partially loaded vehicle.
Note: The axle is set to HIGH by default.
To shift the axle between HIGH and LOW
with the vehicle stopped, place the
transmission in position N, then press and
hold the button for two seconds.
118
F-650/750 (TBC) , enUSA, First Printing Rear AxleE208228
Page 122 of 382
GENERAL INFORMATION
WARNINGS
Do not drive with your foot resting on
the brake pedal. This results in
abnormally high brake temperatures,
excessive lining wear and increased
stopping distance. Continuous application of the brakes
causes the brakes to overheat,
resulting in temporary loss of braking.
Note:
Occasional brake noise is normal. If
a metal-to-metal, continuous grinding or
continuous squeal sound is present, the
brake linings may be worn-out. Have the
system checked by an authorized dealer. If
your vehicle has continuous vibration or
shudder in the steering wheel while braking,
have it checked by an authorized dealer.
All standard equipment brakes are
self-adjusting. Automatic adjustment,
when required, occurs whenever you apply
and release the brakes during forward or
reverse operation.
Know the required stopping distances for
all driving conditions you may encounter.
For longer brake lining life, take full
advantage of engine braking power when
coming to a stop. See Warning Lamps and
Indicators (page 58).
Wet brakes result in reduced braking
efficiency. Gently press the brake pedal a
few times when driving from a car wash or
standing water to dry the brakes.
If brakes do not grip well:
• Check brake adjustment.
• Check brake linings for excessive wear.
• Check system air pressure on vehicle
equipped with air brakes. •
Let the brakes cool if you have been
using them excessively, as in mountain
driving or after several fast, high-speed
stops.
• If you have been driving through deep
water, gently apply the brakes several
times while your vehicle is moving
slowly.
Brake Over Accelerator
In the event the accelerator pedal
becomes stuck or entrapped, apply steady
and firm pressure to the brake pedal to
slow the vehicle and reduce engine power.
If you experience this condition, apply the
brakes and bring your vehicle to a safe
stop. Move the transmission to park (P),
switch the engine off and apply the parking
brake. Inspect the accelerator pedal for
any interference. If none are found and the
condition persists, have your vehicle towed
to the nearest authorized dealer
Anti-lock Brake System
This system helps you maintain steering
control during emergency stops by keeping
the brakes from locking. This lamp momentarily
illuminates when you turn the
ignition on. If the light does not
illuminate during start up, remains on or
flashes, the system may be disabled. Have
the system checked by an authorized
dealer. If the system is disabled, normal
braking is still effective. If the
brake warning lamp illuminates
when you release the parking brake, have
the system checked by an authorized
dealer.
119
F-650/750 (TBC) , enUSA, First Printing BrakesE209041 E209041
Page 123 of 382
If you connect a PLC trailer with
the ignition on, the trailer ABS
light also illuminates. If the light
fails to illuminate, if it remains on after you
start the vehicle or continues to flash, have
the system serviced immediately.
HINTS ON DRIVING WITH
ANTI-LOCK BRAKES
Note: When the system is operating, the
brake pedal may pulse and may travel
further. Maintain pressure on the brake
pedal. You may also hear a noise from the
system. This is normal.
The anti-lock braking system will not
eliminate the risks when:
• You drive too closely to the vehicle in
front of you.
• Your vehicle is hydroplaning.
• You take corners too fast.
• The road surface is poor.
PARKING BRAKE
Hydraulic Brakes WARNINGS
Always set the parking brake and
leave your vehicle with the
transmission in park (P).
When doing this procedure, you need
to take the transmission out of park
(P) which means your vehicle can
roll freely. To avoid unwanted vehicle
movement, always fully set the parking
brake prior to doing this procedure. Use
wheels chocks if appropriate. Unexpected and possibly sudden
vehicle movement may occur if you
do not take these precautions. WARNINGS
If the parking brake is fully released,
but the brake warning lamp remains
illuminated, the brakes may not be
working properly. Have your vehicle
checked as soon as possible. Apply the parking brake whenever the
vehicle is parked. To set the parking brake,
pull the handle up until it snaps into the
locked position.
When the parking brake is out of
adjustment, seek service immediately.
The parking brake warning lamp
in the instrument cluster
illuminates, and remains
illuminated (when you switch on the
ignition), until you release the parking
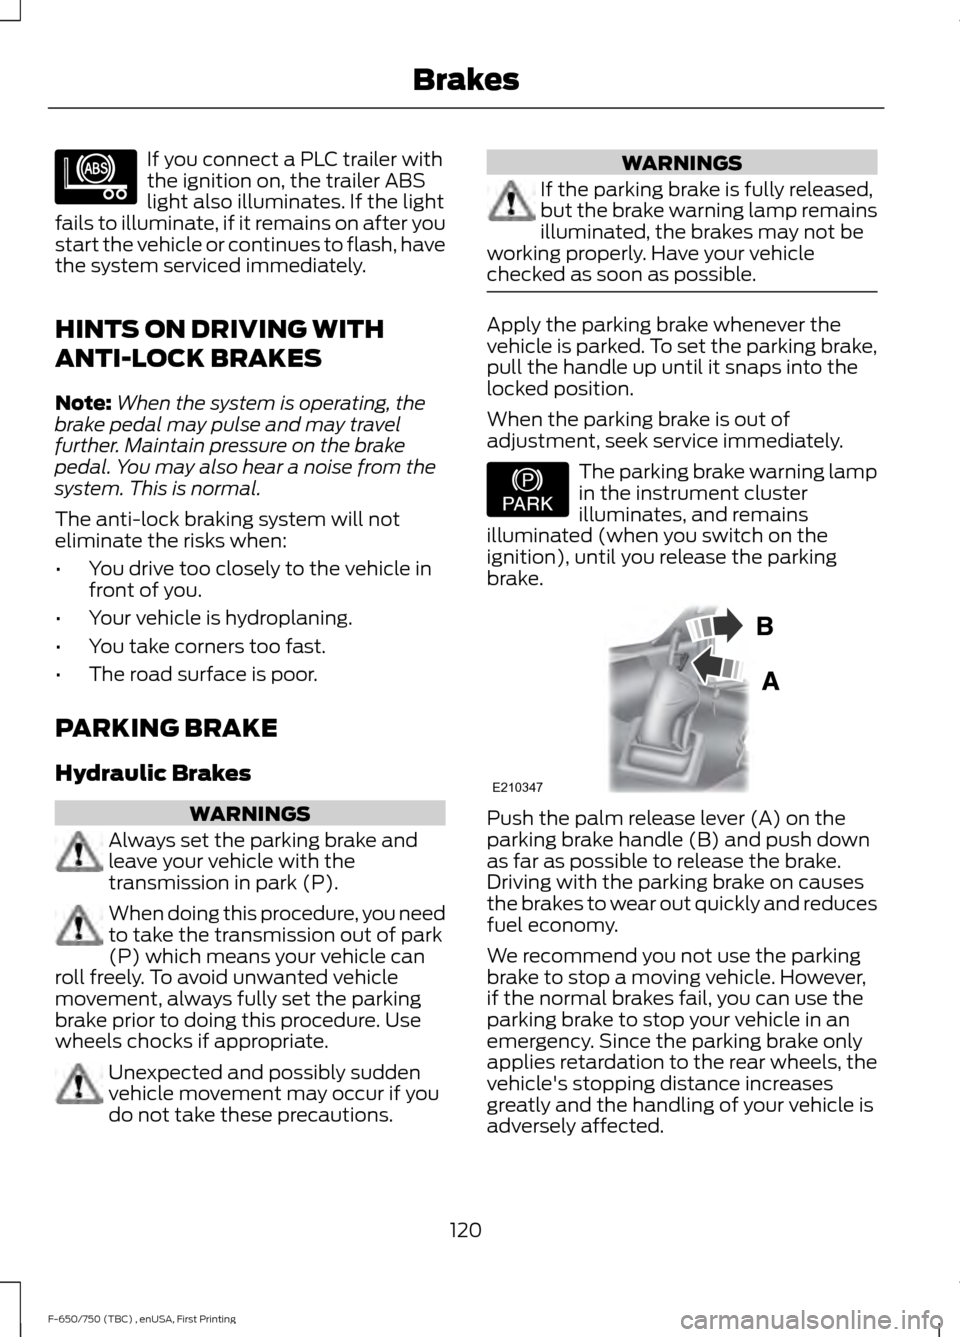
brake. Push the palm release lever (A) on the
parking brake handle (B) and push down
as far as possible to release the brake.
Driving with the parking brake on causes
the brakes to wear out quickly and reduces
fuel economy.
We recommend you not use the parking
brake to stop a moving vehicle. However,
if the normal brakes fail, you can use the
parking brake to stop your vehicle in an
emergency. Since the parking brake only
applies retardation to the rear wheels, the
vehicle's stopping distance increases
greatly and the handling of your vehicle is
adversely affected.
120
F-650/750 (TBC) , enUSA, First Printing BrakesE210335 E208810 E210347